Saturn ST-CC0215: УТЮГ
УТЮГ: Saturn ST-CC0215
Оглавление
- УТЮГ
- Устройство прибора: ПЕРЕД ПЕРВЫМ ИСПОЛЬЗОВАНИ- ЕМ МЕРЫ ПРЕДОСТОРОЖНОСТИ РАСПЫЛЕНИЕ ВОДЫ ПАРОВОЕ ГЛАЖЕНИЕ ИНТЕНСИВНАЯ ПОДАЧА ПАРА ОЧИСТКА И УХОД СУХОЕ ГЛАЖЕНИЕ ПОВТОРНОЕ НАГРЕВАНИЕ УТЮГА ФУНКЦИЯ САМООЧИСТКИ
- Технические характеристики: Комплектность НАПОЛНЕНИЕ РЕЗЕРВУАРА ВОДОЙ БЕЗОПАСНОСТЬ ОКРУЖАЮЩЕЙ СРЕДЫ. УТИЛИЗАЦИЯ УСТАНОВКА ТЕМПЕРАТУРЫ
4
· Connect he iron to a suitable mains
very hard, the self-clean function should
supply outlet
used more frequently.
· Turn the temperature control button
· Make sure the appliance is
to the “• • ”, or “• • •” "MAX" setting
unplugged.
· The pilot light turns on when the
· Set the Variable steam control knob
required temperature is reached. The
to position "0" (=no steam).
iron is ready for use.
· Fill the water tank to the maximum
· Turn the steam knob to the required
level.
position, steam starts coming out from
· Select the maximum ironing
the holes in the sole plate.
temperature.
Notice: With conventional steam
· Put the plug in the wall socket.
ironing, water may leak from the sole
· Unplug the iron when the
plate if too low temperature has been
temperature pilot light has gone out.
select. If this happens turn the
· Hold the iron over the silk, press and
temperature control to the advised
hold die self-clean button and gently
position. Steam will recommence as
shake the iron. (Steam and boiling
soon as die appropriate temperature has
water will come out of the soleplate.
been reached.
Impurities and flakes (if any) will be
flushed out.)
BURST OF STEAM
· Release the self-clean button as soon
This function provides an extra amount
as all water in the tank has been used
of steam to remove stubborn wrinkles.
up.
· Fill the iron with water.
· Repeat the self-clean process if the
· Turn the temperature control to the
iron still contains a lot of impurities.
position 'MAX".
· The iron is ready for use.
CARE AND CLEANING
· Press the burst of steam knob once
1. Turn the Temperature Control Dial to
· Steam will penetrate into the
OFF, then disconnect the iron from the
garment removing the wrinkles.
wall outlet and cool it down completely.
· Wait a few seconds before pressing
2. Deposits and other residues on the
the steam control knob wrinkles again
sole plate can be removed with a cloth
when there are stubborn wrinkles.
soaked in a vinegar/water solution.
Usually all wrinkles can be removed
3. The casing may the wiped with a
within three pressings.
damp cloth and then polished with a dry
one.
DRY IRONING
4. Never use any abrasives to clean the
· Connect the iron to a suitable mains
sole plate.
supply outlet.
5. Keep the sole plate smooth, avoid
· Ensure that the steam control knob
contact with metal objects.
is in position “0”.
6. When you have finished ironing or
· Select the setting on the
you are leaving iron unattended:
temperature control.
- turn the steam control knob to
· When the pilot light turns off, the
position “0”.
required temperature is reached. The
- stand the iron upright
iron is ready to use.
- disconnect the iron from the wall
outlet
TO LET THE IRON HEAT UP AGAIN
7. Do not allow children to touch the
Pick up the iron or move it slightly.
iron or the power cord whom ironing.
The red shot-off pilot goes out. If the
8. Do not immerse die iron or the cord
temperature of the soleplate drops
into water or any other liquid.
below the set ironing temperature, the
9. Do not touch hot metal parts, hot
temperature pilot goes on.
water or steam. These parts become hot
If the pilot light goes on after you have
and may cause burns. Take care if you
move the iron, wait for it to go out
turn die iron upside downs: there may
before you start ironing.
be not hot water in the tank. The plug
If the pilot light does not go on after
and cord should not be allowed to touch
you move the iron, the soleplate still
the hot sole plate. Let the iron cool
has right temperature and iron is ready
down completely before taking it away.
for use.
Roll the power cord around the iron for
storage.
SELF CLEAN FUNCTION
10.Disconnect die iron from the wall
The Self Clean function can remove any
outlet for filling in water or when you
scale or impurities.
remove the water after use.
Use the self-clean function once every
11.The iron is for household use only.
two weeks. If the water in your area is
12. Save the instruction manual for
future reference.
5
Notes:
Specification
· Some parts of the iron have been
Power: 2200 W
slightly greased and as result the iron
Rated Voltage: 220-230 V
may smoke slightly when switched on
Rated Frequency: 50 Hz
for the first time. It will not happen
Rated Current: 10 A
again after a few uses.
· Before using for the first time,
Set
remove any protective films or stickers
Iron 1pc
from the sole plate and the cabinet.
Instruction Manual with
Then clean the sole place with a soft
Warranty Book 1pc
cloth.
Package 1pc
· When using the iron for the first
time, test it on an old piece of fabric to
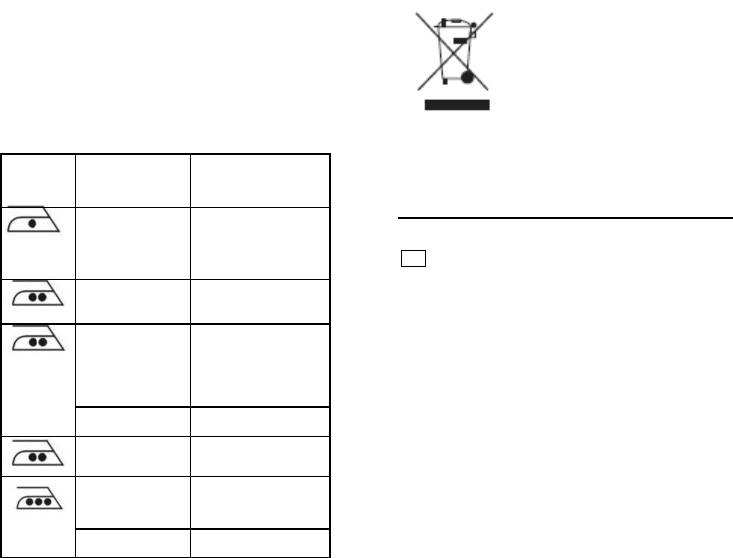
ENVIRONMENT FRIENDLY
ensure that the sole plate and water
DISPOSAL
tank are completely clean.
You can help protect
the environment!
HOW TO FILL IN WATER
Please remember to
· Set the Steam Control Knob “0” and
respect the local
the temperature Control Dial to OFF.
regulations: hand in the
· Unplug the iron from the wall outlet.
non-working electrical
· Pour water into the water inlet.
equipments to an
· Fill up to the maximum level “MAX”
appropriate waste
of the water tank.
disposal centre.
The manufacturer reserves the
LABEL KIND OF
FIBRE
right to change the specification
TEXTILE
MATERIAL
and design of goods.
Synthetic Acrylic
Modacryc
Polypropylene
Po|yurethane
RU
Synthetic Acetate
УТЮГ
Triacetate
Уважаемый покупатель!
Synthetic Cupro
Поздравляем Вас с приобретением
Polyamide
изделия с торговой маркой
(Nylon)
“Saturn”. Уверены, что наши
Polyester
изделия будут верными и
Viscose(Rayon)
надежными помощниками в
Silk Silk
Вашем домашнем хозяйстве.
Wool Wool
Не подвергайте устройство резким
перепадам температур. Резкая
Cotton Cotton
смена температуры (например,
внесение устройства с мороза в
теплое помещение) может
Linen Linen
вызвать конденсацию влаги
внутри устройства и нарушить его
работоспособность при
SETTING THE TEMPERATURE
включении. Устройство должно
· Insert the plug in the wall socket and
отстояться в теплом помещении не
stand the iron upright.
менее 1,5 часов.
· Turn the temperature control knob to
Ввод устройства в эксплуатацию
the desired temperature setting.
после транспортировки
· The desired temperature has been
производить не ранее, чем через
reached when the pilot light has turned
1,5 часа после внесения его в
off.
помещение.
The pilot light will turn on and off from
time after time, indicating that the
selected temperature is being
maintained.


