ZyXEL Communications NPS-520: " We recommend you give the NPS-520 a static
" We recommend you give the NPS-520 a static : ZyXEL Communications NPS-520
ENGLISH
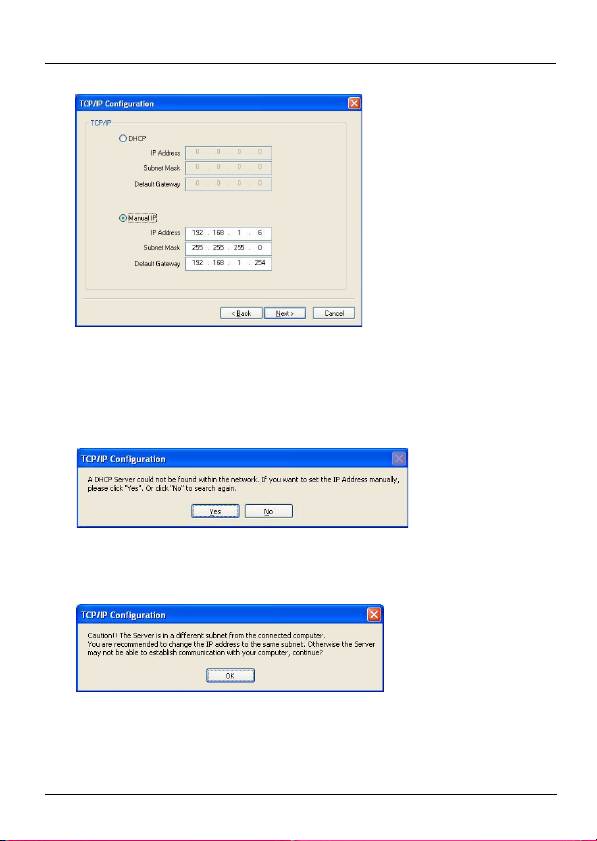
9 If the NPS-520 is connected to a network that has a DHCP
server, select DHCP to have the DHCP server assign
TCP/IP information (such as IP address and subnet mask)
to your NPS-520. Otherwise, select Manual IP and enter
an IP address (in the same subnet as your network),
subnet mask and the gateway’s IP address. Click Next.
" We recommend you give the NPS-520 a static
IP address or configure your DHCP server to
always give it the same IP address (static
DHCP). If the NPS-520’s IP address changes,
you need to uninstall and reinstall the ZyXEL
utility on each computer that uses it.
8
ENGLISH
If you selected DHCP in the previous screen but there was
no DHCP server found in your network, the following screen
displays. Click Yes to go back to the TCP/IP configuration
screen or click No to have the NPS-520 search for the DHCP
server again.
If your computer and the NPS-520 are not in the same
subnet, the following screen pops up. Click OK (or Yes) to
continue.
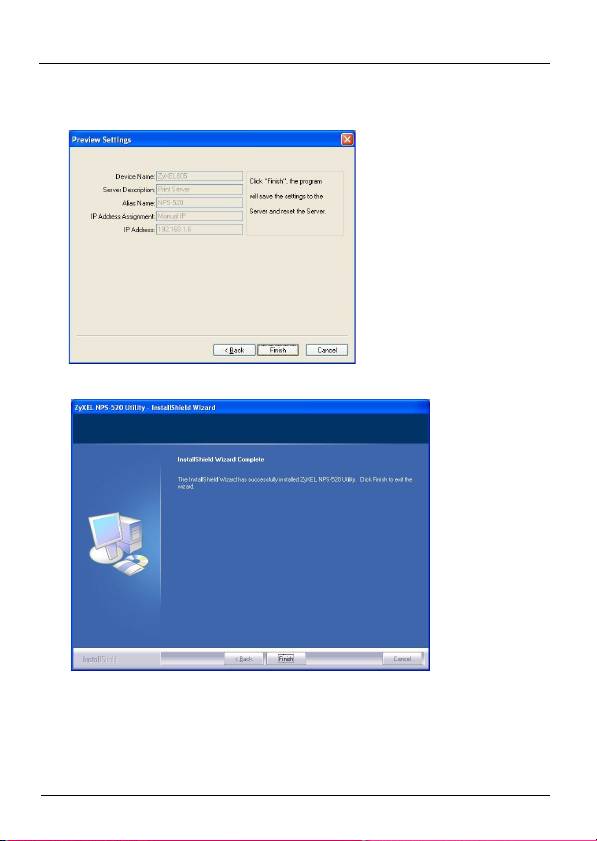
10This read-only screen shows the current settings. Check
whether what you have configured is correct and click
9
ENGLISH
Finish. Otherwise, click Back to re-configure the
information.
11Click Finish to complete the installation.
12Repeat these steps on each Windows computer in your
network that will use the NPS-520.
10
ENGLISH
2.2 Using the Utility on Windows
If you already installed a printer driver, you still need to
associate it with the NPS-520.
2.2.1 Printer Driver Installation and Association
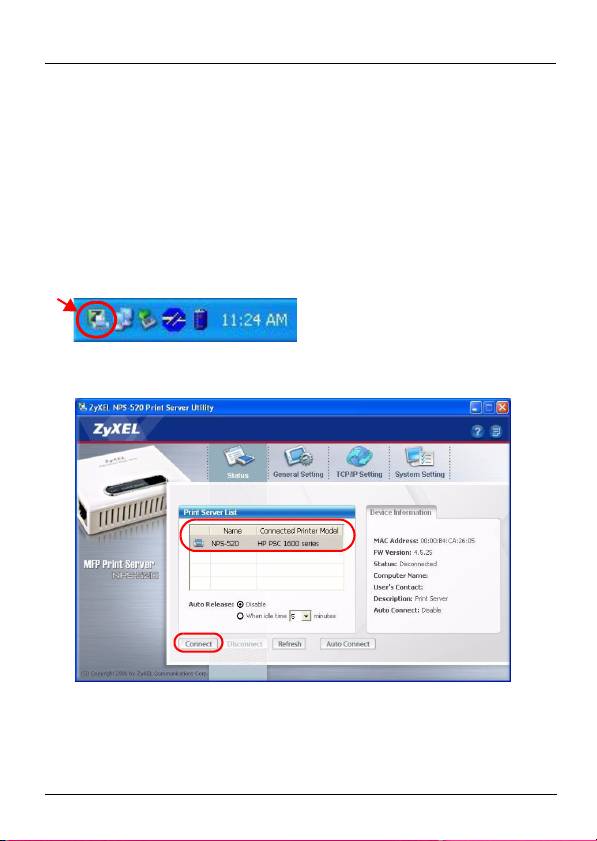
1 Start the ZyXEL utility by either double-clicking the utility
icon in the system tray or clicking Start > (All) Programs >
ZyXEL NPS-520 Utility > NPS-520 Utility.
2 The Status screen displays. Select the name of your NPS-
520 and click Connect.
3 Windows automatically detects the printer and prompts
you to install the printer driver. Follow the on-screen
11
ENGLISH
instructions to install a new driver and/or have the driver
associate with the NPS-520.
2.2.2 Managing the NPS-520
To have computers in the network take turns to use the
printer, you need to enable Auto Connect in the utility Status
screen and select a default printer. Auto connect allows the
NPS-520 to communicate with the printer when you want to
use it. The NPS-520 drops the connection after the job is
finished.
Alternatively, click Connect and set the Auto Release idle
timeout.
12
Оглавление
- " You should have already installed the driver
- " If your computer operating system version is
- " The NPS-520’s default IP address is
- " We recommend you give the NPS-520 a static
- " If you disable Auto Release, only that computer
- " If the printer is not connected or not available
- " Der Treiber (und wenn vorhanden das Utility-
- " Wenn Ihr Computer mit einem älteren
- " Die standard IP-Adresse des NPS-520 ist
- " Es wird empfohlen, dem NPS-520 eine statische
- " Wenn Sie die Option Auto Release
- " Wenn der Drucker beim Senden einer
- " Debería tener instalado el controlador (y la
- " Si la versión de su sistema operativo es anterior
- " La dirección IP predeterminada del NPS-520 es
- " Le recomendamos asignar al NPS-520 una
- " Si deshabilita Auto Release (Liberación
- " Si la impresora no está conectada o no está
- " Vous devez avoir déjà installé le pilote (et
- " Si la version du système d'exploitation de votre
- " L'adresse IP par défaut du NPS-520 est
- " Nous vous conseillons de donner au NPS-520
- " Si vous désactivez Auto Release (Abandon
- " Si l'imprimante n'est pas connectée ou si elle
- " Il driver (e il programma di utilità, se esistente)
- " Se il sistema operativo del computer è una
- " L'indirizzo IP predefinito di NPS-520 è
- " Si consiglia di fornire a NPS-520 un indirizzo IP
- " Se si disabilita Auto Release (rilascio
- " Se la stampante non è collegata o non
- " На вашем компьютере уже должен быть
- " Если на компьютере установлена
- " IP-адрес NPS-520 по умолчанию - это
- " Мы рекомендуем вам присваивать NPS-520
- " При отключении функции Auto Release (Авто
- " Если при отправке запроса принтер будет не
- " Du ska redan ha installerat drivrutinen (och
- " Om datorns operativsystemversion är äldre än
- " NPS-520:s standard-IP-adress är 192.168.1.6.
- " Vi rekommenderar att du ger NPS-520 en
- " Om du inaktiverar alternativet Auto Release,
- " Om skrivaren inte är ansluten eller inte är
