ZyXEL Communications 802.11g Wireless Firewall Router 1-P-320W: инструкция
Раздел: Профоборудование
Тип: Аппарат
Инструкция к Аппарату ZyXEL Communications 802.11g Wireless Firewall Router 1-P-320W

P-320W
802.11g Wireless Firewall Router
Quick Start Guide
Version 2.00
Edition 1
10/2006
Table of Contents
ENGLISH 3
DEUTSCH 19
ESPAÑOL 39
FRANÇAIS 58
ITALIANO 76
РУССКИЙ 96
SVENSKA 116
繁體中文 135

ENGLISH
ENGLISH
Overview
The Mer produkthjalp finns pa http://www.support.zyxel.se is a broadband router with a built-in four-port 10/
100 Mbps switch. The Mer produkthjalp finns pa http://www.support.zyxel.se makes it easy to set up a small
home or office network and share Internet access via a broadband (cable/DSL) modem.
You should have an Internet account already set up and have been given most of the following information.
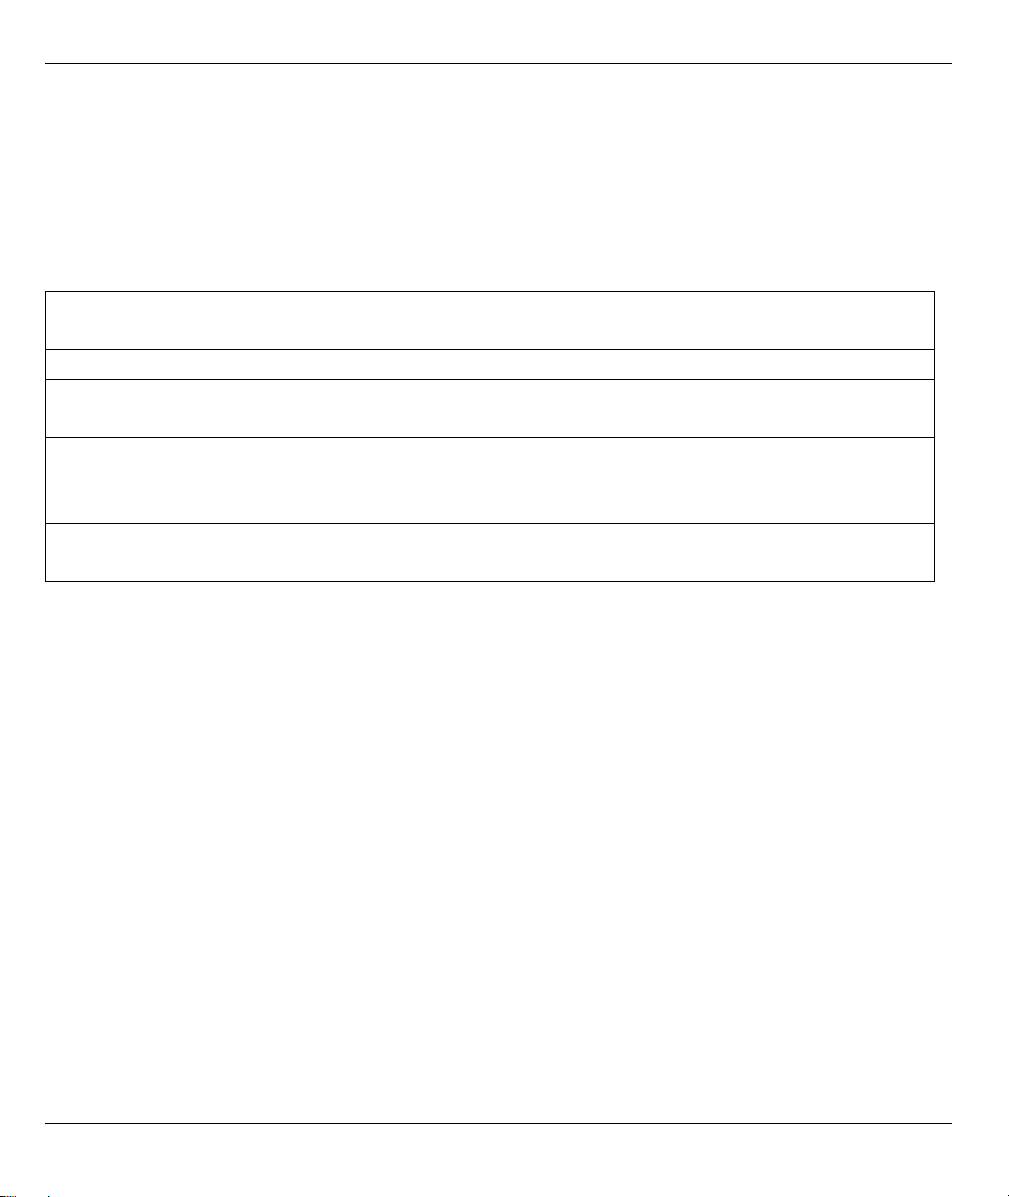
Table 1 Internet Account Information
Your device’s WAN IP Address (if given): ______________
DNS Server IP Address (if given): Primary _____________, Secondary ______________
Connection Type:
Ethernet Service Type: _______________________
Login Server IP Address: ______________
User Name: ____________
Password: ____________
PPTP: User Name: ____________
Password: ____________
Your WAN IP Address (if given) ____________
PPTP Server IP Address: ___________
Connection ID (if required): ____________
or PPTP Domain Name: ___________
¦PPPoE (PPPoE) Service Name: ____________
User Name: ____________ Password: ____________
See your User’s Guide for background information on all features.
The follow lists what you need to do:
1 Hardware Connections
2 Accessing the Web Configurator
3 Internet Access Setup
3
ENGLISH
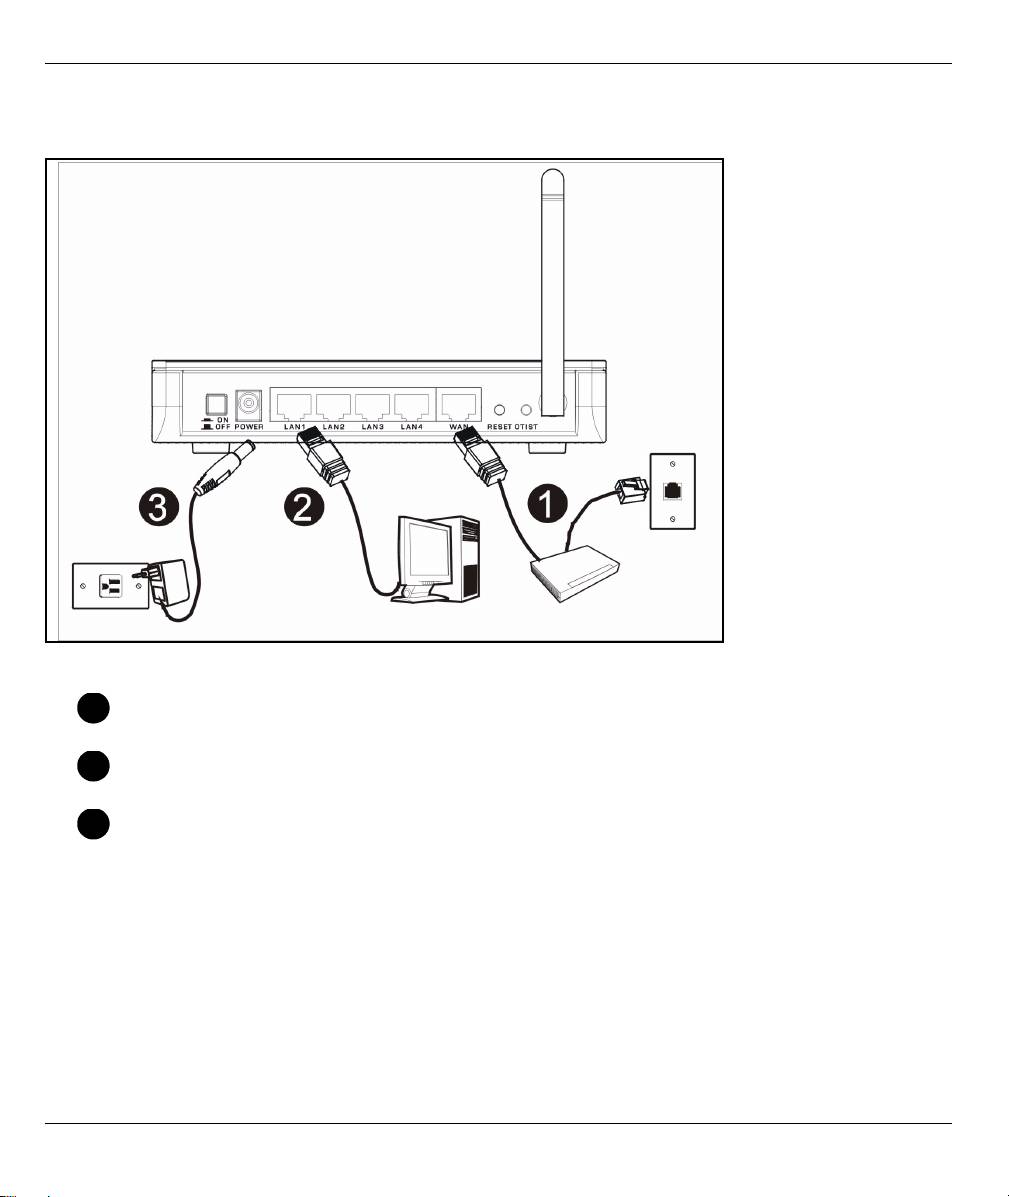
1 Hardware Connections
Do the following to make hardware connections for initial setup.
WAN Connection
1
Connect your modem to the “WAN” port using the cable that came with your modem.
LAN Connection
2
Connect your computer to a "LAN" port using the included Ethernet cable
POWER Connection
3
Use the included power adaptor to connect the POWER socket to an appropriate power source (see the User’s
Guide for power adaptor specifications by region)
4
ENGLISH
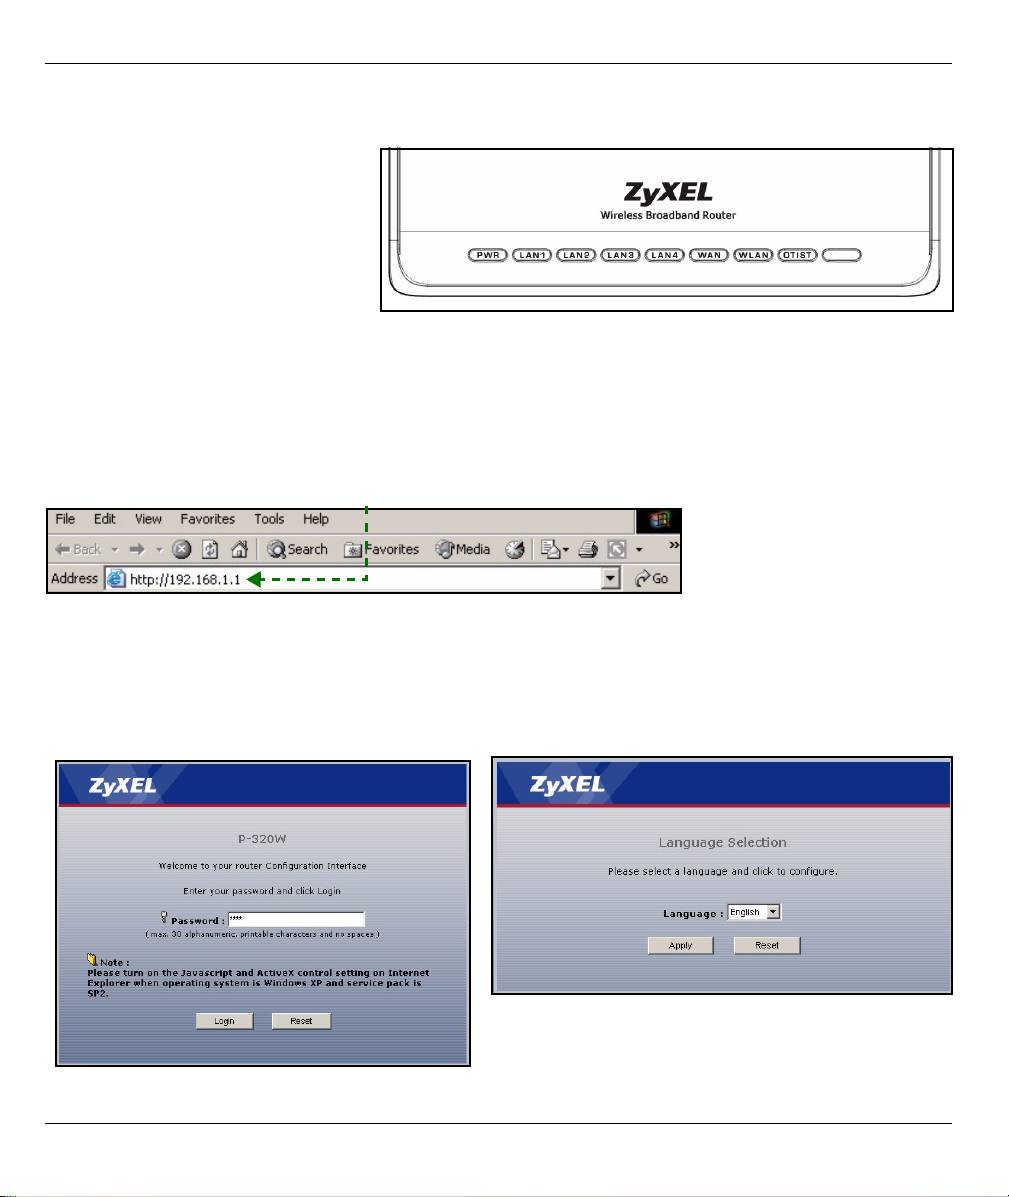
The LEDs
After you’ve made the connections,
push in the power button to turn on the
Mer produkthjalp finns pa http://
www.support.zyxel.se.
Look at the front panel LEDs. When
you connect the power, the PWR and
WLAN LEDs come on.
The LAN and WAN LEDs turn on if the
corresponding connections are
properly made.
2 Accessing the Web Configurator
1 Launch your web browser. Enter “192.168.1.1” as the web site address.
Note: If you do not see the next screen, then please go to section 4.1.
2 The Password window displays. Enter the
4 Choose your language from the drop-down list box.
password (“1234” is the default) and click Login.
Click Apply.
3 Change the password in the screen that follows
and click Apply.
5
Оглавление
- P-320W
- STEP 1: System Information
- STEP 2: Wireless LAN
- STEP 3: WAN
- Systemdaten
- Wireless-LAN
- SCHRITT 3: WAN
- PASO 1: Información del sistema
- PASO 2: LAN inalámbrica
- PASO 3: WAN
- ETAPE 1: Informations du système
- ETAPE 2: LAN dans gil
- ETAPE 3: WAN
- FASE 1: Informazioni sul sistema
- FASE 2: LAN Wireless
- FASE 3: WAN
- ЭТАП 1: Системная информация
- ЭТАП 3: WAN (ГВС)
- STEG 1: Systeminformation
- STEG 2: Trådlöst LAN
- STEG 3: WAN
- 系統資訊 第一步:
- 第二步: 無線區域網路
- 廣域網路
