Melitta Caffeo CI: 6 Preparing beverages, adjusting settings immediately before dispensing
6 Preparing beverages, adjusting settings immediately before dispensing: Melitta Caffeo CI
13
ENGLISH
6 Preparing beverages, adjusting settings immediately before dispensing
Two options are available for preparing beverages.
•
Standard dispensing: Settings such as coffee strength, quantity of
coffee and milk and can be changed directly before dispensing.
•
My Coffee button
: Personal settings that are already entered and
saved can be called with the My Coffee button (see page 19).
6.1 Preparing espresso or café crème
Prerequisite: The appliance must be ready for operation (see „Switching on
and off“ on page 12).
•
Place a suitable vessel under the outlet.
•
Press the button for coffee strength
to adjust the coffee strength.
•
Press the button for espresso
or for café crème
, depending on
the beverage you desire.
→
The grinding process and coffee dispensing start now. Dispensing ends
automatically when the set dispensed quantity is reached.
•
Turn the rotary switch to adjust the dispensed
quantity while the coffee is being dispensed.
→
The bean symbols indicate the coffee strength. The
dispensed quantity is displayed in millilitres.
•
To stop dispensing before the programmed
amount is reached, press the button for espresso
or for café crème
or the rotary switch.
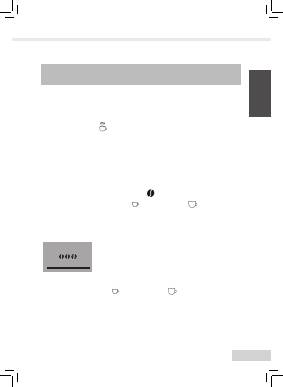
Café Crème
220 ml
14
6.2 Preparing a cappuccino
Prerequisite: The appliance must be ready for operation (see „Switching on
and off“ on page 12).
•
Place a suitable vessel under the outlet.
•
Push the outlet downwards as far as it will go.
•
Connect the
short
tube with the outlet and the supplied Melitta
®
CAFFEO
®
CI
®
milk container (Fig.
C
) or use the
long
tube for
conventional milk cartons.
•
Press the button for coffee strength
to adjust the coffee strength.
•
Press the button for cappuccino
.
→
The grinding process and coffee dispensing start
now. Dispensing ends automatically when the set
dispensed quantity is reached.
→
The bean symbols indicate the coffee strength. The
dispensed quantity is displayed in millilitres.
•
Turn the rotary switch to adjust the dispensed
quantity while the coffee is being dispensed.
→
To stop dispensing coffee before the programmed amount is reached, press
the rotary switch. The appliance will then continue with dispensing the milk.
The appliance warms up for milk dispensing.
→
Milk dispensing will start. Dispensing ends automatically when the set milk
quantity is reached.
•
To completely cancel coffee and milk dispensing, press the button for
cappuccino
.
•
Turn the rotary switch to adjust the milk quantity while the milk is being
dispensed, if required.
•
To stop dispensing milk before the programmed amount is reached,
press the rotary switch.
•
Carry out the Easy Cleaning programme, if necessary. The appliance
will prompt you to do this automatically (see page 31)
OR
select
another beverage.
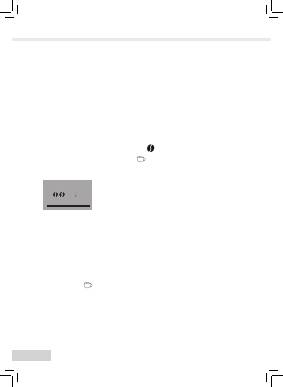
Cappuccino
110 ml 060 ml
15
ENGLISH
6.3 Preparing a latte macchiato
Prerequisite: The appliance must be ready for operation (see „Switching on
and off“ on page 12).
•
Place a suitable vessel under the outlet.
•
Push the outlet downwards as far as it will go.
•
Connect the
short
tube with the outlet and the supplied Melitta
®
CAFFEO
®
CI
®
milk container (Fig.
C
) or use the
long
tube for
conventional milk cartons.
•
Press the button for coffee strength
to adjust the coffee strength.
•
Press the button for latte macchiato
.
→
The appliance warms up for milk dispensing.
→
Milk dispensing will start. Dispensing ends automatically when the set milk
quantity is reached.
•
Turn the rotary switch to set the milk quantity while the milk is being
dispensed, if required.
•
To stop dispensing milk before the programmed amount is reached,
press the rotary switch. The appliance will then immediately start
dispensing the coffee.
→
The grinding process and coffee dispensing start now. Dispensing stops
automatically when the set dispensed quantity is reached.
•
To completely cancel coffee and milk dispensing, press the button for
latte macchiato
.
•
Turn the rotary switch to adjust the dispensed
quantity while the coffee is being dispensed, if
required.
→
The bean symbols indicate the coffee strength. The
dispensed quantity is displayed in millilitres.
•
To stop dispensing coffee before the programmed
amount is reached, press the rotary switch.
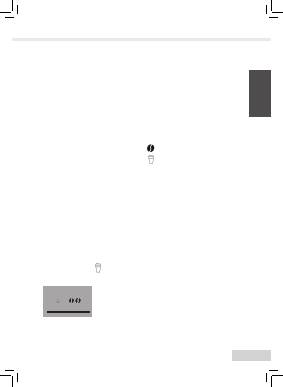
Latte Macchiato
110 ml 060 ml
16
•
Carry out the Easy Cleaning programme, if necessary. The appliance
will prompt you to do this automatically (see page 31)
OR
select
another beverage.
6.4
Preparing milk froth or warm milk
Prerequisite: The appliance must be ready for operation (see „Switching on
and off“ on page 12).
•
Place a suitable vessel under the outlet.
•
Connect the
short
tube with the outlet and the supplied Melitta
®
CAFFEO
®
CI
®
milk container (Fig.
C
) or use the
long
tube for
conventional milk cartons.
•
Press the button for milk froth
.
Press briefly
for milk froth and
press and hold
for hot milk (note graphic display).
→
The appliance warms up for milk or milk froth dispensing.
→
Milk or milk froth dispensing will start. Dispensing ends automatically when
the set milk or milk froth quantity is reached.
•
Turn the rotary switch to adjust the milk or milk froth quantity while the
milk or milk froth is being dispensed, if required.
•
To stop dispensing milk or milk froth before the programmed amount is
reached, press the button for milk
froth
or the rotary switch.
•
Carry out the Easy Cleaning programme, if necessary. The appliance
will prompt you to do this automatically (see page 31)
OR
select
another beverage.
17
ENGLISH
6.5 Preparing hot water
Prerequisite: The appliance must be ready for operation (see „Switching on
and off“ on page 12).
•
Place a suitable vessel under the outlet.
•
Press the button for hot water
.
→
Hot water will start dispensing. Dispensing ends automatically when the set
water quantity is reached.
•
Turn the rotary switch to adjust the water quantity while the hot water is
being dispensed.
•
To stop dispensing hot water before the programmed amount is
reached, press the hot water button
or the rotary switch.
6.6 Preparing beverages with ground coffee
Prerequisite: The appliance must be ready for operation (see „Switching on
and off“ on page 12).
•
Open the lid of the ground coffee chute (Fig.
A
, No.
8
).
•
Fill
max. one coffee scoop
of fresh ground coffee into the ground
coffee chute.
Caution!
–
Only fill the ground coffee chute with ground coffee. Instant products can
clog up the brewing unit.
–
Never fill more than one coffee scoop (supplied with the appliance) of
ground coffee, otherwise the brewing unit will be overfilled.
•
Close the lid of the ground coffee chute.
•
Place a suitable vessel under the outlet.
•
Press the button for the beverage you wish to prepare, e.g. the button
for café crème
.
→
Coffee dispensing now starts. It ends automatically when the set dispensed
quantity is reached.
18
•
Turn the rotary switch to adjust the dispensed quantity while the coffee
is being dispensed.
•
To stop dispensing coffee before the programmed amount is reached,
press the button for café crème
or the rotary switch.
Note
If you do not dispense coffee from the appliance within 3 minutes after opening
the ground coffee chute, the appliance will automatically switch to operation
with coffee beans and will dispose of the ground coffee into the coffee grounds
container to prevent later risk of overfilling the brewing chamber.
Note
When preparing beverages with ground coffee, the 2 cups option with the
button is not available.
Оглавление
- Dear Customer,
- Table of contents
- 1 Information about these operating instructions
- 2 General safety instructions
- 3 Appliance description
- Cappuccino 110 ml 060 ml
- 4 Starting up
- 5 Switching on and off
- 6 Preparing beverages, adjusting settings immediately before dispensing
- 7 My Coffee button: Preparing beverages with personal settings
- 8 Overview and operation of menus
- 9 Care and maintenance
- 10 Inserting, changing and removing the water filter
- 11 Transport and disposal
- 12 Troubleshooting
- Уважаемый покупатель!
- Содержание
- 1 Указания по данному руководству поэксплуатации
- 2 Общие указания по технике безопасности
- 3 Описание аппарата
- КAПУЧИНО 110 ml 060 ml
- 4 Начало эксплуатации
- 5 Включение и выключение
- 6 Приготовление напитков с настройками во время подачи
- 7 Кнопка «Мой кофе»: приготовлениенапитков с индивидуальными настройками
- 8 Обзор и использование меню
- 9 Уход и обслуживание
- 10 Установка, замена, извлечение водяногофильтра
- 11 Транспортировка и утилизация
- 12 Устранение неисправностей
- Drodzy Klienci!
- Spis treści
- 1 Wskazówki dotyczące instrukcji obsługi
- 2 Ogólne zasady bezpieczeństwa
- 3 Opis urządzenia
- Cappuccino 110 ml 060 ml
- 4 Uruchamianie
- 5 Włączanie i wyłączanie
- 6 Przyrządzanie napojów z ustawieniamibezpośrednio przy pobieraniu
- 7 Przycisk My Coffee: przyrządzanie napojów z indywidualnymi ustawieniami
- 8 Przegląd i obsługa menu
- 9 Konserwacja
- 10 Wkładanie, wymiana, wyjmowanie filtra wody
- 11 Transport i utylizacja
- 12 Usuwanie usterek
- Vážená zákaznice, vážený zákazníku,
- Obsah
- 1 Upozornění k tomuto návodu k použití
- 2 Všeobecné bezpečnostní pokyny
- 3 Popis přístroje
- Cappuccino 110 ml 060 ml
- 4 Uvedení do provozu
- 5 Zapnutí a vypnutí
- 6 Příprava nápojů s nastavením přímo přiodběru
- 7 Tlačítko My Coffee: Příprava nápojů s osobním nastavením
- 8 Přehled a ovládání nabídky
- 9 Péče a údržba
- 10 Vsazení, výměna, vyjmutí vodního filtru
- 11 Přeprava a likvidace
- 12 Odstranění poruch
- Sevgili müşterimiz!
- İçindekiler
- 1 Bu kullanma kılavuzu ile ilgili bilgiler
- 2 Genel güvenlik bilgileri
- 3 Cihazın tanımı
- Cappuccino 110 ml 060 ml
- 4 İşletime alma
- 5 Açma ve kapama
- 6 İçeceklerin alım esnasında doğrudan ayarlarile hazırlanması
- 7 My-Coffee (Benim Kahvem) tuşu: Kişisel ayarlarınızla içecek hazırlama
- 8 Menülere genel bakış ve menülerin kullanımı
- 9 Bakım
- 10 Su filtresinin yerleştirilmesi, değiştirilmesi,çıkartılması
- 11 Nakliye ve bertaraf
- 12 Arızaların giderilmesi
