Melitta Caffeo CI: 8 Overview and operation of menus
8 Overview and operation of menus: Melitta Caffeo CI
20
8 Overview and operation of menus
8.1 Accessing the main menu
Prerequisite: The appliance must be ready for operation (see „Switching on
and off“ on page 12).
•
Press and hold the rotary switch for more than
two seconds.
→
The main menu will appear on the graphic display.
•
Turn the rotary switch to select the sub-menu you
require. The selection is highlighted.
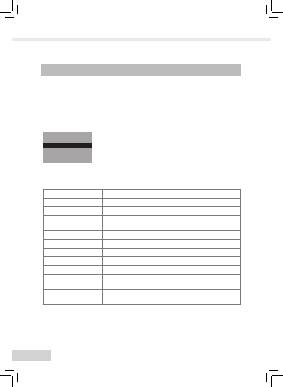
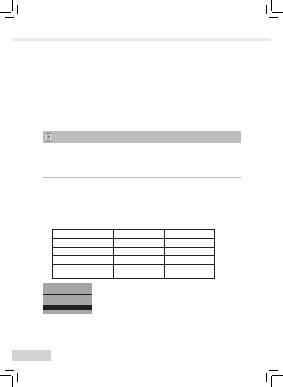
8.2 Overview of sub-menus
Menu option
Meaning
"Exit"
To exit the main menu
"My Coffee"
To enter personal coffee settings,
page
21
"Care"
Rinsing, easy cleaning, intensive cleaning, cleaning,
descaling, inserting a filter,
page 23
"Energy-Saving Mode" To change energy-saving mode settings,
page
24
"Set clock"
To change the time,
page
25
"Auto OFF"
To change settings for automatic switch-off,
page
25
"Water hardness"
To set the water hardness,
page
26
"Language"
To change the language,
page
27
"Statistics"
To display the total number of dispensed beverages,
page
27
"System"
To reset to default settings, to vent the appliance,
page
27
•
Press the rotary switch to access the selected sub-menu or to exit the
menu with
Exit.
Settings
Exit
My Coffee
Care

21
ENGLISH
Note
By pressing any of the dispensing buttons, you can exit every sub-menu
directly and return to standby mode.
8.3 "My Coffee" sub-menu
In this sub-menu, you can set and save different beverage settings for standard
dispensing and for „My Coffee“ dispensing.
Settings for standard dispensing:
Personal settings such as dispensed quantity,
coffee strength, brewing temperature, milk froth and milk quantities can be saved in
the
Standard
profile and can be directly accessed through the respective dispensing
buttons.
Settings for My Coffee dispensing:
You can set individual beverage settings for
up to four people, which can be accessed by selecting the respective profile with
the My Coffee button.
Editing user profiles
•
Select the
My Coffee
sub-menu.
•
Turn the rotary switch until the user you wish to edit is highlighted. You
can choose a name between
name 1
and
name 4
as well as
standard
.
•
Press the rotary switch to select the desired user, e.g.
name 1
.
Entering a user name
•
Turn the rotary switch until
Change Name
is highlighted and press it to
confirm the selection.
• Turn the rotary switch to select the first letter of
the name and press it to confirm the selected
letter.
→
The first letter is capitalised automatically.
•
Proceed in the same way for all remaining letters.
You can enter a maximum of nine characters.
•
Select
to delete a letter.
• Select the empty field to enter a space.
•
Select
Exit
to save the
name and return to the
My Coffee
sub-menu.
p q r s t u v w x y z -
1 2 3 4 5 6 7 8 9 0
Exit
Marie
a b c d e f g h i j k l m n o
e
22
Entering user settings for beverages
•
Turn the rotary switch until the beverage is
highlighted for which you want to adjust the user
settings, e.g.
Latte macchiato
and press it to
confirm the selection.
•
Turn the rotary switch until the property is
highlighted for which you want to save a setting
e.g.
Milk quantity
. Press the rotary switch to
confirm the selection.
•
Turn the rotary switch until the desired quantity is highlighted, e.g.
80
ml
, and press it to confirm the selection.
Note
The default setting is applied for all preferences for which you enter no settings.
Direct save function
Instead of saving settings in the menu, you can change settings such as the coffee
or milk quantity during dispensing with the My Coffee button
. The changes will
be saved directly under the selected user name.
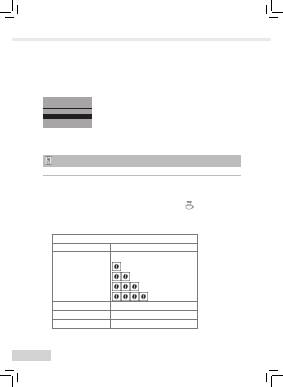
The following user settings for beverages are possible:
Setting options
Dispensed quantity
30 ml to 220 ml
Coffee strength
Choice of four settings:
Mild
Normal
Strong
Very strong
Brewing temperature
Low, medium, high
Milk froth quantity
10 ml to 220 ml
Milk quantity
0 ml to 220 ml
Latte Macchiato
Milk quantity
Exit
Froth quantity
23
ENGLISH
Switching user to enabled/disabled
You can disable a stored user name, for example if the user has not used the
appliance over a long period. The user remains stored but cannot be selected using
the My Coffee button.
•
Select the user name you wish to switch to
disable.
•
Select
Enabled/Disabled
in the menu.
•
Turn the rotary switch until
Disabled
is highlighted
and press the rotary switch to confirm the
selection.
→
The user is switched to disabled. A tick appears next to
Disabled
to confirm.
•
Proceed in the same way to switch a user back to enabled.
8.4 "Care" sub-menu
In this sub-menu, you can start various integrated care and cleaning programmes.
Menu option
Meaning
"Exit"
To exit the sub-menu
"Rinsing"
To rinse the coffee unit,
page
31
"Easy Cleaning"
To rinse the milk unit,
page
31
"Intensive Cleaning"
To start the Intensive Cleaning programme for the milk
unit,
page
32
"Cleaning"
To start the cleaning programme for the coffee unit,
page 34
"Descaling"
To start the descaling programme for the coffee unit,
page 36
"Filter"
To insert, change and remove the water filter,
page
38
Enabled/Disabled
Exit
Enabled
Disabled
√
24
Starting the care and cleaning programme
•
Select the
Care
sub-menu.
→
The care and cleaning programmes are displayed
on the graphic display.
•
Turn the rotary switch until the care and cleaning
programme you wish to start is highlighted, e.g.
Intensive Cleaning
and press it to confirm the
selection.
•
Turn the rotary switch until
Start
is highlighted and press it to start the
programme.
→
Depending on the programme you select, different prompts and notifications
will appear on the graphic display.
8.5 "Energy-saving mode" sub-menu
In this sub-menu, you can set how much time elapses before the appliance
switches to the energy-saving mode. The appliance is factory-set to 5 minutes.
•
Select the
Energy-Saving Mode
sub-menu.
•
Turn the rotary switch to highlight the time you
wish to elapse before the appliance switches to
energy-saving mode, and press the rotary switch
to confirm the selection.
•
Or
select
OFF
if you do not want the appliance to switch to energy-
saving mode.
Note
In energy-saving mode, the appliance consumes much less energy than in
standby mode. However, we recommend switching the appliance off using the
ON/OFF button
if it will not be used for an extended period (e.g. overnight).
Care
Intensive Cleaning
Easy Cleaning
Cleaning
Energy-Saving Mode
Exit
5 min
√
15 min
25
ENGLISH
8.6
"Set clock" sub-menu
You can change or deactivate the time in this sub-menu.
•
Select the
Set clock
sub-menu
.
•
Turn the rotary switch to select the desired hour
and press it to confirm.
•
Turn the rotary switch to select the desired
minutes and press it to confirm.
→
The time is saved. The appliance automatically returns to the main menu.
Deactivating the time display
•
Enter the time
00:00
.
→
No time is displayed when the appliance is ready for operation.
8.7 "Auto-OFF" sub-menu
In this sub-menu, you can set how much time elapses before the appliance
switches off automatically. The appliance is factory-set to 30 minutes. You can also
enter a specific time at which the appliance switches off automatically.
•
Select the
Auto OFF
sub-menu.
•
Turn the rotary switch until
OFF after
... is
highlighted if you want to program an elapsed
time, and press it to confirm the selection.
•
Turn the rotary switch to set how much time
(between 30 minutes and 8 hours) elapses
before the appliance switches off automatically.
• Press the rotary switch to confirm the selected time, e.g. "1 hour".
→
The time is saved. The appliance automatically returns to the main menu.
Set clock
13
: 10 : 07
Auto OFF
OFF after...
Exit
OFF at...
26
Auto OFF at
•
Turn the rotary switch until
OFF at...
is highlighted if you want to
program a switch-off time.
• Turn the rotary switch to select the desired hour and press it to confirm.
•
Turn the rotary switch to select the desired minutes and press it to
confirm.
→
The time is saved. The appliance automatically returns to the main menu.
Note
It is not possible to fully disable the Auto-OFF function. After the last action, the
appliance switches off at the earliest after 30 minutes and at the latest after 8
hours. When
both
an elapsed time (
OFF after...
)
and
a switch OFF time (
OFF
at...
) are set, the appliance selects the switch-off time that occurs earlier after
the last action.
8.8 "Water hardness" sub-menu
In this sub-menu, you can set the water hardness.
Use the test strip provided to determine the water hardness in your area. Comply
with the instructions on the test strip package. The appliance is factory-adjusted to
„very hard“ water hardness
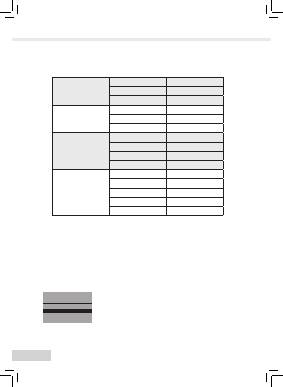
Water hardness range
°dH
°f
soft
0 - 7.2 °dH
0 - 13 °f
medium
7.2 - 14 °dH
13 - 25 °f
hard
14 - 21.2 °dH
25 - 38 °f
very hard
> 21.2 °dH
> 38 °f
•
Select the
Water hardness
sub-menu.
•
Turn the rotary switch until the desired water
hardness level is highlighted, e.g.
Very hard
.
•
Press the rotary switch to save the selected
water hardness level.
→
The water hardness level is saved. The appliance automatically returns to
the main menu.
Water hardness
Hard
Very hard
√
Exit
27
ENGLISH
8.9 "Language" sub-menu
In this sub-menu, you can set the language for the graphic display.
•
Select the
Language
sub-menu.
•
Turn the rotary switch until the desired language
is highlighted and press it to save the selected
language.
→
The question
Change language?
is displayed.
•
Turn the rotary switch until
Yes
is highlighted and
press it to confirm the selection.
→
The selected language is saved. The appliance automatically returns to the
main menu.
8.10 "Statistics" sub-menu
In this sub-menu, you can display the total number of coffee specialities prepared
since the appliance was first started up.
•
Select the
Statistics
sub-menu.
•
The total number of all prepared beverages is
displayed.
8.11 "System" sub-menu
In this sub-menu, you can reset the appliance to the default settings and vent the
appliance.
Resetting the appliance to the default settings
•
Select the
System
sub-menu.
•
Turn the rotary switch until
Default settings
is
highlighted and press it to confirm the selection.
•
Turn the rotary switch until
Reset
is highlighted
and press it to confirm the selection.
→
All settings including the personal settings in the
My Coffee
menu are reset to the default settings.
Language
Français
English
√
Exit
Statistics
00273
Default settings
Reset
Exit
28
Overview of default settings:
Espresso
Dispensed quantity
50 ml
Coffee strength
Strong
Brewing temperature
Normal
Café Crème
Dispensed quantity
120 ml
Coffee strength
Normal
Brewing temperature
Normal
Cappuccino
Dispensed quantity
60 ml
Milk froth quantity
80 ml
Coffee strength
Strong
Brewing temperature
High
Latte Macchiato
Dispensed quantity
70 ml
Milk froth quantity
180 ml
Milk quantity
0 ml
Coffee strength
Normal
Brewing temperature
High
Venting the appliance
We recommend that you vent the appliance if it will not be used for an extended
period of time and before transport. This also protects the appliance from frost
damage.
• If necessary, remove the water filter, see page 38.
•
Place a vessel under the outlet.
•
Select the
System
sub-menu.
•
Turn the rotary switch until
Venting
is highlighted
and press it to confirm the selection.
•
Turn the rotary switch until
Start
is highlighted
and press it to confirm the selection.
•
Connect the tube to the drip tray and to the outlet
(Fig.
D
) and press the rotary switch to confirm.
→
The appliance heats up.
Venting
Start
Exit
29
ENGLISH
Warning!
Danger of burning and scalding from hot steam
The machine releases hot steam when it is vented. Never allow any part of
your body, e.g. your face to come into contact with the hot steam.
•
Lift the lid of the water tank (Fig.
A
, No.
6
) and
pull the water tank up and out of the appliance.
→
The appliance is vented. The appliance then
automatically switches off completely.
8.12
Adjusting grinding fineness
The grinding fineness level was optimally adjusted prior to delivery. Consequently,
we recommend that you only readjust grinding fineness after approximately 1,000
coffee preparation processes (about 1 year).
You can only set the grinding fineness
while
the mill is running. Thus, adjust
grinding fineness directly after coffee dispensing starts.
If the coffee flavour is not intense enough, we recommend that you set a finer
grinding level.
•
Place the lever (Fig.
B
, No.
14
) in one of the three positions
(as viewed from the rear of the appliance).
Lever position
Grinding fineness
Left
Fine
Centre
Medium
Right
Coarse
(factory setting)
Venting
Remove
water tank
Оглавление
- Dear Customer,
- Table of contents
- 1 Information about these operating instructions
- 2 General safety instructions
- 3 Appliance description
- Cappuccino 110 ml 060 ml
- 4 Starting up
- 5 Switching on and off
- 6 Preparing beverages, adjusting settings immediately before dispensing
- 7 My Coffee button: Preparing beverages with personal settings
- 8 Overview and operation of menus
- 9 Care and maintenance
- 10 Inserting, changing and removing the water filter
- 11 Transport and disposal
- 12 Troubleshooting
- Уважаемый покупатель!
- Содержание
- 1 Указания по данному руководству поэксплуатации
- 2 Общие указания по технике безопасности
- 3 Описание аппарата
- КAПУЧИНО 110 ml 060 ml
- 4 Начало эксплуатации
- 5 Включение и выключение
- 6 Приготовление напитков с настройками во время подачи
- 7 Кнопка «Мой кофе»: приготовлениенапитков с индивидуальными настройками
- 8 Обзор и использование меню
- 9 Уход и обслуживание
- 10 Установка, замена, извлечение водяногофильтра
- 11 Транспортировка и утилизация
- 12 Устранение неисправностей
- Drodzy Klienci!
- Spis treści
- 1 Wskazówki dotyczące instrukcji obsługi
- 2 Ogólne zasady bezpieczeństwa
- 3 Opis urządzenia
- Cappuccino 110 ml 060 ml
- 4 Uruchamianie
- 5 Włączanie i wyłączanie
- 6 Przyrządzanie napojów z ustawieniamibezpośrednio przy pobieraniu
- 7 Przycisk My Coffee: przyrządzanie napojów z indywidualnymi ustawieniami
- 8 Przegląd i obsługa menu
- 9 Konserwacja
- 10 Wkładanie, wymiana, wyjmowanie filtra wody
- 11 Transport i utylizacja
- 12 Usuwanie usterek
- Vážená zákaznice, vážený zákazníku,
- Obsah
- 1 Upozornění k tomuto návodu k použití
- 2 Všeobecné bezpečnostní pokyny
- 3 Popis přístroje
- Cappuccino 110 ml 060 ml
- 4 Uvedení do provozu
- 5 Zapnutí a vypnutí
- 6 Příprava nápojů s nastavením přímo přiodběru
- 7 Tlačítko My Coffee: Příprava nápojů s osobním nastavením
- 8 Přehled a ovládání nabídky
- 9 Péče a údržba
- 10 Vsazení, výměna, vyjmutí vodního filtru
- 11 Přeprava a likvidace
- 12 Odstranění poruch
- Sevgili müşterimiz!
- İçindekiler
- 1 Bu kullanma kılavuzu ile ilgili bilgiler
- 2 Genel güvenlik bilgileri
- 3 Cihazın tanımı
- Cappuccino 110 ml 060 ml
- 4 İşletime alma
- 5 Açma ve kapama
- 6 İçeceklerin alım esnasında doğrudan ayarlarile hazırlanması
- 7 My-Coffee (Benim Kahvem) tuşu: Kişisel ayarlarınızla içecek hazırlama
- 8 Menülere genel bakış ve menülerin kullanımı
- 9 Bakım
- 10 Su filtresinin yerleştirilmesi, değiştirilmesi,çıkartılması
- 11 Nakliye ve bertaraf
- 12 Arızaların giderilmesi
