Canon pixma pro-1: When the second page of the pattern is printed, Print Head Alignment is At the end of the installation, Quick Menu starts up. You can open the Online complete. Manual and On-screen Manual from here when you want to know about the details of the functions and operations or when need arises.
When the second page of the pattern is printed, Print Head Alignment is At the end of the installation, Quick Menu starts up. You can open the Online complete. Manual and On-screen Manual from here when you want to know about the details of the functions and operations or when need arises.: Canon pixma pro-1
Table of contents
- Contents■
- Printer Installation Flow■ Printer Preparation Software Installation Installation Complete
- Symbols Used in This Document
- Printed Manual■ On-screen Manual and Online Manual■ Getting Started (this manual)
- Devices Required for Wired Connection■ When using the printer over a wired connection, a commercial network device (router, etc.) and Ethernet cable are required.
- Preparation
- 1 2
- 3 4 5 6
- 7 When it is necessary to turn off the printer
- 1 2 Install the Ink Tanks
- 3 4
- 5 6
- 1 2 Install the Print Head
- 3 4
- 5
- 6
- 7 8
- 9
- Software Installation
- For Windows XP/Windows XP SP1/Windows XP SP2/Windows Vista
- For Windows XP/Windows XP SP1/Windows XP SP2/Windows Vista If you prefer not to apply a Windows service pack, install the printer driver and IJ Network Tool by following the procedure below.
- For Mac OS X v10.6 to v10.6.7 Do you prefer to apply a Mac OS software update?
- For Mac OS X v10.4.11 to v10.5 Perform the installation by following one of the methods below.
- For Mac OS X v10.4.11 to v10.5 Install the software (the printer driver and IJ Network Tool) stored on the Setup CD-ROM by following 1 to 3 below.
- Do not connect the USB Easy-WebPrint EX cable yet.
- 1 1. Make sure that the POWER lamp (white) (A) is lit. 2. Press the ON button (B) to TURN OFF THE PRINTER.
- 2 1. Make sure that the printer has turned off. 2. Turn on the computer. 3. Insert the Setup CD-ROM into the CD-ROM drive.
- 3 3
- 4
- When the second page of the pattern is printed, Print Head Alignment is At the end of the installation, Quick Menu starts up. You can open the Online complete. Manual and On-screen Manual from here when you want to know about the details of the functions and operations or when need arises.
- 5 Load Paper
- My Image Garden 6 Application Software
- CREATIVE PARK PREMIUM Print Studio Pro
C
D
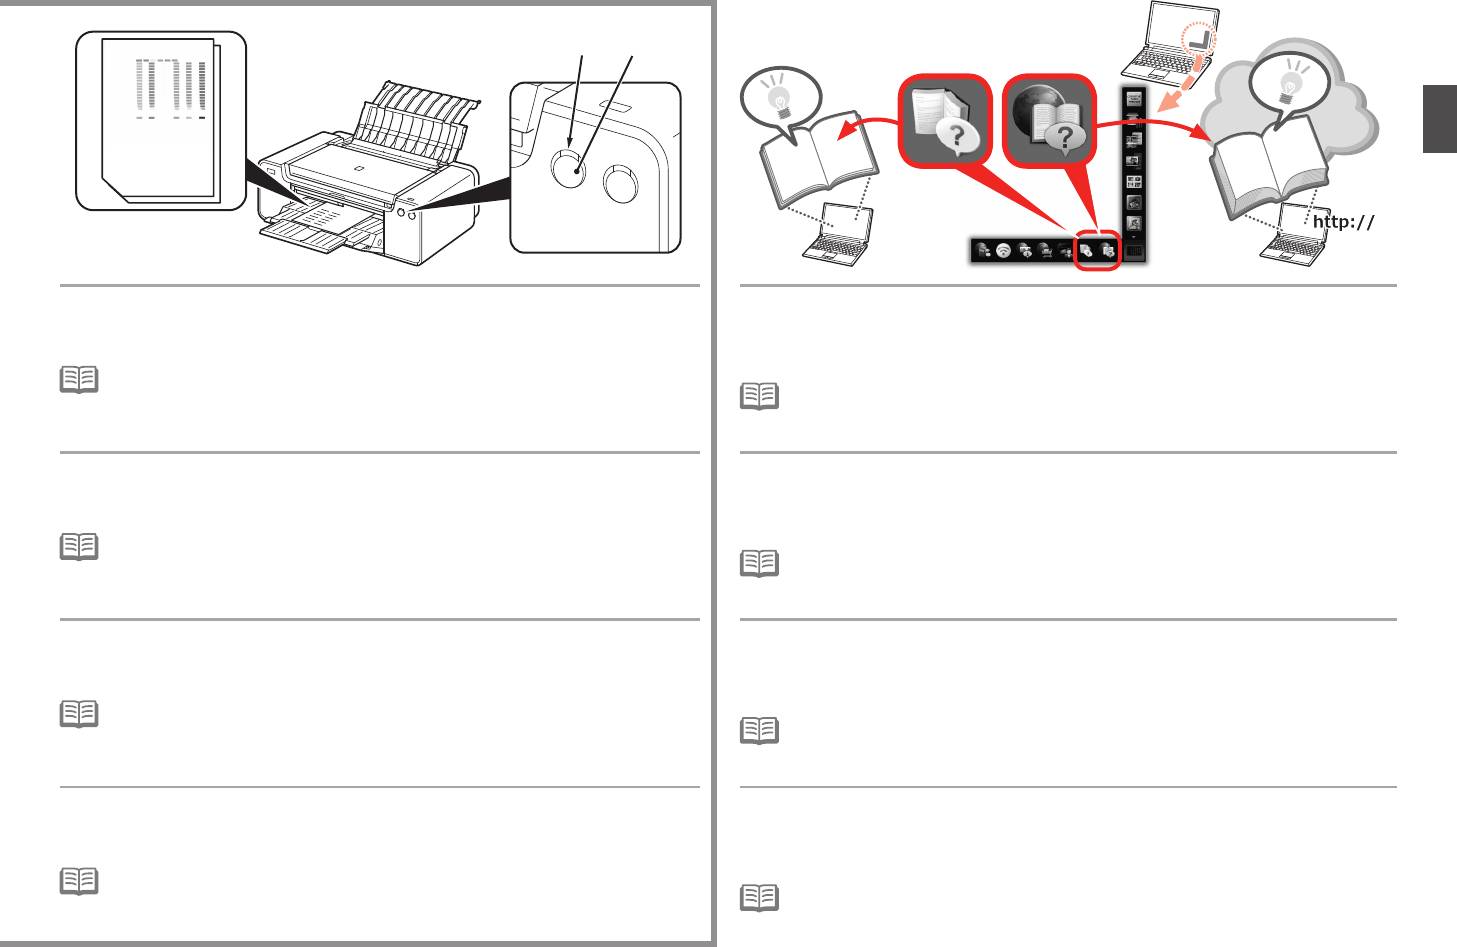
When the second page of the pattern is printed, Print Head Alignment is
At the end of the installation, Quick Menu starts up. You can open the Online
complete.
Manual and On-screen Manual from here when you want to know about the details
Some parts of patterns printed on the first page are faint.
of the functions and operations or when need arises.
•
If the Alarm lamp (orange) (C) ashes, press the RESUME/CANCEL button (D) on the
printer to clear the error, then click Next. After the installation is complete, perform Print
•
Installation of Quick Menu and On-screen Manual on the computer is required.
Head Alignment by referring to the Online Manual.
•
Internet connection is required for using the Online Manual.
Une fois que la seconde page du motif est imprimée, l’alignement de la tête
À la fin de l’installation, Quick Menu démarre. À partir de là, vous pouvez ouvrir
d’impression est terminé.
le Manuel en ligne et le Manuel à l’écran si vous voulez en savoir plus sur les
Certaines zones des motifs imprimés sur la première page sont pâles.
fonctions et opérations, ou en cas de besoin.
•
Si le voyant Alarme (Alarm) (orange) (C) clignote, appuyez sur le bouton REPRENDRE/
ANNULER (RESUME/CANCEL) (D) de l’imprimante pour éliminer l’erreur, puis cliquez sur
•
L’installation sur l’ordinateur de Quick Menu et du Manuel à l’écran est requise.
Suivant. Une fois l’installation terminée, effectuez l’alignement de la tête d’impression en
•
Une connexion Internet est nécessaire pour utiliser le Manuel en ligne.
vous reportant au Manuel en ligne.
Nachdem die zweite Seite des Musters gedruckt wurde, ist die Ausrichtung des
Am Ende der Installation öffnet sich das Quick Menu. Sie können das Online-
Druckkopfs abgeschlossen.
Handbuch und On-Screen-Handbuch von hier aus öffnen, wenn Sie weitere
Einige Teile der gedruckten Muster auf der ersten Seite sind blass.
Informationen zu den Funktionen und dem Betrieb usw. wünschen.
•
Wenn die Alarm-Anzeige (orange) (C) blinkt, drücken Sie die Taste FORTSETZEN/
ABBRECHEN (RESUME/CANCEL) (D) am Drucker, um den Fehler zu beheben, und
•
Die Installation von Quick Menu und On-Screen-Handbuch auf dem Computer ist erforderlich.
klicken Sie dann auf Weiter (Next). Führen Sie nach dem Abschluss der Installation die
•
Für die Verwendung vom Online-Handbuch ist eine Internetverbindung erforderlich.
Ausrichtung des Druckkopfs gemäß den Anweisungen im Online-Handbuch durch.
Al termine della stampa della seconda pagina del motivo, l’allineamento della
Al termine dell’installazione, viene avviato Quick Menu. Da qui è possibile aprire il
testina di stampa è completato.
Manuale online e il Manuale a video quando si desidera conoscere i dettagli delle
Una parte dei motivi stampati sulla prima pagina è sbiadita.
funzioni e delle operazioni o in caso di necessità.
•
Se la spia di Allarme (Alarm) (arancione) (C) lampeggia, premere il pulsante RIPRENDI/
ANNULLA (RESUME/CANCEL) (D) posto sulla stampante per correggere l’errore, quindi
•
Quick Menu e il Manuale a video devono essere installati nel computer.
fare clic su Avanti (Next). Al termine dell’installazione, eseguire l’Allineamento testina di
•
Per utilizzare il Manuale online è necessario disporre di una connessione a Internet.
stampa facendo riferimento al Manuale online.
29


