Canon pixma pro-1: Preparation
Preparation: Canon pixma pro-1
Table of contents
- Contents■
- Printer Installation Flow■ Printer Preparation Software Installation Installation Complete
- Symbols Used in This Document
- Printed Manual■ On-screen Manual and Online Manual■ Getting Started (this manual)
- Devices Required for Wired Connection■ When using the printer over a wired connection, a commercial network device (router, etc.) and Ethernet cable are required.
- Preparation
- 1 2
- 3 4 5 6
- 7 When it is necessary to turn off the printer
- 1 2 Install the Ink Tanks
- 3 4
- 5 6
- 1 2 Install the Print Head
- 3 4
- 5
- 6
- 7 8
- 9
- Software Installation
- For Windows XP/Windows XP SP1/Windows XP SP2/Windows Vista
- For Windows XP/Windows XP SP1/Windows XP SP2/Windows Vista If you prefer not to apply a Windows service pack, install the printer driver and IJ Network Tool by following the procedure below.
- For Mac OS X v10.6 to v10.6.7 Do you prefer to apply a Mac OS software update?
- For Mac OS X v10.4.11 to v10.5 Perform the installation by following one of the methods below.
- For Mac OS X v10.4.11 to v10.5 Install the software (the printer driver and IJ Network Tool) stored on the Setup CD-ROM by following 1 to 3 below.
- Do not connect the USB Easy-WebPrint EX cable yet.
- 1 1. Make sure that the POWER lamp (white) (A) is lit. 2. Press the ON button (B) to TURN OFF THE PRINTER.
- 2 1. Make sure that the printer has turned off. 2. Turn on the computer. 3. Insert the Setup CD-ROM into the CD-ROM drive.
- 3 3
- 4
- When the second page of the pattern is printed, Print Head Alignment is At the end of the installation, Quick Menu starts up. You can open the Online complete. Manual and On-screen Manual from here when you want to know about the details of the functions and operations or when need arises.
- 5 Load Paper
- My Image Garden 6 Application Software
- CREATIVE PARK PREMIUM Print Studio Pro
25 cm (10 inches)
25 cm (10 pouces)
25 cm (10 Zoll)
1
25 cm (10 pollici)
35 cm (14 inches)
35 cm (14 pouces)
35 cm (14 Zoll)
35 cm (14 pollici)
•
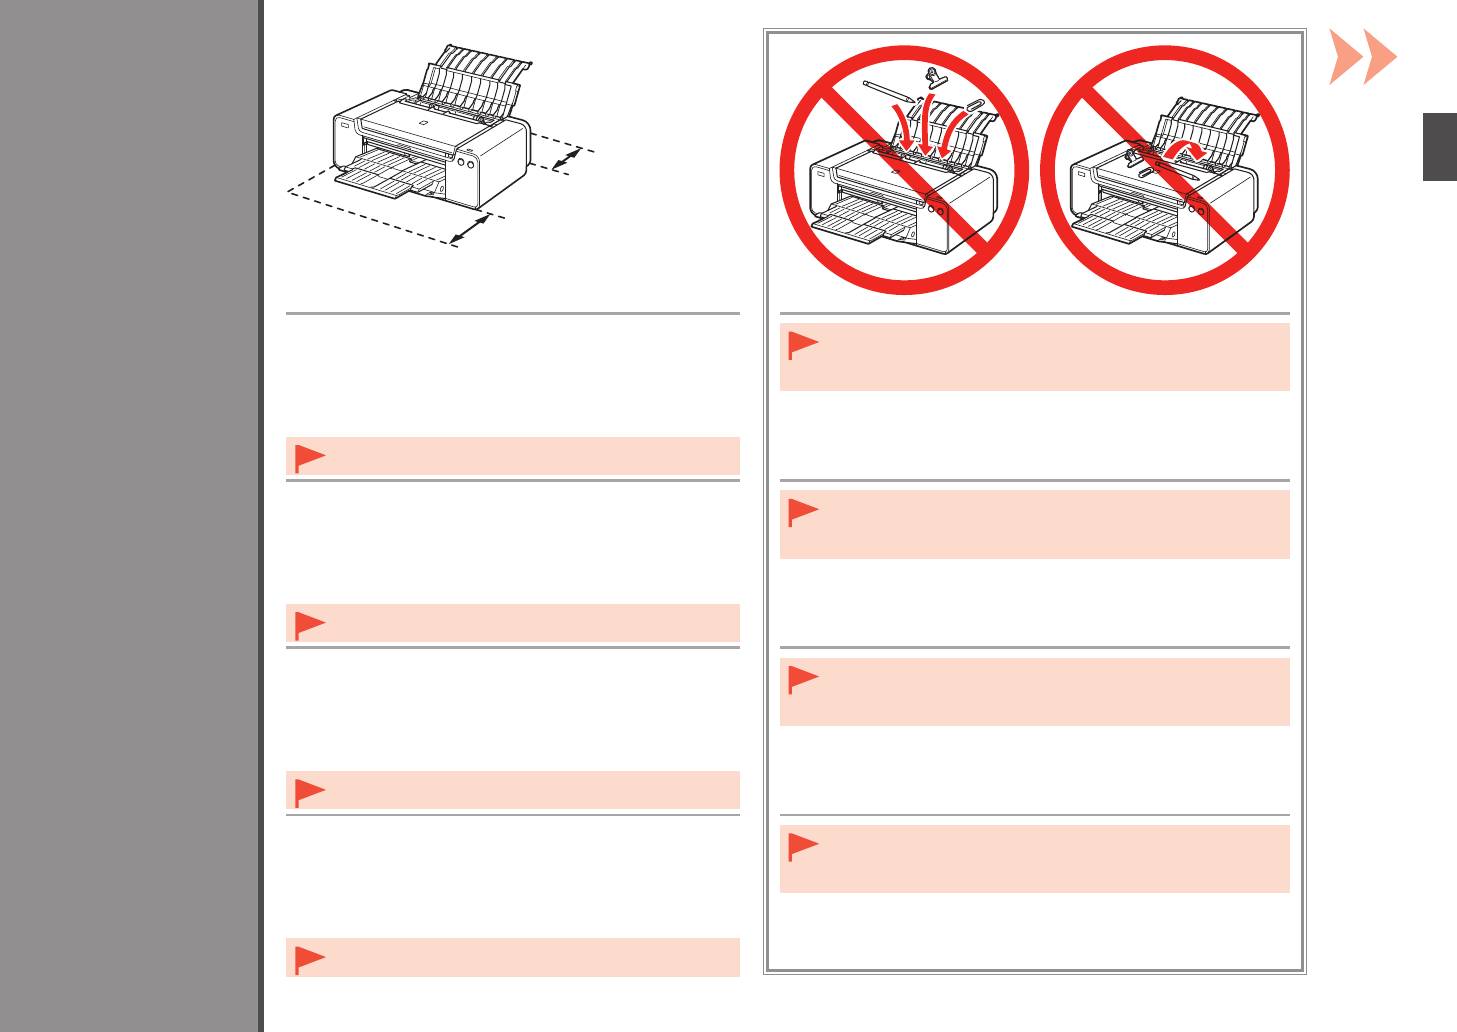
Place the printer on a flat surface.
•
Do not install the printer where an object may fall on it. In addition, do
Preparation
Préparation
•
Do not place any object in front of the printer.
not place any object on the top of the printer. It may fall into the printer
Vorbereitung
•
To open the Paper Support and Paper Output Tray, keep a space
when opening covers, resulting in malfunction.
Preparazione
of 35 cm (14 inches) in front of the printer and a space of 25 cm
(10 inches) behind it.
•
When installing the printer, lift and move it with the help of
another person.
•
Placez l’imprimante sur une surface plane.
•
N’installez pas l’imprimante dans une zone présentant un risque de
•
Ne placez aucun objet devant l’imprimante.
chute d’objets. En outre, ne placez aucun objet sur le dessus de
•
Pour ouvrir le support papier et le bac de sortie papier, conservez
l’imprimante. Il pourrait tomber dans l’imprimante à l’ouverture des
u
n espace de 35 cm (14 pouces) devant l’imprimante et un espace
capots et causer des dysfonctionnements.
de 25 cm (10 pouces) derrière.
•
Lors de l’installation de l’imprimante, soulevez-la et déplacez-
la avec l’aide d’une autre personne.
•
Stellen Sie den Drucker auf einer flachen Oberfläche auf.
•
Stellen Sie den Drucker nicht an Standorten auf, an denen
•
Legen Sie keine Gegenstände vor dem Drucker ab.
Gegenstände auf ihn fallen können. Legen Sie keine Gegenstände auf
•
L
assen Sie mindestens 35 cm (14 Zoll) vor und 25 cm (10 Zoll)
das Gerät. Sie könnten beim Öffnen von Abdeckungen ins Innere des
hinter dem Drucker frei, damit die Papierstütze und das
Druckers gelangen, was zu Fehlfunktionen führen kann.
Papierausgabefach geöffnet werden können.
•
Heben und bewegen Sie den Drucker zusammen mit einer
anderen Person, um ihn aufzustellen.
•
Collocare la stampante su un ripiano orizzontale.
•
Non installare la stampante dove rischia di essere colpita da oggetti
•
Non collocare oggetti davanti alla stampante.
che cadono. Inoltre, non collocare oggetti sopra la stampante.
•
Per aprire il supporto per la carta e il vassoio di uscita della carta,
Potrebbero cadere dentro la stampante all’apertura del coperchio
mantenere uno spazio di 35 cm (14 pollici) davanti alla stampante
e
provocare malfunzionamenti.
e uno spazio di 25 cm (10 pollici) dietro di essa.
•
Durante l’installazione, sollevare e spostare la stampante con
l’aiuto di un’altra persona.
5


