Yamaha BRX-610: USING USEFUL FUNCTIONS Setting the sleep timer Operating this unit by TV remote control (the HDMI control function)
USING USEFUL FUNCTIONS Setting the sleep timer Operating this unit by TV remote control (the HDMI control function): Yamaha BRX-610
Table of contents
- CAUTION: READ THIS BEFORE OPERATING YOUR UNIT.
- WHAT YOU CAN DO WITH THIS UNIT SUPPLIED PARTS
- ABOUT DISCS AND FILES Types of discs/files that can be used with this unit
- Loading a disc Notice for watching 3D video images Disc precautions
- Front panel
- Remote control 4 PROGRAM : Sets the order of playback
- I ZOOM : Zooms in/out. The
- S TOP MENU : Displays the top menu screen
- Rear panel
- Installing the batteries in the remote control Using the remote control
- 5.1-channel speaker layout Connecting speakers
- Connecting the FM antenna Connecting iPod
- Connecting to a TV
- Connecting audio devices (such as a CD or MD player) Connecting a satellite/cable TV tuner Connecting a portable digital music player other than iPod
- NETWORK AND USB CONNECTION Connecting to the NETWORK terminal Connecting to the USB port
- OTHER CONNECTION Connecting the power cable
- INITIAL WIZARD/EASY SETUP Setting with the Initial Wizard/Easy Setup
- BASIC OPERATION
- BASIC OPERATION
- BASIC OPERATION Playing back photo/music/video
- BASIC OPERATION ■ Operations for viewing photos
- BASIC OPERATION Using network content Using network services
- Operation for iPod Operation for CDs
- ADVANCED PLAYBACK OPERATION On Screen menu
- Status menu
- Using Bookmark Using search Program play
- Enjoying BONUSVIEW™ and BD- Live™
- LISTENING TO FM RADIO STATIONS Tuning to radio stations Selecting preset radio stations Presetting radio stations
- Deleting preset stations Displaying Radio Data System information (Russia model only)
- USING USEFUL FUNCTIONS Setting the sleep timer Operating this unit by TV remote control (the HDMI control function)
- USING USEFUL FUNCTIONS ■ Registering HDMI components to TV ■ Changing the connection method and connected components
- SETUP MENU Menu/Submenu Item Function Page
- Menu/Submenu Item Function Page
- Operation for SETUP menu
- SETUP MENU General Setting
- SETUP MENU ■ Playback ■ Network ■ Security
- Display Setting ■ TV
- SETUP MENU ■ Video Process
- Audio Setting ■ Audio Output ■ Post Process ■ System Information ■ Speaker Setting
- About the video output formats When [TV System] is set to [PAL] When [TV System] is set to [Multi]
- SOFTWARE UPGRADE Upgrading the software
- TROUBLESHOOTING General Problem Cause Remedy Page
- Problem Cause Remedy Page
- Radio reception Problem Cause Remedy Page iPod Status message Cause Remedy Page Problem Cause Remedy Page
- Problem Cause Remedy Page USB Status message Cause Remedy Page Problem Cause Remedy Page
- Disc playback ■ General Problem Cause Remedy Page
- ■ Picture Problem Cause Remedy Page Remote control Problem Cause Remedy Page Network Problem Cause Remedy Page
- TROUBLESHOOTING Problem Cause Remedy Page
- Messages on the screen Error message Cause Remedy Page Others Problem Cause Remedy Page
- GLOSSARY
- SPECIFICATIONS
- SPECIFICATIONS
USING USEFUL FUNCTIONS
You can also enjoy the following function.
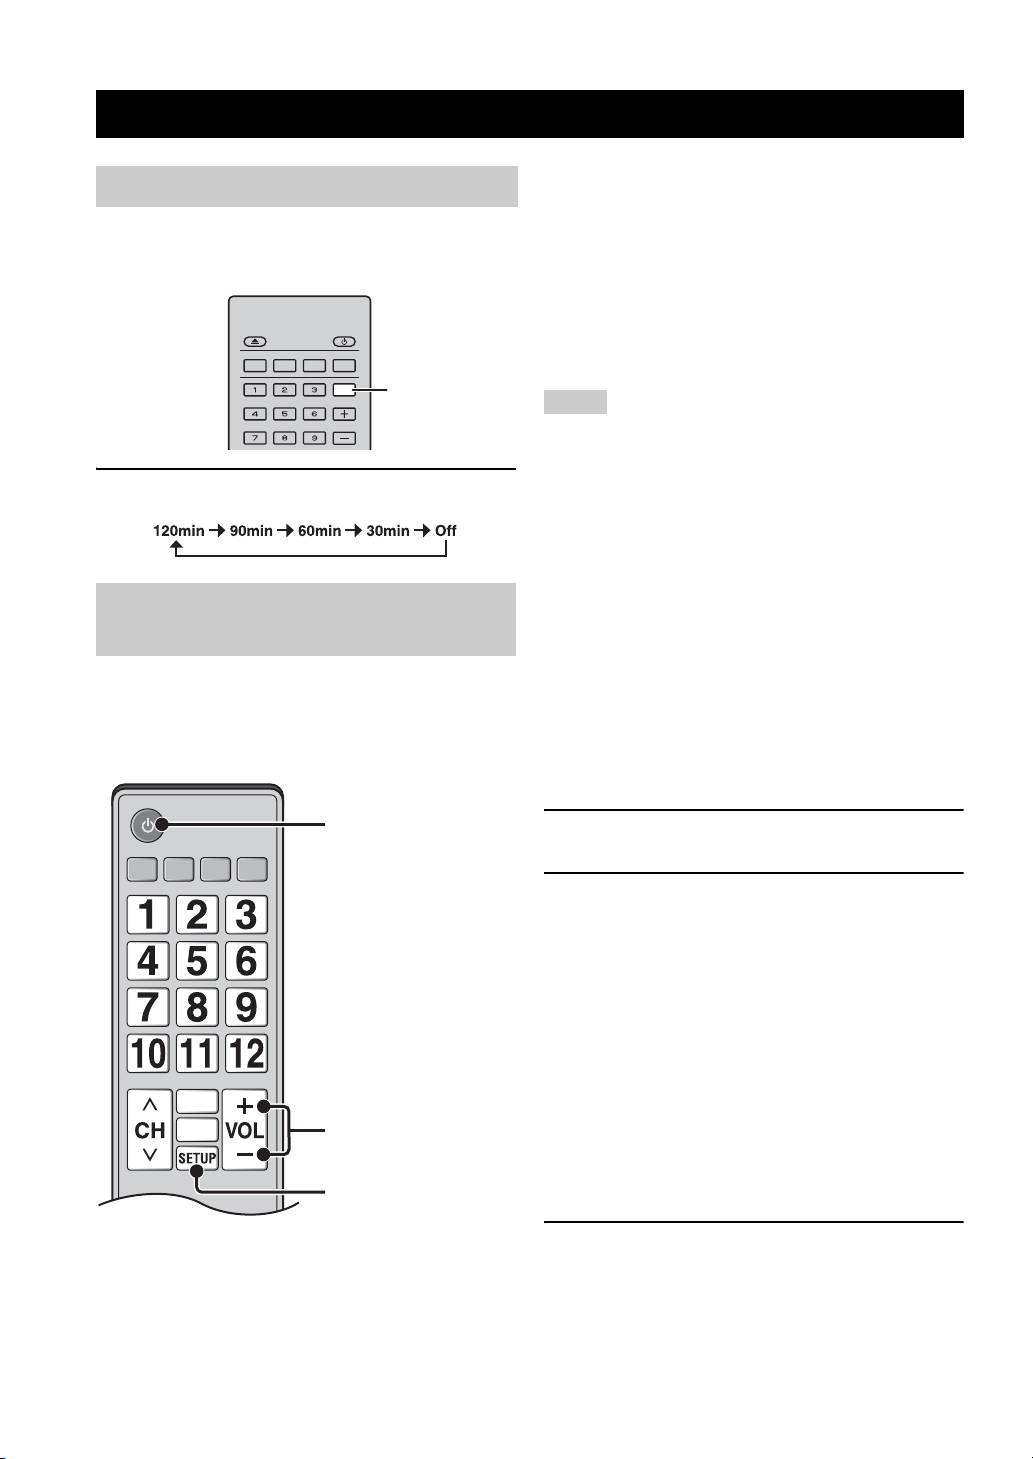
Setting the sleep timer
• When you start playback of DVD/BD discs other than
CD discs on this unit or display HOME/SETUP menu
You can set the sleep timer by using the remote control.
screen, the input selector of the TV is switched to this
The sleep timer sets this unit to standby mode after the
unit automatically (One Touch Play).
specified time elapses.
*1 When you select this unit to output TV sounds by using the
TV remote control, the unit automatically selects TV as the
input source, and sound can be enjoyed from the speakers
PROGRAM MARKER DIGEST ZOOM
connected to the unit.
SLEEP
SLEEP
Notes
SW
• This unit may be operated by using cursor buttons of TV remote
control for some TVs.
• Even if your TV supports the HDMI control function, some
1 Press SLEEP repeatedly.
functions may not be available. For details, refer to the manual
supplied with your TV.
• HDMI control function may not work properly depending on
the TV.
• Functions other than ones shown above may work depending on
the TV.
Operating this unit by TV remote
• In order to make the HDMI control function available, set up
settings for the HDMI control function on ALL components
control (the HDMI control function)
(this unit, TV, and other components). Certain operation may
also be required.
You can use the TV remote control to operate this unit if
• Each function may be set independently to activate/deactivate
your TV supports the HDMI control function and is
depending on the TV.
connected to this unit’s HDMI terminal.
• Refer to the operation manuals supplied with the TV for details
Remote control of TV (Example)
regarding setup.
■ Setting the HDMI control function
Turns on/off both TV and
1 Turn on all components connected to the TV with
this unit.
HDMI.
2 Check all components connected with HDMI and
enable the HDMI control function on each
component.
For this unit, set [HDMI Control] to [On] (p. 35).
For external components, refer to the manual
supplied with each component.
y
• The default setting of [HDMI Control] is set to [Off] for
this unit.
• The example of TV settings
– From a setup menu on your TV, select “Link setting” =
Controls the volume of
this unit.
“HDMI control setting” (example), then set a setting
such as “HDMI control function” to “ON” (example).
– Setting such as “Speaker priority” should be set to “AV
Select this unit or TV to
output sounds.
*1
amplifier”.
3 Turn off the TV and then turn on it again.
30 En
