EXFO Photonic Solutions Div. FVA-600: 4 Operating the FVA-600 Variable Attenuator
4 Operating the FVA-600 Variable Attenuator: EXFO Photonic Solutions Div. FVA-600

4 Operating the FVA-600
Variable Attenuator
Selecting Wavelengths
Six wavelengths are already preselected in your unit. The wavelength in use is
displayed in the upper left corner of the screen.
To select a wavelength:
Press to switch between the available values.
λ
You can edit the six preselected wavelengths. See Editing Wavelength on page 12.
You can also return to the default factory wavelengths. See Reverting to the Default
Settings on page 17.
Setting the Attenuation
You can change the attenuation value while you are performing your tests.
To set the attenuation:
Press and hold or to set the attenuation rapidly and according to the
selected step size. See Setting Attenuation Step Size on page 12.
OR
Select
Press and hold and to go to the maximum attenuation, or press and hold
Select
and to go to the minimum attenuation.
Selecting an Operation Mode
The FVA-600 is used in three different operating modes:
³ Absolute mode
³ Relative mode, which allows you to work with a reference attenuation
³ Power mode, which can be used to display the FVA-600 output power after
power edition settings.
To select an operation mode:
Abs/
Rel/
Press to switch between the available modes.
Pwr
FVA-600 9
Operating the FVA-600 Variable Attenuator 10
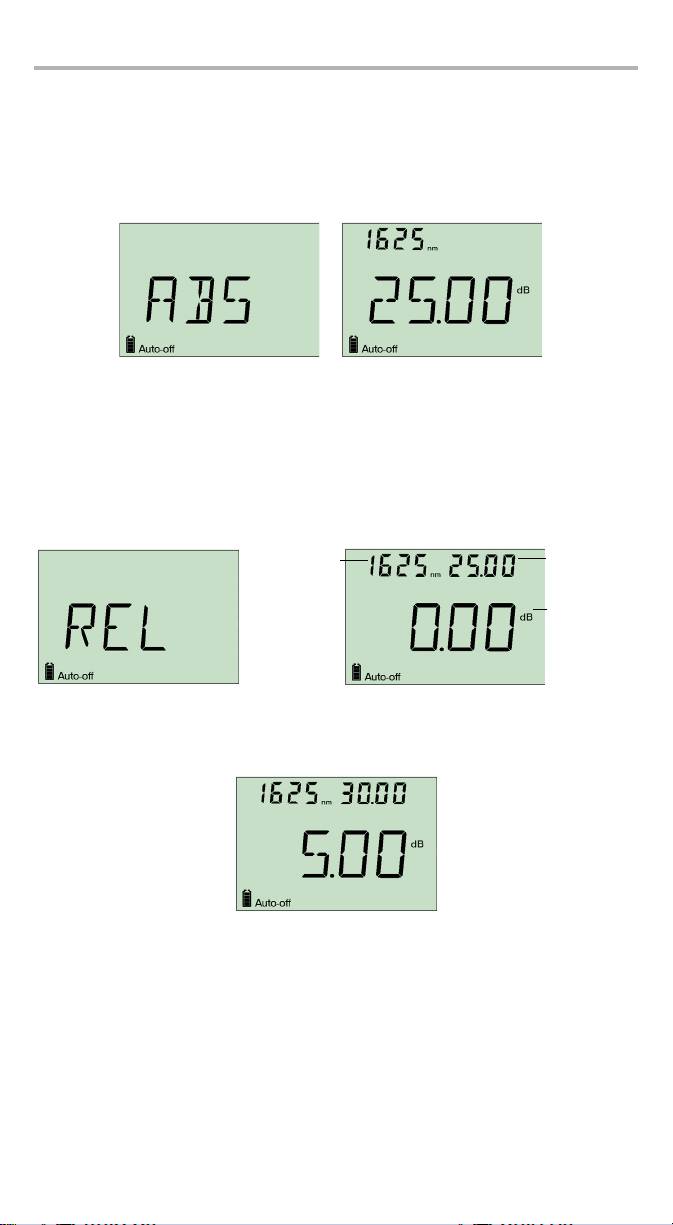
Using the Absolute Mode
The absolute mode displays the current wavelength and attenuation settings.
Note: The attenuation value is the actual insertion loss between the input and
output ports, including connectors.
Using the Relative Mode
The relative mode displays the current wavelength, the total attenuation, and the
relative attenuation. You need to set a reference before using the relative mode.
Note: The reference used is the one that was stored for the current
wavelength.
Current
Attenuation
wavelength
Relative
attenuation
loss/gain
If you vary the attenuation, the total attenuation introduced by the FVA-600 is
displayed in the top right corner, while the relative loss (or gain) with respect to the
selected reference is displayed in dB.
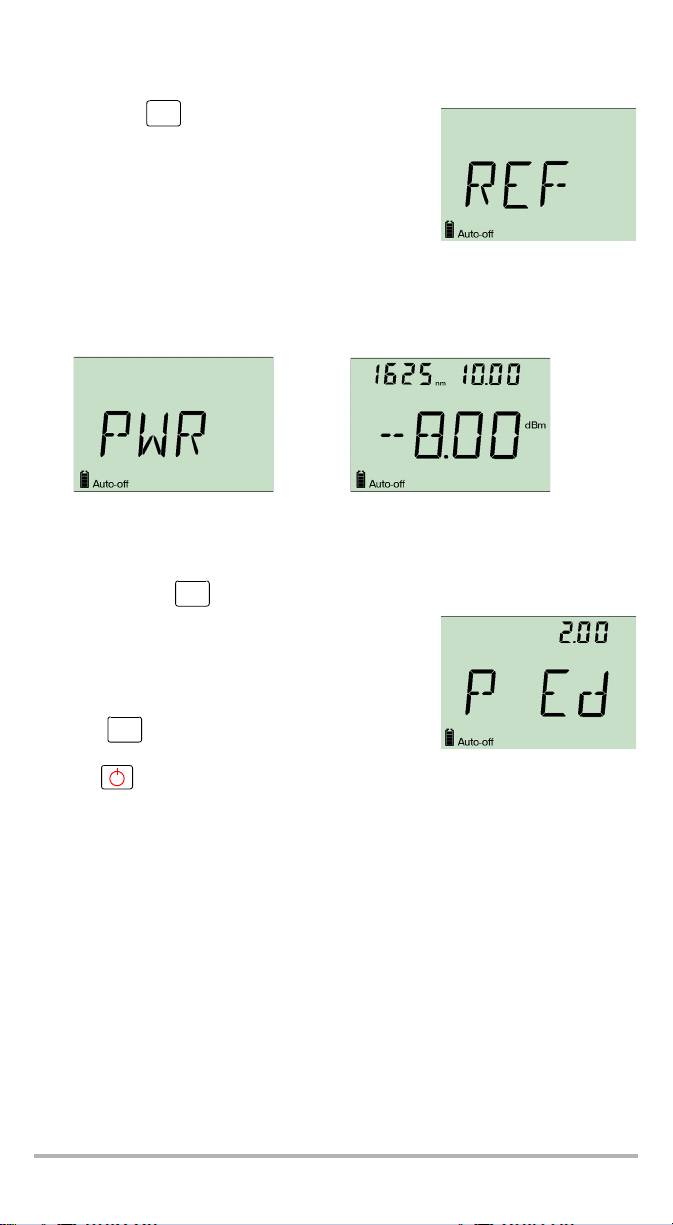
To take a reference:
Press and hold .
Select
While taking and storing the reference, the unit will
display REF for a short time. The unit returns to relative
mode using the new reference taken.
Using the Power Mode (Output
Power)
The power mode allows you to use the FVA-600 as if it was a power meter. This
operation mode uses the power value for the wavelength in use. It is a good practice
to edit this power.
To modify the power value:
1. Using the proper adapter, connect a power meter at the output of the FVA-600
and match the power meter value and the FVA-600 power value.
2. Press and hold to enter the power edition mode.
Select
3. Press the arrow buttons to go to the previous or
next power value. Hold them down to go to the
previous or next power value faster. You can also
change the power step size. See Setting Power
Step Size on page 12.
4. Press to confirm your selection.
Select
You can also exit the power edition mode by
pressing . However, the new power value will not be stored and the previous
power value will be used.
FVA-600 11
Operating the FVA-600 Variable Attenuator 12
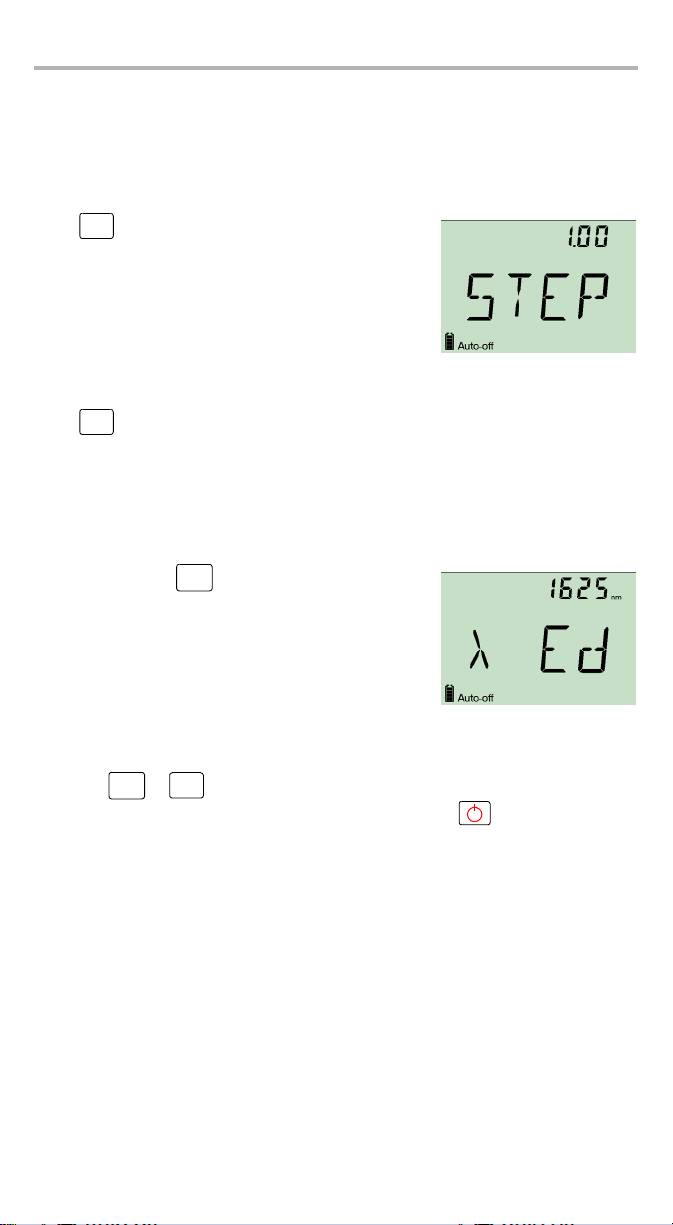
Setting Attenuation Step Size
The unit has six preselected attenuation step sizes that allows you to vary the
attenuation more or less rapidly. The attenuation step size in use is stored when the
unit is turn off.
To select a step size:
Step
Press to switch between the available values.
Size
Setting Power Step Size
The unit has three preselected power step sizes that
allows you to vary the power in edition more or less
rapidly. The power step size in use is stored when the
unit is turn off.
To select a step size:
Step
Press to switch between the available values.
Size
Editing Wavelength
Six wavelengths are already preprogrammed in your unit. You can edit them to
better suit your needs.
To edit the wavelength value:
1. Press and hold to enter the wavelength
λ
edition mode.
2. Use the arrow buttons to go to the previous or next
wavelength value. Hold them down to change the
wavelength faster.
Note: An asterisk appears in the top right corner
of the unit when a manually selected value matches a calibrated
wavelength.
3. Press or to confirm your selection.
λ
Select
You can also exit the wavelength edition mode by pressing without selecting a
new wavelength.

Zeroing the unit
The Variable Attenuator contains mechanical elements used to change attenuation.
It is a good practice to have the instrument mechanism return to the zero (home)
position to reestablish its relative position on the range of attenuation.
To perform a zeroing:
Step
Press and hold .
Size
The screen displays ZERO while the zeroing is
performed. After the search is complete, the unit
returns to the attenuation that was previously in use.
Using the USB Port
The FVA-600 Variable Attenuator includes a USB port located on the side of the unit.
USB port
EXFO provides two installation kits to control the FVA-600 via the USB port.
³ One installation kit is for a computer using Microsoft Windows XP or
Vista (32/64 bits). This kit gives you the source code so you can set up a program
that better suits your needs. The source code is in C# and the project was
developed with Microsoft Visual Studio 2005.
³ The other installation kit is designed for the FTB-500. You can access the
application through the Tools (IPM) tab in ToolBox.
When you use either of the installation kits, the
remote-controlled unit displays REM. on its screen.
The unit returns to local mode when you exit the
software or if you disconnect from the USB port. The
screen displays RTL until you press a key, then the unit
can be controlled by the keypad.
FVA-600 13
Оглавление
- 1 Introducing the FVA-600 Variable Attenuator
- 2 Safety Information
- 3 Getting Started with Your FVA-600 Variable Attenuator
- 4 Operating the FVA-600 Variable Attenuator
- 5 Maintenance
- 6 Troubleshooting
- 7 Warranty
- A Technical Specifications
- BTypical Test Configurations
- 1 Présentation de l’Atténuateur Variable FVA-600
- 2 Informations relatives à la sécurité
- 3 Initiation à votre Atténuateur Variable FVA-600
- 4 Utilisation de l’Atténuateur Variable FVA-600
- 5 Entretien
- 6 Dépannage
- 7 Garantie
- A Caractéristiques techniques
- B Configurations de test classiques
- 1FVA-600 可变衰减器简介
- 2 安全信息
- 3FVA-600 可变衰减器入门
- 4 操作 FVA-600 可变衰减器
- 5 维护
- 6 故障排除
- 7 保修
- A 技术规格
- B 典型测试配置
- 1 Presentación del Atenuador variable FVA-600
- 2 Información de seguridad
- 3 Primeros pasos con el Atenuador variable FVA-600
- 4 Funcionamiento del Atenuador variable FVA-600
- 5 Mantenimiento
- 6 Solución de problemas
- 7 Garantía
- A Especificaciones técnicas
- B Configuraciones de las comprobaciones típicas
- 1 Apresentação do Atenuador variável FVA-600
- 2Informações de segurança
- 3 Iniciar a utilização do seu Atenuador variável FVA-600
- 4 Funcionamento da Atenuador variável FVA-600
- 5 Manutenção
- 6 Resolução de avarias
- 7 Garantia
- A Especificações técnicas
- B Configurações de teste convencionais
- 1 Общие сведения о Регулируемый аттенюатор FVA-600
- 2 Информация о безопасности
- 3 Начало работы с Регулируемый аттенюатор FVA-600
- 4 Работа с устройством Регулируемый аттенюатор FVA-600
- 5 Обслуживание
- 6 Поиск и устранение неисправностей
- 7 Гарантия
- A Технические характеристики
- B Типовые конфигурации тестов
