Yamaha RX-797: Switching the remote control ID
Switching the remote control ID: Yamaha RX-797
Table of contents
- CAUTION: READ THIS BEFORE OPERATING YOUR UNIT.
- CONTENTS
- FEATURES SUPPLIED ACCESSORIES
- CONTROLS AND FUNCTIONS Front panel
- CONTROLS AND FUNCTIONS
- Front panel display
- CONTROLS AND FUNCTIONS Rear panel
- CONTROLS AND FUNCTIONS Remote control
- CONTROLS AND FUNCTIONS
- Zone 2 remote control
- Installing batteries in the remote controls Using the remote controls
- CONNECTIONS Connecting speakers
- Connecting audio and video components
- Connecting the AM and FM antennas
- ■ Connecting the AM loop antenna
- Connecting the power supply cord
- Turning on and off this unit
- PLAYING AND RECORDING Playing a source
- PLAYING AND RECORDING
- Adjusting the tonal quality
- Recording a source
- Using the sleep timer
- Muting the sound output
- FM/AM TUNING Automatic tuning
- Manual tuning
- Automatic preset tuning
- FM/AM TUNING
- FM/AM TUNING Manual preset tuning
- FM/AM TUNING Selecting preset stations Exchanging preset stations
- RADIO DATA SYSTEM (EUROPE MODEL ONLY) Receiving Radio Data System Changing the Radio Data System stations mode
- PTY SEEK function
- EON function
- ADVANCED SETUP Changing the ADVANCED SETUP menu parameters
- Switching the remote control ID
- ZONE 2 Connecting the Zone 2 components
- Controlling Zone 2
- REMOTE CONTROL FEATURES Control area
- Controlling other components
- Setting remote control codes
- TROUBLESHOOTING ■ General
- ■ Tuner
- ■ Remote control
- SPECIFICATIONS
- LIST OF REMOTE CONTROL CODES
ADVANCED SETUP
3 Press the preset station number buttons (1
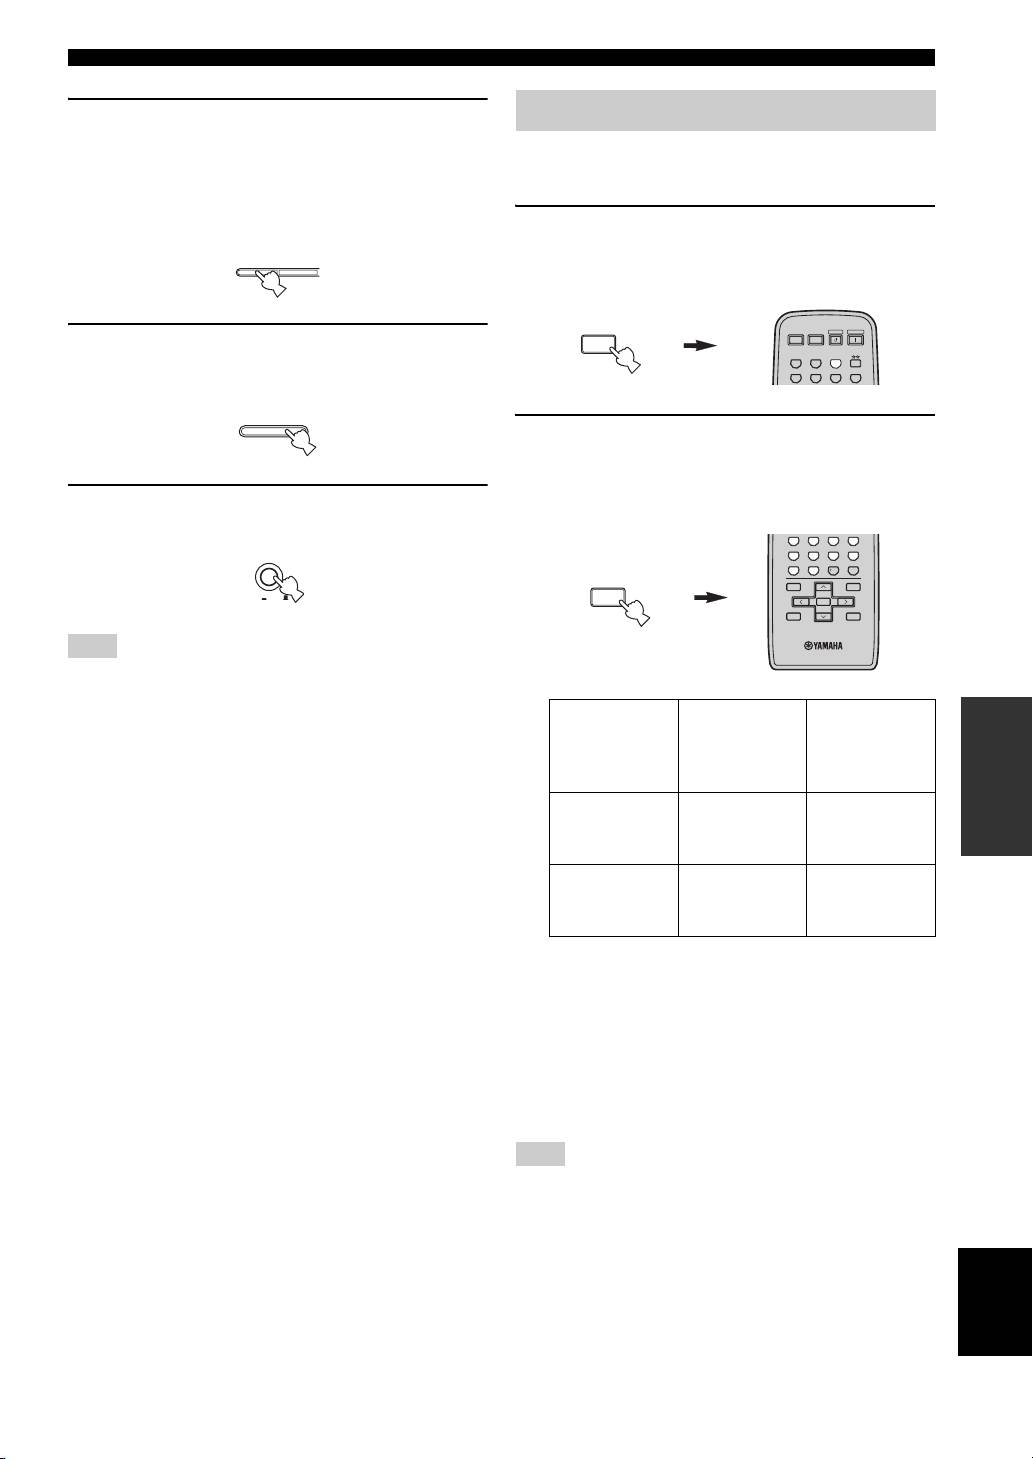
Switching the remote control ID
and 2) on the front panel repeatedly to move
You can select the unit you want to operate with the
through the menu and select the parameter
remote control by switching the remote control ID.
you want to adjust.
See page 32 for a complete list of available
1 Press and hold CODE SET on the remote
parameters.
control and then press TUNER on the remote
1 2
control.
CODE SET
POWER POWER
STANDBY
POWER
AVTV
4 Press A/B/C/D/E on the front panel
MENU
CD
MD/TAPE
TUNER
repeatedly to toggle between the available
DTV/CBL
VCR
PHONODVD
parameters.
A/B/C/D/E
2 While holding down CODE SET on the
remote control, use the numeric buttons on
the remote control to enter the three-digit
5 Press MASTER ON/OFF to release it outward
code number listed in the table below.
to the OFF position to confirm your setting.
4321
MASTER
65
7
8
09
10
ENT.
CODE SET
MENUTITLE
BAND
ON OFF
MENU
ENTER
A/B/C/D/E A/B/C/D/E
DISPLAYRETURN
PRESET/CH
Note
The settings you made are reflected next time you turn on the
power of this unit.
Remote
OPERATION
ADVANCED
control ID*
Function Code number
(this unit’s
setting)
To operate this
ID1
unit using an
801
alternative code.
To operate this
ID2
unit using the
802
(default setting)
default code.
*
When you change the remote control ID, you must switch
the remote control ID of this unit (see page 32).
When using multiple YAMAHA receivers or
amplifiers with the same default code setting, you
may unwantedly operate those components
simultaneously. In this case, set one of the alternative
codes for this unit to operate this unit separately.
Note
Also change the remote control ID of the Zone 2 remote control
(see page 9).
English
33
