Yamaha RX-797: TROUBLESHOOTING ■ General
TROUBLESHOOTING ■ General: Yamaha RX-797
Table of contents
- CAUTION: READ THIS BEFORE OPERATING YOUR UNIT.
- CONTENTS
- FEATURES SUPPLIED ACCESSORIES
- CONTROLS AND FUNCTIONS Front panel
- CONTROLS AND FUNCTIONS
- Front panel display
- CONTROLS AND FUNCTIONS Rear panel
- CONTROLS AND FUNCTIONS Remote control
- CONTROLS AND FUNCTIONS
- Zone 2 remote control
- Installing batteries in the remote controls Using the remote controls
- CONNECTIONS Connecting speakers
- Connecting audio and video components
- Connecting the AM and FM antennas
- ■ Connecting the AM loop antenna
- Connecting the power supply cord
- Turning on and off this unit
- PLAYING AND RECORDING Playing a source
- PLAYING AND RECORDING
- Adjusting the tonal quality
- Recording a source
- Using the sleep timer
- Muting the sound output
- FM/AM TUNING Automatic tuning
- Manual tuning
- Automatic preset tuning
- FM/AM TUNING
- FM/AM TUNING Manual preset tuning
- FM/AM TUNING Selecting preset stations Exchanging preset stations
- RADIO DATA SYSTEM (EUROPE MODEL ONLY) Receiving Radio Data System Changing the Radio Data System stations mode
- PTY SEEK function
- EON function
- ADVANCED SETUP Changing the ADVANCED SETUP menu parameters
- Switching the remote control ID
- ZONE 2 Connecting the Zone 2 components
- Controlling Zone 2
- REMOTE CONTROL FEATURES Control area
- Controlling other components
- Setting remote control codes
- TROUBLESHOOTING ■ General
- ■ Tuner
- ■ Remote control
- SPECIFICATIONS
- LIST OF REMOTE CONTROL CODES
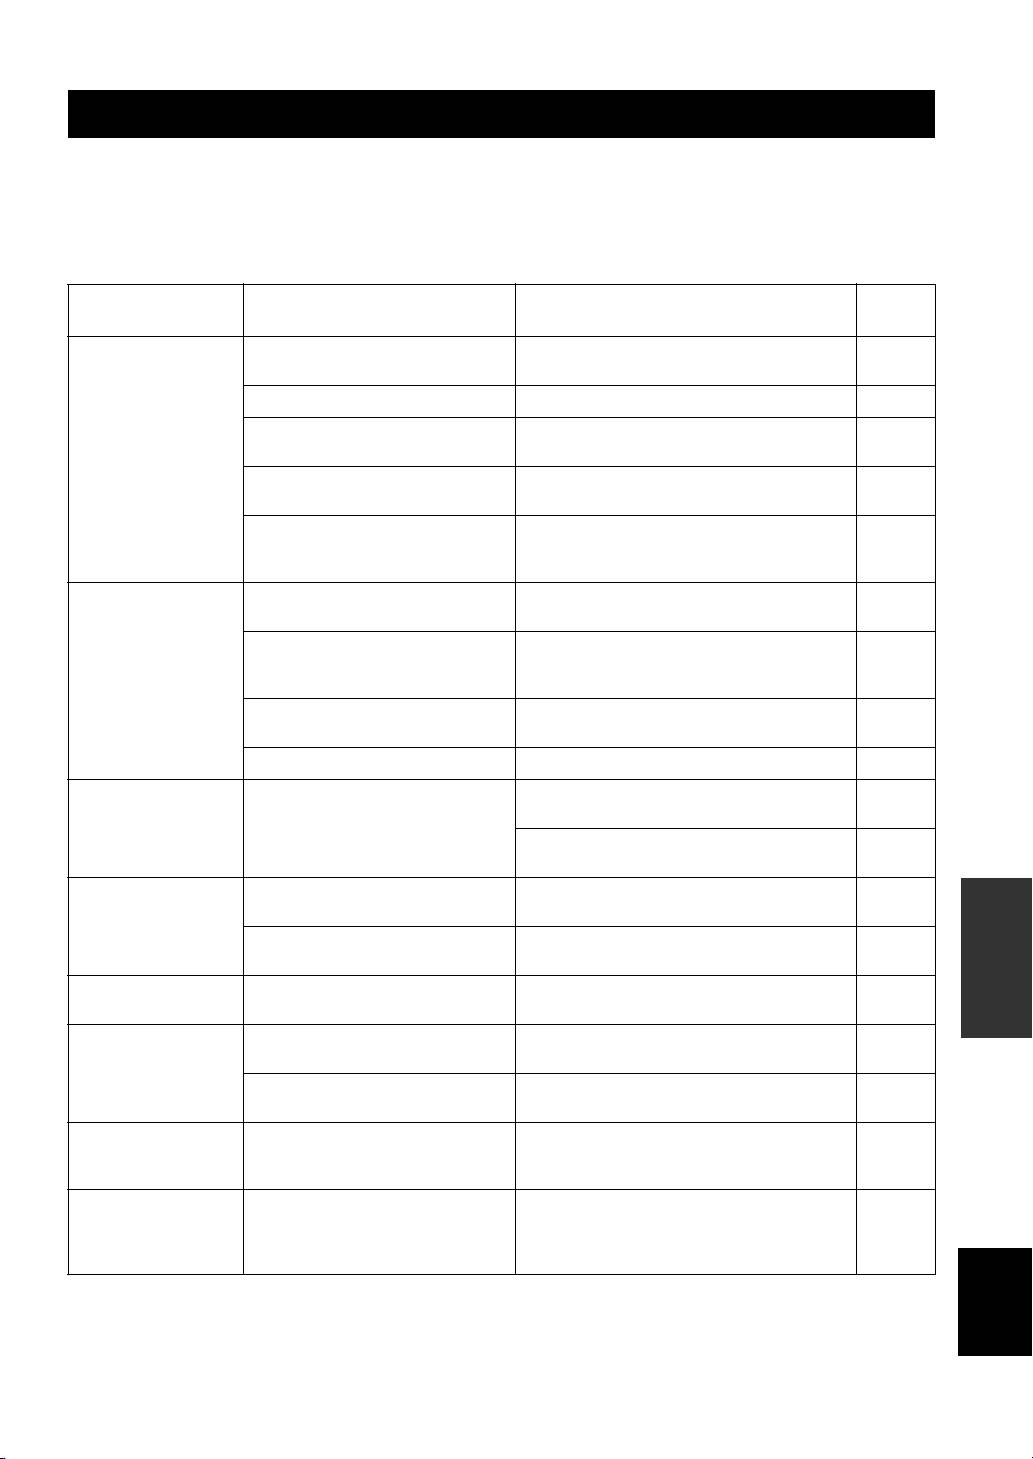
TROUBLESHOOTING
TROUBLESHOOTING
Refer to the chart below if this unit does not function properly. If the problem you are experiencing is not listed below or
if the instructions below do not help, set this unit to the standby mode, disconnect the power cord, and contact the nearest
authorized YAMAHA dealer or service center.
■ General
See
Problem Cause Remedy
page
This unit fails to turn
The power supply cord is not connected or
Connect the power supply cord firmly.
—
on.
the plug is not completely inserted.
The impedance setting is incorrect. Set the impedance to match your speakers.
15
The protection circuitry has been activated
Check that the speaker wires are not touching each
11
because of a short circuit, etc.
other and then turn the power of this unit back on.
The IMPEDANCE SELECTOR switch on
Set the IMPEDANCE SELECTOR switch to either
15
the rear panel is not set to either end.
end when the power of this unit is turned off.
This unit has been exposed to a strong
Set this unit to the standby mode, disconnect the
external electric shock (such as lightning
power supply cord, plug it back in after 30 seconds,
—
or strong static electricity).
then use it normally.
No sound Incorrect input or output cable
Connect the cables properly. If the problem persists,
12
connections.
the cables may be defective.
No appropriate input source has been
Select an appropriate input source with the INPUT
selected.
selector on the front panel (or one of the input
17
selector buttons on the remote control).
The SPEAKERS A/B switches are not set
Turn on the corresponding SPEAKERS A or
17
properly.
SPEAKERS B.
Speaker connections are not secure. Secure the connections.
11
The sound suddenly
The protection circuitry has been activated
Check that the IMPEDANCE SELECTOR setting is
15
goes off.
because of a short circuit, etc.
correct.
Check that the speaker wires are not touching each
11
other and then turn the power of this unit back on.
Only the speaker on
Incorrect cable connections. Connect the cables properly. If the problem persists,
INFORMATION
11, 12
ADDITIONAL
one side can be
the cables may be defective.
heard.
Incorrect setting for the BALANCE
Set the BALANCE control to the appropriate
19
control.
position.
There is a lack of bass
The + and – wires are connected in
Connect the speaker wires to the correct + and –
11
and no ambience.
reverse at the amplifier or the speakers.
phase.
A “humming” sound
Incorrect cable connections. Connect the audio plugs firmly. If the problem
12
can be heard.
persists, the cables may be defective.
No connection from the turntable to the
Make the GND connection between the turntable and
12
GND terminal.
this unit.
The volume level is
The record is being played on a turntable
The turntable should be connected to this unit through
low while playing a
with an MC cartridge.
the MC head amplifier.
—
record.
The volume level
The component connected to the MD/
Turn on the power of the component.
cannot be increased,
TAPE OUT jacks of this unit is turned off.
—
or the sound is
distorted.
English
39
