Gigabyte GA-8IE800: BIOS Flash Procedureyte @BIOS
BIOS Flash Procedureyte @BIOS: Gigabyte GA-8IE800
TM
BIOS Flash Procedureyte @BIOS
Program to flash BIOS.
English
Method 1:
We use GA-7VTX motherboard and Flash841 BIOS flash utility as example.
Please flash the BIOS according to the following procedures if you are now under the DOS mode.
Flash BIOS Procedure:
STEP 1:
(1) Please make sure your system has installed the extraction utility such as winzip or pkunzip.
Firstly you have to install the extraction utility such as winzip or pkunzip for unzip the files. Both of
these utilities are available on many shareware download pages like http://www..cnet.com
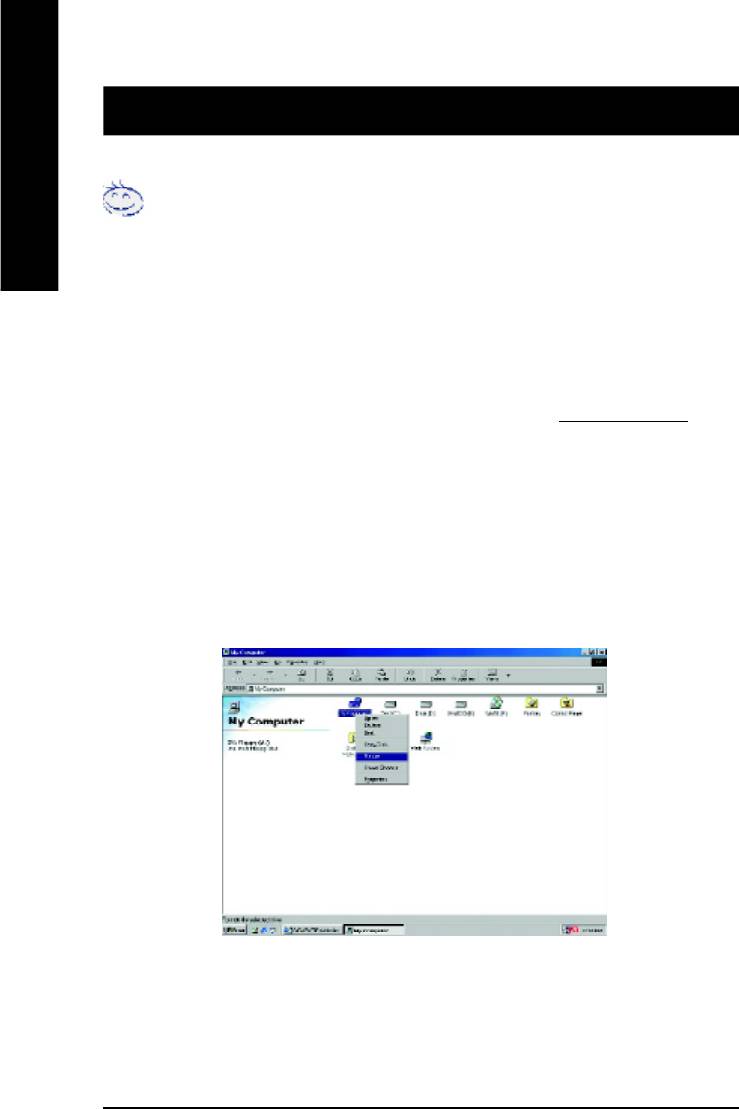
STEP 2: Make a DOS boot diskette. (See example: Windows 98 O.S.)
Beware: Windows ME/2000 are not allowed to make a DOS boot diskette.
(1) With an available floppy disk in the floppy drive. Please leave the diskette "UN-write
protected" type. Double click the "My Computer" icon from Desktop, then click "3.5 diskette
(A)" and right click to select "Format (M)"
- 54 -GA-8IE800 Motherboard
English
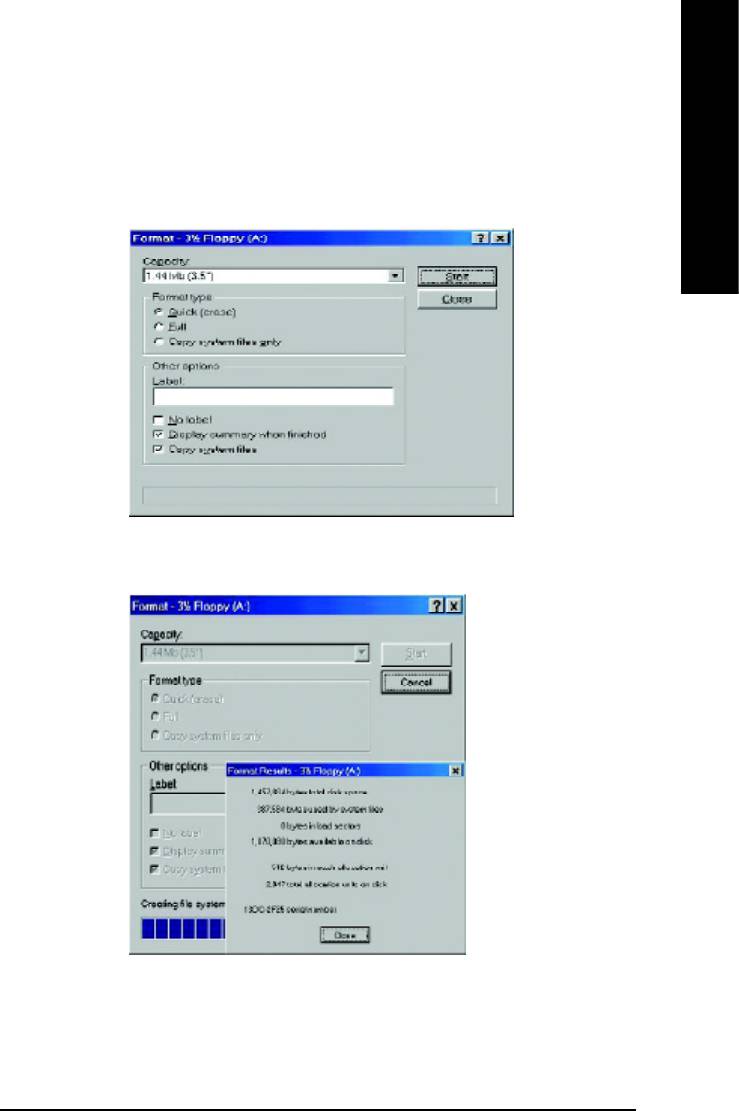
(2) Select the "Quick (erase)" for Format Type, and pick both "Display summary when finished"
and "Copy system files", after that press "Start". That will format the floppy and transfer the
needed system files to it.
Beware: This procedure will erase all the prior data on that floppy, so please proceed
accordingly.
(3) After the floppy has been formatted completely, please press "Close".
- 55 -
Technical Reference
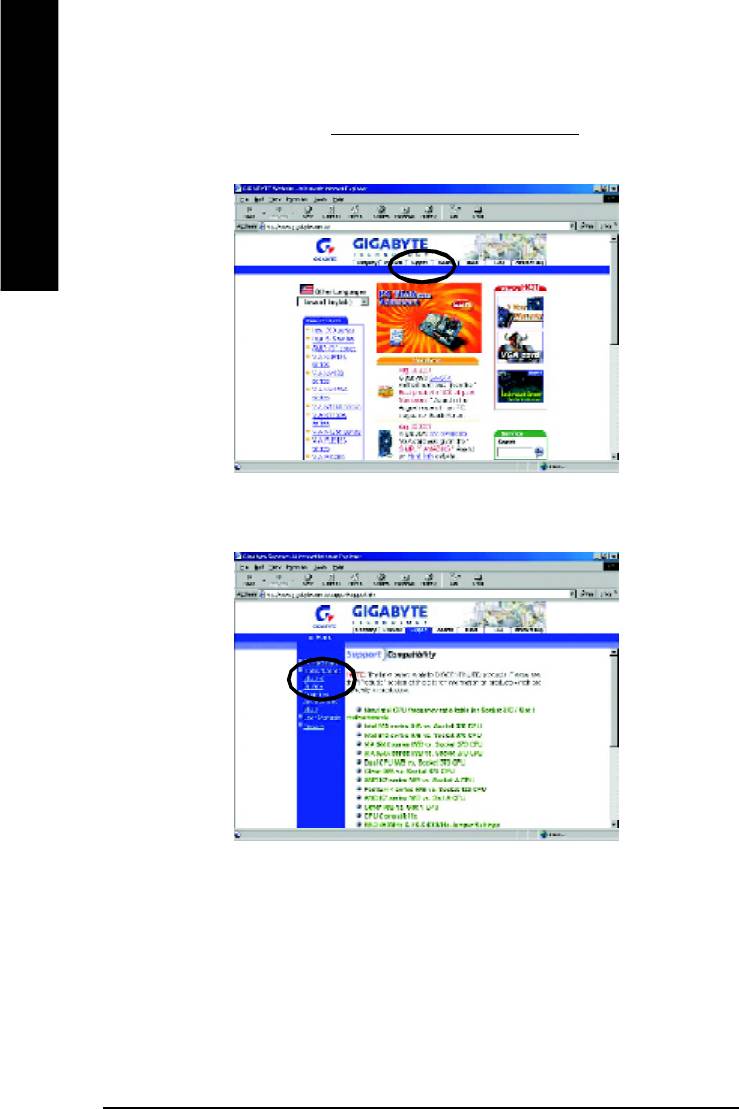
STEP 3: Download BIOS and BIOS utility program.
(1) Please go to Gigabyte website http://www.gigabyte.com.tw/index.html, and click "Support".
English
(2) From Support zone, click the "Motherboards BIOS & Drivers".
- 56 -GA-8IE800 Motherboard
English
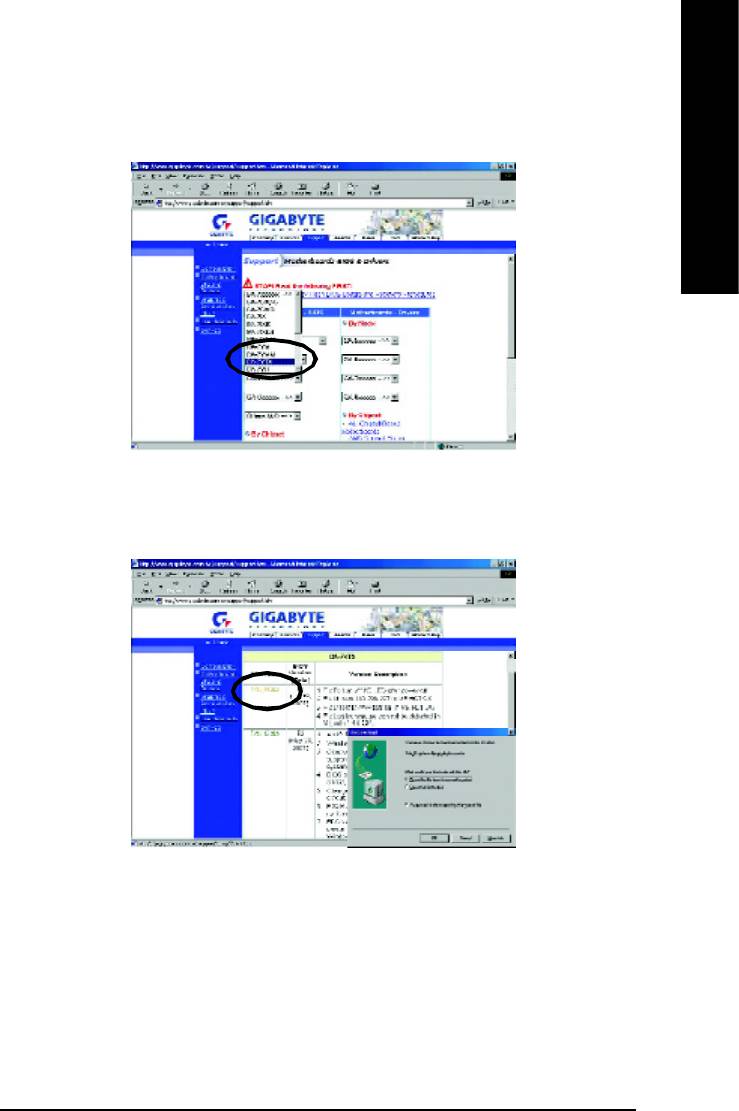
(3) We use GA-7VTX motherboard as example. Please select GA-7VTX by Model or Chipset
optional menu to obtain BIOS flash files.
(4) Select an appropriate BIOS version (For example: F4), and click to download the file. It will
pop up a file download screen, then select the "Open this file from its current location" and
press "OK".
- 57 -
Technical Reference
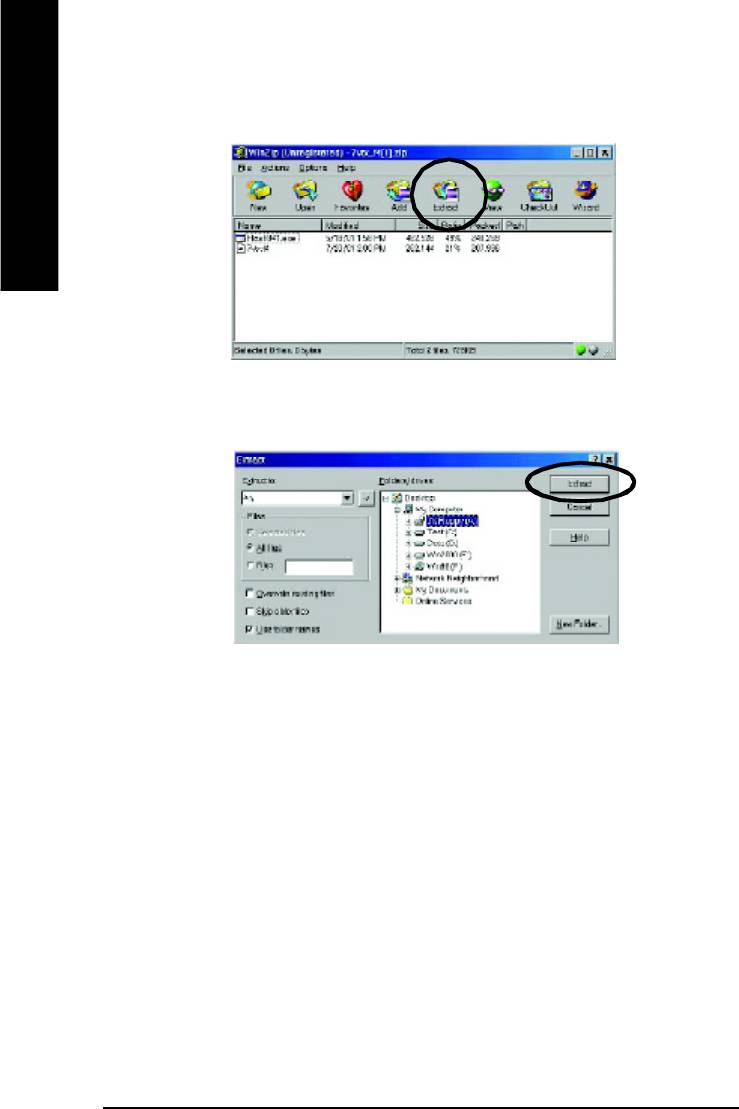
(5) At this time the screen shows the following picture, please click "Extract" button to unzip the
files.
English
(6) Please extract the download files into the clean bootable floppy disk A mentioned in STEP 2,
and press "Extract".
- 58 -GA-8IE800 Motherboard
English
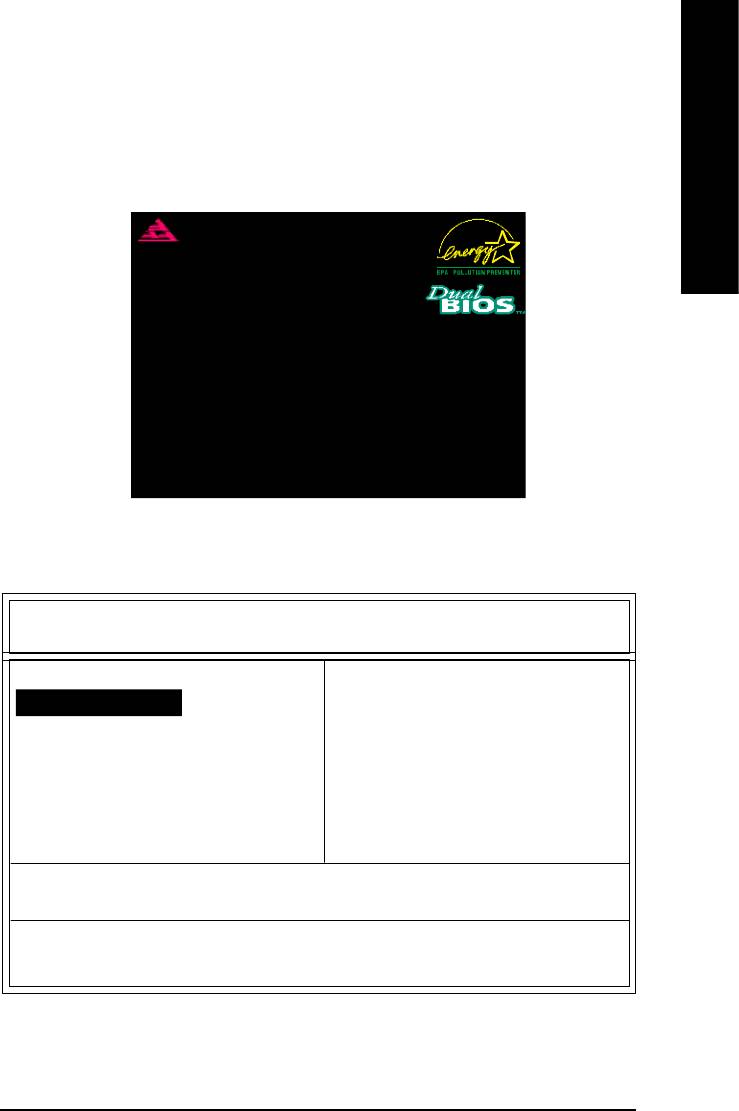
STEP 4: Make sure the system will boot from the floppy disk.
(1) Insert the floppy disk (contains bootable program and unzip file) into the floppy drive A. Then,
restart the system. The system will boot from the floppy disk. Please press <DEL> key to
enter BIOS setup main menu when system is boot up.
American Release:09/16/99
Megatrends AMIBIOS (C) 1999 American Megatrend
7VTX F1
Check System Health OK
AMD-Athlon(tm)Processor-900MHz
Checking NVRAM...
262144KB
Wait...
Press F1 to enter Dual BIOS Utility. Press ESC to quit
Press any key to contiune
( C ) American Megatrends Inc.,
63-0001-001199-00101111-071595-VIA_K7-GA7VTX1-F
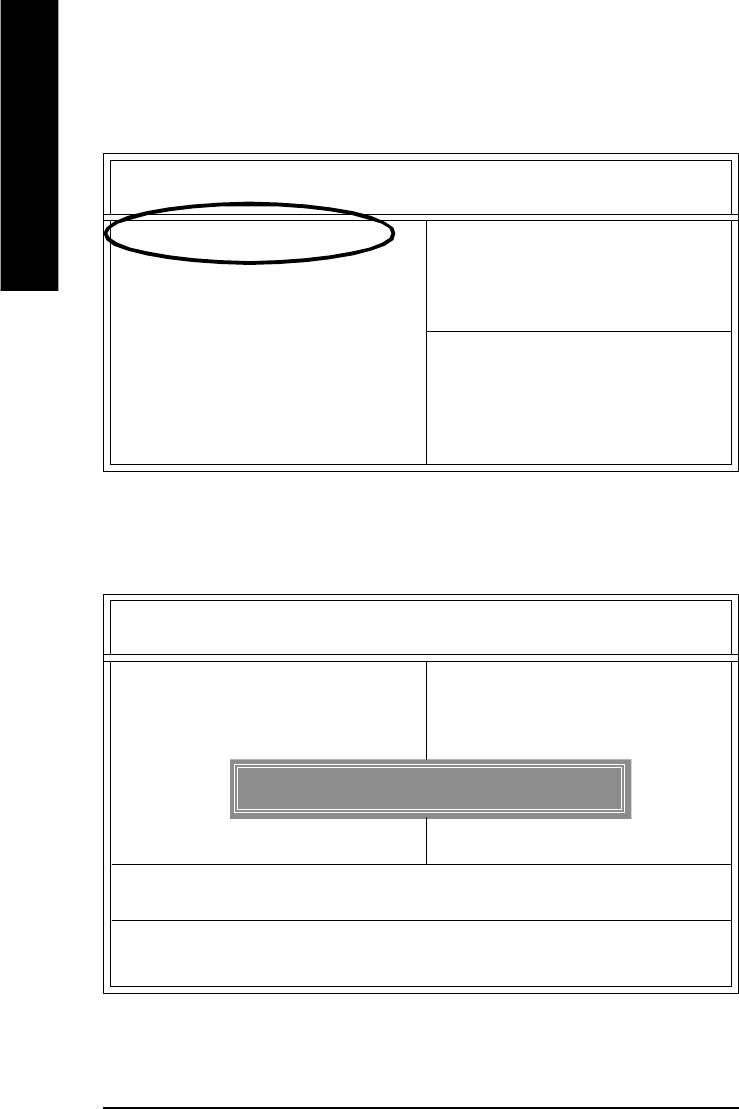
(2) Once you enter the BIOS setup utility, the main menu will appear on the screen. Use the
arrows to highlight the item "BIOS FEATURES SETUP".
AMIBIOS SIMPLE SETUP UTILITY - VERSION 1.24b
(C) 1999 American Megatrends, Inc. All Rights Reserved
STANDARD CMOS SETUP INTEGRATED PERIPHERALS
BIOS FEATURES SETUP HARDWARE MONITOR & MISC SETUP
CHIPSET FEATURES SETUP SUPERVISOR PASSWORD
POWER MANAGEMENT SETUP USER PASSWORD
PNP / PCI CONFIGURATION IDE HDD AUTO DETECTION
LOAD BIOS DEFAULTS SAVE & EXIT SETUP
LOAD SETUP DEFAULTS EXIT WITHOUT SAVING
ESC: Quit hifg : Select Item (Shift)F2 : Change Color F5: Old Values
F6: Load BIOS Defaults F7: Load Setup Defaults F10:Save & Exit
Time, Date , Hard Disk Type…
- 59 -
Technical Reference
(3) Press "Enter" to enter "BIOS FEATURES SETUP" menu. Use the arrows to highlight the item
"1st Boot Device", and then use the "Page Up" or "Page Down" keys to select "Floppy".
AMIBIOS SETUP - BIOS FEATURES SETUP
English
( C ) 2001 American Megatrends, Inc. All Rights Reserved
1st Boot Device : Floppy
2nd Boot Device : IDE-0
3rd Boot Device : CDROM
S.M.A.R.T. for Hard Disks : Disabled
BootUp Num-Lock : On ESC: Quit hifg: Select Item
Floppy Drive Seek : Disabled F1 : Help PU/PD/+/- : Modify
Password Check : Setup F5 : Old Values (Shift)F2: Color
F6 : Load BIOS Defaults
F7 : Load Setup Defaults
(4) Press "ESC" to go back to previous screen. Use the arrows to highlight the item "SAVE &
EXIT SETUP" then press "Enter". System will ask "SAVE to CMOS and EXIT (Y/N)?" Press
"Y" and "Enter" keys to confirm. Now the system will reboot automatically, the new BIOS
setting will be taken effect next boot-up.
AMIBIOS SIMPLE SETUP UTILITY - VERSION 1.24b
(C) 2001 American Megatrends, Inc. All Rights Reserved
STANDARD CMOS SETUP INTEGRATED PERIPHERALS
BIOS FEATURES SETUP HARDWARE MONITOR & MISC SETUP
CHIPSET FEATURES SETUP SUPERVISOR PASSWORD
POWER MANAGEMENT SETUP USER PASSWORD
PNP / PCI CONFIGURATION IDE HDD AUTO DETECTION
Save to CMOS and EXIT (Y/N)? Y
LOAD BIOS DEFAULTS SAVE & EXIT SETUP
LOAD SETUP DEFAULTS EXIT WITHOUT SAVING
ESC: Quit hifg : Select Item (Shift)F2 : Change Color F5: Old Values
F6: Load BIOS Defaults F7: Load Setup Defaults F10:Save & Exit
Save Data to CMOS & Exit SETUP
- 60 -GA-8IE800 Motherboard
English
STEP 5: BIOS flashing.
(1) After the system boot from floppy disk, type "A:\> dir/w" and press "Enter" to check the entire
files in floppy A. Then type the "BIOS flash utility" and "BIOS file" after A:\>. In this case you
have to type "A:\> Flash841 7VTX.F4" and then press "Enter".
Starting Windows 98…
Microsoft(R) Windows98
© Copyright Microsoft Corp 1981-1999
A:\> dir/w
Volume in drive A has no label
Volume Serial Number is 16EB-353D
Directory of A:\
COMMAND.COM 7VTX.F4 FLASH841.EXE
3 file(s) 838,954 bytes
0 dir(s) 324,608 bytes free
A:\> Flash841 7VTX.F4
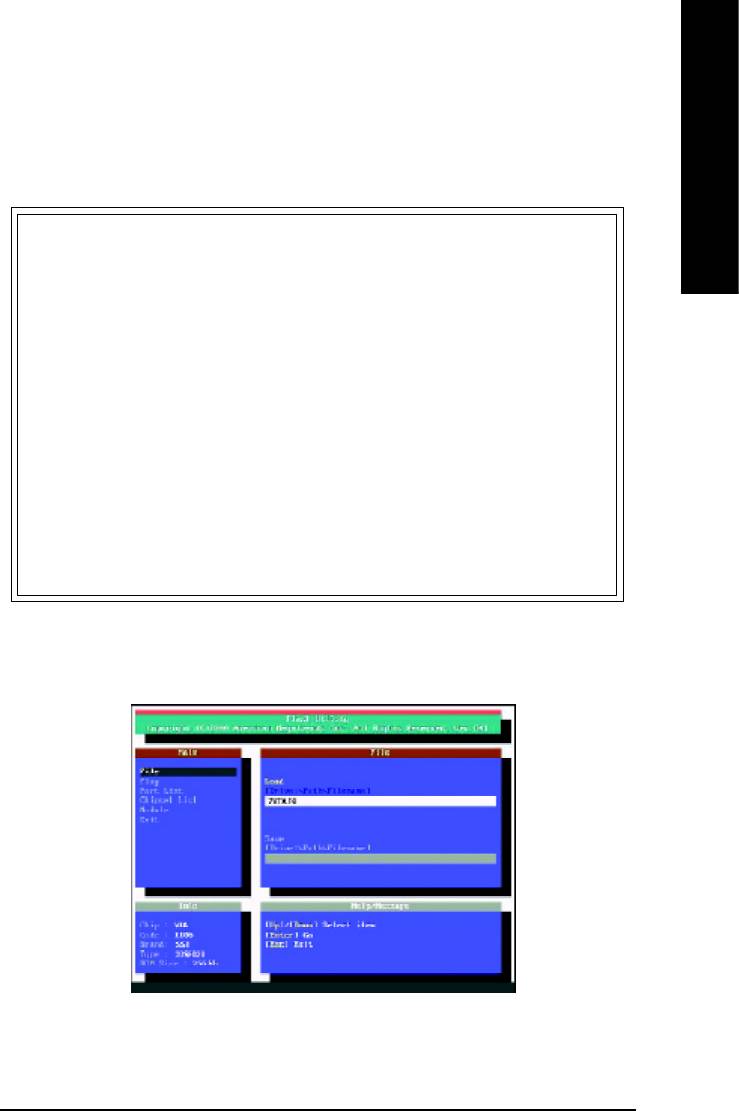
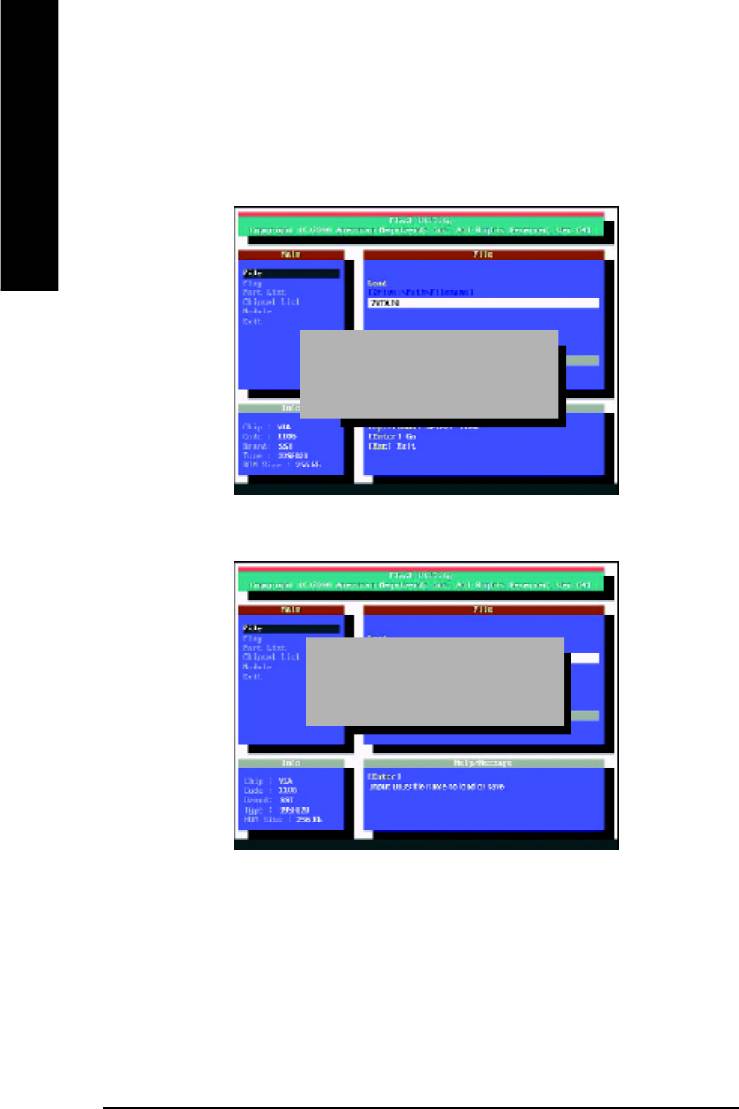
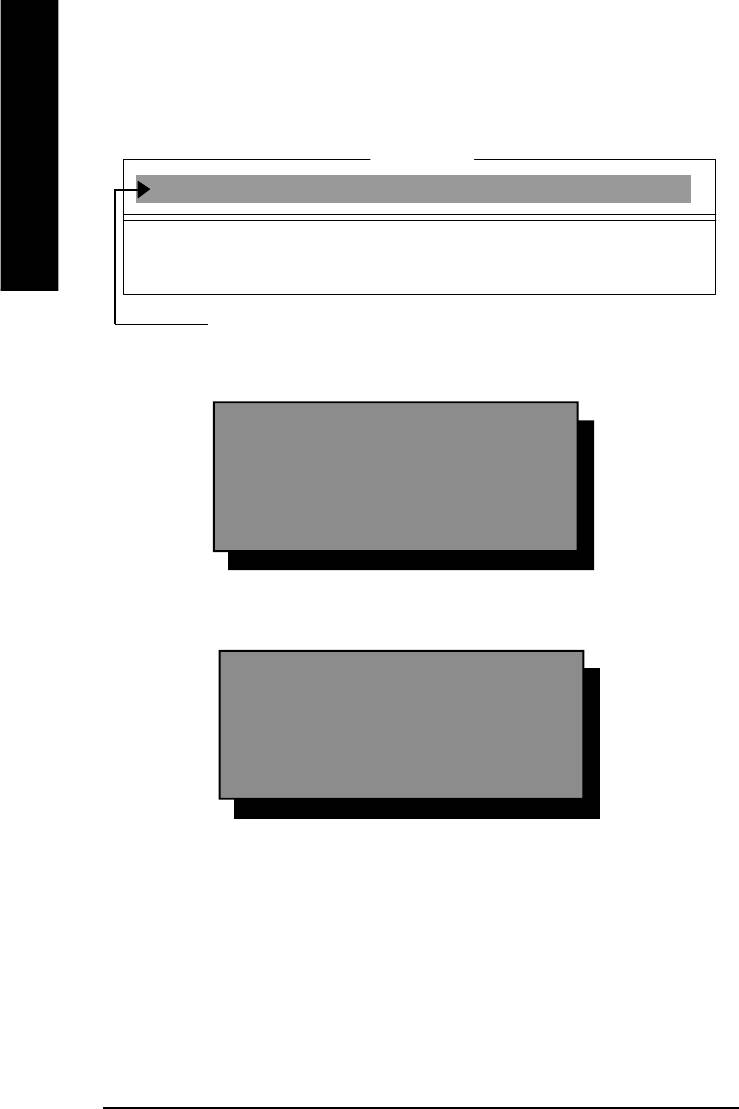
(2) Now screen appears the following Flash Utility main menu. Press "Enter", the highlighted
item will locate on the model name of the right-upper screen. Right after that, press "Enter" to
start BIOS Flash Utility.
- 61 -
Technical Reference
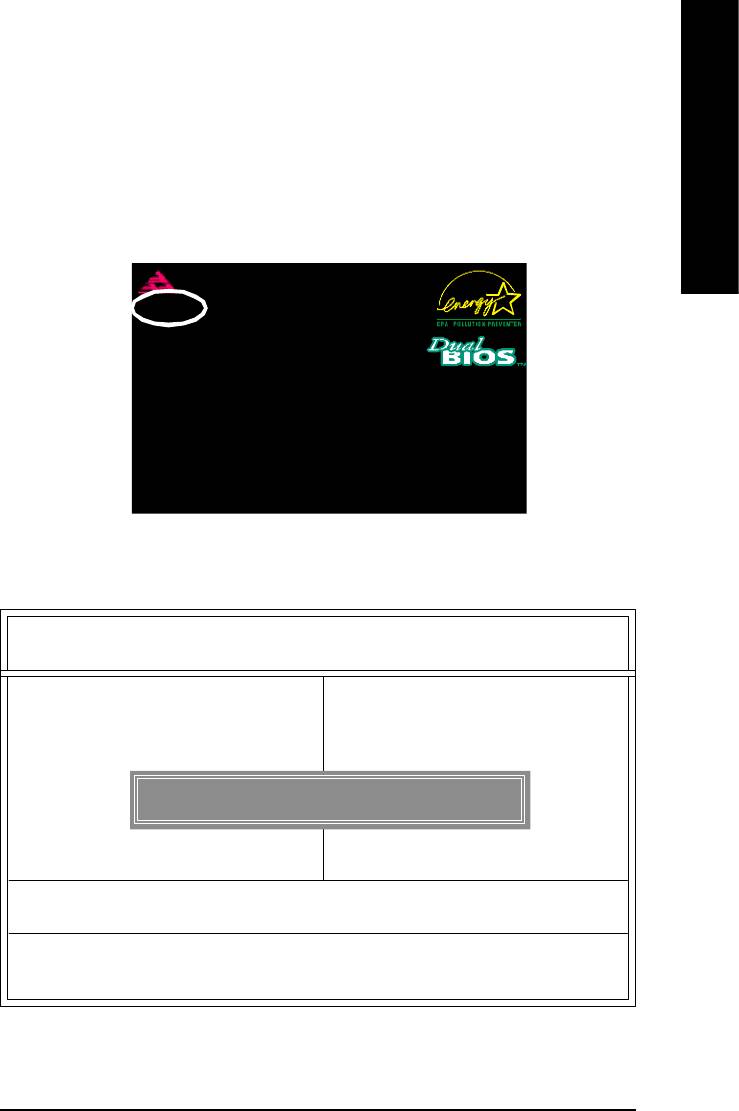
(3) It will pop up a screen and asks "Are you sure to flash the BIOS?" Press [Enter] to continue
theprocedure, or press [ESC] to quit.
Beware: Please do not turn off the system while you are upgrading BIOS. It will render your
BIOS corrupted and system totally inoperative.
English
Are you sure to flash the BIOS?
[Enter] to continue Or [Esc] to cancel?
(4) The BIOS flash completed. Please press [ESC] to exit Flash Utility.
EXIT?
[Enter] to continue Or [Esc] to cancel?
- 62 -GA-8IE800 Motherboard
English
STEP 6: Load BIOS defaults.
Normally the system redetects all devices after BIOS has been upgraded. Therefore, we
highly recommend reloading the BIOS defaults after BIOS has been upgraded. This
important step resets everything after the flash.
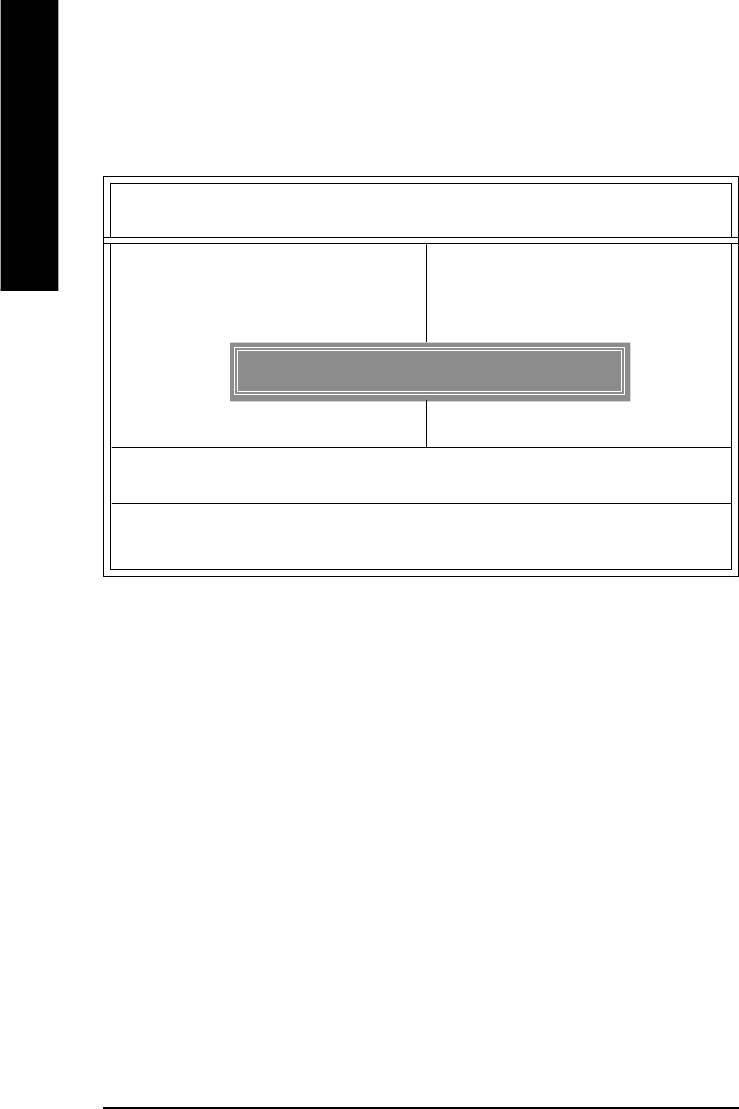
(1) Take out the floppy diskette from floppy drive, and then restart the system. The boot up
screen will indicate your motherboard model and current BIOS version.
American Release:09/16/99
Megatrends AMIBIOS (C) 1999 American Megatrend
7VTX F4
Check System Health OK
AMD-Athlon(tm)Processor-900MHz
Checking NVRAM...
262144KB
Wait...
Press F1 to enter Dual BIOS Utility. Press ESC to quit
Press any key to contiune
( C ) American Megatrends Inc.,
63-0001-001199-00101111-071595-VIA_K7-GA7VTX1-F
(2) Don't forget to press <DEL> key to enter BIOS setup again when system is boot up. Use the
arrows to highlight the item "LOAD SETUP DEFAULTS" then press "Enter". System will ask
"Load Setup Defaults (Y/N)?" Press "Y" and "Enter" keys to confirm.
AMIBIOS SIMPLE SETUP UTILITY - VERSION 1.24b
(C) 2001 American Megatrends, Inc. All Rights Reserved
STANDARD CMOS SETUP INTEGRATED PERIPHERALS
BIOS FEATURES SETUP HARDWARE MONITOR & MISC SETUP
CHIPSET FEATURES SETUP SUPERVISOR PASSWORD
POWER MANAGEMENT SETUP USER PASSWORD
PNP / PCI CONFIGURATION IDE HDD AUTO DETECTION
Load Setup Defaults? (Y/N)?N
LOAD BIOS DEFAULTS SAVE & EXIT SETUP
LOAD SETUP DEFAULTS EXIT WITHOUT SAVING
ESC: Quit hifg : Select Item (Shift)F2 : Change Color F5: Old Values
F6: Load BIOS Defaults F7: Load Setup Defaults F10:Save & Exit
Load Setup Defaults
- 63 -
Technical Reference
(3) Use the arrows to highlight the item "SAVE & EXIT SETUP" and press "Enter". System will
ask "SAVE to CMOS and EXIT (Y/N)?" Press "Y" and "Enter" keys to confirm. Now the
system will reboot automatically, the new BIOS setting will be taken effect next boot-up.
English
AMIBIOS SIMPLE SETUP UTILITY - VERSION 1.24b
(C) 2001 American Megatrends, Inc. All Rights Reserved
STANDARD CMOS SETUP INTEGRATED PERIPHERALS
BIOS FEATURES SETUP HARDWARE MONITOR & MISC SETUP
CHIPSET FEATURES SETUP SUPERVISOR PASSWORD
POWER MANAGEMENT SETUP USER PASSWORD
PNP / PCI CONFIGURATION IDE HDD AUTO DETECTION
Save to CMOS and EXIT (Y/N)? Y
LOAD BIOS DEFAULTS SAVE & EXIT SETUP
LOAD SETUP DEFAULTS EXIT WITHOUT SAVING
ESC: Quit hifg : Select Item (Shift)F2 : Change Color F5: Old Values
F6: Load BIOS Defaults F7: Load Setup Defaults F10:Save & Exit
Save Data to CMOS & Exit SETUP
(4) Congratulate you have accomplished the BIOS flash procedure.
- 64 -GA-8IE800 Motherboard
English
Method 2:
Q-Flash Introduction
A. What is Q-Flash Utility?
Q-Flash utility is a pre-O.S. BIOS flash utility enables users to update its BIOS within BIOS
mode, no more fooling around any OS.
B. How to use Q-Flash?
a. After power on the computer, pressing <Del> immediately during POST (Power On Self Test) it
will allow you to enter AWARD BIOS CMOS SETUP, then press <F8> to enter Q-Flash utility.
CMOS Setup Utility-Copyright (C) 1984-2002 Award Software
}Standard CMOS Features Top Performance
}Advanced BIOS Features Load Fail-Safe Defaults
}Integrated Peripherals Load Optimized Defaults
}Power Management Setup Set Supervisor Password
Enter Q-Flash Utility (Y/N)? Y
}PnP/PCI Configurations Set User Password
}PC Health Status Save & Exit Setup
}Frequency/Voltage Control Exit Without Saving
ESC:Quit higf:Select Item
F8: Q-Flash F10:Save & Exit Setup
Time, Date, Hard Disk Type...
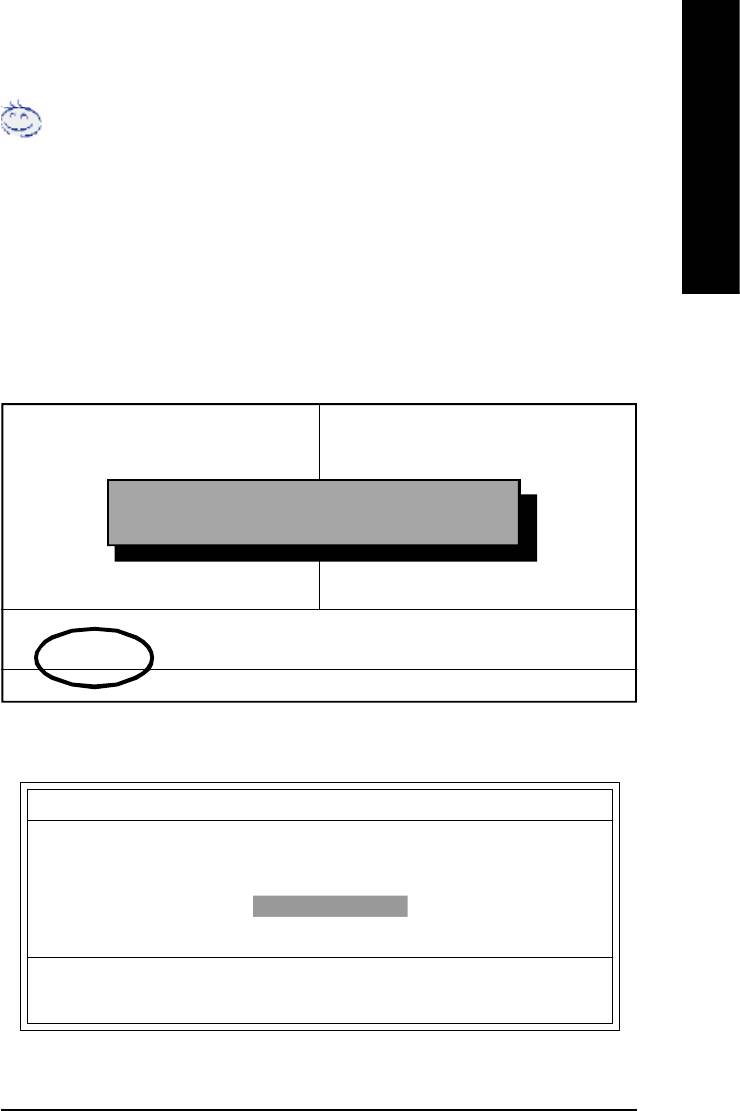
b. Q-Flash Utility
Q-Flash Utility V3.05
Flash Type/Size : SST 39SF020 / 256K
Keep DMI Data : Yes
Load BIOS from Floppy
Save BIOS to Floppy
Space Bar:Change Value
Enter: Run ESC: Reset h/i: Select Item
- 65 -
Technical Reference
Load BIOS From Floppy
!In the A:drive, insert the "BIOS" diskette, then Press Enter to Run.
1 File(s) found
English
XXXX.XX 256K
Total Size: 1.39M Free Size: 1.14M
F5: Refresh DEL: Delete ESC: Return Main
Where XXXX.XX is name of the BIOS file.
!Press Enter to Run.
Are you sure to update BIOS?
[Enter] to contiune Or [ESC] ot abort...
!Press Enter to Run.
!! COPY BIOS Completed -Pass !!
Please press any key to continue
Congratulation! You have completed the flashed and now can restart system.
- 66 -GA-8IE800 Motherboard
English
Method 3:
BIOS Flash Procedure
BIOS update procedure:
TM
If you don’t have DOS boot disk, we recommend that you used Gigabyte @BIOS
Program to
flash BIOS.
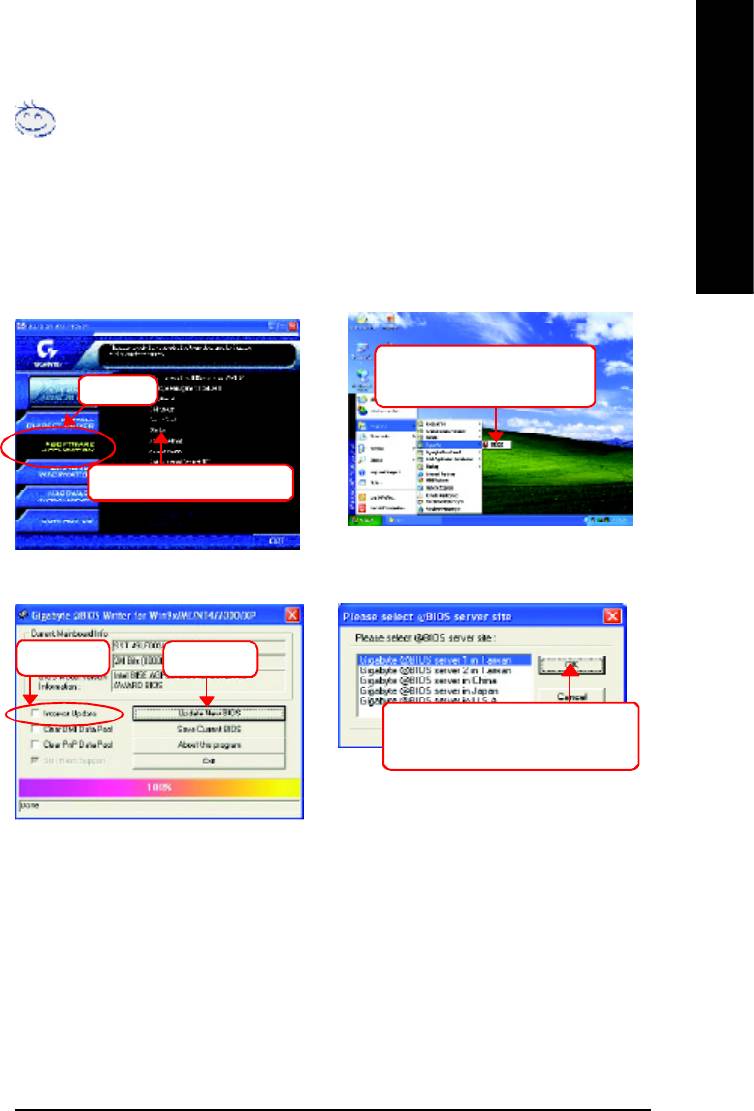
Follow the setup that showing on the scween to install the Utility.
2.Click"Start"-"Programs"-
Press here.
"GIGABYTE"-"@BIOS"
1.Click "@BIOS (B02102201).
(1) (2)
Click "P".
Click here.
3. Please select @BIOS sever site,
then Click "OK".
(3)
(4)
Methods and steps:
I. Update BIOS through Internet
a. Click "Internet Update" icon
b. Click "Update New BIOS" icon
TM
c. Select @BIOS
sever
d. Select the exact model name on your motherboard
e. System will automatically download and update the BIOS.
- 67 -
Technical Reference

II. Update BIOS NOT through Internet:
a. Do not click "Internet Update" icon
b. Click "Update New BIOS"
c. Please select "All Files" in dialog box while opening the old file.
English
d. Please search for BIOS unzip file, downloading from internet or any other methods (such
as: 8IE800.F1).
e. Complete update process following the instruction.
III. Save BIOS
In the very beginning, there is "Save Current BIOS" icon shown in dialog box. It means to
save the current BIOS version.
IV. Check out supported motherboard and Flash ROM:
In the very beginning, there is "About this program" icon shown in dialog box. It can help you
check out which kind of motherboard and which brand of Flash ROM are supported.
Note:
a. In method I, if it shows two or more motherboard's model names to be selected, please
make sure your motherboard's model name again. Selecting wrong model name will
cause the system unbooted.
b. In method II, be sure that motherboard's model name in BIOS unzip file are the same as
your motherboard's. Otherwise, your system won't boot.
TM
c. In method I, if the BIOS file you need cannot be found in @BIOS
server, please go onto
Gigabyte's web site for downloading and updating it according to method II.
d. Please note that any interruption during updating will cause system unbooted
- 68 -GA-8IE800 Motherboard
English
Revision History2-/4-/6-Channel Audio Function Introuction
The installation of windows 98SE/2K/ME/XP is very simple. Please follow next step to install the
function!
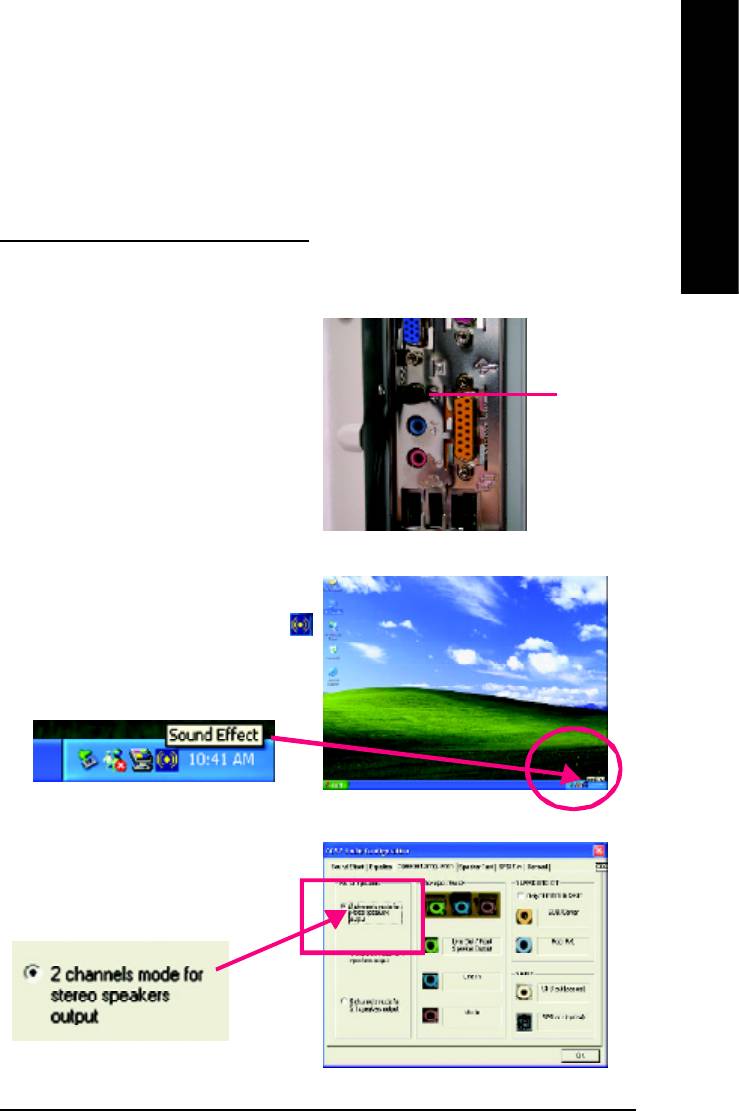
Stereo Speakers Connection and Settings:
We recommend that you use the speaker with amplifier to acqiire the best sound effect if the stereo output is
applied.
STEP 1:
Connect the stereo speakers or earphone to “Line Out”.
Line Out
STEP 2 :
After installation of the audio driver, you’ll find an
icon on the taskbar’s status area. Click the audio icon
“Sound Effect” from the windows tray at the bottom of
the screen.
STEP 3:
Select “Speaker Configuration”, and choose the
“2 channels for stereo speakers out put”.
- 69 -
Technical Reference
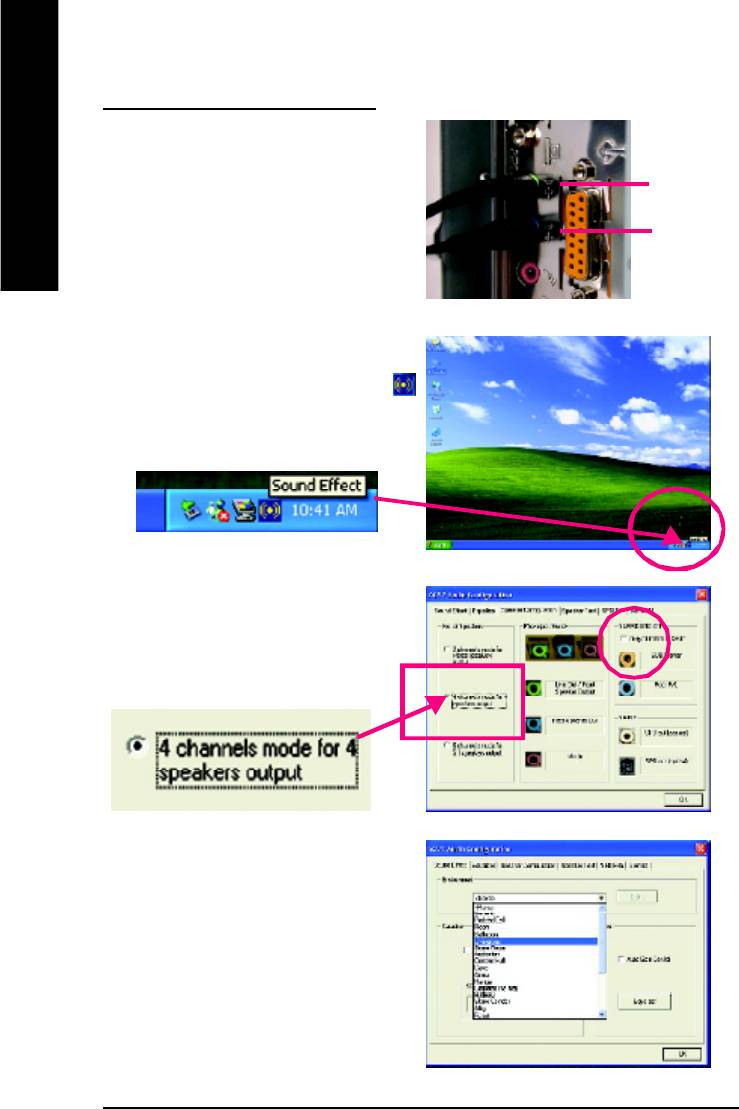
4 Channel Analog Audio Output Mode
STEP 1 :
Connect the front channels to “Line Out”,the
rear channels to “Line In”.
Line Out
English
Line In
STEP 2 :
After installation of the audio driver, you’ll find an
icon on the taskbar’s status area. Click the audio icon
“Sound Effect” from the windows tray at the bottom of
the screen.
STEP 3 :
Select “Speaker Configuration”, and choose the “4
channels for 4 speakers out put”.
Disable “Only SURROUND-KIT”, and press “OK”.
When the “Environment settings” is “None”, the
sound would be performed as stereo mode
(2 channels output). Please select the other settings
for 4 channels output.
- 70 -GA-8IE800 Motherboard
English
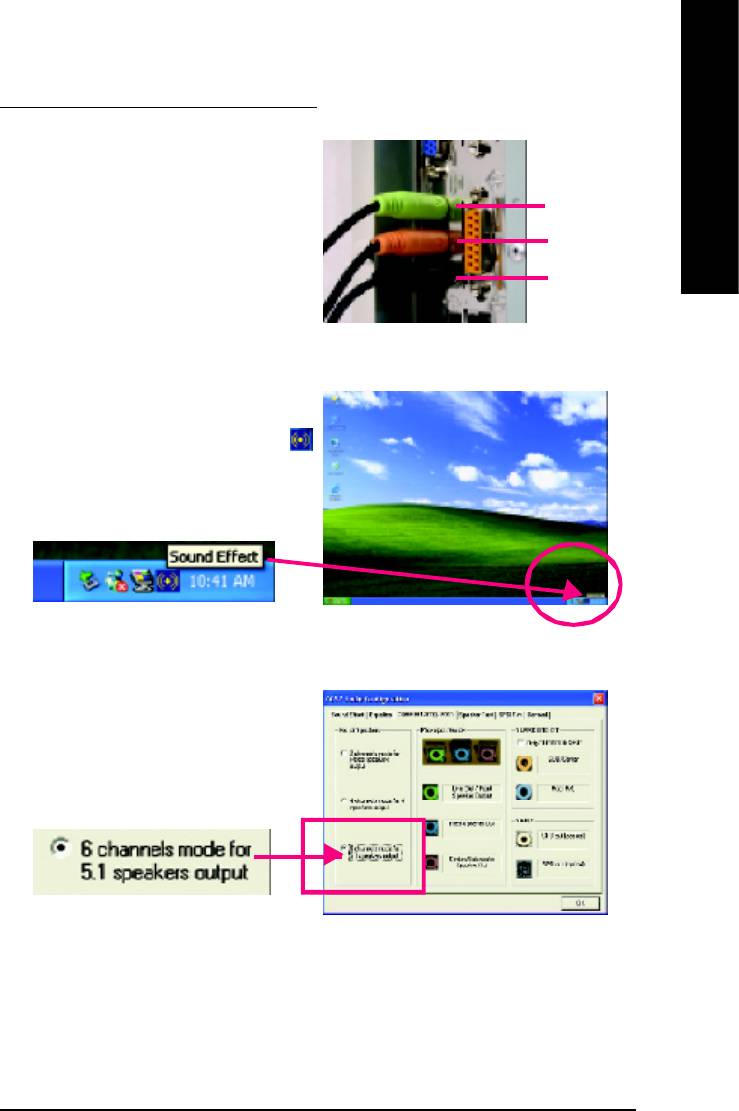
Basic 6 Channel Analog Audio Output Mode
Use the back audio panel to connect the audio output
without any additional module.
STEP 1 :
Line Out
Connect the front channels to “Line Out”,the rear chan-
Line In
nels to “Line In”, and the Center/Subwoofer channels
to “MIC In ”.
MIC In
STEP 2 :
After installation of the audio driver, you’ll find an
icon on the taskbar’s status area. Click the audio icon
“Sound Effect” from the windows tray at the bottom of
the screen.
STEP 3 :
Select “Speaker Configuration”, and choose the
“6 channels for 5.1 speakers out put”.
Disable “Only SURROUND-KIT” and pess “OK”
- 71 -
Technical Reference
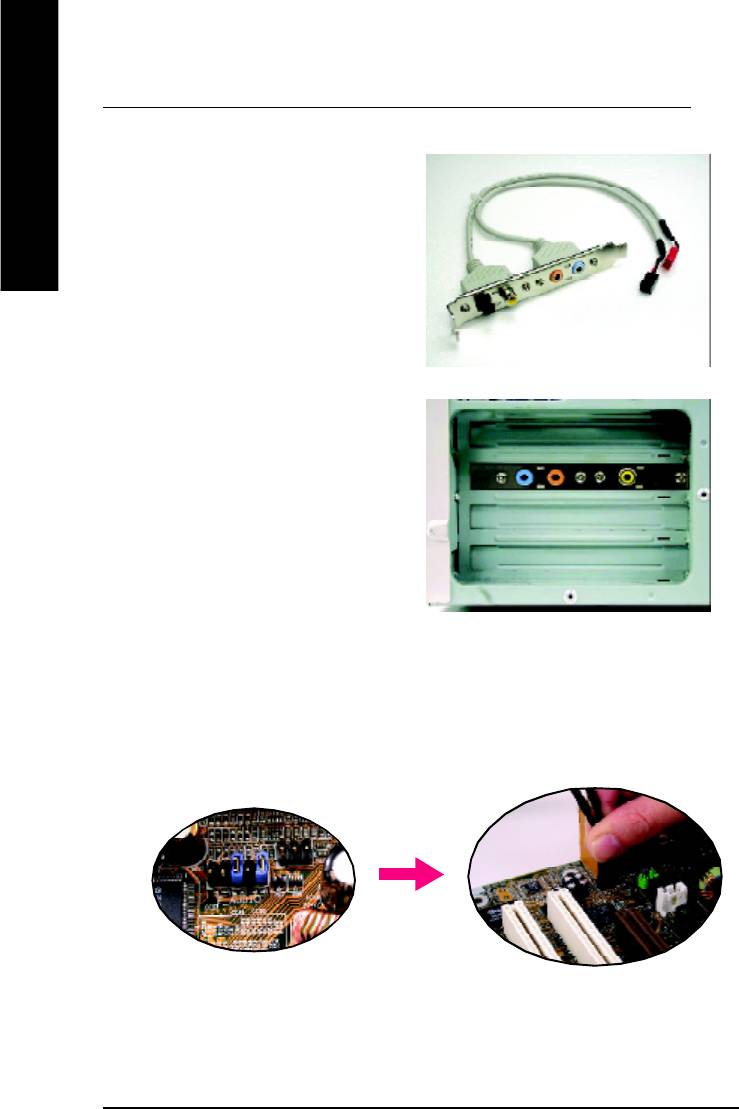
Advanced 6 Channel Analog Audio Output Mode (using Audio Combo Kit,Optional Device):
(Audio Combo Kit provides SPDIF output port : optical & coaxis and SURROUND-KIT : Rear R/L & CEN /
Subwoofer)
English
SURROUND-KIT access analog output to rear
channels and Center/Subwoofer channels. It is the best
solution if you need 6 channel output, Line In and MIC
at the same time. "SURROUND-KIT” is included in the
GIGABYTE unique "Audio Combo Kit” as picture.
STEP 1 :
Insert the “Audio Combo Kit” in the back of the case ,
and fix it with the screw.
STEP 2 :
Connect the ”SURROUND-KIT” to SUR_CEN on the
M/B.
- 72 -GA-8IE800 Motherboard
English
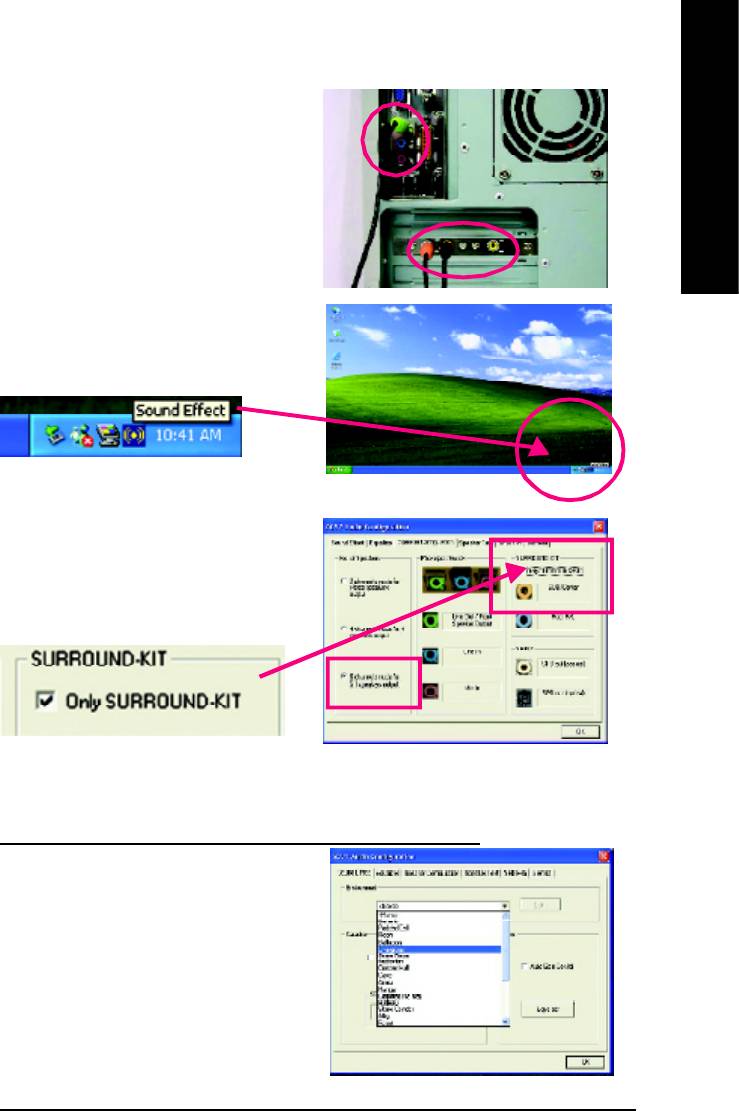
STEP 3 :
Connect the front channels to back audio panel’s
“Line Out”, the rear channels to SURROUND-KIT’s
REAR R/L, and the Center/Subwoofer channels to
SURROUND-KIT’s SUB CENTER.
STEP 4 :
Click the audio icon “Sound Effect” from the windows
tray at the bottom of the screen.
STEP 5 :
Select “Speaker Configuration”, and choose the “6
channels for 5.1 speakers out put”.
Enable “Only SURROUND-KIT” and press “OK”.
Basic & Advanced 6 Channel Analog Audio Output ModeNotes:
When the "Environment settings" is "None", the sound
would be perform ed as stereo m ode(2 channels
output). Please select the other settings for 6 channels
output.
- 73 -
Technical Reference
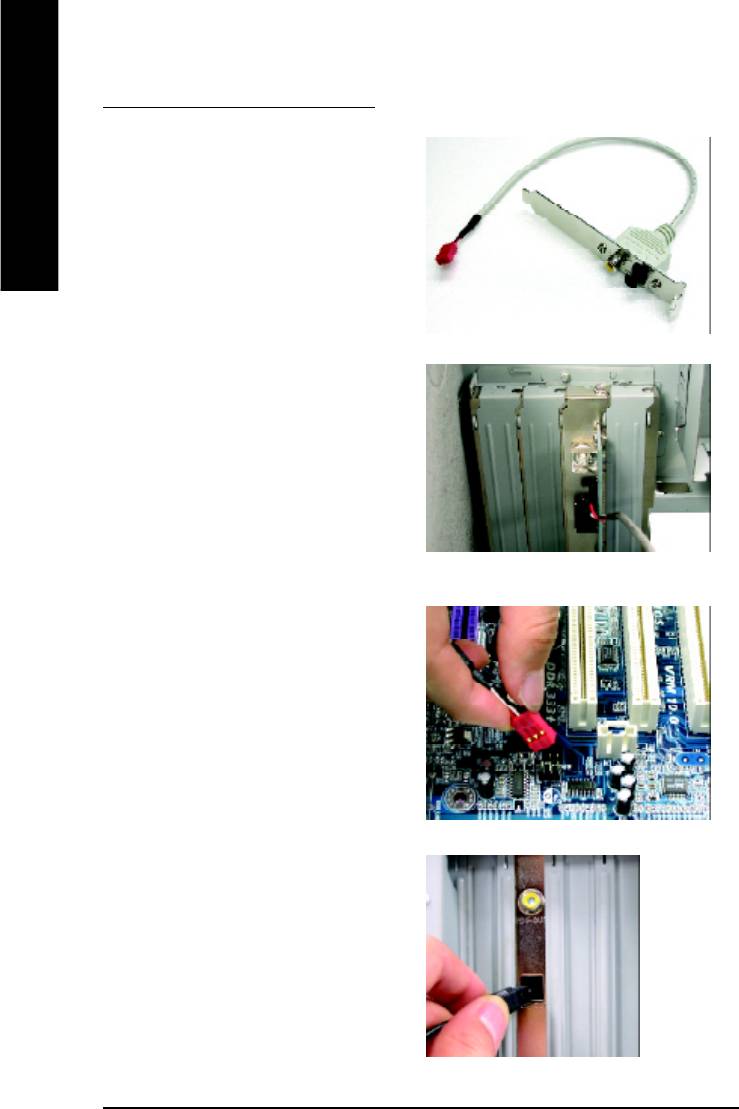
SPDIF Output Device (Optional Device)
A “SPDIF output” device is available on the
motherboard. Cable with rear bracket is provided
English
and could link to the “SPDIF output” connector
(As picture.) For the further linkage to decoder,
rear bracket provides coaxial cable and Fiber con-
necting port.
1. Connect the SPDIF output device to the rear
bracket of PC, and fix it with screw.
2. Connect SPDIF wire to the motherboard.
3. Connect co-axial or optical output to the SPDIF
decoder.
- 74 -GA-8IE800 Motherboard


