ZyXEL Communications 802.11 Wireless Digital Media Adaptor DMA-1000W: " You can only install the media server software on a Windows XP computer.
" You can only install the media server software on a Windows XP computer. : ZyXEL Communications 802.11 Wireless Digital Media Adaptor DMA-1000W
ENGLISH
Use the following sections in this guide (in the listed order) to view files on computers or on
a USB stick.
Viewing Files on a USB Stick
Viewing Files on Computers
2 Connect Your DMA-1000W
1 Install the Media Server Software
5 Play Your Files
2 Connect Your DMA-1000W
3 Configure Wireless Settings
4 Share Your Files
5 Play Your Files
1 Install the Media Server Software
You must install the media server software on each computer that you will use to share
files with the DMA-1000W.
" You can only install the media server software on a Windows XP computer.
See Requirements for more details.
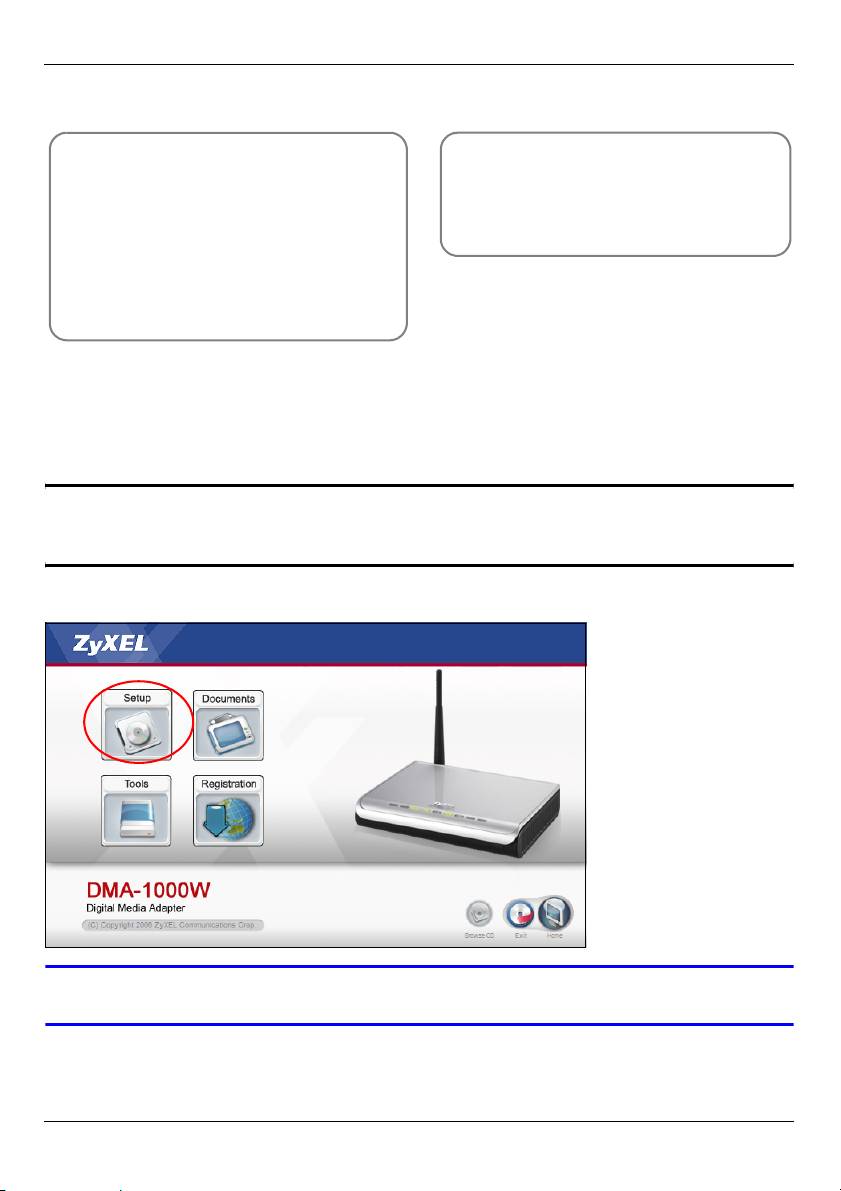
1 Put the CD into your CD-ROM. Click Setup in the following screen.
V If this screen does not display, locate and double-click setup.exe.
3
ENGLISH
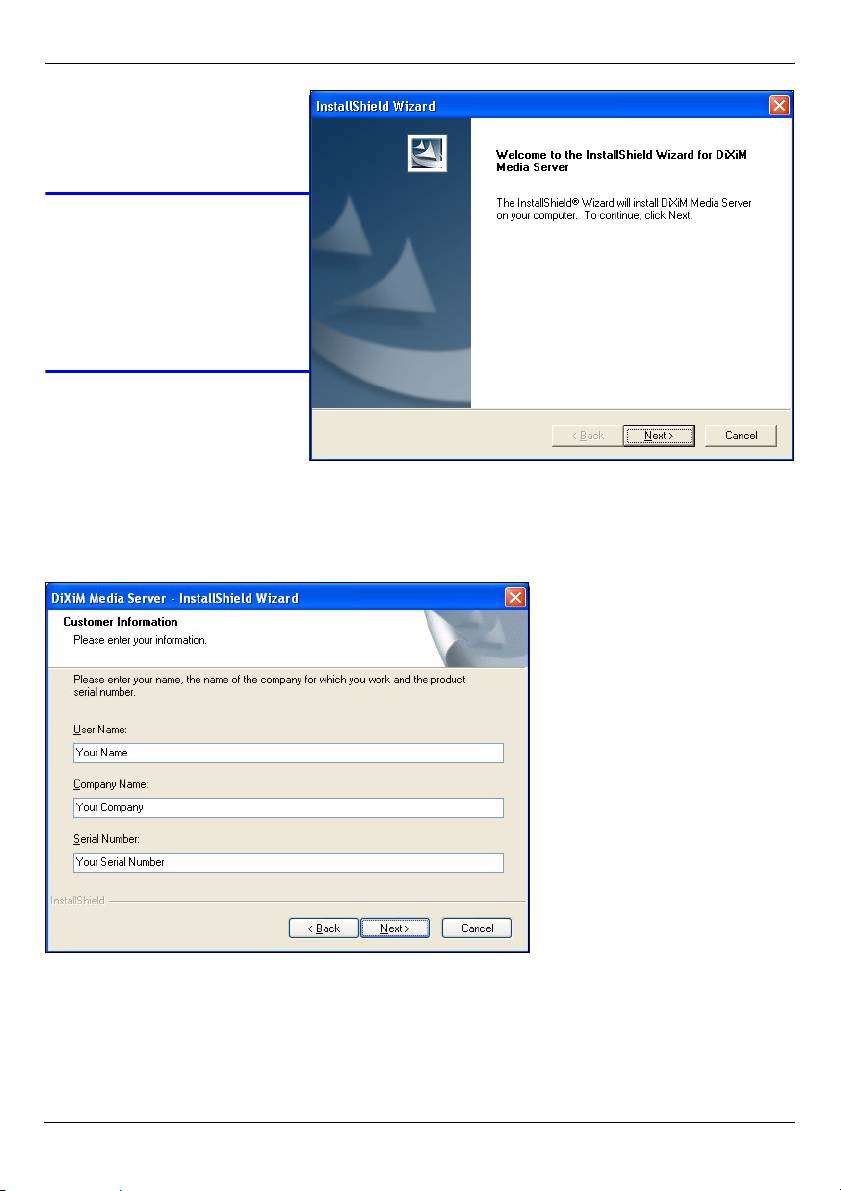
2 The installation wizard
appears. Follow the
directions to install the
software.
V See the
requirements
section if you have
trouble installing or
using the media
server.
3 Enter your information in
this screen. Enter a user
name (up to 64 ASCII
characters recommended). The company name is optional (up to 64 ASCII characters
recommended). Click Registration in the screen that opened when you inserted the
CD-ROM (see page 3). Then click Media Server Serial Number to open a text file with
a serial number. Copy and paste the serial number into the Serial Number field in the
screen shown here.
4
ENGLISH
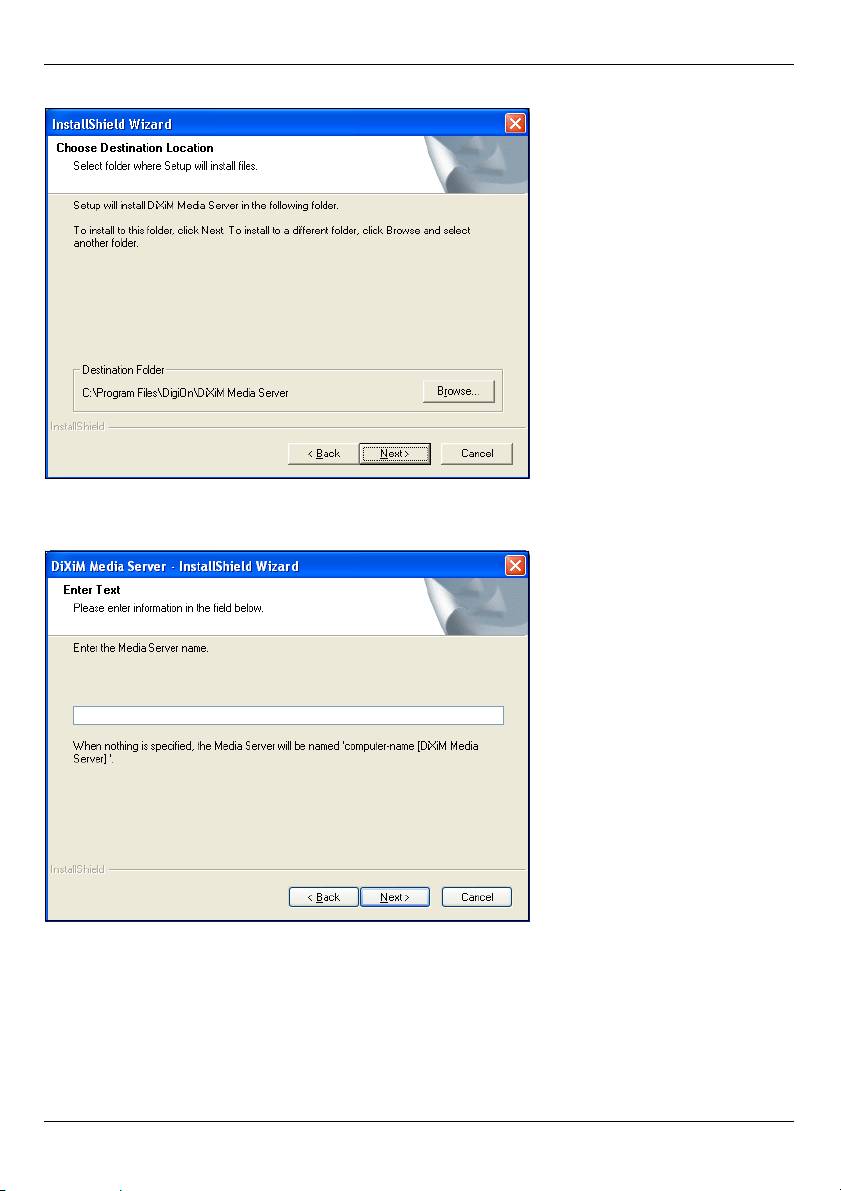
4 Select a destination for the software (or just leave the default).
5 You can specify a name for the media server that the DMA-1000W displays on your TV.
It is helpful to use unique names if you install the media server on multiple computers.
Up to 34 ASCII characters recommended.
5
ENGLISH
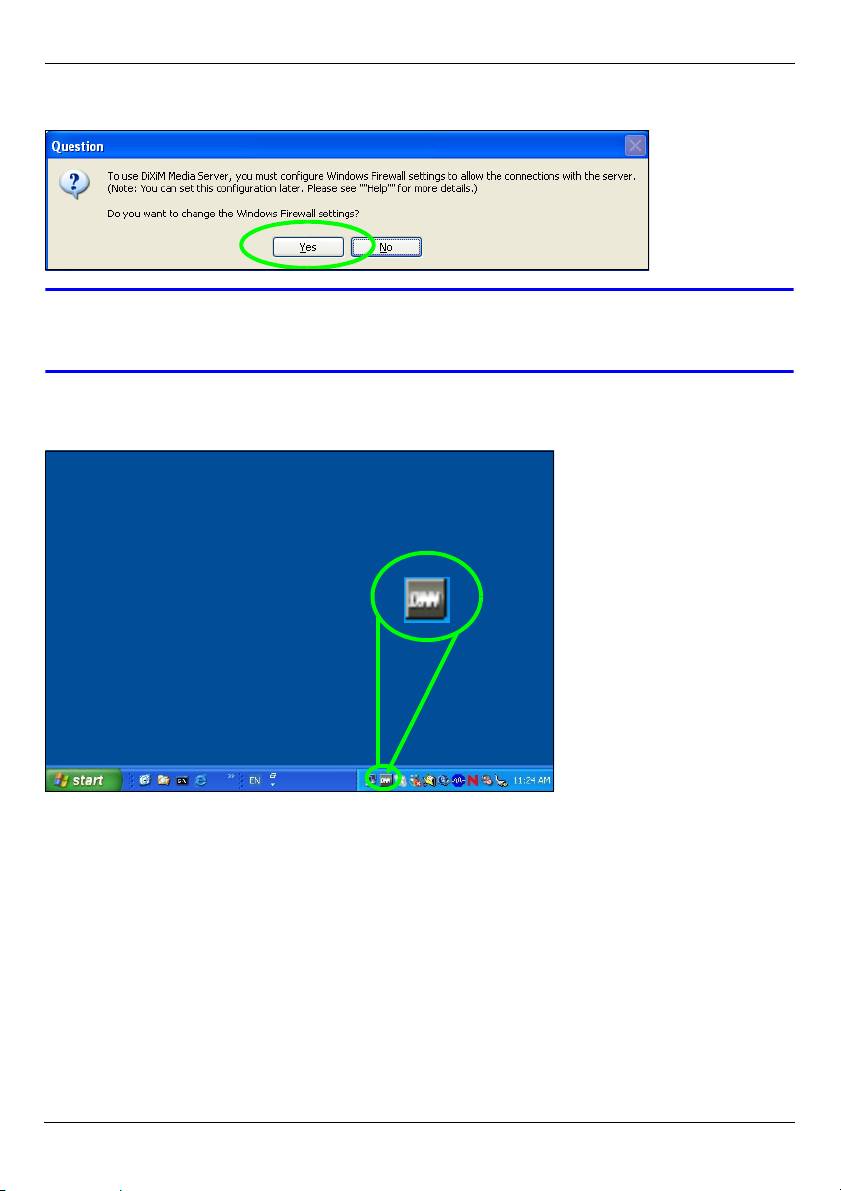
6 If you see a screen asking about configuring the Windows XP firewall, click Yes. This
allows the DMA-1000W to access the files on your computer that you share.
V Refer to the User’s Guide if your computer has another software firewall
(like ZoneAlarm for example) that you need to configure.
7 This icon displays in the system tray (usually in the bottom right corner) after the
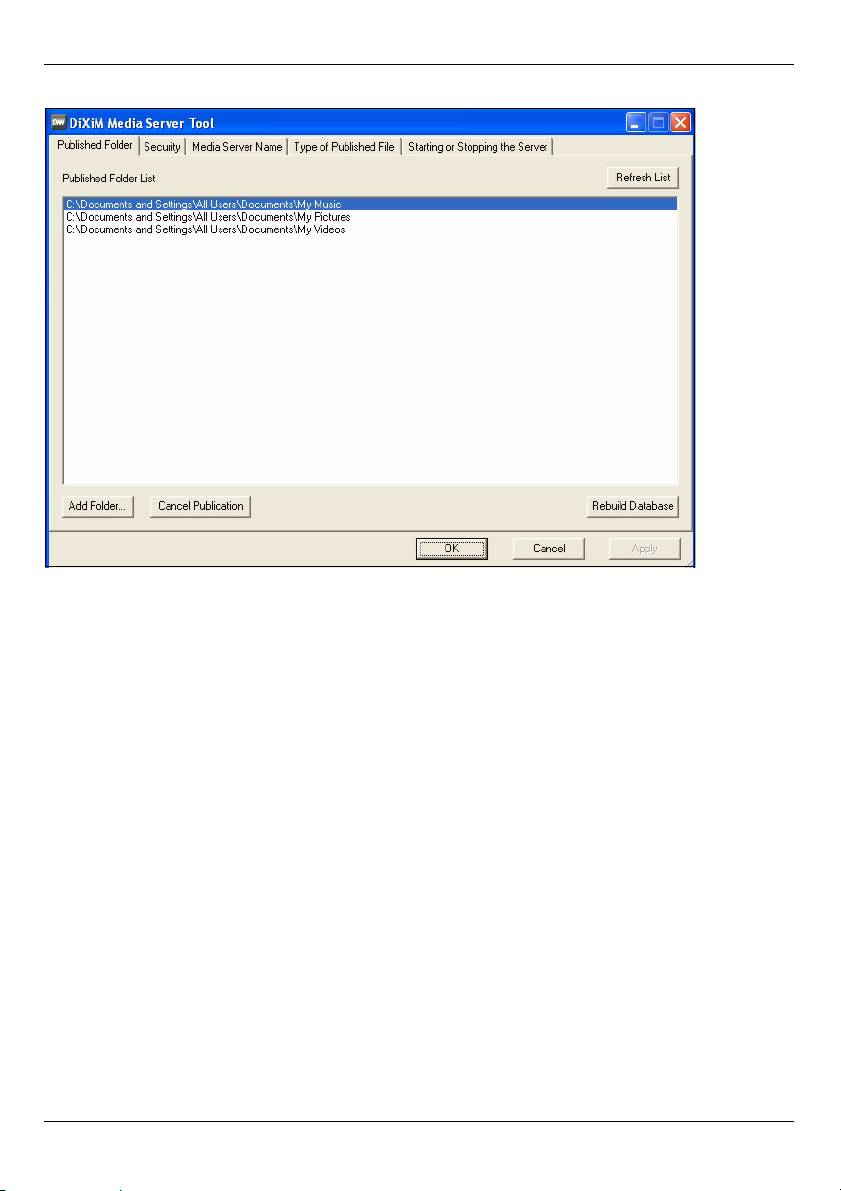
installation is done. Double-click the icon to open the server configuration screens.
8 The Published Folder List lists folders of files that your computer will share with the
DMA-1000W.
•Your My Music, My Pictures and My Videos folders are included by default.
• To share other files, click the Add Folder button and browse to select a folder that
you want to share.
6
ENGLISH
• To remove a folder from the list, click it and then click Cancel Publication.
7
ENGLISH
2 Connect Your DMA-1000W
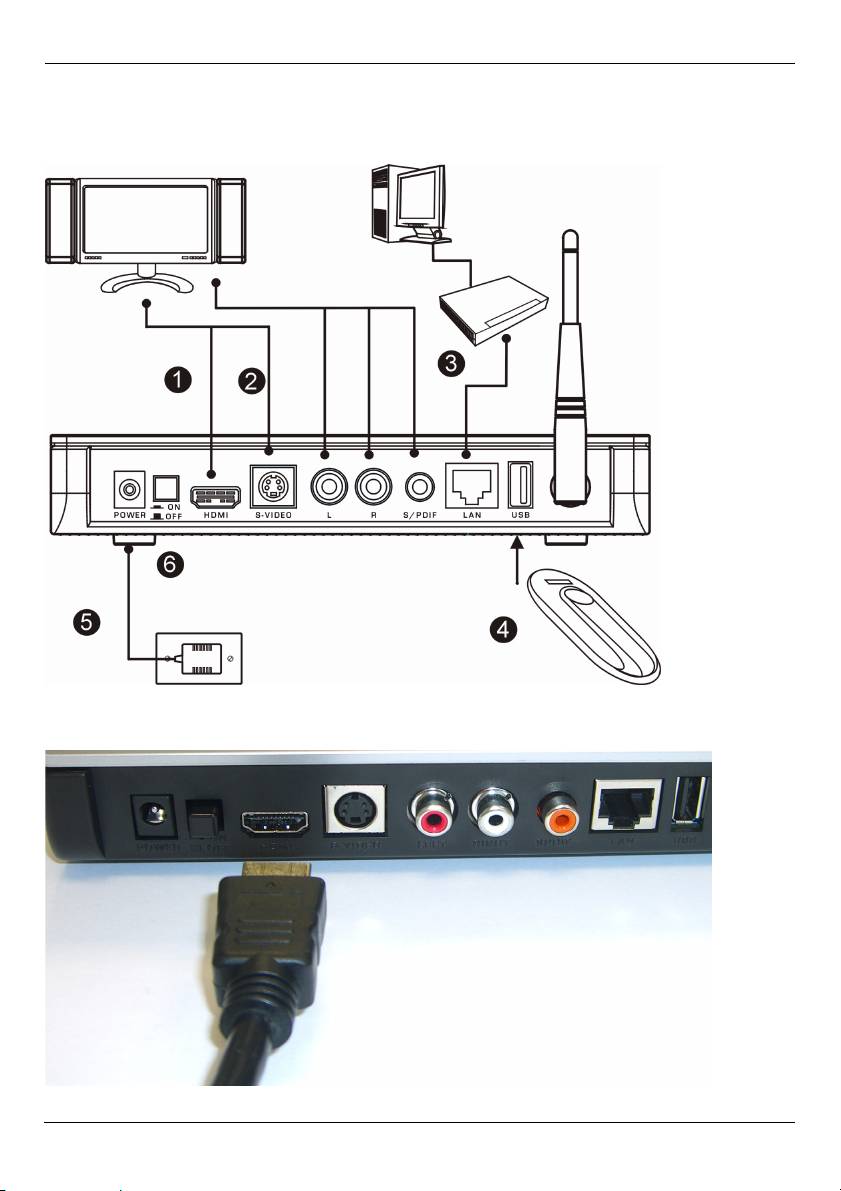
Turn off your TV before you connect the DMA-1000W.
1 If your TV has a HDMI connector, use an HDMI cable to connect the DMA-1000W’s
HDMI connector (shown) to the TV.
8
ENGLISH
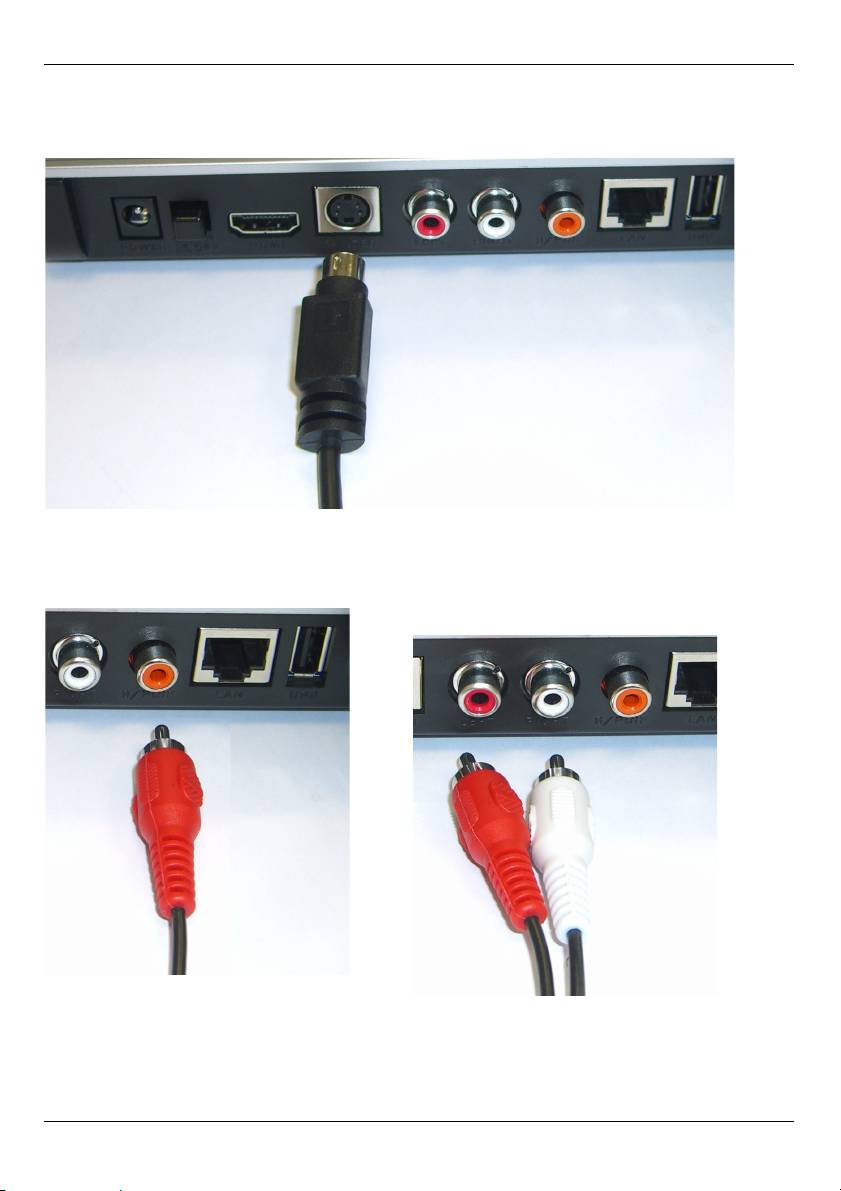
2 If your TV does not have an HDMI connector:
A Use an S-video cable to connect the DMA-1000W’s S-VIDEO connector (shown) to
the TV.
B If your TV or audio system has a
C If your TV or audio system does not
coaxial S/PDIF jack, use an RCA
have a coaxial S/PDIF jack, use RCA
cable to connect it to the DMA-
cables to connect it to the DMA-
1000W’s S/PDIF jack (shown).
1000W’s LEFT and RIGHT jacks
(shown).
9
ENGLISH
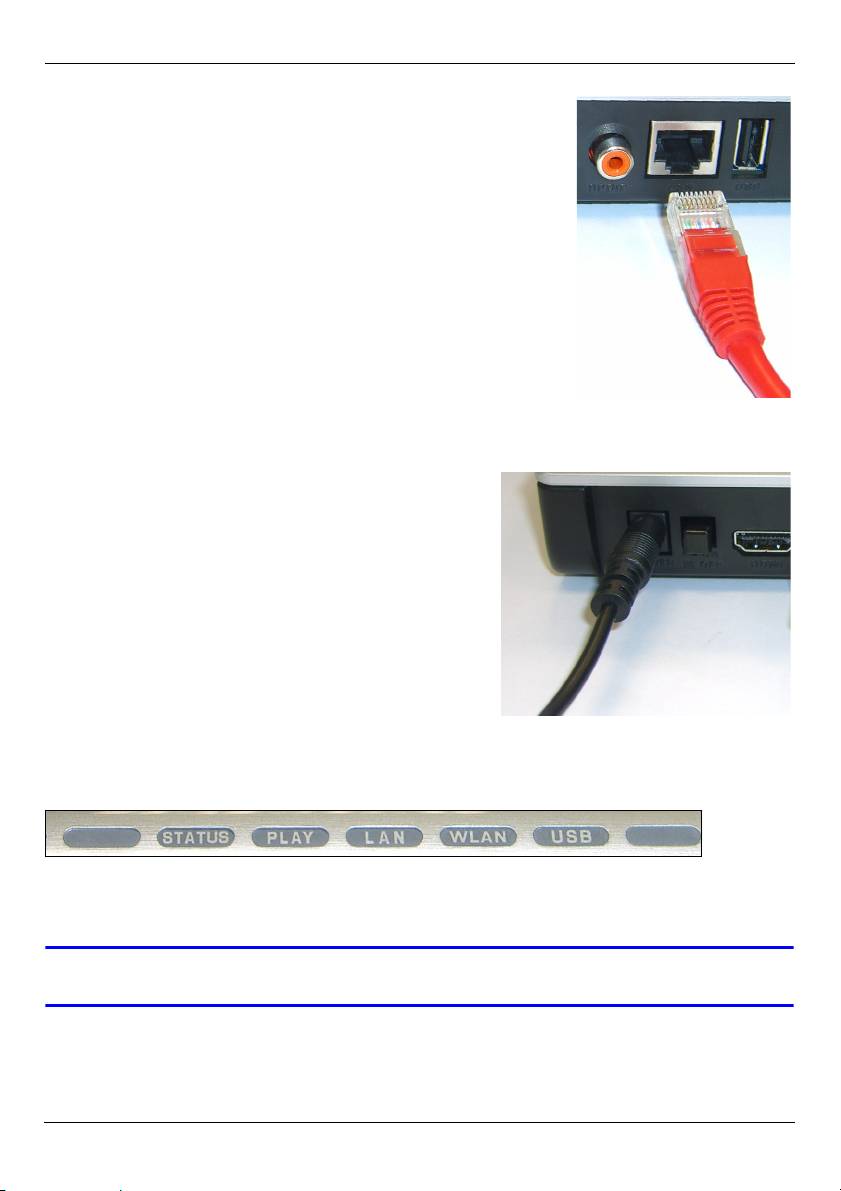
3 Use this step if you want to use a wired connection instead
of a wired connection (the DMA-1000W only supports one
type at a time). Refer to the User’s Guide to configure
wired LAN settings. Skip to the next step if you will use a
wireless connection. Connect the DMA-1000W’s LAN port
if your content files are on your computer. The media
server software should already be installed. Skip to the
next step if you will only play files from a USB stick.
• Use the straight-through Ethernet cable (gray at the
time of writing) to connect to an Ethernet switch, router
or hub.
• Use the cross-over Ethernet cable (red at the time of
writing) to connect directly to your computer.
4 If you want to play files from a USB memory stick, connect
it to the DMA-1000W’s USB port. This is optional if you use the wired or wireless
connection to connect to your computer.
5 Connect the POWER socket to a power source
using only the included power adaptor.
6 Point the antenna towards the ceiling. You will
also need to configure the wireless settings to
have the DMA-1000W connect to your computer
or wireless Access Point (AP). See section 3 .
7 Your computer should already be turned on. Turn
on the TV and the DMA-1000W.
2.1 Check the LEDs (Lights)
Look at the front of the device.
1 The STATUS LED comes on.
2 The LAN light and/or the USB light turn on.
V Check your connections if the lights do not come on.
10
ENGLISH
3 Configure Wireless Settings
Use this section to configure the DMA-1000W’s wireless settings if you want to use a
wireless connection, otherwise skip to Section 4. Use the remote control to navigate and
configure the menus (see page 17 for a figure of the remote control).
Do one of the following to configure the wireless settings.
1 Have the DMA-1000W scan for the wireless network (see section 3.1).
2 Manually configure the wireless settings (refer to the User’s Guide for details).
3 Use Windows® Connect Now to save your computer’s wireless settings onto a USB
memory stick and connect it to the DMA-1000W to configure the DMA-1000W’s
wireless settings (skip to section 3.2).
3.1 Wireless LAN Configuration Steps
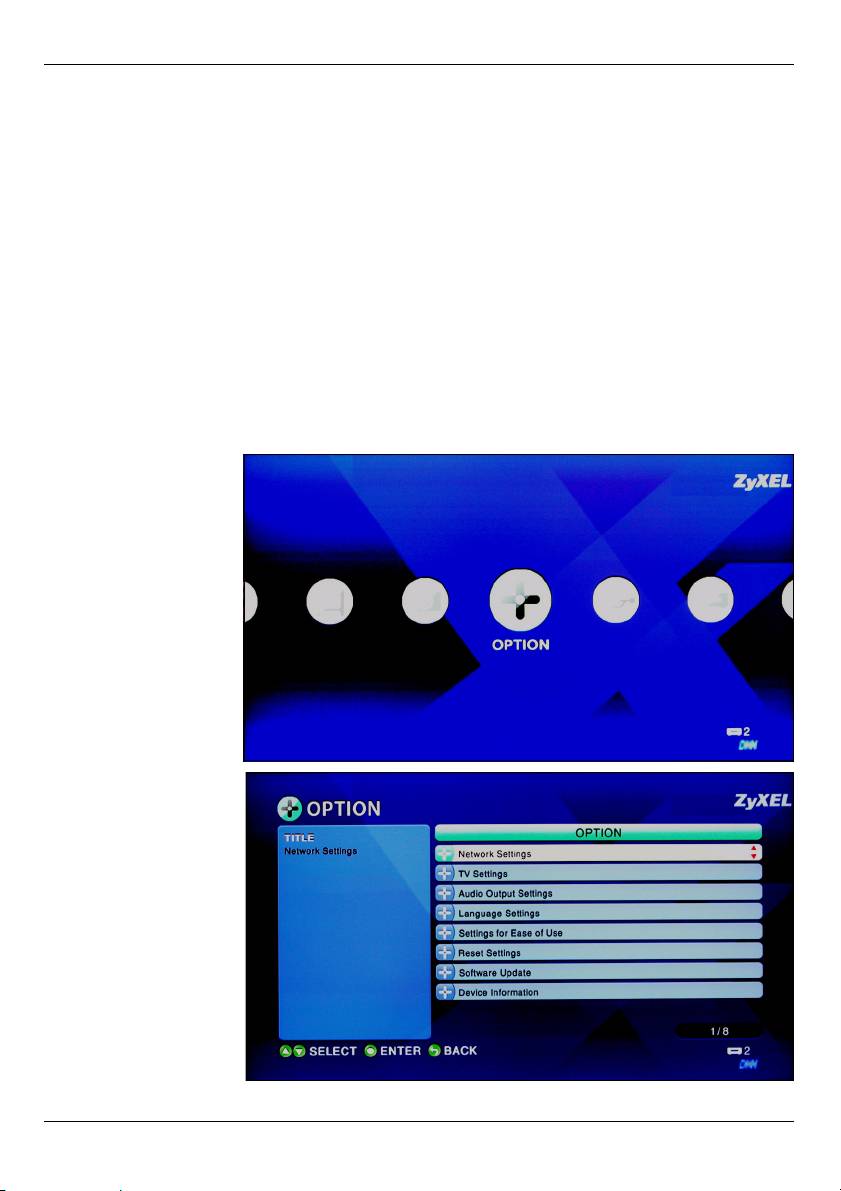
1 Look at your
television and use
the remote
control’s arrow
buttons to go to
the OPTION menu
icon. Press the OK
button.
2 Select Network
Settings and press
the OK button.
11

ENGLISH
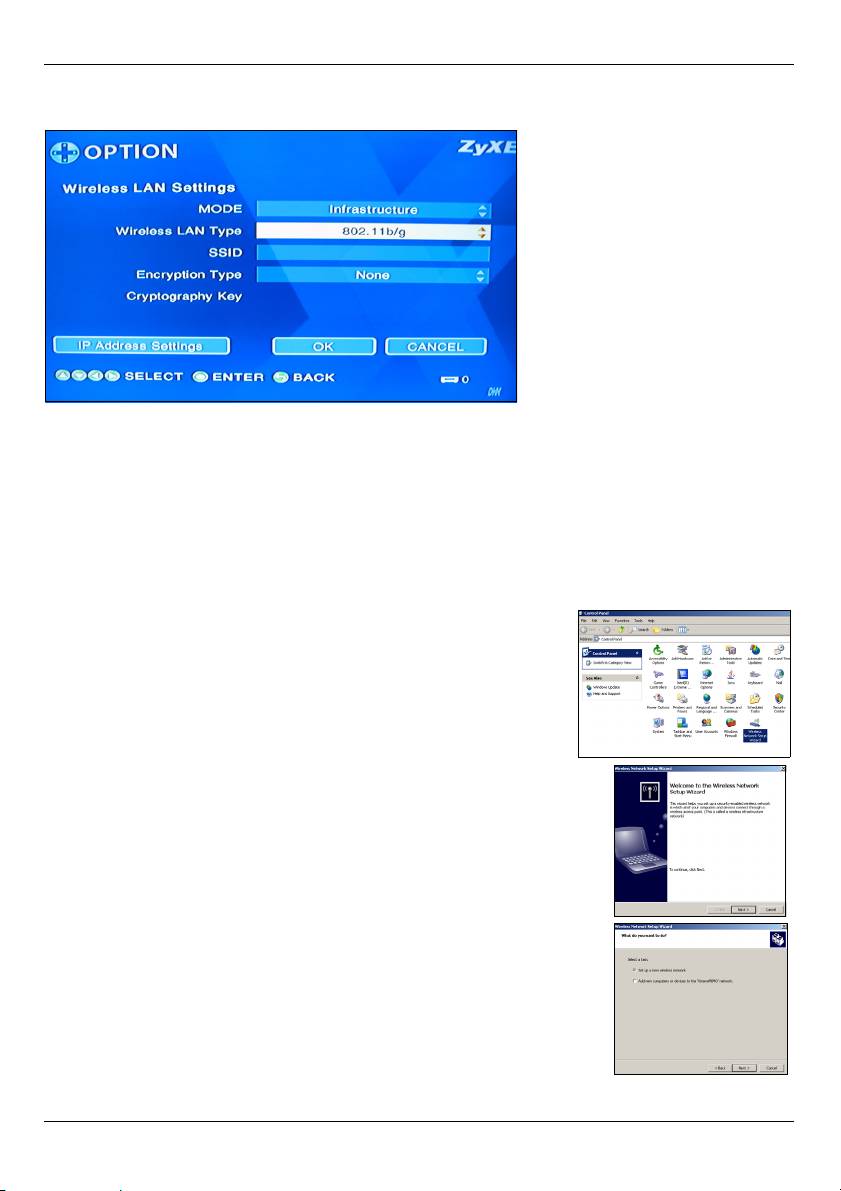
3 Select Wireless
LAN Settings and
then OK.
4 Select whether to
have the DMA-1000W
scan for available wireless
networks, manually enter
the network settings, or
use Windows® Connect
Now (see section 3.2). In
this example, you select
the scan option and then
OK.
5 The DMA-1000W scans
and displays a list of
available wireless
networks. Select the
network to which you want
to connect. You need to
enter any security settings
that the network uses.
Select OK when you are
done and continue with
section 4.
12
ENGLISH
6 Make sure you configure this screen with the same settings as on the AP or wireless-
enabled computers.
3.2 Wireless LAN Setup Using Windows® Connect Now
Windows® Connect Now is included with Windows XP Service Pack 2 (SP2). Follow these
steps to use Windows® Connect Now to save your computer’s wireless settings to a USB
memory stick which you connect to the DMA-1000W to configure the DMA-1000W’s
wireless settings. You do not need to connect the USB stick to the computer yet, you will
be prompted to do so later.
1 Click Start > Control Panel and double-click Wireless
Network Setup Wizard.
2 The first wizard screen displays. Click Next in each screen
to continue.
3 Select Set up a new wireless network to configure a new
wireless network.
13

ENGLISH
4 In the Network name (SSID) field, specify a unique name to
identify your wireless LAN.
5 Select Automatically assign a network key to have Windows
create a security key.
6 Select Use a USB Flash drive to set up a wireless network.
7 Connect the USB memory stick to your computer’s USB port.
8 This screen appears after your wireless settings are saved on
the USB stick.
• Remove the USB stick from your computer and insert it in
the DMA-1000W’s USB port.
• Follow the directions in section 3.1.
• After the DMA-1000W’s wireless settings are configured,
remove the USB stick from the DMA-1000W and insert it
back into your computer’s USB port and click Next.
9 This screen displays when you have successfully set up a
secure wireless network. Click Finish.
10The WLAN LED turns on (or blinks) when the wireless
connection is successful.
V Recheck your wireless settings if the WLAN LED
stays off.
14
ENGLISH
4 Share Your Files
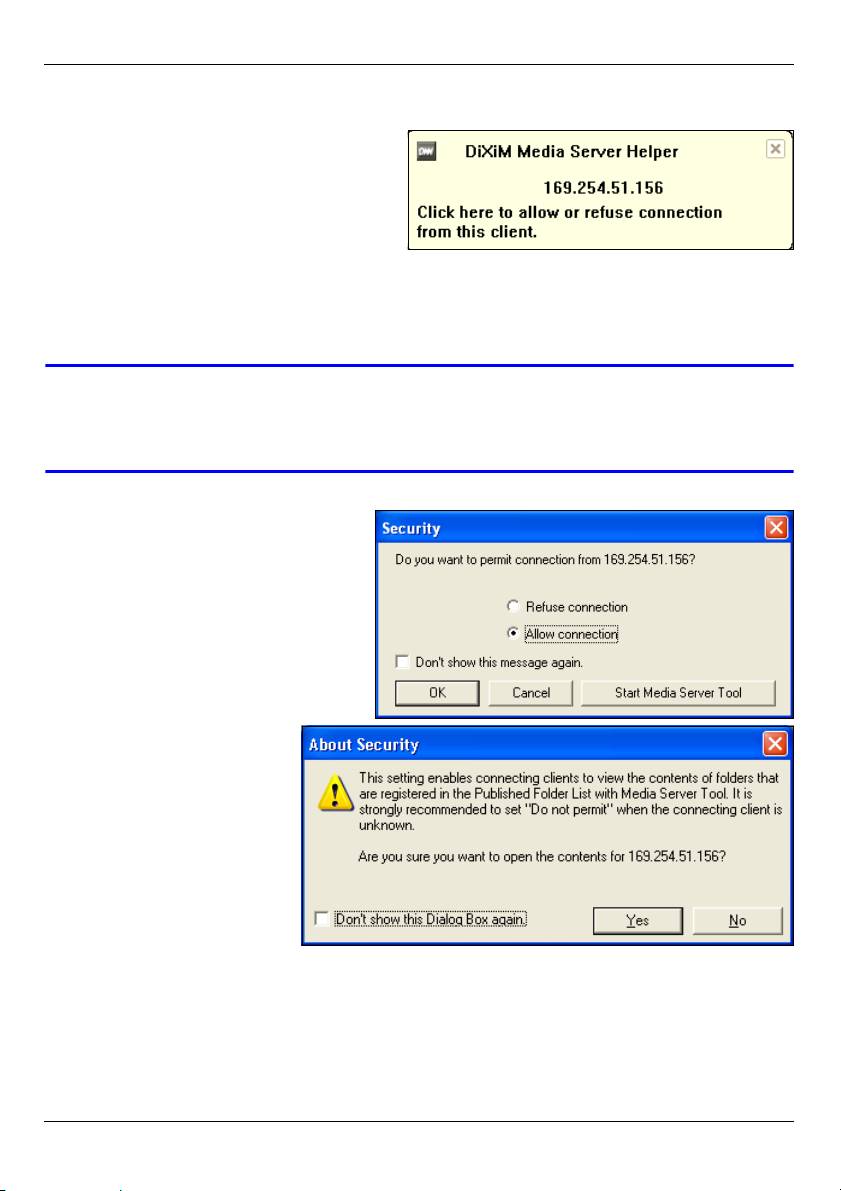
1 Look at your computer screen. Wait for
the media server to detect the DMA-
1000W and open a pop-up window
with the DMA-1000W’s IP address. If
the DMA-1000W does not get an IP
address automatically, it uses Auto-IP
to assign itself an IP address. If your computer is also set to get an IP address
automatically, the computer and the DMA-1000W will be able to communicate. See the
User’s Guide if you need to configure the DMA-1000W with a static IP address. Click
anywhere in this window.
V You may need to wait for two or three minutes. If the window still does not
display, check the DMA-1000W’s LEDs and connections and use the power
button to restart the DMA-1000W.
2 Select Allow Connection and click
OK.
3 Click Yes to allow the
DMA-1000W to access
your published (shared)
files.
15
Оглавление
- DMA-1000W
- " If you are using Windows Vista, see the Windows Vista Media Server
- " You can only install the media server software on a Windows XP computer.
- " Set your TV’s input to the DMA-1000W’s connection (either HDMI or S-
- " Eine Beschreibung des Umgangs DMA -1000 Dateien gespeichert auf
- " Die Mediaserver-Software kann nur auf Windows XP-Computern installiert
- " Stimmen Sie den TV-Eingang auf den Anschluss des DMA-1000W ab
- " Si está usando Windows Vista, consulte el apéndice Windows Vista Media
- " Sólo puede utilizar el software del servidor multimedia en un ordenador con
- " Ajuste la entrada de su televisor a la conexión del DMA-1000W (bien HDMI
- " Si vous utilisez Windows Vista, voir l'annexe sur Windows Vista Media
- " Vous pouvez uniquement installer le logiciel du serveur multimédia sur un
- " Paramétrez l'entré de votre téléviseur sur la connexion (HDMI ou S-Vidéo)
- " Se usate Windows Vista, fate riferimento al capitolo Windows Vista Media
- " Il software Media Server può essere installato solo su un computer
- " Impostare l'ingresso della TV al collegamento del DMA-1000W (HDMI
- " Для настройки работы компьютеров под управлением Windows Vista,
- " Вы можете установить это ПО только на компьютер с Windows XP.
- " Переключите вход вашего телевизора на соединение с DMA-1000W
