Yamaha RX-397: Selecting preset stations Exchanging preset stations
Selecting preset stations Exchanging preset stations: Yamaha RX-397
Table of contents
- CAUTION: READ THIS BEFORE OPERATING YOUR UNIT.
- CONTENTS
- FEATURES SUPPLIED ACCESSORIES
- CONTROLS AND FUNCTIONS Front panel
- CONTROLS AND FUNCTIONS
- Front panel display
- CONTROLS AND FUNCTIONS Rear panel
- Remote control
- CONTROLS AND FUNCTIONS Installing batteries in the remote control Using the remote control
- CONNECTIONS CAUTION
- CONNECTIONS Connecting speakers
- Connecting the AM and FM antennas
- CONNECTIONS Connecting the AM loop antenna
- CONNECTIONS Connecting the power supply cord
- CONNECTIONS Turning on and off this unit
- PLAYING AND RECORDING CAUTION Playing a source
- PLAYING AND RECORDING Adjusting the tonal quality
- Recording a source
- Using the sleep timer
- Muting the sound output
- FM/AM TUNING Automatic tuning
- Manual tuning Automatic preset tuning
- Customized automatic preset tuning
- Manual preset tuning
- Selecting preset stations Exchanging preset stations
- RADIO DATA SYSTEM (EUROPE MODEL ONLY) Receiving Radio Data System stations Changing the Radio Data System mode
- PTY SEEK function
- EON function
- Press STANDBY/ON on the front panel to set ADVANCED SETUP Changing the ADVANCED SETUP menu parameters
- Press STANDBY/ON to confirm your setting.
- General TROUBLESHOOTING Problem
- Tuner Problem
- Remote control Problem
- SPECIFICATIONS
24
FM/AM TUNING
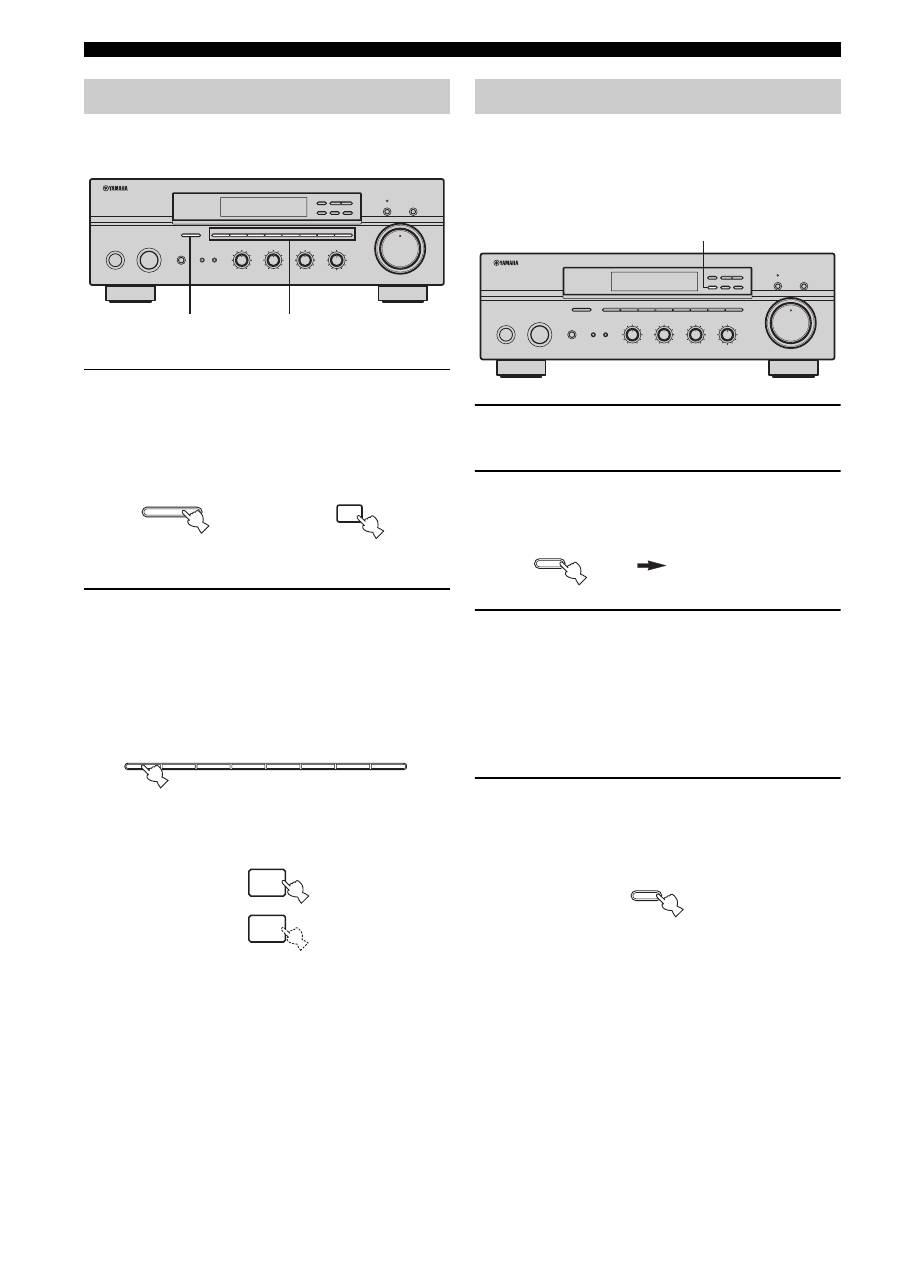
You can tune into the desired station simply by selecting
the preset station number where it is stored.
1
Press A/B/C/D/E on the front panel
repeatedly (or on the remote control) to
select a preset station group (A to E).
The selected preset station group is shown in the front
panel display.
2
Press one of the preset station number
buttons on the front panel (or
PRESET
u
/
d
on the remote control) to
select a preset station number (1 to 8).
The preset station number appears in the front panel
display along with the reception band and the
frequency.
You can exchange the assignment of two preset stations
with each other. The following procedure describes an
example where a preset station E1 is exchanged with
another preset station A5.
1
Repeat steps 1 and 2 in “Selecting preset
stations” to select a preset station E1.
2
Press EDIT on the front panel.
E1 and the MEMORY indicator flash in the front
panel display.
3
Repeat steps 1 and 2 in “Selecting preset
stations” to select another preset station A5.
A5 and the MEMORY indicator flash in the front
panel display.
4
Press EDIT on the front panel again.
E1-A5 appears in the front panel display, indicating
that the two preset station assignments have been
exchanged.
Selecting preset stations
STANDBY
/ON
INPUT
PHONES
BASS
TAPE MONITOR
PURE DIRECT
5
5
1
0
1
4
4
2
2
3
3
+
–
VOLUME
l
TUNING
h
FM/AM
EDIT
A/B/C/D/E
1
2
3
4
5
6
7
8
MEMORY
MAN'L/AUTO FM
TUNING MODE
AUTO/MAN'L
TREBLE
5
5
1
0
1
4
4
2
2
3
3
+
–
BALANCE
5
5
1
0
1
4
4
2
2
3
3
R
L
LOUDNESS
5
7
1
FLAT
6
4
8
2
10
–30dB
3
9
SPEAKERS
B
A
1
2
0
12
12
2
8
4
∞
20
20
60
60
26
26
40
40
16
16
-dB
-dB
A/B/C/D/E
A/B/C/D/E
Front panel
or
Remote control
1
2
3
4
5
6
7
8
u
d
PRESET
or
Front panel
Remote control
Exchanging preset stations
STANDBY
/ON
INPUT
PHONES
BASS
TAPE MONITOR
PURE DIRECT
5
5
1
0
1
4
4
2
2
3
3
+
–
VOLUME
l
TUNING
h
FM/AM
EDIT
A/B/C/D/E
1
2
3
4
5
6
7
8
MEMORY
MAN'L/AUTO FM
TUNING MODE
AUTO/MAN'L
TREBLE
5
5
1
0
1
4
4
2
2
3
3
+
–
BALANCE
5
5
1
0
1
4
4
2
2
3
3
R
L
LOUDNESS
5
7
1
FLAT
6
4
8
2
10
–30dB
3
9
SPEAKERS
B
A
2,4
0
12
12
2
8
4
∞
20
20
60
60
26
26
40
40
16
16
-dB
-dB
EDIT
MEMORY
Flashes
MEMORY
Flashes
EDIT
