Toshiba JournE Air800-801 – page 3
Manual for Toshiba JournE Air800-801
Table of contents
- Introduction Check the components What’s in the Box
- Important Information Safety Precautions and Maintenance Care of the Digital Frame
- Recycling Copyright Statement Disclaimer Trademarks
- Journe Air Overview Front View Bottom View
- Rear View Left View System Requirements
- Getting Started Placing the Unit Connecting to the A/C Power Turning on the Digital Frame
- Built-in battery (available on Journe Air 801 only)
- Connections Memory Card: USB Connection
- Understanding the Wi-Fi Icons
- Basic Operations Photo Mode
- 4. Select a sequence: Sequential or Random, then press OK.
- Transition Effect
- Frequency
- Background Color
- Effect
- Rotate
- Browsing Photos Flickr / Picasa Activate an Account
- Add an Account
- Delete an Account
- Time and Date Mode Set Time and Date
- Time Setting Date Setting
- Set Alarm Clock and Alarm Tone Set Alarm Clock Set On/Off
- Set Alarm Tone
- Put Photos in the Photo Calendar
- Photo + Audio Mode
- Video Mode
- Video Playback Mode Icons Definition
- Audio Mode
- One click playing
- Copy and Delete Files
- To copy files to another storage device: To copy all files in a storage device to another storage device:
- To delete files: To delete all files in a storage device:
- 3D Album Installing 3D Album 1. Insert the Software CD and select 3D Album Software. 2. Click Yes, I agree to accept the license agreement and continue the
- 3. Choose a location in the install path field to install 3D Album. (Note that 4. After the installation is complete, a QuickTime install window will pop up.
- 3D Album Functions Converting Photos
- Create a 3D-Album
- System Settings Brightness
- Language
- Network WPS
- Wi-Fi Wizard
- Advance Configuration To configure settings manually:
- To turn the antenna on and off:
- Profile List
- Web Album Store to
- Timer Function (Auto On/Off)
- 10.When the time is set, press OK to confirm.
- Auto Tilt
- Auto Light
- Restore to Default Settings USB Mode Mass Storage Sub View
- 6. Launch the Sub View software installed on your PC.
- To set the digital frame to Extended mode: To set the digital frame to Clone mode:
- To display a playing video file on the digital frame, you have to set the digital frame as the primary monitor.
- PictBridge Print Status Information
- Wi-Fi Status Information Firmware Upgrade
- Supported Video Format Frequently Asked Questions TOSHIBA Support
- Regulatory statements
- Working Environment
- Following information is only for EU-member states:
3. Press OK to confirm.
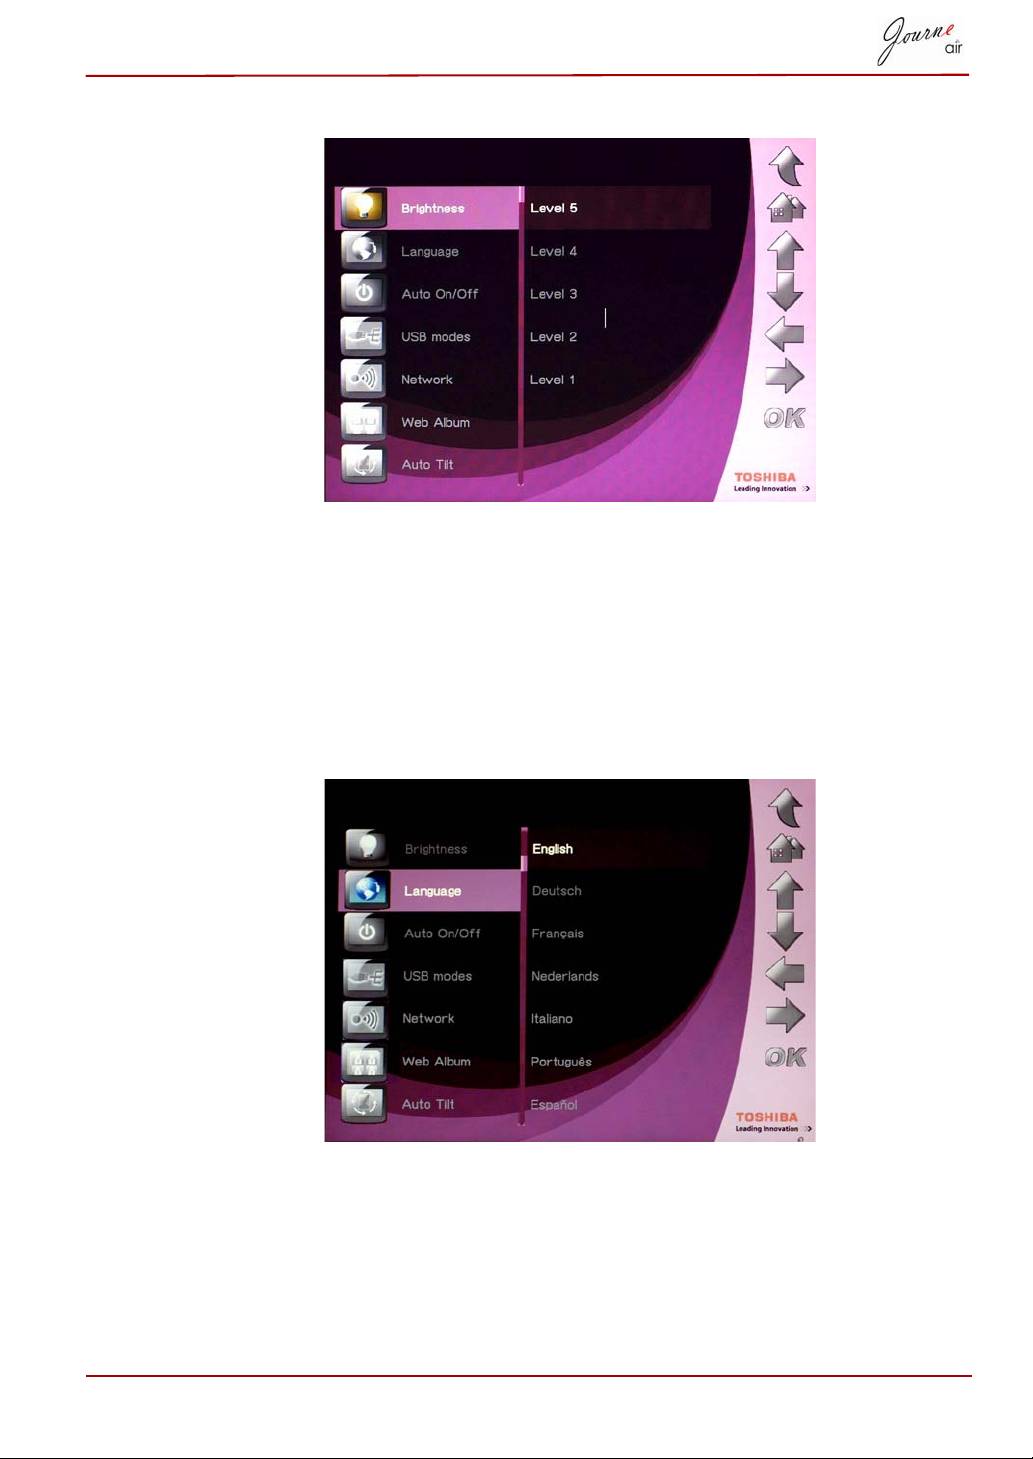
Language
Use this option to choose the menu language of the digital frame.
1. Select Language and press OK.
2. Press Up and Down to select your preferred language.
3. Press OK to confirm your selection. The new setting will be effective
immediately.
User’s Manual EN-41
Network
You must connect to the network to download photos from Flickr and
Picasa. Once you have created new accounts and activated them, you
must select a network setting for the digital frame before you can begin
downloading.
You may need to change the network setting in different
regions for the best connection speed.
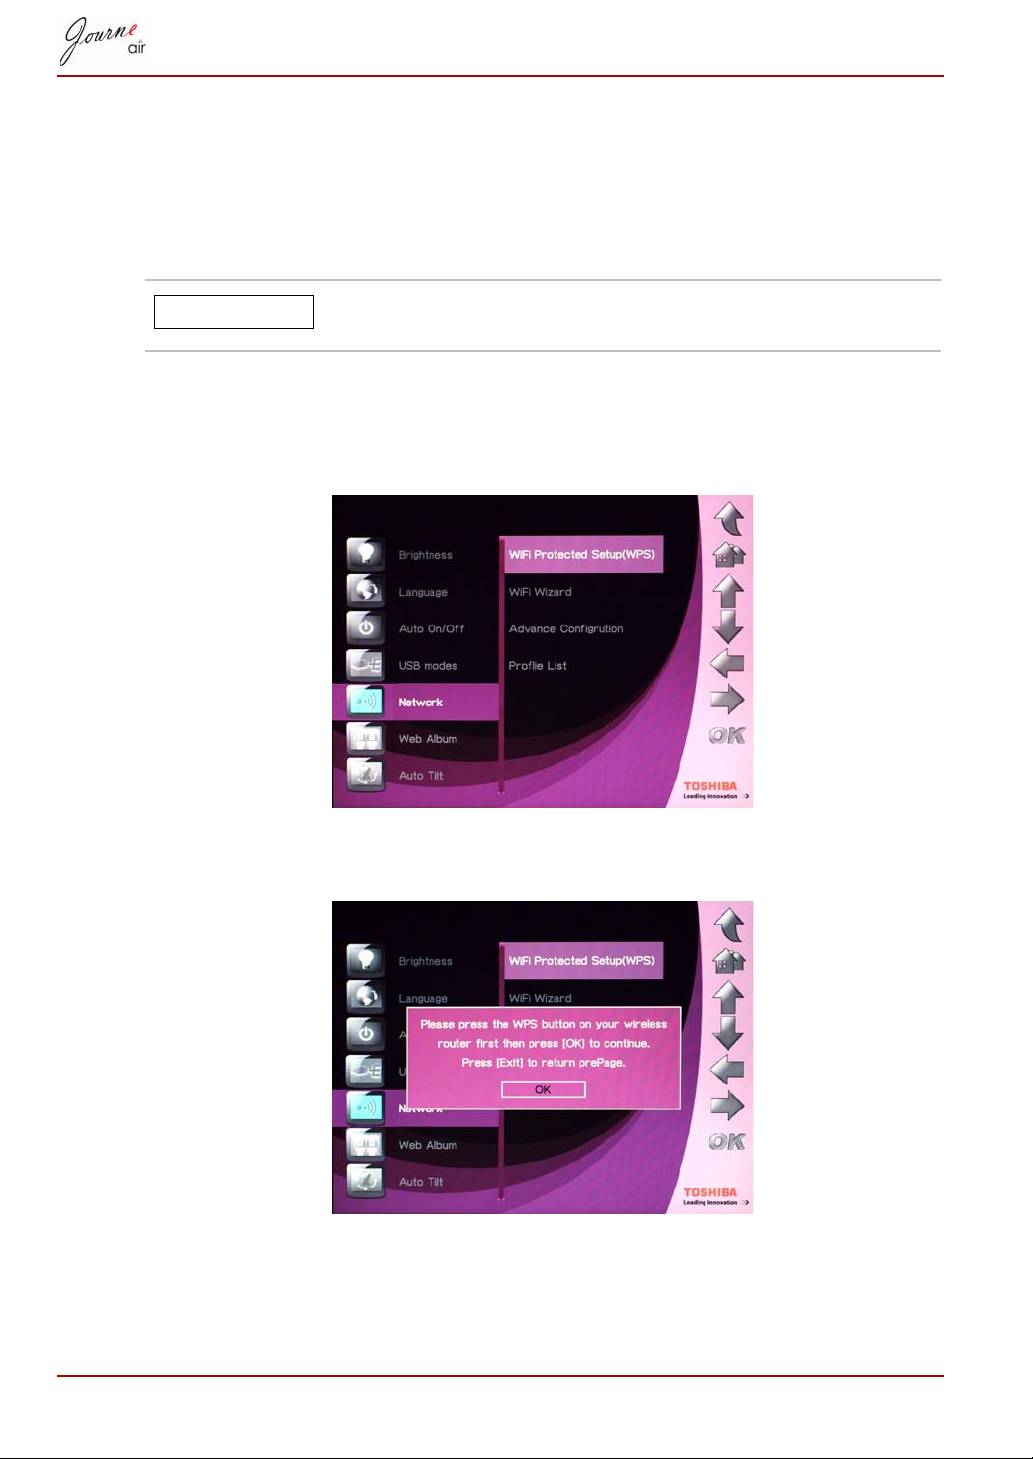
WPS
Wi-Fi Protected Setup (WPS) is the easiest way to connect to the network.
1. Select Wi-Fi Protected Setup (WPS) and press OK.
2. Press the “WPS” button on your wireless router, and then press OK to
continue.
3. Press Exit to return to the previous page.
EN-42 User’s Manual
NOTE
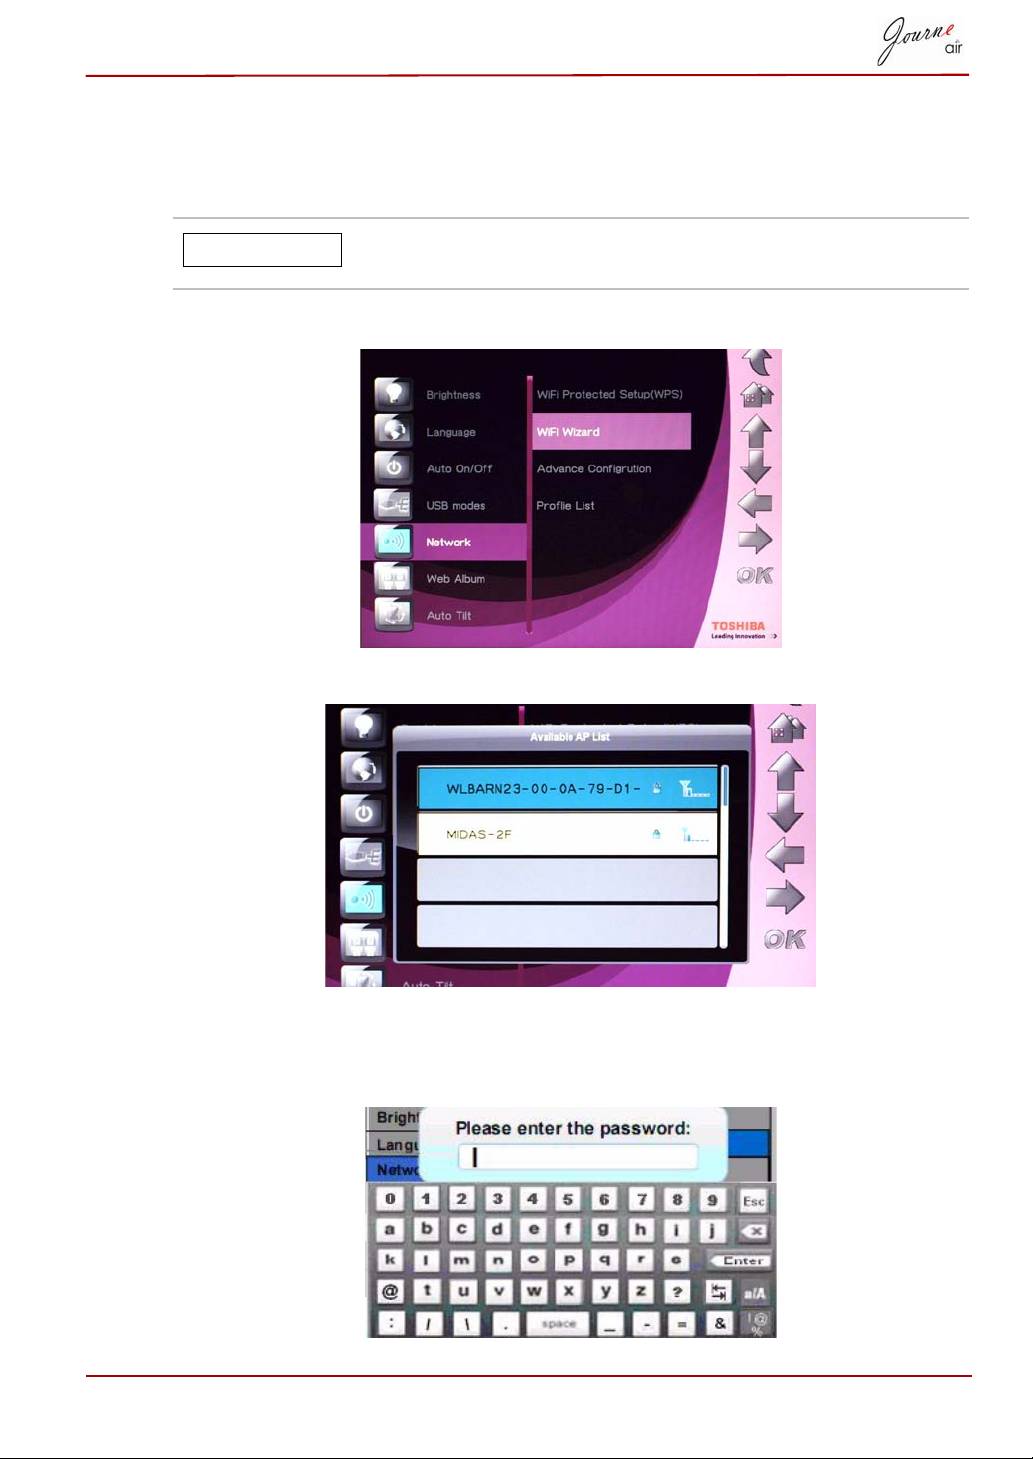
Wi-Fi Wizard
Use Wi-Fi wizard to detect and connect to wireless routers in your area.
Available routers are prioritized by security level and signal strength.
Secured routers are indicated by the lock symbol. You
must enter a password to access these routers.
1. Select Wi-Fi Wizard and press OK.
2. Press Up or Down to select your preferred router.
3. Press OK to confirm your selection.
4. Enter the password for a secured router. The router automatically
connects if no password is needed.
User’s Manual EN-43
NOTE
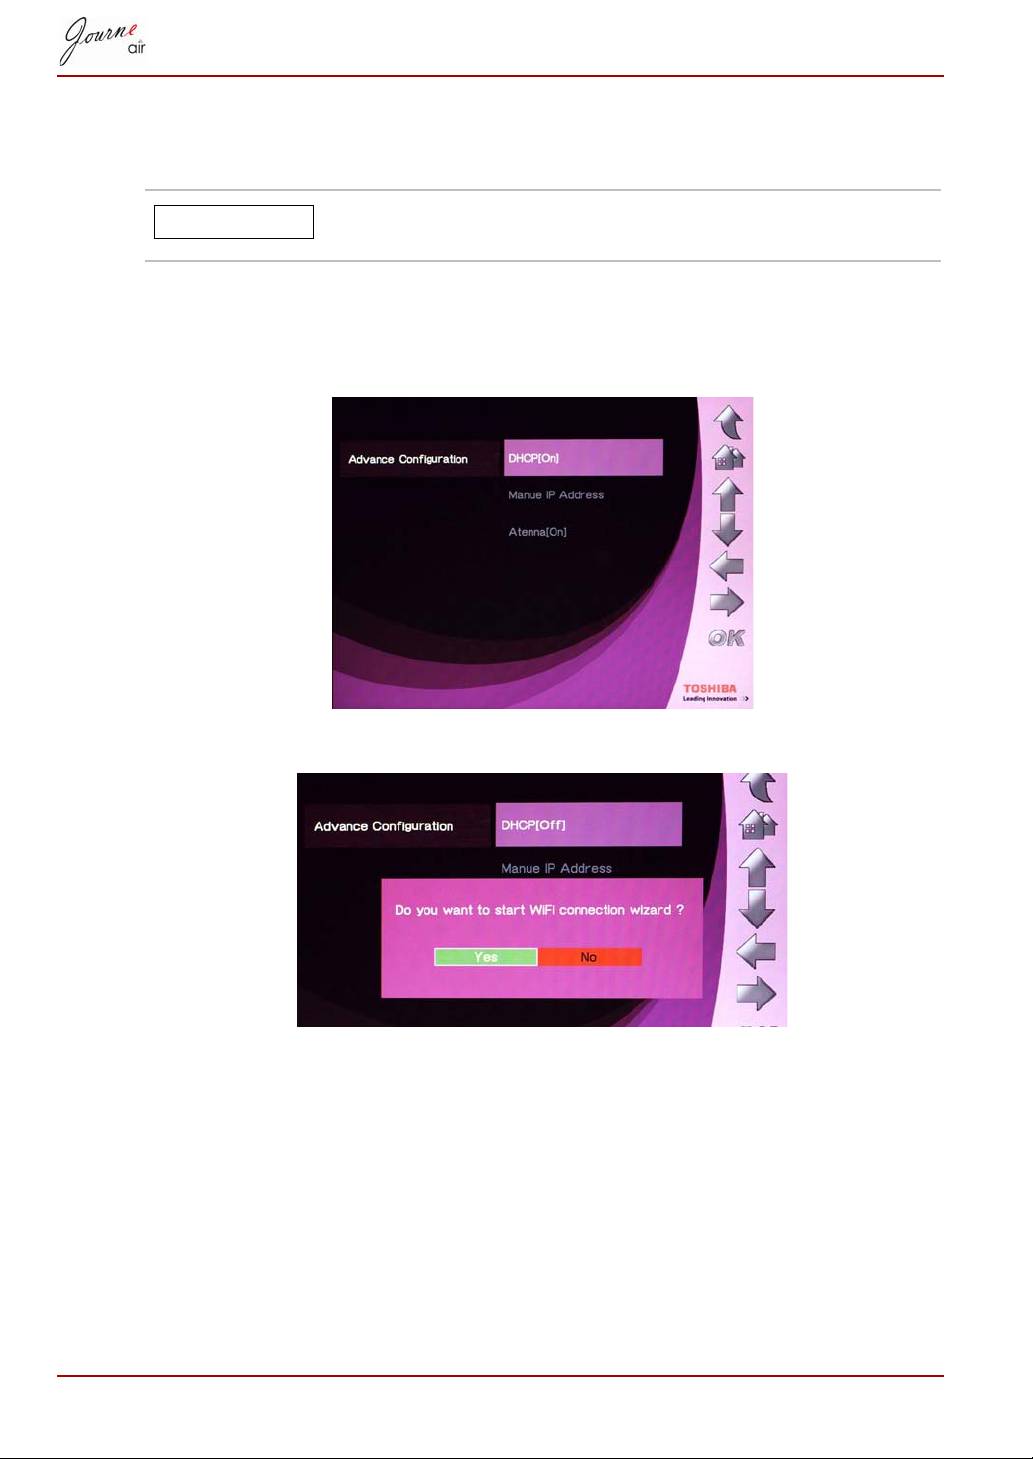
Advance Configuration
Use Wi-Fi Advance Configuration for customized settings.
The battery drains more quickly when the antenna is set
to [On]. To conserve battery power, turn the antenna off.
To use DHCP:
1. Select Advance Configuration and press OK.
2. Select DHCP and press OK.
3. Select Yes and press OK.
4. Please refer to Wi-Fi Wizard.
To configure settings manually:
1. Select Advance Configuration and press OK.
2. Select Manual IP Address and press OK.
EN-44 User’s Manual
NOTE
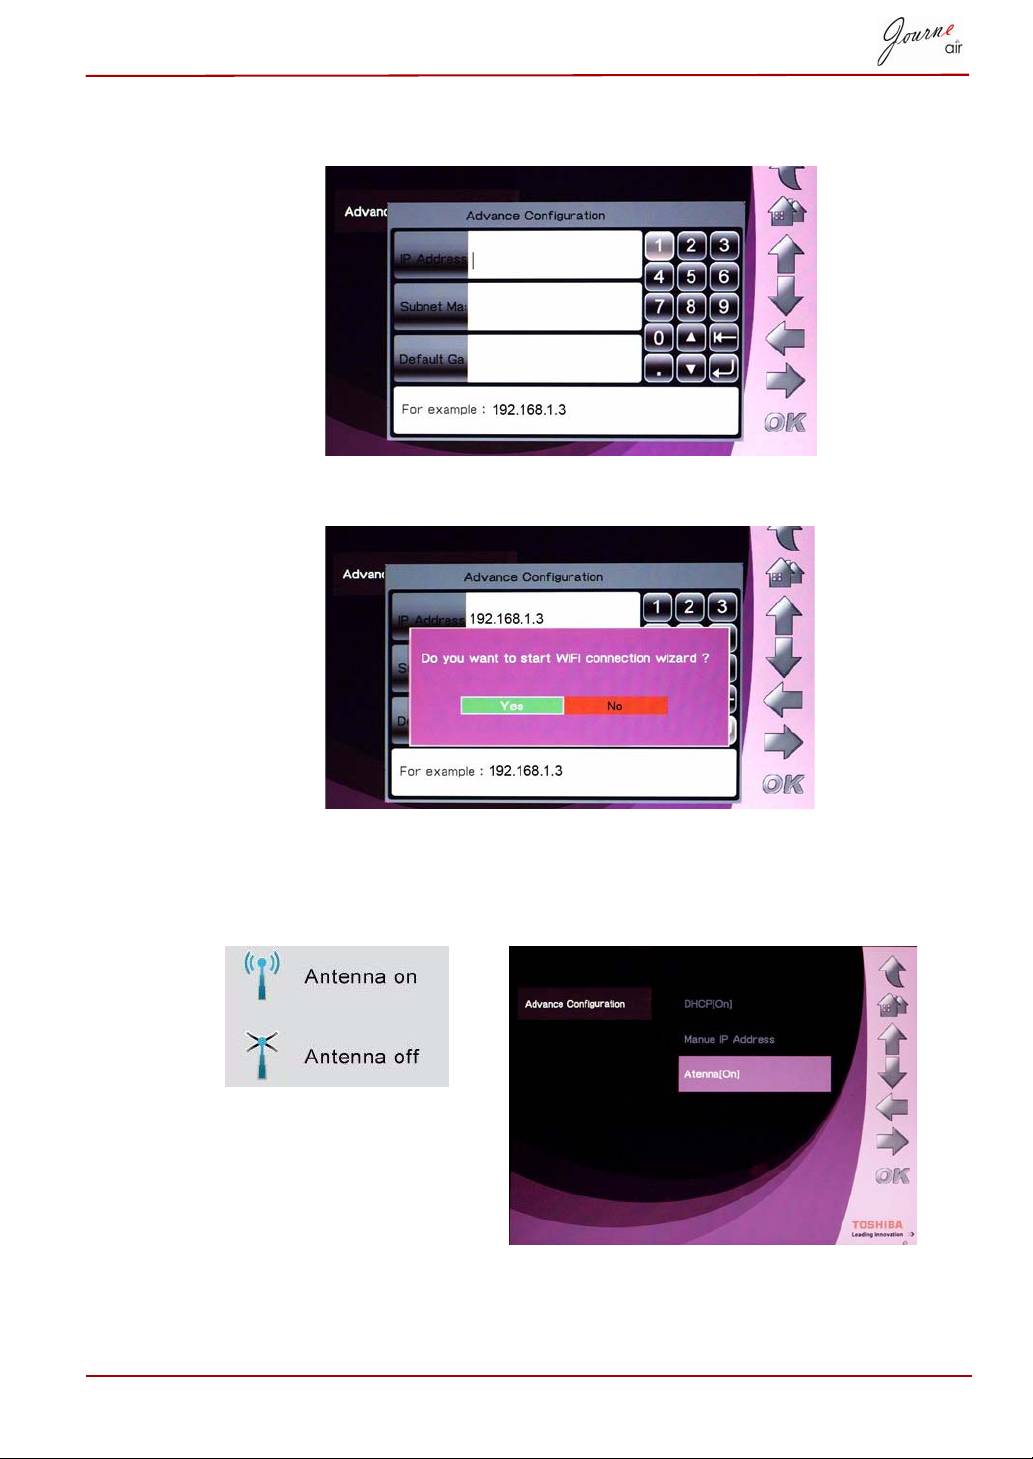
3. Enter the IP address, subnet mask, and default gateway. Examples are
given.
4. Select Yes and press OK. Please refer to Wi-Fi Wizard.
To turn the antenna on and off:
1. Select Advance Configuration and press OK.
2. Select Antenna and press OK.
User’s Manual EN-45
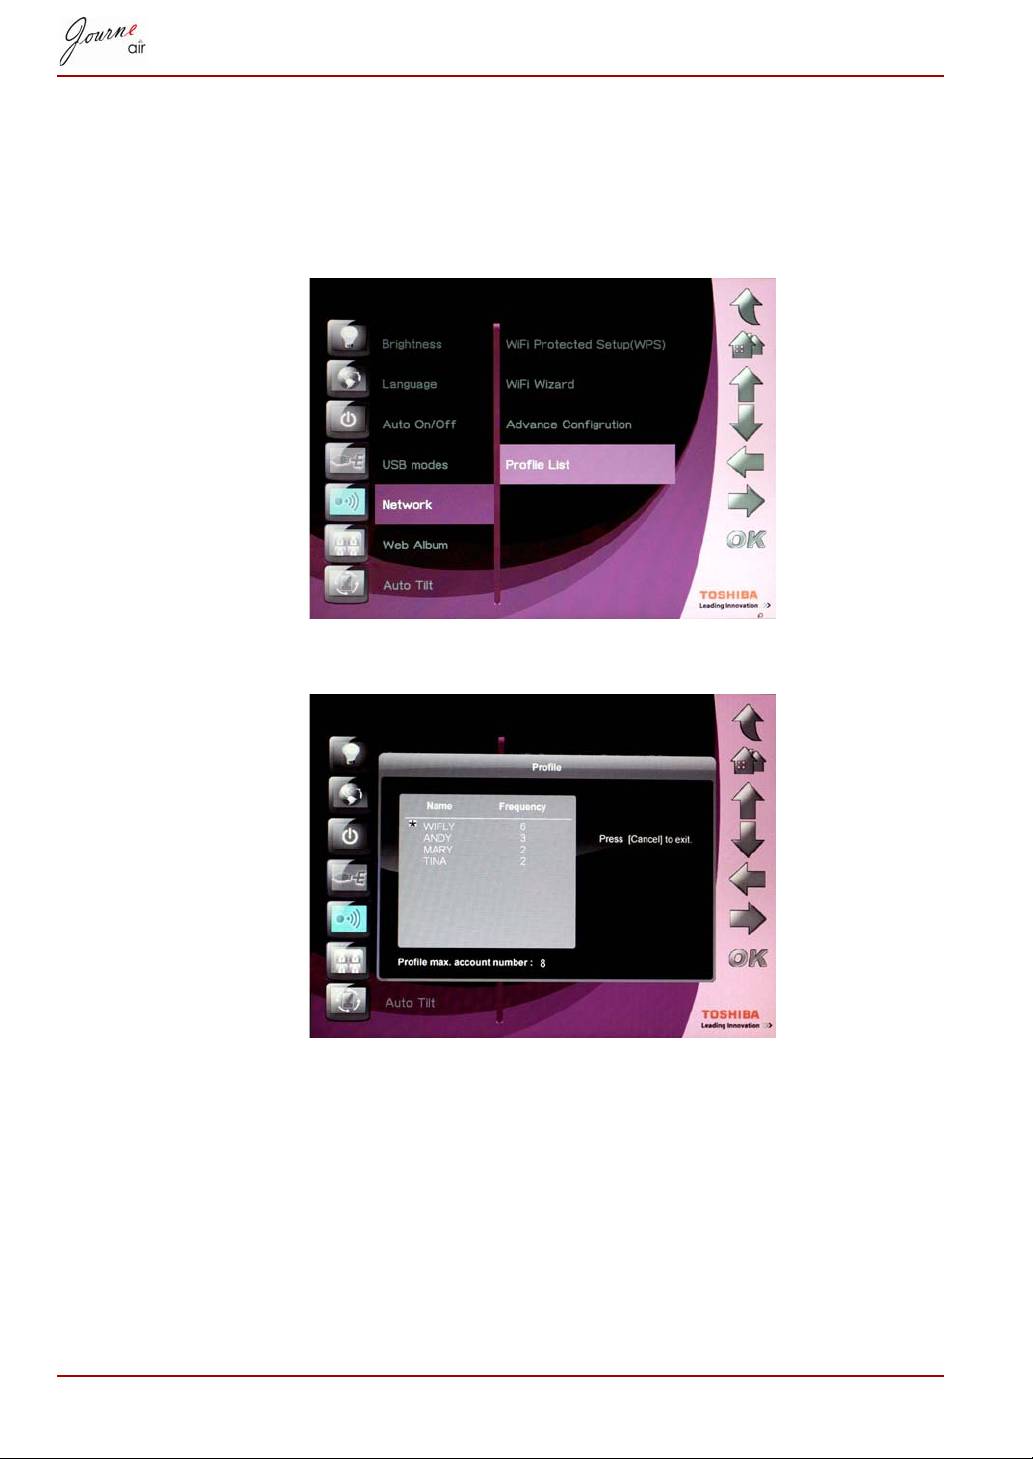
Profile List
Wireless connections you have previously used are stored in the profile list.
They are sorted by frequency, and the current wireless connection setting
is indicated by an asterisk. A maximum of eight profiles can be stored here.
1. Select Profile List and press OK.
2. Press Cancel to exit.
EN-46 User’s Manual
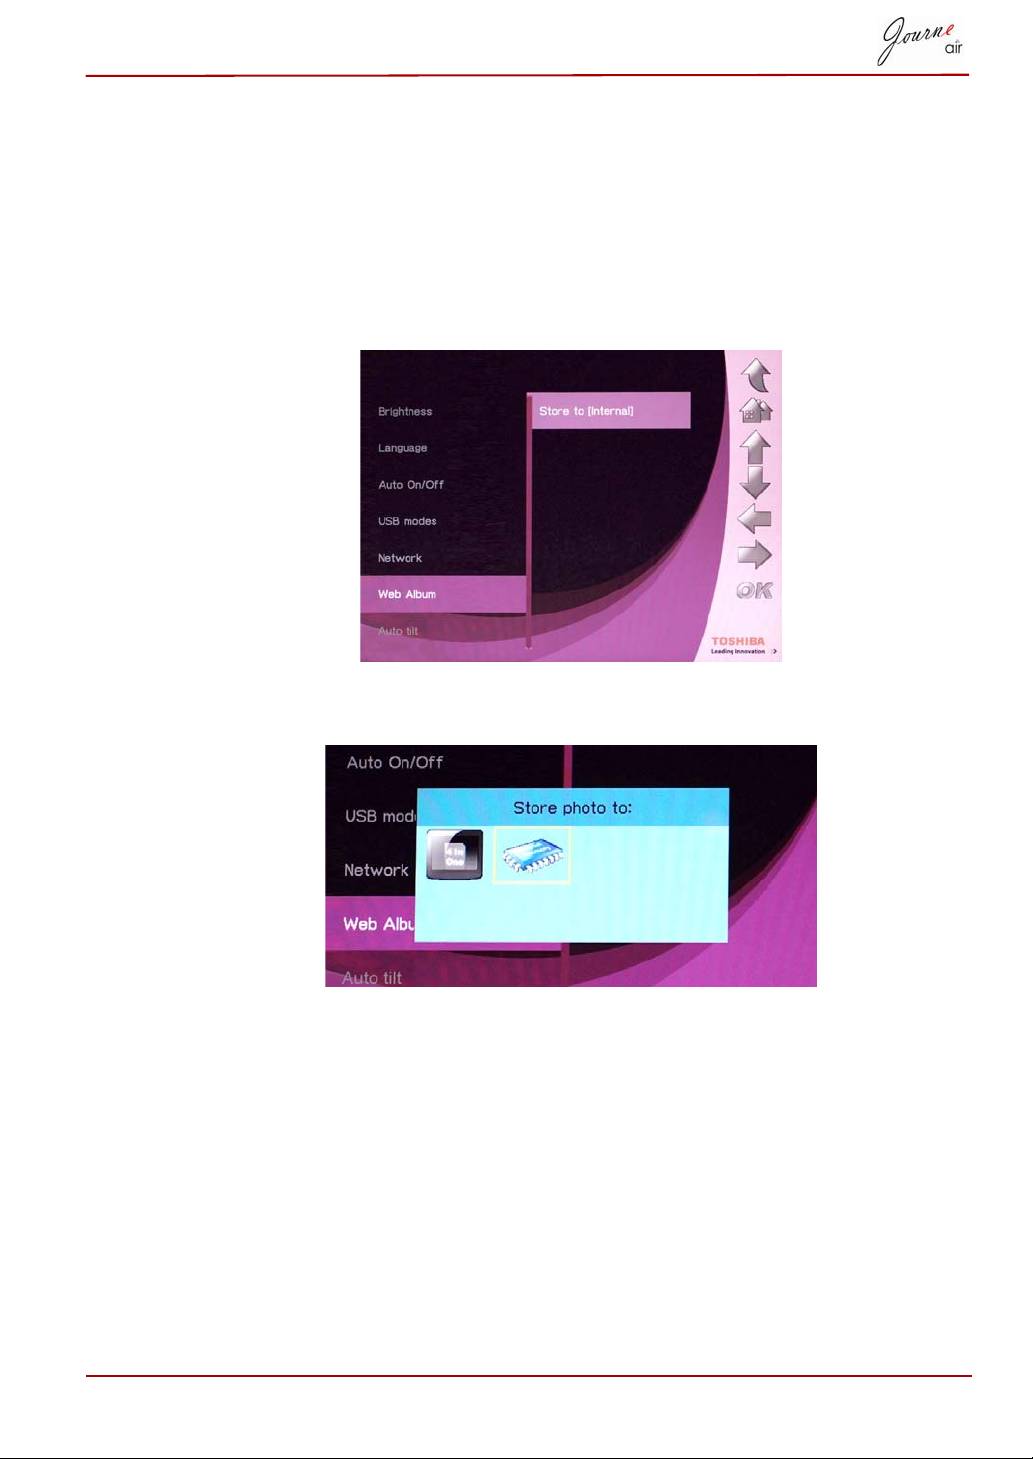
Web Album
Store to
Photos you download from Flickr and Picasa are stored to the internal
memory by default. Use this function to select another path.
1. Select Web Album Setting and press OK.
2. Select Store to and press OK.
3. Press Left or Right to select the storage memory.
4. Press OK to confirm your selection.
User’s Manual EN-47
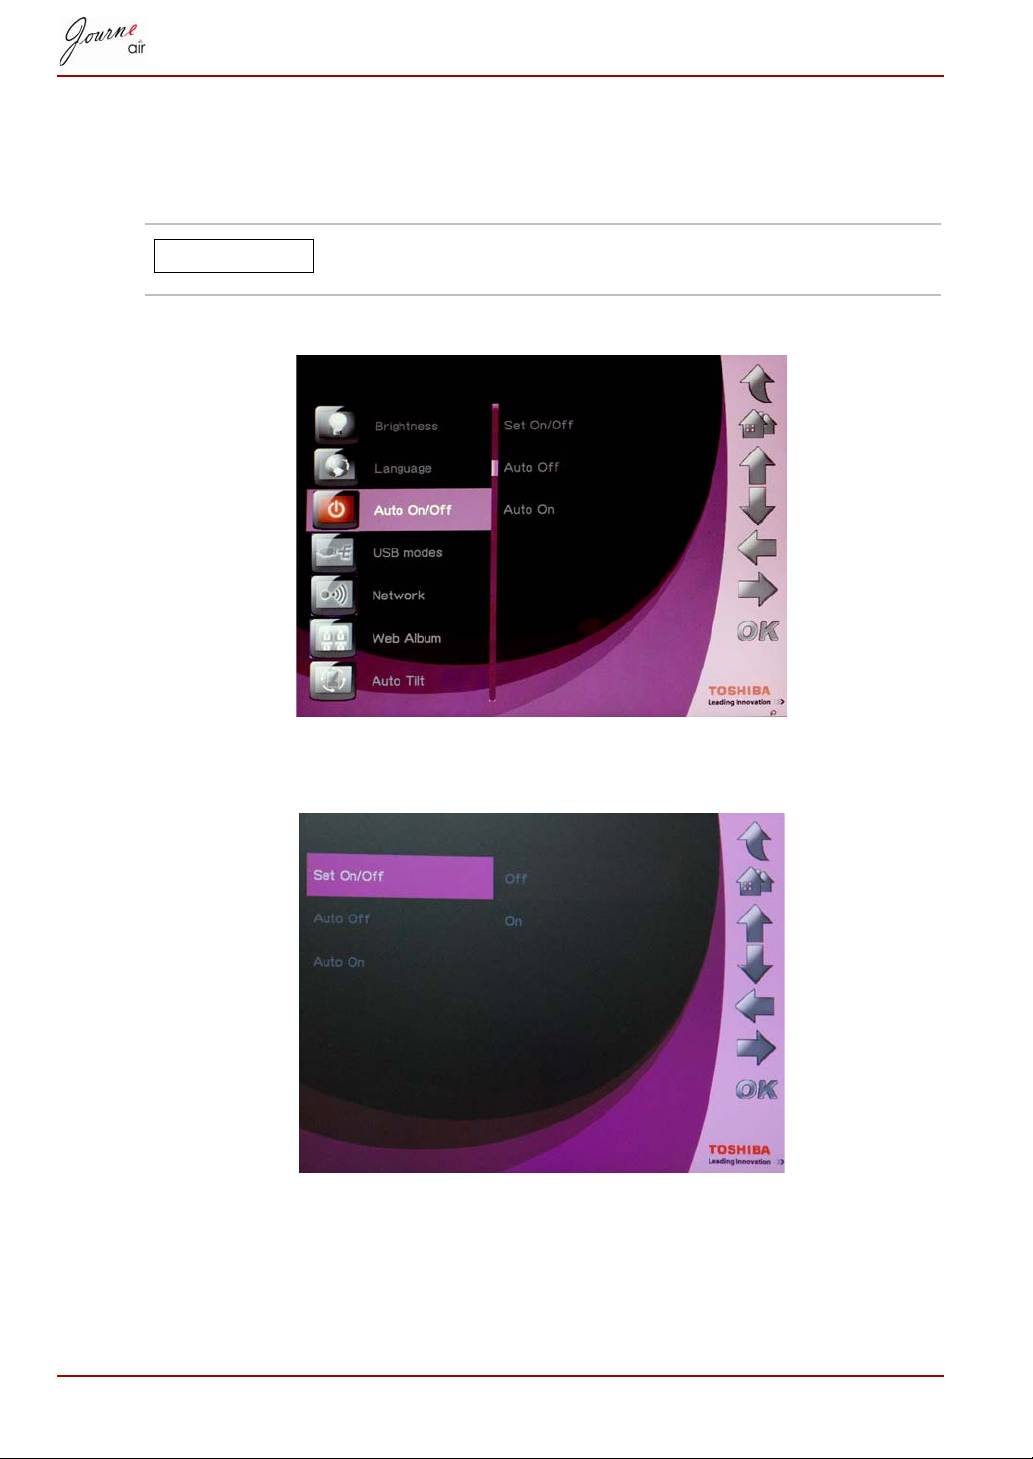
Timer Function (Auto On/Off)
Depending on your lifestyle and schedule, you may want to have the digital
frame automatically turn on and off for you.
Local time must be set correctly before setting up this
feature (see Time and Date Mode section).
1. Select Auto On/Off and press OK.
2. To turn on the timer, select Set On/Off and press OK, then select On
and press OK. Select Off and press OK to turn off the timer.
3. To set the Off time, select Auto Off and press OK.
4. Press Up and Down to select the time.
5. Press Left and Right to move between hours and minutes.
EN-48 User’s Manual
NOTE

6. When the time is set, press OK to confirm.
7. To set the On time, select Auto On and press OK.
8. Press Up and Down to select the time.
9. Press Left and Right to move between hours and minutes.
10.When the time is set, press OK to confirm.
User’s Manual EN-49
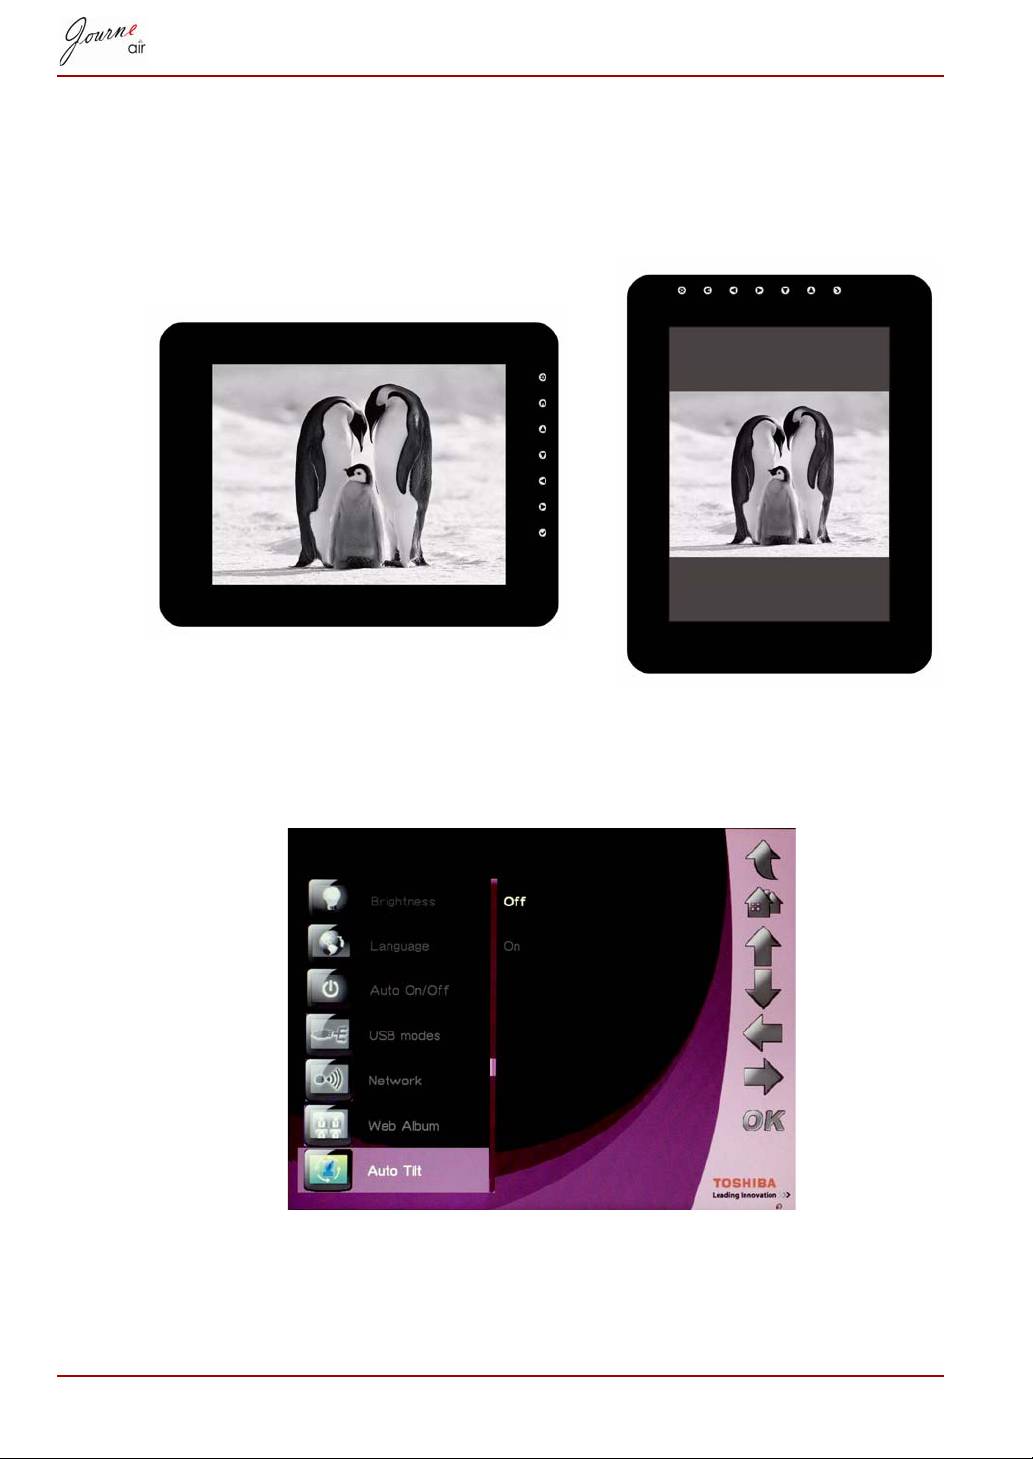
Auto Tilt
The digital frame has a built-in tilt sensor that allows the photo frame to
determine its own orientation relative to gravity and thereby automatically
switch from displaying pictures vertically to displaying pictures horizontally.
To activate the Auto Tilt function:
1. Select Auto Tilt and press OK.
2. Select On and press OK to confirm.
EN-50 User’s Manual

Auto Light
The digital frame has a built-in light sensor that can automatically turn on/
off the panel display when the ambient lights in a room are turned on/off.
To activate the Auto Light function:
1. Select Auto Light and press OK.
2. Select On and press OK to confirm.
User’s Manual EN-51
when lights in a room are turn on
when lights in a room are turn off
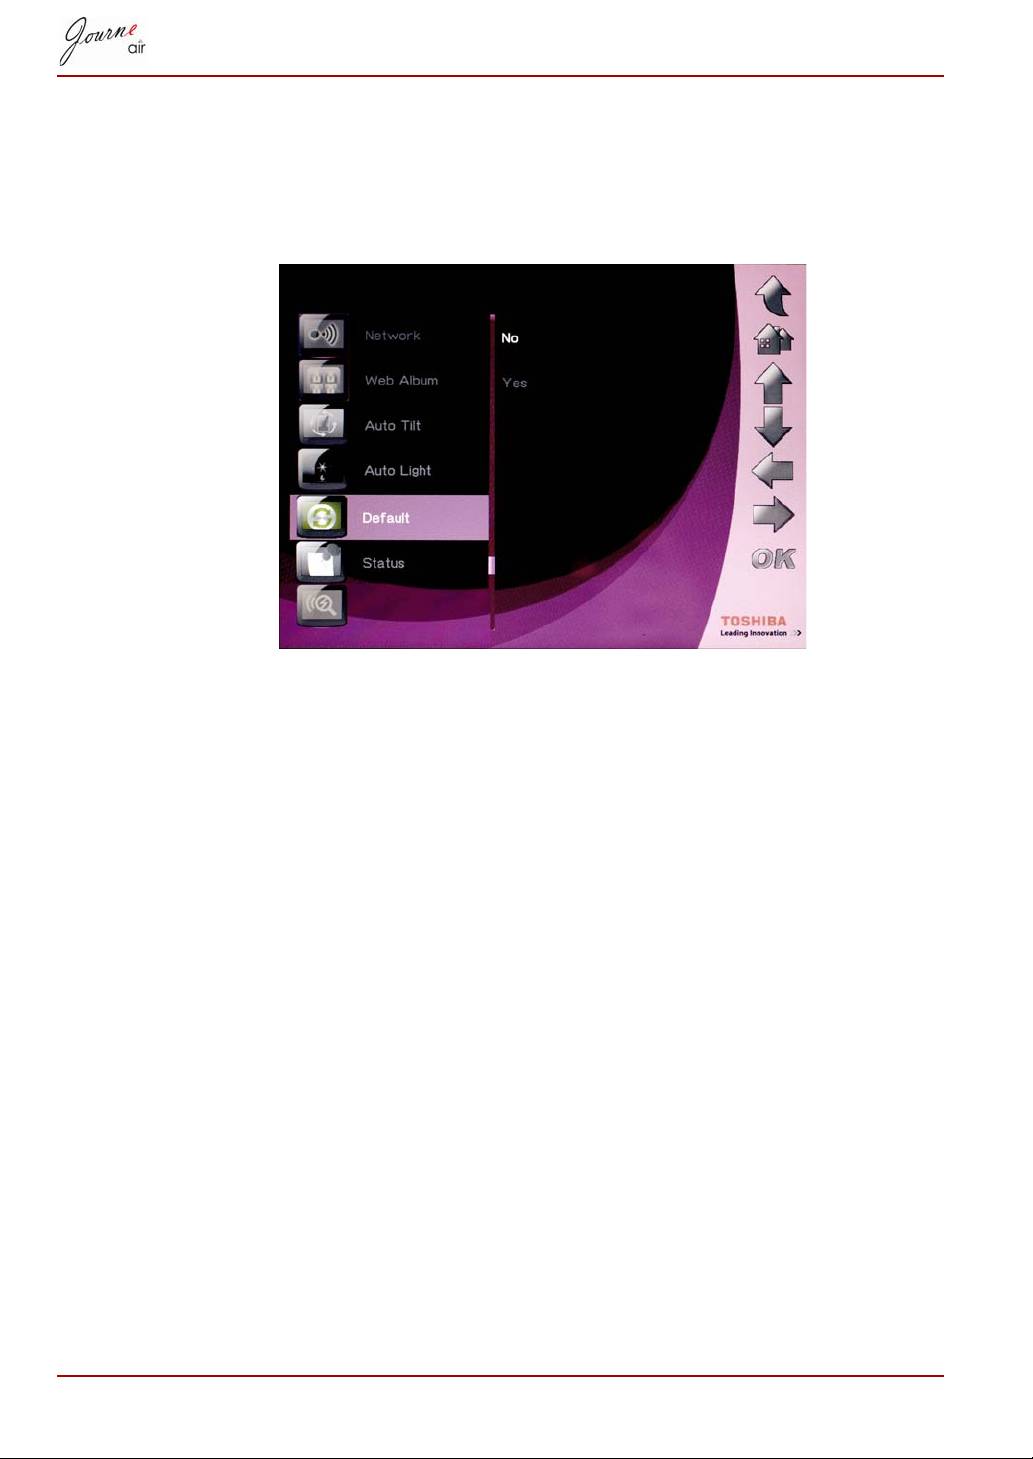
Restore to Default Settings
To restore the settings of the digital frame to default settings:
1. Select Default and press OK.
2. Select Yes and press OK to confirm.
USB Mode
During a USB connection, the default setting for your digital frame is mass
storage mode. If set to other modes, the digital frame returns to the default
setting when the USB cable connection ends. You can select between
mass storage mode, Sub View mode, and PictBridge Print mode.
Mass Storage
Select this mode to store and retrieve pictures and data on the digital
frame. To set the digital frame to mass storage mode:
1. Select USB Mode and press OK.
2. Select Mass Storage and press OK. The digital frame will now be
recognized as a USB mass storage device.
Sub View
Select this mode to use the digital frame as a second monitor for your PC.
To set the digital frame to Sub View mode:
1. Install the Sub View software from the software CD into your PC.
2. In the digital frame main menu, select Settings and press OK.
EN-52 User’s Manual
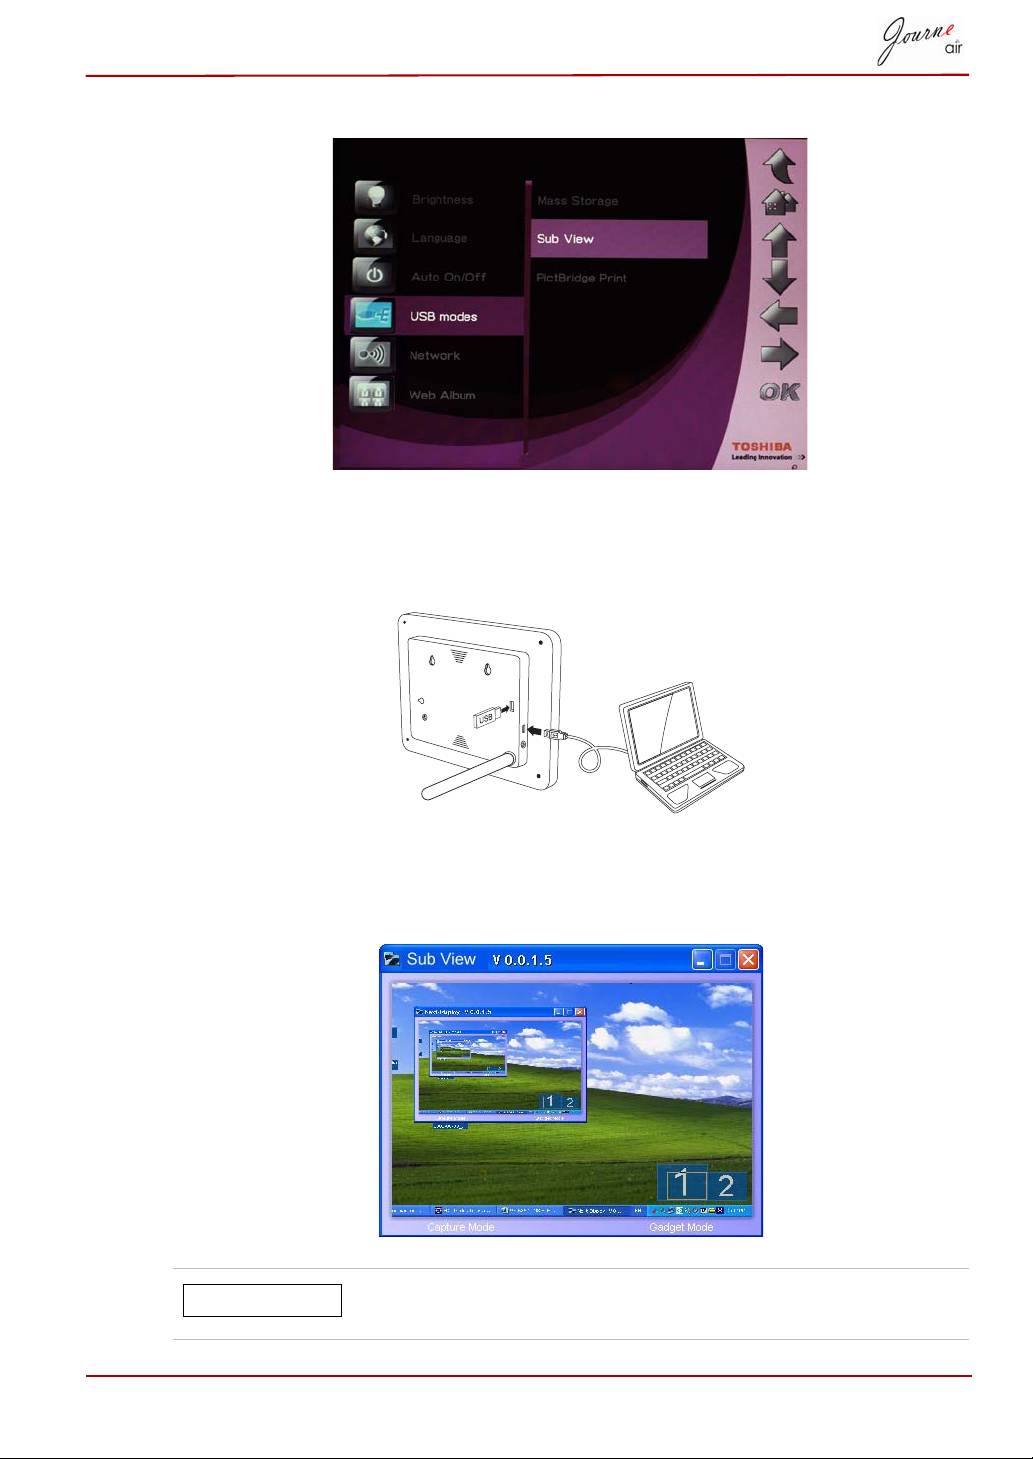
3. Select Sub View and press OK.
4. Select On and press OK. Now the digital frame is in Sub View mode and
is not operable.
5. Connect the digital frame to your PC with the supplied USB cable.
6. Launch the Sub View software installed on your PC.
7. The Sub View window will pop, displaying the current screen view in the
digital frame.
In the Sub View mode the digital frame has two display
modes: Extended mode and Clone mode.
User’s Manual EN-53
NOTE
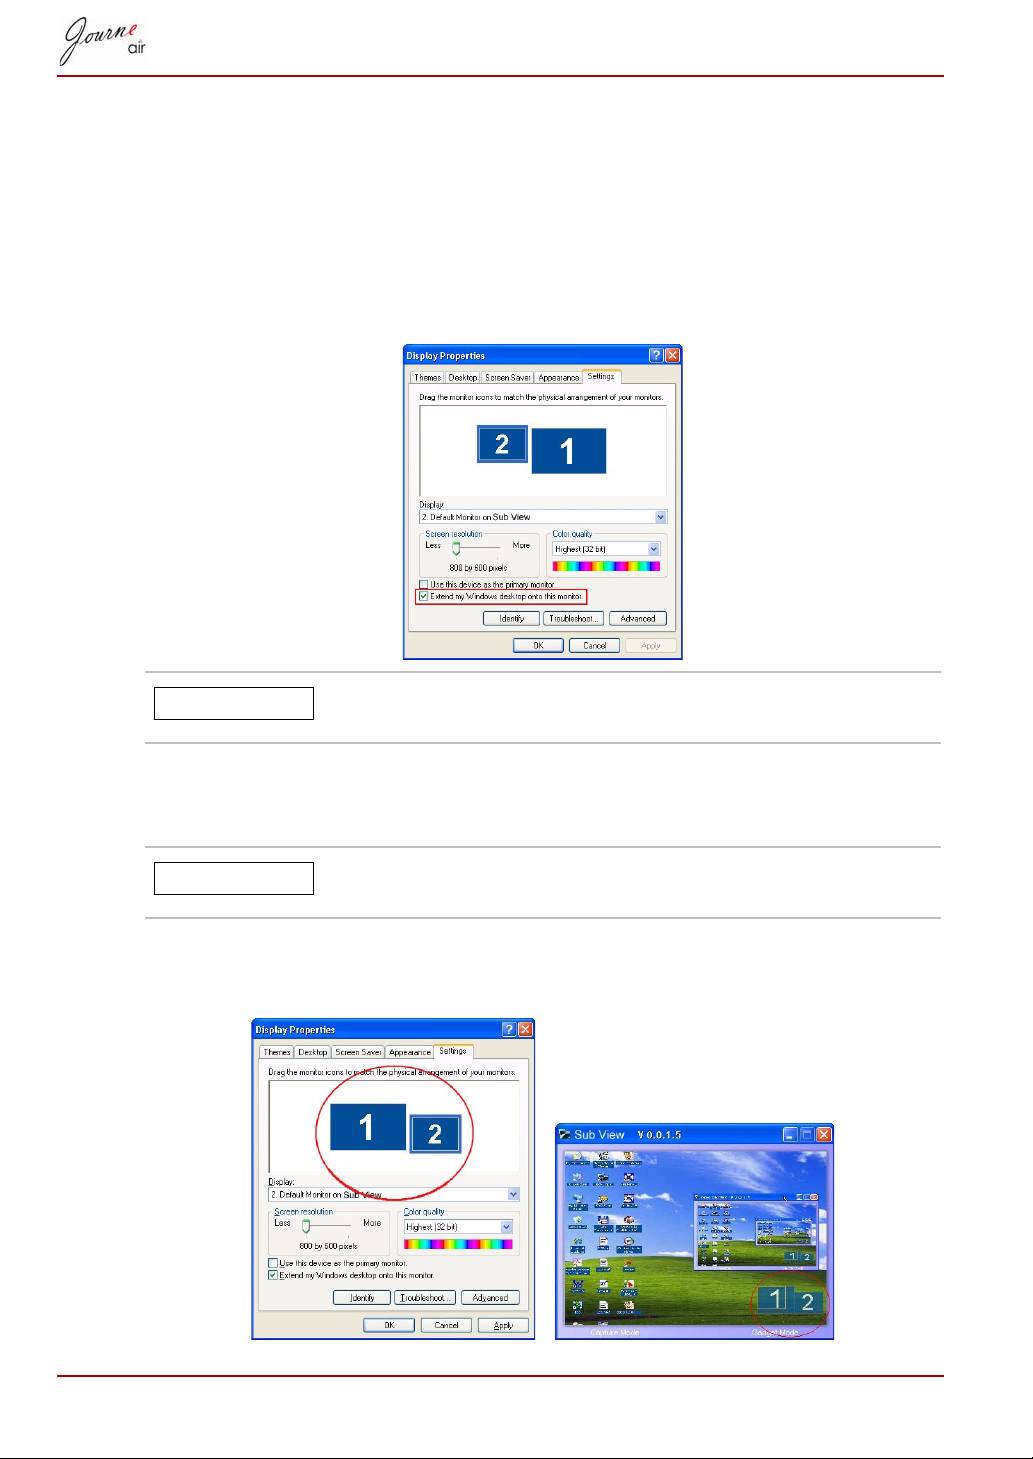
To set the digital frame to Extended mode:
1. Right click on the desktop, and select Properties from the menu.
2. In the Display Properties panel, select Settings tab.
3. Under the Display dropdown menu, select 2. Default Monitor on Sub
View.
4. Check the option Extend my Windows desktop onto this monitor at
the bottom of the Settings tab.
In Extended mode, the digital frame screen becomes an
extension of your desktop.
To set the digital frame to Clone mode:
n Uncheck the Extend my Windows desktop onto this monitor option.
In Clone mode the screen of the digital frame displays
the same screen as that displayed on your PC monitor.
In the Settings tab, you can drag the monitor icons to match the physical
arrangement of your monitors.
EN-54 User’s Manual
NOTE
NOTE

In the bottom right corner of the Sub View window, there are two blue
rectangles; these represent the range of the PC monitor and the digital
frame. There is also a white rectangle superimposed on the blue one. It
represents the visible range of the digital frame; and you can move and
resize the display with this.
To display a playing video file on the digital frame, you have to set the
digital frame as the primary monitor.
1. Right click on the desktop, and select Properties from the menu.
2. In the Display Properties panel, select Settings tab.
3. In the Display: dropdown menu, select 2. Default Monitor on Sub
View.
4. Check the option Use this device as the primary monitor at the
bottom of the Settings tab.
In Windows Vista, Sub View can move all the gadgets on the desktop to the
digital frame. To do this, just click Gadget Mode on the bottom of the Sub
View window.
User’s Manual EN-55

PictBridge Print
Select this mode to print photos directly from your digital frame. To set the
digital frame to PictBridge Print mode:
1. Select USB Mode and press OK.
2. Select PictBridge Print and press OK. You can now connect to a printer
using the USB cable.
Status Information
Select Status to check the status of the digital frame. The status information
includes firmware version, free space of internal memory and other storage
devices.
EN-56 User’s Manual
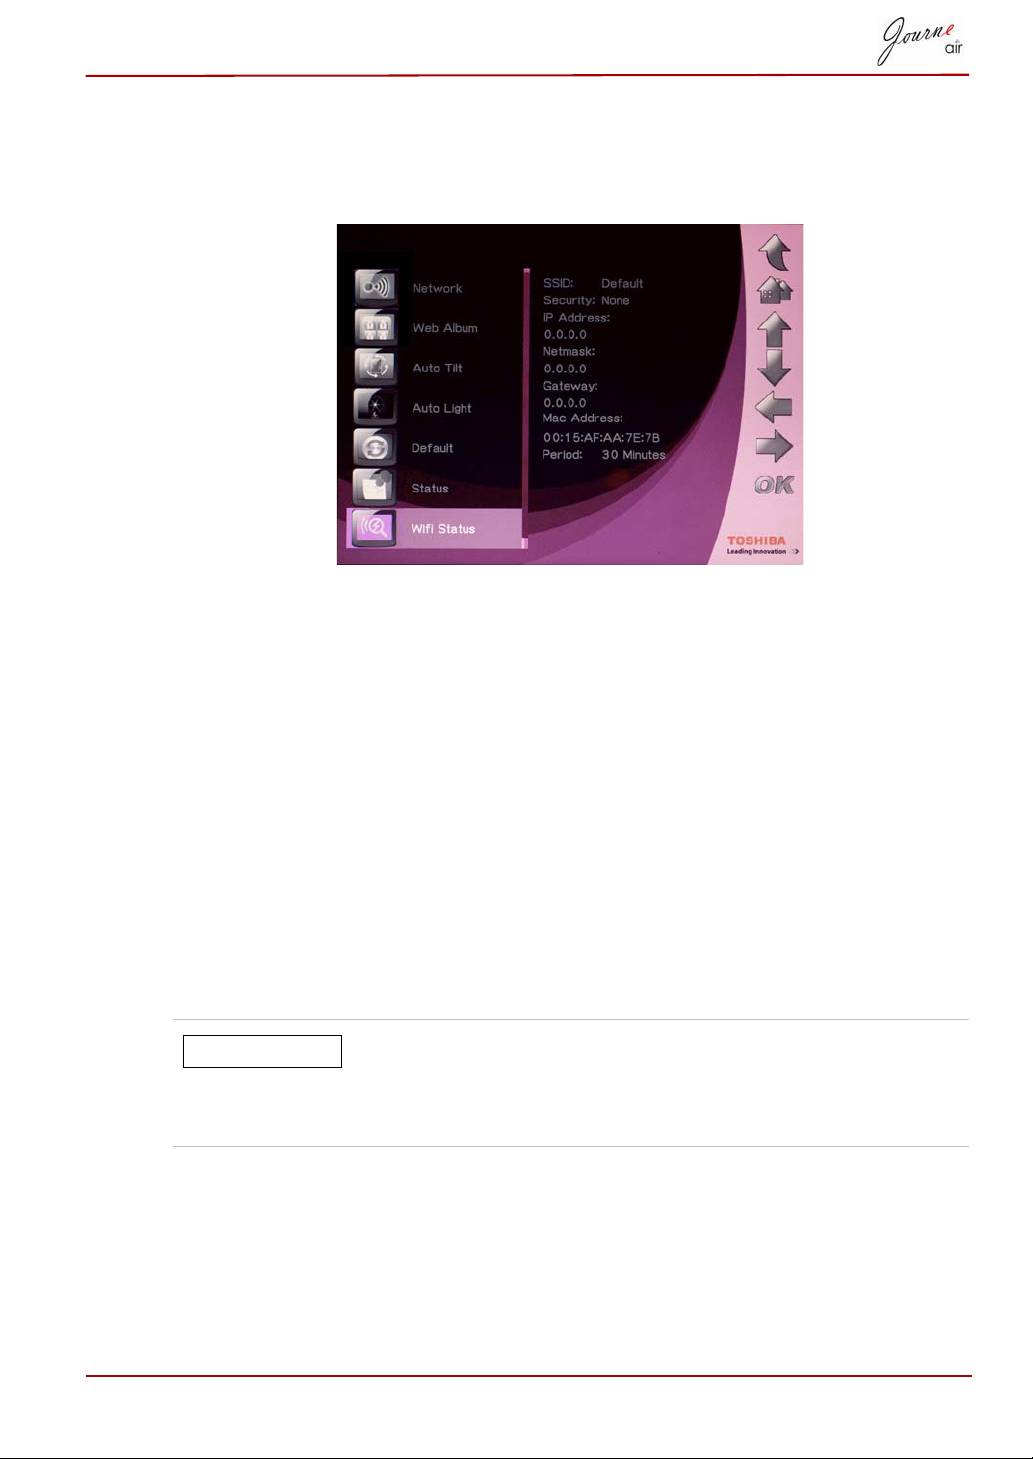
Wi-Fi Status Information
Select Wi-Fi Status to view the status of the Wi-Fi connection. The Wi-Fi
status information includes network, security, and gateway details.
Firmware Upgrade
To upgrade the firmware of the digital frame:
1. Visit www.computers.toshiba.europe.com to download the latest
firmware, and save the firmware in your memory card.
2. Turn off the digital frame, and insert the memory card.
3. Turn on the digital frame.
4. When the digital frame is on it will search the memory card
automatically. If the firmware in the memory card is detected, the digital
frame will upgrade the firmware automatically.
5. After the upgrade is finished, unplug the memory card and then the
digital frame will reboot automatically, and the upgrade is complete.
After firmware is upgraded, delete the firmware file in the
memory card. If the file is not deleted and the memory
card is inserted in the digital frame, the digital frame will
execute upgrade again every time it is turned on.
User’s Manual EN-57
NOTE

Supported Video Format
AVI MOV AVI MOV
Motion JPEG - <DSC> Yes Yes H.264 - < DV > No No
MPEG1 - <VCD> Yes Yes H.263 - < Mobile > Yes Yes
MPEG1 - <SVCD> Yes Yes H.263 + Yes Yes
MPEG2 - < DVD> Yes Yes WMV - < PC >
MPEG4 - < DV > Yes Yes
Frequently Asked Questions
Q: After copying photos, how can I check if the photos are already stored
inside?
A: Your frame will display “photos copied” on the screen after all photos
have been transferred. You can view transferred photos with the thumbnail
function.
Q: Can I switch between different photo slideshows by using different
memory cards?
A: Yes, the digital photo frame will show the slideshow photos stored in the
card currently connected.
Q: Can I use the digital photo frame to delete photos on memory card?
A: Yes, photos on external devices can be deleted through the digital photo
frame.
TOSHIBA Support
Need help?
For the latest driver updates, user manuals & FAQs please have a look at
the TOSHIBA options & services support page:
computers.toshiba.eu/options-support
Please see computers.toshiba.eu/options-warranty
for the TOSHIBA hotline numbers.
EN-58 User’s Manual

Regulatory statements
CE Compliance
This product is CE marked in accordance with the requirements of the
applicable EU Directive (1999/05/EC, R&TTE). Responsible for CE-
marking is Toshiba Europe GmbH, Hammfelddamm 8, 41460 Neuss,
Germany. A copy of the official Declaration of Conformity can be obtained
from the following website:
http://epps.toshiba-teg.com
Indication of the countries
This device is for use in:
AT, BE, CZ, CY, DK, EE, FI, FR, DE, EL, HU, IE, IT, LV, LT, LU, MT, NL,
PL, PT, SK, SI, ES, SE, UK, IS, NO, CH, LI
Indication of restrictions of use
France Outdoor use limited
Military Radiolocation use. Refarming of the
to 10m W.e.i.r.p.
2.4GHz has been ongoing in recent years to
within the band
allow current relaxed regulation. Full
2454-2483.5 MHz
implementation planned 2012.
Italy - If used outside of own premises general
authorization is required.
Luxembourg None General authorization required for network and
for service supply (not for spectrum).
Norway Implemented This subsection does not apply for the
geographical area within a radius of 20km from
the centre of Ny-Ålesund.
Russian
- Only for indoor applications.
Federation
User’s Manual EN-59

Working Environment
The Electromagnetic Compliance (EMC) of this product has been verified
typically for this product category for a so called Residential, Commercial &
Light Industry Environment. Any other working environment has not been
verified by Toshiba and the use of this product in these working
environments is maybe restricted or cannot be recommended. Possible
consequences of the use of this product in non verified working
environments can be: Disturbances of other products or of this product in
the nearby surrounding area with temporarily malfunction or data loss/
corruption as result. Example of non verified working environments and
related advices:
Industrial environment (e.g. where 3-phase 380V mains is being used
mainly): Danger of disturbances of this product due to possible strong
electromagnetic fields especially near to big machinery or power units.
Medical environment: The compliance to the Medical Product Directive has
not been verified by Toshiba, therefore this product cannot be used as a
medical product without further verification. The use in usual office
environments e.g. in hospitals should be no problem if there is no restriction
by the responsible administration.
Automotive environment: Please search the owner instructions of the
related vehicle for advices regarding the use of this product (category).
Aviation environment: Please follow the instructions of the flight personnel
regarding restrictions of use.
Additional environments not related to EMC
Outdoor use: As a typical home/office equipment this product has no
special resistance against ingress of moisture and is not strong shock
proofed.
Explosive atmosphere: The use of this product in such special working
environment (Ex) is not allowed.
EN-60 User’s Manual
