Toshiba JournE album: instruction
Class: Photo and Video Accessories
Type:
Manual for Toshiba JournE album
Table of contents
- Table of Contents
- Conventions
- Introduction Checking the components
- Safety Instructions Do not disassemble, modify, tamper with or repair your product Handling the AC adaptor and power cables/cords or plugs Attaching the power cable/cord
- Dust on the power plug connectors or connector base Only use TOSHIBA AC adaptor Use correct power source Only use approved power cables/cords Do not handle the power plug with wet hands Choking hazards
- Avoid liquids, moisture and foreign objects Never place your product or AC adaptor on a heat sensitive surface Never place your product in a damp environment Use the LCD correctly
- Never place your product in locations with excess heat Never place your product in a location with extremely low temperatures Never subject your product to sudden temperature variations Never operate your product during a thunderstorm System Requirements
- The Grand Tour Front View Bottom View
- Side View
- Getting Started Positioning the Unit Connecting to AC Power Turning on the Digital Album
- Built-in battery
- Inserting/Removing a Memory Card Inserting a Memory Card: Removing a Memory Card
- USB Connection
- Understanding the Menu Icons
- Basic Operations Photo Mode
- To rotate the photo, press the OK button on the album.
- Slide Show
- To listen to the background music during a slide show, press the volume Up button to turn on the music and volume. To pause the music, press the Volume Down button repeatedly until the sound is off.
- Video Mode
- Copying and Deleting Files Copying Files from Memory Cards to an Album Copying Files from a PC to an Album
- Deleting Files in an Album Setup Theme Style
- Screen Brightness Language
- Date/Time Auto Shutdown Timer
- Status Firmware Upgrades
- Supported Formats
- Frequently Asked Questions Specifications
- TOSHIBA Support Copyright Statement Disclaimer Trademarks
- Regulatory Statements
- Additional Environments not Related to EMC Following information is only for EU-member states:
- Disposal of Batteries and/or Accumulators

User’s Manual
CZ
RS
FR
RU
GR
SK
HR
SL
HU
TR
PL
AR

User’s Manual
Table of Contents
Table of Contents ......................................................................................2
Conventions...............................................................................................4
Introduction................................................................................................5
Checking the components........................................................................5
Safety Instructions ....................................................................................6
System Requirements...............................................................................9
The Grand Tour........................................................................................10
Front View ............................................................................................10
Bottom View .........................................................................................10
Side View..............................................................................................11
Getting Started.........................................................................................12
Positioning the Unit...............................................................................12
Connecting to AC Power ......................................................................12
Turning on the Digital Album ................................................................12
Built-in battery.......................................................................................13
Inserting/Removing a Memory Card.....................................................14
Inserting a Memory Card:................................................................14
Removing a Memory Card...............................................................14
USB Connection ...................................................................................15
Understanding the Menu Icons.............................................................16
Basic Operations .....................................................................................17
Photo Mode ..........................................................................................17
Slide Show.......................................................................................19
Video Mode ..........................................................................................21
Copying and Deleting Files.....................................................................22
Copying Files from Memory Cards to an Album...................................22
Copying Files from a PC to an Album ..................................................22
Deleting Files in an Album....................................................................23
Setup.........................................................................................................23
Theme Style .........................................................................................23
Screen Brightness ................................................................................24
Language..............................................................................................24
Date/Time .............................................................................................25
Auto Shutdown Timer ...........................................................................25
Status ...................................................................................................26
EN-2 User’s Manual

Firmware Upgrades.................................................................................26
Supported Formats .................................................................................27
Frequently Asked Questions..................................................................28
Specifications ..........................................................................................28
TOSHIBA Support....................................................................................29
Copyright Statement ...............................................................................29
Disclaimer ................................................................................................29
Trademarks ..............................................................................................29
Regulatory Statements ...........................................................................30
CE Compliance ....................................................................................30
Working Environment ...........................................................................30
Additional Environments not Related to EMC ......................................31
Following information is only for EU-member states: ...........................31
Disposal of Products .......................................................................31
Disposal of Batteries and/or Accumulators .....................................32
User’s Manual EN-3

Conventions
This manual uses the following formats to describe, identify, and highlight
terms and operating procedures.
Abbreviations
On first appearance, and whenever necessary for clarity, abbreviations are
enclosed in parentheses following their definition. For example: Read Only
Memory (ROM).
Icons
Icons identify ports, dials, and other parts of your product. The indicator
panel also uses icons to identify components.
Safety Icons
This guide contains safety instructions that must be observed to avoid
potential hazards that could result in personal injuries,damage to your
equipment, or loss of data. These safety cautions have been classified
according to the seriousness of the risk, and icons highlight these
instructions as follows:
Signal Words Meaning
Indicates an imminently hazardous situation which, if not
avoided, will result in death or serious injury.
Indicates a potentially hazardous situation which, if not
avoided, could result in death or serious injury.
Indicates a potentially hazardous situation which, if not
avoided, may result in minor injury or moderate injury.
Indicates a potentially hazardous situation which, if not
avoided, may result in property damage.
Provides important information.
EN-4 User’s Manual
DANGER
WARNING
CAUTION
CAUTION
NOTE
Introduction
Welcome and thank you for choosing a TOSHIBA product.
For your convenience, your TOSHIBA product is furnished with two guides:
n Quick Start Guide
n comprehensive User’s Manual (pre-installed on Journe album)
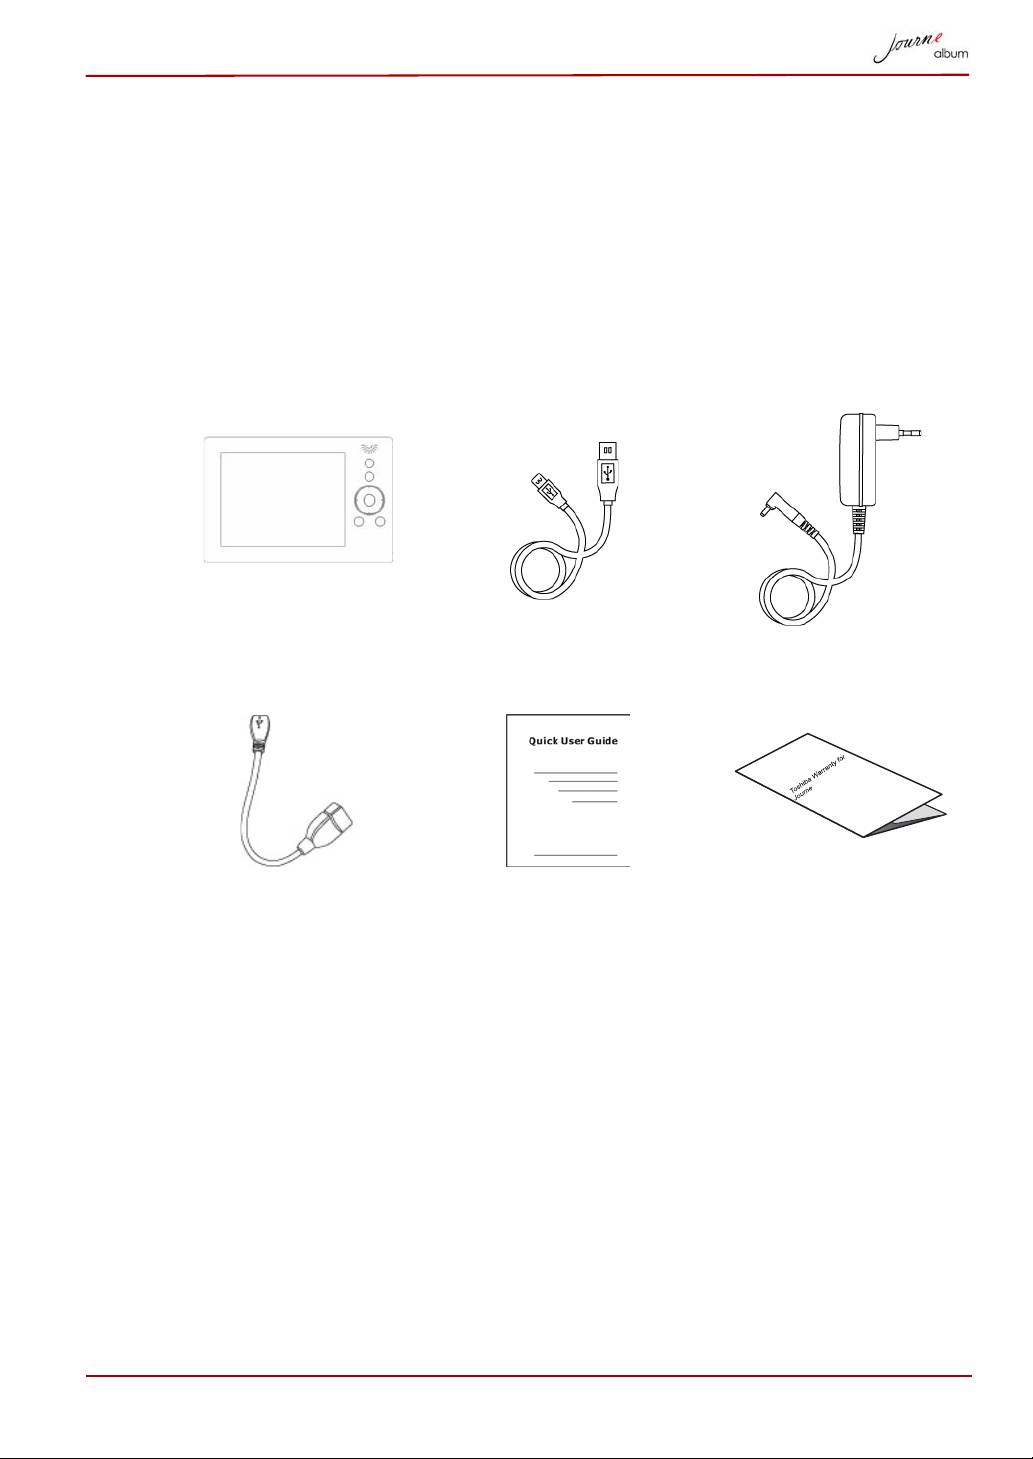
Checking the components
Journe Album USB Cable AC Adaptor
USB Host Cable Quick Start Guide
Warranty Leaflet
(printed) & User’s
Manual (pre-installed
on Journe album)
User’s Manual EN-5

Safety Instructions
Always read the safety instructions carefully:
Do not disassemble, modify, tamper with or repair your product
n Do not attempt to disassemble, modify, tamper with or repair product
(including AC adaptor). Disassembly, modification, tampering or
repairing the product could cause fire or electric shock, possibly
resulting in serious injury.
Please contact an authorized Toshiba service provider for any repair
service.
Handling the AC adaptor and power cables/cords or plugs
n When handling the power cable/cord, follow these precautions:
n Never tamper with the power cable/cord or plug.
n Never splice or alter a power cable/cord.
n Never bend or twist a power cable/cord.
n Never pull on a power cable/cord to remove a plug from a socket.
Always grasp the plug directly.
n Never place heavy objects on a power cable/cord.
n Never run a power cable/cord through a pinch point such as a door
or window.
n Never place a power cable/cord near a heat source.
n Never use nails, staples or similar objects to fasten or attach cord in
place.
n Never attempt to disassemble or repair an AC adaptor.
Doing any of the above may damage the cables, and/or result in a
fire or electric shock, possibly resulting in serious injury.
Attaching the power cable/cord
n Always confirm that the power plug (and extension cable plug if used)
has been fully inserted into the socket, to ensure a secure electrical
connection. Failure to do so may result in a fire or electric shock,
possibly resulting in serious injury.
n Be careful if you use a multiple connector. An overload on one socket
could cause a fire or electric shock, possibly resulting in serious injury.
EN-6 User’s Manual
WARNING

Dust on the power plug connectors or connector base
n If dust gets on the power plug connectors or connector base, turn the
power off and disconnect the power plug. Then clean the connector and/
or connector base with a dry cloth. Continuing to use the product without
cleaning the power plug may result in a fire or an electric shock, possibly
resulting in serious injury.
Only use TOSHIBA AC adaptor
n Always use the TOSHIBA AC adaptor that was provided with your
product (that may have been provided with your product), or use AC
adaptors specified by TOSHIBA to avoid any risk of fire or other damage
to the product. Use of an incompatible AC adaptor could cause fire or
damage to the product possibly resulting in serious injury. TOSHIBA
assumes no liability for any damage caused by use of an incompatible
adaptor or charger.
Use correct power source
n Never plug the AC adaptor into a power source that does not
correspond to both the voltage and the frequency specified on the
regulatory label of the unit. Failure to do so could result in a fire or
electric shock, possibly resulting in serious injury.
Only use approved power cables/cords
n Always use or purchase power cables/cords that comply with the legal
voltage and frequency specifications and requirements in the country of
use. Failure to do so could result in a fire or electric shock, possibly
resulting in serious injury.
Do not handle the power plug with wet hands
n Never attempt to connect or disconnect a power plug with wet hands.
Failure to follow this instruction could result in an electric shock, possibly
resulting in serious injury.
Choking hazards
n Never leave small parts such as covers, caps and screws within the
reach of infants or small children. Swallowing a small part may cause
choking and suffocation resulting in death or serious injury. If a part is
swallowed, immediately take appropriate emergency action and consult
a doctor.
User’s Manual EN-7

Avoid liquids, moisture and foreign objects
n Never allow any liquids to spill into any part of your product, and never
expose the product to rain, water, seawater or moisture. Exposure to
liquid or moisture can cause electric shock or fire, resulting in damage or
serious injury. If any of these eventualities should accidentally occur,
immediately:
1. Turn off the product.
2. Disconnect the AC adaptor from the power plug socket and product.
Do not turn on the power again, until you have taken the product to an
authorized service center. Failure to follow these instructions could
result in serious injury or permanent damage to the product.
Never place your product or AC adaptor on a heat sensitive surface
n Never place your product or AC adaptor on a wooden surface, furniture,
or any other surface that could be marred by exposure to heat since the
product base and AC adaptor’s surface increase in temperature during
normal use.
n Always place your product or AC adaptor on a flat and hard surface that
is resistant to heat damage.
Never place your product in a damp environment
n Never use or place your product in a bathroom or any other damp
environment or in an outdoor environment or location where it may be
exposed to rain, mist, fog or other source of water or moisture. Such
exposure could cause a fire or electric shock, possibly resulting in
serious injury. It may also cause a computer failure, or loss of data.
Use the LCD correctly
n If the LCD (Liquid Crystal Display) panel is damaged, causing a liquid
crystal leak, never ingest or touch the liquid. Serious injury could result.
n If LCD liquid should accidentally contact your lips or mouth, always rinse
immediately with large amounts of water.
n If LCD liquid contacts your body, always use large amounts of water to
wash it off immediately to prevent skin rash.
n If LCD liquid should accidentally contact your eyes, always rinse them
immediately with large amounts of water, and obtain prompt medical
attention.
n If any of the LCD liquid contacts your clothes, remove them immediately
and wash with a synthetic detergent.
n Failure to follow these instructions may result in serious injury.
EN-8 User’s Manual

n Never touch the LCD if it is damaged or broken, as the liquid contained
within the display may leak, possibly resulting in serious injury. Contact
an authorized Company service provider immediately for replacement of
the damaged LCD and dispose of any damaged LCD in compliance with
local laws and/or regulations.
Never place your product in locations with excess heat
n Never place your product where it will be exposed to excess heat, such
as in direct sunlight, an unventilated vehicle or near a heater. This may
result in a system failure, malfunction, loss of data or damage to the
product.
Never place your product in a location with extremely low
temperatures
n Never place your product in a location where it will be exposed to
extremely low temperatures. This may result in a system failure,
malfunction or loss of data.
Never subject your product to sudden temperature variations
n Never subject your product to sudden temperature variations. This may
result in condensation, causing a system failure, malfunction or loss of
data.
Never operate your product during a thunderstorm
n Never operate your product on AC power during a thunderstorm. If you
see lightning or hear thunder, immediately turn off the product. An
electric surge caused by the storm, may result in a system failure, loss
of data or hardware damage.
System Requirements
n Windows 2000/XP/Vista
n USB 2.0 interface
User’s Manual EN-9
CAUTION
The Grand Tour
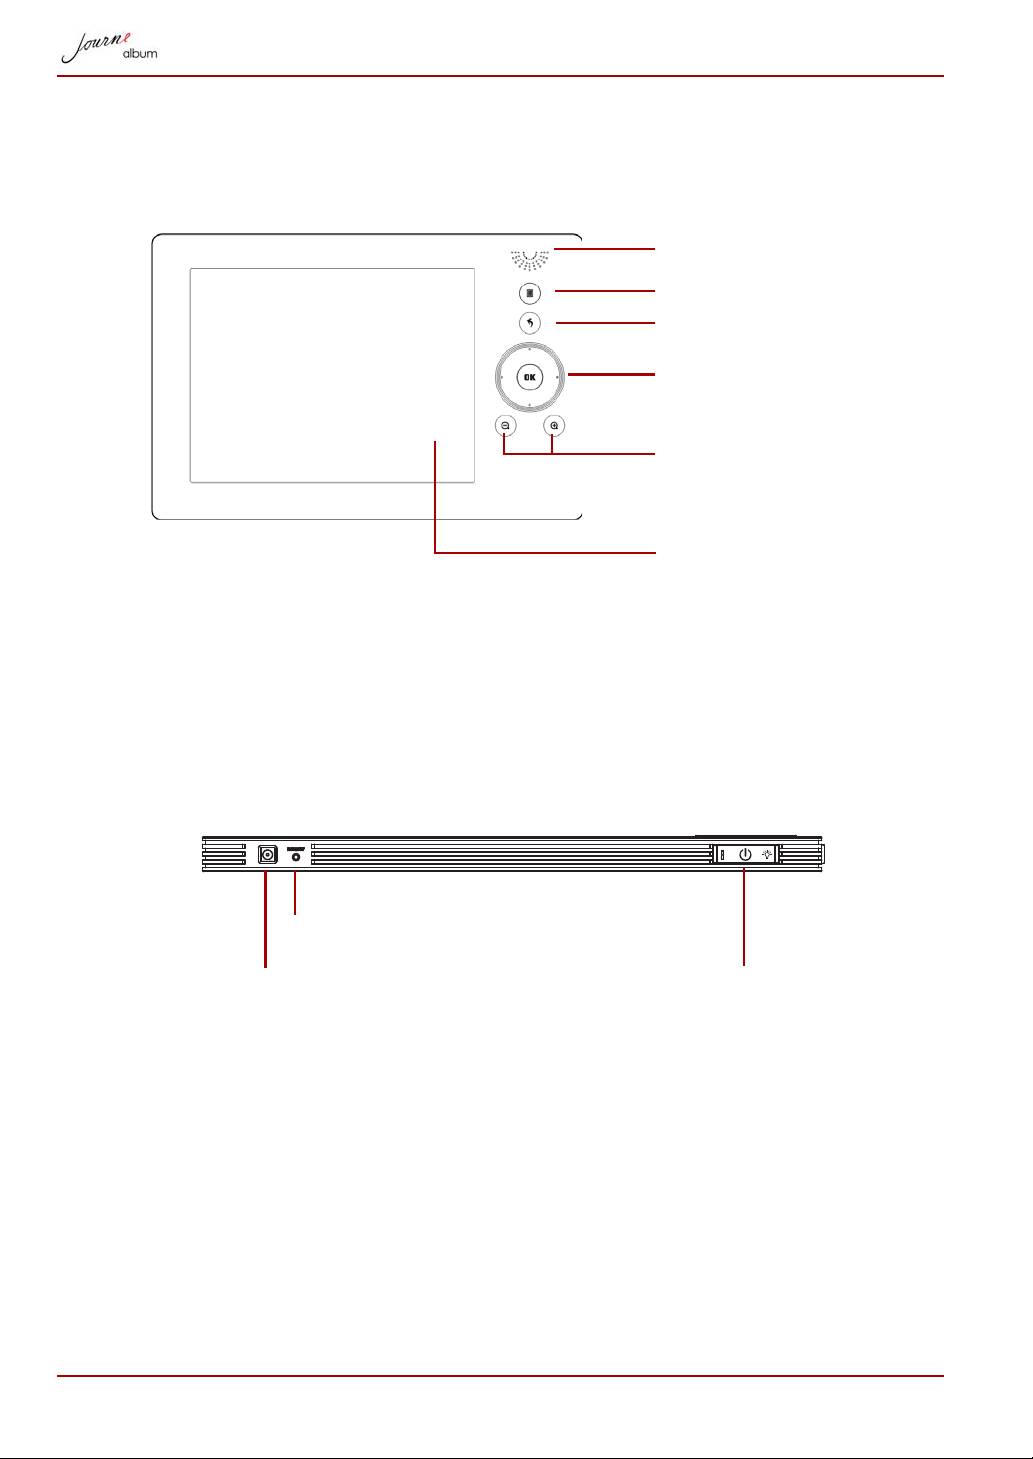
Front View
Control
Operate the photo album by pressing the control
Buttons
buttons on the front panel.
LCD also displays function icons for each button in the
corresponding position.
Bottom View
EN-10 User’s Manual
Speaker
MENU
ESC
up/down/right/left/OK
Volume Up/Down or Zoom
In/Out
LCD
DC IN jack Used to charge the digital album with the supplied
adapter.
Reset Button Used to reset the digital album-press the Reset
button.
Power Button Used to turn on the digital album-press the Power
button at the bottom of the display.
DC IN
Reset
Power

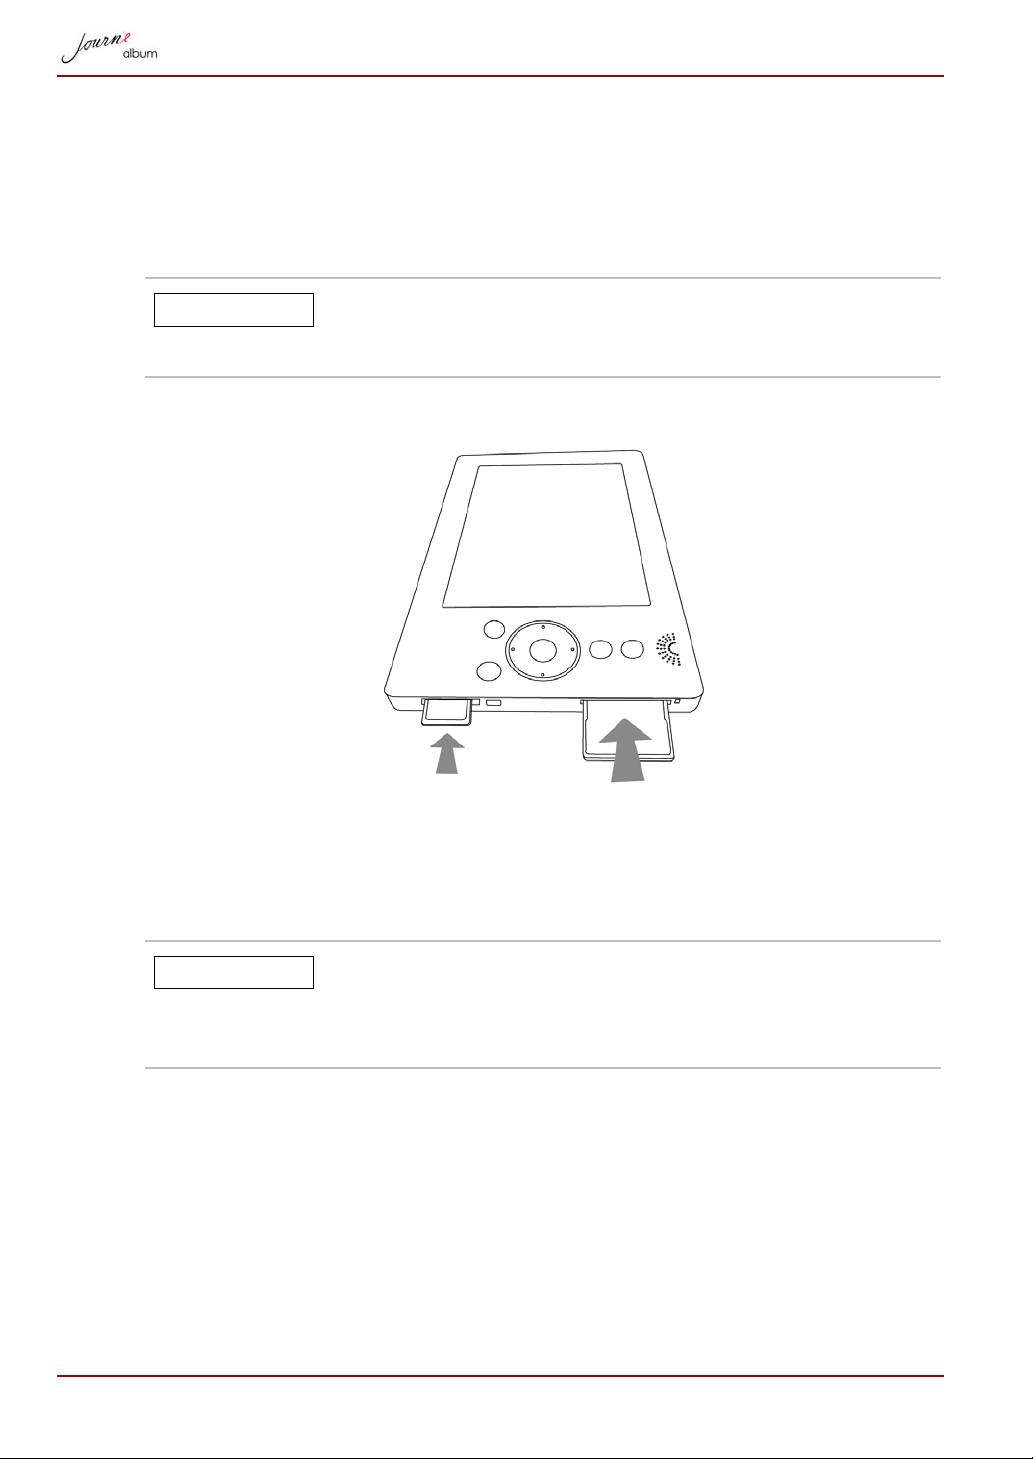
Side View
To use the card slot, please open the slot cover follow the illustrations as
displayed below.
The card slots will be displayed.
Mini USB
This USB Connector connects the digital album to
Connector
your PC.
SD/MMC/MS/MS-
This slot allows you to insert the Secure Digital
Pro cards slot
(SD) /Multi Media Card (MMC)/Memory Stick (MS)/
Memory Stick Pro (MS-Pro) cards.
CF card slot This slot allows you to insert a Compact Flash (CF)
card.
Please note that not all memory media have been tested
and verified to work correctly. Therefore, it is not
possible to guarantee that all memory media will operate
properly.
User’s Manual EN-11
card slot covers
A
B
SD/MMC/MS/MS-Pro
CF card slotMini USB
cards slot
Connector
NOTE
Getting Started
Positioning the Unit
The digital album should be placed close to a power socket. Protect the unit
from high temperatures and high moisture levels.
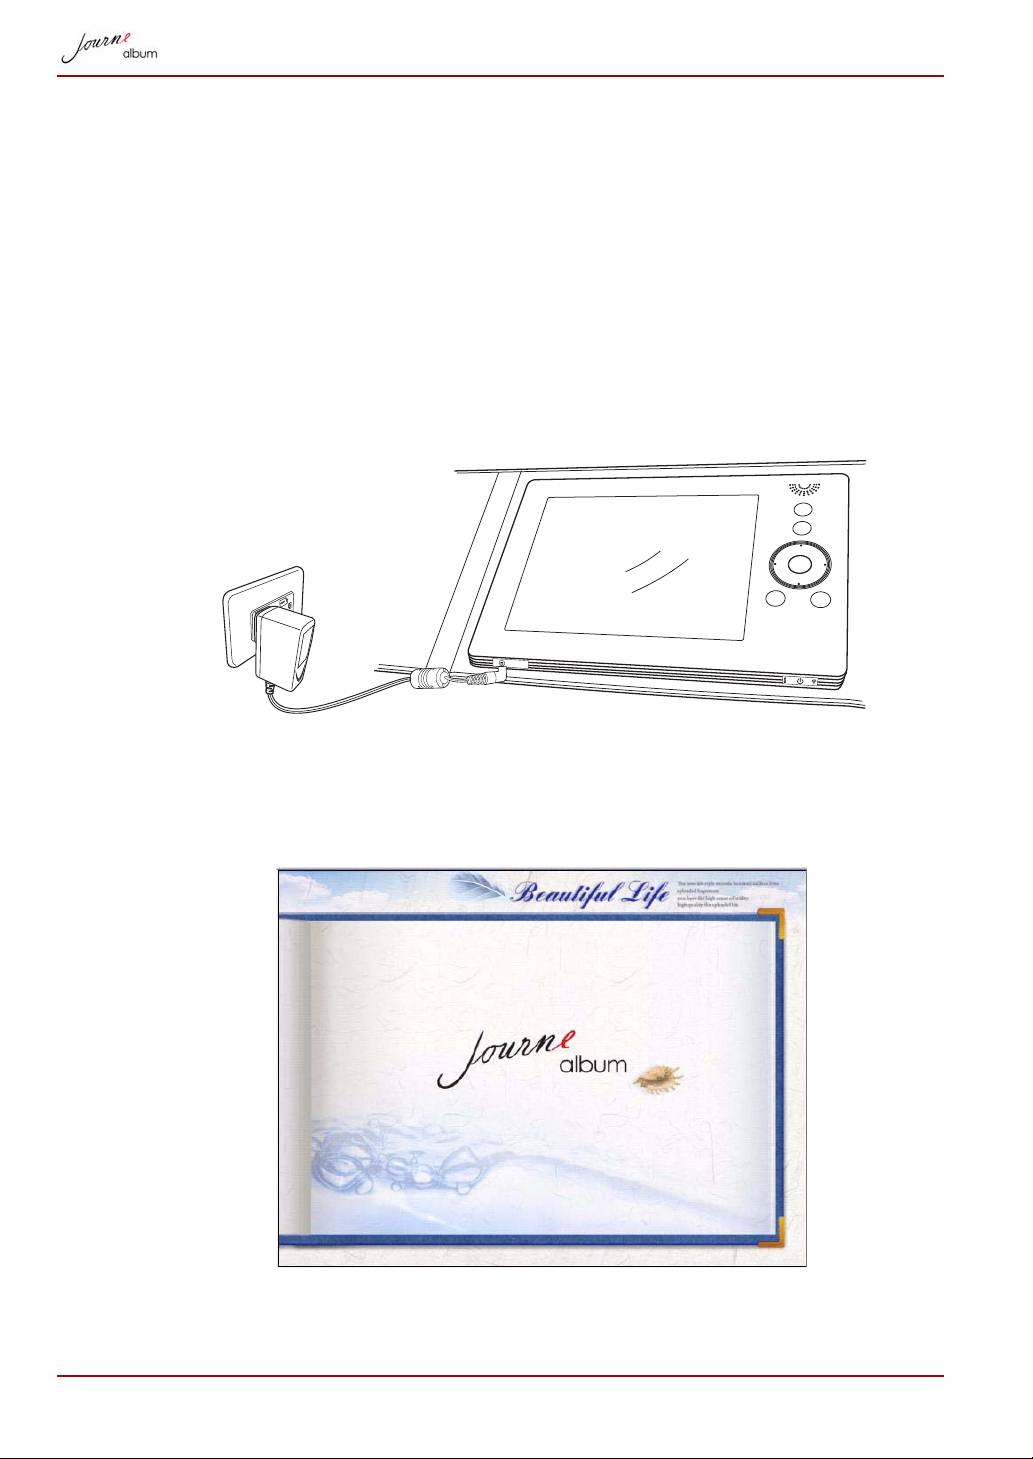
Connecting to AC Power
1. Connect one end of the AC power adapter to the power jack at the
bottom of the album.
2. Connect the other end to a power outlet.
Turning on the Digital Album
Press the power button at the bottom of the display. The power LED will
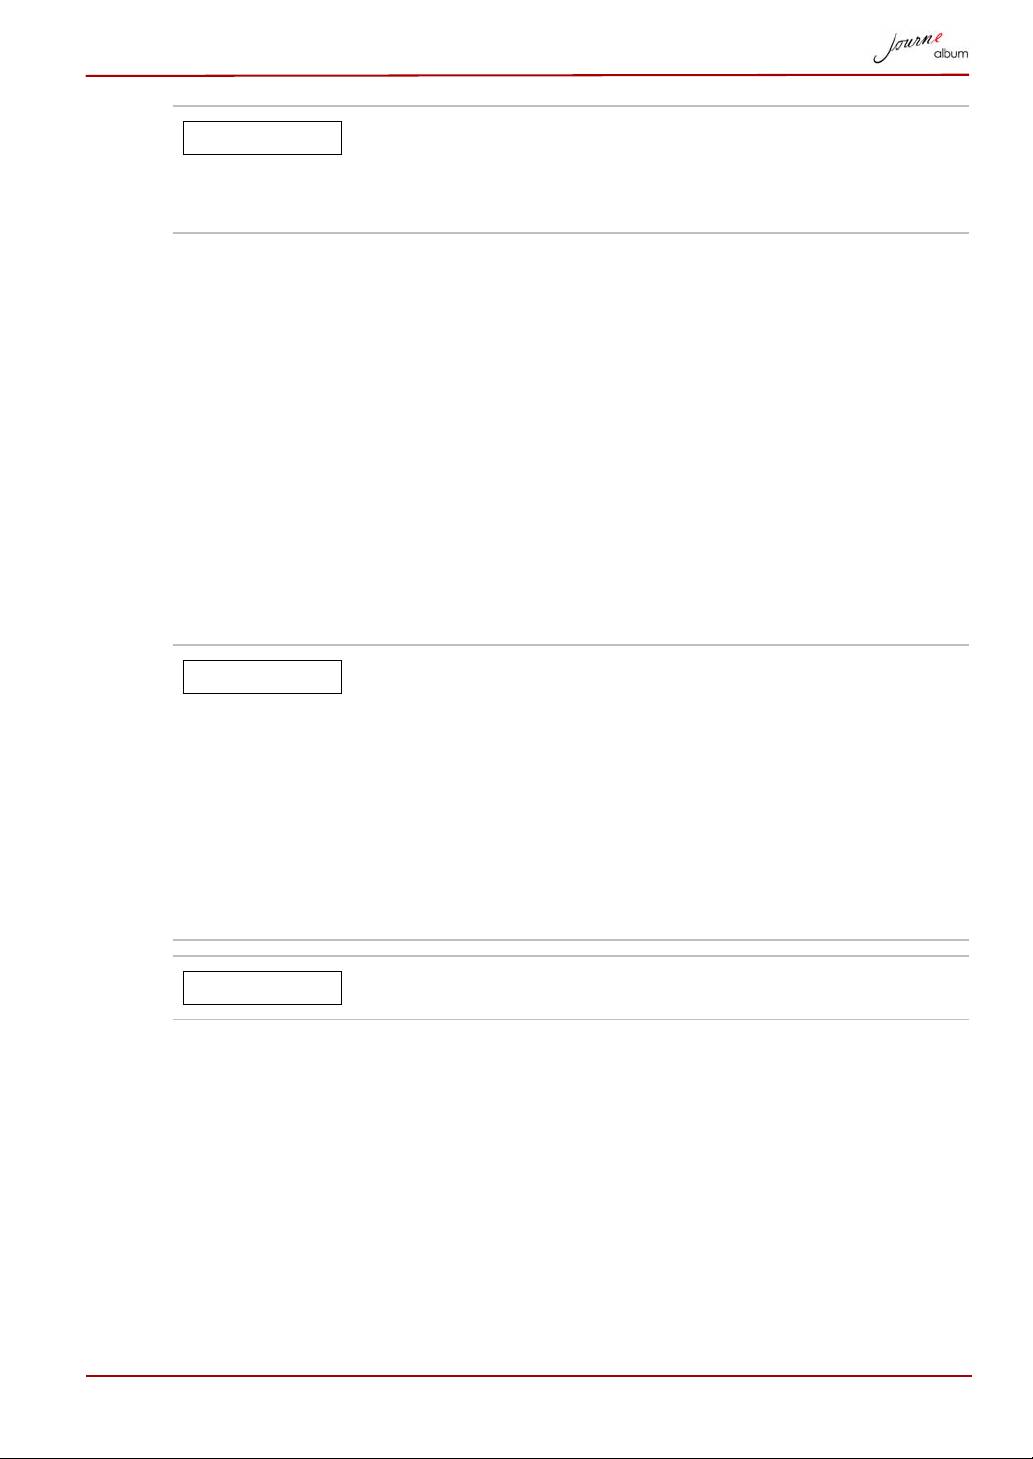
light blue and the startup screen will appear as displayed below.
EN-12 User’s Manual
If you are using the album for the first time,no albums
will be displayed. To copy photos to the unit’s internal
memory,please follow the instructions in the Copying
and Deleting Files section.
You can turn off the digital album by pressing the power button. It takes 2
seconds for the photo album to shut down.
Built-in battery
The digital album is equipped with a built-in lithium polymer battery. To
check the battery status, enter Setup mode and select Status.
To charge the battery, follow the steps below:
1. Connect one end of the AC power adapter to the power jack at the
bottom of the album.
2. Connect the other end to a power outlet.
3. Place the digital album on a stable surface, and keep power connected
until the battery is fully charged.
User’s Manual EN-13
NOTE
Please charge the battery for 8 hours before using for
the first time.
When the battery is running out of power, a warning
message will show on the screen and the album will shut
down automatically. Charge the battery as outlined
above.
The fully charged battery usually lasts about
2.5 hours,depending on use and settings.
Power system and plug types may vary depending on
your country/region.
Do not disassemble or modify the battery.
NOTE
CAUTION
Inserting/Removing a Memory Card
Inserting a Memory Card:
1. Insert your memory card into the slot on the side of the album with the
metal connectors facing down.
When inserting memory media, do not touch the metal
contacts. You could expose the storage area to static
electricity, which can destroy data.
2. Press the card gently until it clicks into place.
Removing a Memory Card
1. Press the memory card until it clicks and partially pops out of the slot.
2. Grasp the card and remove it.
Do not remove memory media while data is being
written or read. Wait for the operation to be completed.
For the detailed information, please refer to Copying and
Deleting Files section.
EN-14 User’s Manual
CAUTION
CAUTION
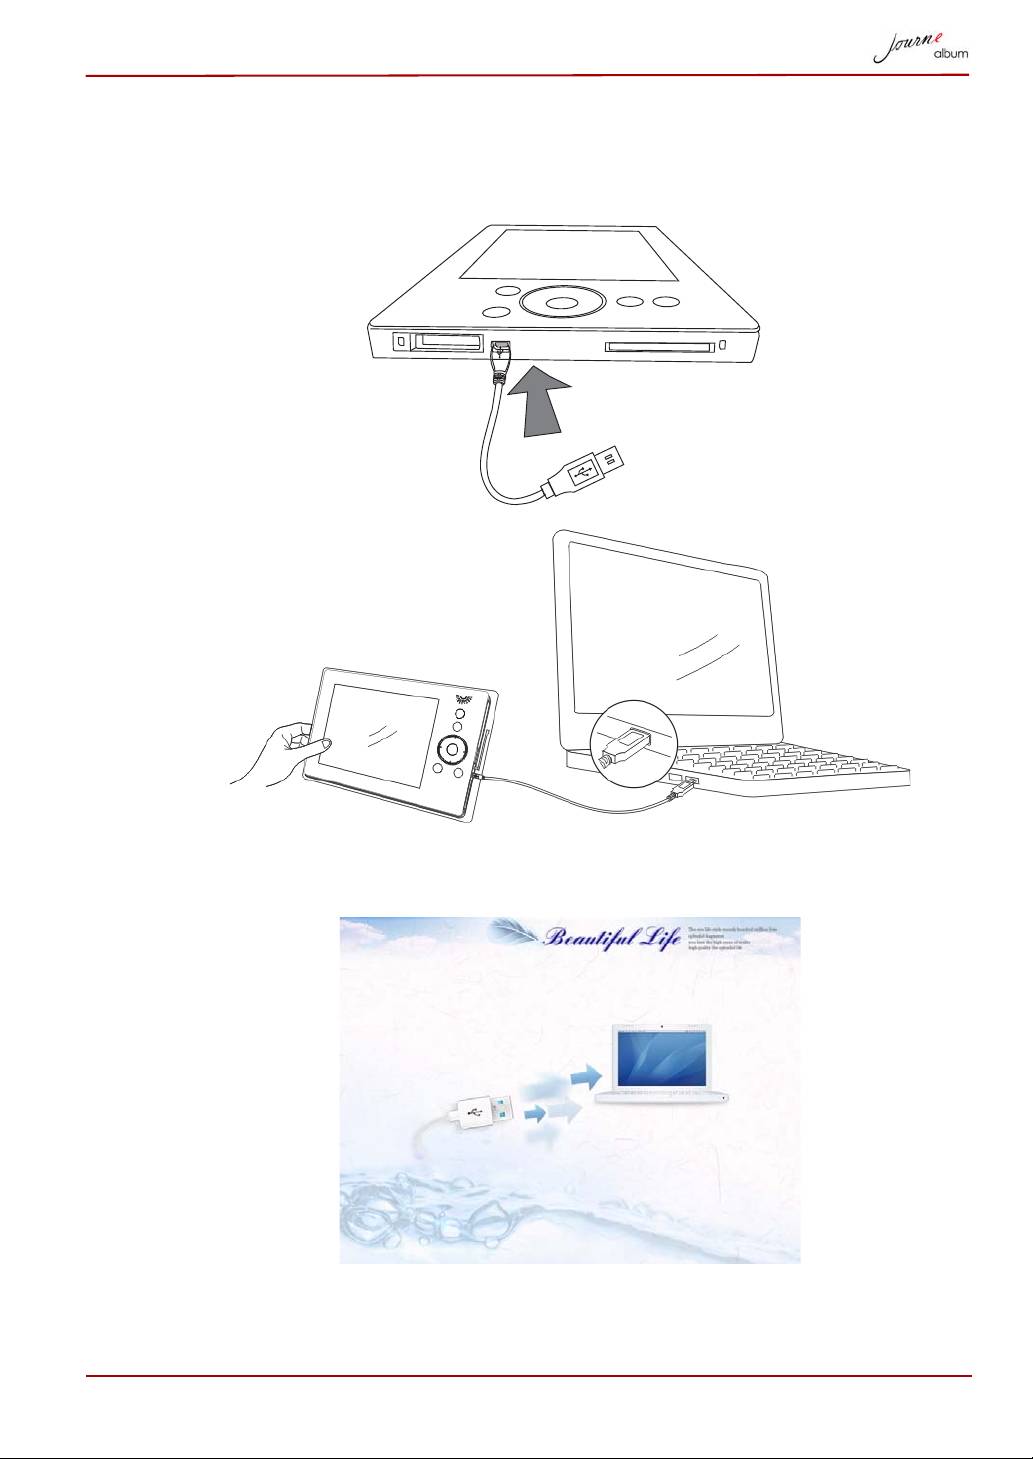
USB Connection
The album can be connected to a PC using the supplied USB cable. The
PC will recognize the digital album as a mass storage device.
Once the digital album connects to a PC, it is not operable until it is
disconnected from the PC.
User’s Manual EN-15
album screen
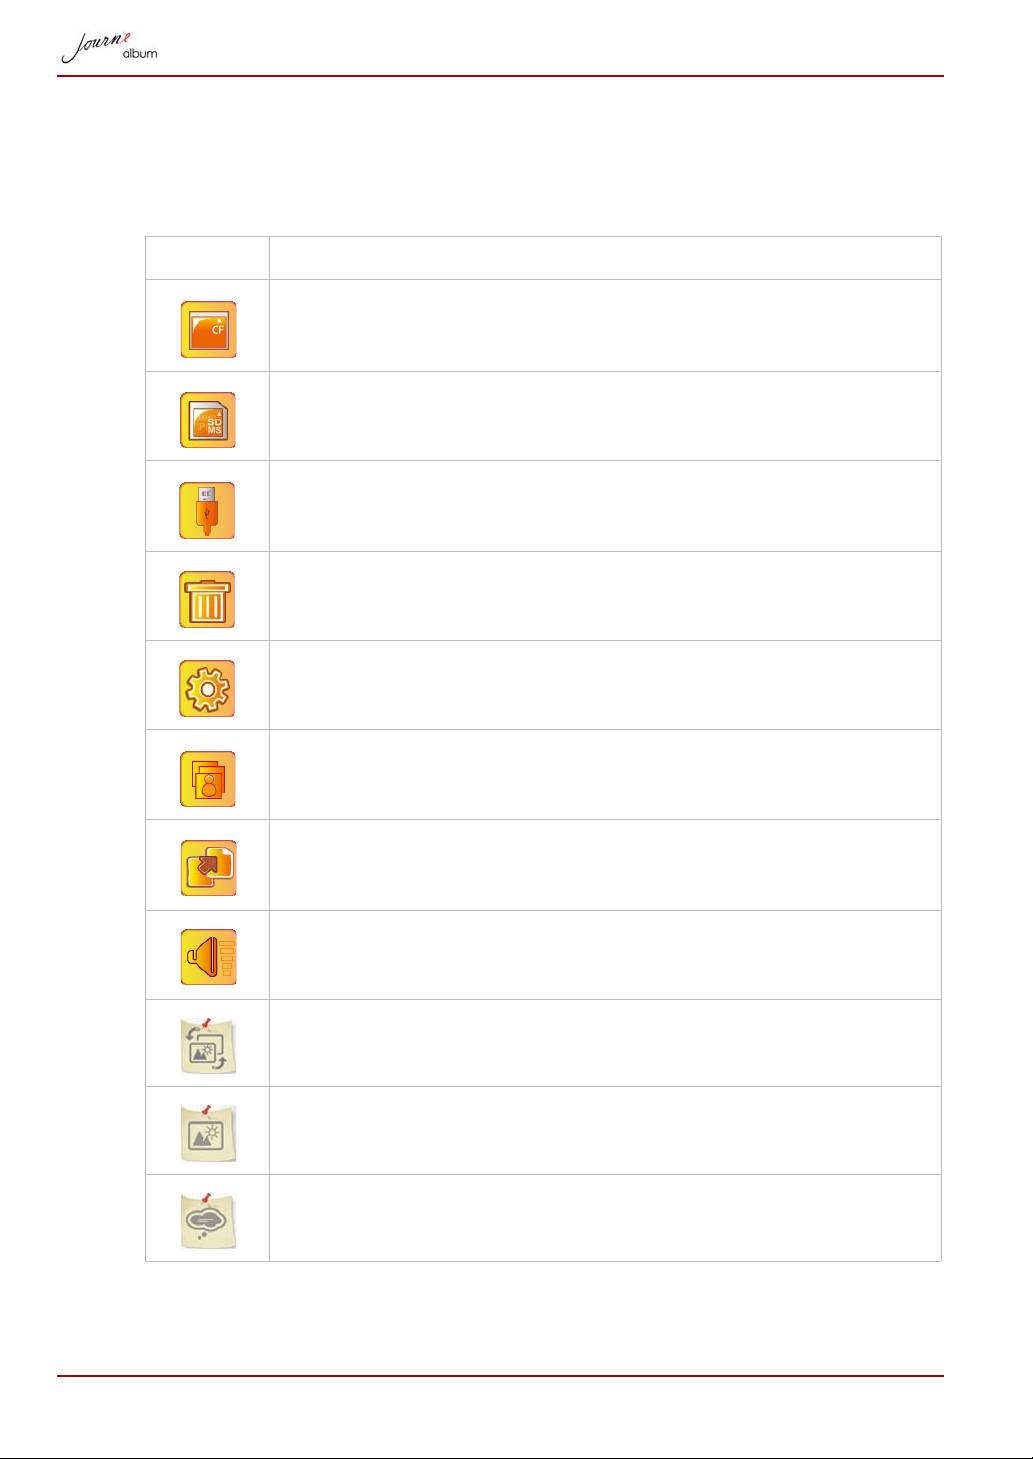
Understanding the Menu Icons
The top left corner of the screen will display different icons for operation
depending on your use. These icons are defined as follows:
Icon Actions
Go to the browser screen in card (appears when CF card is
inserted). When selected, the icon is highlighted in orange.
Go to the browser screen in card (appears when SD/MMC/
MS/MS-Pro card is inserted).
Go to the browser screen in USB drive (appears when the
USB drive is inserted).
Delete files.
Setup.
Go to Slide Show screen.
Backup icon. Copy files from the memory card to the album.
Display volume level.
Theme
Screen Brightness
Language
EN-16 User’s Manual
Date/Time
Auto Shutdown Timer
Status
Basic Operations
Photo Mode
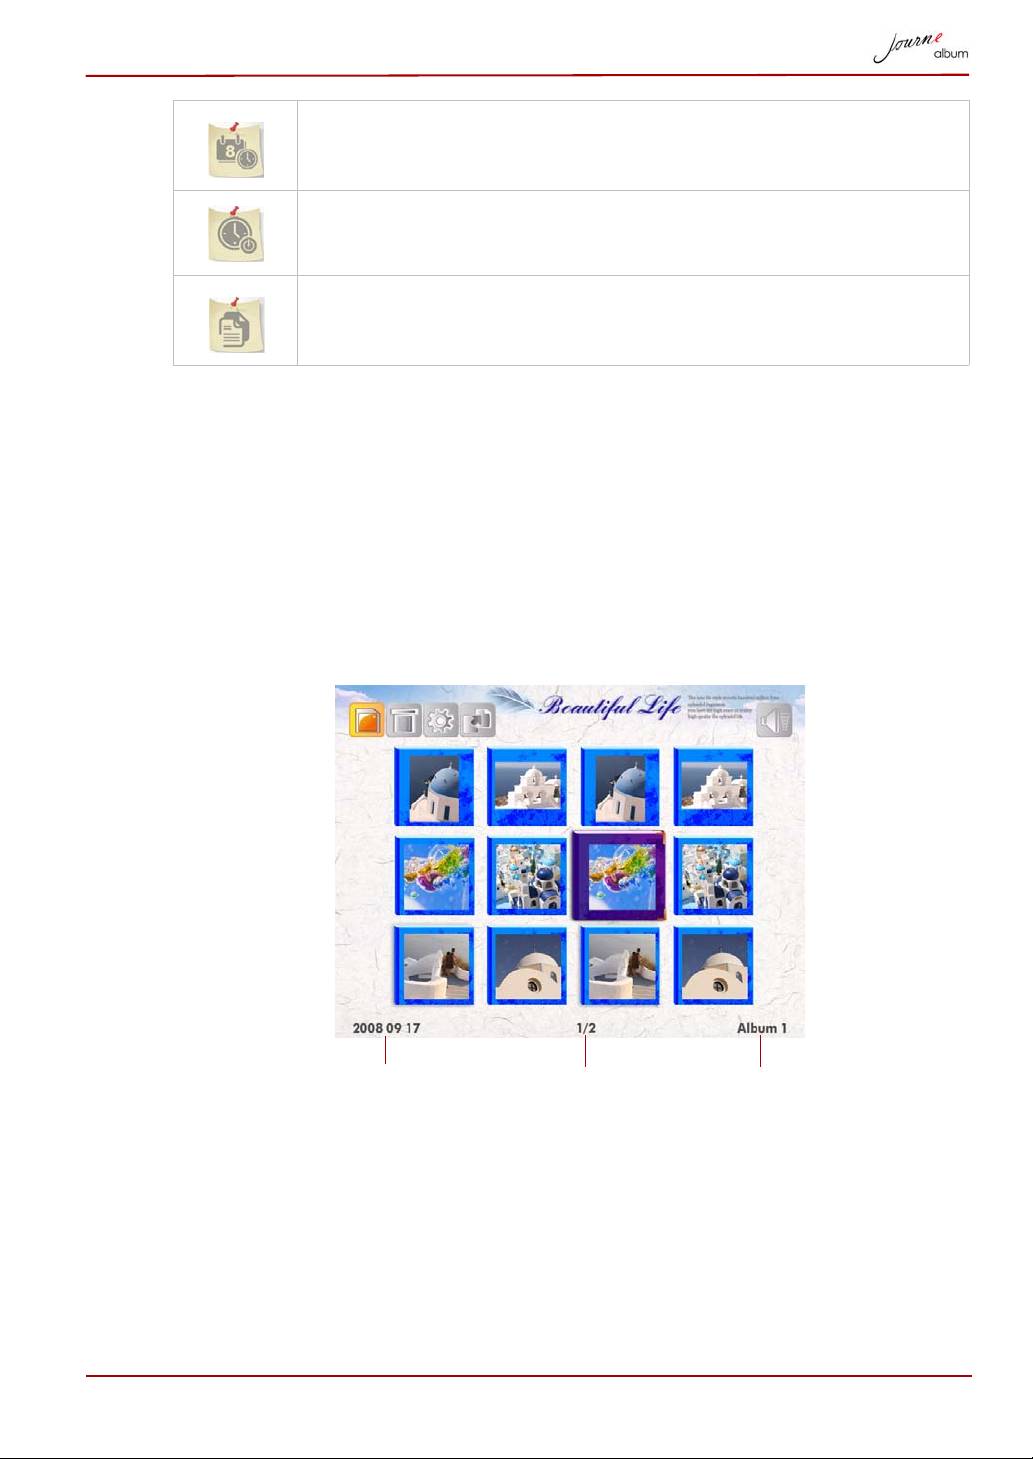
The Album screen is the digital album’s main screen. Folders in internal
memory are listed as albums. The first photo in each album is displayed as
a preview.
1. Select the album on the screen by pressing the up/down/left/right
button, followed by the OK button to enter the album.
User’s Manual EN-17
Album namedate created page number
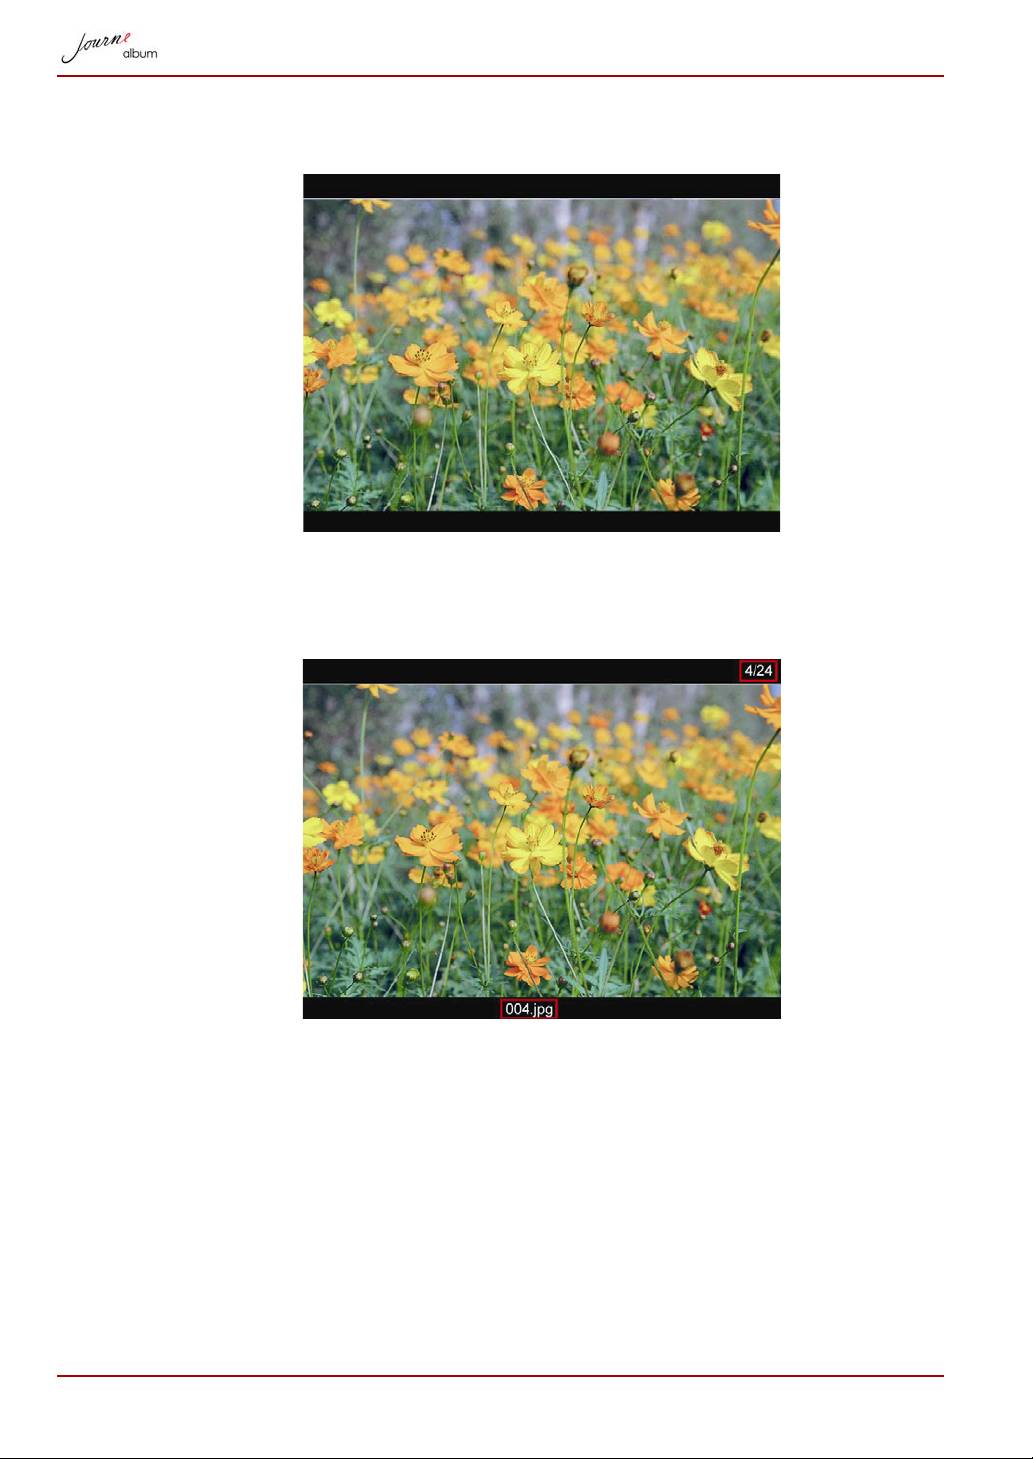
2. Select the photo you want to access, then press OK. The photo will be
displayed.
To rotate the photo, press the OK button on the album.
To display the photo information, press the MENU button on the album.
Pressing the MENU button again will hide photo information.
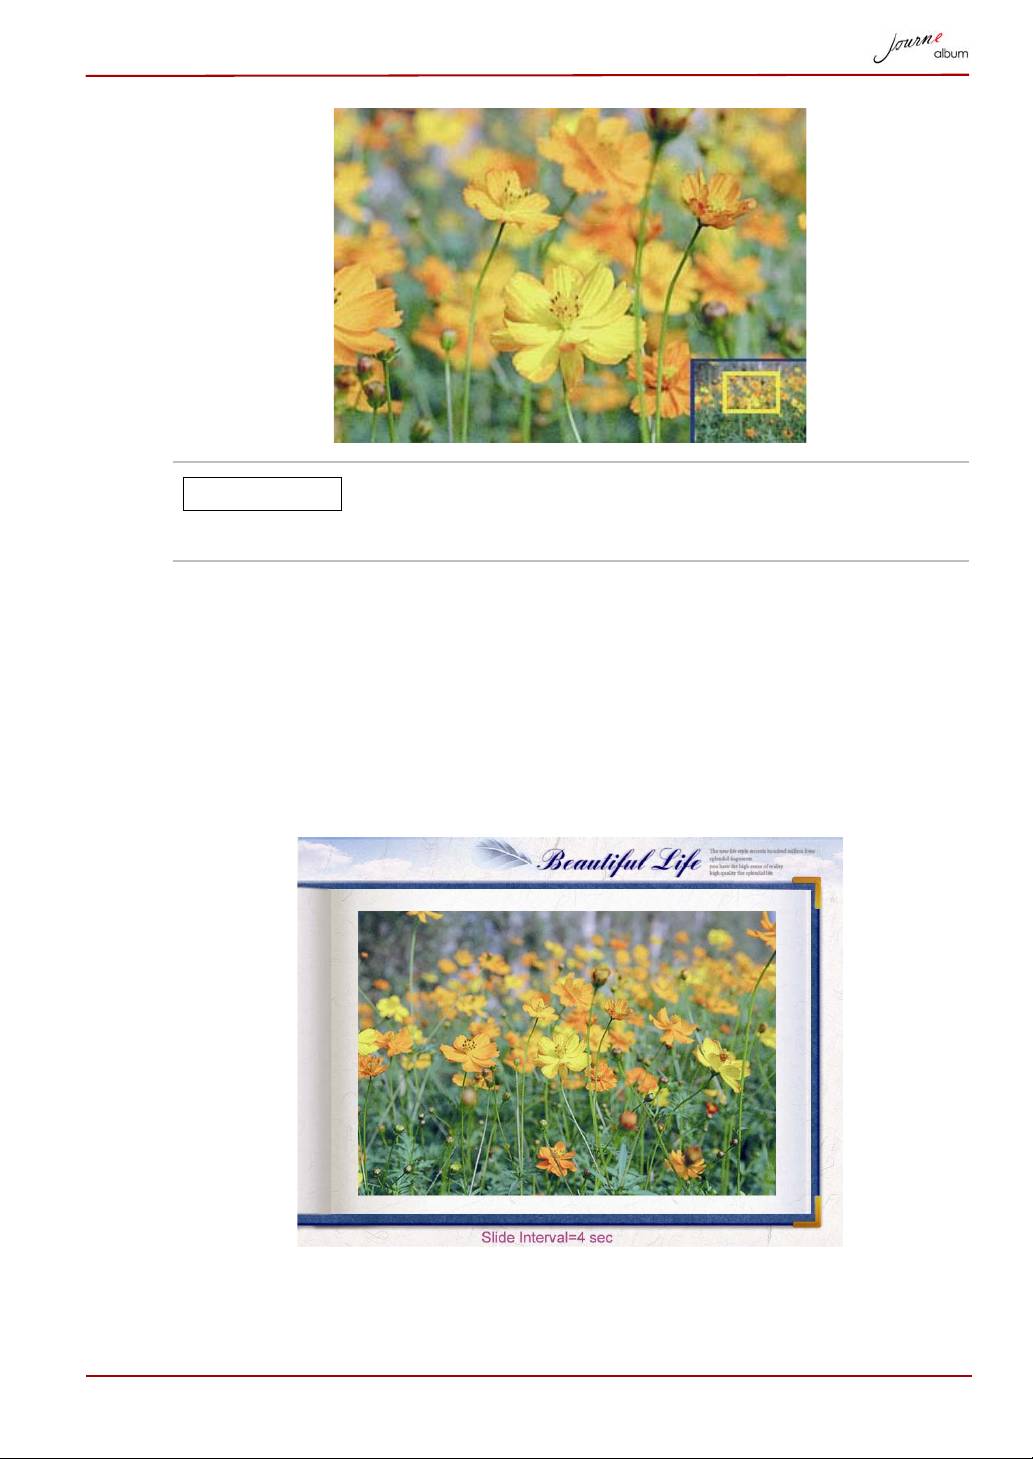
To enlarge the photo, press the Zoom In button. The photo will be
displayed in full screen mode. Users can view details of a photo by
zooming in.
EN-18 User’s Manual
Music cannot be controlled while viewing photos. To
adjust music settings, please press the ESC button to
return to the album screen.
Slide Show
You may use the slide show function to display the photos automatically.
In the album menu, press the MENU button to display the Slide Show icon,
then press OK button to activate it.
During the slide show, the OK button can be pressed at any time to pause.
The interval between photos can also be adjusted between 1-60 seconds
by pressing the Up/Down button on the album.
User’s Manual EN-19
NOTE
The slide show function is not available in each photo
screen.
Slide show cycles in a single album and will not proceed
to the next album.
Video files are skipped in slide shows.
To listen to the background music during a slide show, press the volume Up
button to turn on the music and volume. To pause the music, press the
Volume Down button repeatedly until the sound is off.
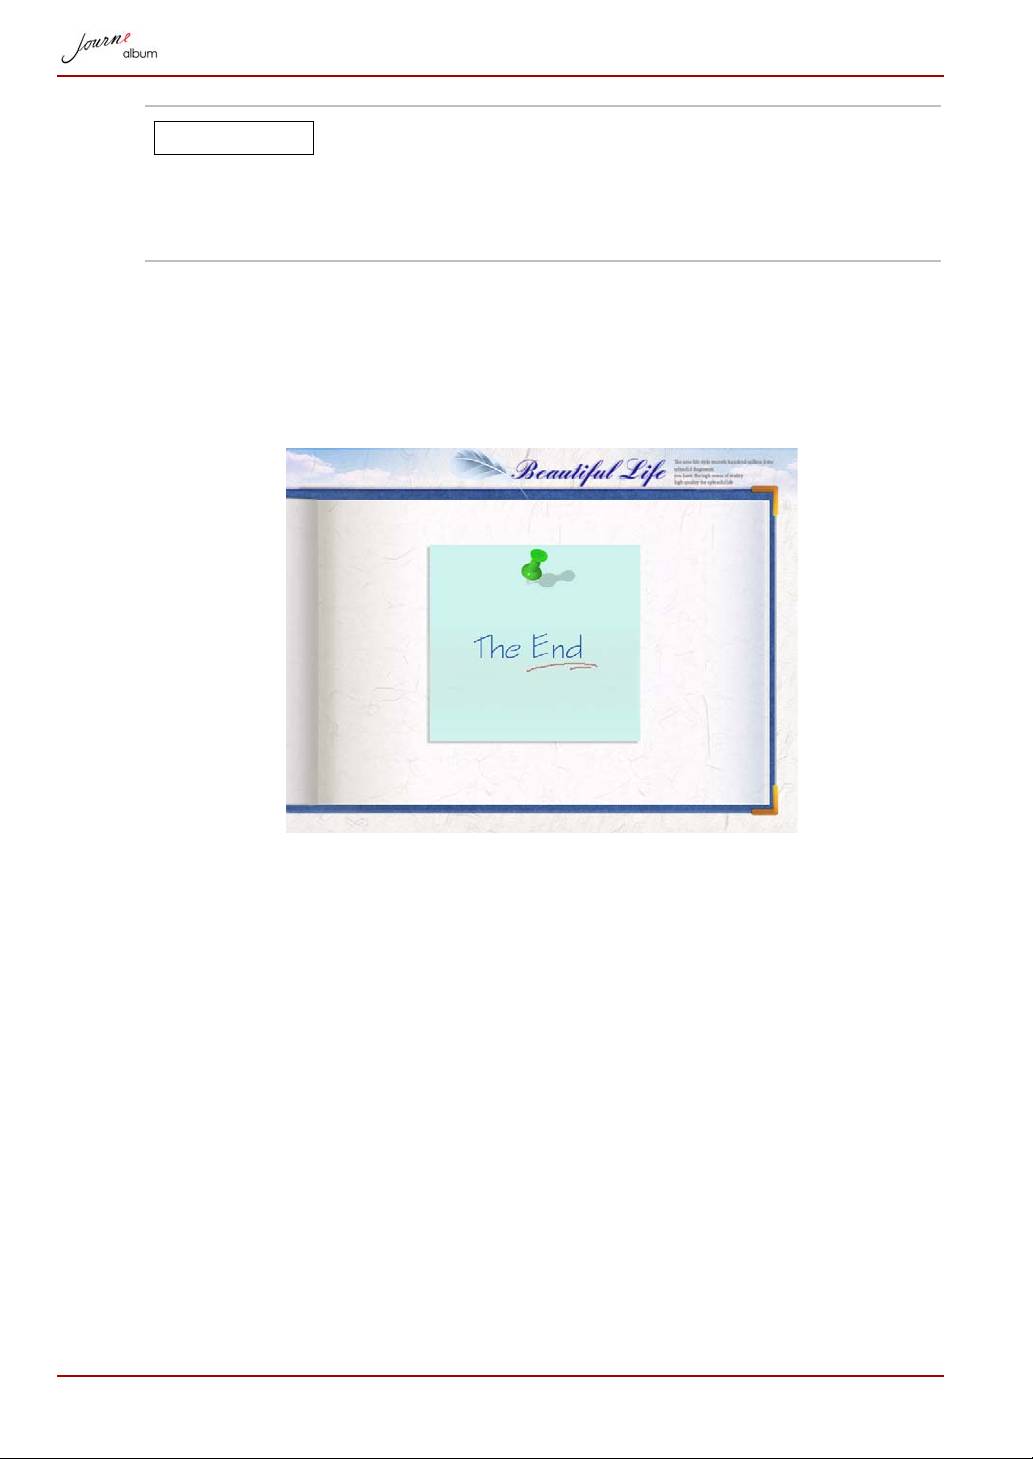
On reaching the end of the album, a page will be displayed, showing the
words “The End”.
EN-20 User’s Manual
NOTE
