Canon i-sensys mf6140dn: Specifying Initial Fax Settings and Connecting a Telephone Cable
Specifying Initial Fax Settings and Connecting a Telephone Cable: Canon i-sensys mf6140dn
Table of contents
- Contents
- Navigating the Menu and Text Input Method About the Supplied Manuals
- Attach the Optional Cassette to the Machine Connecting the Power Cord and Turning ON the Power Specifying the Initial Settings
- Choosing the Method to Connect the Machine to the Computer Connecting via a Wired LAN
- Specifying Initial Fax Settings and Connecting a Telephone Cable
- Perform Useful Tasks
- Clearing Paper Jams
- Replacing Toner Cartridge
- Symbols Used in This Manual Keys and Buttons Used in This Manual Illustrations and Displays Used in This Manual Important Safety Instructions Installation Power Supply Handling
- Maintenance and Inspections Consumables Others Legal Notices Legal Limitations on Usage of Your Product and the Use of Images
13
En
For details on the installation procedures:
See the MF Driver Installation Guide
You can also download the driver from the Canon website.
Windows
Macintosh
Setting a Paper Size and Type
Follow the instructions on the screen, set the paper size
and type.
Select Paper
MP Tray
A4:Plain
Paper Settings
1
Paper Settings
Multi-Purpose Tray
Drawer 1
Drawer 2
Register Custom Paper
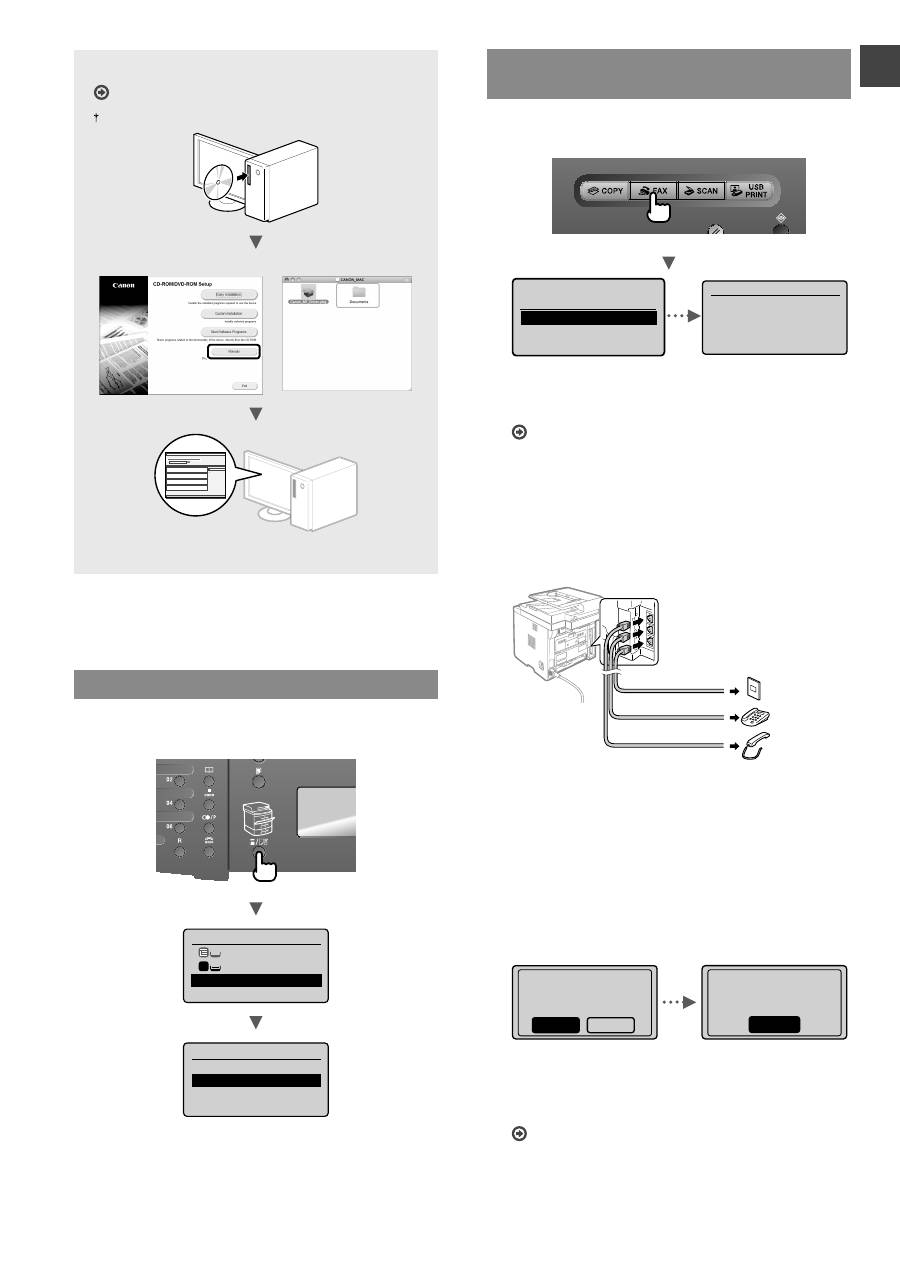
Specifying Initial Fax Settings and
Connecting a Telephone Cable
1
Specify the initial fax settings.
Perform fax setup?
Set up Now
Set up Later
Connect phone line.
Follow illustrations
on the next screen:
Connect line to A.
*Next : Press OK
Follow the “Fax Setup Guide” to specify a fax number, a
unit name, and a receive mode. For more details on the
receive mode, see the e-Manual.
e-Manual “Fax”
▶
“Using the Fax Functions”
▶
“Receiving Faxes”
▶
“RX Mode”
How to use a username
When you send a document, the sender information
that you registered is printed on the recipient’s paper.
2
Connect a telephone cable.
Handset (option)
Telephone line connector
Telephone
(C)
(B)
(A)
When <Connect phone line.> appears on the display,
connect the telephone cable by referring to the
illustration.
When installing the optional handset:
For more details, see the supplied manual with the
handset.
3
Exit the Fax Setup Guide, and then restart the
machine.
End Fax Setup
Guide?
No
Yes
OK
Turn the main power
OFF and ON to apply
settings.
Turn OFF the machine and wait for at least 10 seconds
before turning it ON again. The telephone line types are
not detected automatically. See the e-Manual and set a
telephone line manually.
e-Manual “Fax”
▶
“Using the Fax Functions”
▶
“Changing Fax Settings (Settings that Can Be Speci
fi
ed
Using the [Menu] Button)”
▶
“Con
fi
guring Send
Settings”
▶
“Select Line Type”


