Omnimount UL10378: A B B
A B B: Omnimount UL10378
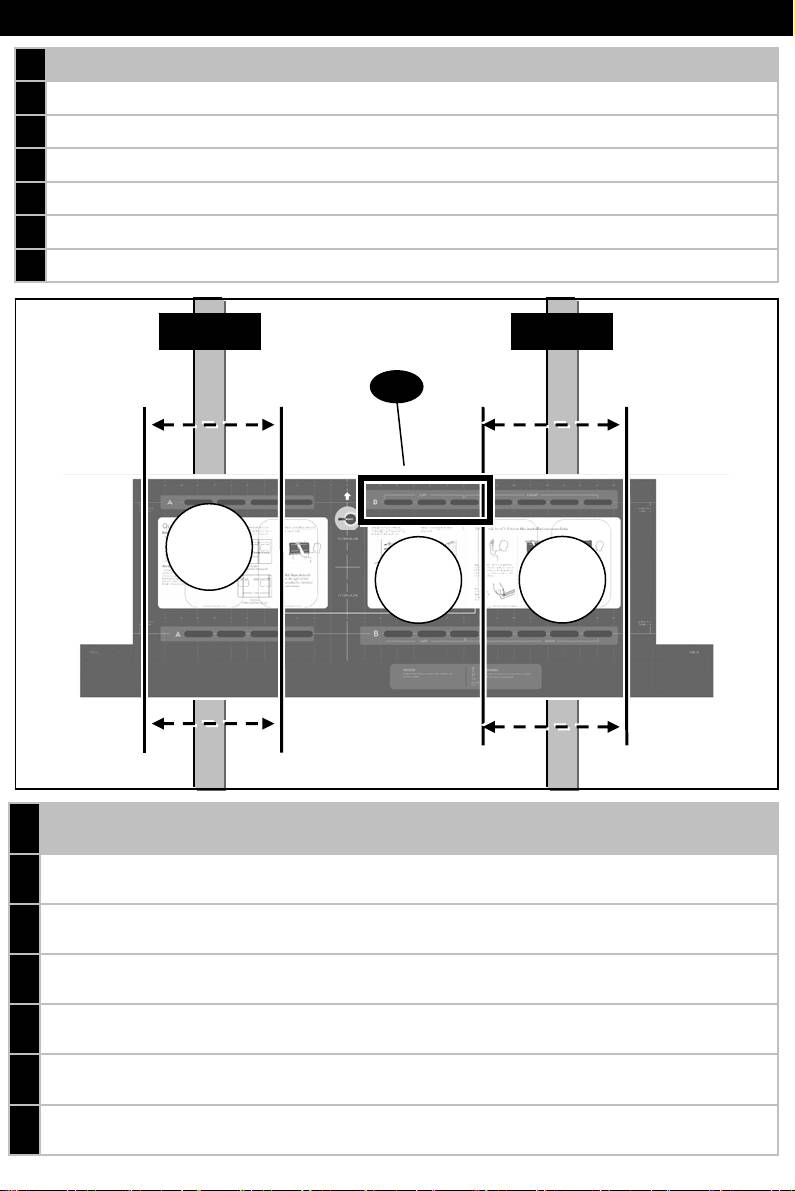
WOOD STUD INSTALLATION
CAUTION: Any Wood Stud Installation Greater than 16” Wide Must use a Dry Wall Anchor (Not Included) in the (B-Left) Section of
EN
the Wall Template.
ADVERTENCIA: Toda instalación con paneles de madera, cuyo ancho sea superior a 40,64 cm (16 pulgadas) debe llevar un taco de
ES
pared (no incluido) en la sección (B izquierda) de la plantilla de pared.
ATTENTION: touteinstallation de poteau de cloison en bois d'une largeursupérieure à41 cm doit être équipée d'une bride d'ancrage
FR
pour murs secs(non fournie) dans la section (B gauche) du gabarit mural.
ACHTUNG: Für jede Holzbalkenmontage, die breiter als 40,6 cm ist, muss ein Trockenmauerdübel (nicht imLieferumfang enthalten) in der
DE
Öffnung (B-links) der Wandschablone verwendet werden.
VOORZICHTIG: Voor elkeinstallatie op houten dragers verder uit elkaar dan 16 inch moet een hollewandanker worden gebruikt (niet
NL
meegeleverd) in het (B-links) gedeelte van het muursjabloon.
ATTENZIONE - Per qualunque installazione su montanti in legno di larghezza superiore a 40,6 cm (16 poll.) occorre utilizzare un tassello
IT
da muro a secco (non incluso) nella sezione(B sinistra) della piastra a muro.
ПРЕДОСТЕРЕЖЕНИЕ. При любой установке на деревянную основу шириной более 16 дюймов (41 см) в секции (B-Left)
RU
стеновой пластины должны использоваться сухие анкера (не входят в комплект поставки).
Stud # 2Stud # 1
W-B
A
B
B
Left
Right
Adjust wall template (2) to accommodate width of studs. Refer to Wall Template (2) for further instructions.
EN
Stud #1 must be positioned in Section (A)
Stud #2 must be positioned in Section (B-Right).
Ajuste la plantilla de pared (2) según el ancho de los paneles. Para obtener más instrucciones, consulte la plantilla de pared (2).
El panel 1 debe estar ubicado en la sección(A)
ES
El panel 2 debe estar ubicado en la sección (B derecha).
Ajustez le gabarit mural (2) à la largeur des poteaux de cloison. Reportez-vous au gabarit mural (2) pour de plus amplesinstructions.
Placezle poteau de cloison n°1 dans la section (A).
FR
Placezle poteau de cloison n°2 dans la section (B droite).
Wandschablone (2) an die Breite der Balken anpassen. Weitere Informationen finden Sie auf der Wandschablone (2).
Balken mit derBeschriftung 1 muss in Öffnung (A) positioniert werden
DE
Balken mit derBeschriftung 2 muss in Öffnung (B-rechts) positioniert werden.
Pas het muursjabloon (2) aan voor de afstand tussen de dragers. Zie het muursjabloon (2) voor nadere instructies.
Drager nr. 1 moet in gedeelte (A) zijn
NL
Drager nr. 2 moetin gedeelte (B-rechts) zijn.
Posizionare la piastra a muro (2) in base alla larghezza dei montanti. Vedere Piastra a muro (2) per ulteriori istruzioni.
Il montante 1 deve essere posizionato nella sezione (A).
IT
Il montante 2 deve essere posizionato nellasezione (B destra).
Отрегулируйте стеновую пластину (2) по ширине опор. Дополнительные инструкции указаны на стеновой пластине (2).
Опора №1 должна быть расположена в секции (А)
RU
Опора №2 должна быть расположена в секции (B-Right).
P11
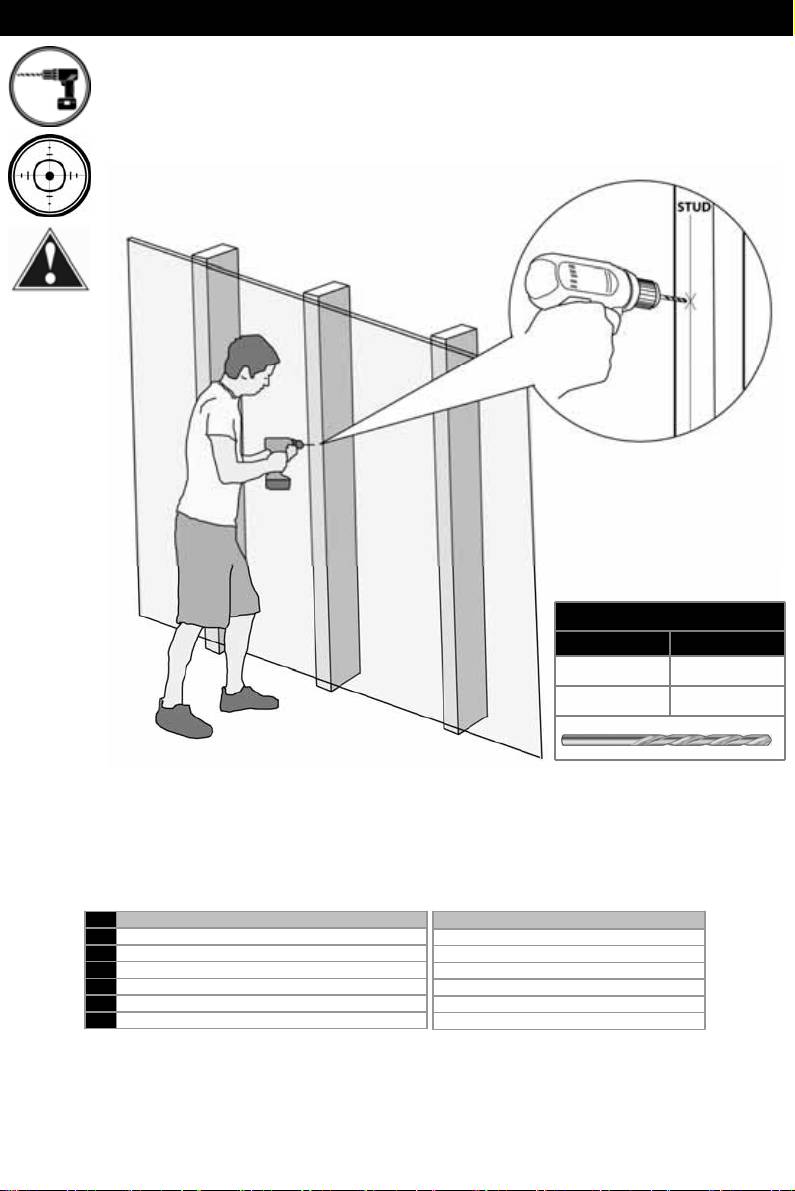
WOOD STUD INSTALLATION
X4
Wood Pilot
Pilot Hole Size Pilot Drill Depth
1/8” inch 2” inch
4 mm 55 mm
EN
Wood Stud Wall Installation
Drill pilot hole
ES
Instalaciónen pared con paneles de madera
Realice el agujero piloto
FR
Installation murale surpoteau de cloison en bois
Percez le trou de guidage
DE
Montage an Holzbalken an der Wand
Bohren Sie die Vorbohrung
NL
Installatie op muur met houten dragers
Boor een montagegat
IT
Installazione su muro con montanti in legno
Trapanare il foro pilota
RU
Установка на стену с деревянными стойками
Просверлите направляющее отверстие
P12
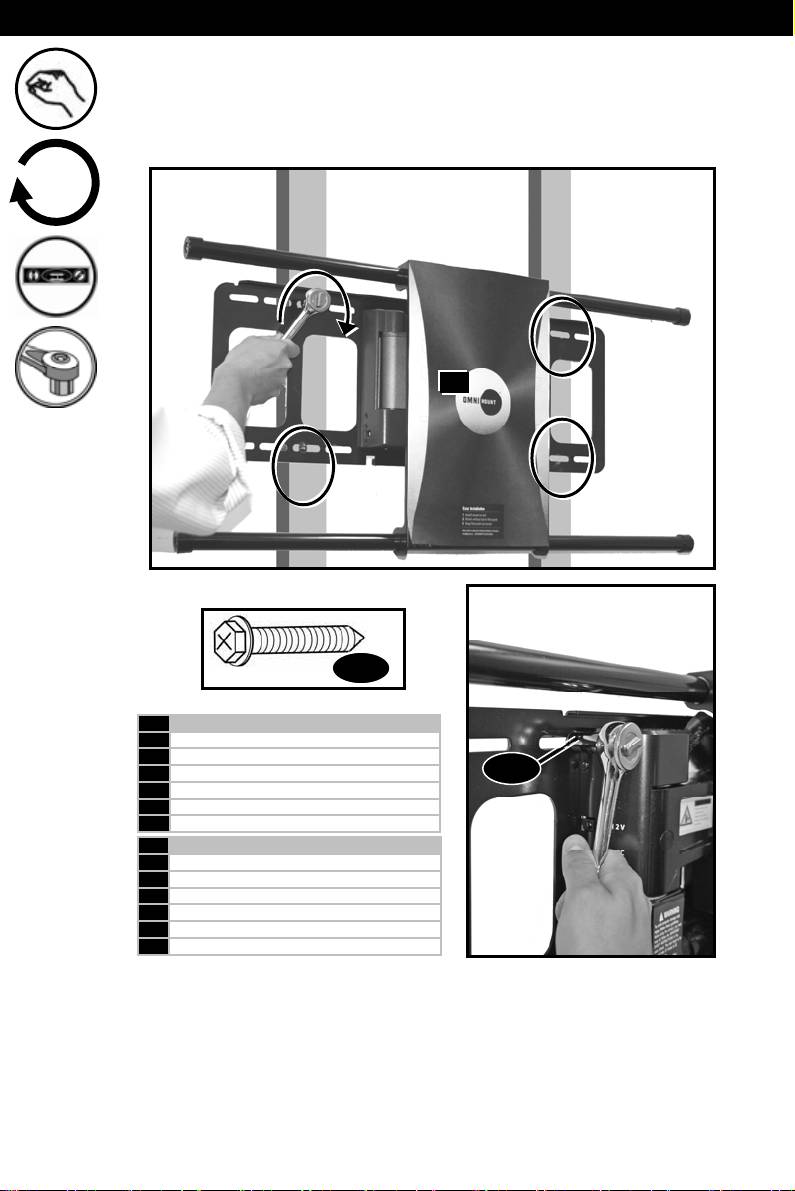
WOOD STUD INSTALLATION
X4
1
W-A
EN
Tighten Fastener
ES
Ajuste el sujetador
FR
Serrez l'attache
W-A
DE
Ziehen Siedie Befestigung fest
NL
Draaide bevestiging vast
IT
Serrare il dispositivo di fissaggio
RU
Затяните крепление
EN
Hand tools only
ES
Herramientas de mano solamente
FR
Outils manuels uniquement
DE
Nur Handwerkzeuge
NL
Gebruik alleen handgereedschap
IT
Serrare esclusivamente a mano
RU
Используйте только ручной инструмент
P13
