Yamaha A-S700: CONTROLS AND FUNCTIONS Front panel
CONTROLS AND FUNCTIONS Front panel: Yamaha A-S700
Table of contents
- CAUTION: READ THIS BEFORE OPERATING YOUR UNIT.
- CONTENTS FEATURES SUPPLIED ACCESSORIES
- CONTROLS AND FUNCTIONS Front panel
- Remote control
- Installing batteries in the remote Using the remote control control
- Rear panel
- Connecting speakers and other components CAUTION
- ■ Bi-wire connection CAUTION ■ Connecting via banana plug
- Connecting the supplied power cable
- Playing a source
- ■ Using the PURE DIRECT switch ■ Adjusting the BASS and TREBLE controls Adjusting the tonal quality ■ Using the CD DIRECT AMP switch
- ■ Adjusting the LOUDNESS control Recording a source
- TROUBLESHOOTING ■ General Problems Possible Causes Solutions
- Problems Possible Causes Solutions
- ■ Remote control Problems Possible Causes Solutions
- SPECIFICATIONS
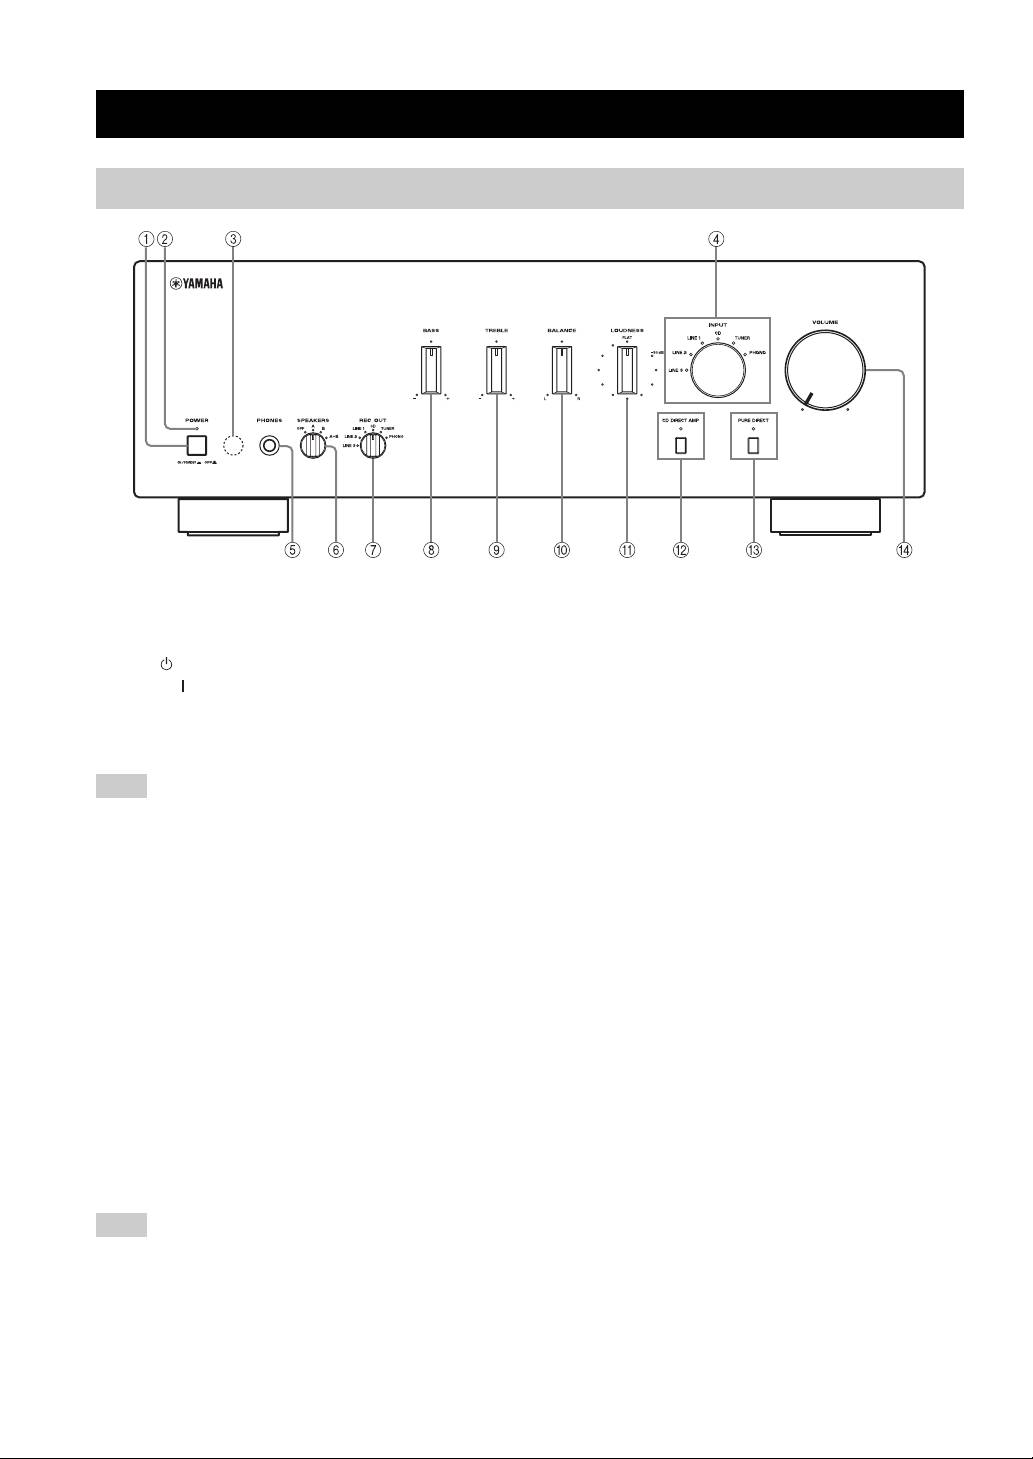
CONTROLS AND FUNCTIONS
Front panel
1 POWER
5 PHONES jack
Press inward to the ON position to turn on the power of
Connect headphones for private listening.
this unit. You can set this unit to standby mode by
Rotate the SPEAKERS selector on the front panel to the
pressing button on the remote control or turn on the unit
OFF position to turn off the sound from the speakers.
by pressing button on the remote control when this unit is
6 SPEAKERS selector
turned on.
Turn on or off the speaker set connected to the
Press again to release it outward to the OFF position to
SPEAKERS A and/or B terminals on the rear panel each
turn off this unit.
time the corresponding SPEAKERS selector is set to A, B
Note
or A+B.
Even when this unit is turned off, this unit consumes a small
7 REC OUT selector
amount of power to preserve the memory.
Select a source for recording independently of the INPUT
2 POWER on indicator
selector setting, allowing you to record the selected source
while listening to another source.
Lights up as follows:
See page 11 for details.
ON: Bright
Standby mode: Dark
8 BASS
OFF: Off
Increase or decrease the low frequency response.
3 Remote control sensor
See page 10 for details.
Receives signals from the remote control.
9 TREBLE
4 INPUT selector and indicators
Increase or decrease the high frequency response.
See page 10 for details.
Select the input source you want to listen to.
The input source indicators light up when the
0 BALANCE
corresponding input sources are selected.
Adjust the sound output balance of the left and right
y
speakers. See page 10 for details.
The input source names correspond to the names of the
A LOUDNESS
connection jacks on the rear panel.
Retain a full tonal range at any volume level.
Note
See page 11 for details.
The input setting is retained for about 1 week after the power
B CD DIRECT AMP and indicator
cable is unplugged.
Reproduces CD sound in the highest signal quality
regardless of the INPUT selector setting.
The indicator above it lights up when this function is
turned on. See page 10 for details.
2 En
