Yamaha A-S700: ■ Bi-wire connection CAUTION ■ Connecting via banana plug
■ Bi-wire connection CAUTION ■ Connecting via banana plug: Yamaha A-S700
Table of contents
- CAUTION: READ THIS BEFORE OPERATING YOUR UNIT.
- CONTENTS FEATURES SUPPLIED ACCESSORIES
- CONTROLS AND FUNCTIONS Front panel
- Remote control
- Installing batteries in the remote Using the remote control control
- Rear panel
- Connecting speakers and other components CAUTION
- ■ Bi-wire connection CAUTION ■ Connecting via banana plug
- Connecting the supplied power cable
- Playing a source
- ■ Using the PURE DIRECT switch ■ Adjusting the BASS and TREBLE controls Adjusting the tonal quality ■ Using the CD DIRECT AMP switch
- ■ Adjusting the LOUDNESS control Recording a source
- TROUBLESHOOTING ■ General Problems Possible Causes Solutions
- Problems Possible Causes Solutions
- ■ Remote control Problems Possible Causes Solutions
- SPECIFICATIONS
CONNECTIONS
CAUTION
• The IMPEDANCE SELECTOR must be set to the appropriate position before connecting one or two speaker sets.
See page 5 for details.
• Do not let the bare speaker wires touch each other or do not let them touch any metal part of this unit. This could
damage this unit and/or the speakers.
• Do not connect this unit or other components to the main power until all connections between components are
complete.
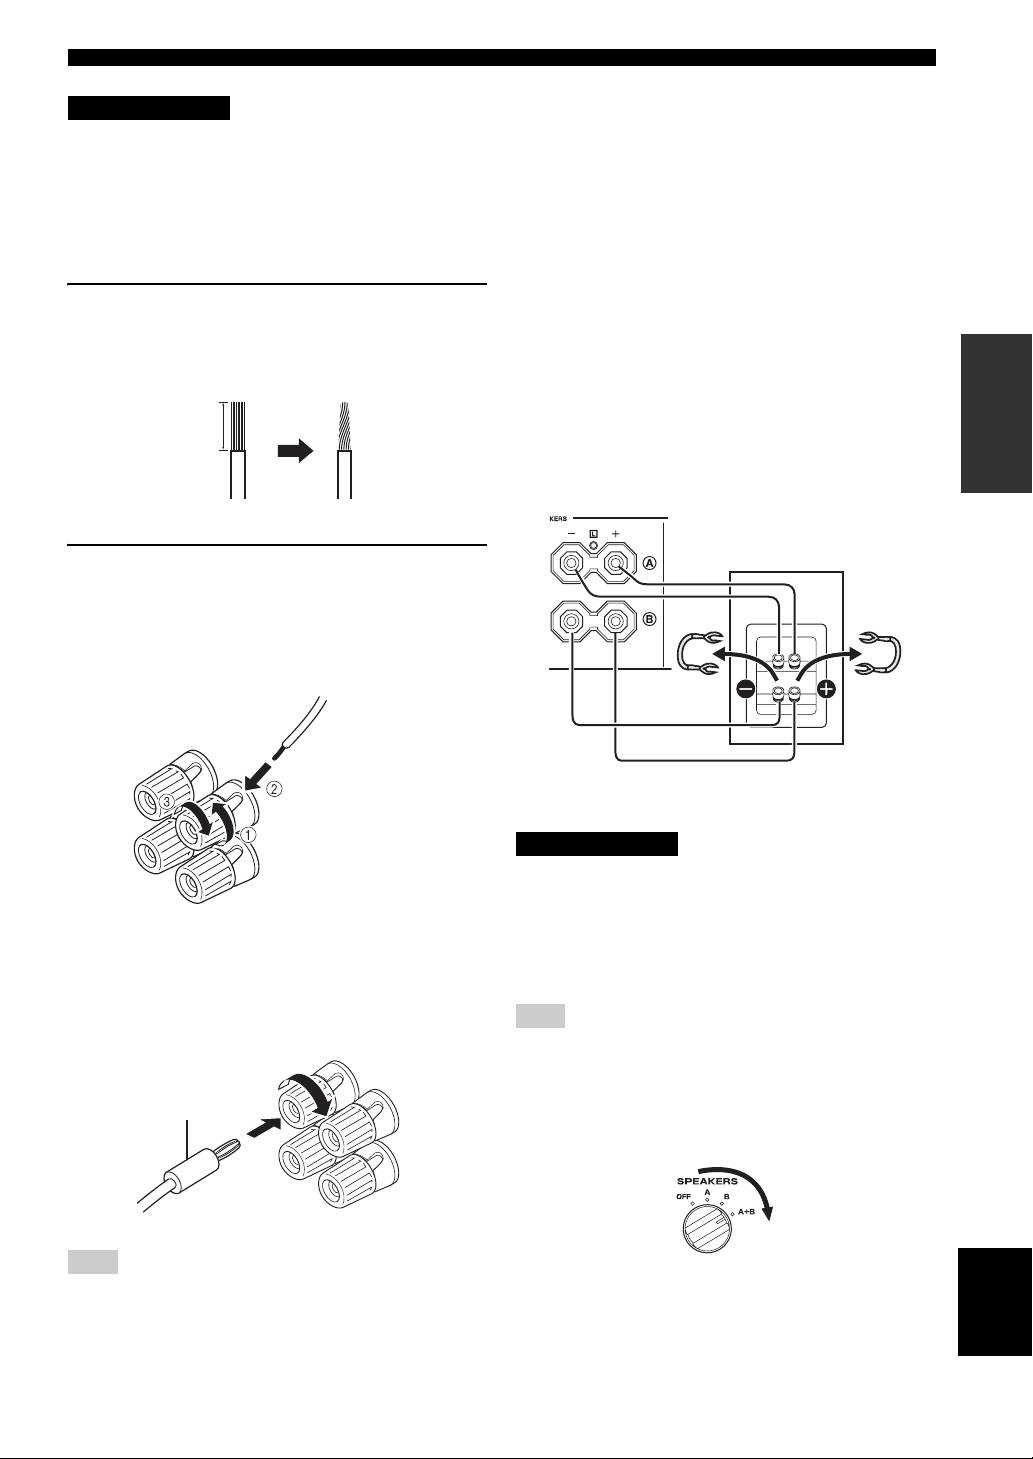
■ Bi-wire connection
1 Remove approximately 10 mm (3/8 in) of
The bi-wire connection separates the woofer from the
insulation from the end of each speaker
combined midrange and tweeter section. A bi-wire
PREPARATION
cable and twist the exposed wires of the
compatible speaker has four binding post terminals. These
two sets of terminals allow the speaker to be split into two
cable together to prevent short circuits.
independent sections. With these connections, the mid and
high frequency drivers are connected to one set of
10 mm (3/8 in)
terminals and the low frequency driver to another set of
terminals.
This unit
Speaker
2 Connect the speaker cable.
1 Unscrew the knob.
2 Insert one bare wire into the hole in the side
of each terminal.
3 Tighten the knob to secure the wire.
Red: positive (+)
Connect the other speaker to the other set of terminals in
Black: negative (–)
the same way.
CAUTION
When making bi-wire connections, set the IMPEDANCE
SELECTOR switch to HIGH or LOW depending on the
impedance of your speakers:
■ Connecting via banana plug
6 Ω or higher: HIGH
(Except for Asia, Korea, U.K. and Europe
4 Ω or higher: LOW
See page 5 for IMPEDANCE SELECTOR switch.
models)
First, tighten the knob and then insert the banana plug into
Note
the end of the corresponding terminal.
When making bi-wire connections, remove the shorting bridges
or cables on the speaker.
y
Banana plug
To use the bi-wire connections, switch the SPEAKERS selector
to the A+B position.
Note
English
One or two speaker sets can be connected to this unit.
7 En
