Yamaha A-S700: Connecting the supplied power cable
Connecting the supplied power cable: Yamaha A-S700
Table of contents
- CAUTION: READ THIS BEFORE OPERATING YOUR UNIT.
- CONTENTS FEATURES SUPPLIED ACCESSORIES
- CONTROLS AND FUNCTIONS Front panel
- Remote control
- Installing batteries in the remote Using the remote control control
- Rear panel
- Connecting speakers and other components CAUTION
- ■ Bi-wire connection CAUTION ■ Connecting via banana plug
- Connecting the supplied power cable
- Playing a source
- ■ Using the PURE DIRECT switch ■ Adjusting the BASS and TREBLE controls Adjusting the tonal quality ■ Using the CD DIRECT AMP switch
- ■ Adjusting the LOUDNESS control Recording a source
- TROUBLESHOOTING ■ General Problems Possible Causes Solutions
- Problems Possible Causes Solutions
- ■ Remote control Problems Possible Causes Solutions
- SPECIFICATIONS
CONNECTIONS
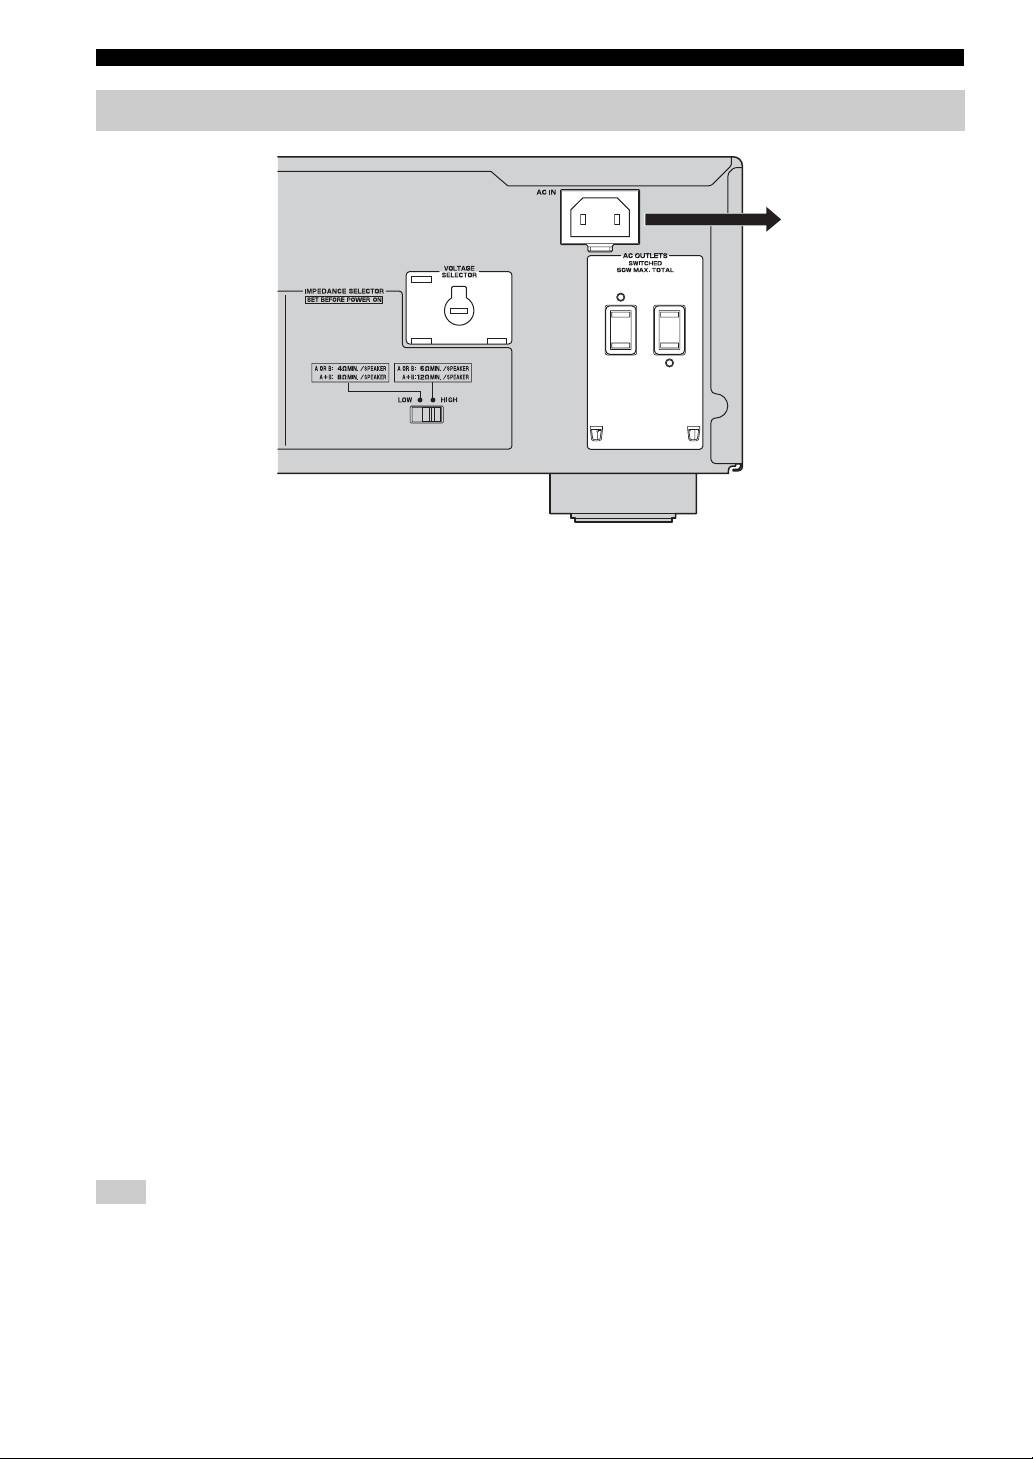
Connecting the supplied power cable
To the wall outlet with the
supplied power cable
(Asia and General models)
■ VOLTAGE SELECTOR
(Asia and General models only)
The VOLTAGE SELECTOR on the rear panel of this unit
must be set for your local main voltage BEFORE plugging
the supplied power cable into the wall outlet.
Improper setting of the VOLTAGE SELECTOR may
cause damage to this unit and create a potential fire
hazard.
Rotate the VOLTAGE SELECTOR clockwise or
counterclockwise to the correct position using a straight
slot screwdriver.
Voltages are as follows:
Asia model.......................... AC 220/230–240 V, 50/60 Hz
General model ......AC 110/120/220/230–240 V, 50/60 Hz
■ AC OUTLET(S) (SWITCHED)
U.K. and Australia models ..................................... 1 outlet
Korea model .............................................................. None
Other models ........................................................ 2 outlets
Use these outlets to connect the power cables from your
other components to this unit. The power to the AC
OUTLET(S) is controlled by POWER on the front panel
of this unit (or on the remote control). The outlet(s) supply
power to any connected component whenever the power
of this unit is turned on. For information on the maximum
power (total power consumption of components), see
“SPECIFICATIONS” on page 15.
Note
Do not connect components with a built-in amplifier, such as a
subwoofer, etc.
■ Connecting the supplied power cable
Plug the supplied power cable into the AC IN on the rear
panel of this unit and then, plug the power cable into the
wall outlet after all other connections are complete.
8 En
