Nikon AI-S Zoom-NIKKOR ED 200-400mm f-4: ■ Using a built-in rotating tripod collar ■ Using the lens hood ■ Lens protective glass
■ Using a built-in rotating tripod collar ■ Using the lens hood ■ Lens protective glass: Nikon AI-S Zoom-NIKKOR ED 200-400mm f-4
Table of contents
- Notes on Safety Operations
- Observe the following precautions when handling the camera and lens
- ■ Nomenclature
- En
- ■ Major features ■ Usable cameras and available functions
- Cameras
- ■ Focusing
- To limit the range of autofocus ■ Focus operation selection switch and focus operation button (See p. 20 for compatible cameras.) Focus lock (AF-L)
- Memory recall (MEMORY RECALL)
- Autofocus (AF) start on the lens (AF-ON) ■ Vibration reduction mode (VR
- Setting the vibration reduction ON/OFF switch Setting the vibration reduction mode switch
- ■ Setting the aperture ■ Focusing, zooming, and depth of field
- ■ Using a built-in rotating tripod collar ■ Using the lens hood ■ Lens protective glass
- ■ The built-in flash and vignetting
- ■ Slip-in filter holder ■ Recommended focusing screens
- ■ Lens care
- ■ Standard accessories ■ Optional accessories ■ Specifications
- Weight: Approx. 3,360 g (7.4 lbs) with lens protective
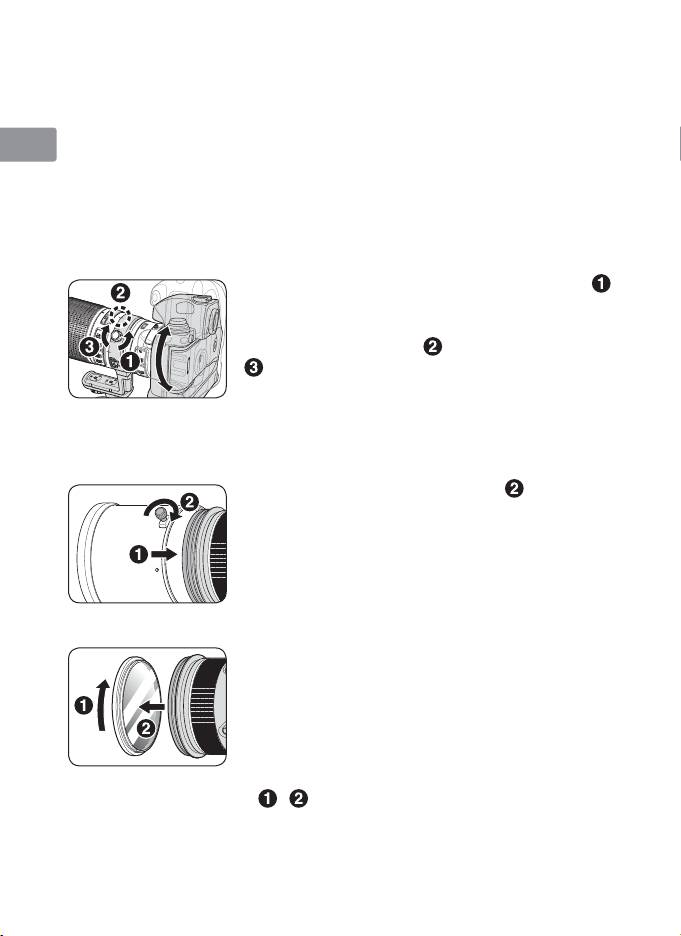
■ Using a built-in rotating tripod collar
When using a tripod, attach it to the lens’ tripod collar instead of the
Jp
camera.
• When holding the camera by its handgrip and rotating the camera
En
with the lens in its tripod collar, your hand may bump into the tripod,
depending on the tripod in use.
De
• It’s possible to detach the tripod collar by removing the tripod collar
lock screw. For details on this procedure, contact your nearest Nikon
Fr
service center or representative office.
Changing the camera position
Es
Loosen the tripod collar ring fastening screw ( ).
Depending on camera position (vertical or
Se
horizontal), turn the lens to an appropriate lens
rotating position index (
) and tighten the screw
Ru
(
).
Nl
■ Using the lens hood
Lens hoods minimise stray light and protect the lens.
It
Attaching the hood
Ck
• Fully tighten the lens hood screw ( ).
• If the lens hood is not correctly attached,
Ch
vignetting may occur.
• To store the lens hood, attach it in the
Kr
reverse position.
■ Lens protective glass
This lens is available with a lens protective glass
attached. Keeping this glass on the lens is
recommended at all times.
• If the picture you want to take includes a bright
light source, removing this glass may reduce
ghost images. To detach the glass, unscrew by
rotating the rubber ring around the glass
(
, ).
• Store the glass in the dedicated lens protective
glass case provided.
28
