Siemens TK 76001: Table of Contents
Table of Contents: Siemens TK 76001
Table of contents
- Table of Contents

deen
Table of Contents
Safety instructions
Overview...................................................24
Please read the operating instructions
Beforeusingforthersttime....................25
carefully and keep them for future
Controls ....................................................26
reference.
− Power on/off switch O / I .......................26
This automatic espresso machine is
− a button ................................................26
designed for domestic use and not
− Rotary knob ...........................................26
commercial use.
− Selection buttons < and > ..................26
− Display ..................................................27
! Risk of electric shock
−
start
button ............................................ 29
Connect and operate the appliance only in
−
°C
button ...............................................29
accordancewiththespecicationsonthe
− j button and settings .............................30
rating label.
− Adjusting the grinding unit .....................30
Do not use if either the power cord or the
− Cup warming ......................................... 30
appliance is damaged.
Menu settings ...........................................31
Use indoors at room temperature only.
−Language ..............................................31
This appliance is not intended for use by
−Waterhardness .....................................31
persons (including children) with reduced
− Descale .................................................31
physical, sensory or mental capabilities, or
− Clean .....................................................31
lack of experience and knowledge, unless
− Calc‘n‘Clean .......................................... 31
they have been given supervision or
− Show clock ............................................ 32
instruction concerning use of the appliance
− Time mode ............................................32
by a person responsible for their safety.
− Set clock................................................32
Keep children away from the appliance.
− Cup warmer on (TK76F09 only) ............32
Children should be supervised to ensure
− Cup warmer off in .................................. 32
that they do not play with the appliance.
−Auto off after ..........................................32
In the event of malfunction, unplug the
−Waterlter .............................................32
appliance immediately.
− Contrast.................................................33
To avoid potential hazards, repairs such as
− Factory settings .....................................33
replacing a damaged cord should only be
Preparation using coffee beans ................ 33
performed by our service personnel.
Preparation using ground coffee .............34
Never immerse the appliance or power cord
Preparing milk froth and warm milk ..........35
in water.
Dispensing hot water ................................35
Do not reach into the grinding unit.
Maintenance and daily cleaning ...............35
− Cleaning the milk system ......................36
! Risk of scalding
− Cleaning the brewing unit .....................36
The milk frother for milk and hot water gets
Storing accessories ..................................37
veryhot.Afteruse,allowtocooldownrst
Tips on energy saving ..............................37
before touching.
Service Programmes ...............................37
− Descaling ..............................................38
− Cleaning ................................................ 38
− Calc‘n‘Clean .......................................... 39
Frost protection.........................................40
Disposal .................................................... 40
Accessories ..............................................40
Guarantee.................................................40
Simple troubleshooting .............................41
23

deen
Dear Coffee Connoisseur,
These instructions describe various models
with different features.
Congratulations on purchasing this fully
Please also note the enclosed quick
automatic espresso machine from Siemens.
reference guide. It can be kept in the
special storage compartment 25 until it is
needed.
Overview
Figures A, B, C, D and E
1 Power on/off switch O / I
20 Button for cup warming function,
2 a button
illuminated
3
°C
button (temperature / child-proof lock)
21 Drawer
4 Selection buttons < >
(ground coffee / cleaning tablet)
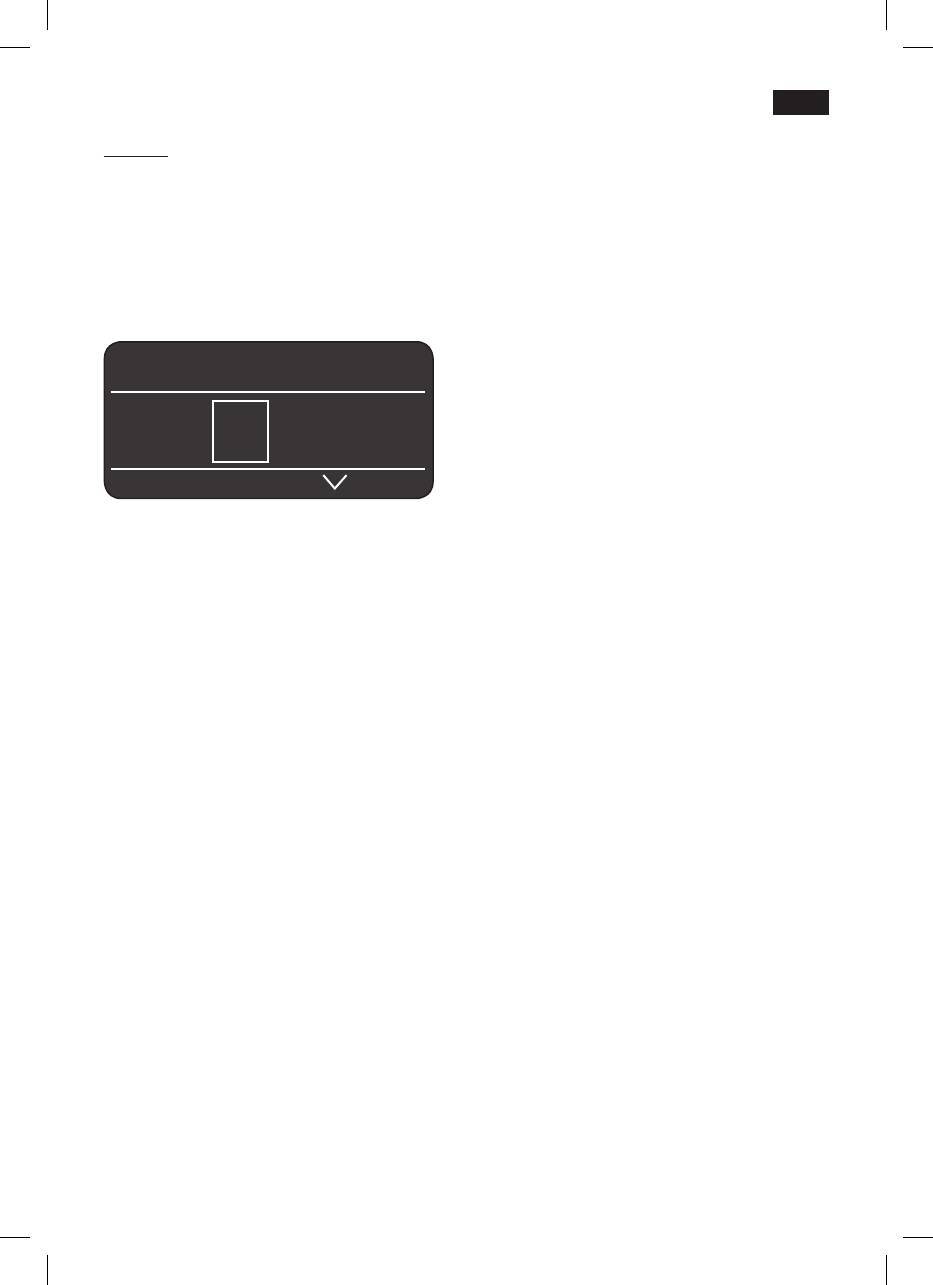
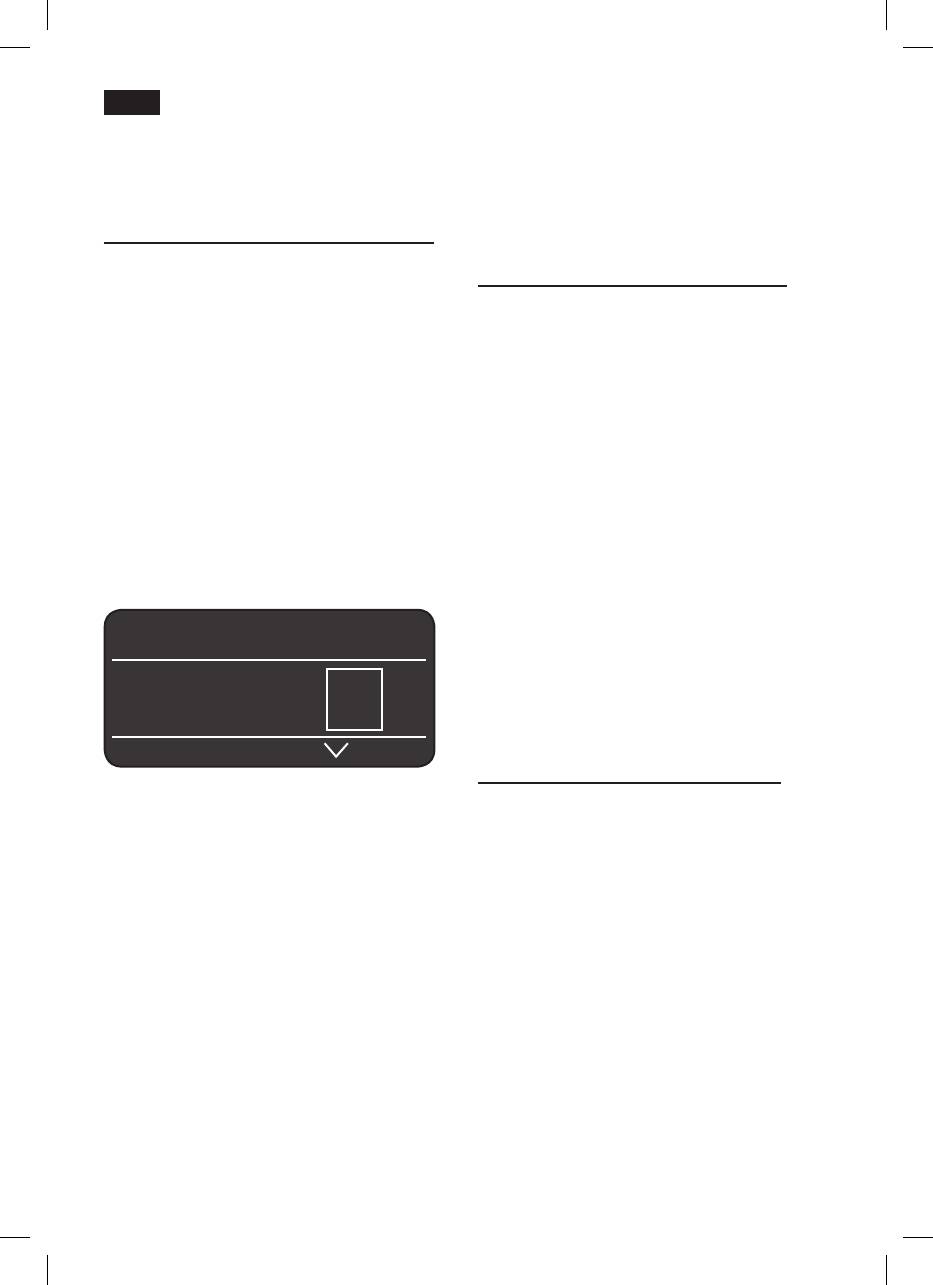
5 Display
22 Door to brewing unit
a) Status line
23 Door opener
b) Selection line
24 Brewing unit
c) Navigation line
a) Sliding button
6 Rotary knob for display settings
b) Lock
7 Info menu button j
25 Storage compartment for quick
8
start
button (drinks / programmes)
reference guide
9 Coffee outlet, height-adjustable and
26 Cover of storage compartment
swivelling
27 Drip tray panel
10 Milk frother, height-adjustable
28 Drip tray for coffee outlet
(milk / hot water)
29 Grate for coffee outlet
a) Upper part
30 Grate for milk frother
b) Lower part
31 Coffee grounds container
c) Tube
32 Cable storage compartment
d) Milk pipe
33 Milk container (insulated)
11 Removable water tank
34 Waterlter
12 Lid for water tank
13 Storage compartments
(measuring spoon and milk frother
accessories)
14 Measuring spoon
(insertionaidforwaterlter)
15 Bean container
16 Aroma cover
17 Selector for grind setting
18 Illuminated ring
19 Cup warming
24

deen
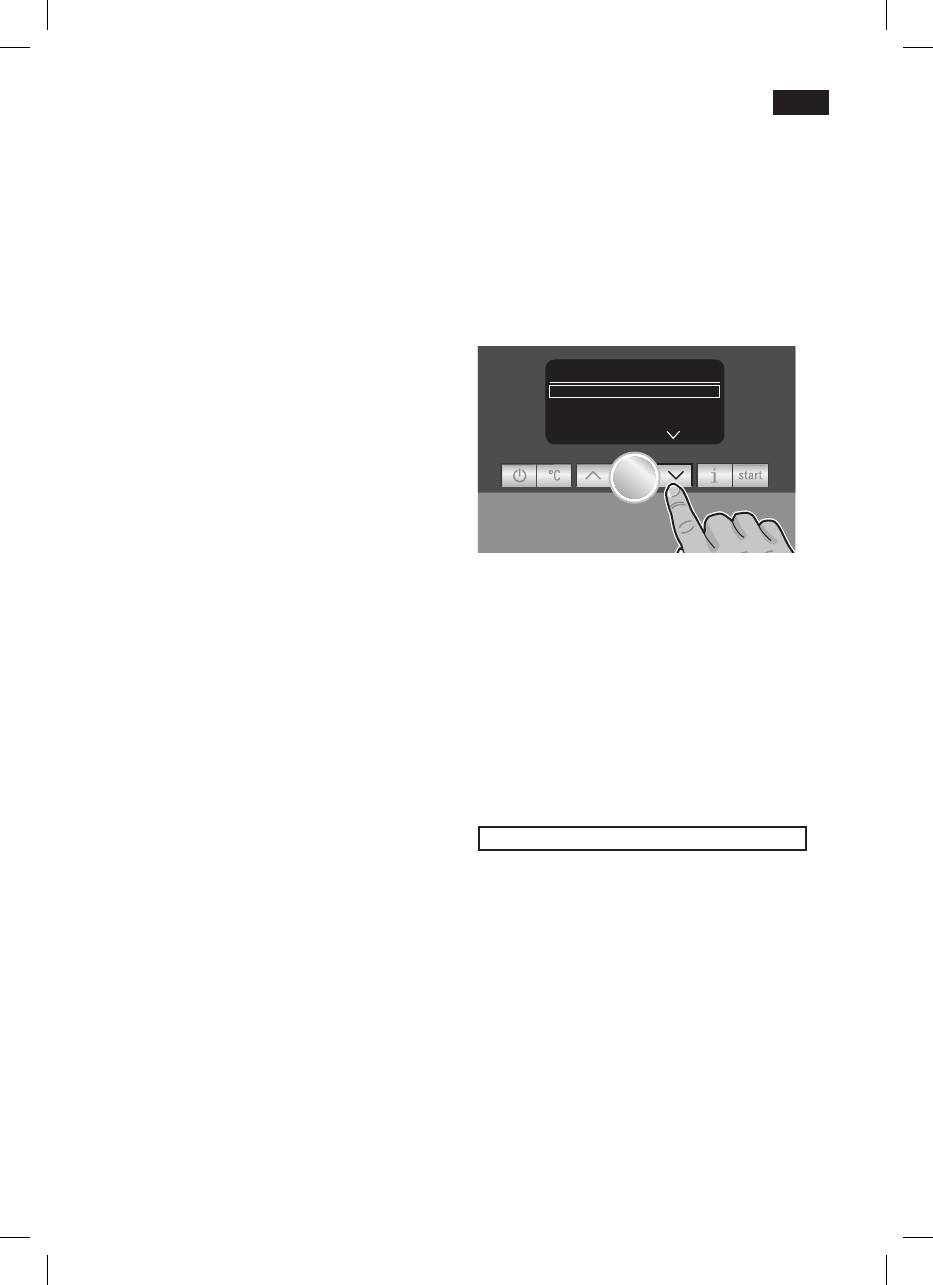
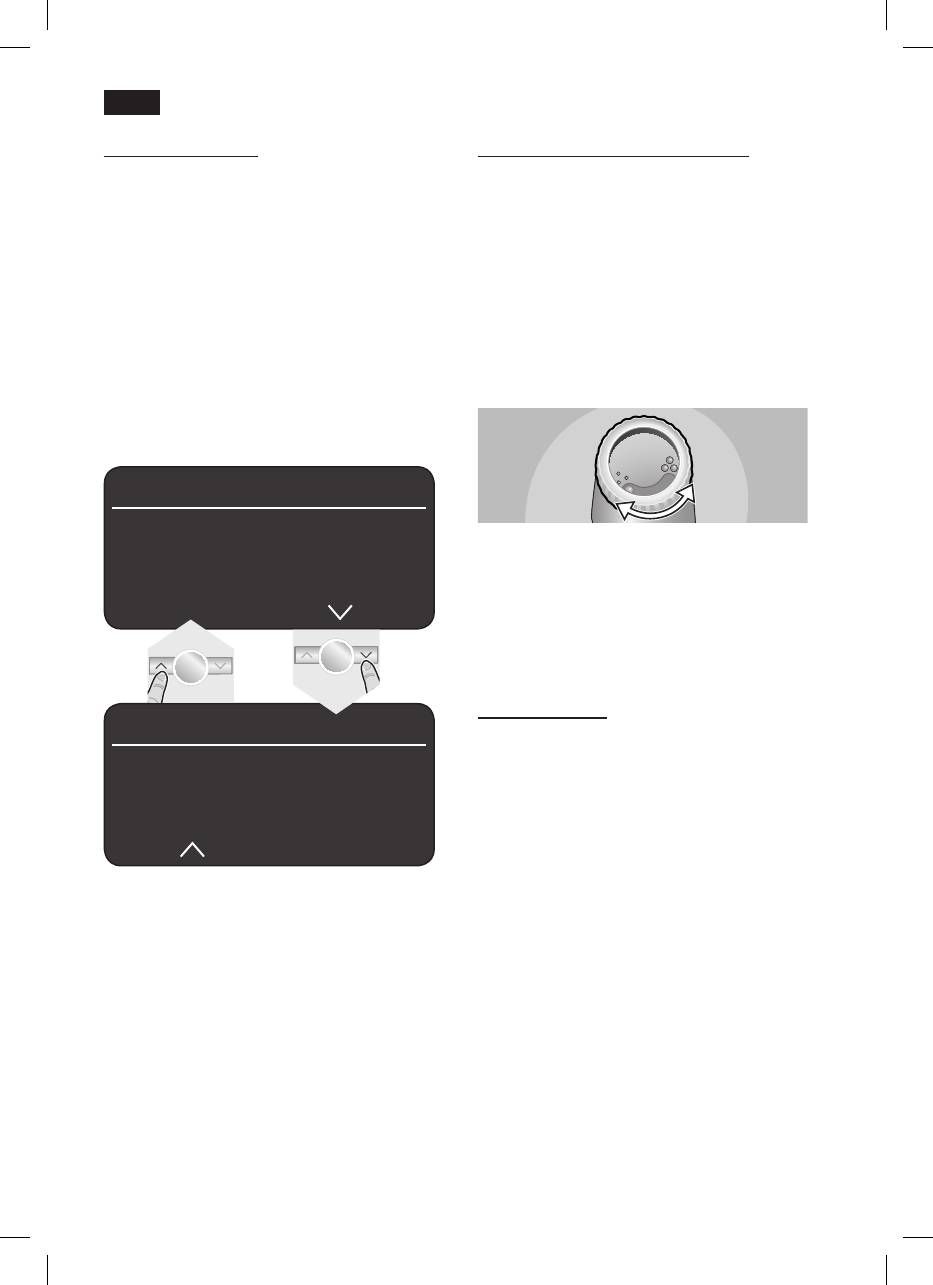
●
Press the power switch 1 O / I. The
start
Before using
button 8 lights up and the different
for the rst time
languages appear in the display 5.
General
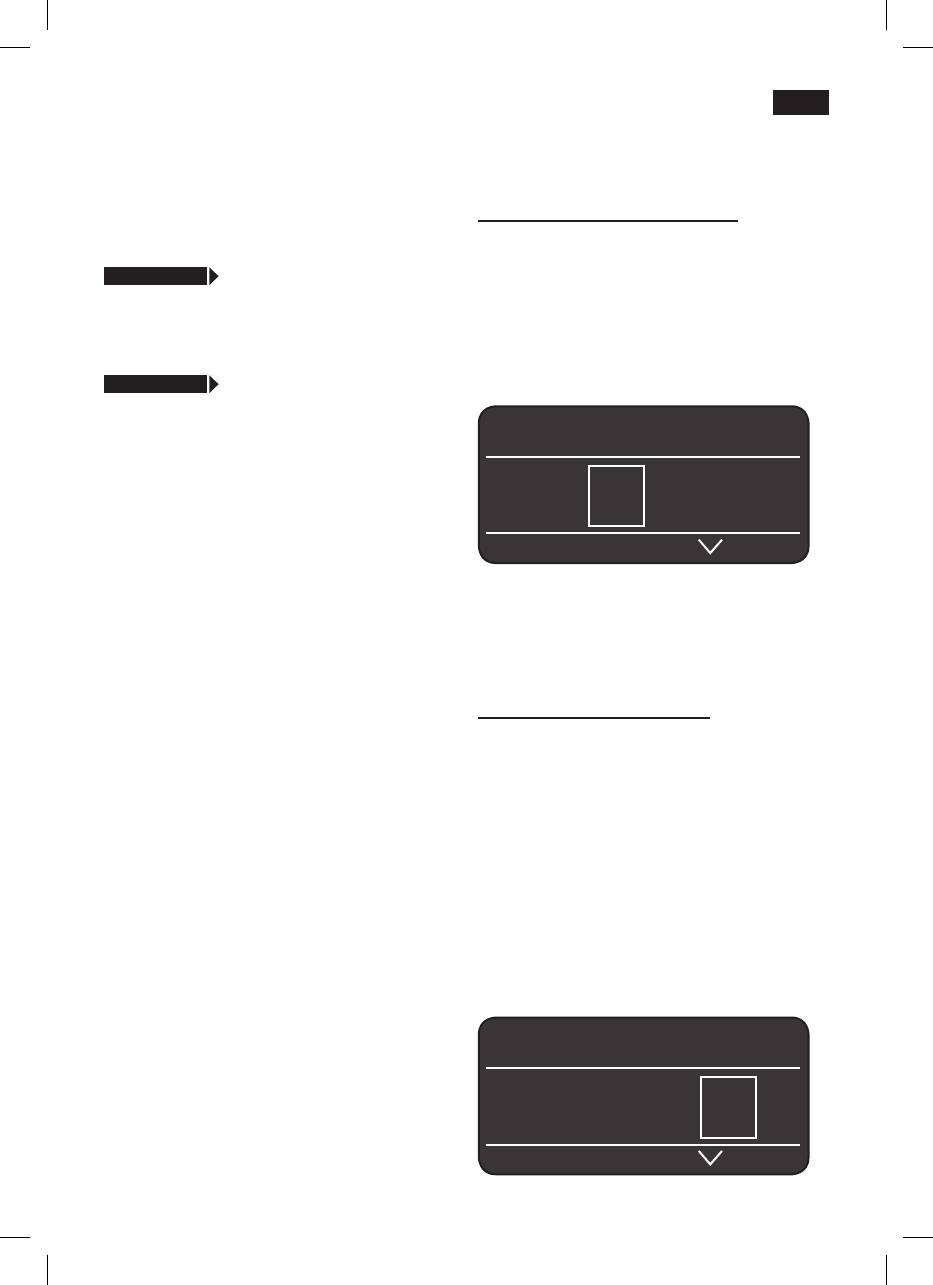
●
Use the buttons < and > 4 to select the
Fill the water tank with fresh, uncarbonated
language in which you want the display
water only, and preferably use only beans
texts to appear.
for fully automatic coffee and espresso
machines. Do not use coffee beans that
Language
Deutsch
start
have been glazed, caramelised or treated
engLish
with other additives containing sugar, since
Pycckий
they will block the brewing unit.
The water hardness setting can be adjusted
on this appliance. The factory default setting
for the water hardness is 4. Check the
water hardness with the enclosed test strip.
If a value other than water hardness 4 is
displayed, change the setting on the
The selected language is highlighted by a
appliance accordingly after switching on
frame. The following languages can be
(see “Menu settings WATER HARDNESS”).
selected:
Switching on the appliance
Deutsch
●
Place the fully automatic espresso
machineonaatsurfacethatcantakeits
e
ngLish
weight.
P
ycckий
Note: The appliance has four runners under
its base and can be moved sideways in an
n
eDerLanDs
arc to make operation and positioning
easier.
F
rançais
●
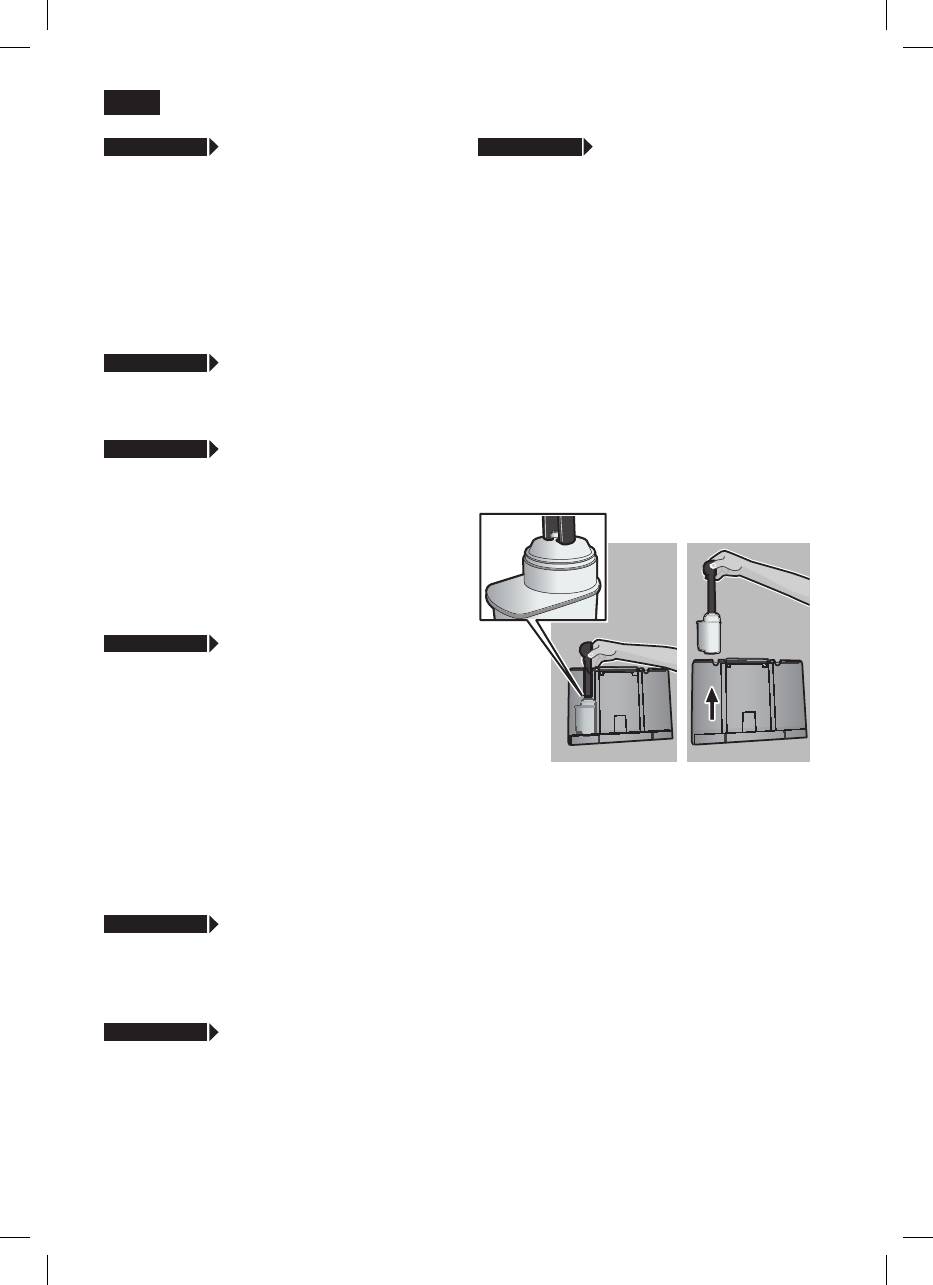
Pull the power cord out of the storage
compartment 32 and plug in. Adjust the
i
taLiano
length of the cable by pushing it back in
or pulling it out. The easiest way to do
s
venska
this is to place the appliance so that its
backisushwiththeedgeofthecounter
e
sPañoL
and either pull the cable downward or
push it upward.
P
oLski
●
Lift the lid of the water tank 12.
●
Remove and rinse the water tank 11 and
●Pressthe
start
button 8. The language
llitwithfreshcoldwater.
you selected is saved and the a button 2
Donotllabovethe“max” mark.
lights up.
●
Replace the water tank 11 and push it
rmlydownwardintoplace.
●
Close the lid of the water tank 12 again.
●
Fill the bean container 15 with coffee
beans.
25

deen
●Pressthe
a button 2. The brand logo
Controls
lights up in the display 5. The appliance
now heats up and rinses. Some water will
Power on/off switch O / I
run out of the coffee outlet 9. The
The power switch 1 O / I is used to switch
appliance is ready for use when the
the appliance to “energy saving mode” or to
symbols for selecting the type of coffee
switch it off completely. In “energy saving
preparation appear in the display 5.
mode” only the a button 2 lights up.
Important: Do not switch the appliance off
at the power on/off switch 1 until it is in
energy saving mode, so that the automatic
esPresso Ë Í
rinse process can take place.
a button
 à À Á Ä Å
The appliance is switched on (ready for
use) or put into “energy saving mode” with
the a button 2.
The a button 2asheswhiletheappliance
Note: The factory settings of the fully
is rinsing.
automatic espresso machine are
programmed for optimal performance. The
The appliance does not rinse if:
appliance switches to “energy saving mode”
●
it is still warm when switched on
automatically after 1 hour (see “Menu
●
no coffee was dispensed before it was
settings AUTO OFF AFTER”).
switched to “energy saving mode”.
Tip: If the appliance is being used for the
The appliance is ready for use when the
rsttimeorhasnotbeenoperatedfora
symbols for drink selection and the
start
longperiod,therstcupofcoffeewillnot
button 8 light up on the display 5.
have the full aroma.
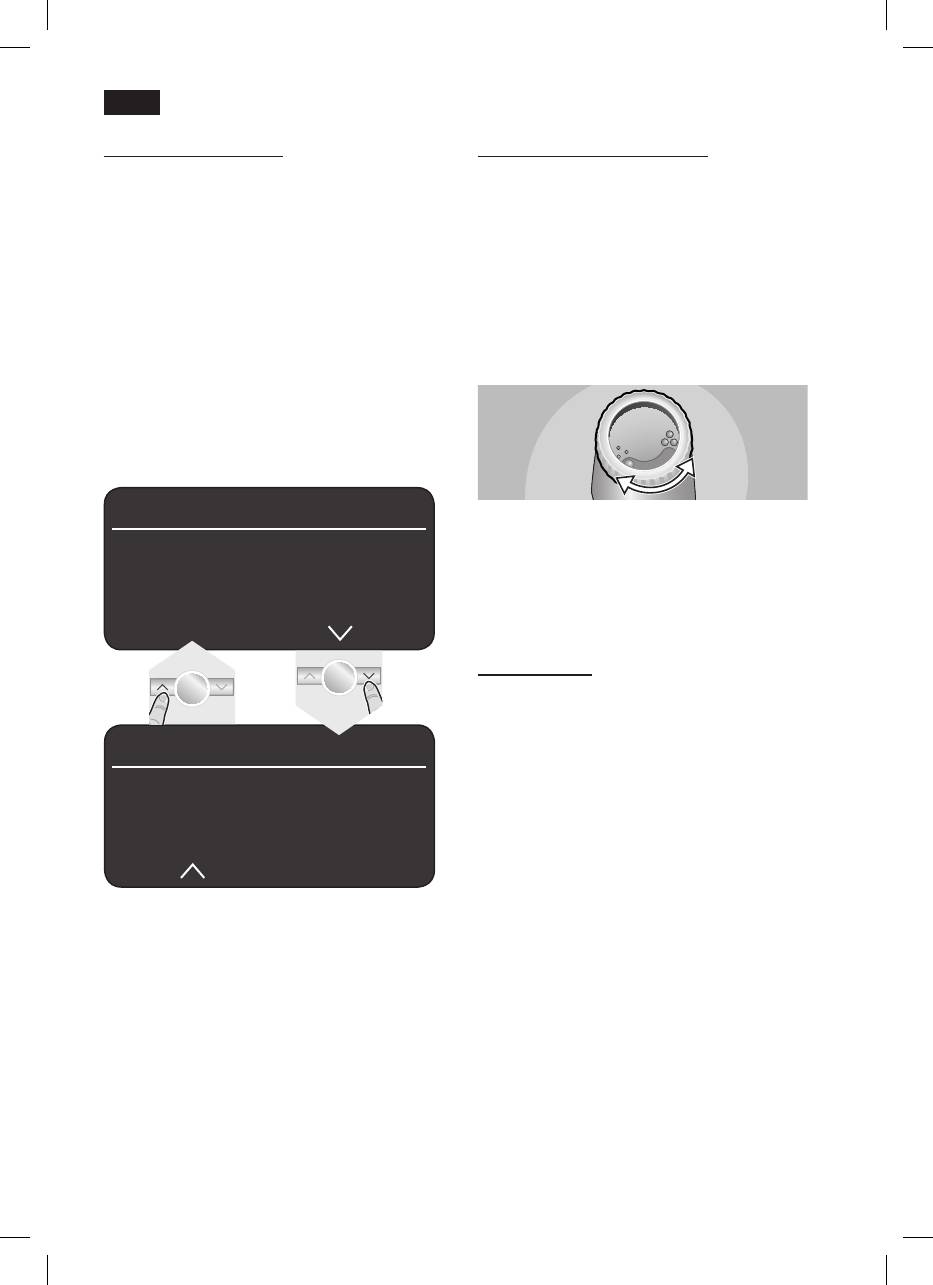
Rotary knob
When using the espresso machine for the
Turn the knob 6 to the left or right to
first time, you will achieve a suitably thick
navigate through the display 5, or to adjust
and stable “crema” only after the first few
parameters in the menu.
cups have been dispensed.
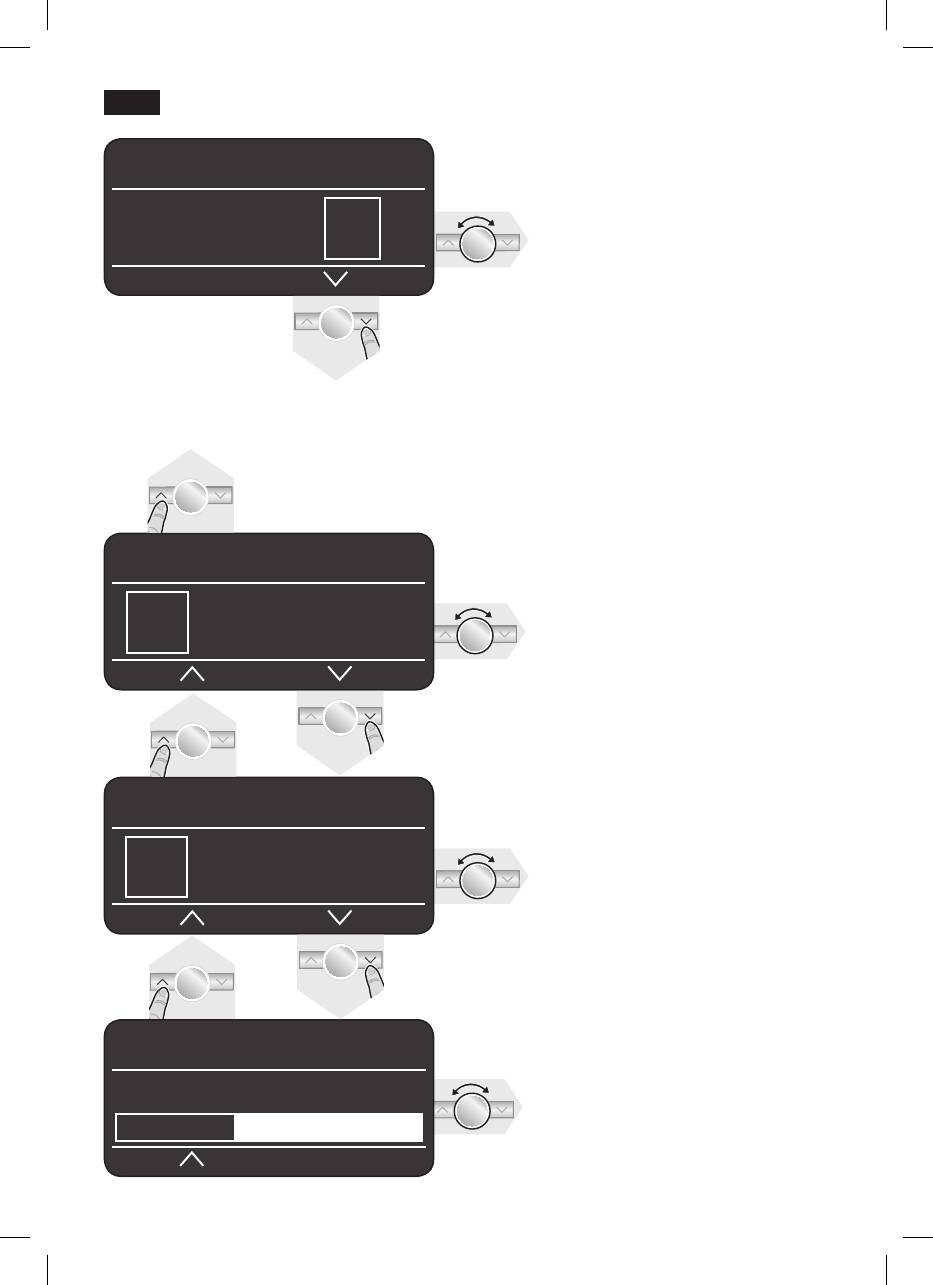
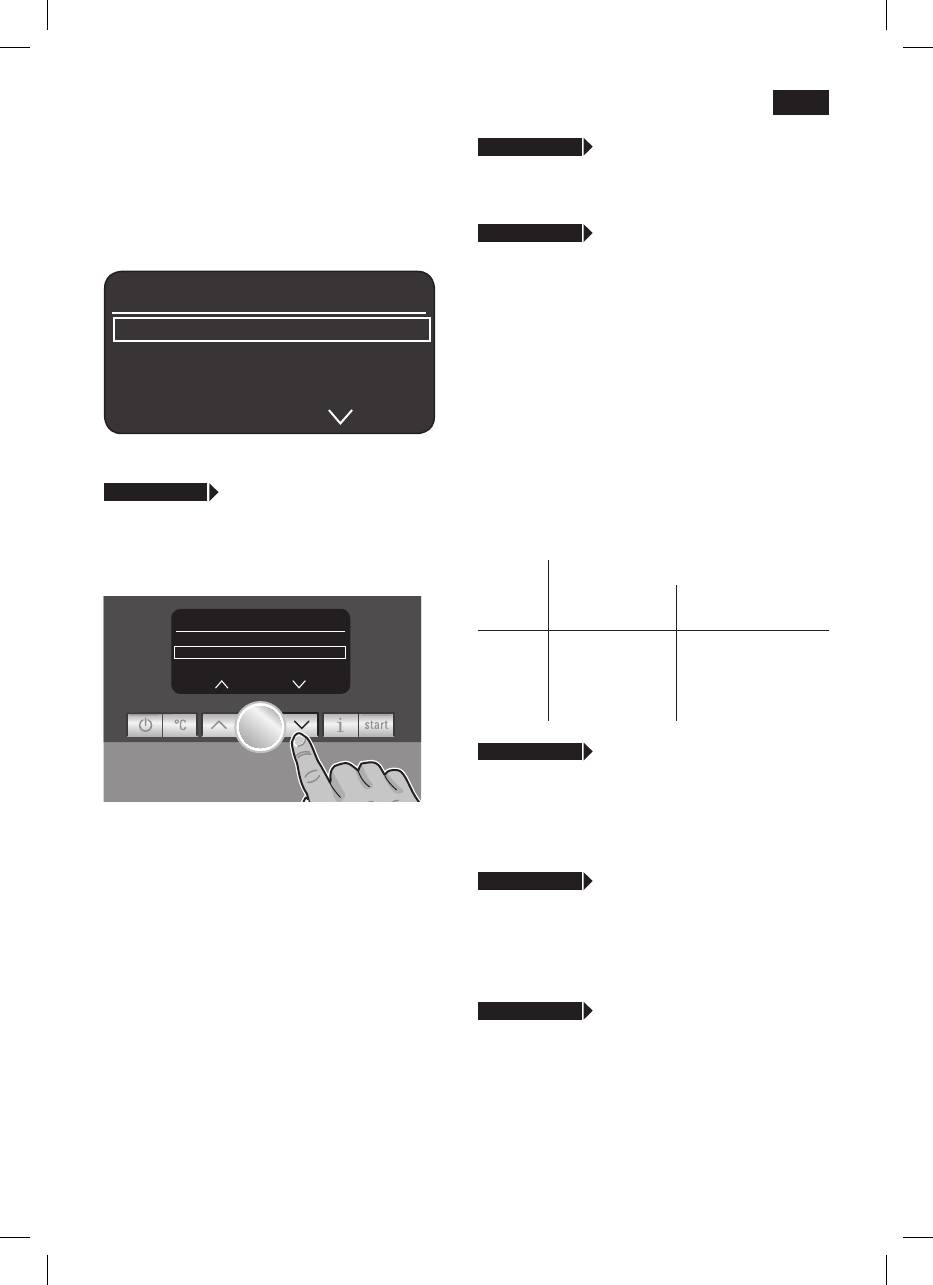
Selection buttons < and >
Press the selection buttons < and > 4 to
navigate up and down through the menu
levels (navigation line 5c).
26
deen
Display
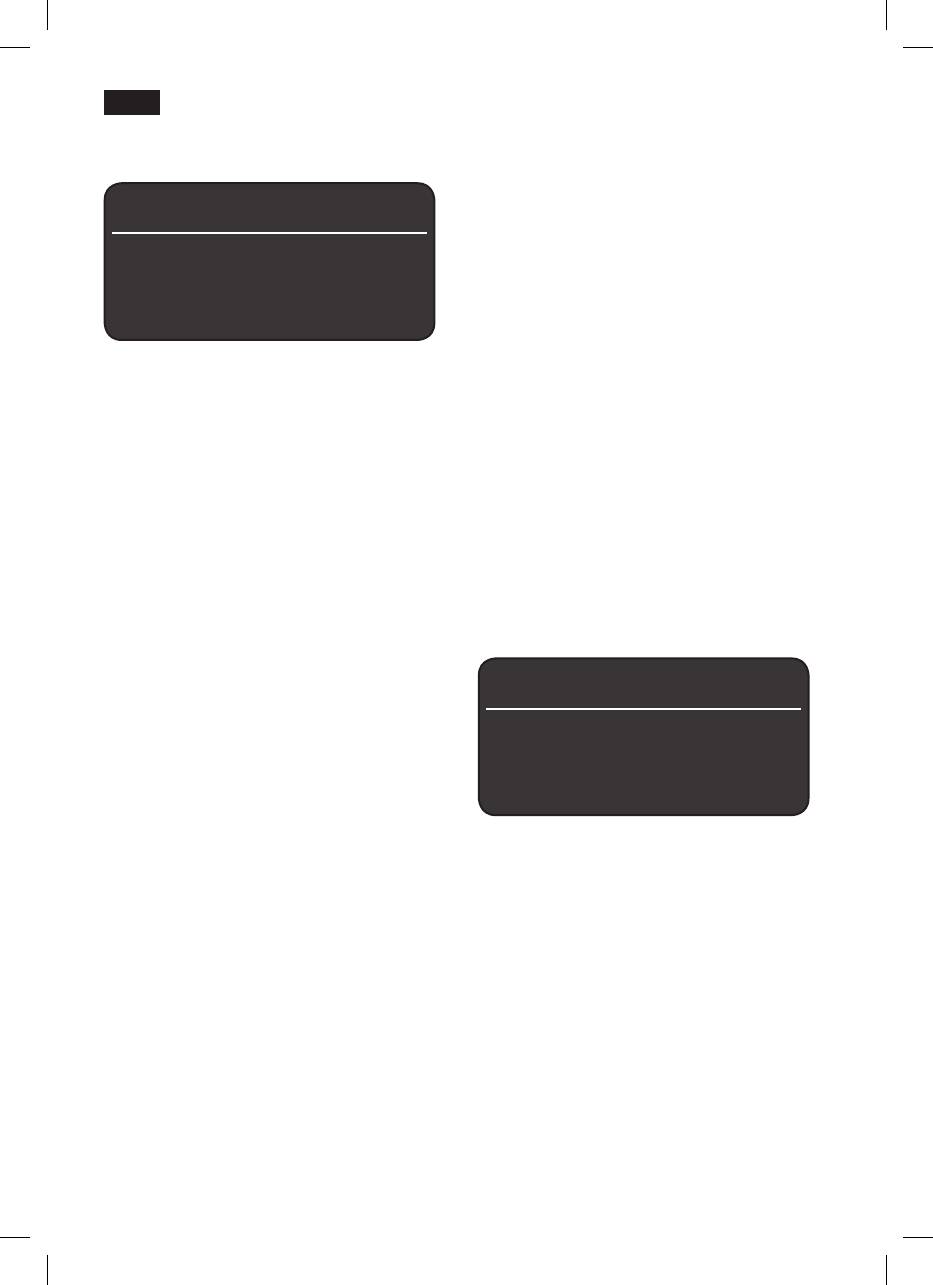
Display messages
The display 5 uses symbols to indicate the
Various messages are shown on the
selection options, coffee strength and per-
display 5.
cup quantity, and uses texts to indicate
settings, ongoing processes and messages.
Information:
The rotary knob 6 and selection buttons 4
Water tank aLMost eMPty
can be used to change settings. The
bean container aLMost eMPty
selected setting is highlighted by a frame.
PLease Wait
Prompts:
reFiLL Water tank
5a
esPresso Ë Í
rePLace Water tank
check Water tank
b
 à À Á Ä Å
rePLace DriP tray
eMPty DriP tray
c
reFiLL bean container
The status line 5a in the display shows the
Position sWiveL arM
name of the type of drink, along with the
set uP MiLk Frother
strength setting, e.g. 55 and per-cup
rePLace breWing unit
quantity, e.g.
�
. The selection line 5b
c
Lose Door
shows symbols for drink selection.
PLease check breWing unit
The arrows in the navigation line 5c indicate
FiLL DraWer With PoWDer
the direction in which more menu levels can
cLose DraWer
be found.
service - change FiLter
service - DescaLe
service - cLean
service - caLc‘n‘cLean
insuFFicient teMPerature
PLease Wait
high or LoW voLtage
27
deen
Selection options
My coFFee Ë Í
2 x esPresso
2 x coFFee
Â
Ã
Á Ä Å Æ Ç È
À
esPresso Á coFFee
Ä White coFFee
Macchiato
Å
Æ
caPPuccino
Ç
My coFFee
È
MiLk Froth
É
WarM MiLk
s
hort rinse For
hot Water
MiLk systeM
Ê
Ì
My coFFee Ë Í
Coffee strength
(only for coffee drinks)
5 5 5 5 5 5
5 55 555
mild regular strong
Per-cup quantity
My coFFee Ë Í
(only for coffee drinks)
� Ð Ò
� Ð Ò
small medium large
In addition to selecting the coffee
My coFFee Ë Í
strength and per-cup quantity you
can choose the exact mix of
esPresso MiLk
espresso and milk for your own
coffee setting My coFFee Ç. The
40%
settingcanbedenedin20%steps
by turning the rotary knob 6.
28
deen
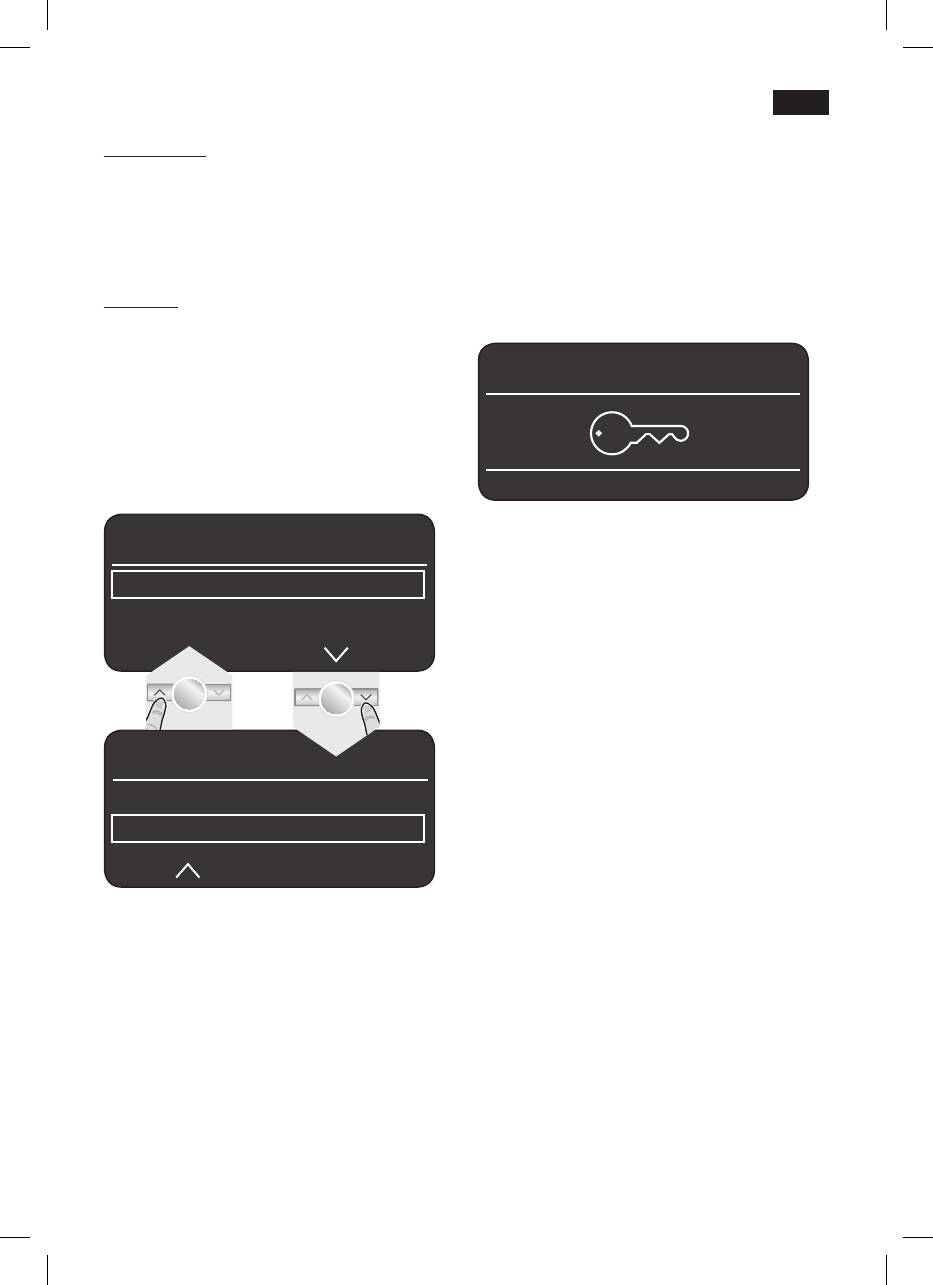
Start button
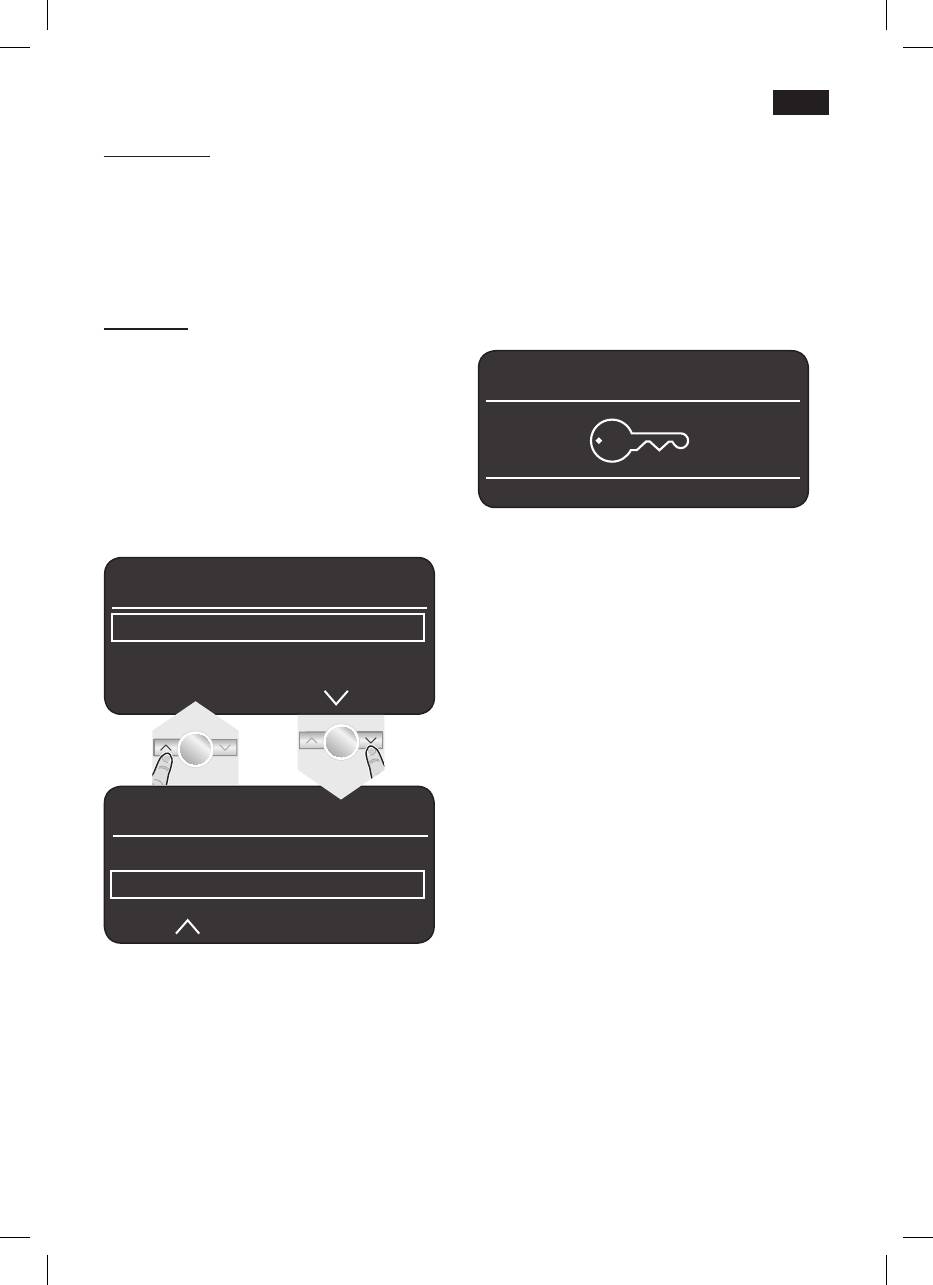
Child-proof lock
Press the
start
button 8 to begin drink
The appliance can be locked to protect
preparation or to start a service programme.
children from scalding and burning.
Press the
start
button 8 again during drink
●Holddownthe
°C
button 3 for at least 3
preparation to cut the dispensing process
seconds. The display 5 shows a key: the
short.
child-proof lock is activated.
It is no longer possible to operate the
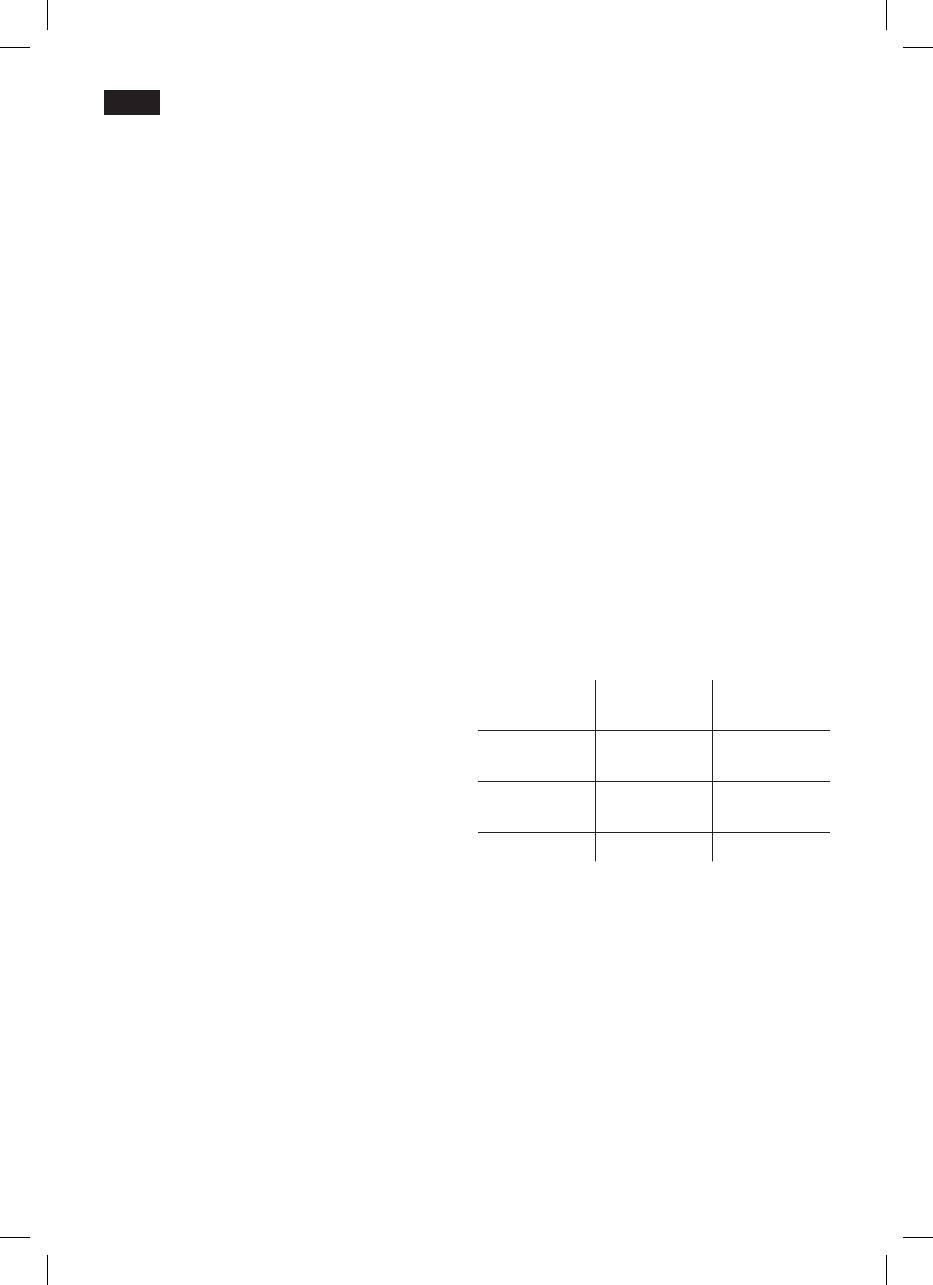
°C button
appliance and the cup warmer 19 is
Use the °
C
button 3 to set the temperature
switched off.
forcoffeeandteawater(pressbriey)and
to switch the child-proof lock on or off
esPresso Ë Í
(hold down for at least 3 seconds).
Setting the temperature:
Press the
°C
button 3brieyandenterthe
settings with the < and > buttons 4 and
the rotary knob 6.
● Todeactivatethechild-prooflock,hold
teMPerature
down the
°C
button 3 for at least 5
seconds. The key disappears from the
coFFee
norMaL
display 5.
hot Water
teMPerature
coFFee
hot Water
<90°c
Press the
C°
button 3 again to save the
settings and return to drink selection.
These settings are automatically effective
for all types of coffee preparation.
29
deen
j button and settings
Adjusting the grinding unit
Use the j button 7 to display information
The rotary selector 17 adjusts the grind
(pressbriey)andadjust settings (hold
settingsfromcoarsetone.
down for at least 3 seconds).
Warning
Displaying information
Adjust the grinding unit only while it is
The following information can be displayed
running! Otherwise the appliance may be
in the Info menu:
damaged.
–
how many drinks have been dispensed
●Whilethegrindingunitisrunning,adjust
since the espresso machine was switched
the rotary selector 17fromne•••to
on
coarse●●●asrequired.
–
when should the next service be
completed.
●Pressthej button 7brieyandnavigate
with the < and > buttons 4.
inFo
Note: The new setting will not become
apparent until after the second cup of
DescaLe aFter xxx cuPs
coffee.
cLean aFter xxx cuPs
no FiLter
Tip: For dark roast coffee beans, choose a
change FiLter in xxx cuPs *
nergrind,forlighterbeansacoarsergrind.
Cup warming
! Warning: The cup warmer 19
becomes very hot.
The fully automatic espresso machine has a
inFo
cup warmer 19 that can be switched on or
off manually with button 20. When the cup
no. oF coFFees xx
warmer 19 is on, button 20 lights up.
no. oF MiLk Mixes xx
aMount hot Water xL
Tip: For optimal cup warming, place the
base of the cups on the cup warmer 19.
*appearsonlyifthelterisactivated.
TK76F09 only
The cup warming function can also be pre-
Press the j button 7againbrieytoreturn
programmed (see “Menu settings CUP
to drink selection. If no button is pressed for
WARMER ON”).
about 10 seconds the appliance
automatically switches back to drink
selection mode.
Adjusting settings
(see “Menu settings”).
30

deen
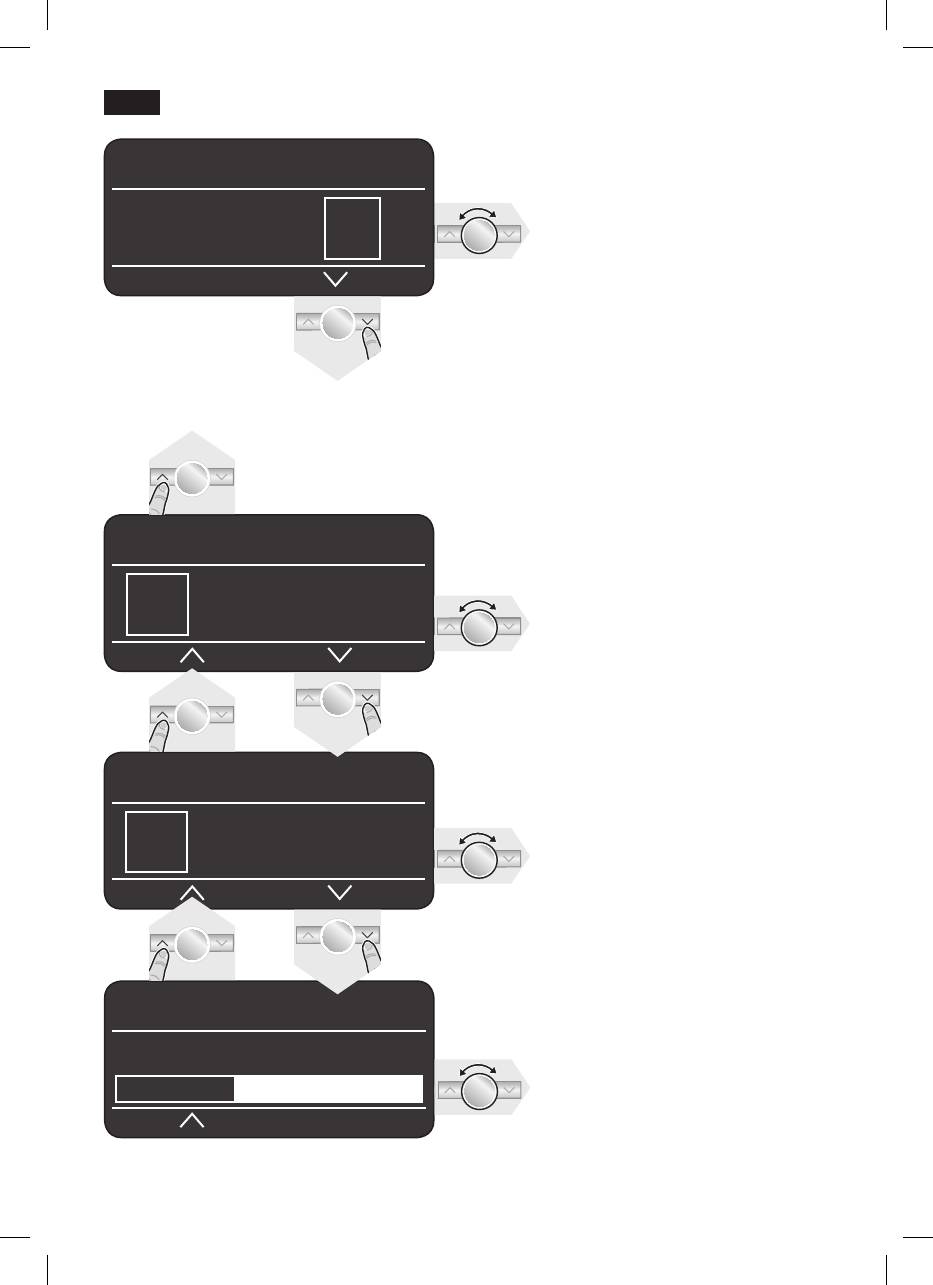
j 3 sec. + >
Language
Menu settings
●Turntheknob6 to select the required
●Holdthej button down for at least 3
language
seconds.
The different setting options are now
j 3 sec. + >
Water harDness
displayed
●Turntheknob6 to select the required
water hardness
1,2,3 or 4.
settings
Note: It is important to set the water
Language engLish
hardness correctly, so that the appliance
Water harDness
indicates accurately when the descaling
DescaLe
programme should be run. The factory
setting for the water hardness is 4.
You can check the water hardness using
In the following operating instructions, each
the enclosed test strip or by asking your
new setting begins with
j 3 sec. + >
local water supplier.
followed by an exact description.
●Diptheteststripinthewaterbrieyand
The different setting options can be
check the result after 1 minute.
selected with the
< and > buttons 4.
Level Water hardness
settings
German (°dH) French (°fH)
Water harDness
1
1-7
1-13
DescaLe
start
cLean
2
8-14
14-25
3
15-21
26-38
4
22-30
39-54
j 3 sec. + >
DescaLe
●Ifyouwanttodescaletheappliance,
press the
start
button 8 and run the
N.B.: The changes you have made are
descaling programme (see “Descaling”).
saved automatically.
Itisnotnecessarytoconrmthem
j 3 sec. + >
cLean
additionally.
●Ifyouwanttocleantheappliance,press
the
start
button 8 and run the cleaning
programme (see “Cleaning”).
j 3 sec. + >
caLc‘n‘cLean
●Ifyouwanttodescaleandcleanthe
appliance, press the
start
button 8 and
run the Calc‘n‘Clean programme (see
“Calc‘n‘Clean”).
31
deen
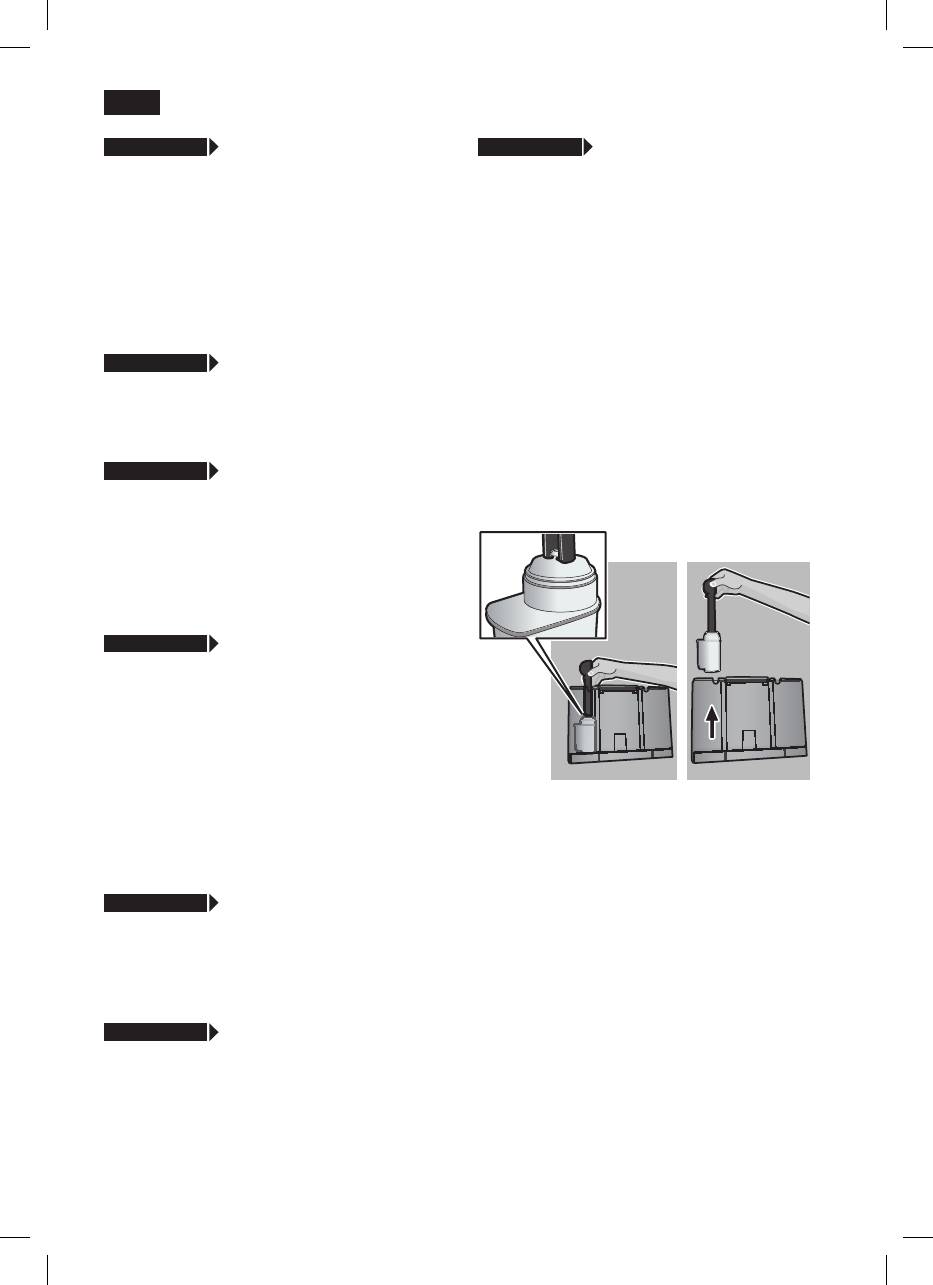
j 3 sec. + >
shoW cLock
j 3 sec. + >
Water FiLter
With this function you can set the clock to
Beforeanewwaterlter34 is used, it must
show the time in the display 5 during energy
be rinsed.
saving mode.
●
Todothis,pressthewaterlter34rmly
●Turntheknob6 to switch the clock
into the water tank 11 with the aid of the
display on = yes or off = no.
measuring spoon 14. Fill the water tank
with water up to the “max” mark.
Note: You must already have set the time
●
Turn the knob 6 to select start and
as shown in set cLock.
press the
start
button 8.
●PLace 0.5 L container unDer MiLk
j 3 sec. + >
tiMe MoDe
Frother
start
●
In time mode you can turn the knob 6 to
●
Place a container with a capacity of 0.5
set the time format to 12h or 24h.
litres under the milk frother 10.
●
Press the
start
button 8. Water will now
j 3 sec. + >
set cLock
owthroughthelter34 to rinse it.
●Turntheknob6 to set the current time,
●
Next, empty the container. The appliance
e.g. 08:25.Thegurethatcanbesetis
is ready to use once more.
always backlit; the backlighting switches
automatically between the hours and
minutes.
TK76F09 only
(programmable cup warmer)
j 3 sec. + >
cuP WarMer on
With this additional function the cup warmer
19 switches on automatically at a
programmable time, irrespective of whether
the appliance is in “energy saving mode” or
is ready for use.
Note: Rinsingthelter34 simultaneously
Note: You must already have set the time
activatesthesettingforthe“changelter”
under set cLock
display.
●
Set the required time by turning the knob
6. If oFF is selected, the function is
Youcannddetailedinformationaboutthe
deactivated.
waterlterintheenclosedlterinstructions.
j 3 sec. + >
cuP WarMer oFF in
Thelter34 is no longer effective when the
Here you can set the time span after which
change FiLter display appears, or at the
the cup warmer 19 switches off again
latest after 2 months. It needs to be
automatically.
replaced for reasons of hygiene and so that
there is no build-up of limescale (this could
j 3 sec. + >
auto oFF aFter
damage the appliance).
●
Turn the knob 6 to enter the time span
after which the appliance should
Replacementlterscanbeobtainedfrom
automatically switch to “energy saving
retailers (TZ70003) or from customer
mode” following drink preparation.
service(467873).Ifnonewlter34 is used,
A time between 5 minutes and 8 hours can
turn the Water FiLter setting to no.
be set.
32
deen
Note: If the appliance has not been used
Different coffee drinks can be prepared
for a prolonged period (e.g. vacation) the
quite simply at the press of a button.
lter34 should be rinsed before the
appliance is used again. To do this, simply
Drink preparation without milk
dispense a cup of hot water.
The appliance must be ready for use.
●
Place the pre-warmed cup(s) under the
j 3 sec. + >
contrast
coffee outlet 9.
The display contrast can be set from –20
●
Select the required espresso or coffee by
to +20. The factory setting is +0.
turning the knob 6. The display 5 shows
●
Enter the required setting with the knob 6.
the selected drink along with the setting
for coffee strength and the per-cup
j 3 sec. + >
Factory settings
quantity for this drink.
You can cancel your own settings and
reactivate the factory settings.
esPresso Ë Í
●
To activate the factory settings, press the
start
button 8.
Note: The appliance can also be reset to
 à À Á Ä Å
the factory settings using a combination of
buttons. The appliance must be switched off
fully.
●
Hold down the < and > buttons 4 and
The settings can be altered (see “Controls”).
the on/off switch 1 O / I at the same time
●
Press the
start
button 8.
for at least 5 seconds. Press the
start
The coffee is brewed and then dispensed
button 8. The factory settings are now
into the cup(s).
reactivated.
Drink preparation with milk
The appliance must be ready for use.
●Placethepipe10d of the milk frother 10
Preparation
deep in the milk container 33.
●
Swivel the coffee outlet 9 to the right until
using coffee beans
it clicks into place.
This fully automatic espresso machine
●
Place the pre-warmed cup or glass under
grinds beans freshly for each brew. If
the coffee outlet 9 and milk frother 10.
possible, use only beans for fully automatic
●
Select the required Macchiato
Å
,
coffee and espresso machines. For optimal
Cappuccino
Æ
, White coffee Ä or My
quality, deep-freeze the beans or store in a
coffee Ç by turning the knob 6. The
cool place in sealed containers. Coffee
display 5 shows the selected drink along
beans can be ground while frozen.
with the setting for coffee strength and
the per-cup quantity for this drink.
Important: Fill the water tank 11 with fresh
water every day. The tank should always
containsufcientwaterforoperatingthe
caPPuccino Ë Í
appliance.
Tip: Pre-warm cups, especially small, thick
À Á Ä Å Æ Ç
espresso cups, on the cup warmer 19.
33

deen
The settings can be altered (see “Controls”).
Drink preparation with milk
●
Press the
start
button 8. First milk is
●
Turn the knob 6 to select White coffee Ä,
delivered into the cup or glass. Then the
Macchiato
Å
, Cappuccino
Æ
or
coffee is brewed and dispensed into the
My coffee Ç.
cup or glass.
●
Place the pipe 10d of the milk frother 10
in the milk container 33.
Important:Driedmilkresidueisdifcultto
●
Swivel the coffee outlet 9 to the right until
remove, so clean the milk frother 10 with
it clicks into place.
lukewarm water immediately after use
●
Place the pre-warmed cup or glass under
(see “Cleaning the milk system”).
the coffee outlet 9 and milk frother 10.
●
Open the drawer 21 by pressing.
●
Pour in no more than 2 level measuring
spoons 14 of ground coffee.
Preparation using
Warning: Do not use whole beans or
ground coffee
instant coffee.
This fully automatic espresso machine can
●
Close the drawer 21.
also be operated with ground coffee (not
●
Press the
start
button 8. First milk is
instant coffee powder).
delivered into the cup or glass. After that
the ground coffee is brewed and
Drink preparation without milk
dispensed into the cup or glass.
●
Select À or Á by turning the knob 6.
●
Place the pre-warmed cup(s) under the
Important:Driedmilkresidueisdifcultto
coffee outlet 9.
remove, so clean the milk frother 10 with
●
Open the drawer 21 by pressing.
lukewarm water immediately after use (see
●
Pour in no more than 2 level measuring
“Cleaning the milk system”).
spoons 14 of ground coffee.
N.B.: Repeat the procedure for another
Warning: Do not use whole beans or
coffee / milk drink. If no coffee is taken
instant coffee.
within 90 seconds, the brewing chamber
●
Close the drawer 21.
emptiesautomaticallytoavoidoverlling.
●
Press the
start
button 8.
The appliance rinses.
The coffee is brewed and then dispensed
into the cup(s).
N.B.: Repeat the procedure for another cup
of coffee. If no coffee is taken within 90
seconds, the brewing chamber empties
automaticallytoavoidoverlling.Theappli-
ance rinses.
34

deen
Preparing milk froth
Dispensing hot water
and warm milk
! Risk of burns
! Risk of burns
The milk frother 10 gets very hot. After use,
The milk frother 10 gets very hot. After use,
allowtocooldownrstbeforetouching.
allowtocooldownrstbeforetouching.
The appliance must be ready for use.
The appliance must be ready for use.
●
Place the pre-warmed cup or glass under
●
Place the pipe 10d of the milk frother 10
the outlet of the milk frother 10.
in the milk container 33.
●
Select the required setting for hot water
●
Place the pre-warmed cup or glass under
Ê
by turning the knob 6.
the outlet of the milk frother 10.
●
Press the
start
button 8. Hot water runs
●
Select the required setting
out of the milk frother outlet 10 for about
“Milk froth”
È
or “Warm milk”
É
by
40 seconds.
turning the knob 6.
●
Press the
start
button 8 again to cut the
●
Press the
start
button 8. Milk froth or
process short.
warmmilkowsfromtheoutletofthemilk
frother 10 for about 40 or 60 seconds
N.B.: It is possible to set the temperature of
respectively.
the hot water (see “Controls, °
C
button”).
●
Press the
start
button 8 again to cut the
process short.
Maintenance and daily
Note: When preparing warm milk you may
cleaning
hear a whistling sound. This is caused by
the milk frother 10 for technical reasons.
! Risk of electric shock
Unplug the appliance before cleaning it.
Tip: For optimal milk froth quality, use cold
Never immerse the appliance in water.
low-fat milk (1.5% fat) if possible.
Do not use a steam cleaner.
Important:Driedmilkresidueisdifcultto
●
Wipe the outside of the appliance with a
remove, so clean the milk frother 10 with
soft, damp cloth. Do not use abrasive
lukewarm water immediately after use (see
cloths or cleaning agents.
“Cleaning the milk system”).
●
Rinse the water tank 11 and the brewing
unit 24 with water only.
●
The cover of the storage compartment
26, the drip tray panel 27 and the
insulating cover of the milk container 33
should only be wiped gently with a damp
cloth. Do not put them in the
dishwasher.
●
Remove the grate for the coffee outlet 29,
and the grate for the milk frother 30. Take
out the drip tray for coffee outlet 28 with
the coffee grounds container 31 by pulling
them out forward, empty and clean. All
these parts can also be cleaned in the
dish washer.
35

deen
●
Clean the measuring spoon 14, aroma
●
Rinse all parts with clear water and dry
cover 16 and the inside of the milk
them.
container 33 by hand or in the dish
●
Reassemble all the parts and replace fully
washer.
in the appliance.
●
Wipe out the inside of the appliance (tray
holders).
Note: All the parts of the milk frother 10 can
also be put in the dishwasher.
Important: Drip tray 28 should be emptied
and cleaned daily to prevent mould from
Cleaning the brewing unit
developing.
(refer also to the quick reference guide)
In addition to the automatic cleaning pro-
N.B.: If the appliance is cold when switched
gramme, the brewing unit 24 should be
on with the
a button 2, or if it is set to a
removed regularly for cleaning.
mode after brewing coffee, it rinses
●
Switch to the “energy saving mode” with
automatically, in other words the system
the a button 2.
cleans itself.
●
Switch the appliance off completely at the
power on/off switch 1 O / I; no buttons
Cleaning the milk system
are lit.
Clean the milk system 10 immediately after
●
Slide the door opener 23 to the right and
use!
open the door 22 to the brewing unit 24.
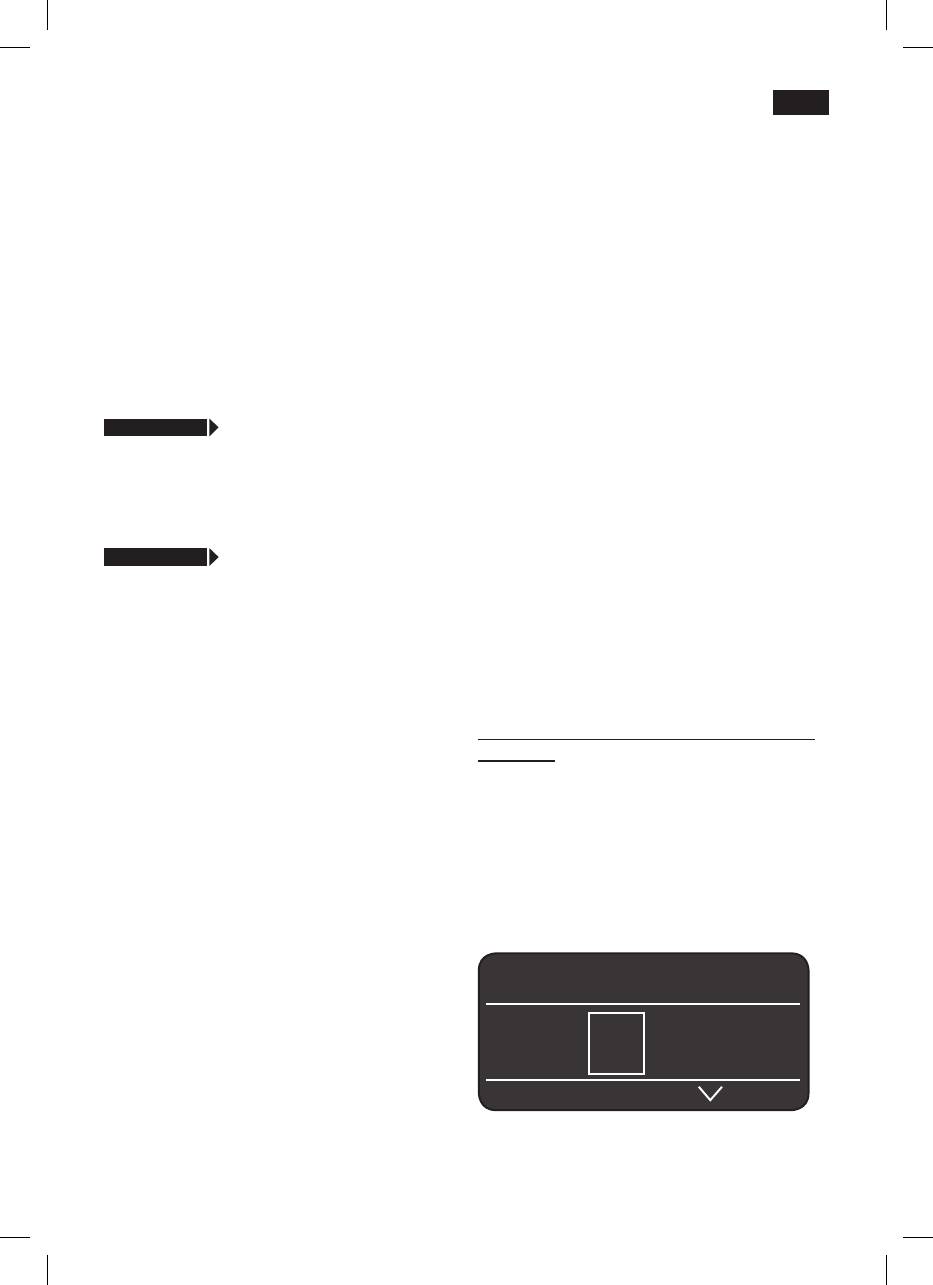
The milk system 10 can be pre-cleaned
●
Slide the red lock 24b on the brewing unit
automatically.
24 completely to the left.
●
Select the
symbol in the display 5 and
●
Press the red button 24a, grasp the
Ì
press the
start
button 8.
brewing unit 24 by the recessed grips
PLace eMPty gLass unDer Frother,
(Fig. E) and remove carefully.
P
Lace suction PiPe in gLass
start
●
Rinse the brewing unit 24 under running
●
Place an empty glass under the milk
water.
system 10 and put the end of the pipe
10d in the glass.
Important: Clean without detergent and do
●
Press the
start
button 8. The appliance
not place in the dishwasher.
nowllstheglassautomaticallywith
●
Wipe out the inside of the appliance with
water and draws it in again through the
a damp cloth.
pipe 10d for cleaning. The rinse
●
Allow the brewing unit 24 and the inside
procedure stops automatically after about
of the appliance to dry.
1 minute.
●
Reinsert the brewing unit 24 fully into the
●
Now empty the glass and clean the pipe
appliance.
10d.
●
Slide the red lock 24b fully to the right
and close the door 22.
In addition to this, clean the milk system
thoroughly at regular intervals (by hand or
in the dishwasher).
Dismantling the milk system 10 for
cleaning:
●
Pull the milk system 10 forward out of the
appliance.
●
Clean the individual parts (Fig. C) with a
detergent solution and a soft brush.
36

deen
Storing accessories
Service Programmes
The espresso machine has special com-
Tip: Refer also to the quick reference guide
partments for storing the accessories and
in the storage compartment 25.
quick reference guide inside the appliance.
●
To store the measuring spoon 14, milk
At regular intervals, the display 5 shows the
pipe 10d and tube 10c, remove the water
following texts:
tank 11 and insert the parts in the shaped
service - DescaLe or
recesses 13.
s
ervice - cLean or
service - caLc‘n‘cLean.
The quick reference guide has its own
The appliance should be cleaned or des-
compartment by the brewing unit 24.
caled immediately using the corresponding
●
Open the door 22 to the brewing unit.
programme. You also have the option of
●
Grasp the red cover 26 to the storage
combining both processes with thethe
compartment 25 by the tab and remove.
Calc‘n‘Clean function (see “Calc‘n‘Clean”).
●
Stow away the quick reference guide,
If the service programme is not run as
replace the cover 26 and close the door
instructed, the appliance may be damaged.
to the brewing unit 22
Warning
Each time you run the service programme,
you should follow the instructions for using
Tips on energy saving
the descaling and cleaning agents.
–
The fully automatic espresso machine
Never interrupt the service programme!
switches to “energy saving mode”
Do not drink the liquids!
automatically after one hour (factory
Never use vinegar, vinegar-based products,
setting). The appliance uses very little
citric acid or citric acid-based products!
power in “energy saving mode”. The
Never put descaling tablets or other
default time of one hour can be altered:
descaling agents in the ground coffee
(see Menu settings, “auto oFF aFter”) .
drawer or the drawer for cleaning tablets!
–
If the appliance is not being used, switch
For descaling, use only the descaling
it off at the power on/off switch 1 O / I on
tablets included with the appliance. They
the front.
have been developed specially for this coffee
–
If possible, do not interrupt coffee or milk
machine to optimise the descaling process.
froth dispensing. Cutting the coffee or
milk froth dispensing process short
Specially developed descaling and
results in higher energy consumption and
cleaning tablets are available from
in more residual water collecting in the
retailers or customer service.
drip tray.
–
Descale the appliance regularly to avoid a
Order number Retail Customer
build-up of limescale. Limescale residue
service
results in higher energy consumption.
Cleaning
TZ60001 310575
tablets
Descaling
TZ60002 310967
tablets
Important:Ifthereisalter34 in the water
tank 11, it needs to be removed before the
service programme is run.
37
deen
not enough DescaLing
Descaling
FLuiD. reFiLL FLuiD
Note: If there is not enough descaling
solution in the water tank 11, the
esPresso Ë Í
corresponding prompt is displayed. Pour in
descaling solution and press
start
8 again.
service - DescaLe
i - button 3 sec.
cLean anD reFiLL Water tank
start
●
Rinse the water tank 11andrellitwith
fresh water up to the “max” mark.
The
start
button 8asheswhilethedifferent
●
Press the
start
button 8. The descaling
descaling processes are running.
programme now runs for about 1 minute
Theguresonthetoprightindicatethe
and rinses the appliance.
progress of the programme.
DescaLing
●
Hold the j button 7 down for at least 3
e
MPty DriP tray
seconds.
rePLace DriP tray
DescaLe
start
●
Empty drip tray 28 and replace them.
●
Press the
start
button 8; the display 5 will
The appliance has completed descaling and
guide you through the programme.
is ready for use again.
eMPty DriP tray
r
ePLace DriP tray
Cleaning
●
Empty drip tray 28 and replace them.
PLace 0.5 L container unDer MiLk
esPresso Ë Í
Frother
start
●
Place a container with a capacity of 0.5
service - cLean
litres under the milk frother 10.
●
Press the
start
button 8.
i - button 3 sec.
Note: Ifthewaterlter34 is activated, the
displaywillpromptyoutoremovethelter
The
start
button 8asheswhilethedifferent
34, then press the
start
button 8 again
cleaning processes are running.
reMove FiLter
start
Theguresonthetoprightindicatethe
progress of the programme.
aDD 0.5 L Water anD DescaLer
●
Fill the water tank 11 up to the “max”
start
mark.
●
Pour lukewarm water into the empty
●
Hold the j button 7 down for at least 3
water tank 11 up to the “0.5” litre mark
seconds.
and dissolve 2 Siemens descaling tablets
in it.
cLean
start
●
Press the
start
button 8. The descaling
●
Press the
start
button 8; the display 5 will
programme will now run for about 20
guide you through the programme.
minutes.
DescaLing
38

deen
eMPty DriP tray
guresonthetoprightindicatetheprogress
r
ePLace DriP tray
of the programmes.
●
Empty drip tray 28 and replace them. The
●
Hold the
j button 7 down for at least 3
appliance rinses twice.
seconds.
Position sWiveL arM
caLc‘n‘cLean
start
●
Swivel the coffee outlet 9 to the left until it
●
Press the
start
button 8; the display will
clicks into place.
guide you through the programme.
cLeaning
eMPty DriP tray
oPen DraWer
rePLace DriP tray
●
Open the drawer 21 by pressing.
●
Empty drip tray 28 and replace them.
●
Swivel the coffee outlet 9 to the right until
insert sieMens cLeaning tabLet anD
it clicks into place.
cLose DraWer
●
Place a container with a capacity of at
●
Drop a Siemens cleaning tablet in the
least 1 litre under the milk frother 10.
drawer 21 and close.
●
Press the
start
button 8. The appliance
rinses twice.
Press start
●
Press the
start
button 8. The cleaning
cLeaning
programme will now run for about 7
o
Pen DraWer
minutes.
●
Open the drawer 21 by pressing.
cLeaning
insert sieMens cLeaning tabLet anD
e
MPty DriP tray
cLose DraWer
r
ePLace DriP tray
●
Drop a Siemens cleaning tablet in the
●
Empty drip tray 28 and replace them.
drawer 21 and close.
The appliance is ready for use again.
Note: Ifthewaterlter34 is activated, the
display 5willpromptyoutoremovethelter
34 and press the
start
button 8 again.
Calc‘n‘Clean
reMove FiLter
start
Calc‘n‘Clean combines the separate
functions of descaling and cleaning. If both
aDD 0.5 L Water anD DescaLer
programmes are due to be run soon, the
start
espresso machine automatically suggests
●
Pour lukewarm water into the empty
this service programmes.
water tank 11 up to the “0.5” litre mark
and dissolve 2 Siemens descaling tablets
in it.
esPresso Ë Í
●
Press the
start
button 8. The descaling
programme now runs for about 20
minutes.
service - caLc‘n‘cLean
DescaLing
i - button 3 sec.
not enough DescaLing
FLuiD. reFiLL FLuiD
The
start
button 8asheswhilethedifferent
Note: If there is not enough descaling
Calc‘n‘Clean processes are running. The
solution in the water tank 11, the
39
deen
corresponding prompt is displayed. Pour in
●
Select the “Milk froth”
È
setting, start and
descaling solution and press
start
8 again.
release steam for about 15 seconds.
●
Switch the appliance off at the power on/
cLean anD reFiLL Water tank
off switch 1 O / I.
start
●
Empty the water tank 11 and the drip tray
●
Rinse the water tank 11andrellitwith
28.
fresh water up to the “max” mark.
●
Press the
start
button 8. The descaling
programme now runs for about 1 minute
Disposal
A
more, followed by the cleaning
programme for about 7 minutes, and
This appliance is labelled in accordance
rinses the appliance.
with the European Directive 2002/96/EG
relating to waste electrical and electronic
DescaLing
equipment – WEEE. The directive provides
cLeaning
the framework for the EU-wide take-back
eMPty DriP tray
and disposal of end-of-life appliances.
r
ePLace DriP tray
Please ask your specialist retailer about
●
Empty drip tray 28 and replace them.
current disposal facilities.
The appliance has completed descaling and
cleaning and is ready for use again.
Accessories
Important: If one of the service
programmes is interrupted, e.g. by a power
The following accessories can be obtained
outage, proceed as follows:
from retailers and customer service.
●
Rinse the water tank 11andrellitwith
fresh water up to the “max” mark.
Order
Retail Customer
●
Press the
start
button 8. The cleaning
number
service
programme now runs for about 3 minutes,
Cleaning
TZ60001 310575
and rinses the appliance.
tablets
cLeaning
Descaling
TZ60002 310967
eMPty DriP tray
tablets
r
ePLace DriP tray
Water filters TZ70003 467873
●
Empty drip tray 28 and replace them.
The appliance is ready for use again.
Guarantee
Frost protection
The guarantee conditions for this appliance
! To avoid damage from low tempera-
areasdenedbyourrepresentativeinthe
tures during transport and storage, the
country in which it is sold. Details regarding
appliance must be completely emptied
these conditions can be obtained from the
rst.
dealer from whom the appliance was pur-
chased. The bill of sale or receipt must be
Note: The appliance must be ready for use
produced when making any claim under the
and the water tank 11lled.
terms of this guarantee.
●
Place a large, narrow receptacle under
Rightofmodicationreserved.
the milk frother 10.
40
deen
Simple troubleshooting
Problem Cause Solution
Display shows
Beans are not falling into
Gently tap the bean
reFiLL bean container
the grinding unit
container 15.
although the bean container
(beans too oily).
Change the type of coffee if
15 is full, or the grinding unit
necessary.
does not grind the beans.
When the bean container 15
is empty, wipe it with a dry
cloth.
No hot water dispensed. The milk frother 10 or its
Clean the milk frother 10 or
holder is soiled.
its holder.
Too little or no milk froth
The milk frother 10 or its
Clean the milk frother 10 or
or
holder is soiled.
its holder.
The milk frother 10 does not
Milk unsuitable for frothing. Use low-fat milk (1.5 % fat).
draw the milk in.
The milk frother 10 is not
Assemble the milk frother 10
correctly assembled.
correctly.
Coffee dispensing slows to
Coffeeisgroundtoonely.
Adjust the grinding unit to a
a trickle or stops completely.
Pre-ground coffee is too
coarser setting. Use coarser
ne.
pre-ground coffee.
Build-up of limescale in the
Descale the appliance.
appliance.
Coffee has no “crema”. Unsuitable type of coffee. Change type of coffee used.
The beans are no longer
Use fresh beans.
fresh.
The grinding setting is not
Adjust
grinding setting to
suitable
for the beans.
ne.
Coffee is too “acidic”. The grinding setting is too
Adjust the grinding unit to a
coarse or the pre-ground
nersettingorusenerpre-
coffee is too coarse.
ground coffee.
Unsuitable type of coffee Use a darker roast.
Coffee is too “bitter”. The grinding setting is too
Adjust the grinding unit to a
neorthepre-ground
coarser setting or use
coffeeistoone.
coarser pre-ground coffee.
Unsuitable type of coffee. Change type of coffee used.
Display shows
error
The appliance has a fault. Please call the hotline.
P
Lease contact hotLine.
If you are unable to solve the problem, please call the hotline.
41

deen
Simple troubleshooting
Problem Cause Solution
The water filter 34 does not
The water filter 34 is not
Press the water filter 34
stay in position in the water
correctly engaged.
firmly into the tank
tank 11.
attachment until you feel it
engage.
The coffee grounds are not
The grind setting is too fine
Adjust the grinding unit to a
compact and are too wet.
or too coarse, or you are
coarser or finer setting, or
not using enough pre-
use 2 level measuring
ground coffee.
spoons of ground coffee.
Display shows
Brewing unit is soiled. Clean brewing unit.
PLease check breWing
Too much pre-ground
Clean brewing unit.
unit
coffee in the brewing unit.
(Pour in no more than 2
level measuring spoons of
ground coffee).
Coffee or milk froth quality
Build-up of limescale in the
Descale the appliance with
varies considerably.
appliance.
two descaling tablets as
described in the instructions.
Water dripped onto the inner
Drip tray removed too early. Wait a few seconds after
floor of the appliance when
the last drink was dispensed
the drip tray was removed.
before removing the drip
tray.
If you are unable to solve the problem, please call the hotline.
42

defr
Sommaire
Consignes de sécurité
Présentation .............................................44
Lire attentivement le mode d’emploi,
Avant la première utilisation .....................45
se conformer à ses indications et le
Eléments de commande ........................... 46
conserver à portée de la main !
− Interrupteur électrique O / I ...................46
Cette machine à café est destinée à un
− Touche a ...............................................46
usage ménager, dans des quantités
− Bouton rotatif .........................................46
généralement consommées à domicile
− Touches de sélection < et > ...............46
et en aucun cas pour une utilisation
− Ecran ..................................................... 47
commerciale.
− Touche
start
..........................................49
− Touche
°C
.............................................. 49
! Risque de choc électrique !
− Touche j réglages .................................50
Pour le raccordement et l‘utilisation de la
−Réglerlanessedelamouture ............50
machine, respecter impérativement les
− Chauffe-tasses ......................................50
indicationsgurantsurlaplaquesignaléti-
Réglages menu ........................................51
que. N’utiliser la machine que si le cordon
−Langue ..................................................51
électrique et la machine ne présentent
−Duretéeau ............................................51
aucun dommage.
− Détartrage .............................................51
N’utiliser la machine qu’à l’intérieur de lo-
− Nettoyage ..............................................51
caux, à température ambiante.
− Calc‘n‘Clean .......................................... 51
Nepasconerl’appareilàdesenfantsouà
−Afcherheure ........................................52
des personnes aux capacités sensorielles
− Mode .....................................................52
ou intellectuelles diminuées ou ne dispo-
− Régler heure .........................................52
sant pas d’une expérience ou d’une
− Chauffe-tasses MA (TK76F09) ..............52
connaissancesufsante,saufsielleslefont
− AR chauf-tasse......................................52
soussurveillanceousiellesontbénécié
−ARautodans ........................................52
préalablement d’une information à propos
− Filtre eau ...............................................52
de la manipulation de l’appareil de la part
− Contraste...............................................53
de la personne responsable de leur sécu-
− Réglage usine .......................................53
rité.
Préparation avec du café en grains ..........53
Biensurveillerlesenfantsandelesempê-
Préparation à partir de café moulu ..........54
cher de jouer avec l’appareil.
Préparer de la mousse de lait et du lait
En cas de défaut, débrancher immédiate-
chaud ........................................................ 55
ment le cordon électrique. Les réparations
Préparer de l’eau chaude .........................55
sur la machine, par ex. le remplacement du
Entretien et nettoyage quotidien ...............56
cordonélectrique,doiventêtreeffectuées
− Nettoyage du mousseur du lait .............56
uniquement par notre Service après-vente
− Nettoyer l‘unité de percolation...............56
and‘éliminertouslesrisques.Nejamais
Rangement des accessoires ...................57
plonger la machine ou le cordon électrique
Conseils pour économiser l’énergie .........57
dans l’eau.
Programmes de maintenance .................57
Ne pas glisser les doigts à l’intérieur du
− Détartrage .............................................58
moulin.
− Nettoyage ..............................................59
− Calc‘n‘Clean .......................................... 60
! Risque de brûlure !
Protection contre le gel ............................. 61
La buse Eau chaude / Vapeur devient
Accessoires ..............................................61
brûlante. Après utilisation, bien laisser
Mise au rebut et Garantie .........................61
refroidir la buse avant de la saisir.
Eliminersoi-mêmelesproblèmessimples 62
43

defr
Chère amatrice de café,
Ce mode d’emploi décrit différents modèles
cher amateur de café,
qui se différencient par leur niveau
d’équipement.
Félicitation pour avoir choisi la cafetière
Veuillez également tenir compte du
Siemens.
Mémento fourni.
Un logement 25 a été prévu pour le
conserver à portée de main dans la
machine.
Présentation
Figures A, B, C, D et E
1 Interrupteur électrique O / I
18 Anneau lumineux
2 Touche a
19 Chauffe-tasses
3 Touche
°C
(température / sécurité
20 Bouton de commande pour chauffe-
enfants)
tasses éclairé
4 Touches de sélection < >
21 Tiroir à café
5 Ecran
(café en poudre / pastille de nettoyage)
a) Ligne d‘état
22 Volet de la chambre de percolation
b) Ligne de sélection
23 Ouvre-volet
c) Ligne de navigation
24 Unité de percolation
6 Bouton rotatif pour réglages à l’écran
a) Bouton poussoir
7 Touche j (menu Info)
b) Verrouillage
8 Touche
start
(boissons / programmes)
25 Logement du Mémento
9 Bec verseur du café, réglable en
26 Verrouillage logement
hauteur et pivotant
27 Panneau des bacs collecteurs
10 Mousseur lait, réglable en hauteur
28 Bac collecteur du bec verseur du café
(production de mousse de lait / eau
29 Grille bec verseur du café
chaude)
30 Grille mousseur de lait
a) partie supérieure
31 Récipient pour marc de café
b) partie inférieure
32 Logement du cordon électrique
c)exible
33 Réservoir de lait (isolé)
d) tube mousseur
34 Filtre eau
11 Réservoir d’eau amovible
12 Couvercle du réservoir d’eau
13 Logements
(cuillère-dose et accessoire mousseur
lait)
14 Cuillère-dose (sert de poignée pour
placerleltred‘eau)
15 Bac à café
16 Couvercle préservateur d’arôme
17 Sélecteurderéglagedenessede
mouture
44
defr
●
Remplir de café en grains le bac
Avant la première
à café 15.
utilisation
●
Appuyer sur l'interrupteur électrique 1
Généralités
O / I, la touche 8
start
s’allume et, à
Utiliser uniquement de l’eau pure, sans gaz
l’écran 5,s’afchentdifférenteslangues.
carbonique et de préférence du café en
●
A l’aide des touches de sélection 4
grain pour espresso ou pour percolateur.
< et > choisir la langue souhaitée ; tous
Ne pas employer des grains de café avec
lestextesécranss’afcherontensuite
glaçage, des grains caramélisés ou enro-
dans cette langue.
bés d’une substance sucrée quelconque ;
ils encrassent et obturent l’unité de
Language
passage.
Deutsch
start
Sur cette machine, il existe un réglage de la
engLish
Pycckий
dureté de l’eau. En usine, la machine est
réglée sur la dureté 4. Se servir de la ban-
delette fournie pour déterminer la dureté de
l’eau.
Si la dureté est différente de la valeur 4,
programmer la machine en conséquence
après la mise en route (voir point
« Réglages menu Dureté eau »)
Lalanguesélectionnéeestidentiéepar
un cadre. Vous avez le choix entre les
Mise en service de la machine
langues suivantes :
●
Placer la machine sur une surface plane
et capable de supporter son poids.
Deutsch
Info : la machine à café est équipée de
e
ngLish
quatreroulettesendessous;ellepeutêtre
positionnéeenformed’arcandefaciliter
P
ycckий
la commande et l’accès.
●
Extraire du logement 32 la longueur de
n
eDerLanDs
cordon électrique nécessaire et brancher
dans une prise. Pour ajuster la longueur
F
rançais
ducordon,ilsuftdeletireroudele
repousser à l’intérieur. Pour cela, placer
i
taLiano
la machine sur un bord de table, par ex.,
et tirer le câble vers le bas ou le pousser
s
venska
vers le haut.
●
Rabattre vers le haut le couvercle du
e
sPañoL
réservoir d'eau 12.
●
Retirer le réservoir d'eau 11, le rincer et le
P
oLski
remplir d’eau froide. Ne pas dépasser le
repère « max ».
●Appuyersurlatouche8
start
, la langue
●
Placer le réservoir d'eau 11 bien vertical
sélectionnée est enregistrée, la touche 2
et appuyer pour le faire descendre.
a s’allume.
●
Refermer le couvercle du réservoir
d'eau 12.
45

defr
●Appuyersurlatouche2
a, le logo de la
Eléments de commande
marque s’allume à l’écran 5. La machine
se met à chauffer et à effectuer un
Interrupteur électrique O / I
rinçage ; un peu d’eau s’écoule du bec
L’interrupteur électrique 1 O / I permet
verseur du café 9. Lorsque les symboles
d‘activer ou de désactiver entièrement le
de sélection de la préparation appa-
« mode Eco » de la machine. En « mode
raissent à l’écran 5lamachineestprêteà
Eco », seule la touche 2 a est allumée.
fonctionner.
Important : ne couper l’alimentation que
lorsque la machine est en « mode Eco »
afin que le rinçage automatique soit
esPresso Ë Í
effectué.
Touche a
 à À Á Ä Å
La touche 2 a place la machine en position
marche(prêteàfonctionner)oulareplace
en « mode Eco ».
La touche 2 a clignote tant que la machine
Info : la machine à café est programmée en
effectue son rinçage.
usine de manière à fonctionner de manière
La machine n’effectue pas de rinçage
optimale. Au bout de 1 heure, la machine se
lorsque :
place automatiquement en « mode Eco »
●
elle est encore chaude au moment de la
(voir point « Réglages menu AR AUTO
mise en marche.
DANS »).
●
il n’a pas été préparé de café avant le
passage en « mode Eco ».
Conseil pratique : lors de la première
utilisationouaprèsunepérioded’arrêt
Lamachineestprêteàfonctionnerlorsque
prolongée, la première tasse de café n’a
les symboles de sélection de boisson et la
pas tout l’arôme désiré.
touche 8
start
sont allumés à l’écran 5.
Une fois effectuée la mise en service de la
Bouton rotatif
machine, la présence d‘une mousse dense
Le bouton rotatif 6 sert à naviguer dans
etnesurlecafén‘estobtenuequ‘après
l‘écran 5 en tournant vers la gauche et la
avoir préparé plusieurs tasses.
droite;ilpermetaussidemodiercertains
paramètres dans le menu.
Touches de sélection < et >
L’activation des touches de sélection 4 < et
> permet de naviguer à l’écran (Ligne de
navigation 5c) vers le bas et vers le haut.
46

defr
Ecran
Messages à l’écran :
A l‘aide des symboles Boissons au café,
L’écran 5afchedifférentsmessages.
Arôme et Quantité ainsi que des textes de
réglage, l‘écran 5afcheenpermanence
Informations :
les opérations en cours et les messages. Le
rés. eau Presque viDe
bouton rotatif 6 et les touches de sélection
bac à caFé Presque viDe
4 servent à effectuer les réglages. Le
Patientez svP
réglagesélectionnéestidentiéparun
cadre.
Invitations à agir :
reMPLir Le réservoir D‘eau
PLacer Le réservoir D‘eau
5a
contrôLer Le réservoir D‘eau
esPresso ËË Í
PLacer Le bac coLLecteur
b
viDer Le bac coLLecteur
 à À Á Ä Å
c
reMPLir Le bac à caFé
P
ivoter Le bec verseur
La ligne d‘état 5a de l‘écran 5 indique le
PLacer L‘ eMbout Pour Mousse
nom de la boisson, ainsi que, pour les
reMPLacer L‘unité De Passage
boissons au café, l‘arôme réglé, par ex. 55
FeMer Le voLet
et la quantité, par ex. �. Sur la ligne de
contrôLer L‘unité De Passage
sélection 5bgurentlessymbolespourle
Mettre Du caFé
choix des boissons.
FerMer Le tiroir
Lesèchesdelalignedenavigation5c
indiquent la direction où se trouvent encore
changer Le FiLtre
des niveaux de menu.
Détartrer svP
n
ettoyer svP
c
aLc‘n‘cLean
teMPérature troP basse
Patientez svP
s
urtension ou sous-tension
47
defr
Sélections possibles
My coFFee Ë Í
2 x esPresso
2 x caFé
Â
Ã
Á Ä Å Æ Ç È
À
esPresso Á caFé
Ä caFé au Lait
Macchiato
Å
Æ
caPPuccino
Ç
My coFFee
Mousse Lait
Lait chauD
È
É
r
incer brièveMent
eau chauDe
Mousseur De Lait
Ê
Ì
My coFFee Ë Í
Arôme du café (uniquement pour les
boissons au café)
5 55 555
5 5 5 5 5 5
Doux Normal Fort
Quantité (uniquement pour les
My coFFee Ë Í
boissons au café)
� Ð Ò
� Ð Ò
réduite moyenne importante
En plus de l‘arôme du café et de la
My coFFee Ë Í
quantité,ilestpossiblededénirpour
le réglage individuel MY COFFEE Ç
esPresso Lait
le rapport entre le café et le lait : le
40%
réglage se fait de 20% en tournant le
bouton rotatif.
48
defr
Touche start
Sécurité enfants
Appuyer sur la touche 8
start
pour lancer la
And’éviterquelesenfantsnesebrûlent
préparation d‘une boisson ou pour effectuer
ou s’ébouillantent, il est possible de
un programme de Service.
verrouiller la machine.
Pour réduire la quantité de boisson appuyer
●Maintenirappuyéelatouche3
°C
durant
de nouveau sur la touche 8
start
en cours
au moins 3 secondes ; l’écran 5afche
de préparation.
une clé, la sécurité enfants est activée.
Aucune commande n’est plus possible, le
Touche °C
chauffe-tasses 19 est désactivé.
La touche 3
°C
assure le réglage de la
température du café et de l‘eau chaude
(appui bref) ainsi que l‘activation et la
esPresso Ë Í
désactivation de la sécurité enfants
(maintenir appuyée durant 3 s mini.).
Régler la température :
Appuyer brièvement sur la touche 3
°C
et à
l’aide des touches 4 < et > ainsi que du
bouton rotatif, effectuer les réglages.
●Pourdésactiverlasécuritéenfants,
maintenir appuyée la touche 3
°C
durant
3secondesaumoins,laclégurantà
teMPérature
l’écran 5 disparaît.
caFé
norMaL
eau chauDe
teMPérature
caFé
eau chauDe
<90°c
Appuyer de nouveau sur la touche 3
°C
pour enregistrer et revenir à la sélection des
boissons.
Les réglages s’appliquent automatiquement
à tous les modes de préparation.
49
defr
Touche j réglages
Régler la nesse de la mouture
La touche 7 j sert à appeler des
Le sélecteur 17 de réglage de la mouture
informations (appui bref) et à effectuer
ducafépermetderéglerlanessede
des réglages (maintenir appuyée durant 3 s
mouture souhaitée du café.
au moins).
Attention
Appeler des informations
Modifier le réglage de la mouture
Dans le menu Info, il est possible d‘appeler
uniquement lorsque le broyeur fonctionne.
les informations suivantes :
Sinon la machine peut être endommagée.
–
nom de boissons préparées depuis la
●Lorsquelebroyeurfonctionne,réglerle
mise en service de la machine à café
sélecteur 17entreunemouturene• • •
–
date de la prochaine maintenance
etunemoutureplusgrossière●●●.
●
appuyer brièvement sur la touche 7 j et
naviguer à l’aide des touches 4 < et >.
Menu inFo
Détartrage
xxx tasses
Info : le nouveau réglage n’est perceptible
nettoyer
xxx tasses
qu’à la seconde ou la troisième tasse.
FiLtre non PLacé
changer FiLtre
xxx tasses *
Conseil pratique : régler une mouture plus
nepourlesgrainstorréésfoncésetun
pouture plus grossière pour les grains
torréésclairs.
Chauffe-tasses
Menu inFo
! Attention, le chauffe-tasses 19
devient très brûlant !
nbre caFés xx
La machine à café est équipée d‘un
n
bre boissons Lait xx
chauffe-tasses 19quipeutêtreactivéou
q
té eau bouiLLante x L
désactivé manuellement à l‘aide du bouton
20. Lorsque le chauffe-tasses 19 est
allumé, le bouton 20 est éclairé.
* apparaîtuniquementlorsqueleltreest
activé.
Conseil pratique : Pour réchauffer de
manière optimale les tasses, les poser sur
Appuyer brièvement sur la touche 7 j pour
le chauffe-tasses 19 ouverture dirigée vers
revenir à la sélection de boissons. Après
le haut.
env.10secondessansconrmation,la
machine se replace automatiquement en
Uniquement pour la TK76F09
mode de sélection des boissons.
Le chauffe-tasses 19peutaussiêtre
préprogrammé (voir point « Réglages menu
Effectuer les réglages
CHAUFFE-TASSES MA »).
(voir point « Réglages menu »).
50
defr
j 3 s + >
Langue
Réglages menu
●Tournerleboutonrotatif6 pour
●Maintenirappuyéedurant3saumoinsla
sélectionner la langue souhaitée
touche 7 j.
Les différentes possibilités de réglage
j 3 s + >
Dureté eau
s’afchent.
●Tournerleboutonrotatif6 pour sélection-
ner la dureté de l’eau :
1,2,3 et 4.
régLages
Info : le réglage correct de la dureté de
Langue Français
l’eau est important car il permet à la ma-
Dureté eau
chine d’indiquer le moment où un détar-
Détartrage
trage est nécessaire. Par défaut, la dureté
de l’eau est réglée sur 4.
Laduretédel’eaupeutêtredéterminéeà
Dans la suite du texte de ce mode d’emploi,
l’aidedelabandelettefournieouêtre
chaque nouveau réglage commence par
demandée au Service des Eaux local.
j 3 s + >
suivi d'une description
●Plongerbrièvementlabandelettedetest
précise.
dans l‘eau et lire le résultat qui apparaît
Les touches 4
< et > permettent de
au bout de 1 minute.
sélectionner les différentes possibilités de
Niveau Dureté de l’eau
réglage.
Allemagne
France (°fH)
régLages
(°dH)
Dureté eau
1
1-7
1-13
Détartrage
start
nettoyage
2
8-14
14-25
3
15-21
26-38
4
22-30
39-54
j 3 s + >
Détartrage
●Silamachineabesoind’undétartrage,
appuyer sur la touche 8
start
et effectuer
Remarque :lesmodicationseffectuées
le programme de détartrage (voir point
sont automatiquement enregistrées.
« Détartrage »).
Aucune manipulation supplémentaire n‘est
nécessaire.
j 3 s + >
nettoyage
●Silamachineabesoind’unnettoyage,
appuyer sur la touche 8
start
et effectuer
le programme de nettoyage (voir point
« Nettoyage »).
j 3 s + >
caLc‘n‘cLean
●Silamachineabesoind’êtredétartréeet
nettoyée, appuyer sur la touche 8
start
et
effectuer le programme Calc‘n‘Clean
(voir point « Calc‘n‘Clean »).
51
defr
j 3 s + >
aFFicher heure
j 3 s + >
FiLtre eau
Ilestpossiblederéglericil’afchagede
Avantd‘utiliserunnouveaultreàeau34 il
l’heure à l’écran 5 lorsque la machine est
faut tout d‘abord effectuer un rinçage.
en « mode Eco ».
●
Pourcela,enfoncerfermementleltreà
●Tournerleboutonrotatif6 pour activer
eau 34 dans le réservoir d‘eau 11 à l‘aide
l’afchagedel’heure= oui ou le
de la cuillère dose 14. Remplir d‘eau le
désactiver = non.
réservoir jusqu‘au repère « max ».
Info : ilfautpréalablementdénirl’heure
●
Tourner le bouton rotatif 6 pour
dans régLer heure.
sélectionner start et appuyer sur la
touche 8
start
.
j 3 s + >
MoDe
●PLacer réciPient 0,5 L sous
●
Dans Mode, le bouton rotatif 6 permet de
Mousseur Lait
start
régler le format de l‘heure sur 12h ou
●
Placer un récipient d'une capacité de 0,5l
24h.
sous le mousseur lait.
●
Appuyer sur la touche 8
start
. L‘eau
j 3 s + >
régLer heure
traverseleltre34 pour le rincer.
●Tournerleboutonrotatif6 pour régler
●
Ensuite, vider le récipient. La machine est
l’heure, par ex. 08:25. Le chiffre réglable
denouveauprêteàfonctionner.
est rétro-éclairé ; le rétro-éclairage passe
automatiquement des heures aux minutes.
Uniquement TK76F09
(chauffe-tasses programmable)
j 3 s + >
chauFFe-tasses Ma
Cette fonction supplémentaire met en mar-
che le chauffe-tasses 19 automatiquement à
une heure programmée. Indépendamment
du fait que la machine se trouve en « mode
Eco»ouestprêteàfonctionner
Info : ilfautpréalablementdénirl’heure
dans régLer heure.
Info : lerinçagedultre34 a activé le
●
Régler l'heure en tournant le bouton
réglagepourl’afchageduchangementde
rotatif 6. Sélectionner ar pour désactiver
ltre.
la fonction.
Vous trouverez des informations détaillées
j 3 s + >
ar chauF-tasse
surleltred’eaudanslesInstructions
Cela permet de régler l’intervalle de temps
relativesaultreci-jointes.
à l‘issue duquel le chauffe-tasses 19 se
désactive automatiquement après la mise
Aumomentoùs’afchechanger Le
en marche.
FiLtre ou bien au bout de 2 mois, au plus
tard,leltre34n’estplusefcace.Pourdes
j 3 s + >
ar auto Dans
raisons d’hygiène et pour éviter l’entartrage
●
Tourner le bouton rotatif 6pourdénir
de la machine (ce qui provoque des
l’intervalle de temps à l’issue duquel la
dommages),ilfautremplacerleltre.
machine se place en mode Eco après la
dernière préparation de boisson.
Le réglage possible est situé entre 5
minutes et 8 heures.
52
defr
Lesltresderechangesontdisponibles
Préparation avec du café
dans le commerce (TZ70003) ou peuvent
en grains
êtrecommandésauprèsduService
Clientèle (467873). Si l‘on n‘utilise pas un
Cette machine à espresso / café entière-
nouveaultre34, il faut régler
FiLtre eau
ment automatique moud du café frais lors
sur non.
de chaque préparation. Utiliser de préfé-
rence du café pour espresso/pour percola-
Info : si la machine n’est pas utilisée durant
teur. Conserver le café au froid dans un
une période prolongée (par ex. congés), il
récipient hermétiquement fermé ou le
fautqueleltre34 utilisé soit rincé avant
congeler. Il est possible de broyer les grains
utilisation ; pour cela verser tout simplement
de café congelés.
une tasse d’eau chaude.
Important : mettre tous les jours de l’eau
j 3 s + >
contraste
fraîche dans le réservoir d’eau 11. Celui-ci
Lecontrastedel’écranpeutêtrerégléentre
doittoujourscontenirsufsammentd’eau
−20 et +20 ; le réglage usine est +0.
pour assurer le fonctionnement de la
●
Le bouton rotatif 6 permet de choisir le
machine.
réglage souhaité.
Conseil : Placer les tasses, en particulier
j 3 s + >
régLages usine
les petites tasses épaisses pour espresso,
Il est possible d’effacer ses propres
sur le chauffe-tasses 19andeles
réglages et de rétablir les réglages usine.
préchauffer.
●
Pour rétablir les réglages usine, appuyer
sur la touche 8
start
.
Il est possible de préparer différents cafés
très simplement, en appuyant sur un
Info : Lamachinepeutàtoutmomentêtre
bouton.
replacée manuellement sur les réglages
usine à l‘aide d‘une combinaison de tou-
Préparation d’un espresso et d’un café
ches.Lamachinedoitêtreentièrement
sans lait
désactivée.
Lamachinedoitêtreprêteàfonctionner.
●
Maintenir appuyés simultanément durant
●
Placer la(les) tasse(s) sous le bec verseur
5 secondes au moins les touches 4 < et
du café 9.
> ainsi que l‘interrupteur électrique 1
●
Sélectionner l’espresso ou le café
O / I. Appuyer sur la touche 8
start
, les
souhaité en tournant le bouton rotatif 6.
réglages usine sont rétablis.
L’écran 5afchelaboissonchoisieainsi
que l’arôme du café et la quantité
correspondant à la boisson.
esPresso Ë Í
 à À Á Ä Å
Lesréglagespeuventêtremodiés(voir
point « Eléments de commande »).
53
defr
●
Appuyer sur la touche 8
start
.
Préparation à partir
La machine effectue la percolation du café
de café moulu
qui s’écoule dans la tasse/les tasses.
La machine peut aussi préparer un café à
Préparation d‘une boisson avec du lait
partir de café moulu (pas du café soluble).
Lamachinedoitêtreprêteàfonctionner.
●
Plonger profondément dans le récipient
Préparation d‘une boisson sans lait
du lait 33 le tube mousseur 10d du
●
A l’aide du bouton rotatif 6, sélectionner
mousseur de lait 10.
À ou Á.
●
Basculer le bec verseur du café 9 vers la
●
Placer la tasse/les tasses préchauffée(s)
droite jusqu‘à ce qu‘il s‘enclipse (bruit
sous le bec verseur du café 9.
caractéristique).
●
Ouvrir le tiroir à café 21 en appuyant.
●
Placer la tasse préchauffée ou le verre
●
Verser au maximum 2 cuillères-dose 14
sous le bec verseur du café 9 et
rases de café moulu.
mousseur lait 10.
●
Sélectionner la boisson : macchiato Å,
Attention : ne pas verser de café en grains
cappuccino Æ, café au lait Ä ou My cof-
ou de café soluble.
fee Ç en tournant le bouton rotatif 6.
●
Fermer le tiroir à café 21.
L‘écran 5afchelaboissonchoisieainsi
●
Appuyer sur la touche 8
start
.
que l‘arôme du café et la quantité corres-
La machine effectue la percolation du café
pondant à la boisson.
moulu qui s’écoule dans la tasse/les tasses.
Remarque : pour préparer une autre tasse
caPPuccino Ë Í
de café moulu, répéter l’opération. Si vous
ne versez pas de café dans un délai de 90 s,
la chambre de percolation se vide automati-
quementand’empêcherundébordement.
À Á Ä Å Æ Ç
La machine effectue un rinçage.
Préparation d‘une boisson avec lait
Lesréglagespeuventêtremodiés(voir
●
A l’aide du bouton rotatif 6, sélectionner
point « Eléments de commande »).
une boisson : Café au lait Ä,
●
Appuyer sur la touche 8
start
. Tout
Macchiato
Å
, Cappuccino Æ
d‘abord le lait est pompé dans la tasse ou
ou My coffee Ç.
le verre. Ensuite, la machine effectue la
●
Introduire le tube mousseur 10d du
percolation du café qui s‘écoule dans la
mousseur de lait 10 dans le récipient de
tasse ou le verre.
lait 33.
●
Faire pivoter le bec verseur du café 9
Important : les restes de lait séchés sont
vers la droite jusqu’à ce qu’il s’enclipse
difcilesàretirer;aprèschaqueutilisation,
(bruit caractéristique).
nettoyer le mousseur lait 10 à l’eau tiède
●
Placer la tasse préchauffée ou le verre
(voir point « Nettoyage du mousseur de
sous le bec verseur du café 9 et le
lait »).
mousseur lait 10.
●
Ouvrir le tiroir à café 21 en appuyant.
●
Remplir avec 2 cuillères-dose 14 rases
maxi. de café en poudre.
54

defr
Attention : ne jamais remplir avec du café
Info : lors de la préparation du lait chaud, il
en grains ou du café soluble.
peutseproduiredesbruitsdesifement.
●
Refermer le tiroir à café 21.
Ceux-ci sont dus à la technologie du
●
Appuyer sur la touche 8
start
. Tout
mousseur de lait 10.
d‘abord le lait est pompé dans la tasse ou
le verre. Ensuite, la machine effectue la
Conseil : pour obtenir une mousse de lait
percolation du café en poudre qui s‘écou-
optimale, utiliser de préférence du lait froid
le dans la tasse ou le verre.
d’une teneur en matières grasses de 1,5%.
Important : les restes de lait séchés sont
Important : Les restes de lait séchés sont
difcilesàretirer;aprèschaqueutilisation,
difcilesàretirer;aprèschaqueutilisation,
nettoyer le mousseur lait 10 à l’eau tiède
nettoyer le mousseur lait 10 à l’eau tiède
(voir point « Nettoyage du mousseur
(voir point « Nettoyage du mousseur de
de lait »).
lait »).
Remarque : pour préparer une autre tasse
à partir de café moulu / lait, répéter l’opéra-
Préparer de l’eau chaude
tion. Si vous ne versez pas de café dans un
délai de 90 s, la chambre de percolation se
! Risque de brûlure
videautomatiquementand’empêcherun
Le mousseur lait 10 devient très brûlant.
débordement. La machine effectue un rin-
Après utilisation, bien laisser refroidir avant
çage.
de le saisir.
Lamachinedoitêtreprêteàfonctionner.
●
Placer la tasse préchauffée ou le verre
Préparer de la mousse
sous le bec du mousseur de lait 10.
●
Sélectionner le réglage souhaité Eau
de lait et du lait chaud
chaude Ê en tournant le bouton rotatif 6.
! Risque de brûlure
●
Appuyer sur la touche 8
start
, l’eau
Le mousseur lait 10 devient brûlant. Après
chaude s’écoule durant env. 40 s du
utilisation, bien laisser refroidir avant de le
mousseur de lait 10.
saisir.
●
Il est possible d’interrompre
Lamachinedoitêtreprêteàfonctionner.
prématurément cette opération en
●
Plonger le tube mousseur 10d du
appuyant de nouveau sur la touche 8
mousseur 10 dans le réservoir de lait 33.
start
.
●
Placer la tasse préchauffée ou le verre
sous le mousseur lait 10.
Remarque : il est possible de régler la
●
Sélectionner « Mousse lait » È ou « Lait
température de l‘eau chaude (voir point
chaud » É en tournant le bouton rotatif 6.
« Eléments de commande Touche
°C
»).
●
Appuyer sur la touche 8
start
, de la
mousse de lait (durant 40 s env.) ou du
lait chaud (durant 60 s env.) s‘écoule du
mousseur de lait 10.
●
Appuyer de nouveau sur la touche 8
start
pour interrompre l’opération.
55

defr
Nettoyage du mousseur de lait
Entretien et nettoyage
Nettoyer le mousseur de lait 10 après
quotidien
chaque utilisation!
! Risque de choc électrique!
Il est possible d‘effectuer un pré-nettoyage
Avant tout nettoyage, débrancher le cordon
automatique du mousseur de lait 10.
électrique. Ne jamais plonger la machine
●
A l‘écran 5, sélectionnez le symbole Ì et
dans l’eau. Ne pas utiliser de nettoyeur à
appuyer sur la touche 8
start
.
vapeur.
PLacer un verre viDe sous Le
●
Nettoyer le boîtier de la machine à l’aide
Mousseur, PLacer L‘eMbout Pour
d’un chiffon doux humide. Ne pas utiliser
Mousse Dans Le verre
de tissus ou de produits nettoyants abra-
start
sifs.
●
Placer un verre vide sous le mousseur de
●
Rincer le réservoir d‘eau 11 et l‘unité de
lait 10 et introduire l‘extrémité du tube
percolation 24 uniquement avec de l‘eau.
mousseur 10d dans le verre.
●
Pour le nettoyage, essuyer avec un
●
Appuyer sur la touche 8
start
. La machine
chiffon humide le couvercle préservateur
remplit automatiquement le verre d‘eau
d’arôme 26, le panneau des bacs
puis l‘aspire par le tube mousseur 10d
collecteurs 27 et l’isolation du réservoir
pour rincer le dispositif. Au bout de 1 min
de lait 33. Ne pas passer au lave-
environ,l‘opérationdenettoyages‘arrête
vaisselle.
automatiquement.
●
Retirer la grille du bec verseur du café 29
●
Vider le verre et nettoyer le tube
et la grille du mousseur de lait 30. Retirer
mousseur 10d.
vers l‘avant le bac collecteur du bec
De plus, nettoyer régulièrement et très
verseur de café 28 avec le récipient pour
soigneusement le mousseur de lait (en
marc de café 31, les vider et les nettoyer.
lave-vaisselle ou à la main).
Tous ces éléments peuvent passer en
lave-vaisselle.
Démonter le mousseur lait 10 pour le
●
Laver à la main ou passer en machine la
nettoyer.
cuillère-dose 14, le couvercle préserva-
●
Extraire le mousseur de lait 10 de la
teur d’arôme 16 et la partie intérieure du
machine en le tirant vers l‘avant.
réservoir de lait 33.
●
Nettoyer les différents éléments (gure
●
Essuyer l‘intérieur de la machine (bacs de
C) à l‘eau savonneuse, avec une brosse
collecte).
douce.
●
Bien rincer tous les éléments à l‘eau
Important : Il convient de vider et nettoyer
courante et les sécher.
tous les jours le bac collecteur 28an
●
Remonter tous les éléments et les
d’éviter les moisissures.
remplacer jusqu‘en butée.
Remarque : lorsque la machine froide est
Info : tous les éléments du mousseur lait 10
allumée à l’aide de la touche 2 a ou bien
peuventêtrelavésenmachine.
placée en position a après un prélèvement
de café, la machine réalise un rinçage
Nettoyer l‘unité de percolation
automatique. Le système est donc
(voir aussi Mémento)
autonettoyant.
En plus du programme de nettoyage auto-
matique, il convient de retirer régulièrement
l’unité de percolation 24andelanettoyer.
●
Appuyer sur la touche 2 a pour placer la
machine en « mode Eco ».
56

defr
●
Arrêterentièrementlamachineàl’aidede
Conseils pour économiser
l’interrupteur électrique 1 O / I, aucune
l’énergie
touche n’est allumée.
●
Faire glisser l'ouvre-volet 23 vers la droite
–
La machine se place automatiquement en
et ouvrir le volet 22 de l’unité de passage
« mode Eco » au bout d’une heure
24.
(réglage usine). Dans ce mode, la
●
Faire glisser le verrouillage rouge 24b de
machine consomme très peu d’électricité.
l‘unité de percolation 24 vers la gauche.
La valeur par défaut de une heure peut
●
Appuyer sur le bouton poussoir rouge
êtremodiée,(voirpoint«Réglages
24a et saisir l‘unité de percolation 24 par
menu ar auto Dans »)
les évidements (gure E) et la retirer
–
Lorsque la machine n’est pas utilisée,
avec précaution.
l’arrêteraumoyendel’interrupteur
●
Nettoyer l‘unité de percolation 24 sous un
électrique 1 O / I placé à l’avant.
jet d‘eau claire.
–
Autant que possible ne jamais interrom-
pre la production de café ou de mousse
Important : ne pas ajouter de détergent, ne
de lait. Une interruption provoque en effet
pas laver en machine.
une consommation d’énergie supérieure
●
Essuyer l‘intérieur de la machine avec un
ainsi que le remplissage plus rapide des
chiffon humide.
bacs collecteurs.
●
Laisser sécher l‘unité de percolation 24 et
–
Détartrerrégulièrementlamachinean
l‘intérieur de la machine.
d’éviter les dépôts de calcaire. Les dé-
●
Replacer l‘unité de percolation 24 et
pôts de calcaire provoquent en effet une
pousser jusqu‘en butée.
consommation électrique plus élevée.
●
Faire glisser vers la droite le verrouillage
rouge 24b et fermer le volet 22.
Programmes de
maintenance
Rangement des
Conseil : voir aussi le Mémento placé dans
accessoires
son logement 25.
La machine est dotée de logements
spéciaux pour les accessoires et le
A certains intervalles de temps, l‘écran 5
Mémento.
afchedifférentsmessages:
●
Pour ranger la cuillère-dose 14, le tube
Détartrer svP
mousseur 10detleexible10c, retirer le
n
ettoyer svP ou
réservoir d‘eau 11 et placer les éléments
caLc‘n‘cLean.
dans les évidements 13.
Lamachinedoitalorsêtrenettoyéeoudé-
tartrée sans délai avec le programme cor-
Le Mémento possède son propre logement
respondant. Il est également possible d‘ef-
à côté de l‘unité de percolation 24.
fectuer les deux opérations simultanément
●
Ouvrir le volet 22 de l‘unité de
avec la fonction Calc‘n‘Clean (voir point
percolation.
« Calc‘n‘Clean »). Si le programme de
●
Saisir par la languette la fermeture rouge
maintenance n‘est pas réalisé conformé-
26 du logement 25 et la retirer.
ment aux indications, cela peut détériorer la
●
Ranger le Mémento, replacer la fermeture
machine.
26 et refermer le volet de l‘unité de
percolation 22.
57

defr
Attention
Détartrage
Lors de chaque programme de maintenan-
ce, utiliser le produit détartrant et le produit
nettoyant conformément aux indications.
esPresso Ë Í
Ne jamais interrompre le programme de
maintenance !
Détartrer svP
Ne jamais boire les liquides !
Ne jamais utiliser de vinaigre, de produits à
touche i 3 s
base de vinaigre, d‘acide citrique ou de
produits à base d‘acide citrique !
Ne jamais déposer de pastilles de
Durant les différentes opérations de
détartrage ou autres produits de détartrage
détartrage, la touche 8
start
clignote.
dans le tiroir du café moulu 21 !
Les chiffres en haut à droite indiquent la
Pour le détartrage et le nettoyage, utiliser
progression de l‘opération.
exclusivement les pastilles de détartrage
●
Maintenir appuyée la touche 7 j au moins
fournies. Elles ont été spécialement
3 secondes.
conçues pour la machine à café.
Détartrage
start
Des pastilles de détartrage et de net-
●
Appuyer sur la touche 8
start
, le
toyage spécialement développées sont
programmedéleàl’écran5.
disponibles dans le commerce et auprès
du Service Clientèle.
viDer Le bac coLLecteur
P
Lacer Le bac coLLecteur
●
Vider le bac collecteur 28 et le replacer.
Service
N° commande Commerce
Clientèle
PLacer réciPient 0,5 L sous
Pastilles de
TZ60001 310575
Mousseur Lait
start
nettoyage
●
Placer un récipient d'une capacité de 0,5l
Pastilles de
TZ60002 310967
sous le mousseur lait 10.
détartrage
●
Appuyer sur la touche 8
start
.
Important :siunltred‘eau34 est placé
Info : sileltreàeau34 est activé,
dans le réservoir d‘eau 11 le retirer
l’utilisateurestinvitéàretirerleltre34 et à
impérativement avant de lancer le
appuyer de nouveau sur la touche 8
start
programme de maintenance.
retirer Le FiLtre eau
start
0,5 L eau + Détartrant reMPLir
start
●
Verser de l‘eau tiède dans le réservoir
d‘eau 11 jusqu‘au repère « 0,5l » et
dissoudre 2 pastilles de détartrage
Siemens.
●
Appuyer sur la touche 8
start
, le
programme de détartrage se déroule
maintenant durant 20 minutes environ
Détartrage en cours
58

defr
Détartrant insuFFis.
nettoyage
start
r
aJouter Détartrant
●
Appuyer sur la touche 8
start
, le
Info : s‘il n‘y a pas assez de solution de
programme se déroule à l’écran 5.
détartrage dans le réservoir d‘eau 11, le
viDer Le bac coLLecteur
message demandant de rajouter de la
P
Lacer Le bac coLLecteur
solutiondedétartrages‘afche;appuyerde
●
Vider le bac collecteur 28 et le replacer, la
nouveau sur la touche 8
start
.
machine effectue deux rinçages.
rincer Le réservoir D’eau et reMPLir
Pivoter Le bec verseur
start
●
Faire pivoter le bec verseur du café 9
●
Rincer le réservoir d’eau 11 et le remplir
vers la gauche dans la position café
d’eau fraîche jusqu’au repère « max ».
jusqu’à ce qu’il s’enclipse (bruit
●
Appuyer sur la touche 8
start
, le
caractéristique).
programme de détartrage se déroule
nettoyage en cours
durant env. 1 minute et effectue un
rinçage de la machine.
ouvrir tiroir
Détartrage en cours
●
Ouvrir le tiroir à café 21 en appuyant.
v
iDer Le bac coLLecteur
PLacer une PastiLLe De nettoyage
PLacer Le bac coLLecteur
s
ieMens Dans Le tiroir et reFerMer
●
Vider le bac collecteur 28 et le replacer.
●
Placer une pastille de nettoyage Siemens
La machine est maintenant détartrée et de
dans le tiroir 21 et refermer.
nouveauprêteàfonctionner.
aPPuyer sur start
●
Appuyer sur la touche 8
start
, le
nettoyage est activé pour une durée de 7
Nettoyage
minutes env.
nettoyage en cours
esPresso Ë Í
v
iDer Le bac coLLecteur
P
Lacer Le bac coLLecteur
nettoyer svP
●
Vider le bac collecteur 28 et le replacer.
touche i 3 s
La machine est maintenant nettoyée et de
nouveauprêteàfonctionner.
Durant les différentes opérations de
nettoyage, la touche 8
start
clignote.
Les chiffres en haut à droite indiquent les
progrès de l‘opération.
●
Remplir le réservoir d‘eau 11 jusqu‘à
« max ».
●
Maintenir appuyée la touche 7 j au moins
3 secondes.
59

defr
Info : sileltreàeau34 est activé,
Calc‘n‘Clean
l’utilisateurestinvitéàretirerleltre34 et à
Calc‘n‘Clean combine les fonctions
appuyer de nouveau sur la touche 8
start
.
Détartrage et Nettoyage. Si le moment de
retirer Le FiLtre eau
start
réaliser chacun des deux programmes est
proche, la machine propose
0,5 L eau + Détartrant reMPLir
automatiquement ce programme.
start
●
Verser de l‘eau tiède dans le réservoir
d‘eau 11 jusqu‘au repère « 0,5l » et
dissoudre 2 pastilles de détartrage
esPresso Ë Í
Siemens.
●
Appuyer sur la touche 8
start
, le
caLc‘n‘cLean
programme de détartrage se déroule
touche i 3 s
durant 20 minutes env.
Détartrage en cours
Durant les différentes opérations du
Détartrant insuFFis.
programme Calc‘n‘Clean, la toucheCalc‘n‘Clean, la touche, la touche 8
start
r
aJouter Détartrant
clignote. Les chiffres en haut à droite
Info : s‘il n‘y a pas assez de solution de
indiquent l’avancement de l’opération.
détartrage dans le réservoir d‘eau 11, le
●
Maintenir appuyée la touche 7 j durant 3
message demandant de rajouter de la solu-
secondes au moins.
tiondedétartrages‘afche;appuyerde
nouveau sur la touche 8
start
.
caLc‘n‘cLean
start
rincer Le réservoir D’eau et reMPLir
●
Appuyer sur la touche 8
start
, le
start
programmedéleàl’écran.
●
Rincer le réservoir d’eau 11 et remplir
d’eau fraîche jusqu’au repère « max ».
viDer Le bac coLLecteur
●
Appuyer sur la touche 8
start
, le
P
Lacer Le bac coLLecteur
programme de détartrage se déroule
●
Vider le bac collecteur 28 et le replacer.
durant 1 minute environ, puis le
●
Basculer le bec verseur du café 9 vers la
programme de nettoyage rince la
droite jusqu‘à ce qu‘il s‘enclipse (bruit
machine durant 7 minutes environ.
caractéristique).
●
Placer un récipient d'une capacité de 1 l
Détartrage en cours
au moins sous le mousseur lait 10.
nettoyage en cours
●
Appuyer sur la touche 8
start
, la machine
viDer Le bac coLLecteur
effectue deux rinçages.
P
Lacer Le bac coLLecteur
●
Vider le bac collecteur 28 et le replacer.
nettoyage en cours
o
uvrir tiroir
La machine est nettoyée et détartrée et de
●
Appuyer sur le tiroir à café 21 pour
nouveauprêteàfonctionner.
l’ouvrir.
Important : si l’un des programmes de
PLacer une PastiLLe De nettoyage
maintenance a été interrompu, par ex. par
s
ieMens Dans Le tiroir et reFerMer
une coupure de courant, procéder comme
●
Placer une pastille de nettoyage Siemens
indiqué ci-après :
dans le tiroir 21 et refermer.
60
defr
●
Rincer le réservoir d’eau 11 et remplir
Accessoires
d’eau fraîche jusqu’au repère « max ».
●
Appuyer sur la touche 8
start
, le program-
Les accessoires suivants sont disponibles
me de nettoyage se déroule durant 3
dans le commerce ou auprès du service
minutes environ et rince la machine.
Clientèle.
Service
nettoyage en cours
N° commande Commerce
Clientèle
viDer Le bac coLLecteur
Pastilles de
TZ60001 310575
P
Lacer Le bac coLLecteur
nettoyage
●
Vider le bac collecteur 28 et le replacer.
Pastilles de
TZ60002 310967
Lamachineestdenouveauprêteà
détartrage
fonctionner.
Filtre d‘eau TZ70003 467873
Protection contre le gel
Mise au rebut A
! An d’éviter les dommages provo-
qués par le gel lors du transport et du
CetappareilestidentiéselonlaDirective
stockage, il faut préalablement vider
européenne 2002/96/CE relative aux
entièrement la machine.
déchets d‘équipements électriques et
électroniques(DEEE).Cettedirectivedénit
Info :lamachinedoitêtreprêteàfonction-
les conditions de collecte et de recyclage
ner et le réservoir d‘eau 11doitêtrerempli.
des anciens appareils à l’intérieur de
●
Placer un grand récipient étroit sous le
l’Union Européenne. S‘informer auprès du
mousseur lait 10.
revendeur sur la procédure actuelle de
●
Sélectionner le réglage « Mousse lait »
recyclage.
È, et envoyer de la vapeur durant 15
secondes env.
Garantie
●
Arrêterlamachineàl’aidede
l’interrupteur électrique 1 O / I.
Les conditions de garantie applicables sont
●
Vider le réservoir d’eau 11 et le bac
celles publiées par notre distributeur dans
collecteur 28.
le pays où a été effectué l’achat. Le reven-
deurchezquivousvousêtesprocuré
l’appareil fournira les modalités de garantie
sur simple demande de votre part. En cas
de recours en garantie, veuillez toujours
vous munir de la preuve d’achat.
Sousréservedemodications.
61

defr
Eliminer soi-même les problèmes simples
Problème Cause Remède
Afchagede
Les grains ne tombent pas
Frapper légèrement le bac à
reMPLir Le bac à caFé
dans le broyeur (grains trop
café 15.
bien que le bac à café 15
gras).
Changer éventuellement de
soit rempli, ou bien le
café.
moulin ne parvient pas à
Une fois que le bac à café
moudre.
15 est vide, l’essuyer avec
un chiffon sec.
Impossible de produire de
Le mousseur lait 10 ou le
Nettoyer le mousseur lait 10
l’eau chaude.
support du mousseur lait 10
ou son support.
est obturé.
Trop peu de mousse ou pas
Le mousseur lait 10 ou le
Nettoyer le mousseur de lait
de mousse
support du mousseur lait 10
10 ou le support du
ou
est obturé.
mousseur de lait 10.
le mousseur de lait 10
Lait non adapté. Utiliser du lait à une teneur
n’aspire pas le lait.
de 1,5 % de matières
grasses.
Le mousseur de lait 10 n’est
Monter correctement le
pas correctement monté.
mousseur de lait 10.
Le café s’écoule goutte à
Mouturetropne,café
Régler une mouture moins
goutte ou ne s’écoule plus.
moulutropn.
ne.Utiliserducafémoulu
moinsn.
La machine est fortement
Détartrer la
machine.
entartrée.
Le
café ne présente pas de
Qualité du café ne convient
Changer de qualité de café.
« crème ».
pas.
Les grains ne sont pas
Les grains ne sont pas
fraîchementtorréés.
fraîchementtorréés.
La mouture n’est pas
Optimiserlanessedela
adaptée aux grains de café.
mouture.
Le café est trop « acide ». La mouture n’est pas assez
Régler une mouture plus
neoubienlecafémoulu
neouacheterducafé
n’estpasassezn.
mouluplusn.
Qualité de café non
Utiliseruncafétorrééplus
adaptée.
foncé.
S’il n’est pas possible de résoudre les problèmes, appeler impérativement le
Service Clientèle!
62

defr
Eliminer soi-même les problèmes simples
Problème Cause Remède
Le café est trop « amer ». Lamoutureesttropneou
Régler une mouture moins
lecafémouluesttropn.
neouacheterducafé
moulumoinsn.
Qualité du café ne convient
Changer de qualité de café.
pas.
Afchageàl’écran
Une défaillance s’est
Appeler le Service Clientèle.
DeFaiLLance
produite dans la machine.
a
PPeLer service
c
LientèLe.
Leltreàeau34 ne tient
Leltreàeau34 n’est pas
Bienappuyerleltre
pas dans le réservoir
enclipsé.
à eau 34 dans le réservoir
d’eau 11.
jusqu’à ce qu’il s’enclipse
(bruit caractéristique).
Le marc de café n’est pas
La mouture est réglée trop
Régler la mouture plus
compact et il est trop
fine ou trop grossière ou la
grossière ou plus fine ou
humide.
quantité de café moulu est
bien utiliser 2 cuillères-
trop faible.
doses de café moulu bien
rases.
Affichage du message
Unité de passage
Nettoyer l’unité de passage.
contrôLer L’unité De
encrassée.
Passage
Trop de café moulu dans
Nettoyer l’unité de passage
l’unité de passage.
(remplir au maximum 2
cuillères-doses de café
moulu bien rases).
Qualité de la mousse de
La
machine
est entartrée. Détartrer la machine en
café ou de lait variable.
utilisant deux pastilles de
détartrage et en respectant
les instructions.
Présence d’eau sur le fond
Bac collecteur retiré trop
Retirer le bac collecteur en
interne de la machine une
tôt.
attendant quelques
fois que l’on a retiré le bac
secondes après la dernière
collecteur.
boisson préparée.
S’il n’est pas possible de résoudre les problèmes, appeler impérativement le
Service Clientèle!
63

deit
Sommario
Istruzioni di sicurezza
Riepilogo delle parti e degli elementi di
Leggere con attenzione interamente,
comando ................................................... 65
osservare e conservare le istruzioni per
Al primo impiego ....................................... 66
l’uso!
Elementi di comando ................................67
Questa macchina automatica per
− Interruttore di rete O / I ..........................67
espresso è destinata all’uso domestico e
− Tasto a ..................................................67
alla preparazione di quantità tipiche per
− Pulsante girevole...................................67
questo impiego e non all’attività
− Tasti selettori < e > .............................67
professionale.
− Display ..................................................68
− Tasto
start
.............................................70
! Pericolo di scarica elettrica!
− Tasto
°C
................................................. 70
Nel collegamento e nell’uso
− Impostazioni del tasto j ......................... 71
dell’apparecchio rispettare i dati della
− Regolare il grado di macinatura ............71
targhettadiidenticazione.
− Riscaldamento tazze .............................71
Usare solo se il cavo di alimentazione e
Impostazioni del menu..............................72
l’apparecchio non presentano danni.
−Lingua ...................................................72
Usare l’apparecchio solo in ambienti interni
−Durezzaacqua ...................................... 72
a temperatura ambientale.
−Decalcicare..........................................72
Non permettere l’uso dell’apparecchio ai
− Pulire ..................................................... 72
bambini o a soggetti con ridotte capacità
− Calc‘n‘Clean .......................................... 72
sicheopsichicheocomunquenondotati
− Visualizzare ora .....................................73
disufcienteesperienzaeconoscenza,a
− Modo ora ............................................... 73
meno che non siano sorvegliati o non
− Regolare ora .........................................73
abbiano ricevuto istruzioni sull’uso
− Riscald. tazza ON (solo per TK76F09) .73
dell’apparecchio da una persona che sia
− Riscald. tazza OFF tra ..........................73
responsabile della loro sicurezza.
−Autospegnimentoin .............................73
Tenere i bambini lontani dall’apparecchio.
− Filtro acqua ...........................................73
Sorvegliare i bambini, per evitare che
− Contrasto...............................................74
giochino con l’apparecchio.
−Imp.predenita ......................................74
In caso di guasto, estrarre immediatamente
Preparazione con chicchi di caffè ............. 74
la spina di alimentazione.
Preparazione con caffè macinato ............75
Per evitare rischi, le riparazioni
Preparazione di schiuma di latte
all’apparecchio, quali ad esempio la
e di latte caldo ..........................................76
sostituzione di un cavo di alimentazione
Prelievo di acqua per il thè .......................77
danneggiato, devono essere eseguite solo
Cura e pulizia quotidiana ..........................77
dal nostro servizio di assistenza clienti.
− Pulire la linea del latte ........................... 77
Non immergere mai l’apparecchio o il cavo
− Pulire il bollitore .....................................78
di alimentazione in acqua.
Accessori per la conservazione ................ 78
Non toccare i dispositivi di macinazione.
Consigli per risparmiare energia...............78
Programmi di assistenza .........................79
! Pericolo di scottature!
− Decalcicare..........................................79
L’inserto schiuma per latte / acqua calda si
− Pulire ..................................................... 80
riscalda molto. Prima di toccarlo, dopo
− Calc‘n‘Clean .......................................... 81
l’uso, è necessario lasciarlo raffreddare.
Protezione dal gelo e Accessori ...............82
Smaltimento e Garanzia ...........................82
Soluzione di piccoli guasti ........................83
64

deit
Gentili amanti del caffè,
ll presente manuale d’uso descrive diversi
modelli con dotazioni diverse.
congratulazioni per aver acquistato questa
Si prega di osservare anche le istruzioni
macchina automatica per espresso della
brevi. Queste si possono inserire in un
società Siemens.
apposito scomparto 25, che consente di
tenerle sempre a portata di mano per la
consultazione durante l’uso.
Riepilogo delle parti e
degli elementi di comando
Figure A, B, C, D ed E
1 Interruttore di rete O / I
18 Anello luminoso
2 Tasto a
19 Vassoio tazze con funzione di
3 Tasto
°C
riscaldamento
(temperatura / sicurezza bambini)
20 Tasto per l’accensione del vassoio
4 Tasti selettori
< >
scaldatazze
5 Display
21 Cassetto per caffè macinato /
a) Riga di stato
pastiglie di pulizia
b) Riga di selezione
22 Sportelli del bollitore
c) Riga di navigazione
23 Interruttore aprisportello
6 Pulsante girevole per le impostazioni del
24 Bollitore
display
a) Pulsante scorrevole
7 Tasto j (menu informativo)
b) Dispositivo di blocco
8 Tasto
start
(Bevande / Programmi)
25 Scomparto per riporre le istruzioni brevi
9 Uscita caffè regolabile in altezza e
26 Chiusura dello scomparto per la
orientabile
conservazione delle istruzioni brevi
10 Inserto schiuma regolabile in altezza
27 Pannello raccogligocce
(prelievo latte / acqua calda)
28 Raccogligocce uscita caffè
a) Elemento superiore
29 Griglia di sgocciolamento uscita caffè
b) Elemento inferiore
30 Griglia di sgocciolamento inserto
c) Flessibile
schiuma
d) Tubicino del latte
31 Contenitore per fondi di caffè
11 Serbatoio acqua rimovibile
32 Vano portacavo
12 Coperchio del serbatoio per l’acqua
33 Recipiente per il latte (isolato)
13 Vano per riporre il dosatore del caffè
34 Filtro per l’acqua
macinato e gli accessori dell’inserto
schiuma
14 Dosatore del caffè macinato (guida di
inserimentoperilltrodell’acqua)
15 Serbatoio chicchi
16 Coperchio salva-aroma
17 Selettore della regolazione del grado di
macinatura
65
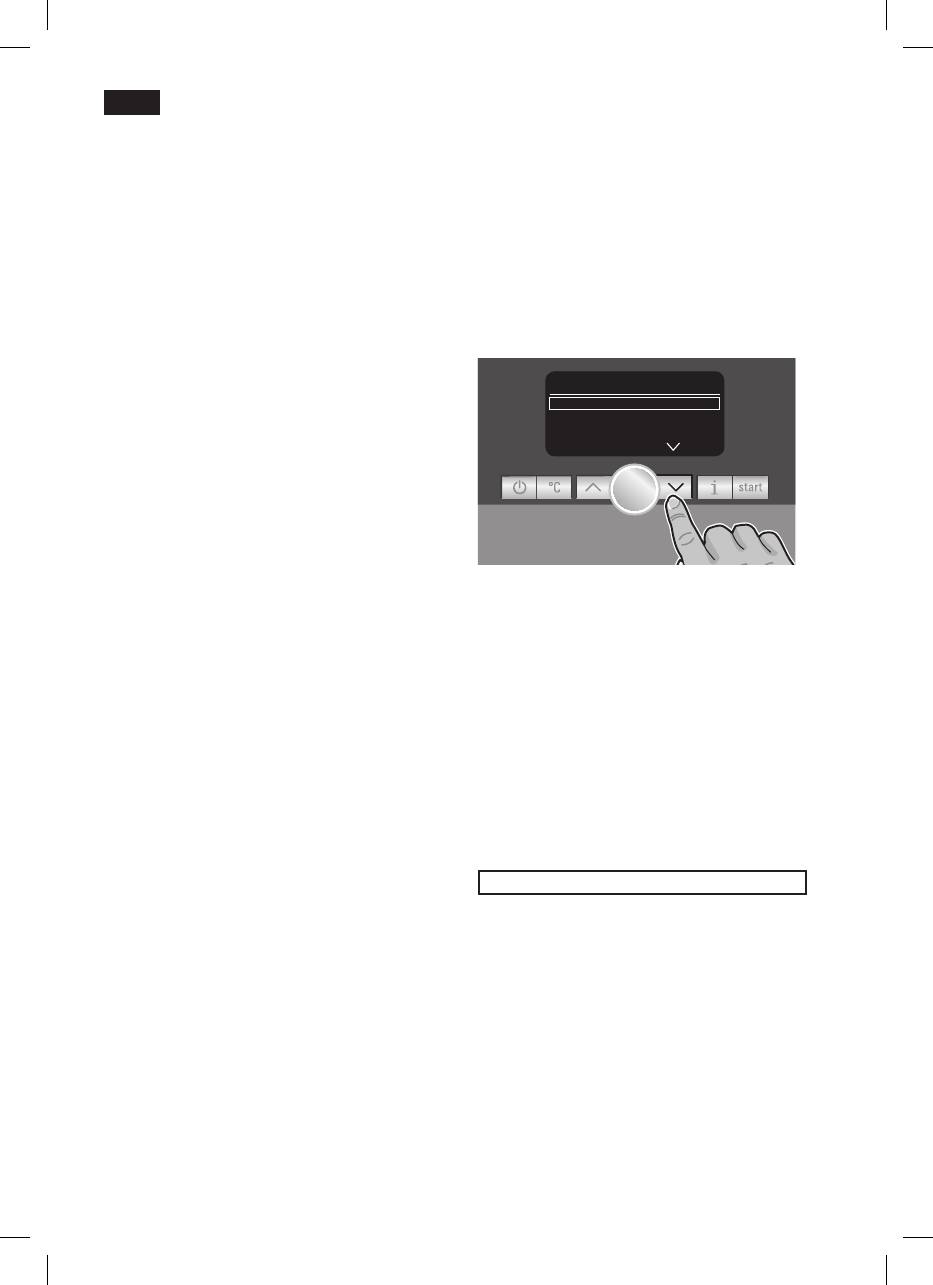
deit
●
Richiudere il coperchio del serbatoio per
Al primo impiego
l’acqua 12.
Informazioni generali
●
Riempire l’apposito serbatoio 15 con i
Versare nei corrispondenti serbatoi solo
chicchi di caffè.
acqua pulita non addizionata con anidride
●
Premere l’interruttore di rete 1 O / I, il
carbonica e preferibilmente miscele di caffè
tasto 8 start si accende e sul display 5
per macchine automatiche per espresso e
vengono visualizzate diverse lingue.
caffè. Non usare chicchi di caffè glassati,
●
Ora scegliere la lingua di visualizzazione
caramellati o trattati con altri additivi conte-
degli altri testi del display con i tasti
nenti zucchero, in quanto otturano il bollito-
selettori 4 < e >.
re.
In questo apparecchio è possibile regolare
Language
Deutsch
start
la durezza dell’acqua. Il valore preimpostato
engLish
è 4. Determinare la durezza dell’acqua con
Pycckий
le apposite striscie fornite in dotazione. Se
la durezza indicata è diversa da 4, program-
mare di conseguenza l’apparecchio (vedere
il capitolo “Menu impostazioni Durezza
acqua”).
Mettere l’apparecchio in funzione
La lingua selezionata viene
●
Posizionare la macchina per il caffè
contrassegnata con una cornice. Sono
espressosuunasuperciepiana,in
disponibili le seguenti lingue:
grado di sostenere il suo peso
Deutsch
Informazione: l’apparecchio è dotato, sul
fondo, di quattro rotelle, che permettono di
e
ngLish
spostarlosuunalineaadarcoalnedi
facilitarne l’uso e la collocazione.
P
ycckий
●
Estrarre il cavo dal vano portacavo 32 e
inserire la spina. Per regolare la lunghez-
n
eDerLanDs
za, estrarre il cavo spostandolo verso il
basso oppure reinserirlo spostandolo
F
rançais
verso l’alto. Per eseguire questa opera-
zione, posizionare l’apparecchio ad
i
taLiano
esempio al bordo del tavolo.
●
Sollevare il coperchio del serbatoio per
s
venska
l’acqua 12.
●
Estrarre il serbatoio per l’acqua 11,
e
sPañoL
sciacquarlo e riempirlo con acqua pulita
fredda. Non superare il livello indicato
P
oLski
come “max”.
●
Posizionare il serbatoio dell’acqua 11
●Premereiltasto8
start
, la lingua
diritto e spingerlo completamente verso il
selezionata viene memorizzata, il tasto 2
basso.
a si accende.
66
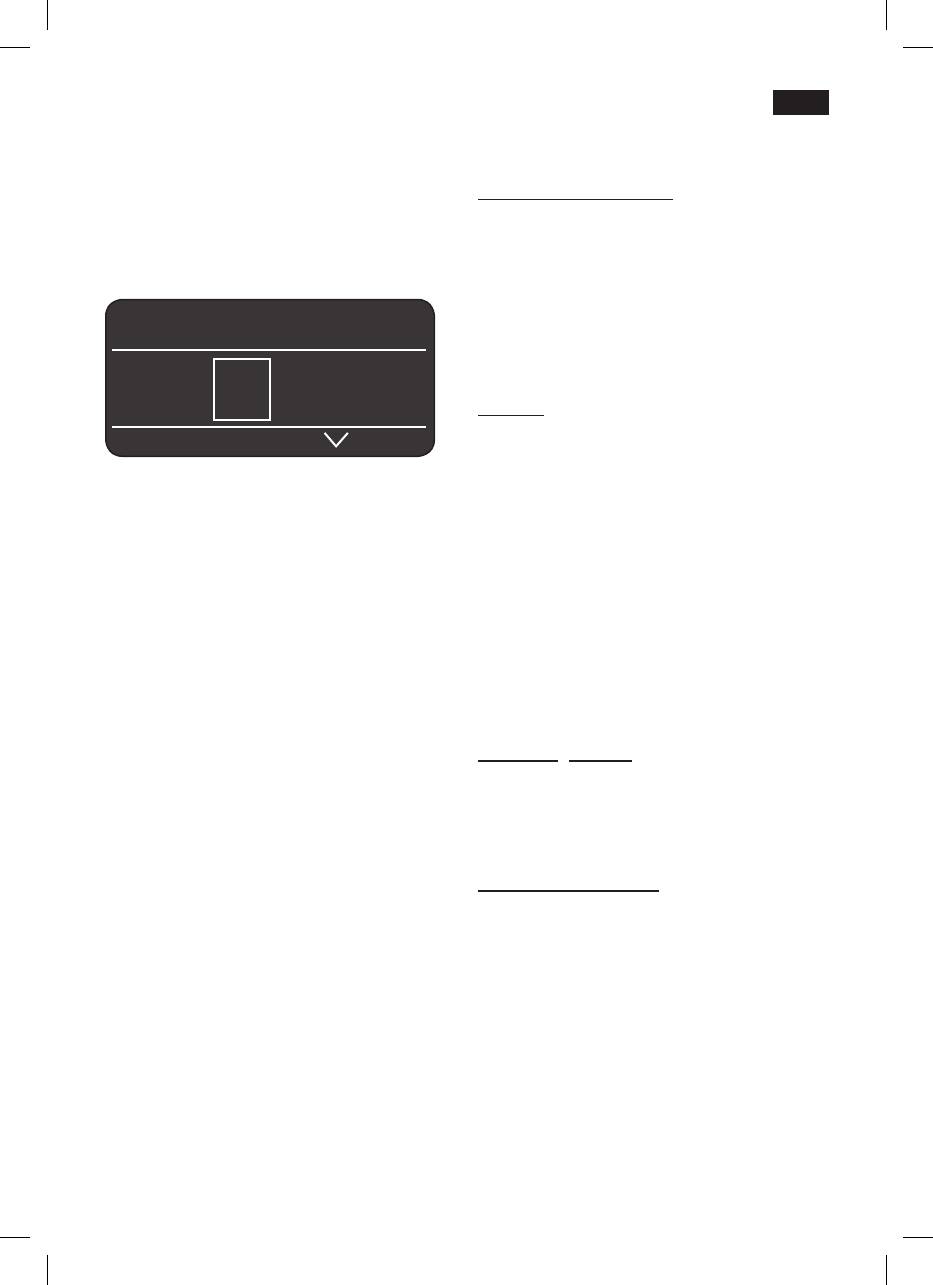
deit
●Premereiltasto2
a, sul display 5
Elementi di comando
compare il logo del marchio. Ora
l’apparecchio si riscalda ed esegue un
Interruttore di rete O / I
risciacquo,unpo’diacquauisce
L’interruttore di rete 1 O / I attiva o disattiva
dall’uscita caffè 9. Quando sul display 5
completamente la “modalità di risparmio”
compaiono i simboli per la preparazione,
dell’apparecchio. Nella “modalità di
l’apparecchio è pronto per l’uso.
risparmio” è acceso solo il tasto 2 a.
Importante: spegnere l’apparecchio con
l’interruttore di esercizio solo quando è
esPresso Ë Í
attiva la “modalità di risparmio”, affinché
venga eseguito il risciacquo automatico.
 à À Á Ä Å
Tasto a
Con il tasto 2 a l’apparecchio si accende
(pronto per l’uso) o si ripristina la “modalità
di risparmio”.
Informazione: la macchina per il caffè
Il tasto 2 alampeggianoaquando
espresso è preprogrammata con imposta-
l’apparecchio esegue il risciacquo.
zioni standard per un funzionamento ottima-
L’apparecchio non esegue il risciacquo
le. Dopo 1 ora l’apparecchio passa automa-
quando:
ticamente alla “modalità di risparmio” (vede-
●
è ancora caldo all’accensione;
re capitolo “Impostazioni di menu AUTO
●
non è avvenuto alcun prelievo di caffè
SPEGNIMENTO IN”).
prima del passaggio alla “modalità di
risparmio”.
Consiglio: al primo utilizzo o quando l’ap-
L’apparecchio è pronto per l’uso quando i
parecchio resta inutilizzato per un periodo
simboli per la selezione delle bevande e il
più lungo, la prima tazza non ha un aroma
tasto 8
start
lampeggiano.
pieno.
Pulsante girevole
Dopo la prima messa in funzione della
Il pulsante girevole 6 permette di navigare
macchina automatica per espresso, si
nel display ruotandolo verso sinistra o verso
otterrà una crema consistente e densa solo
destraoppuredimodicareiparametrinel
dopo aver prodotto alcune tazze.
menu.
Tasti selettori < e >
Con i tasti selettori 4 < e > è possibile
navigare verso il basso o verso l’alto
all’interno dei livelli di menu (riga di
navigazione 5c).
67
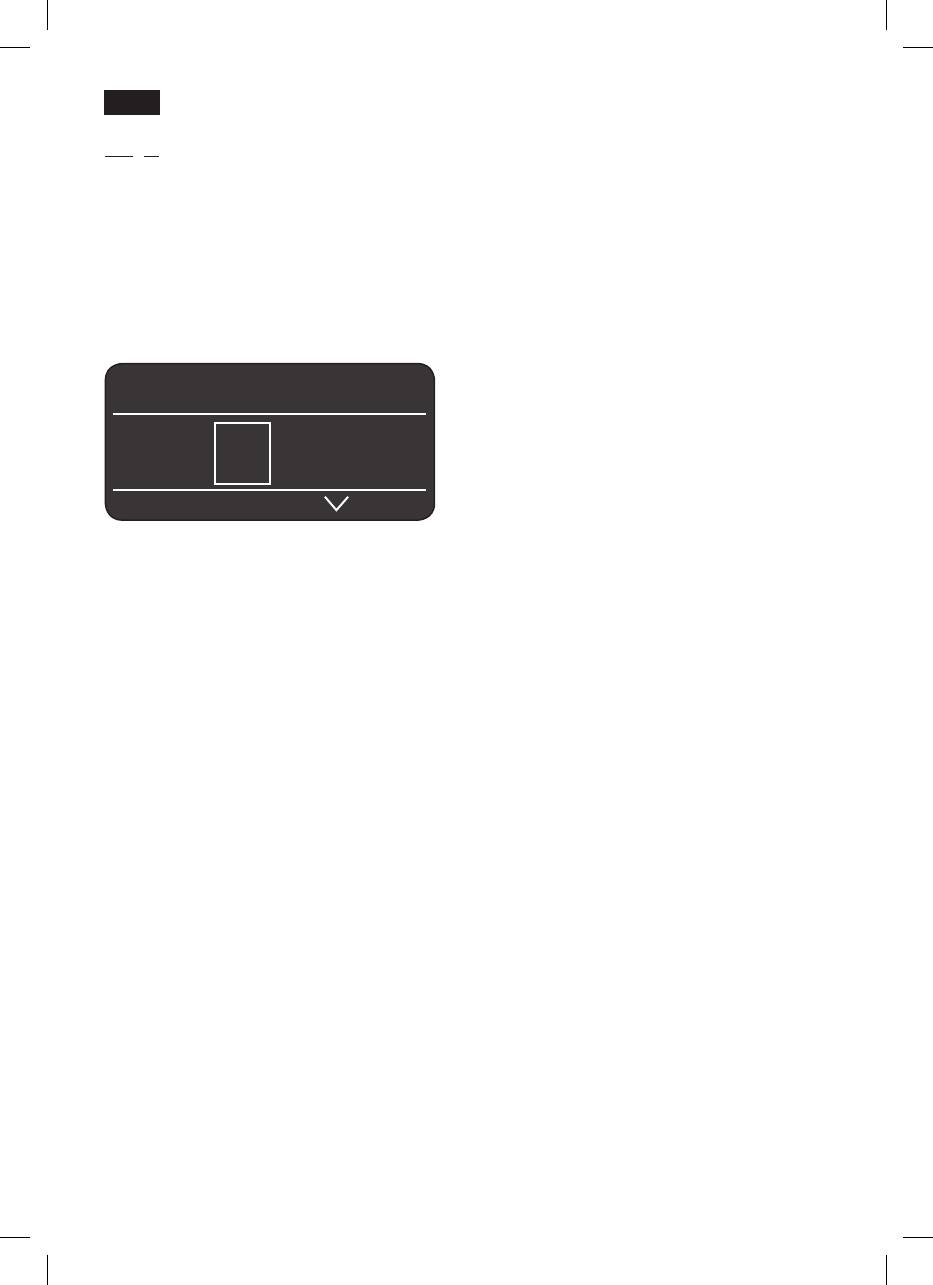
deit
Display
Messaggi sul display
Il display 5 visualizza, mediante simboli,
Sul display 5 vengono visualizzati diversi
possibilità di selezione, intensità del caffè e
messaggi.
quantità, e, mediante testi, impostazioni,
processi in corso e messaggi. Le imposta-
Informazioni:
zioni si eseguono qui mediante il pulsante
serb. acqua in esaur.
girevole 6 e i tasti selettori 4.
s
erb. chicchi in esaur.
L’impostazione selezionata viene contras-
s
i Prega Di attenDere
segnata con una cornice.
Azioni:
rieMPire serbatoio acqua
inserire serbatoio acqua
5a
esPresso ËË Í
controLLare serbat. acqua
b
inserire raccogLigocce
 à À Á Ä Å
vuotare raccogLigocce
c
rieMPire serbatoio chicchi
Posizionare uscita caFFè
Nella riga di stato 5a del display 5 viene
inserire innesto schiuMa
visualizzato il nome del tipo di bevanda e il
inserire unità Di inFusione caFFè.
valore impostato per l’intensità, ad esempio
c
hiuDere sPorteLLo
55 e per la quantità, ad esempio
�
. La
controLLare unità Di inFusione
riga di selezione 5b rappresenta i simboli
caFFè
per la selezione delle bevande.
versare La PoLvere
Le frecce nella riga di navigazione 5c
c
hiuDere iL cassetto
indicano in quale direzione sono disponibili
ulteriori livelli di menu.
caMbiare FiLtro
DecaLciFicare
eseguire PuLizia
caLc‘n‘cLean
teMP. troPPo bassa
s
i Prega Di attenDere
aLto – basso voLtaggio
68
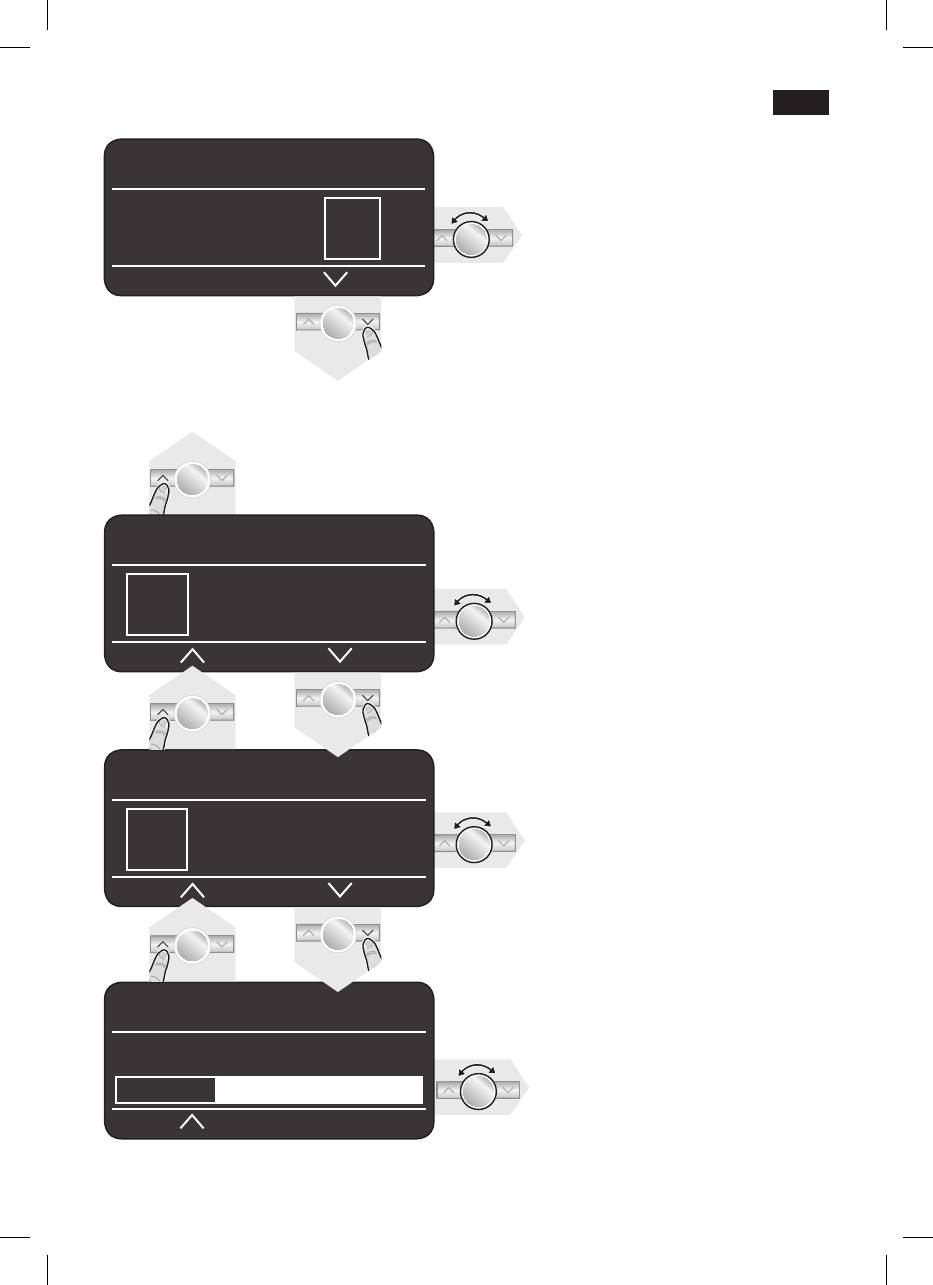
deit
Possibilità di selezione
My coFFee Ë Í
2 esPresso
2xcaFFè
Â
Ã
À
esPresso Á caFFè
Á Ä Å Æ Ç È
Ä caFFeLatte
Macchiato
Å
Æ
caPPuccino
Ç
My coFFee
schiuMa Latte
Latte caLDo
È
É
L
avaggio raPiDo
acqua caLDa
sisteMa Latte
Ê
Ì
Intensità del caffè
(solo per bevande a base di caffè)
My coFFee Ë Í
5 5 5 5 5 5
Media Normale Forte
5 55 555
Quantità
(solo per bevande a base di caffè)
My coFFee Ë Í
� Ð Ò
� Ð Ò
piccola media grande
Oltre all’intensità del caffè e alla
quantità di riempimento, per
My coFFee Ë Í
l’impostazione personalizzata My
coFFee Ç è possibile selezionare
esPresso Latte
anche la proporzione di miscela tra
40%
caffè espresso e latte: L’impostazione
può essere eseguita gradualmente,
con incrementi del 20%, ruotando il
pulsante girevole.
69
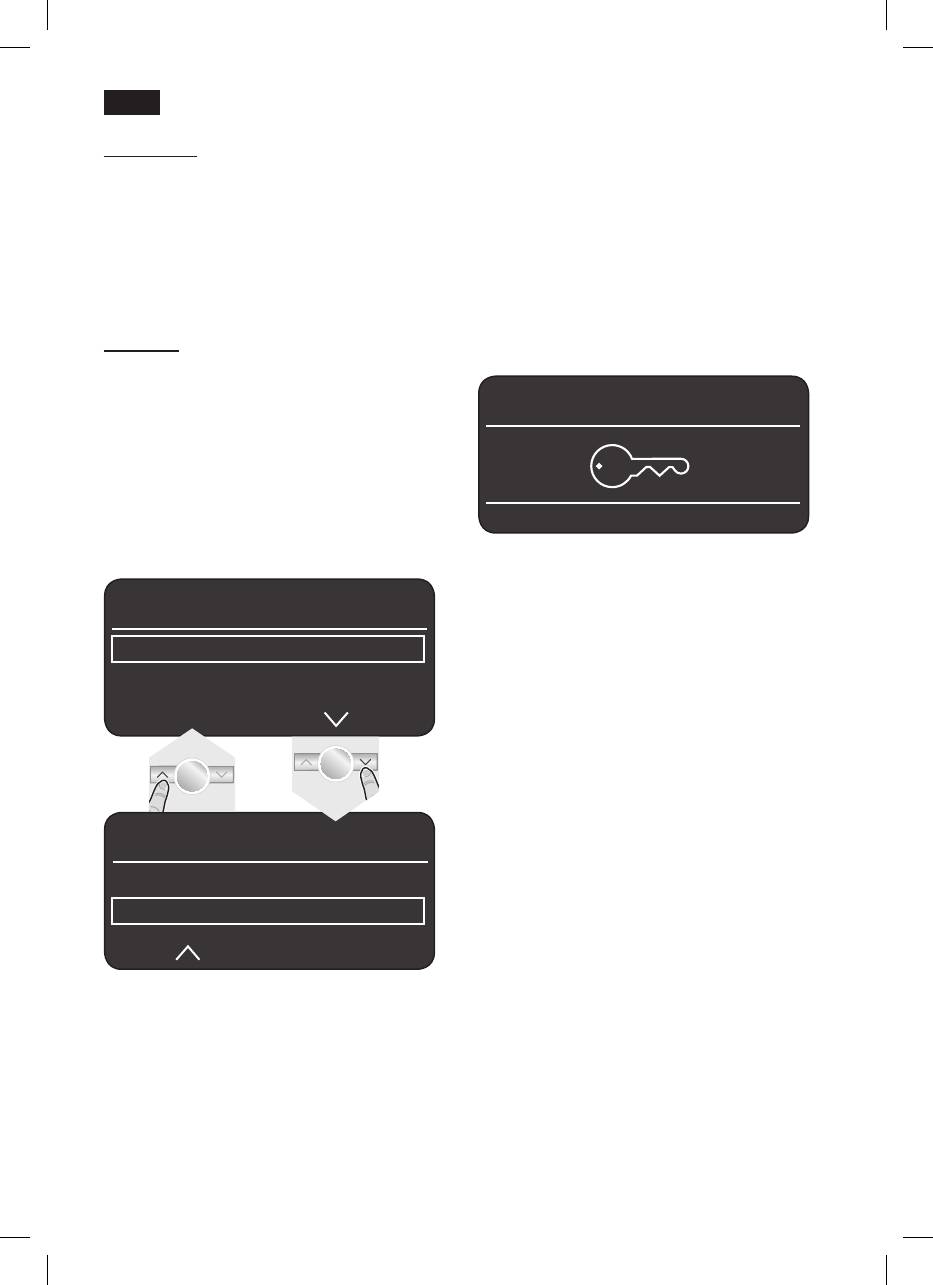
deit
Tasto
start
Sicurezza bambini
Premento il tasto 8
start
si avvia la
Esiste la possibilità di bloccare l’apparec-
preparazione della bevanda e un
chio per proteggere i bambini da ustioni e
programma di assistenza.
scottature.
Premendo nuovamente il tasto 8
start
●Tenerepremutoiltasto3
°C
per almeno 3
durante la preparazione della bevanda è
secondi, sul display viene visualizzato il
possibile interrompere anticipatamente il
simbolo di una chiave. A questo punto la
prelievo.
sicurezza bambini è attiva.
In questo stato la macchina non può essere
Tasto
°C
utilizzata. Il vassoio scaldatazze è spento.
Con il tasto 3
°C
si imposta la temperatura
del caffè e dell’acqua per il thè (premendo
per breve tempo) e si attiva o disattiva la
esPresso Ë Í
sicurezza bambini (tenere il tasto premuto
per almeno 3 secondi).
Regolazione della temperatura
Premere brevemente il tasto 3
°C
ed
eseguire le impostazioni con i tasti < e > e
il pulsante girevole.
●Perdisattivarelasicurezzabambini
tenere premuto il tasto 3
C°
per almeno 3
secondi; sul display 5 il simbolo della
teMPeratura
chiave scompare.
caFFè
norMaLe
acqua caLDa
teMPeratura
caFFè
acqua caLDa
<90°c
Premendo nuovamente il tasto 3
C°
e
ritornare alla selezione della bevanda.
Questeimpostazionisonoefcaci
automaticamente per tutti i tipi di
preparazione.
70
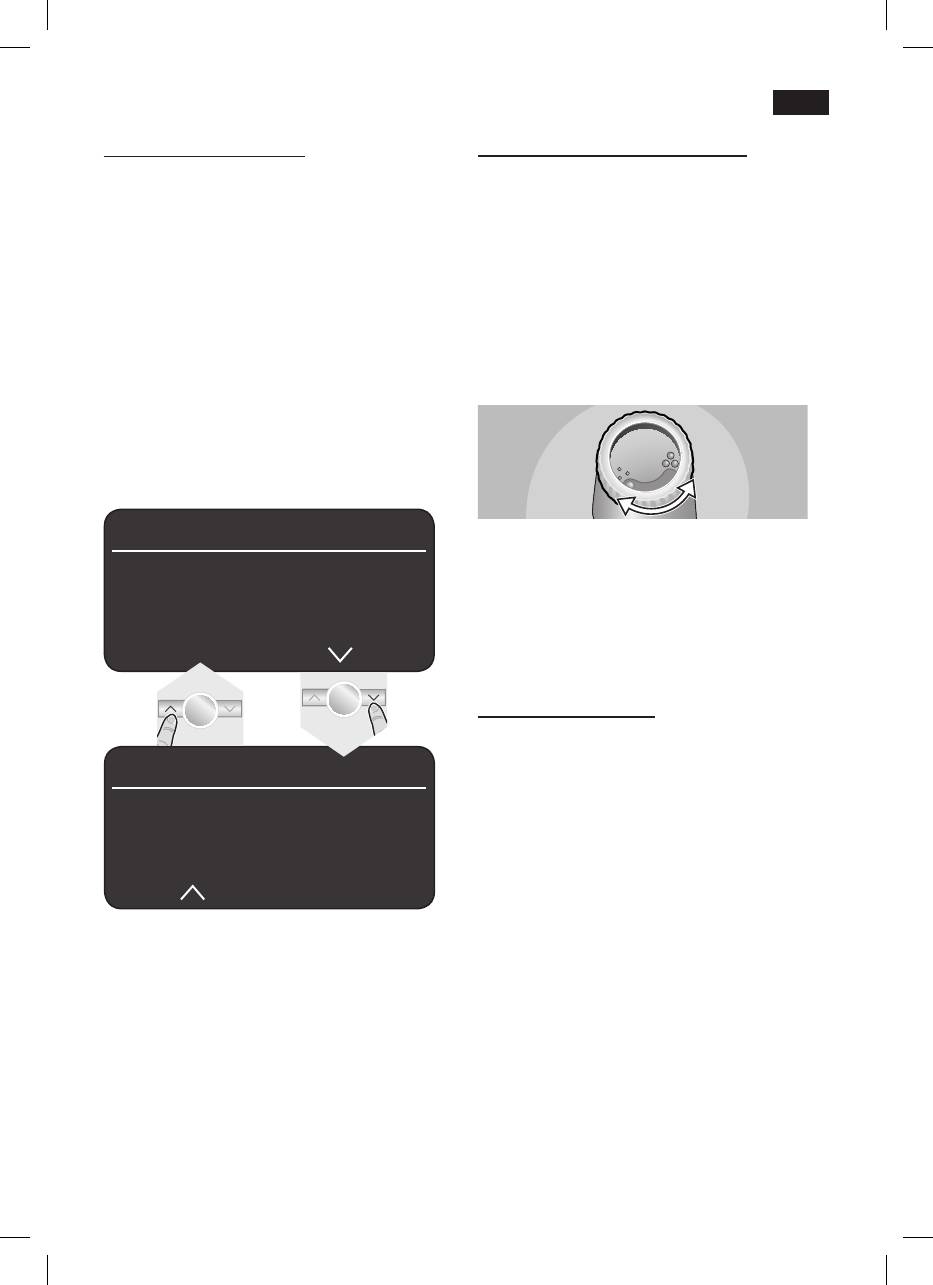
deit
Impostazioni del tasto j
Regolare il grado di macinatura
Con il tasto 7 j è possibile richiamare delle
Con il selettore 17 è possibile regolare il
informazioni (premere brevemente) ed
grado di macinatura desiderato per il caffè.
eseguire le impostazioni (tenere il tasto
premuto per almeno 3 secondi).
Attenzione
Regolare il grado di macinatura solo con il
Richiamare informazioni
macinacaffè in funzione! In caso contrario
Nel menu Info si possono richiamare le
l’apparecchio potrebbe subire danni.
seguenti informazioni:
●Conilmacinacaffèinfunzione,
– il numero di bevande prelevate dalla
posizionare il selettore 17 su un valore
messa in funzione della macchina per
compresotracaffèmacinatone•••è
caffè espresso
caffèmacinatogrosso●●●.
–ilperiodochedevetrascorrerenoal
prossimo intervento di assistenza
●Premerebrevementeiltasto7
j e
navigare con i tasti < e >.
Menu inFo
Informazione: la nuova regolazione risulta
effettiva solo a partire dalla seconda tazza.
DecaLc. tra ca. xxx tazze
PuLire tra ca. xxx tazze
Consiglio: per chicchi più tostati scegliere
Manca FiLtro
ungradodimacinaturapiùne,perchicchi
caMbio FiLtro tra xxx tazze *
meno tostati scegliere un grado di
macinatura più grosso.
Riscaldamento tazze
! Attenzione! Il dispositivo di
riscaldamento tazze si riscalda molto!
Menu inFo
La macchina automatica per espresso è
dotata di una funzione per il riscalda-mento
nuMero Di tazze xx
delle tazze 19, che può essere attivata o
nuMero Di Mix Latte xx
disattivata manualmente con il tasto 20. Se
quantità Di acqua caLDa xL
il riscaldamento tazze 19 è attivo, il tasto 20
si accende.
*comparesoloseilltroèattivo.
Consiglio: per un riscaldamento ottimale
delle tazze, posizionarle sul dispositivo con
Premendo di nuovo il tasto j per breve
la base a contatto con il riscaldamento 19.
tempo si ritorna alla selezione delle bevan-
de. Dopo circa 10 secondi di inattività,
Solo per TK 76F09
l’apparecchio passa automaticamente alla
Esiste anche la possibilità di preprogram-
modalità di selezione delle bevande.
mare il riscaldamento tazze (vedere il
Capitolo “Impostazioni del menu riscaLD.
Eseguire le impostazioni
tazze on”).
(vedere capitolo “Impostazioni del menu”).
71
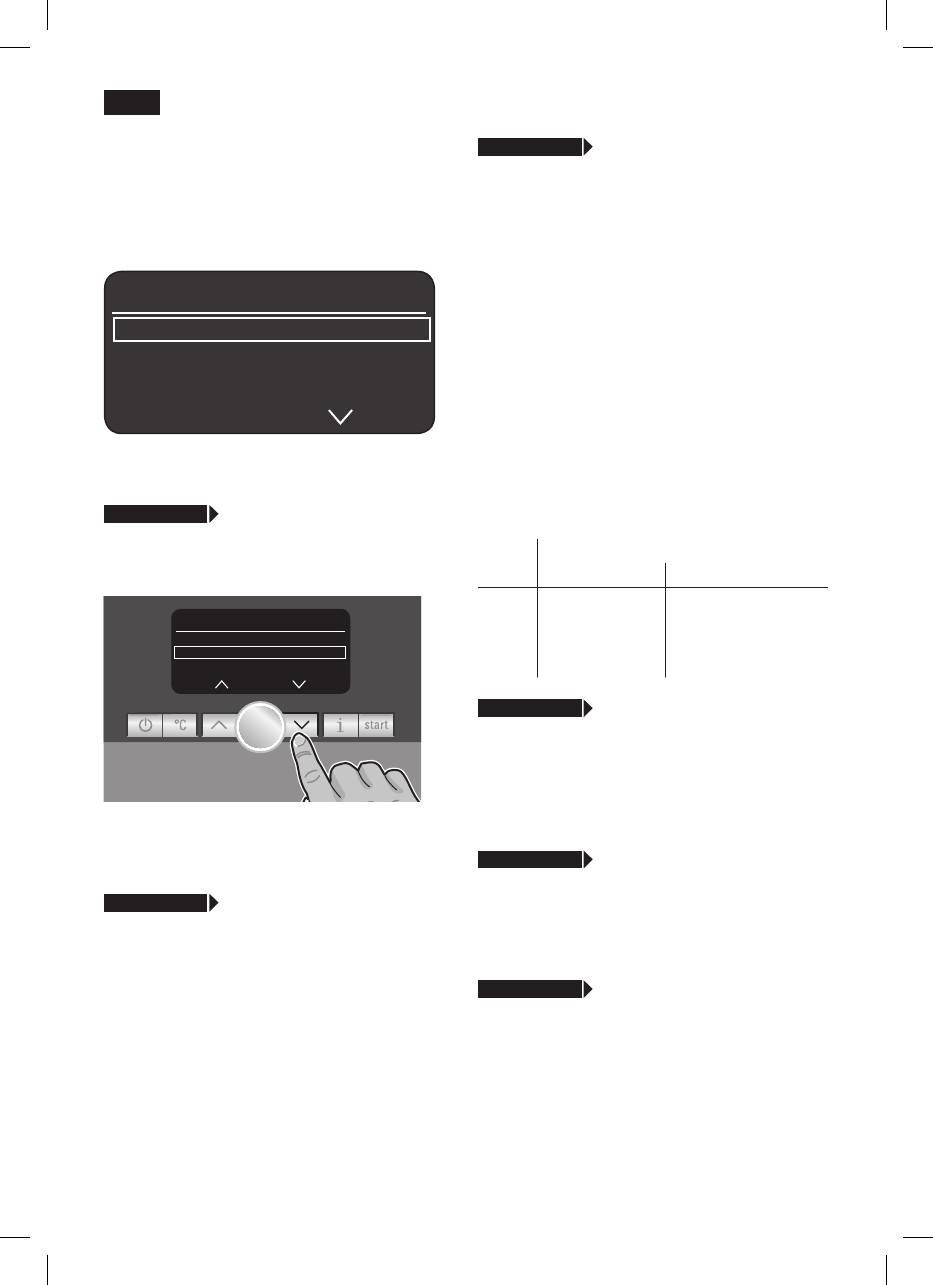
deit
j 3 sec. + >
Durezza acqua
Impostazioni del menu
●Ruotandoilpulsantegirevole6 è
●Tenerepremutoiltasto7 j per almeno 3
possibile selezionare la durezza
secondi.
dell’acqua desiderata sui valori
Compaiono le diverse possibilità di
1,2,3 e 4.
impostazione.
Informazione: l’impostazione della corretta
iMPostazioni
durezzadell’acquaèimportanteafnché
l’apparecchiovengadecalcicatonegli
Lingua itaLiano
intervalli dovuti. Il valore preimpostato per la
Durezza acqua
durezza dell’acqua è 4. La durezza
DecaLciFicare
dell’acqua si può determinare con la strisce
di test fornite in dotazione oppure si può
richiedere alla società locale di distribuzione
dell’acqua.
Nel testo che segue ogni nuova
●Immergereinacquaperbrevetempola
impostazione inizia con
striscia di test e leggere il risultato dopo 1
j 3 sec. + >
ed è seguita da una
minuto.
descrizione precisa.
Grado Grado di durezza dell’acqua
Con i tasti < e > è possibile selezionare le
diverse possibilità di impostazione.
Tedesco (°dH) Francese (°fH)
1
1-7
1-13
iMPostazioni
2
8-14
14-25
Durezza acqua
3
15-21
26-38
DecaLciFicare
start
PuLire
4
22-30
39-54
j 3 sec. + >
DecaLciFicare
●Pereseguireladecalcicazione
dell’apparecchio, premere il tasto 8
start
e ed eseguire il programma di
decalcicazione(vedereCapitolo
Nota: lemodicheeseguitevengono
“Decalcicare”).
salvate automaticamente, senza la
necessità di un’ulteriore conferma.
j 3 sec. + >
PuLire
●Pereseguirelapuliziadell’apparecchio,
j 3 sec. + >
Lingua
premere il tasto 8
start
e ed eseguire il
●Ruotandoilpulsantegirevole6 è
programma di pulizia (vedere Capitolo
possibile selezionare la lingua desiderata.
“Pulire”).
j 3 sec. + >
caLc‘n‘cLean
●Pereseguirecontemporaneamentela
DecalcicazioneelaPulizia
dell’apparecchio, premere il tasto 8
start
ed eseguire il programma Calc‘n‘Clean
(vedere Capitolo “Calc‘n‘Clean”).
72
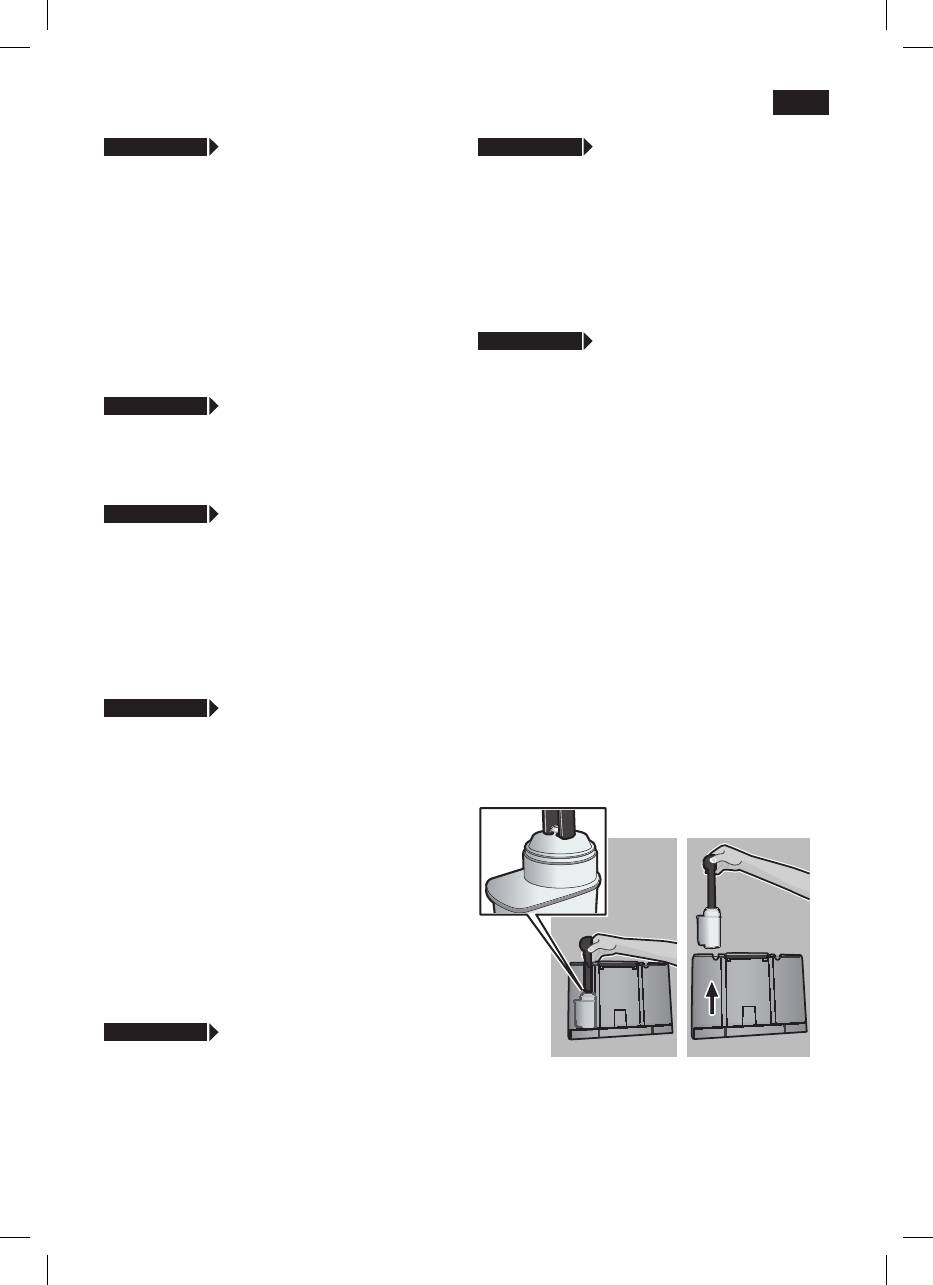
deit
j 3 sec. + >
visuaLizzare ora
j 3 sec. + >
auto sPegniMento in
In questo modo si può impostare la
●
Ruotando il pulsante girevole 6 è
visualizzazione dell’ora sul display in
possibile inserire il tempo che deve
modalità di risparmio.
trascorrere dall’ultimo prelievo, prima che
●Ruotandoilpulsantegirevole6 è
l’apparecchio passi alla modalità di
possibile attivare
= sì o disattivare = no
risparmio.
la visualizzazione dell’ora.
È possibile impostare un intervallo minimo
di 5 minuti ed un intervalli massimo di 8 ore.
Informazione: dapprima è necessario
impostare l’ora con la funzione
regoLare
j 3 sec. + >
FiLtro acqua
ora.
Ognivoltachesiinserisceunnuovo ltro
34 acqua nel serbatoio acqua 11, è
j 3 sec. + >
MoDo ora
necessario eseguire un risciacquo del
●
Nel Modo ora il pulsante girevole 6
nuovoltro.
consente di impostare il formato dell’ora
●
Per eseguire questa operazione spingere
scegliendo tra 12h o 24h.
saldamenteilltrodell’acqua34 nel
serbatoio dell’acqua 11 aiutandosi con il
j 3 sec. + >
regoLare ora
dosatore 14. Riempiere poi il serbatoio
●Ruotandoilpulsantegirevole6 è
conacquanoalcontrassegno“
max
”.
possibile impostare l’ora attuale, ad
●
Ruotando il pulsante girevole 6 scegliere
esempio 08:25. Il numero da impostare
start e premere il tasto 8
start
.
è retroilluminato e la retroilluminazione
●Posizionare reciP.Da 0,5 L sotto
cambia automaticamente tra ore e minuti.
inserto schiuMa
start
●
Posizionare un recipiente con una
Solo per TK76F09
capacità da 0,5 l sotto l’inserto schiuma.
(riscaldamento tazze programmabile)
●
Premere il tasto 8
start
. Ora l’acqua
j 3 sec. + >
riscaLD. tazza on
scorreattraversoilltro34 per
Con questa funzione supplementare il ri-
sciacquarlo.
scaldamento delle tazze si attiva automati-
●
Quindi vuotare il recipiente. L’apparecchio
camente ad un’ora programmabile, sia che
è nuovamente pronto per l’uso.
l’apparecchio si trovi in “modalità di rispar-
mio”, sia che sia pronto per l’uso.
Informazione: dapprima è necessario
impostare l’ora con la funzione regoLare
ora.
●
Ruotando il pulsante girevole 6 è
possibile selezionare l’ora desiderata.
Selezionando
oFF la funzione è
disattivata.
j 3 sec. + >
riscaLD. tazza oFF tra
Questa impostazione permette di impostare
l’ora di disattivazione automatica della
funzione per il riscaldamento delle tazze
dopo la riaccensione.
73

deit
Informazione: contemporaneamente al
Informazione: È possibile ripristinare
risciacquodelltro34 viene attivata
manualmenteleimpostazionipredenite
l’impostazione di visualizzazione del cambio
dell’apparecchio mediante una
ltro.
combinazione di tasti.
L’apparecchio deve essere completamente
Perinformazionidettagliatesulltro
spento.
dell‘acqua, consultare le istruzioni allegate
●
Premere contemporaneamente i tasti 4
alltro.
< e > e l’interruttore di rete 1 O / I per
almeno 5 secondi; le impostazioni
L’effettodelltro34 è esaurito quando
predenitesononuovamenteattive.
compare l’indicazione
caMbio FiLtro
oppure al massimo dopo 2 mesi dalla
sostituzione.Illtrodeveesseresostituito
Preparazione con chicchi
perragioniigienicheeafnché
di caffè
l’apparecchio non presenti un eccesso di
calcare (che può danneggiare l’apparecchio
Questa macchina automatico per espresso
stesso).
macina automaticamente i chicchi freschi
prima di ogni preparazione. Usare
Filtri di ricambio sono disponibili persso i
preferibilmente miscele di caffè o espresso
rivenditori (TZ70003) o presso il servizio di
appositamente preparate per l’uso con
assistenza clienti (467873).
macchine da caffè. Per garantire una qualità
Senonvieneinseritoalcunnuovoltro34,
ottimale, conservare i chicchi di caffè in
posizionare l’impostazione FiLtro acqua
luogo fresco e chiuso oppure congelarli. È
su no.
possibile macinare anche chicchi congelati.
Informazione: Se l’apparecchio resta
Importante: l’acqua del serbatoio
inattivo per un periodo prolungato (ad
dell’acqua 11 deve essere sempre fresca. Il
esempio durante le vacanze), prima
serbatoio dovrebbe contenere sempre una
dell’uso si dovrebbe eseguire il risciacquo
quantitàdiacquasufcientepergarantireil
delltro34 inserito, semplicemente
funzionamento dell’apparecchio.
prelevando una tazza di acqua calda.
Consiglio: Preriscaldare la o le tazze, in
j 3 sec. + >
contrasto
particolare le piccole e grosse tazze da
Il contrasto del display può essere
espresso, sul vassoio portatazze 19.
impostato da –20 a +20. Il valore
predenitoè+0.
È possibile preparare diverse bevande a
●
Eseguire l’impostazione desiderata con il
base di caffè in modo molto semplice
pulsante girevole 6.
semplicemente agendo sui tasti.
j 3 sec. + >
iMP.PreDeFinita
È possibile eliminare le impostazioni
personali e riattivare le impostazioni
predenite.
●
Perattivarel’impostazionepredenita,
premere il tasto 8
start
.
74
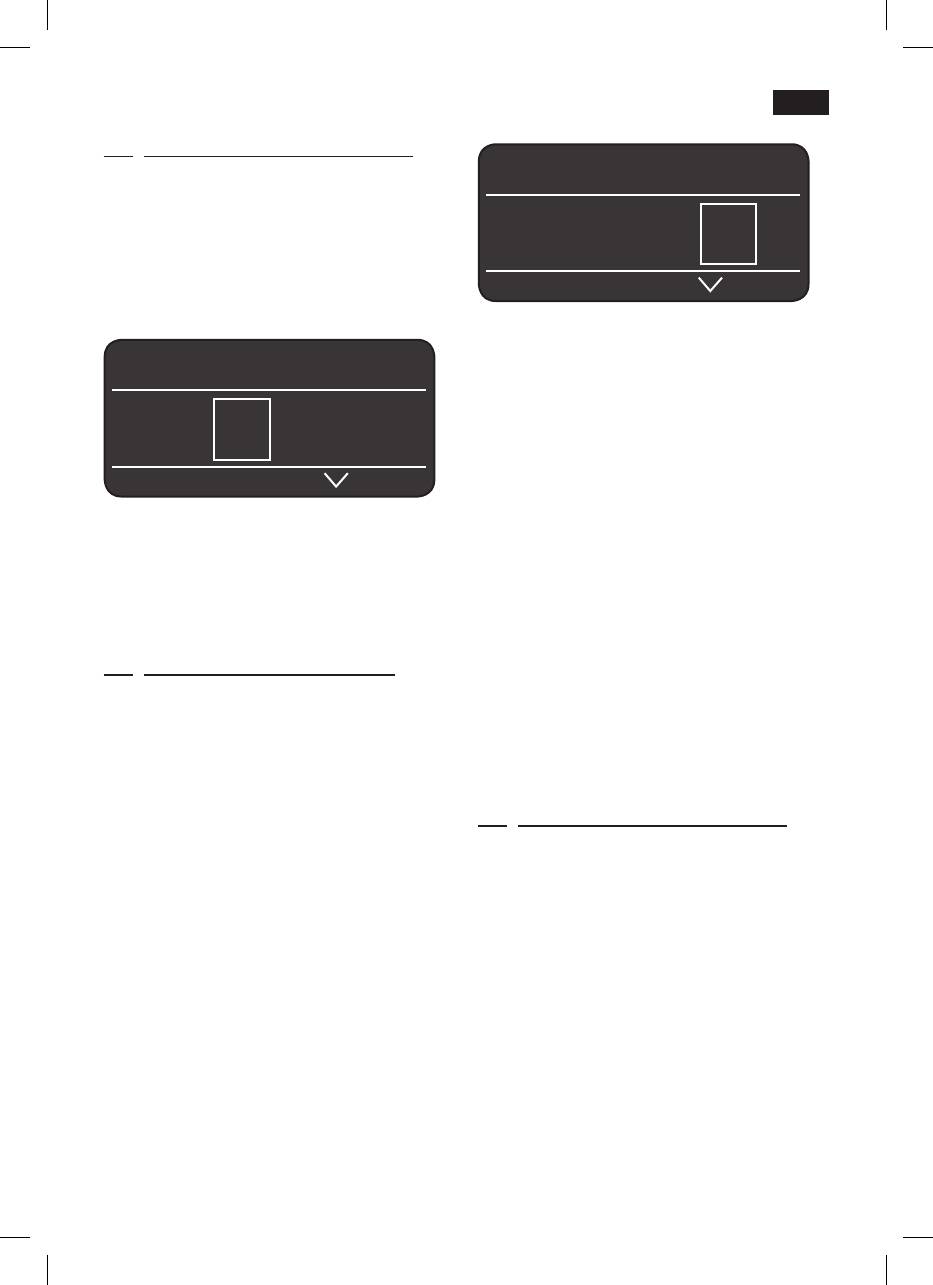
deit
Preparazione di bevande senza latte
L’apparecchio deve essere pronto per l’uso.
caPPuccino Ë Í
●
Posizionare la o le tazze preriscaldate
sotto l’uscita caffè 9.
●
Selezionare l’espresso o il caffè
desiderato ruotando il pulsante girevole 6.
À Á Ä Å Æ Ç
Sul display 5 viene visualizzata la bevanda
selezionata e l’impostazione per l’intensità e
la quantità di caffè per questa bevanda.
Queste impostazioni possono essere
modicate(vederecapitolo“Elementidi
comando”).
esPresso Ë Í
●
Premere il tasto 8
start
.
Dapprima il latte viene immesso nella
tazza o nel bicchiere. Quindi il caffè viene
 à À Á Ä Å
preriscaldato e versato nella tazza o nel
bicchiere.
Queste impostazioni possono essere
Importante: I resti secchi di latte sono
modicate(vederecapitolo“Elementidi
difcilidarimuovere,perquestaragionesi
comando”).
consiglia di pulire l’inserto schiuma 10 con
●
Premere il tasto 8
start
.
acqua tiepida dopo ogni uso (vedere
Ilcaffèvienepreriscaldatoepoiuiscenella
capitolo “Pulire la linea del latte”).
o nelle tazze.
Preparazione di bevande con latte
Preparazione con caffè
L’apparecchio deve essere pronto per l’uso.
macinato
●Inserirenelrecipienteperillatte33 il
tubicino del latte 10d dell’inserto
Questa macchina automatica per caffè
schiuma 10.
espresso può funzionare anche con caffè
●
Spingere l’uscita caffè 9 verso destra no
macinato (non con caffè solubile).
a quando si sente uno scatto.
●
Posizionare la tazza o il bicchiere
Preparazione di bevande senza latte
preriscaldato sotto l’uscita caffè 9 e
●
Con il pulsante girevole 6, selezionare À
inserto schiuma 10.
oppure Á.
●
Selezionare la funzione desiderata,
●
Posizionare la o le tazze preriscaldate
ovvero Macchiato
Å
, Cappuccino Æ,
sotto l’uscita caffè 9.
Caffelatte Ä oppure My coffee Ç
●
Aprire il cassetto per il caffè macinato 21
ruotando il pulsante girevole 6.
esercitando una pressione.
Sul display 5 viene visualizzata la
●
Versare 2 dosatori di caffè 14 pieni.
bevanda selezionata e l’impostazione per
l’intensità e la quantità di caffè per questa
Attenzione: non versare nel cassetto
bevanda.
chicchi interi o caffè solubile.
●
Chiudere il cassetto del caffè
macinato 21.
●
Premere il tasto 8
start
.
Ilcaffèvienepreriscaldatoepoiuiscenella
o nelle tazze.
75

deit
Nota: per preparare un’altra tazza con
Preparazione di schiuma
caffè, ripetere l’operazione. Se entro 90
di latte e di latte caldo
secondi non viene prelevato caffè, il
bollitore si vuota automaticamente per
! Pericolo di ustioni
prevenire che l’acqua trabordi.
L’inserto schiuma 10 si riscalda molto. Dopo
L’apparecchio esegue un risciacquo.
l’uso, prima di afferrarlo, aspettare che si
raffreddi.
Preparazione di bevande con latte
L’apparecchio deve essere pronto per l’uso.
●
Con il pulsante 6 selezionare Caffèlatte
●
Inserire il tubicino del latte 10d dell’inserto
Ä, Macchiato
Å
, Cappuccino Æ oppure
schiuma 10 nel recipiente del latte 33.
My coffee Ç.
●
Posizionare la tazza o il bicchiere sotto
●
Inserire nel recipiente del latte 33 il
l’uscita dell’inserto schiuma 10.
tubicino 10d dell’inserto schiuma 10.
●
Selezionare l’impostazione
●
Spingere l’uscita caffè 9 verso destrano
“Schiuma latte”
È
oppure “Latte caldo”
É
a quando si sente lo scatto.
ruotando il pulsante girevole 6.
●
Posizionare la tazza o il bicchiere sotto
●
Premere il tasto 8
start
, la schiuma (per
l’uscita caffè 9 e inserto schiuma 10.
circa 40 secondi) o il latte caldo (per circa
●
Aprire il cassetto per il caffè macinato 21
60 secondi) fuoriescono dall’uscita
esercitando una pressione.
dell’inserto schiuma 10.
●
Versare 2 dosatori di caffè 14 pieni.
●
Premendo nuovamente il tasto 8
start
è
possibile interrompere anticipatamente
Attenzione: non versare nel cassetto
l’operazione.
chicchi interi o caffè solubile.
●
Chiudere il cassetto del caffè macinato
Informazione: durante la preparazione del
21.
latte caldo, è possibile che la macchina
●
Premere il tasto 8
start
.
emettadeischi.Questisonodovutialla
Dapprima il latte viene aspirato, preparato
struttura dell’inserto schiuma 10.
e pompato nella tazza o nel bicchiere.
Quindi il caffè macinato viene
Consiglio: per una schiuma di latte di
preriscaldatoepoiuiscenellatazzao
qualità ottimale, usare preferibilmente latte
nel bicchiere.
freddo con una percentuale di grasso del
1,5%.
Importante: I resti secchi di latte sono
difcilidarimuovere,perquestaragionesi
Importante: I resti secchi di latte sono
consiglia di pulire l’inserto schiuma 10 con
difcilidarimuovere,perquestaragionesi
acqua tiepida dopo ogni uso (vedere
consiglia di pulire l’inserto schiuma 10 con
capitolo “Pulire la linea del latte”).
acqua tiepida dopo ogni uso (vedere
capitolo “Pulire la linea del latte”).
Nota: per preparare un’altra tazza con caffè
macinato / mix. latte, ripetere l’operazione.
Se entro 90 secondi non viene prelevato
caffè, il bollitore si vuota automaticamente
per prevenire che l’acqua trabordi.
L’apparecchio esegue un risciacquo.
76

deit
con il contenitore per i fondi di caffè 31
Prelievo di acqua per il
tirando in avanti, pulire tutti gli elementi e
thè
reinserirli.
Tutti questi pezzi possono
! Pericolo di ustioni
essere lavati anche in lavastoviglie.
L’inserto schiuma 10 si riscalda molto. Dopo
●
Lavare a mano il dosatore 14, il coperchio
l’uso, prima di afferrarlo, aspettare che si
salva-aroma 16 e la parte interna del
raffreddi.
recipiente del latte 33. Non lavarli in
L’apparecchio deve essere pronto per l’uso.
lavastoviglie.
●
Posizionare la tazza o il bicchiere sotto
●
Pulire con un panno l’interno
l’uscita dell’inserto schiuma 10.
dell’apparecchio (alloggiamento delle
●
Selezionare l’impostazione desiderata
vasche).
Acqua thè
Ê
ruotando il pulsante
girevole 6.
Importante: Il raccogligocce 28 dovrebbe
●
Premere il tasto 8
start
, l’acqua calda
venir svuotato e pulito quotidianamente, per
fuoriesce per circa 40 secondi dall’uscita
prevenire la formazione di muffe.
dell’inserto schiuma 10.
●
Premendo nuovamente il tasto 8
start
è
Nota: se l’apparecchio viene acceso con il
possibile interrompere anticipatamente
tasto 2
a a freddo oppure viene messo in
l’operazione.
funzione dopo il prelievo di caffè, viene
eseguito un risciacquo automatico. Il
Nota: è possibile regolare la temperatura
sistema è quindi autopulente.
dell’acqua calda (vedere capitolo “Elementi
di comando Tasto
°C
”).
Pulire la linea del latte
Pulire la linea 10 del latte dopo ogni
utilizzo!
Cura e pulizia quotidiana
È possibile eseguire una pulizia preventiva
! Pericolo di scarica elettrica!
automatica linea del latte 10.
Prima della pulizia, staccare la spina di
●
Scegliere sul display 5 il simbolo
e
Ì
rete.
premere il tasto 8
start
.
Non immergere mai l’apparecchio in acqua.
inserire un bicchiere vuoto sotto
Non usare dispositivi di pulizia a vapore.
L’inserto schiuMa, iMMergere iL tubo
●
Pulire l‘esterno con un panno morbido e
Di asPirazione neL bicchiere.
start
umido. Non usare panni o detergenti
●
Inserire un bicchiere vuoto sotto la linea
abrasivi.
del latte 10 e immergere l’estremità del
●
Lavare il serbatoio 11 e il bollitore 24 solo
tubicino del latte nel bicchiere 10d.
con acqua.
●
Premere il tasto 8
start
. Ora l’apparecchio
●
La chiusura dello scomparto per la
versa automaticamente acqua nel
conservazione delle istruzioni brevi 26, il
bicchiere e la riaspira per il lavaggio
pannello delle vasche raccogligocce 27 e
attraverso il tubicino del latte 10d. La
il rivestimento isolante del recipiente del
procedura di lavaggio si conclude
latte 33 si possono lavare esclusivamente
automaticamente dopo circa 1 minuto.
con un panno umido. Non mettere in
●
Svuotare il bicchiere e pulire il tubicino
lavastoviglie.
del latte 10d .
●
Togliere la griglia di sgocciolamento usci-
ta caffè 29 e la griglia di sgocciolamento
Inoltre pulire a fondo regolarmente anche il
inserto schiuma 30. Estrarre la vasca
sistema del latte (in lavastoviglie oppure a
raccogligocce dell’uscita caffè 28 insieme
mano).
77

deit
Smontare la linea del latte 10 per pulirla:
Accessori per la
●
Estrarre la linea schiuma 10
conservazione
dall’apparecchio tirandola diritta verso il
lato anteriore.
La macchina automatica per espresso è
●
Pulire i singoli pezzi (gura C) con una
dotata di appositi scomparti per riporre
soluzione di acqua e detersivo) e con uno
accessori e istruzioni brevi al suo interno.
spazzolino morbido.
●
Per riporre il dosatore del caffè macinato
●
Sciacquare ed asciugare tutte le parti.
14, il tubicino del latte 10deilessibile
●
Rimontaretuttiipezzi,inserendolinoin
10c, togliere il serbatoio dell’acqua 11 e
fondo nelle loro posizioni.
inserire i pezzi negli appositi spazi
preformati 13.
Informazione: tutti i pezzi dell’inserto
schiuma 10 possono essere lavati in
Le istruzioni brevi hanno uno scomparto
lavastoviglie.
apposito vicino al bollitore 24.
●
Aprire lo sportello 22 del bollitore.
Pulire il bollitore
●
Afferrare la linguetta della chiusura 26 per
(vedere anche le Istruzioni brevi)
lo scomparto 25 e togliere la chiusura.
Oltre al programma di pulizia automatica,
●
Inlareleistruzionibrevi,reinserirela
l‘unità di infusione 24 dovrebbe venir tolta
chiusura 26 e chiudere lo sportello 22 del
regolarmente per poterla pulire.
bollitore.
●
Attivare il modo di risparmio energia con il
tasto 2
a.
●
Disattivare completamente l’apparecchio
Consigli per risparmiare
con l’interruttore di rete 1 O / I. Non è
energia
illuminato nessun tasto.
●
Spingere verso destra l’interruttore
–
La macchina automatica per espresso,
aprisportello 23 e aprire lo sportello 22
dopoun’ora(impostazionepredenita),
del bollitore 24.
passa automaticamente alla modalità di
●
Spingere completamente verso sinistra il
risparmio, nella quale il consumo di ener-
blocco rosso 24b sul bollitore 24.
gia è molto ridotto. Il tempo reimpostato,
●
Premere il pulsante 24a, afferrare il
diun’ora,puòesseremodicato(vedereil
bollitore 24 per le apposite maniglie
capitolo “Impostazioni del menu auto
sagomate (gura E) ed estrarlo con
sPegniMento in”).
cautela.
–
Se la macchina non viene utilizzata,
●
Pulire il bollitore 24 sotto l’acqua corrente.
spegnerla con il tasto 1 O / I di
alimentazione posizionato sul lato
Importante: non usare detersivi e non
anteriore.
lavare in lavastoviglie;
–
Se possibile non interrompere mai il
●
passare l’interno dell’apparecchio con un
prelievo di caffè o di latte. L’arresto
panno umido;
anticipato del prelievo di latte o di caffè
●
lasciar asciugare il bollitore 24 e l’interno
provoca un consumo maggiorato di
dell’apparecchio;
energia e un eccessivo livello di acqua
●
inserire il bollitore 24noinfondo;
residua nel raccogligocce.
●
spingere completamente verso destra
–
Decalcicareregolarmentel’apparecchio,
il blocco rosso 24b e chiudere
per evitare eccessivi depositi di calcare.
lo sportello 22.
La presenza di residui di calcare provoca
un maggior consumo di energia.
78
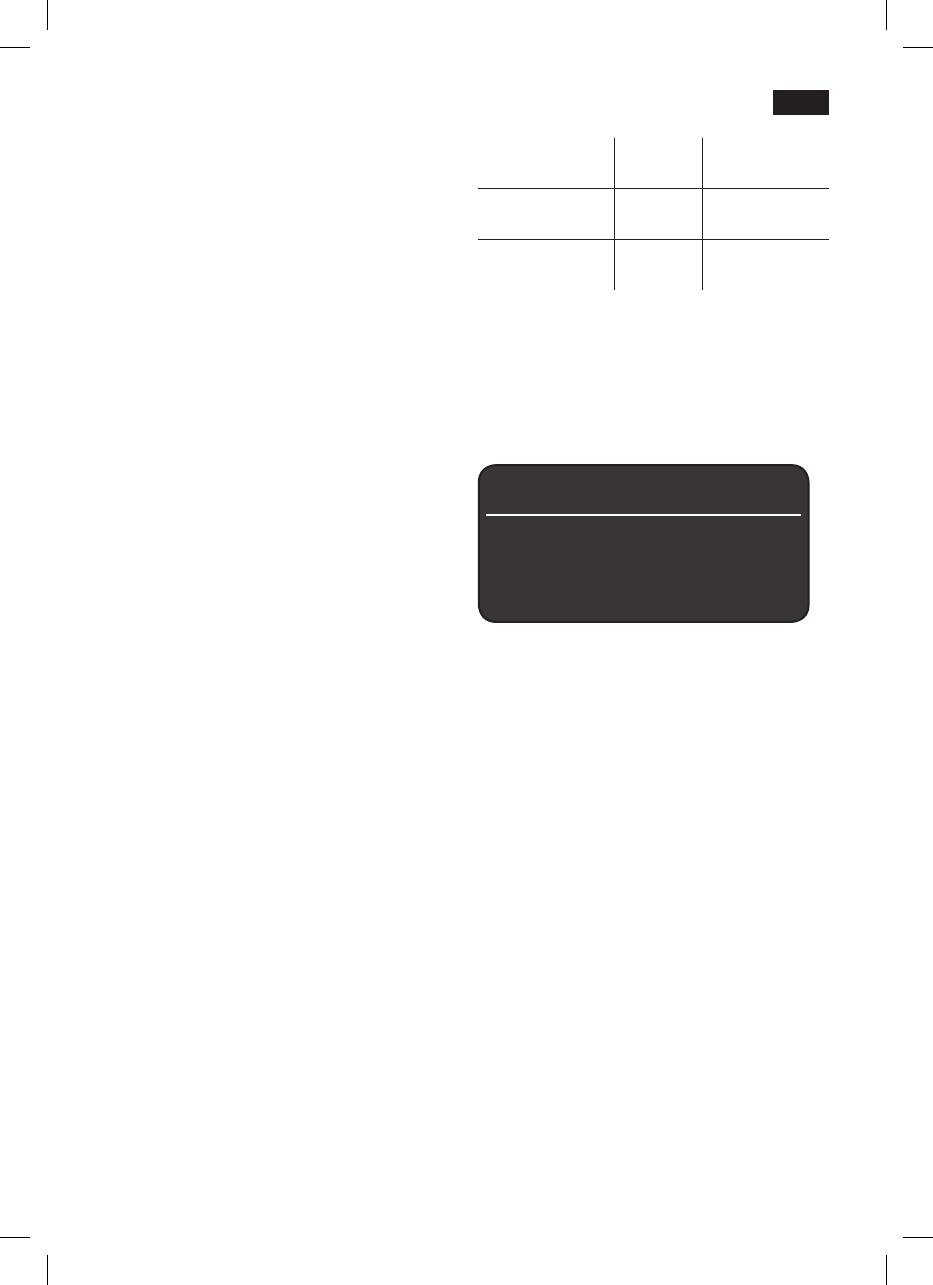
deit
Programmi di assistenza
Codice ordine Riven-
Servizio
ditore
clienti
Consiglio: vedere anche Istruzioni brevi
Pastiglie di
TZ60001 310575
nello scomparto per la conservazione 25.
detersivo
A determinati intervalli di tempo sul
Pastiglie
TZ60002 310967
display 5 compare
decalcicante
DecaLciFicare oppure
e
seguire PuLizia oppure
Importante: se nel serbatoio per l’acqua 11
caLc‘n‘cLean.
èinseritounltroperl’acqua34, è
In questo caso l’apparecchio deve essere
assolutamente necessario toglierlo prima di
immediatamentepulitoodecalcicato
iniziare il programma di assistenza.
utilizzando il corrispondente programma. A
scelta le due procedure si possono riunire
Decalcicare
nella funzione Calc‘n‘Clean (vedere
Capitolo “Calc‘n‘Clean”). Se il programma di
assistenza non viene utilizzato corret-
esPresso Ë Í
tamente secondo le istruzioni, esiste il
rischio di provocare dei danni
DecaLciFicare
all’apparecchio.
tasto i Per 3 sec.
Attenzione
Per ogni programma di assistenza,
utilizzare i decalcificanti e i detergenti
Il tasto 8
start
lampeggia durante le singole
seguendo le istruzioni.
fasididecalcicazione.
Non interrompere mai il programma di
I numeri indicati in alto a destra indicano
assistenza.
l’avanzamento della procedura.
Non ingerire i liquidi utilizzati!
Non utilizzare mai aceto, sostanze a base
●
Tenere premuto il tasto 7 j per almeno 3
di aceto, acido citrico o sostanze a base di
secondi.
acido citrico!
DecaLciFicare
start
Non mettere mai le pastiglie di
●
Premere il tasto 8
start
. Il display 5 guida
decalcificante o altri decalcificanti nel
nelle fasi del programma.
cassetto del caffè macinato 21!
Per decalcificare usare esclusivamente le
vuotare raccogLigocce
pastiglie di decalcificante fornite in dotazio-
i
nserire raccogLigocce
ne, che sono state prodotte appositamente
●
Svuotare il raccogligocce 28 e reinserirlo.
per questo apparecchio.
Posizionare reciP. Da 0,5 L sotto
Presso i rivenditori autorizzati e il
inserto schiuMa
start
servizio clienti sono disponibili speci-
●
Posizionare un recipiente con una
che pastiglie decalcicanti e deter-
capacità da 0,5 l sotto l’inserto schiuma
genti.
10.
●
Premere il tasto 8
start
.
79

deit
Informazione: seilltrodell’acqua34 è
Pulire
attivo,comparel’invitoatogliereilltro34 e
a premere nuovamente il tasto 8
start
eLiMinare FiLtro acqua
start
esPresso Ë Í
versare 0,5 L acqua +
eseguire PuLizia
DecaLciFicante
start
●
Riempire il serbatoio dell’acqua 11 con
tasto i Per 3 sec.
acquatiepidanoalcontrassegno“0,5l”
esciogliervi2pastigliedecalcicanti
Siemens.
Durante le fasi del processo di pulizia, il
●
Premere il tasto 8
start
. Il programma di
tasto 8 start lampeggia.
decalcicazioneduracirca20minuti.
I numeri in alto a destra indicano lo stato di
DecaLciFicazione in corso
avanzamento della procedura.
●
Riempire il serbatoio dell’acqua 11noal
Manca DecaLciFicante
contrassegno “max”.
a
ggiung. DecaLciFicante
●
Tenere premuto il tasto 7 j per almeno 3
Informazione: se il serbatoio dell’acqua 11
secondi.
contienetroppopocodecalcicante,
compare il messaggio corrispondente.
PuLire
start
Aggiungeredecalcicanteepremere
●
Premere il tasto 8
start
. Il display 5 guida
nuovamente il tasto 8
start
.
nelle fasi del programma.
sciacquare e rieMPire
vuotare raccogLigocce
serbatoio acqua
start
i
nserire raccogLigocce
●
Sciacquare il serbatoio dell’acqua 11 e
●
Svuotare il raccogligocce 28 e reinserirlo;
riempirloconacquapulitanoal
l‘apparecchio esegue un doppio ciclo di
contrassegno “max”.
lavaggio.
●
Premere il tasto 8 start. Il programma di
decalcicazioneduracirca1minutoepoi
Posizionare uscita caFFè
esegue il risciacquo.
●
Posizionare l’uscita caffè 9 verso sinistra,
noasentireloscatto.
DecaLciFicazione in corso
PuLizia in corso
v
uotare raccogLigocce
inserire roccogLigocce
aPrire cassetto PoLvere
●
Svuotare il raccogligocce 28 e reinserirlo.
●
Aprire il cassetto polvere 21 esercitando
L’apparecchio è di nuovo pronto per l’uso.
una certa pressione.
inserire PastigLia PuLizia sieMens e
chiuDere cassetto
●
Inserire una pastiglia di pulizia Siemens e
chiudere il cassetto 21.
PreMere start.
●
Premere il tasto 8 start. Il programma di
pulizia dura circa 7 minuti.
PuLizia in corso
80

deit
vuotare raccogLigocce
inserire PastigLia PuLizia sieMens e
i
nserire roccogLigocce
chiuDere cassetto
●
Svuotare il raccogligocce 28 e reinserirlo.
●
Inserire una pastiglia di pulizia Siemens e
L’apparecchio è di nuovo pronto per l’uso.
chiudere il cassetto 21.
Informazione: seilltrodell’acqua34 è
attivo,comparel’invitoatogliereilltro34 e
Calc‘n‘Clean
a premere nuovamente il tasto 8
start
La funzione Calc‘n‘Clean combina le due
eLiMinare FiLtro acqua
start
operazionididecalcicazioneedipulizia.
Se la scadenza delle due procedure è
versare 0,5 L acqua +
ravvicinata, la macchina automatica per
DecaLciFicante
start
caffè espresso propone questo programma
●
Riempire il serbatoio dell’acqua 11 con
di servizio.
acquatiepidanoalcontrassegno“0,5l”
esciogliervi2pastigliedecalcicanti
Siemens.
esPresso Ë Í
●
Premere il tasto 8
start
. Il programma di
decalcicazioneduracirca20minuti.
caLc‘n‘cLean
DecaLciFicazione in corso
tasto i Per 3 sec.
Manca DecaLciFicante
a
ggiung. DecaLciFicante
Durante le fasi del processo Calc‘n‘Clean, il
Informazione: se il serbatoio dell’acqua 11
tasto 8
start
lampeggia. I numeri in alto a
contienetroppopocodecalcicante,
destra indicano lo stato di avanzamento
compare il messaggio corrispondente.
della procedura.
Aggiungeredecalcicanteepremere
●
Tenere premuto il tasto 7 j per almeno 3
nuovamente il tasto 8
start
.
secondi.
sciacquare e rieMPire
serbatoio acqua
start
caLc‘n‘cLean
start
●
Sciacquare il serbatoio dell’acqua 11 e
●
Premere il tasto 8
start
. Il display 5 guida
riempirloconacquapulitanoal
nelle fasi del programma.
contrassegno “max”.
●
Premere il tasto 8
start
. Il programma di
vuotare raccogLigocce
decalcicazioneduracirca1minuto,
i
nserire raccogLigocce
segue per circa 7 minuti il programma di
●
Svuotare il raccogligocce 28 e reinserirlo.
pulizia e quindi il risciacquo.
●
Spingere l’uscita caffè 9versodestrano
a quando si scatta.
DecaLciFicazione in corso
●
Posizionare un recipiente con una
PuLizia in corso
capacità minima di 1 litro sotto l’inserto
vuotare raccogLigocce
schiuma 10.
i
nserire raccogLigocce
●
Premere il tasto 8
start
; l’apparecchio
●
Svuotare il raccogligocce 28 e reinserirlo.
esegue il risciacquo due volte.
L’apparecchio è di nuovo pronto per l’uso.
PuLizia in corso
a
Prire cassetto PoLvere
●
Aprire il cassetto polvere 21 esercitando
una certa pressione.
81
it
Importante: se il programma di assistenza
Accessori
viene interrotto, ad esempio a causa di
un’interruzione di corrente, procedere come
I seguenti accessori generalmente sono
indicato qui di seguito.
disponibile presso i rivenditore e presso il
●
Sciacquare il serbatoio dell’acqua 11 e
servizio clienti.
riempirloconacquapulitanoal
Codice
Riven-
Servizio
contrassegno “max”.
ordinazione
ditori
clienti
●
Premere il tasto 8
start
, il programma di
Pastiglie di
TZ60001 310575
pulizia viene eseguito ora per circa 3
pulizia
minuti per risciacquare l’apparecchio.
Pastiglie
TZ60002 310967
PuLizia in corso
decalcificanti
vuotare raccogLigocce
Filtro acqua TZ70003 467873
i
nserire raccogLigocce
●
Svuotare il raccogligocce 28 e reinserirlo.
L’apparecchio è di nuovo pronto per l’uso.
Smaltimento A
Questo apparecchio è contrassegnato
Protezione dal gelo
conformemente alla Direttiva europea
! Per evitare danni provocati
2002/96/CERiutidiapparecchiature
dall’azione del gelo durante il trasporto o
elettriche ed elettroniche (waste electrical
il deposito, è necessario svuotare
and electronic equipement-WEEE). La
completamente l’apparecchio.
direttiva stabilisce il quadro generale per un
ritiro e recupero valido in tutta I‘UE.
Informazione: l’apparecchio deve essere
Informarsi presso il rivenditore specializzato
pronto per l’uso e il serbatoio dell’acqua 11
sulle attuali disposizioni per la rottamazione.
deve essere pieno.
●
Posizionare un recipiente alto e stretto
Garanzia
sotto l’inserto schiuma 10.
●
Selezionare l’impostazione “inserto
Per questo apparecchio sono valide le
schiuma”
È
, avviare e lasciare che
condizioni di garanzia pubblicate dal nostro
fuoriesca vapore per circa 15 secondi.
rappresentante nel paese di vendita. Il
●
Spegnere l’apparecchio con l’interruttore
rivenditore, presso il quale è stato
di rete 1 O / I.
acquistato l’apparecchio, è sempre ben
●
Svuotare il serbatoio dell‘acqua 11 ed il
disposto a fornire a richiesta informazioni a
raccogligocce 28.
proposito. Per l’esercizio del diritto di
garanzia è comunque necessario
presentare il documento di acquisto.
Conriservadimodica.
82
it
Soluzione di piccoli guasti
Guasto Causa Rimedio
Sul display compare il
I chicchi non ricadono nel
Battere leggermente il
messaggio
macinacaffè (chicchi troppo
serbatoio chicchi 15.
rieMPire serbatoio
oleosi).
Eventualmente cambiare il
chicchi 15
tipo di caffè.
anche se il serbatoio chicchi
Quando il serbatoio chicchi
è pieno o se il macinacaffè
15 è vuoto, pulirlo con un
non macina chicchi.
panno asciutto.
Prelievo acqua calda
L’inserto schiuma 10 o
Pulire l’inserto schiuma 10 o
impossibile.
l’alloggiamento dell’inserto
il suo alloggiamento.
schiuma è otturato.
Troppo poco o troppa
L’inserto schiuma 10 o
Pulire l’inserto schiuma 10 o
schiuma
l’alloggiamento dell’inserto
il suo alloggiamento.
oppure
schiuma è sporco.
L’inserto schiuma 10 non
Latte non adatto. Usare latte con una
aspira il latte.
percentuale di grasso del
1,5%.
L’inserto schiuma 10 non è
Montare correttamente
montato correttamente
l’inserto schiuma 10.
Il caffè scende solo a gocce
Grado di macinatura troppo
Aumentare il grado di
oppure non è possibile più
fine. Caffè macinato troppo
macinatura. Usare caffè
alcun prelievo di caffè.
fine.
macinato più grosso.
L’apparecchio ha troppi
Decalcificare l’apparecchio.
depositi di calcare.
Il caffè non ha nessuna
Tipo di caffè non adatto. Cambiare il tipo di caffè.
crema.
I chicchi non sono freschi di
Utilizzare chicchi freschi.
tostatura.
Il grado di macinatura non è
I
mpostare il grado di
adeguato ai chicchi
di caffè.
macinatura fine.
Il caffè è troppo “acido”. Il grado di macinatura è
Impostare il grado di
troppo grosso oppure il
macinatura su un valore più
caffè è macinato troppo
fine oppure utilizzare un
grosso.
caffè macinato più fine.
Tipo di caffè non adatto. Utilizzare un caffè più
tostato.
Se non è possibile risolvere un problema, chiamare la hotline!
83

it
Soluzione di piccoli guasti
Guasto Causa Rimedio
Il caffè è troppo “amaro”. Il grado di macinatura è
Impostare il grado di
troppo fine oppure il caffè è
macinatura su un valore più
macinato troppo fine.
grosso oppure utilizzare un
caffè macinato più grosso.
Tipo di caffè non adatto. Cambiare il tipo di caffè.
Messaggio sul display 5
Si è verificato un errore
Chiamare l’assistenza.
errore
nell’apparecchio.
c
hiaMare L’assistenza.
Il filtro dell’acqua 34 non
Il filtro dell’acqua 34 non è
Spingere saldamente il filtro
resta incastrato nel
incastrato.
dell’acqua 34 nel punto di
serbatoio dell’acqua 11.
inserimento sul serbatoio
fino a quando si incastra.
I fondi di caffè non sono
Il grado di macinatura è
Impostare un grado di
compatti e sono troppo
troppo fine o troppo grosso
macinatura più grosso o più
bagnati.
oppure è stato inserito
fine oppure utilizzare 2
troppo poco caffè macinato.
dosatori rasi di caffè
macinato.
Messaggi a display
Unità di infusione sporca. Pulire l‘unità di infusione.
controLLare unità Di
Troppo caffè macinato
Pulire l‘unità di infusione
inFusione caFFè
nell‘unità di infusione.
(usare al massimo 2
dosatori rasi di caffè
macinato).
Forti differenze nella qualità
L‘apparecchio presenta
Procedere alla decalcifica-
del caffè o della schiuma del
incrostazioni di calcare.
zione
dell‘apparecchio,
latte.
sec
ondo le istruzioni, con
due compresse di decalcifi-
cante.
Presenza di gocce d‘acqua
Il raccogligocce è stato
Estrarre il raccogligocce
sul fondo interno
estratto troppo presto.
solo alcuni secondi dopo
dell‘apparecchio dopo aver
l‘ultimo prelievo.
tolto il raccogligocce.
Se non è possibile risolvere un problema, chiamare la hotline!
84

denl
Inhoudsopgave
Veiligheidsinstructies
De onderdelen ..........................................86
Lees de handleiding zorgvuldig door,
Voor het eerste gebruik ............................87
neem ze in acht en bewaar ze!
Bedieningselementen ...............................88
Deze espresso-automaat is voor
− Netschakelaar O / I ...............................88
huishoudelijk gebruik en de verwerking
− Toets a ..................................................88
van normale huishoudelijke
− Draaiknop ..............................................88
hoeveelheden bedoeld, niet voor
− Keuzetoetsen < en > ..........................88
bedrijfsmatig gebruik.
− Display ..................................................89
− Toets
start
.............................................91
! Gevaar van elektrische schok!
− Toets
°C
................................................. 91
Het apparaat uitsluitend aansluiten en
− Toets j instellingen ................................92
gebruiken volgens de gegevens op het
− Maalgraad instellen ............................... 92
typeplaatje. Gebruik het apparaat uitsluitend
− Kopjeswarmer .......................................92
indien het aansluitsnoer en het apparaat
Menu-instellingen .....................................93
geen beschadigingen vertonen. Het
−Taal........................................................93
apparaat uitsluitend binnenshuis bij
−Waterhardheid ....................................... 93
kamertemperatuur gebruiken.
− Ontkalken .............................................. 93
Personen (ook kinderen) met fysieke,
− Reinigen ................................................ 93
zintuiglijke of geestelijke beperkingen of
− Calc‘n‘Clean .......................................... 93
met een gebrek aan ervaring en kennis
− Tijd tonen ..............................................94
mogen het apparaat niet gebruiken, tenzij
− Tijdmodus .............................................. 94
ze daarbij onder toezicht staan of worden
− Tijd instellen ..........................................94
begeleid door een persoon die voor hun
− Kopjeswarmer aan (alleen TK76F09) ...94
veiligheid verantwoordelijk is.
− Kopjeswarmer uit na .............................94
Houd het apparaat buiten het bereik van
−Autooffna ............................................. 94
kinderen. Let erop dat kinderen niet met het
−Waterlter ..............................................94
apparaat spelen.
− Contrast.................................................95
In geval van storing onmiddellijk de stekker
− Fabrieksinstelling ..................................95
uit het stopcontact trekken.
Kofezettenmetkofebonen ....................95
Om gevaren te vermijden, mogen repara-
Kofezettenmetgemalenkofe ..............96
ties aan het apparaat – bijvoorbeeld het
Melkschuim en warme melk bereiden ......97
vervangen van een beschadigd aansluit-
Warm water nemen ..................................97
snoer – uitsluitend worden uitgevoerd door
Onderhoud en dagelijkse reiniging ........... 98
onze klantenservice.
− Melksysteem reinigen ...........................98
Het apparaat en het aansluitsnoer niet
− Zetgroep reinigen .................................. 98
onderdompelen in water.
Opberging toebehoren..............................99
Niet in het maalwerk grijpen.
Tips om energie te besparen .................... 99
Serviceprogramma’s ................................99
! Risico op brandwonden!
− Ontkalken ............................................ 100
De melkschuimer voor melk / warm water
− Reinigen .............................................. 101
wordt zeer heet. Na gebruik eerst laten
− Calc‘n‘Clean ........................................ 102
afkoelen en pas daarna aanraken.
Vorstbescherming .................................. 103
Toebehoren.............................................103
Afval........................................................103
Garantie .................................................. 103
Eenvoudige problemen zelf oplossen.....104
85

denl
Bestekofeliefhebber,
Deze handleiding beschrijft verschillende
Gefeliciteerd met uw nieuwe espresso-
modellen, die anders zijn uitgerust.
automaat van Siemens.
Lees ook de beknopte handleiding.
Ze kan in een speciaal opbergvak 25
worden bewaard, zodat ze altijd binnen
handbereik is.
De onderdelen
Afbeeldingen A, B, C, D en E
1 Netschakelaar O/I
17 Draaiknop voor maalgraadinstelling
2 Toets a
18 Lichtring
3 Toets
°C
19 Kopjeswarmer
(temperatuur / kinderbeveiliging)
20 Knop voor kopjeswarmer verlicht
4 Keuzetoetsen < >
21 Poederlade
5 Display
(gemalenkofe/reinigingstablet)
a) Status
22 Deur van de zetgroep
b) Keuze
23 Deuropener
c) Navigatie
24 Zetgroep
6 Draaiknop voor instellingen display
a) Drukknop
7 Toets
j (infomenu)
b) Vergrendeling
8 Toets
start
(bereiding / programma)
25 Opbergvak beknopte handleiding
9 Kofe-uitloopinhoogteverstelbaar
26 Afsluiting opbergvak
en draaibaar
27 Scherm lekschalen
10 Melkschuimer, in hoogte
28 Lekschaalkofe-uitloop
verstelbaar(melk / warm water)
29 Lekplaatkofe-uitloop
a) Bovenstuk
30 Lekplaat melkschuimer
b) Onderstuk
31 Kofedikreservoir
c) Slang
32 Snoervak
d) Melkpijpje
33 Melkreservoir (geïsoleerd)
11 Afneembaar waterreservoir
34 Waterlter
12 Deksel waterreservoir
13 Opbergvakken
(maatlepel en toebehoren
melkschuimer)
14 Maatlepel(handvatvoorwaterlter)
15 Bonenreservoir
16 Aromadeksel
86
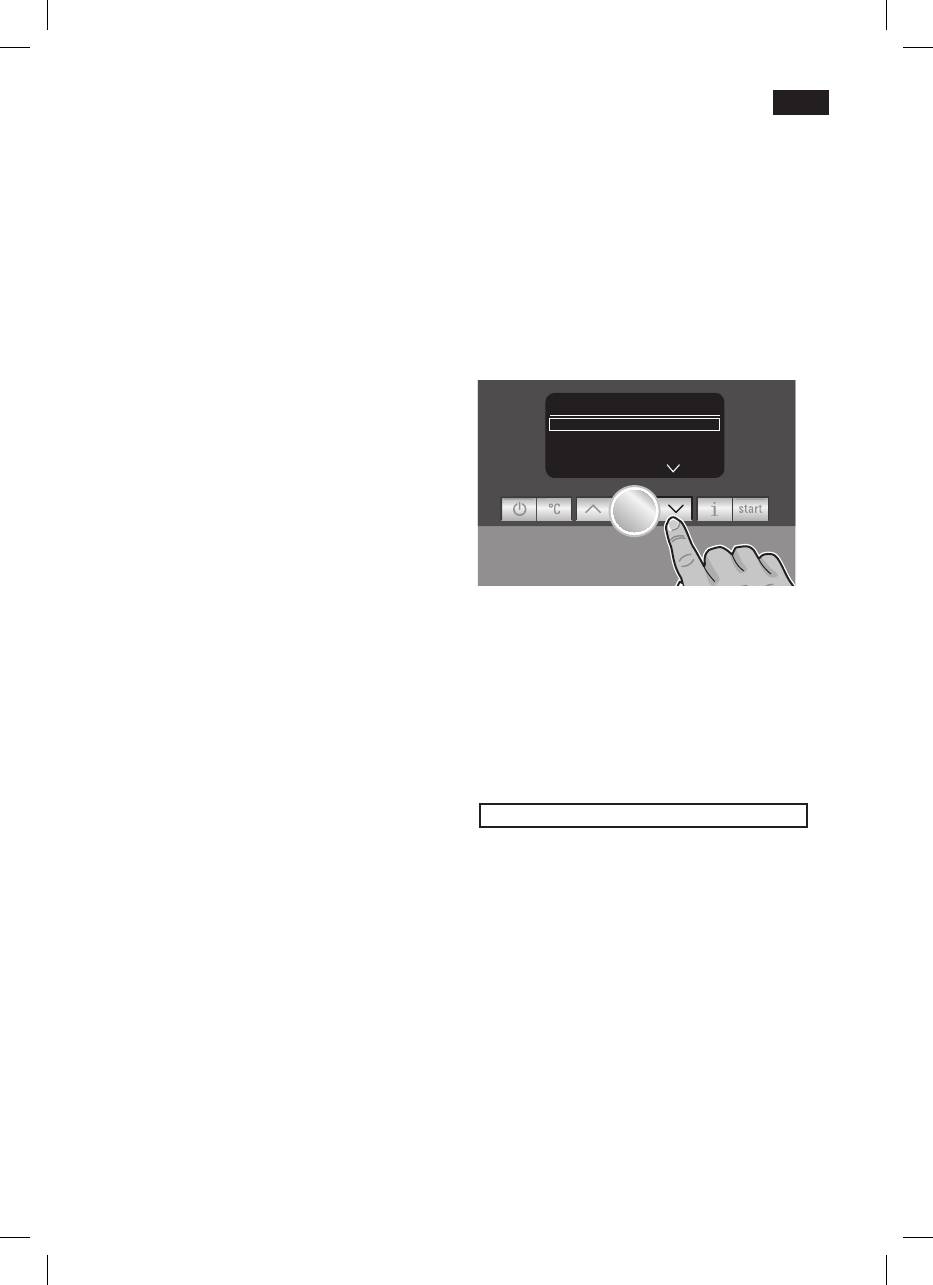
denl
●
Sluit het deksel van het waterreservoir 12
Voor het eerste gebruik
weer.
Algemeen
●
Vul het bonenreservoir 15 met
Doe alleen schoon en koolzuurvrij water en
kofebonen.
bij voorkeur espresso- of bonenmelanges
●
Druk op de netschakelaar 1 O / I, de toets
voor volautomatische apparaten in de over-
8
start
licht op en op het display 5
eenkomstige reservoirs. Gebruik geen ge-
verschijnen verschillende talen.
glaceerde, gekaramelliseerde of met an-
●
Selecteer nu met de keuzetoetsen 4 <
dere suikerhoudende additieven behan-
en > de gewenste taal waarin de
deldekofebonen,wantdezeverstoppen
displayteksten moeten verschijnen.
de zetgroep.
Bij dit apparaat is de waterhardheid
instelbaar. In de fabriek is de waterhardheid
Language
Deutsch
start
ingesteld op 4. Bepaal de hardheid van het
engLish
gebruikte water met het bijgevoegde
Pycckий
teststrookje. Wordt een andere waarde dan
hardheid 4 aangegeven, dan dient het
apparaat na de ingebruikname aangepast
te worden geprogrammeerd (zie onder
hoofdstuk ‘Menu-instellingen
WATERHARDHEID’).
De geselecteerde taal wordt met een
Het apparaat in gebruik nemen
kader gemarkeerd. Volgende talen zijn
●
Plaats de espresso-automaat op een
beschikbaar:
vlakke ondergrond met voldoende draag-
vermogen.
Deutsch
Info: Het apparaat heeft aan de onderkant
e
ngLish
vier wielen en kan in een boogvorm zij-
waarts worden verschoven, om de bedie-
P
ycckий
ning en plaatsing te vergemakkelijken.
●
Trek het netsnoer uit het snoervak 32 en
n
eDerLanDs
steek de stekker in. De gepaste lengte
kan worden ingesteld door het snoer naar
F
rançais
boven terug te schuiven of naar beneden
uit te trekken. Zet het apparaat daarvoor
i
taLiano
met de achterzijde aan bijv. de tafelrand
en trek het snoer naar beneden of schuif
s
venska
het terug naar boven.
●
Klap het deksel van het waterreservoir 12
e
sPañoL
omhoog.
●
Neem het waterreservoir 11 weg, spoel
P
oLski
het uit en vul het met vers, koud water.
Neem hierbij de markering ‘max’ in acht.
●Drukopdetoets8
start
, de
●
Zet het waterreservoir 11 rechtop in het
geselecteerde taal is opgeslagen, de
apparaat zetten en druk het helemaal
toets 2 a licht op.
naar onderen.
87

denl
●Drukopdetoets2
a, het merklogo
Bedieningselementen
verschijnt op het display 5. Het apparaat
warmt nu op en spoelt, er loopt wat water
Netschakelaar O / I
uitdekofe-uitloop9. Als op het display 5
Met de netschakelaar 1 O / I wordt het
de symbolen voor het kiezen van de
apparaat in de ‘spaarmodus’ geschakeld of
bereiding verschijnen, is het apparaat
volledig uitgeschakeld. In de spaarmodus
klaar voor gebruik.
brandt alleen de toets 2 a.
Belangrijk: Schakel het apparaat pas uit
met de netschakelaar, als het zich in de
spaarmodus bevindt, zodat het
esPresso Ë Í
automatische spoelproces plaatsvindt.
Toets a
 à À Á Ä Å
Met de toets 2 a wordt het apparaat
ingeschakeld (gebruiksklaar) of opnieuw in
de spaarmodus geschakeld.
Info: De espresso-automaat is in de fabriek
Toets 2 a knippert, zolang het apparaat
geprogrammeerd met standaardinstellingen
spoelt.
voor een optimale werking. Het apparaat
Het apparaat spoelt niet, als:
schakelt na 1 uur automatisch in de
●
het bij het inschakelen nog warm is;
spaarmodus (zie hoofdstuk ‘Menu-
●
er voor het overschakelen naar de
instellingen AUTO OFF NA’).
‘spaarmodus’geenkofewerdgezet.
Het apparaat is gebruiksklaar, als op het
Opmerking: Bij het eerste gebruik of als
display 5 de symbolen voor de drankkeuze
het apparaat gedurende lange tijd niet is
en de toets 8
start
branden.
gebruikt,heeftdeeerstekopkofenogniet
het volle aroma.
Draaiknop
Met de draaiknop 6 kan op het display 5
Als u de espressomachine voor het eerst
naar links en rechts worden genavigeerd.
gebruikt, krijgt u pas een voldoend dikke en
Met deze knop kunnen ook in het menu
stabiele laag ‘crema’ nadat u de eerste paar
parameters worden versteld.
kopje hebt getapt.
Keuzetoetsen < en >
Met behulp van de keuzetoetsen 4 < en >
kunnen de menuniveaus (navigatie 5c)
omhoog en omlaag doorbladerd worden.
88

denl
Display
Displaymeldingen
Op het display 5 verschijnen symbolen voor
Op het display 5 worden verschillende
keuzemogelijkheden,kofesterkteen-hoe-
meldingen getoond.
veelheid alsmede teksten voor de instellin-
gen, lopende processen en meldingen. Met
Informatie
behulp van de draaiknop 6 en keuzetoetsen
Waterreserv. biJna Leeg
4 kunnen hier instellingen worden gewij-
bonenreserv. biJna Leeg
zigd. De geselecteerde instelling wordt met
even geDuLD
een kader gemarkeerd.
Instructies
Waterreservoir vuLLen
5a
esPresso Ë Í
Waterreservoir PLaatsen
Waterreservoir checken
b
LekschaaL PLaatsen
 à À Á Ä Å
LekschaaL Legen
c
bonenreservoir vuLLen
In de regel ‘status’ 5a van het display wordt
koFFie-uitLooP Draaien
de naam van de drank en de ingestelde
MeLkschuiMer PLaatsen
sterkte, bijv. 55, en hoeveelheid, bijv.
�
,
zetgroeP PLaatsen
vermeld. In de regel ‘keuze’ 5b verschijnen
D
eur sLuiten
symbolen voor de drankkeuze.
zetgroeP controLeren a.u.b.
De pijltjes in de regel ‘navigatie’ 5c geven
P
oeDer biJvuLLen
aan in welke richting er zich nog menuni-
LaDe sLuiten
veaus bevinden.
FiLter vervangen
ontkaLken
reinigen a.u.b.
c
aLc‘n‘cLean
teMPeratuur te Laag
even geDuLD
sPanning te hoog/Laag
89

denl
Keuzemogelijkheden
My coFFee Ë Í
2 x esPresso
2 x koFFie
Â
Ã
À
esPresso Á koFFie
Á Ä Å Æ Ç È
Ä koFFie + MeLk
Macchiato
Å
caPPuccino
Æ
Ç
My coFFee
MeLkschuiM
WarMe MeLk
È
É
k
ort sPoeLen
WarM Water
Ê
Ì
MeLksyst.
Kofesterkte
My coFFee Ë Í
(alleen voor kofedranken)
5 55 555
5 5 5 5 5 5
mild normaal sterk
Hoeveelheid
My coFFee Ë Í
(alleen voor kofedranken)
� Ð Ò
� Ð Ò
klein normaal groot
Naastdekofesterkteen
hoeveelheid kan voor de eigen
My coFFee Ë Í
kofe-instellingMy coFFee Ç nog
de mengverhouding espresso-melk
esPresso MeLk
worden gekozen. De instelling kan in
40%
stappen van 20% worden gewijzigd
door aan de draaiknop 6 te draaien.
90
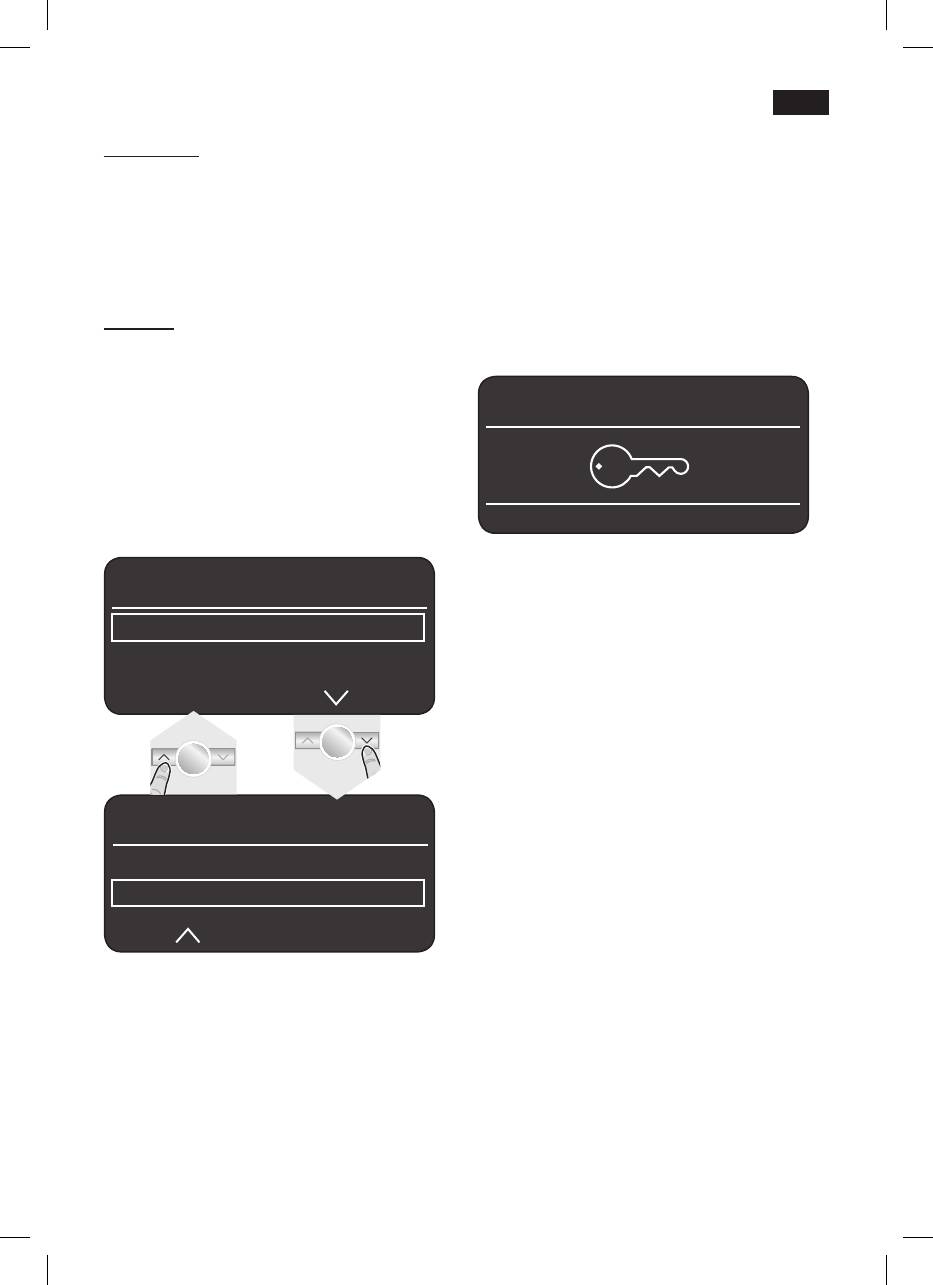
denl
Toets start
Kinderbeveiliging
Met een druk op de toets 8
start
wordt de
Om kinderen tegen brandwonden te
bereiding gestart of een serviceprogramma
beschermen, kan het apparaat worden
uitgevoerd.
vergrendeld.
Door tijdens de bereiding nogmaals op de
●Houddetoets3
°C
ten minste 3
toets 8
start
te drukken, kan het proces
seconden ingedrukt. Op het display 5
vroegtijdig worden afgebroken.
verschijnt een sleutel, de
kinderbeveiliging is geactiveerd.
Toets
°C
Nu is er geen bediening meer mogelijk, de
Met deze toets 3 °
C
kan de temperatuur
kopjeswarmer 19 is uitgeschakeld.
voorkofeenwarmwaterwordeningesteld
(kort indrukken) en kan de kinderbeveili-
ging worden in- of uitgeschakeld (min. 3 s
esPresso Ë Í
ingedrukt houden).
Temperatuur instellen
Druk de toets 3 °
C
kort in en wijzig
vervolgens met de toetsen 4
< en > en de
draaiknop 6 de instellingen.
●Omdekinderbeveiligingtedeactiveren,
dient u de toets 3
°C
ten minste 3
teMPeratuur
seconden ingedrukt te houden. De sleutel
op het display 5 verdwijnt weer.
koFFie
norMaaL
WarM Water
teMPeratuur
koFFie
WarM Water
<90°c
Door de toets 3
°C
in te drukken, worden de
wijzigingen bewaard en keert u naar de
drankkeuze terug.
Deze instellingen gelden automatisch voor
alle bereidingswijzen.
91
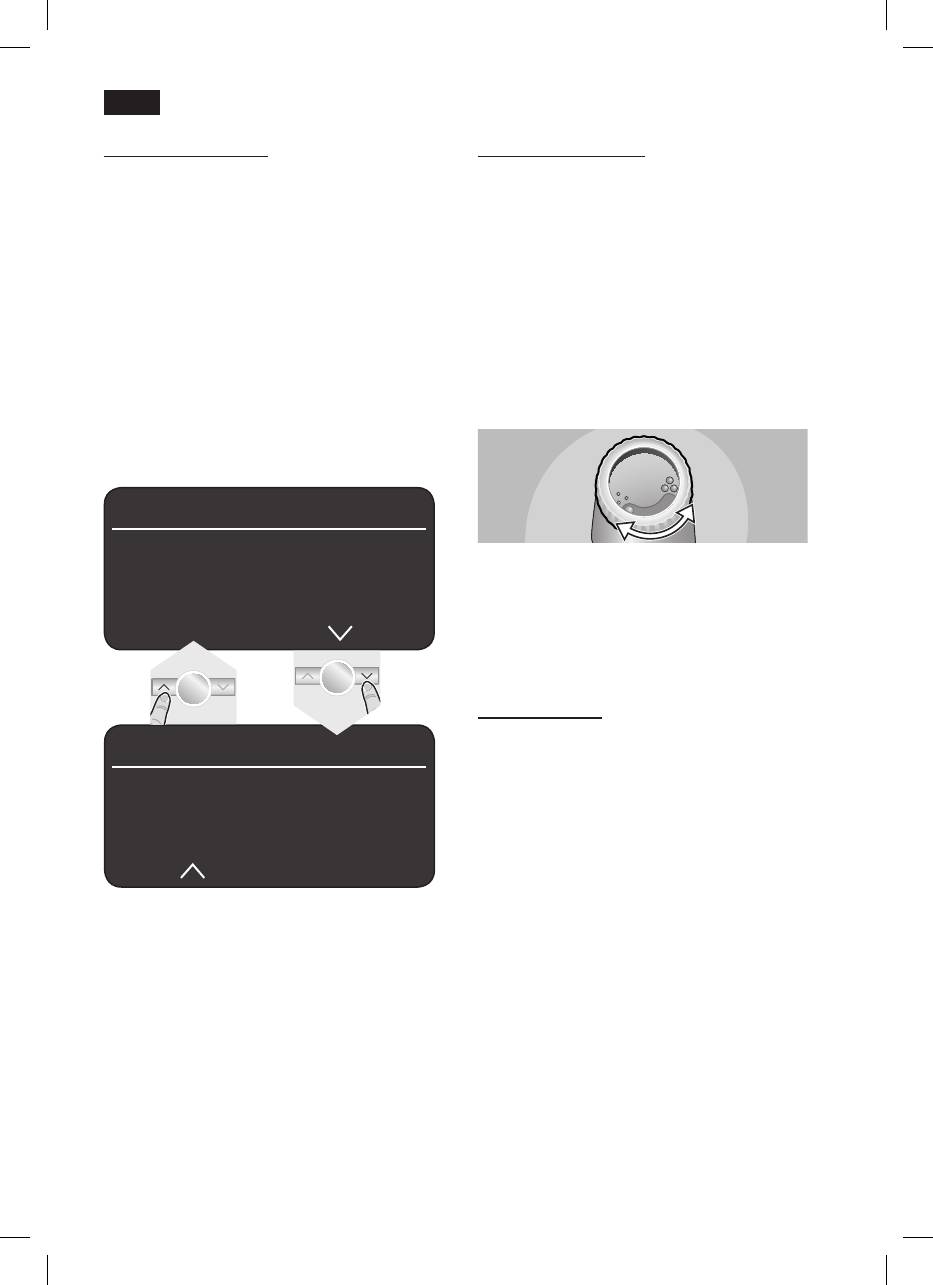
denl
Toets j instellingen
Maalgraad instellen
Met de toets
j 7 kunt u informatie
Met de draaiknop 17 voor de
opvragen (kort indrukken) en instellingen
maalgraadinstelling kan de gewenste
aanpassen (ten minste 3 s ingedrukt
jnheidvandegemalenkofeworden
houden).
ingesteld.
Informatie opvragen
Let op!
In het infomenu kan de volgende informatie
Stel de maalgraad alleen bij draaiend
worden opgevraagd:
maalwerk in! Anders kan het apparaat
–
hoeveel dranken sinds de ingebruikname
worden beschadigd.
van de espresso-automaat werden
●Stel,terwijlhetmaalwerkdraait,dedraai-
bereid;
knop 17invanjngemalenkofe•••tot
–
wanneer de volgende service nodig is.
grofgemalenkofe●●●.
●Drukdetoets
j 7 kort in en blader met de
toetsen 4 < en >.
inFo-Menu
ontkaLken na xxx koPJes
Opmerking: De nieuwe instelling wordt pas
reinigen na xxx koPJes
bijhettweedekopjekofemerkbaar.
geen FiLter ingezet
FiLt. verv. na xxx koPJes *
Opmerking: Kieseenjneremaalgraad
voor donker gebrande bonen en een
grovere voor lichtere bonen.
Kopjeswarmer
! Let op, de kopjeswarmer 19 wordtLet op, de kopjeswarmer 19 wordt
inFo-Menu
heel heet!
De espresso-automaat beschikt over een
aantaL koFFie xx
kopjeswarmer 19 die met toets 20
aantaL koFFie+MeLk xx
handmatig kan worden in- en uitgeschakeld.
voL. WarM Water xL
Is de kopjeswarmer 19 ingeschakeld, dan
brandt de toets 20.
*Verschijntalleenalshetltergeactiveerd
Opmerking: Voor een optimale verwarming
van de kopjes, dienen deze met de
Door de toets j 7 nogmaals kort in te druk-
onderzijde op de kopjeswarmer 19 te
ken, keert u terug naar de drankkeuze.
worden geplaatst.
Wordt gedurende ca. 10 seconden geen
toets bediend, dan keert het apparaat auto-
Alleen TK76F09
matisch weer naar de drankkeuze terug.
De kopjeswarmer 19 kan ook worden
voorgeprogrammeerd (zie hoofdstuk ‘Menu-
Instellingen aanpassen
instellingen KOPJESWARMER AAN’).
(Zie hoofdstuk ‘Menu-instellingen’.)
92
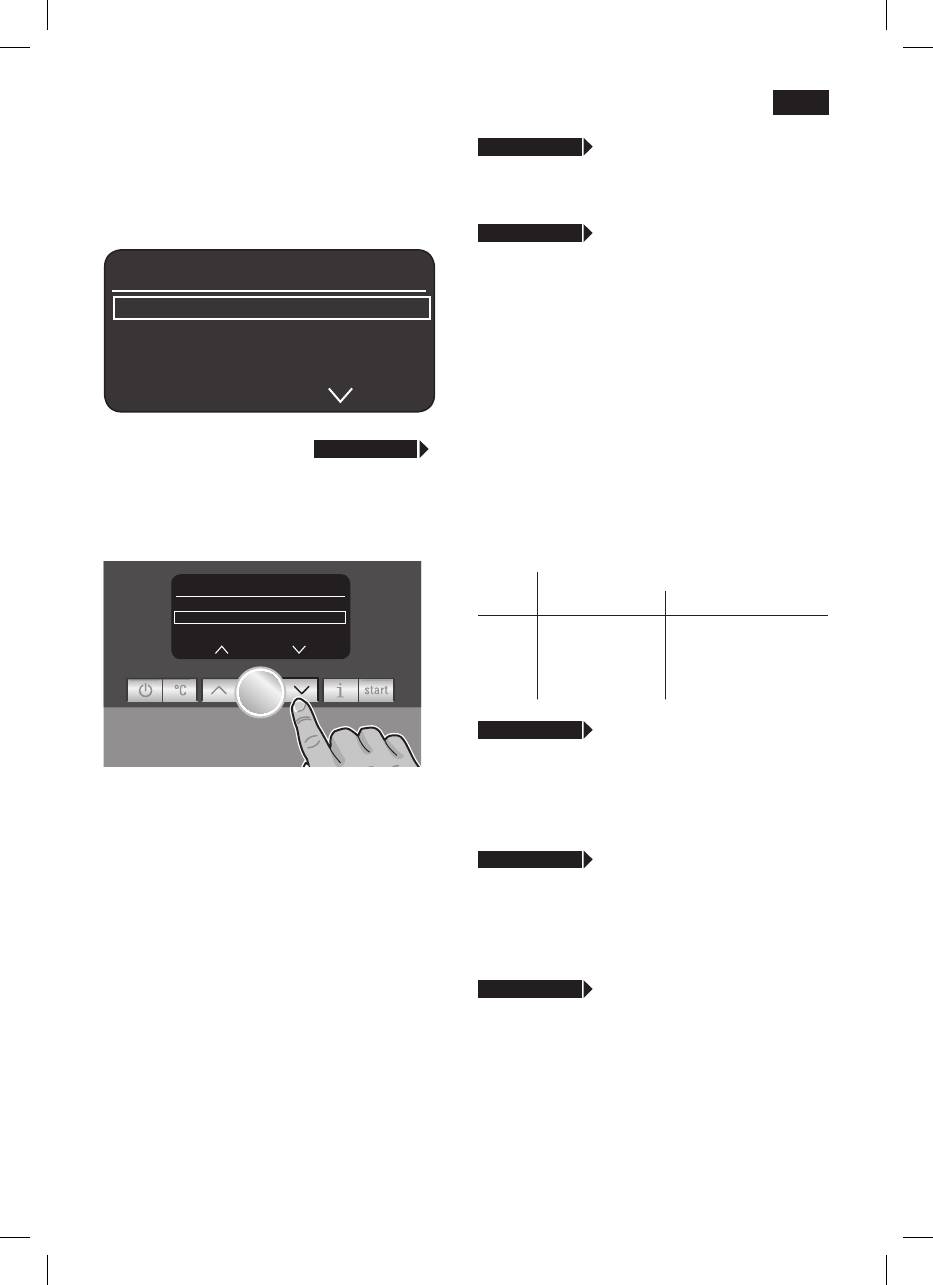
denl
j 3 sec + >
taaL
Menu-instellingen
●Doordedraaiknop6 te verdraaien, kan
●Houddetoetsj 7 minstens 3 s ingedrukt.
de gewenste taal worden geselecteerd.
Nu verschijnen de verschillende
instelmogelijkheden.
j 3 sec + >
WaterharDheiD
●Doordedraaiknop6 te verdraaien, kan
insteLLingen
de gewenste waterhardheid 1, 2, 3 en 4
worden ingesteld.
taaL neDerLanDs
WaterharDheiD
Opmerking: De juiste instelling van de
ontkaLken
waterhardheid is belangrijk, opdat het
apparaat tijdig zou aangeven dat het moet
worden ontkalkt. De vooringestelde
In het vervolg van deze handleiding begint
waterhardheid is 4.
elke nieuwe instelling met
j 3 sec + >
,
De waterhardheid kan met het bijgevoegde
gevolgd door een beschrijving.
teststrookje worden vastgesteld of bij uw
Met de toetsen 4 < en > kunnen de
waterleidingbedrijf worden nagevraagd.
verschillende instelmogelijkheden worden
●Dompelhetteststrookjekortinhetwater
geselecteerd.
en lees na ca. 1 minuut het resultaat af.
Stand Waterhardheid
insteLLingen
WaterharDheiD
Duits (°dH) Frans (°fH)
ontkaLken
start
reinigen
1
1-7
1-13
2
8-14
14-25
3
15-21
26-38
4
22-30
39-54
j 3 sec + >
ontkaLken
●Dienthetapparaattewordenontkalkt,
druk dan op de toets 8
start
en voer het
Opmerking: De uitgevoerde wijzigingen
ontkalkingsprogramma uit (zie hoofdstuk
worden automatisch bewaard.
‘Ontkalken’).
Een extra bevestiging is niet nodig.
j 3 sec + >
reinigen
●Dienthetapparaattewordengereinigd,
druk dan op de toets 8
start
en voer het
reinigingsprogramma uit (zie hoofdstuk
‘Reinigen’).
j 3 sec + >
caLc‘n‘cLean
●Dienthetapparaattegelijkertijdteworden
ontkalkt en gereinigd, druk dan op de
toets 8
start
en voer het programma
Calc‘n‘Clean uit (zie hoofdstuk
‘Calc‘n‘Clean’).
93
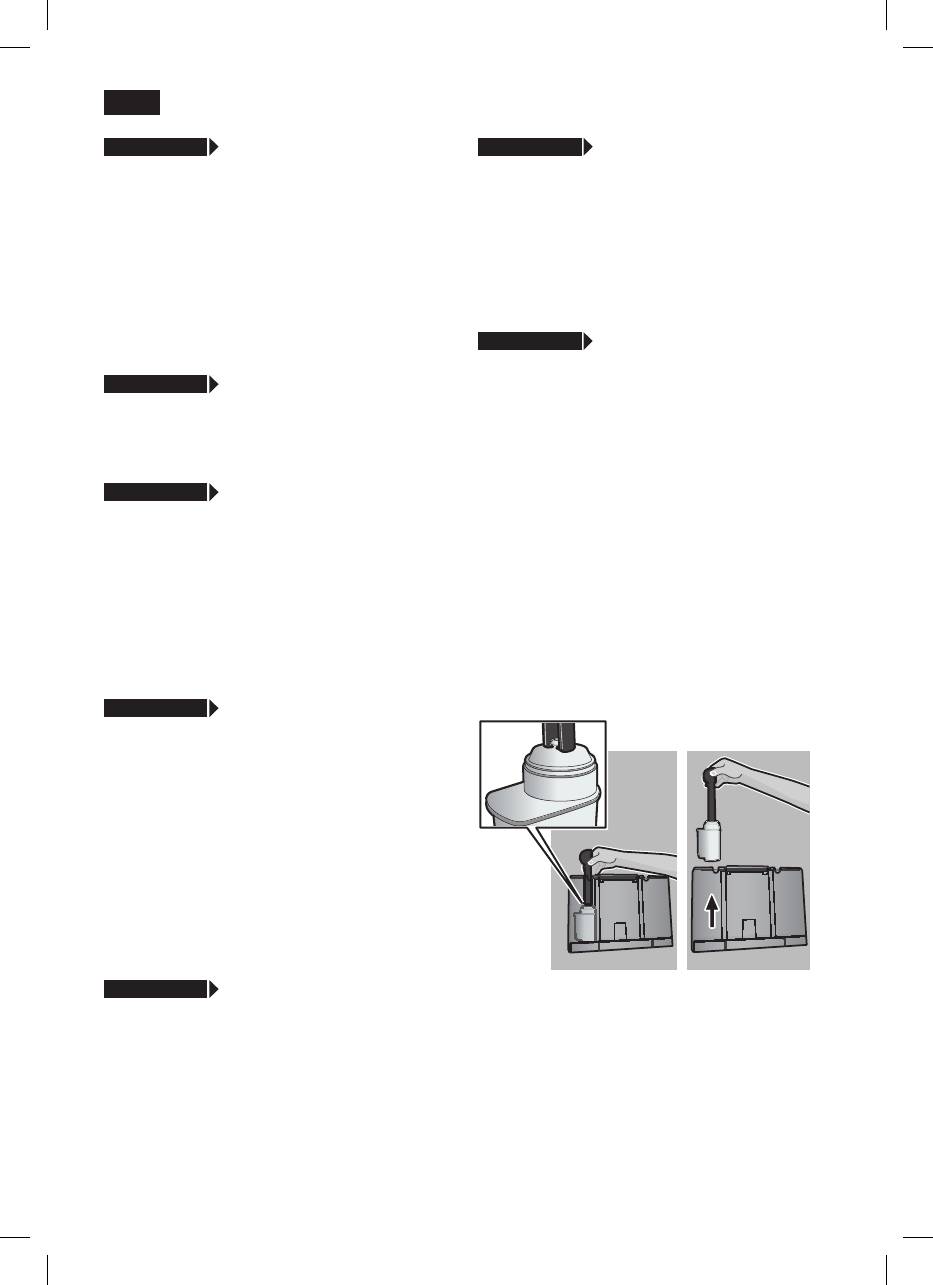
denl
j 3 sec + >
tiJD tonen
j 3 sec + >
auto oFF na
Hiermee kan worden ingesteld dat in de
●
Door aan de draaiknop 6 te draaien, kan
spaarmodus de tijd op het display 5 wordt
de tijdspanne worden ingesteld, waarna
weergegeven.
het apparaat automatisch na de laatste
●Doordedraaiknop6 te verdraaien, kan
bereiding in de ‘spaarmodus’ wordt ge-
de tijdsweergave worden in- (Ja) of
schakeld.
uitgeschakeld (nee).
De instelling is mogelijk van 5 minuten tot 8
uur.
Opmerking: De tijd moet vooraf onder tiJD
insteLLen worden ingesteld.
j 3 sec + >
WaterFiLter
Alvorenseennieuwwaterlter34 kan
j 3 sec + >
tiJDMoDus
worden gebruikt, moet dit gespoeld worden.
●
In de tijdmodus kan met de draaiknop 6
●
Daarvoorhetwaterlter34 met behulp
de uursweergave worden ingesteld op
van de maatlepel 14 in het waterreservoir
12h of 24h.
11 vastduwen. Het waterreservoir tot aan
de markering ‘max’ met water vullen.
j 3 sec + >
tiJD insteLLen
●
Door de draaiknop 6 te verdraaien start
●Dooraandedraaiknop6 te draaien, kan
kiezen en op de toets 8
start
drukken.
de huidige tijd worden ingesteld, bijv.
●0,5L-reservoir onDer MeLkschuiMer
08:25. Het cijfer dat gewijzigd kan wor-
PLaatsen
start
den, heeft een verlichte achtergrond. De
●
Plaats een reservoir met een inhoud van
achtergrondverlichting schakelt automa-
0,5 liter onder de melkschuimer 10.
tisch om tussen de uren en minuten.
●
Druk op de toets 8
start
. Er loopt nu
waterdoorhetlter34, om dit te spoelen.
Alleen TK76F09
●
Giet vervolgens het reservoir leeg. Het
(programmeerbare kopjeswarmer)
apparaat is weer klaar voor gebruik.
j 3 sec + >
koPJesWarMer aan
Met deze functie schakelt de kopjeswarmer
19 op een programmeerbaar tijdstip auto-
matisch in, onafhankelijk van het feit of het
apparaat zich in de ‘spaarmodus’ bevindt of
gebruiksklaar is.
Opmerking: De tijd moet vooraf onder tiJD
insteLLen worden ingesteld.
●
Door aan de draaiknop 6 te draaien, kan
de gewenste tijd worden ingesteld. Bij de
instelling oFF is de functie uitgeschakeld.
j 3 sec + >
koPJesWarMer uit na
Opmerking: Doorhetlter34 te spoelen, is
Hiermee kan de tijdspanne worden
tegelijk ook de instelling voor de indicatie
ingesteld, waarna de kopjeswarmer 19 na
vandeltervervanginggeactiveerd.
het inschakelen automatisch weer wordt
uitgeschakeld.
Uitvoerigeinformatieoverhetwaterlter
vindtuindebijgevoegdelterhandleiding.
94
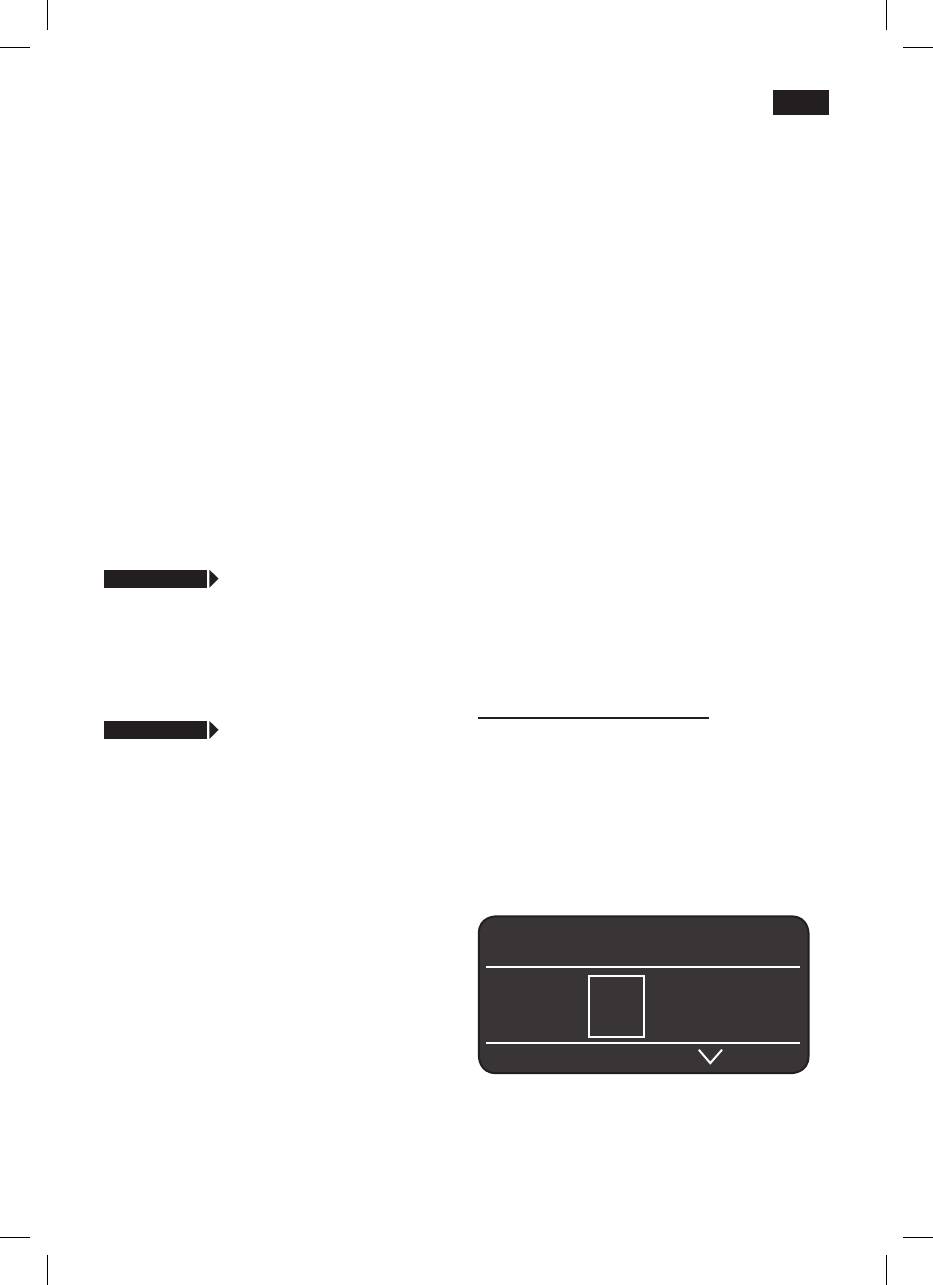
denl
Als
FiLter vervangen verschijnt, of na
Kofezetten
maximaal 2 maanden is de werking van het
met kofebonen
lter34 uitgeput. Het dient om hygiënische
redenen en opdat het apparaat niet zou
Deze espresso-automaat maalt voor elke
verkalken (het apparaat kan schade
bereidingversekofe.Gebruikbijvoorkeur
oplopen) te worden vervangen.
espresso- of bonenmelanges voor
volautomatische apparaten gebruiken. Voor
Reservelterszijnindehandel(TZ70003)
een optimale kwaliteit dienen de bonen koel
of via de klantenservice (467873)
en afgesloten te worden bewaard of te
verkrijgbaar.Wordtergeennieuwlter34
wordendiepgevroren.Dekofebonen
geplaatst, draai de instelling WaterFiLter
kunnen ook diepgevroren worden gemalen.
dan op
nee.
Belangrijk: Vul het waterreservoir 11
Opmerking: Wordt het apparaat langere
dagelijks met vers water. In het
tijd niet gebruikt (bijv. vakantie), dan dient
waterreservoir 11 dient zich altijd voldoende
hetgeplaatstelter34 te worden gespoeld,
water te bevinden voor de werking van het
alvorens het apparaat opnieuw wordt
apparaat.
gebruikt. Laat het apparaat daarvoor
gewoon een kop warm water bereiden.
Opmerking: Verwarm de kopjes, vooral
kleine espressokopjes met een dikke wand,
j 3 sec + >
contrast
voor op de kopjeswarmer 19.
Het contrast van het display 5 kan tussen
–20 en +20 worden ingesteld.
Met een eenvoudige druk op een toets
De fabrieksinstelling is +0.
kunnenverschillendekofedrankenworden
●
Stel met de draaiknop 6 de gewenste
bereid.
waarde in.
Kofedranken zonder melk
j 3 sec + >
FabrieksinsteLLing
Het apparaat moet gebruiksklaar zijn.
Het is mogelijk de eigen instellingen
●
Plaats de voorverwarmde kop(pen) onder
ongedaan te maken en de
dekofe-uitloop9.
fabrieksinstellingen weer te activeren.
●
Selecteer met de draaiknop 6 de
●
Om de fabrieksinstelling te activeren,
gewensteespressoofkofe.Ophet
drukt u op de toets 8
start
.
display 5 verschijnt de gekozen drank en
de voor deze drank ingestelde sterkte en
Opmerking: De fabrieksinstellingen in het
hoeveelheid.
apparaat ook handmatig met een bepaalde
toetsencombinatie worden hersteld. Het
apparaat moet hiervoor compleet
esPresso Ë Í
uitgeschakeld zijn.
●
Houd de toetsen 4 < en > en de net-
schakelaar 1 O / I tegelijk ten minste 5
 à À Á Ä Å
seconden ingedrukt. Druk vervolgens op
de toets 8
start
en de fabrieksinstellingen
zijn weer geactiveerd.
95
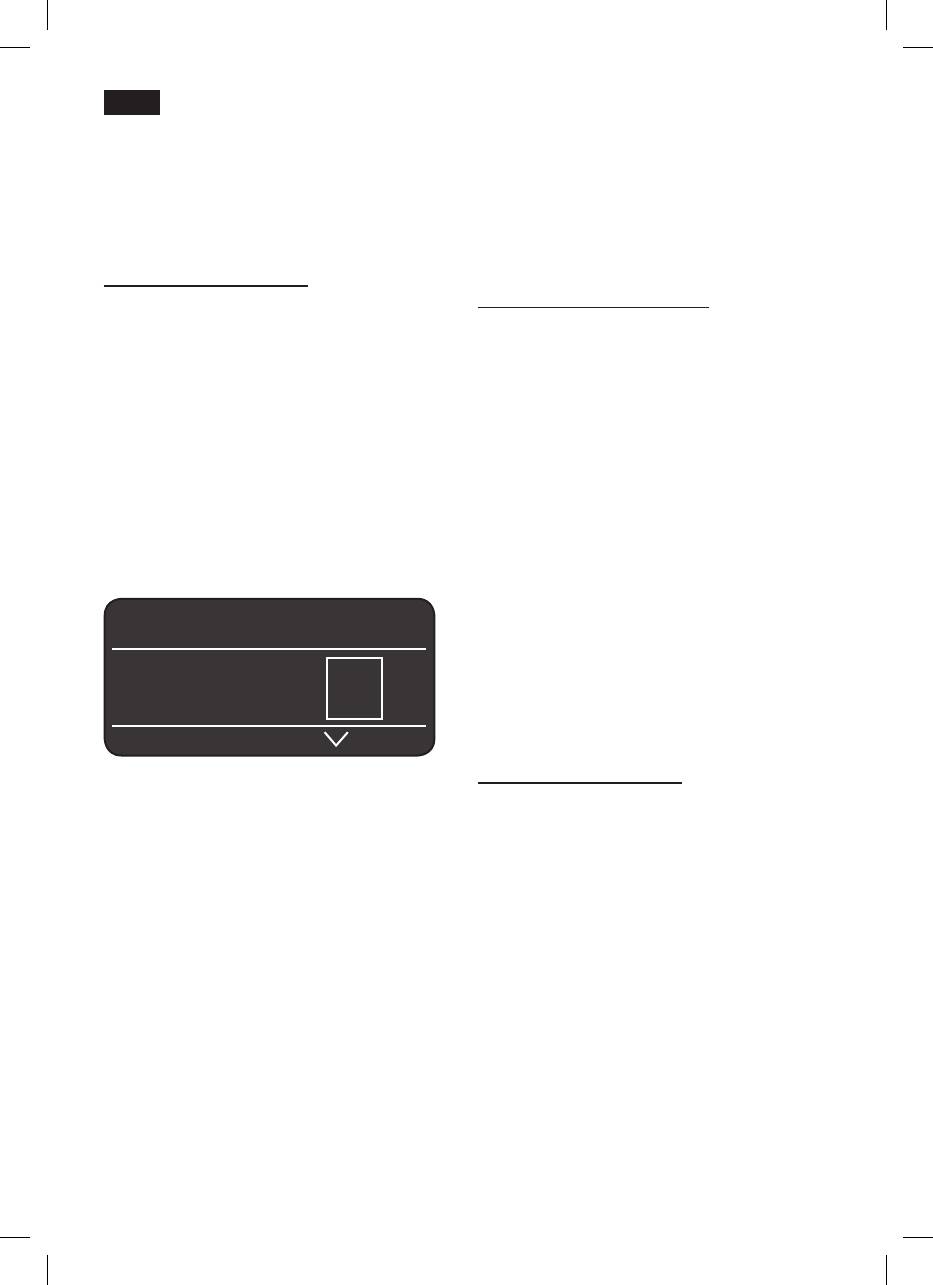
denl
De instellingen kunnen worden veranderd
Kofezetten
(zie hoofdstuk ‘Bedieningselementen’).
met gemalen kofe
●
Druk op de toets 8
start
.
Dekofewordtbereidenlooptvervolgens
Met deze espressoautomaat kan ook met
in de kop(pen).
gemalenkofe(geenoploskofe)kofe
worden gezet.
Kofedranken met melk
Het apparaat moet gebruiksklaar zijn.
Kofedranken zonder melk
●Steekhetmelkpijpje10d van de melk-
●
Selecteer met de draaiknop 6 À of Á .
schuimer 10 diep in het melkreservoir 33.
●
Plaats de voorverwarmde kop(pen) onder
●
Draaidekofe-uitloop9 naar rechts tot
dekofe-uitloop9.
hij hoorbaar vastklikt.
●
Open de poederlade 21 met een druk.
●
Plaats een voorverwarmd kopje of glas
●
Doe er maximaal 2 afgestreken
onderdekofe-uitloop9 en
maatlepels 14gemalenkofein.
melkschuimer 10.
●
Kies met behulp van de draaiknop 6 de
Let op!Doegeenhelebonenofoploskofe
gewenste macchiato
Å
, cappuccino Æ,
in de poederlade!
kofemetmelkÄ of my coffee Ç. Op
●
Sluit de poederlade 21.
het display 5 verschijnt de gekozen drank
●
Druk op de toets 8
start
.
en de voor deze drank ingestelde sterkte
Dekofewordtbereidenlooptvervolgens
en hoeveelheid.
in de kop(pen).
Opmerking:Vooreenvolgendekopkofe
caPPuccino Ë Í
dient deze werkwijze te worden herhaald.
Alsbinnen90secondengeenkofewordt
genomen, wordt het bereidingscomparti-
À Á Ä Å Æ Ç
ment automatisch leeggemaakt, om overla-
ding te voorkomen. Het apparaat spoelt.
De instellingen kunnen worden veranderd
Kofedranken met melk
(zie hoofdstuk ‘Bedieningselementen’).
●
Kies met behulp van de draaiknop 6
●
Druk op de toets 8
start
. Eerst wordt de
kofemetmelkÄ, macchiato
Å
,
melk in het kopje of glas gepompt. Direct
cappuccino Æ of my coffee Ç .
daarnawordtdekofebereid,die
●
Steek het melkpijpje 10d van de melk-
vervolgens in het kopje of glas loopt.
schuimer 10 in het melkreservoir 33.
●
Draaidekofe-uitloop9 naar rechts, tot
Belangrijk: Gedroogde melkresten zijn
hij hoorbaar vastklikt.
moeilijk te verwijderen. Reinig de
●
Plaats een voorverwarmd kopje of glas
melkschuimer 10 daarom na elk gebruik
onderdekofe-uitloop9 en
met lauw water (zie hoofdstuk ‘Melksysteem
melkschuimer 10.
reinigen’).
●
Open de poederlade 21 met een druk.
●
Doe er maximaal 2 afgestreken
maatlepels 14gemalenkofein.
96

denl
Let op!Doegeenhelebonenofoploskofe
Opmerking: Tijdens de bereiding van
in de poederlade!
warmemelkzijnsomsuitendegeluiden
●
Sluit de poederlade 21.
hoorbaar. Die zijn eigen aan de constructie
●
Druk op de toets 8
start
. Eerst wordt de
van de melkschuimer 10.
melk in het kopje of glas gepompt.
Aansluitendwordtdekofebereid,die
Opmerking: Voor optimale melkschuim
vervolgens in het kopje of glas loopt.
gebruikt u bij voorkeur koude melk met een
vetgehalte van 1,5%.
Belangrijk: Gedroogde melkresten zijn
moeilijk te verwijderen. Reinig de
Belangrijk: Gedroogde melkresten zijn
melkschuimer 10 daarom na elk gebruik
moeilijk te verwijderen. Reinig de melk-
met lauw water (zie hoofdstuk ‘Melksysteem
schuimer 10 daarom na elk gebruik met
reinigen’).
lauw water (zie hoofdstuk ‘Melksysteem
reinigen’).
Opmerking:Vooreentweedekopkofe-
melkdrank dient deze werkwijze te worden
Warm water nemen
herhaald. Als binnen 90 seconden geen
kofewordtgenomen,wordthet
! Risico op brandwonden
bereidingscompartiment automatisch
De melkschuimer 10 wordt heel heet. Na
leeggemaakt, om overlading te voorkomen.
gebruik eerst laten afkoelen en pas daarna
Het apparaat spoelt.
aanraken.
Het apparaat moet gebruiksklaar zijn.
Melkschuim en
●
Plaats een voorverwarmd kopje of glas
onder de uitloop van de melkschuimer 10.
warme melk bereiden
●
Kies met behulp van de draaiknop 6 de
! Risico op brandwonden
gewenste instelling warm water
Ê
.
De melkschuimer 10 wordt heel heet. Na
●
Druk op de toets 8
start
. Nu stroomt er
gebruik eerst laten afkoelen en pas daarna
ca. 40 s lang warm water uit de uitloop
aanraken.
van de melkschuimer 10.
●
Door nogmaals op de toets 8
start
te
Het apparaat moet gebruiksklaar zijn.
drukken, kan het proces vroegtijdig
●
Steek het melkpijpje 10d van de
worden afgebroken.
melkschuimer 10 diep in het
melkreservoir 33.
Opmerking: De temperatuur voor warm
●
Plaats een voorverwarmd kopje of glas
water kan worden ingesteld (zie hoofdstuk
onder de uitloop van de melkschuimer 10.
‘Bedieningselementen toets
°C
’).
●
Kies met de draaiknop 6 de gewenste
instelling ‘Melkschuim’
È
of
‘Warme melk’
É
.
●
Druk op de toets 8
start
. Nu stroomt er
melkschuim (ca. 40 s lang) of warme
melk (ca. 60 s lang) uit de uitloop van de
melkschuimer 10.
●
Door nogmaals op de toets 8
start
te
drukken, kan het proces vroegtijdig
worden afgebroken.
97

denl
Melksysteem reinigen
Onderhoud en dagelijkse
Reinig het melksysteem 10 na elk gebruik!
reiniging
Het melksysteem 10 kan automatisch
! Risico op elektrische schokken!
worden voorgespoeld.
Trek vóór het reinigen de netstekker uit.
●
Selecteer op het display 5 het symbool
Ì
Dompel het apparaat nooit in water.
en druk op de toets 8
start
.
Gebruik geen stoomreiniger.
gLas onDer schuiMer PLaatsen,
●
Veeg de buitenzijde met een zachte,
a
anzuigPiJPJe in gLas steken
vochtige doek af. Gebruik geen
start
schurende doeken of reinigingsmiddelen.
●
Plaats een leeg glas onder het
●
Spoel het waterreservoir 11 en de
melksysteem 10 en steek het uiteinde
zetgroep 24 alleen met water.
van het melkpijpje 10d in het glas.
●
Het slot van het opbergvak 26, het
●
Druk op toets 8
start
. Het apparaat vult
scherm van de lekschalen 27 en de
het glas nu automatisch met water en
isolatiehuls van het melkreservoir 33
zuigt dit vervolgens via het melkpijpje 10d
mogen slechts voorzichtig worden
weer op, om dat te spoelen. Na ca. 1 min
schoongeveegd met een vochtige doek.
stopt het spoelproces automatisch.
Niet in de vaatwasser plaatsen.
●
Giet nu het glas leeg en reinig het
●
Verwijderdelekplaatkofe-uitloop29 en
melkpijpje 10d.
lekplaat melkschuimer 30. Trek de
lekschaalvandekofe-uitloop28 met het
Daarnaast dient het melksysteem
kofedikreservoir31 naar voren uit, maak
regelmatig grondig te worden gereinigd (in
de onderdelen leeg en reinig ze. Deze
de vaatwasser of met de hand).
onderdelen kunnen ook in de
vaatwasser worden gereinigd.
Melksysteem 10 voor de reiniging
●
Maatlepel 14, aromadeksel 16 en het
demonteren:
binnendeel van het melkreservoir 33 met
●
Trek het melksysteem 10 recht naar
de hand spoelen of in de vaatwasser
voren uit het apparaat.
doen.
●
Demonteer alle onderdelen (afb. C).
●
Veeg en zuig de binnenkant van het
Reinig deze met een sopje en een zachte
apparaat (houders van de schalen) uit.
borstel.
●
Spoel alle onderdelen met helder water af
Belangrijk: De lekschaal 28 dient dagelijks
en droog ze af.
te worden leeggegoten en gereinigd, om
●
Zet de afzonderlijke onderdelen ineen en
schimmelvorming te voorkomen.
duw de melkschuimer 10 tot aan de
aanslag in het apparaat.
Opmerking: Als het apparaat met de toets
2 a in koude toestand wordt ingeschakeld
Opmerking: Alle onderdelen van de
ofnahetkofezettenindea-modus wordt
melkschuimer 10 kunnen ook in de
gezet, spoelt het automatisch. Zo reinigt het
vaatwasser worden gereinigd.
systeem zichzelf.
Zetgroep reinigen
(zie ook beknopte handleiding)
Aanvullend bij het automatische reinigings-
programma dient de maalunit 24 regelmatig
te worden verwijderd en gereinigd.
●
Schakel het apparaat met de toets 2 a in
de spaarmodus.
98

denl
●
Schakel het met de netschakelaar 1 O / I
Tips om energie
volledig uit. Er brandt geen enkele toets
te besparen
meer.
●
Schuif de deuropener 23 naar rechts en
–
De espresso-automaat schakelt na een
open de deur 22 van de zetgroep 24.
uur (fabrieksinstelling) automatisch in de
●
Schuif de rode vergrendeling 24b aan de
spaarmodus. In de spaarmodus verbruikt
zetgroep 24 helemaal naar links.
het apparaat zeer weinig elektriciteit. De
●
Druk op de rode drukknop 24a, neem de
vooringestelde tijd van een uur kan
zetgroep 24 aan de handvatten (afb. E)
worden gewijzigd (zie hoofdstuk ‘Menu-
vast en trek hem voorzichtig uit het
instellingen onder auto oFF na’).
apparaat.
–
Wordt de espresso-automaat niet
●
Reinig de zetgroep 24 onder stromend
gebruikt, schakel het apparaat dan uit
water.
met de netschakelaar 1 O / I aan de
voorzijde van het apparaat.
Belangrijk: Zonder afwasmiddel reinigen
–
Onderbreekdekofe-ofmelkschuim-
en niet in de vaatwasser plaatsen.
bereiding indien mogelijk niet. Een
●
Veeg het apparaat aan de binnenkant
voortijdigstoppenvandekofe-of
schoon met een vochtige doek.
melkschuimbereiding leidt tot een
●
Laat de zetgroep 24 en de binnenkant
verhoogd energieverbruik en tevens tot
van het apparaat drogen.
meer restwater in de lekschaal.
●
Plaats de zetgroep 24 tot aan de aanslag
–
Ontkalk het apparaat regelmatig, om
in het apparaat.
kalkafzettingen te voorkomen. Kalkresten
●
Schuif de rode vergrendeling 24b
leiden tot een hoger energieverbruik.
helemaal naar rechts en sluit de deur 22.
Opberging toebehoren
Serviceprogramma’s
De espresso-automaat heeft speciale
Opmerking: Zie ook de beknopte
vakken om accessoires en de beknopte
handleiding in het opbergvak 25.
handleiding in het apparaat op te bergen.
●
Om de maatlepel 14, het melkpijpje 10d
Na een bepaalde periode verschijnt op het
en de slang 10c op te bergen, verwijdert
display 5 ofwel
u het waterreservoir 11 en plaatst u de
ontkaLken,
onderdelen in de voorgevormde
r
einigen of
uitsparingen 13.
caLc‘n‘cLean.
Dan moet het apparaat onverwijld met het
De beknopte handleiding heeft een eigen
betreffende programma worden gereinigd of
vak aan de zetgroep 24.
ontkalkt. Indien nodig kunnen beide
●
Open de deur 22 van de zetgroep.
processen worden gecombineerd met
●
Verwijder de rode afsluiting 26 van het
behulp van de functie Calc‘n‘clean (zie
opbergvak 25 door aan de lip te trekken.
hoofdstuk ‘Calc‘n‘clean’). Als het
●
Berg de beknopte handleiding erin op,
serviceprogramma niet volgens de
breng de afsluiting 26 weer aan en sluit
instructies plaatsvindt, kan het apparaat
de deur van de zetgroep 22.
worden beschadigd.
99

denl
Let op!
Ontkalken
Wanneer u het serviceprogramma laat
lopen, dient u altijd ontkalkings- en
reinigingsmiddel volgens de handleiding te
esPresso Ë Í
gebruiken.
Onderbreek het serviceprogramma in geen
ontkaLken
geval!
De vloeistoffen niet opdrinken!
i-knoP 3 sec inDrukken
Gebruik nooit azijn, middelen op basis van
azijn, citroenzuur of middelen op basis van
citroenzuur!
Tijdens de verschillende ontkalkingsstappen
Doe in geen geval ontkalkingstabletten of
knippert de toets 8
start
.
andere ontkalkingsmiddelen in de
De cijfers rechtsboven geven aan hoever
poederlader 21!
het proces gevorderd is.
Gebruik voor het ontkalken en het reinigen
uitsluitend de bijgeleverde tabletten. Deze
●
Houd de toets j 7 minstens 3 s ingedrukt.
werden speciaal voor deze espresso-
ontkaLken
start
automaten ontwikkeld.
●
Druk op de toets 8
start
, het display 5
leidt u door het programma.
Speciaal ontwikkelde en geschikte
ontkalkings- en reinigingstabletten zijn
LekschaaL Legen
in de handel of via de klantenservice
L
ekschaaL PLaatsen
verkrijgbaar.
●
Lekschaal 28 leeggieten en weer
terugplaatsen.
Bestelnr. Handel Klantenservice
0,5L- reservoir onDer MeLkschuiMer
Reinigings-
TZ60001 310575
PLaatsen
start
tabletten
●
Plaats een reservoir met een inhoud van
0,5 liter onder de melkschuimer 10.
Ontkalkings-
TZ60002 310967
●
Druk op de toets 8
start
.
tabletten
Belangrijk:Alserzicheenwaterlter34 in
Opmerking: Ishetwaterlter34
het waterreservoir 11 bevindt, dient dit in elk
geactiveerd, dan verschijnt de instructie om
geval te worden verwijderd, voor het
hetlter34 te verwijderen en nogmaals op
serviceprogramma wordt gestart.
de toets 8
start
te drukken.
WaterFiLter WegneMen
start
0,5 L Water + ontkaLker toevoegen
start
●
Giet lauw water in het lege waterreservoir
11, tot aan de markering ‘0,5 l’ en los
daarin 2 Siemens-ontkalkingstabletten
op.
●
Druk op de toets 8
start
. Het ontkalkings-
programma loopt nu gedurende ca.
20 minuten.
ontkaLkingsProgr. LooPt
100

denl
te Weinig ontkaLker
Reinigen
o
ntkaLker biJvuLLen
Opmerking: Is er te weinig ontkalkingsop-
esPresso Ë Í
lossing in het waterreservoir 11, dan ver-
schijnt deze instructie. Vul de ontkalkingop-
reinigen a.u.b.
lossing bij en druk opnieuw op de toets 8
start
.
i -knoP 3 sec inDrukken
Waterreservoir sPoeLen en vuLLen
start
Tijdens de verschillende reinigingsstappen
●
Spoel het waterreservoir 11 en vul het tot
knippert de toets 8
start
. De cijfers
de markering ‘max’ met vers water.
rechtsboven geven aan hoever het proces
●
Druk op de toets 8
start
. Het
gevorderd is.
ontkalkingsprogramma loopt nu
●
Vul het waterreservoir 11 tot ‘max’.
gedurende ca. 1 minuut en spoelt het
●
Houd de toets j 7 minstens 3 s ingedrukt.
apparaat.
reinigen
start
ontkaLkingsPr. LooPt
●
Druk op de toets 8
start
, het display 5
L
ekschaaL Legen
leidt u door het programma.
LekschaaL PLaatsen
●
Lekschaal 28 leeggieten en weer
LekschaaL Legen
terugplaatsen.
L
ekschaaL PLaatsen
Het apparaat is ontkalkt en weer klaar voor
●
Lekschaal 28 leeggieten en weer
gebruik.
terugplaatsen. Het apparaat spoelt
tweemaal.
koFFie-uitLooP Draaien
●
Draaidekofe-uitloop9 naar links, tot hij
hoorbaar vastklikt.
reinigingsProgr. LooPt
PoeDerLaDe oPenen
●
Open de poederlade 21 met een druk.
sieMens-reinigingstabLet inLeggen en
LaDe sLuiten
●
Leg een Siemens-reinigstablet in de lade
21 en sluit deze.
oP start Drukken
●
Druk op de toets 8
start
. Het reinigings-
programma loopt nu gedurende ca. 7
minuten.
101

denl
reinigingsProgr. LooPt
reinigingsProgr. LooPt
L
ekschaaL Legen
P
oeDerLaDe oPenen
L
ekschaaL PLaatsen
●
Open de poederlade 21 met een druk.
●
Lekschaal 28 leeggieten en weer
terugplaatsen.
sieMens-reinigingstabLet inLeggen en
Het apparaat is gereinigd en weer klaar
LaDe sLuiten
voor gebruik.
●
Leg een Siemens-reinigstablet in de lade
21 en sluit deze.
Opmerking: Ishetwaterlter34
Calc‘n‘Clean
geactiveerd, dan verschijnt de instructie om
Calc‘n‘Clean combineert de functies voor combineert de functies voor
hetlter34 te verwijderen en nogmaals op
ontkalking en reiniging. Als het apparaat
de toets 8
start
te drukken.
ongeveer op hetzelfde moment beide
WaterFiLter WegneMen
start
functies vereist, stelt de espresso-automaat
automatisch dit serviceprogramma voor.
0,5 L Water + ontkaLker toevoegen
start
●
Giet lauw water in het lege waterreservoir
esPresso Ë Í
11, tot aan de markering ‘0,5 l’ en los
daarin 2 Siemens-ontkalkingstabletten
caLc‘n‘cLean
op.
●
Druk op de toets 8
start
. Het ontkalkings-
i-knoP 3 sec inDrukken
programma loopt nu gedurende ca. 20
minuten.
Tijdens de verschillende Calc‘n‘Clean-Calc‘n‘Clean--
ontkaLkingsPr. LooPt
stappen knippert de toets 8
start
. De cijfers
rechtsboven geven aan hoever het proces
te Weinig ontkaLker
gevorderd is.
o
ntkaLker biJvuLLen
●
Houd de toets j 7 minstens 3 s ingedrukt.
Opmerking: Is er te weinig ontkalkingsop-
lossing in het waterreservoir 11, dan ver-
caLc‘n‘cLean
start
schijnt deze instructie. Vul de ontkalkings-
●
Druk op de toets 8
start
, het display 5
oplossing bij en druk opnieuw op de toets 8
leidt u door het programma.
start
.
LekschaaL Legen
Waterreservoir sPoeLen en vuLLen
L
ekschaaL PLaatsen
start
●
Lekschaal 28 leeggieten en weer
●
Spoel het waterreservoir 11 en vul het tot
terugplaatsen.
de markering ‘max’ met vers water.
●
Draaidekofe-uitloop9 naar rechts, tot
●
Druk op de toets 8
start
. Het ontkalkings-
hij hoorbaar vastklikt.
programma loopt nu nog gedurende ca. 1
●
Plaats een reservoir met een inhoud van
minuut, aansluitend loopt het reinigings-
ten minste 1 liter onder de
programma ca. 7 minuten en spoelt het
melkschuimer 10.
apparaat.
●
Druk op de toets 8
start
. Het apparaat
spoelt tweemaal.
102
denl
ontkaLkingsPr. LooPt
Toebehoren
reinigingsProgr. LooPt
LekschaaL Legen
Onderstaand toebehoren is in de handel of
L
ekschaaL PLaatsen
bij de klantenservice verkrijgbaar.
●
Lekschaal 28 leeggieten en weer
terugplaatsen.
Bestelnr. Handel Klantenservice
Het apparaat is gereinigd en ontkalkt en
Reinigings-
TZ60001 310575
weer klaar voor gebruik.
tabletten
Belangrijk: Werd een van de service-
programma’s bijv. door een stroomuitval
Ontkalkings-
TZ60002 310967
onderbroken, ga dan als volgt te werk:
tabletten
●
Spoel het waterreservoir 11 en vul het tot
Waterfilter TZ70003 467873
de markering ‘max’ met vers water.
●
Druk op de toets 8
start
. Het reinigings-
programma loopt nu gedurende ca. 3
minuten en spoelt het apparaat.
Afval A
reinigingsProgr. LooPt
Dit apparaat is gemarkeerd volgens de
LekschaaL Legen
Europese richtlijn betreffende afgedankte
L
ekschaaL PLaatsen
elektrische en elektronische apparatuur
●
Lekschaal 28 leeggieten en weer
(AEEA) 2002/96/EG. Deze richtlijn bepaalt
terugplaatsen.
het kader voor de terugname en verwerking
Het apparaat is weer klaar voor gebruik.
van afgedankte apparatuur, dat over heel
Europa wordt toegepast.
Raadpleeg uw gespecialiseerde handelaar
voor de geldende voorschriften inzake
Vorstbescherming
afvalverwijdering.
! Om vorstschade bij het transport en
de opslag te voorkomen, dient het
apparaat vooraf volledig te worden
Garantie
leeggemaakt.
Voor dit apparaat gelden de garantievoor-
Opmerking: Het apparaat moet gebruiks-
waarden die worden uitgegeven door de
klaar zijn, het waterreservoir 11 gevuld.
vertegenwoordiging van ons bedrijf in het
●
Plaats een grote, smalle kan onder de
land van aankoop. De leverancier, bij wie u
melkschuimer 10.
het apparaat heeft gekocht, geeft u hierover
●
Selecteer de instelling ‘melkschuim’
È
,
graag meer informatie. Om aanspraak te
start het apparaat en laat het ca. 15 se-
maken op de garantie heeft u altijd uw
conden stomen.
aankoopbewijs nodig.
●
Schakel het apparaat met de
netschakelaar 1 O / I uit.
Wijzigingen voorbehouden.
●
Het waterreservoir 11 en de lekschaal 28
leeggieten.
103

denl
Eenvoudige problemen zelf oplossen
Probleem Oorzaak Oplossing
Op het display verschijnt
De bonen vallen niet in het
Klop zachtjes tegen het
bonenreservoir vuLLen,
maalwerk (bonen zijn te
bonenreservoir 15.
hoewel het bonenreservoir
olieachtig).
Gebruik eventueel een
15 gevuld is, of het
andere koffiesoort.
maalwerk maalt geen
Maak het bonenreservoir 15
koffiebonen.
leeg en veeg het uit met een
droge doek.
Er kan geen warm water
De melkschuimer 10 of de
Reinig de melkschuimer 10
worden genomen.
houder van de
of de houder van de
melkschuimer 10 is vuil.
melkschuimer 10.
Te weinig of geen
De melkschuimer 10 of de
Reinig de melkschuimer 10
melkschuim,
houder van de
of de houder van de
of
melkschuimer 10 is vuil.
melkschuimer 10.
de melkschuimer 10 zuigt
Ongeschikte melk. Gebruik melk met een
geen melk aan.
vetgehalte van 1,5%.
De melkschuimer 10 is niet
Monteer de melkschuimer
correct gemonteerd.
10 correct.
Dekofelooptslechts
De maalgraad is te fijn. De
Stel de maalgraad grover in.
druppelsgewijs of er loopt
gemalen koffie is te fijn.
Gebruik grover gemalen
helemaalgeenkofemeer.
koffie.
Het apparaat is sterk
Ontkalk het apparaat.
verkalkt.
De koffie heeft geen
Ongeschikte koffiesoort. Gebruik een andere
‘crema’.
koffiesoort.
De bonen niet meer vers. Gebruik verse bonen.
De maalgraad is niet op de
Stel
de maalgraad fijn in.
koffiebonen afgestemd.
De koffie is te ‘zuur’. De maalgraad is te grof
Stel de maalgraad fijner in
ingesteld of de gemalen
of gebruik fijner gemalen
koffie is te grof.
koffie.
Ongeschikte koffiesoort. Gebruik een donkerder
gebrande soort.
Als de storing niet kan worden verholpen, neem dan in elk geval contact op met
de hotline!
104

denl
Eenvoudige problemen zelf oplossen
Probleem Oorzaak Oplossing
De koffie is te ‘bitter’. De maalgraad is te grof
Stel de maalgraad grover in
ingesteld of de gemalen
of gebruik grover gemalen
koffie is te grof.
koffie.
Ongeschikte koffiesoort. Gebruik een andere
koffiesoort.
Op het display verschijnt
In het apparaat is een
Bel de hotline op.
storing
storing opgetreden.
beL De hotLine a.u.b.
Het waterfilter 34 blijft niet
Het waterfilter 34 is niet
Het waterfilter 34 in het
vastzitten in het
vastgeklikt.
reservoir drukken, tot het
waterreservoir 11.
voelbaar vastklikt.
Het koffiedik is niet compact
De maalgraad is te fijn of te
Stel de maalgraad grover of
en te nat.
grof ingesteld of er wordt te
fijner in, of gebruik 2
weinig gemalen koffie
afgestreken maatlepels
gebruikt.
gemalen koffie.
Op het display verschijnt
Verontreinigde zetgroep. Zetgroep reinigen.
zetgroeP controLeren
Te veel gemalen koffie in de
Zetgroep reinigen. (Gebruik
a.u.b.
zetgroep.
maximaal 2 afgestreken
maatlepels gemalen koffie).
Sterk wisselende koffie- of
Het apparaat is verkalkt. Het apparaat volgens de
melkschuimkwaliteit.
handleiding met twee ont-
kalkingstabletten ontkalken.
Lekwater op binnenzijde
Lekschaal te vroeg
Lekschaal pas enkele
apparaatbodem bij
verwijderd.
seconden na de laatste
verwijderde lekschaal.
drankbereiding wegnemen.
Als de storing niet kan worden verholpen, neem dan in elk geval contact op met
de hotline!
105

ru
Содержание
Указания по технике
Обзор .....................................................107
безопасности
Передпервымиспользованием ..........108
Элементыуправления ..........................109
Внимательно ознакомьтесь с ин-
−СетевойвыключательO / I ...............109
струкцией по эксплуатации, при
−Кнопка
a ............................................109
работе руководствуйтесь указаниями
−Поворотныйпереключатель ............. 109
данной инструкции и сохраняйте ее
−Кнопкивыбора
<и> ....................... 109
для дальнейшего использования!
−Дисплей ..............................................110
Данная полностью автоматическая
−Кнопка
start
........................................ 112
кофе-машина эспрессо предназначена
−Кнопка
°C
............................................112
для бытового использования и рас-
−Кнопка
jНастройки ...........................113
считана на соответствующую
−Установкастепенипомола ...............113
производительность; она не предна-
−Подогревчашек ................................. 113
значена для промышленного примене-
Установкименю ....................................114
ния.
−Язык ....................................................114
−Жесткостьводы .................................114
! Опасность поражения током!
−Декальцинация .................................. 114
Приподключенииприбораиприработе
−Очистка ..............................................114
соблюдатьданные,приведенныена
− Calc‘n‘Clean ........................................114
типовойтабличке.
−Показатьвремя .................................115
Пользоватьсяприборомдопускается
−Форматвремени ................................ 115
толькоприотсутствииповреждений
−Установитьчасы ................................ 115
кабеляиприбора.
−Подогр.чашеквкл(толькоTK76F09) 115
Пользоватьсяприборомтольковнутри
−Подогр.выкл ...................................... 115
помещенийприкомнатнойтемпературе.
−Автооткл.через ..................................115
Недопускаетсяпользованиеприбором
−Фильтрводы .......................................115
лицами(включаядетей)спониженным
−Контраст .............................................116
уровнемфизического,психическогоили
−Фабр.настройки ................................116
умственногоразвитияилинедостаточны-
Приготовлениекофейныхнапитковиз
миопытомизнаниями,заисключением
кофейныхзерен .................................... 116
случаев,вкоторыхпользованиеприбо-
Приготовлениекофейныхнапитковиз
ромпроизводитсяподприсмотромлица,
молотогокофе .......................................117
ответственногозаихбезопасность,или
Приготовлениемолочнойпеныи
данныелицаполучилиотнегосоответс-
теплогомолока .....................................118
твующиеинструкции.
Приготовлениегорячейводы ...............119
Хранитьприборвнедоступномдлядетей
Уходиежедневнаяочистка .................119
месте.Следитьзатем,чтобыдетине
Хранениепринадлежностей ................120
использовалиприборкакигрушку.
Советыпоэкономииэнергии ............... 121
Вслучаесбоявработенемедленноиз-
Сервисныепрограммы ......................... 121
влечьизрозеткивилкусетевогокабеля.
−Удалениенакипи ...............................122
Дляпредотвращенияопасныхситуаций
− Очистка ..............................................123
ремонтприбора(например,замена
− Calc‘n‘Clean ........................................ 123
поврежденногосетевогокабеля)может
Защитаотзамерзания.........................125
выполнятьсятольконашейсервисной
Утилизация/Принадлежности ..............125
службой.
Условиягарантийногообслуживания ..125
Запрещаетсяпогружатьвводуприбор
Самостоятельноеустранение
илисетевойкабель.
небольшихпроблем..............................126
Несуйтерукивкофемолку.
106

ru
! Опасность ожога горячей
Уважаемыелюбителикофе!
жидкостью!
ПоздравляемВасспокупкойэтойполно-
Насадкадляприготовлениямолочной
стьюавтоматическойкофе-машиныэс-
пены/горячейводы10сильнона-
прессофирмыSiemens.
гревается.Послеиспользованиядож-
датьсяохлаждения,толькопослеэтого
Вданнойинструкциипоэксплуатации
прикасаться.
описываютсяразличныемодели,
отличающиесяпооснащению.
Просьбатакжеучитыватьприлагаемую
краткуюинструкцию.
Ееможнохранитьвспециальномотсеке
25додальнейшегоиспользования.
Обзор
Рисунки A, B, C, D и E
1 СетевойвыключательO / I
16 Крышка,сохраняющаяаромат
2 Кнопкаa
17 Поворотныйрегуляторстепени
3 Кнопка
°C
(температура/защитаот
помола
детей)
18 Круговаяподсветка
4 Кнопкивыбора< >
19 Подогревчашек
5 Дисплей
20 Кнопкавключенияподогревачашек,с
a)Строкастатуса
подсветкой
b)Строкавыбора
21 Выдвижнойотсекдлямолотогокофе
c)Строканавигации
(молотыйкофе/таблеткадля
6 Поворотныйпереключательдля
очистки)
установокнадисплее
22 Дверцаблоказаваривания
7Кнопкаj(менюинформации)
23 Кнопкадляоткрываниядверцы
8 Кнопка
start
(напитки/программа)
24 Блокзаваривания
9 Устройстворазливакофе
a)Нажимнаяклавиша
регулируемоеповысоте,поворотное
b)Фиксатор
10 Насадкадляприготовлениямолочной
25 Отсекдляхранениякраткой
пены,регулируемаяповысоте
инструкции
(молоко/горячаявода)
26 Крышкаотсекадляхранения
a)Верхняячасть
27 Заслонкаподдоновдлякапель
b)Нижняячасть
28 Поддондлякапельподустройством
c)Гибкаятрубка
разливакофе
d)Тру б к а длямолока
29 Решетка-подставкаподустройством
11 Съемнаяемкостьдляводы
разливакофе
12 Крышкаемкостидляводы
30 Решетка-подставкаподнасадкойдля
13 Отсекидляхранения(ложкадля
приготовлениямолочнойпены
молотогокофе,насадкадля
31 Емкостьдлякофейнойгущи
приготовлениямолочнойпены)
32 Отсекдляхранениякабеля
14 Мернаяложкадлямолотогокофе
33 Емкостьдлямолока(изолированная)
(приспособлениедляустановки
34 Фильтрдляводы
фильтрадляводы)
15 Емкостьдлякофейныхзерен
107
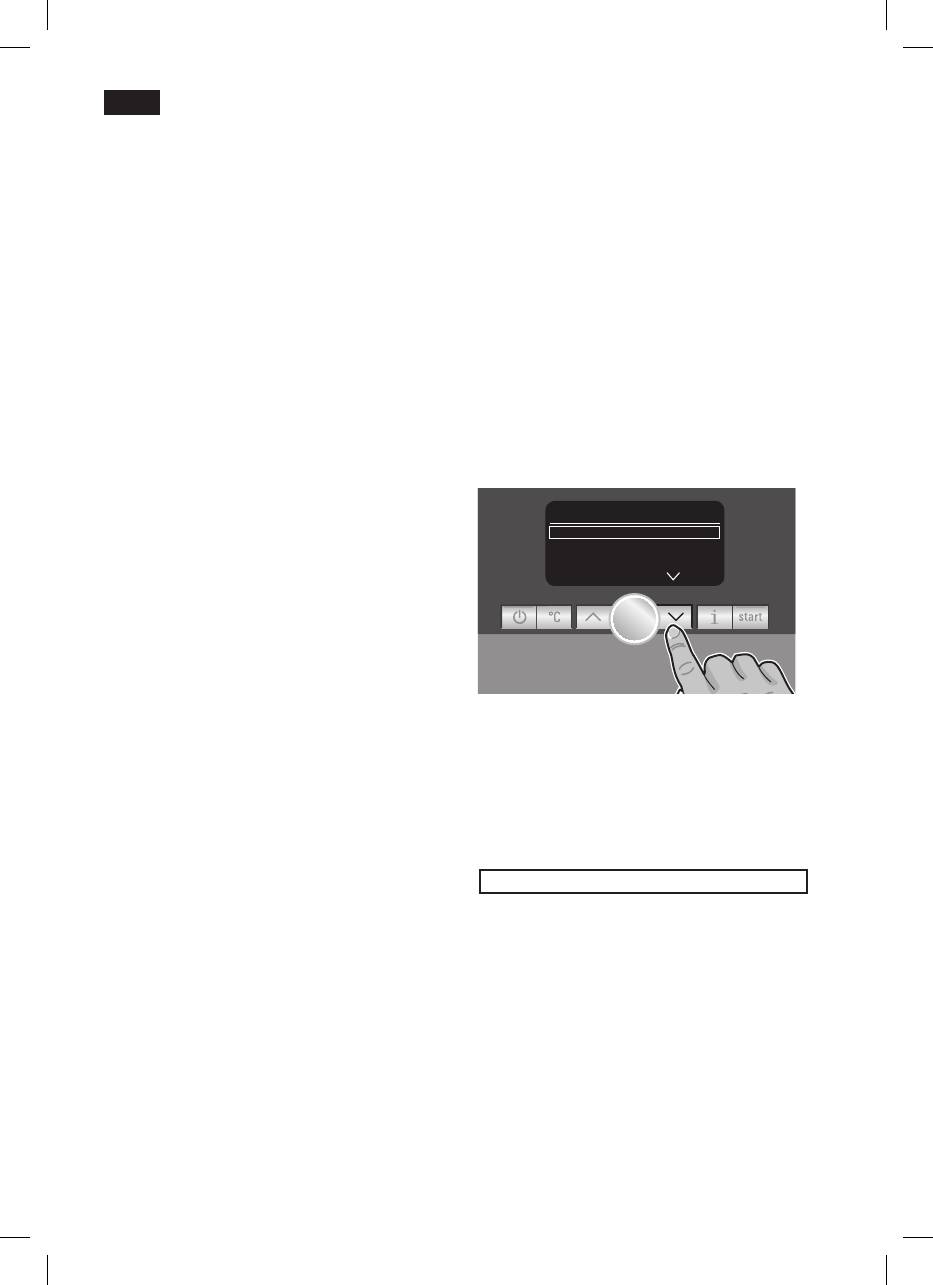
ru
●
Снятьемкостьдляводы11,промыть
Перед первым
ееизаполнитьсвежей,холодной
использованием
водой.Уровеньзаполнениянедолжен
Общие сведения
превышатьотметку“max” (макс.).
Всоответствующиеемкостизаливать
●
Ровноустановитьемкостьдляводы11
толькочистую,негазированнуюводу;
и,надавивнанее,вставитьдоупора.
рекомендуетсязасыпатьспециальные
●
Закрытькрышкуемкостидляводы12.
смесикофейныхзерен,предназна-
●
Заполнитькофейнымизернами
ченныедлякофеварокэспрессои
емкостьдлязерен15.
полностьюавтоматическихкофе-машин
●
Нажатьсетевойвыключатель 1 O / I,
эспрессо.Неиспользоватькофейные
загоритсякнопка8
start
,инадисплее5
зерна,покрытыеглазурью,карамелью
появитсясписокязыков.
илиобработанныедругими
●
Кнопкамивыбора4 <и>выбрать
сахаросодержащимидобавками-они
необходимыйязык,накоторомбудут
засоряютблокзаваривания.
появлятьсядальнейшиесообщенияна
Вэтомприбореможноустанавливать
дисплее.
жесткостьводы.Назаводеустановлена
степеньжесткостиводы4.Жесткость
Language
Deutsch
start
используемойводыопределитьспо-
engLish
мощьюприлагаемойиндикаторной
Pycckий
полоски.Еслипорезультатамтеста
степеньжесткостиотличаетсяот4,после
включениязапрограммироватьприбор
соответствующимобразом(см.раздел
“Установкименю.ЖЕСТКОСТЬВОДЫ”).
Начало работы с прибором
Выбранныйязыквыделяетсярамкой.
●
Установитьполностьюавтоматическую
Можновыбратьодинизследующих
кофе-машинуэспрессонаровную
языков:
поверхность,достаточнопрочнуюдля
весаприбора.
Deutsch
К сведению: Приборимеетнанижней
e
ngLish
сторонечетыреролика,егоможно
смещатьвсторонуподугообразной
P
ycckий
траекториидляоблегченияпроцесса
эксплуатациииразмещения.
n
eDerLanDs
●
Сетевойкабельвытянутьизотсека32,
вставитьштекерврозетку.
F
rançais
Необходимуюдлинуможноотре-
гулировать,убираякабельвверхили
i
taLiano
вытягиваяеговниз.Дляэтогоприбор
заднейсторонойпоставить,например,
s
venska
ккромкестолаивытянутькабельвниз,
илизадвинутьвверх.
e
sPañoL
●
Поднятькрышкуемкостидляводы12.
P
oLski
108
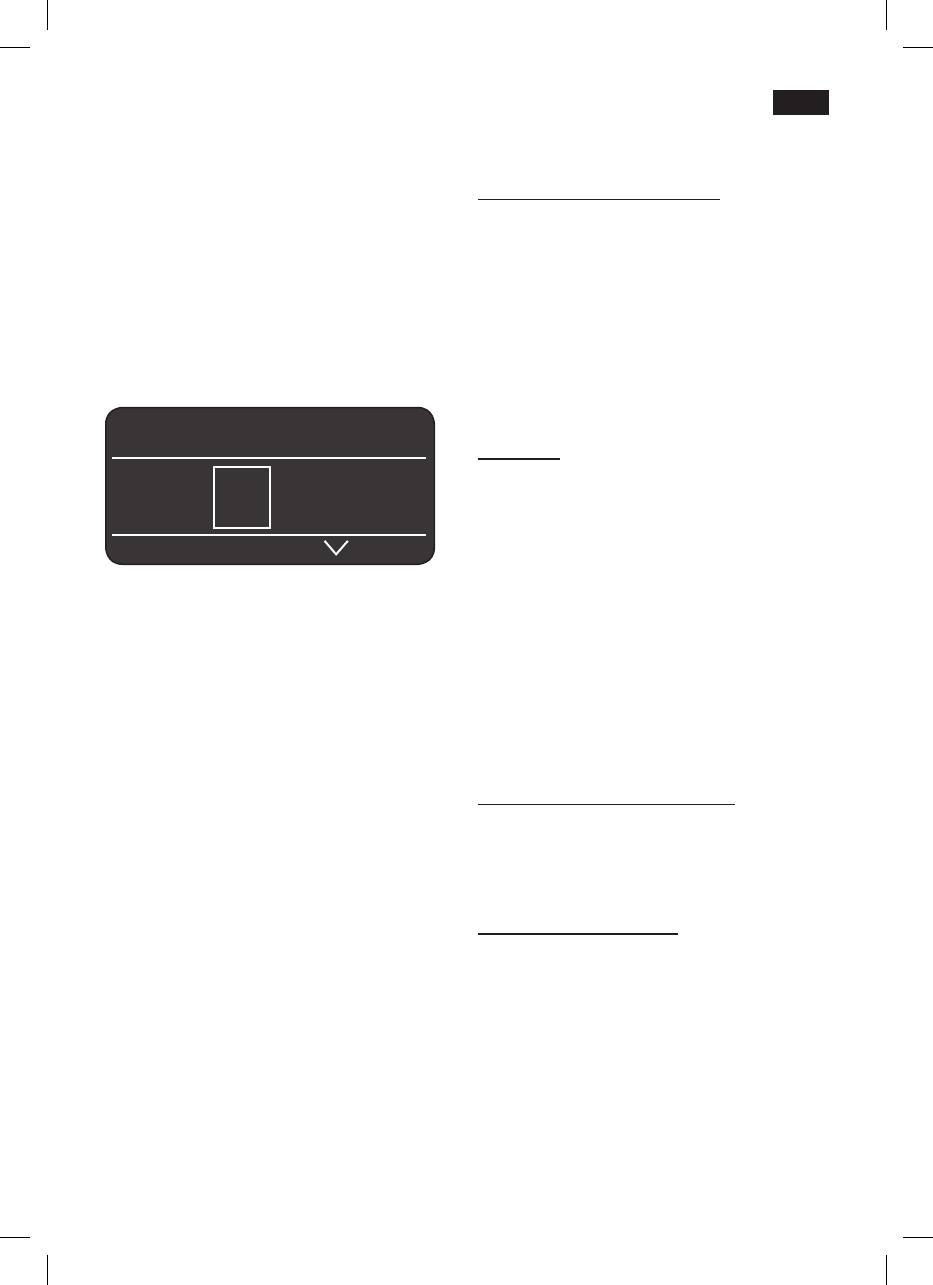
ru
●
Нажатькнопку8
start
,выбранныйязык
Элементы управления
сохраняетсявпамяти,загорается
кнопка2 a.
Сетевой выключатель O / I
Сетевойвыключатель1 O / Iслужитдля
●
Нажатькнопку2 a,надисплее5
переключенияприборав“экономичный
появитсялоготипторговоймарки.
режим”илиегополногоотключения.В
Приборпроизводитнагревипромывку;
“экономичномрежиме”светитсятолько
изустройстваразливакофе9вытекает
кнопка2 a.
небольшоеколичествоводы.Когдана
Важно: Отключать прибор при помо-
дисплее5появятсясимволыдля
щи сетевого выключателя 1 только
выборарежимаприготовления,прибор
тогда, когда он находится в “эконо-
готовкработе.
мичном режиме”, чтобы выполнялась
автоматическая промывка.
Эспрессо Ë Í
Кнопка a
Кнопкой2 a приборвключается(готовк
работе)иливозвращаетсяв
 à À Á Ä Å
“экономичныйрежим”.
Кнопка2 aмигает,покаприбор
производитпромывку.
Промывкаприборанепроизводится,
К сведению:Назаводезапрограммиро-
если:
ваныстандартныенастройки,обеспечи-
●
вмоментвключенияприбореще
вающиеоптимальныйрежимработы
горячий.
полностьюавтоматическойкофе-маши-
●
передпереключениемв“экономичный
ныэспрессо.Спустя1часприборавто-
режим”кофенеготовился.
матическипереключаетсяв“экономич-
Приборготовкработе,еслинадисплее
ныйрежим”(см.раздел“Установкименю.
5светятсясимволыдлявыборанапитков
АВТООТКЛ.ЧЕРЕЗ”)
икнопка8
start
.
Совет:Припервомиспользованиипри-
Поворотный переключатель
бораилипоследлительногоперерывав
Поворотомпереключателя6влевоили
работеароматкофевпервойчашкене
вправоможноперемещатьсяпопунктам
раскрываетсявполноймере.
надисплее5илиизменятьзначения
параметроввменю.
Еслиполностьюавтоматическаякофе-
машинаэспрессонеиспользовалась
Кнопки выбора < и >
ранее,Выначнетеполучатьстабильную
Нажимаянакнопкивыбора4 <и>,
пенунеобходимойтолщинытолькопосле
можнопереходитьнаверхниеинижние
приготовлениянесколькихчашеккофе.
уровнименю(строканавигации5c).
109

ru
Дисплей
Сообщения на дисплее
Надисплее5припомощисимволов
Надисплее5появляютсяразличные
показываются:
сообщения.
возможностивыбора,крепостьи
количествокофе,атакжетекстовая
Информация:
информацияонастройках,текущих
Контейнер для воды почти пуст
процессахисообщениях.Поворотным
отсеК для зёрен почти пуст
переключателем6икнопкамивыбора4
подождите
можновыполнятьнастройки.Выбранная
настройкавыделяетсярамкой.
Указания к действию:
заполнить Контейнер для воды
устан. Конт-р для воды
5a
Эспрессо ËË Í
пров. Конт-р для воды
b
установить поддон для Капель
 à À Á Ä Å
опустошить поддон для Капель
c
заполнить отсеК
для Кофейных зерен
Встрокестатуса5aнадисплеепоказы-
повернуть блоК подачи Кофе
ваетсяназваниенапитка,адлякофей-
установить устройство
ныхнапитковтакжеустановкакрепости,
вспенивания молоКа
например,55,иколичества,например,
устан. заварочный блоК
.Настрокевыбора5bпоказываются
заКрыть дверцу
�
символыдлявыборанапитка.
проверить заварочный блоК
Стрелкивстрокенавигации5cпоказыва-
добавить порошоК
ют, вкакомнаправленииестьещеуровни
заКрыть лотоК
меню.
заменить фильтр
провести деКальцинацию
необходима чистКа
запустить caLc‘n‘cLean
температура ниже нормы
п
одождите
высоКое или
низКое напряжение
110
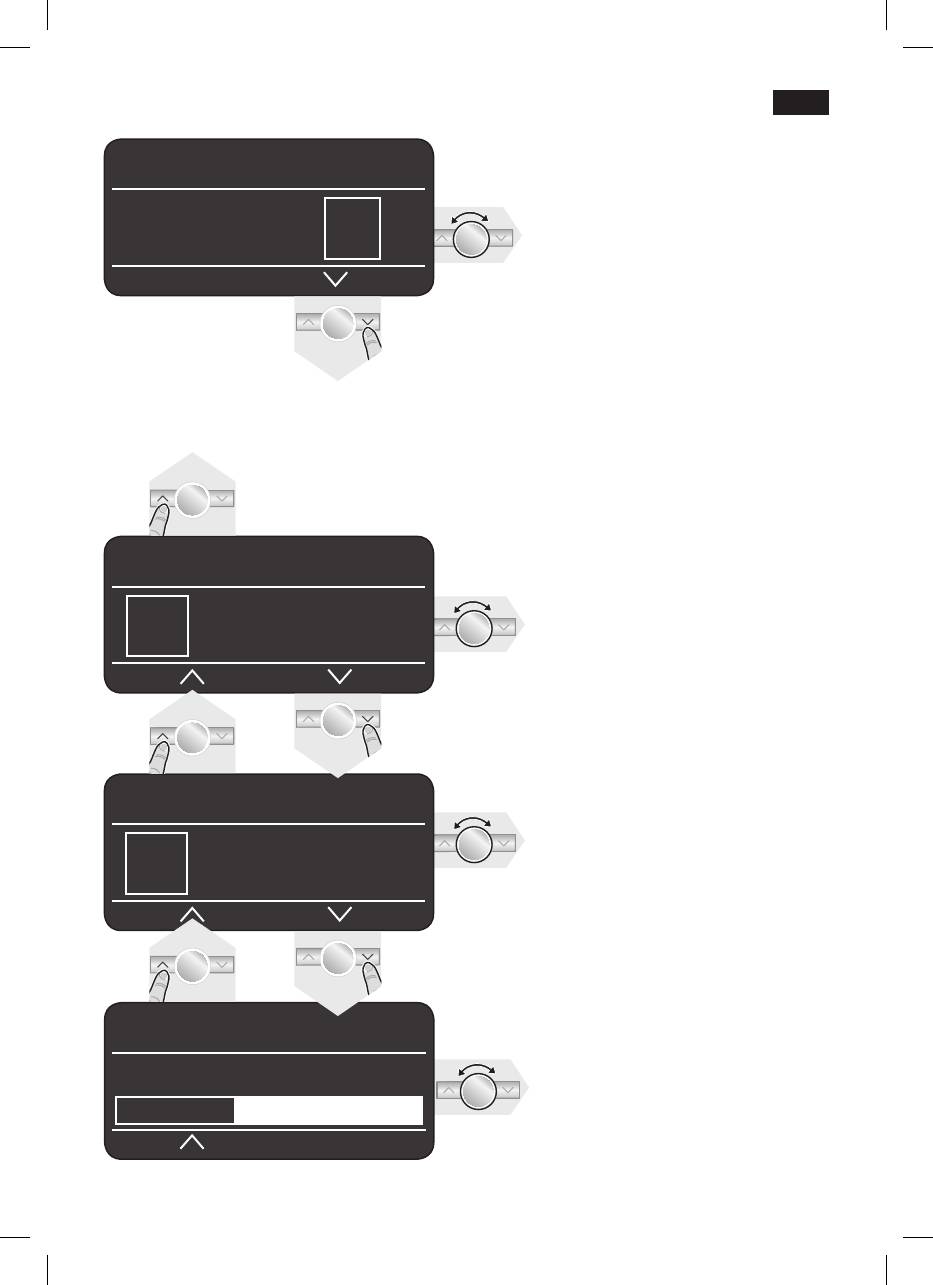
ru
Возможности выбора
My coFFee Ë Í
2 x Эспрессо
2 x Кофе
Â
Ã
À
Эспрессо Á Кофе
Á Ä Å Æ Ç È
Ä Кофе с
маККиато
Å
молоКом
Æ
Капучино
Ç
My coFFee
молочная
теплое
È
É
пена молоКо
Ê Горячая вода Ì быстр.
промывКа
молочн.
системы
Крепость кофе (только для
My coFFee Ë Í
кофейных напитков)
5 5 5 5 5 5
5 55 555
Слабый Нормальный Крепкий
Количество (только для кофейных
напитков)
My coFFee Ë Í
� Ð Ò
малое среднее большое
� Ð Ò
Кромекрепостииколичествакофе
длясобственногорецепта
My coFFee Ë Í
My coFFee Çможновыбирать
пропорциидлясмешивания
Эспрессо молоКо
эспрессоимолока:Установку
40%
можноменятьсшагом20%,
вращаяповоротный
переключатель6.
111
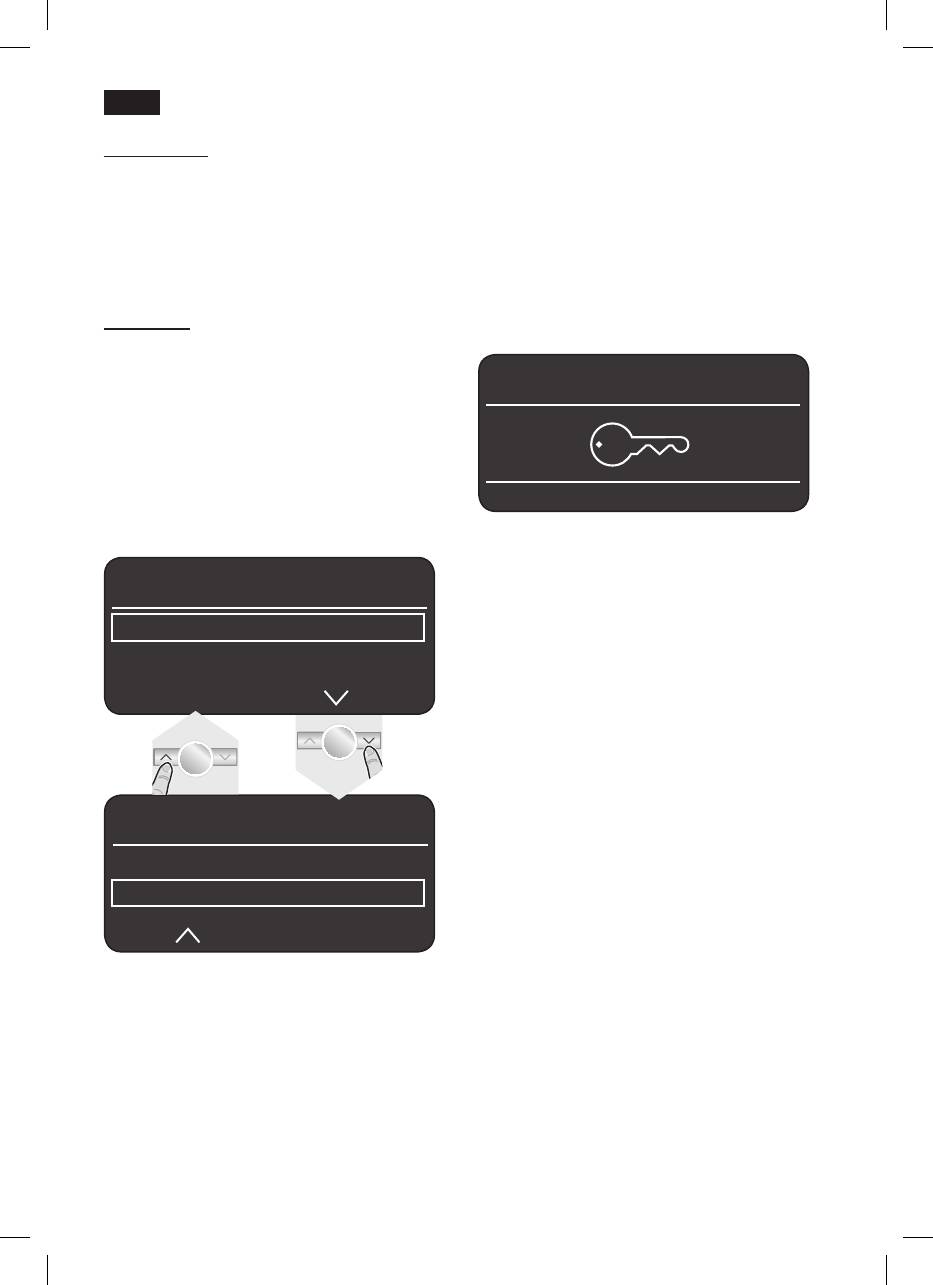
ru
Кнопка
start
Защита от детей
Принажатиинакнопку8
start
начинается
Чтобыпредотвратитьтравмыиожогиу
процессприготовленияиливыполняется
детей,приборможнозаблокировать.
сервиснаяпрограмма.
●Кнопку3
°C
удерживатьнажатой
Повторнымнажатиемкнопки8
start
во
минимум3секунды,надисплее5
времяприготовлениянапиткаможно
появитсяключик:защитаотдетей
досрочноостановитьпроцесс.
активирована.
Теперьработасприборомневозможна,
Кнопка
°C
подогревчашек19отключен.
Кнопкой3
°C
можноустанавливатьтем-
пературудлякофеиводы(коротким
нажатием),атакжевключатьиливыклю-
Эспрессо Ë Í
чатьзащиту от детей(удерживатьнажа-
тоймин.3секунды).
Установка температуры:
Одинразнажатьнакнопку3
°C
и
выполнитьнастройкикнопками4
<и>
иповоротнымпереключателем6.
●Дляотключениязащитыотдетей
кнопку3
°C
удерживатьнажатой
минимум3секунды:ключикнадисплее
температура
5сноваисчезнет.
Кофе
нормальн.
Горячая вода
температура
Кофе
Горячая вода
<90°c
Сохранитьнастройкиповторным
нажатиемкнопки3
°C
ивернутьсяк
пунктувыборанапитка.Данныенас-
тройкиавтоматическивступаютвсилу
длявсехспособовприготовления.
112
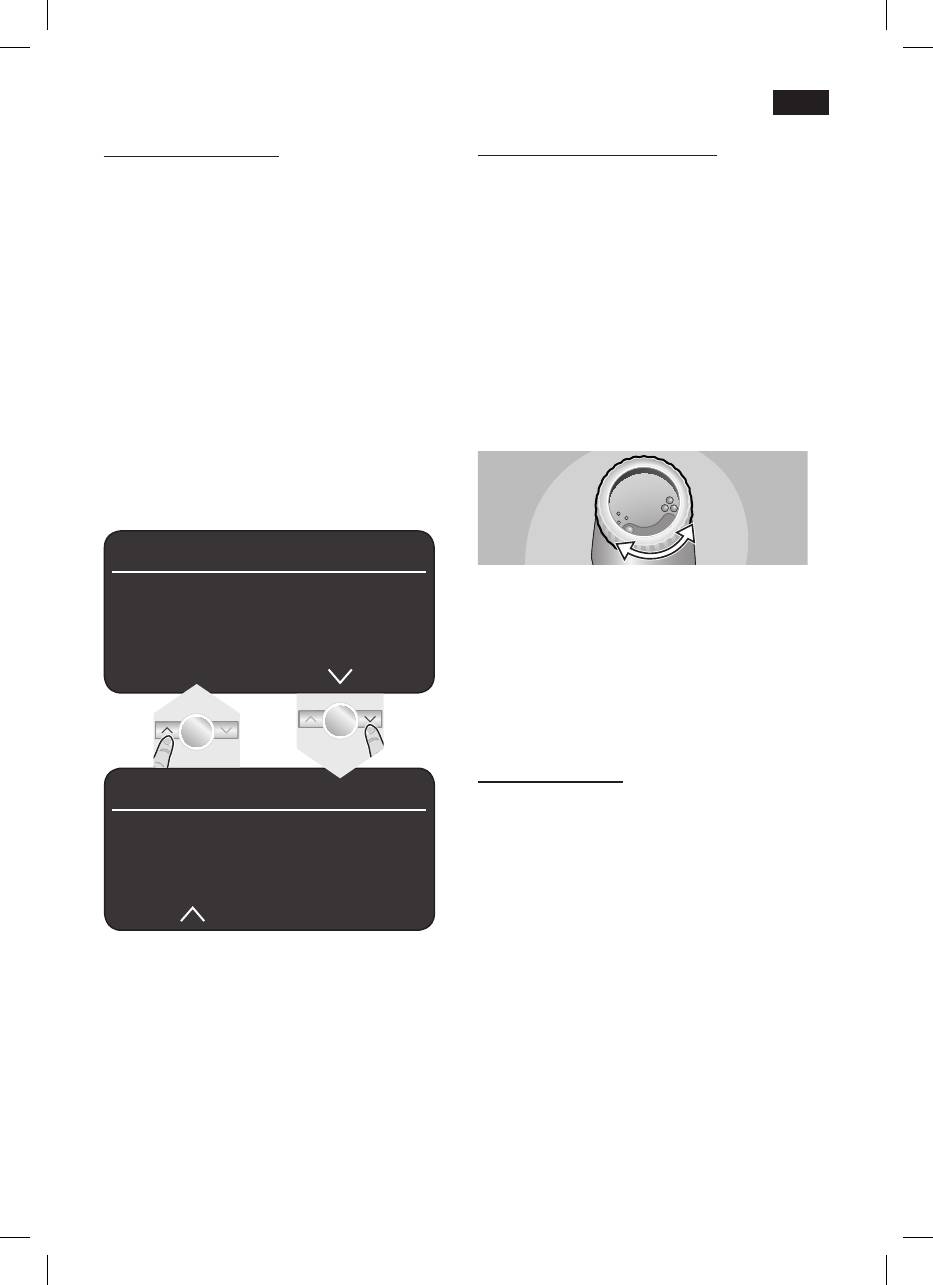
ru
Кнопка j Настройки
Установка степени помола
Кнопкой7
jможнозапрашивать
Поворотнымрегуляторомстепенипомо-
информацию(короткоенажатие)и
ла17можноустановитьнеобходимую
выполнять настройки(удерживать
степеньпомолакофе.
нажатойминимум3с).
Внимание
Запрос информации
Степень помола регулировать только
Вменюинформацииможнопросмотреть
при работающей кофемолке! В про-
следующиеданные:
тивном случае возможно повреждение
–какоеколичествонапиткабыло
прибора.
приготовленосмоментаначала
●Приработающейкофемолкеповорот-
эксплуатацииприбора
нымрегулятором17отрегулировать
–когданеобходимыближайшие
помолкофевдиапазонеоттонкого• • •
сервисныеработы.
доболеегрубого●●●.
●Одинразкоротконажатьнакнопку7
j,
переходитькпунктамменюкнопками4
<и>.
инфо-меню
К сведению:Действиеновойнастройки
деКальц.: xxx чашеК
будетзаметнотольконачинаясовторой
очистКа: xxx чашеК
чашкикофе.
не установлен фильтр
замена фильтра: xxx чш. *
Совет:Длятемныхобжаренныхзернах
устанавливайтеболеемелкийпомол,для
светлыхобжаренныхзернахболее
грубыйпомол.
Подогрев чашек
инфо-меню
! Внимание: устройство подогрева
чашек 19 сильно нагревается!
Кол-во Кофе xx
Полностьюавтоматическаякофе-
молочные напитКи xx
машинаэспрессоимеетфункцию
объем Горяч. воды xл
подогревачашек19,которуюможно
вручнуювключатьилиотключатькнопкой
20.Еслиподогревчашек19включен,
* появляетсятолькоприактивном
кнопка20светится.
фильтре.
Совет:Дляоптимальногоподогрева
Приповторномкороткомнажатиикнопки
чашекставьтеихдномнаповерхность
7 jпроисходитвозвратквыборунапитка.
дляподогрева19.
После10секундбездействияприбор
автоматическивозвращаетсяврежим
Только TK76F09
выборанапитка.
Устройствоподогревачашек19также
можнозапрограммироватьпредвари-
Выполнение настроек
тельно(см.раздел“Установкименю
(см.главу“Установкименю”)
подоГр. чашеК вКл”).
113
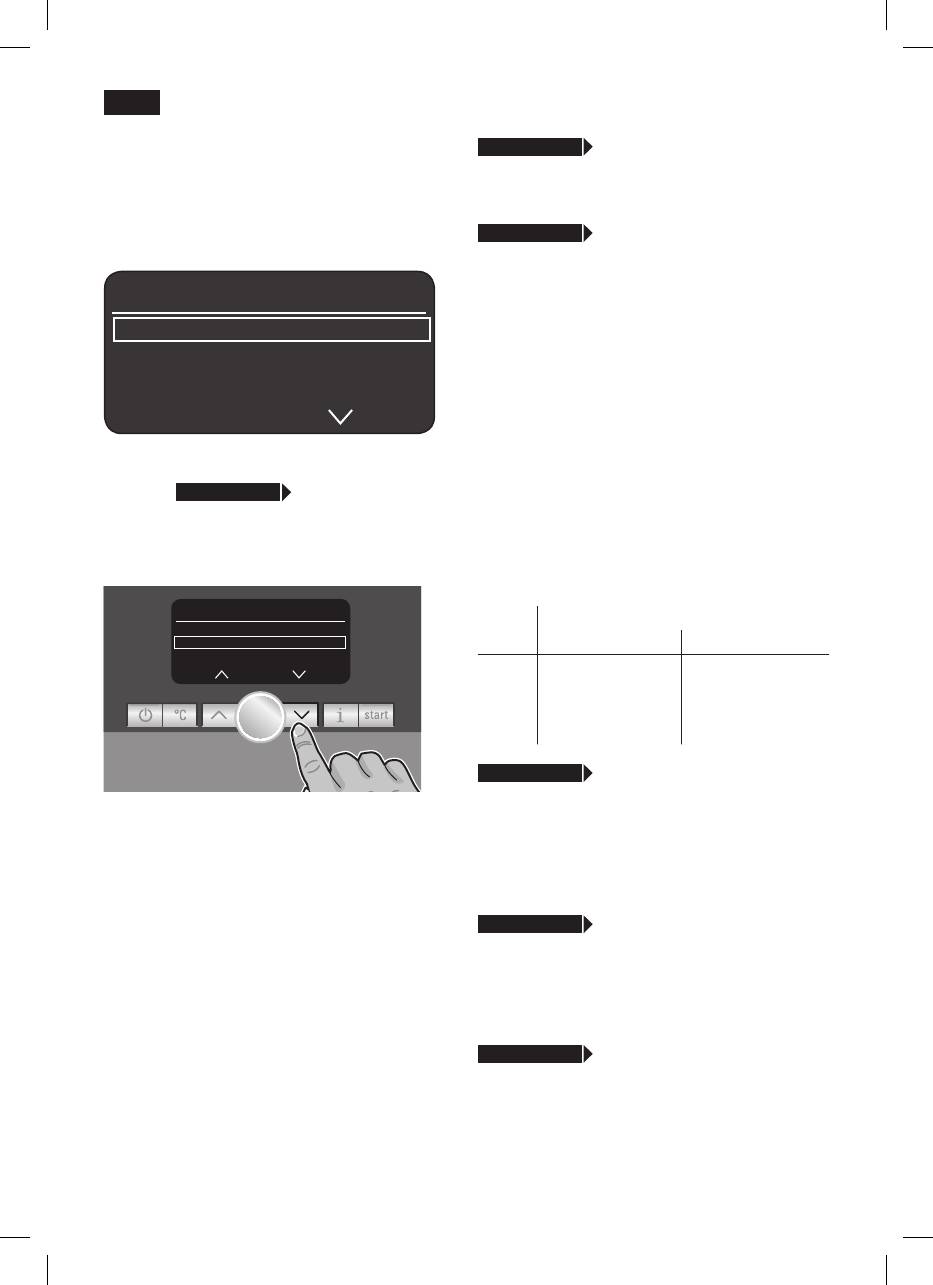
ru
j 3сек + >
языК
Установки меню
●Вращаяповоротныйпереключатель6,
●Кнопку7 jудерживатьнажатой
можновыбратьнеобходимыйязык.
минимум3секунды.
Появятсяразличныевозможностидля
j 3сек + >
жестКость воды
настройки.
●Вращаяповоротныйпереключатель6,
можновыбратьнеобходимую
настройКи
жесткостьводы–1,2,3и4.
К сведению: Правильнаяустановка
языК PуссКий
жесткостиводыважнадляобеспечения
жестКость воды
своевременногонапоминанияо
деКальцинация
необходимостиудалениянакипи.
Предварительноустановленастепень
жесткостиводы4.
Всепоследующиенастройкивданной
Жесткостьводыможноопределитьпри
инструкциипоэксплуатацииотмечаются
помощиприлагаемойиндикаторной
значком
j 3сек + >
,закоторым
полоскиилиузнатьеевместной
следуетподробноеописание.
водоснабжающейорганизации.
Кнопками4 <и>можновыбирать
●Индикаторнуюполоскуненадолго
различныевозможностидлянастройки.
опуститьвводуиспустяпримерно1
минутупосмотретьрезультат.
настройКи
Сте-
Градусыжесткостиводы
жестКость воды
деКальцинация
start
пень
Нем.(°dH) Франц.(°fH)
очистКа
1
1-7
1-13
2
8-14
14-25
3
15-21
26-38
4
22-30
39-54
j 3сек + >
деКальцинация
●Еслинеобходимадекальцинация
Указание:Выполненныеизменения
(удалениенакипи),нажатькнопку8
сохраняютсяавтоматически.
start
ивыполнитьпрограммупо
Дополнительныхдействийнетребуется.
удалениюнакипи(см.раздел
“Удалениенакипи”).
j 3сек + >
очистКа
●Еслинеобходимаочисткаприбора,
нажатькнопку8
start
ивыполнить
программупоочистке(см.раздел
“Очистка”).
j 3сек + >
caLc‘n‘cLean
●Еслиодновременнонеобходимы
декальцинация(удалениенакипи)и
очисткаприбора,нажатькнопку8
start
ивыполнитьпрограммуCalc‘n‘Clean
(см.раздел“Calc‘n‘Clean”).
114

ru
j 3сек + >
поКазать время
j 3сек + >
автоотКл. через
Здесьможноустановить,чтобыв
●
Вращаяповоротныйпереключатель6,
экономичномрежименадисплее5
можнозадатьпромежутоквремени
показывалосьвремясуток.
послепоследнегоприготовления,когда
●Вращаяповоротныйпереключатель6,
приборбудетавтоматическипереклю-
можновключить=даилиотключить=
чатьсявэкономичныйрежим.
нетотображениевремени.
Можноустановитьвремяот5минутдо8
К сведению:Времясутокнеобходимо
часов.
предварительноустановитьвпункте
“установить часы”.
j 3сек + >
ф
ильтр воды
Каждыйразприустановкевемкостьдля
j 3сек + >
ф
ормат времени
водыновогофильтра34необходимаего
●
Врежимевыбораформатавремени
промывка.
поворотнымрегулятором6можно
●
Дляэтогоспомощьюмернойложки
установитьформатвремени12-или
длякофе14установитьфильтрдля
24-часовой.
воды34вемкость11,крепконажавна
него.Емкостьзаполнитьводойдо
j 3сек + >
установить часы
отметки“max”.
●Вращаяповоротныйпереключатель6,
●
Вращаяповоротныйпереключатель6,
можноустановитьтекущеевремясу-
выбратьstartинажатькнопку8
start
.
ток,например,08:25.Значение,кото-
●установить ёмКость 0,5 л под
роеможноизменять,подсвечивается,
вспениватель молоКа
start
подсветкачасовиминутавтоматичес-
●
Установитьемкостьобъемом0,5лпод
кименяется.
насадкудляприготовлениямолочной
пены10.
Только TK76F09
●
Нажатькнопку8
start
.Водапроходит
(программируемый подогрев чашек)
черезфильтр34,промываяего.
j 3сек + >
подоГр. чашеК вКл
●
Послеэтогоопорожнитьемкость.
Этадополнительнаяфункцияавтомати-
Приборсноваготовкработе.
ческивключаетподогревчашек19вза-
данноепрограммойвремя.Независимо
оттого,находитсялиприборв“эконо-
мичномрежиме”илиготовкработе.
К сведению:Времясутокнеобходимо
предварительноустановитьвпункте
“установить часы”.
●
Поворотнымпереключателем6
установитьнеобходимоевремя.При
выбореотКл.функцияотключается.
j 3сек + >
подоГр. выКл
Здесьможноустановитьвремядляавто-
К сведению:Припромывкефильтрадля
матическогоотключенияподогревача-
воды34одновременнобыла
шек19послевключения.Можноустано-
активировананастройкадляиндикации
витьвремяот5минутдо8часов.
временидлязаменыфильтра.
115

ru
Подробнуюинформациюофильтредля
Приготовление
водысм.вприлагаемомруководствепо
кофейных напитков из
фильтру.
кофейных зерен
Послеуказаниянадисплее
заменить
фильтрилимакс.через2месяцарезерв
Даннаяполностьюавтоматическаякофе-
фильтрадляводы34выработан.Замена
машинаэспрессопроизводитпомолсве-
необходимапосоображениямгигиеныи
жегокофеотдельнодлякаждогозавари-
сцельюпредотвращенияобразования
вания.Рекомендуетсяиспользоватьспе-
известковыхотложений(возможны
циальныесмесикофейныхзерен,пред-
поврежденияприбора).
назначенныедлякофеварокэспрессои
полностьюавтоматическихкофе-машин
Сменныефильтрыможноприобрести
эспрессо.Длядостиженияоптимального
черезторговуюсеть(TZ70003)или
качествазернаследуетхранитьвпро-
сервиснуюслужбу(467873).
хладномместе,вплотнозакрытойупа-
Еслиновыйфильтрдляводы34не
ковкеилииспользоватьглубокуюзамо-
устанавливается,дляпозициифильтр
розку.Размалыватьможноизаморожен-
водызадатьнет.
ныекофейныезерна.
К сведению:Еслиприборомдлительное
Важно:Вемкостьдляводы11еже-
времянепользуются(например,в
дневнозаливатьсвежуювод у. Вемкости
отпуске),передиспользованиемприбора
дляводы11постояннодолжнобыть
следуетпромытьужеустановленный
количествоводы,достаточноедля
фильтрдляводы34,дляэтогонужно
работыприбора.
простоприготовитьчашкугорячейводы.
Совет:Чашку(чашки),особенно
j 3сек + >
Контраст
маленькиетолстостенныечашкидля
Контрастдисплея5можнорегулировать
эспрессо,предварительноподогревать
от-20до+20,заводскаянастройка
наподставкедлячашек19.
соответствует+0.
●
Поворотнымпереключателем6
Простымнажатиемкнопкиможно
установитьнеобходимоезначение.
готовитьразличныекофейныенапитки.
j 3сек + >
фабр. настройКи
Приготовление напитков без молока
Собственныенастройкиможноудалитьи
Прибордолженбытьготовкработе.
сноваактивироватьзаводскиенастройки.
●
Подустройстворазливакофе9
●
Дляактивизациизаводскихнастроек
поставитьпредварительноподогретую
нажатькнопку8
start
.
чашку(чашки).
●
Поворотнымпереключателем6
К сведению: Влюбоевремянажатием
выбратьнеобходимыйтипэспрессо
комбинациикнопокможновернуть
иликофе.Надисплее5показывается
заводскиенастройки.Прибордолжен
выбранныйнапиток,атакжеустановки
бытьполностьюотключен.
крепостииколичествакофедля
●
Кнопки4 <и>исетевойвыключатель
данногонапитка.
1 O / Iудерживатьнажатыминеменее
5секунд.Нажатькнопку8
start,
заводскиенастройкивновьактивны.
116
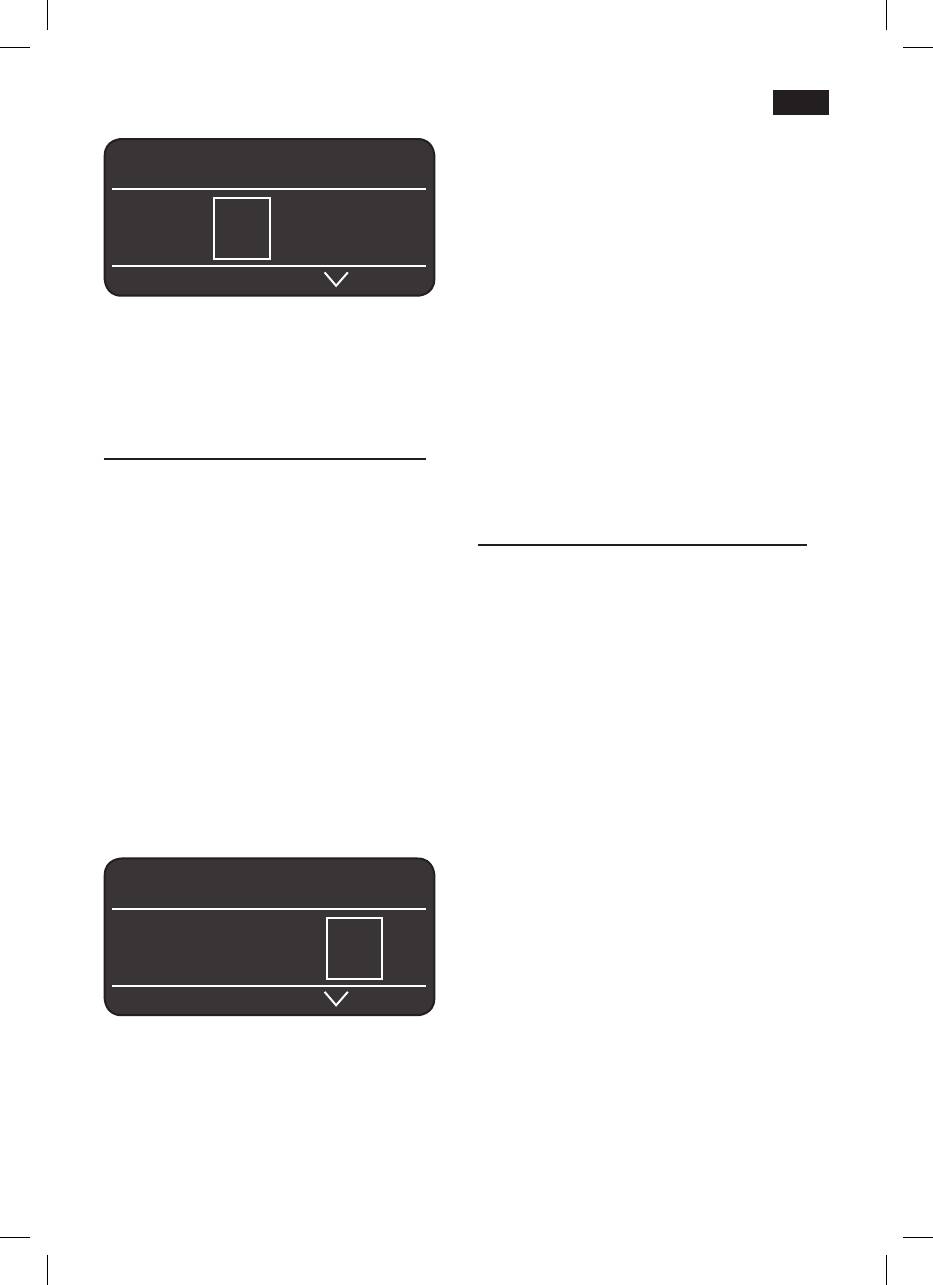
ru
Важно: Засохшиеостаткимолока
удаляютсяструдом,поэтомупосле
Эспрессо Ë Í
каждогоиспользованияпромывать
насадкудляприготовлениямолочной
пены10 теплой водой(см.раздел
 à À Á Ä Å
“Очисткаустройстваприготовления
молочнойпены”).
Настройкиможноменять(см.раздел
“Элементыуправления”).
Приготовление
●
Нажатькнопку8
start
.
кофейных напитков из
Кофезавариваетсяизатемналиваетсяв
чашку(чашки).
молотого кофе
Приготовление напитков с молоком
Даннаяполностьюавтоматическаякофе-
Прибордолженбытьготовкработе.
машинаэспрессоможетработатьс
●Погрузитьглубоковемкостьдля
молотым(нонерастворимым)кофе.
молока33трубкудлямолока10d
насадкидляприготовлениямолочной
Приготовление напитков без молока
пены10.
●
Поворотнымпереключателем6
●
Устройстворазливакофе9отвести
установитьÀилиÁ.
вправо,чтобыбылслышенщелчок
●
Подустройстворазливакофе9
прификсации.
поставитьпредварительноподогретую
●
Предварительноподогретуючашкуили
чашку(чашки).
стаканпоставитьподустройствораз-
●
Открытьвыдвижнойотсекдля
ливакофе9инасадкудляприготовле-
молотогокофе21,нажавнанего.
ниямолочнойпены10.
●
Засыпатьнеболеедвухмерныхложек
●
Выбратьмаккиато
Å
,капучиноÆ,кофе
14молотогокофе(без“горки”).
смолокомÄили“Mycoffee” Ç,
вращаяповоротныйпереключатель6.
Внимание:Незасыпатьнемолотые
Надисплее5показываетсявыбранный
зернаилирастворимыйкофе.
напиток,атакжеустановкикрепостии
●
Закрытьвыдвижнойотсекдля
количествакофедляданногонапитка.
молотогокофе21.
●
Нажатькнопку8
start
.
Кофезавариваетсяизатемналиваетсяв
Капучино Ë Í
чашку(чашки).
Указание:Дляприготовленияещеодной
À Á Ä Å Æ Ç
чашкикофеповторитьпроцесс.Еслив
течение90секундкофенеприготовляет-
ся,камеразавариванияавтоматически
Настройкиможноменять(см.раздел
опорожняетсявоизбежаниепере-
“Элементыуправления”).
полнения.Проводитсяпромывкаприбо-
●
Нажатькнопку8
start
.
ра.
●
Сначалавчашкуилистаканподается
молоко.Послеэтогозаваривается
кофе,которыйналиваетсявчашкуили
стакан.
117

ru
Приготовление напитков с молоком
Приготовление
●
ВыбратькофесмолокомÄ,
молочной пены и
маккиато
,капучиноÆ,или“My
Å
coffee” Ç,вращаяповоротный
теплого молока
переключатель6.
●
Погрузитьтрубкудлямолока10d
! Опасность ожога
насадкидляприготовлениямолочной
Насадкадляприготовлениямолочной
пены10вемкостьдлямолока33.
пены10сильнонагревается.После
●
Устройстворазливакофе9отвести
использованиядождатьсяохлаждения,
вправо,чтобыбылслышенщелчок
толькопослеэтогоприкасаться.
прификсации.
●
Предварительноподогретуючашкуили
Прибордолженбытьготовкработе.
стаканпоставитьподустройство
●
Погрузитьтрубкудлямолока10d
разливакофе9инасадкудля
насадкидляприготовлениямолочной
приготовлениямолочнойпены10.
пены10вемкостьдлямолока33.
●
Открытьвыдвижнойотсекдля
●
Подотверстиенасадкидляприготов-
молотогокофе21,нажавнанего.
лениямолочнойпены10поставить
●
Засыпатьнеболеедвухмерныхложек
предварительноподогретуючашкуили
14молотогокофе(без“горки”).
стакан.
●
Поворотнымпереключателем6вы-
Внимание: Незасыпатьнемолотые
братьнеобходимуюфункцию:молоч-
зернаилирастворимыйкофе.
наяпенаÈилитеплоемолокоÉ.
●
Закрытьвыдвижнойотсекдля
●
Нажмитекнопку8 start,приэтомиз
молотогокофе21.
отверстиявспенивателямолока10
●
Нажатькнопку8
start
.Сначалапро-
потечетмолочнаяпена(принажатии
исходитзабормолока,оноприго-
около40секунд)илитеплоемолоко
товляетсяиподаетсявчашкуили
(принажатииоколо60секунд).
стакан.Послеэтогозаваривается
●
Повторнымнажатиемкнопки8
start
молотыйкофе,которыйзатем
можнодосрочноостановитьпроцесс.
наливаетсявчашкуилистакан.
К сведению:Приприготовлениитеплого
Важно:Засохшиеостаткимолокаудаля-
молокаможетраздаватьсясвистящий
ютсяструдом,поэтомупослекаждого
звук.Ониобусловленытехническими
использованияпромыватьнасадкудля
особенностяминасадкидля
приготовлениямолочнойпены10 теплой
приготовлениямолочнойпены10.
водой (см.раздел“Очисткаустройства
приготовлениямолочнойпены”).
Совет:Длядостиженияоптимального
качествамолочнойпенырекомендуется
Указание:Дляприготовленияещеодной
использоватьхолодноемолокос
чашкиизмолотогокофе/сиспользова-
жирностью1,5%.
ниеммолокаповторитьпроцесс.Еслив
течение90секундкофенеприготовляет-
Важно:Засохшиеостаткимолокаудаля-
ся,камеразавариванияавтоматически
ютсяструдом,поэтомупослекаждого
опорожняетсявоизбежаниепереполне-
использованияпромыватьнасадкудля
ния.Проводитсяпромывкаприбора.
приготовлениямолочнойпены10 теплой
водой(см.раздел“Очисткаустройства
приготовлениямолочнойпены”).
118

ru
Приготовление горячей
Уход и ежедневная
воды
очистка
! Опасность ожога
! Опасность поражения током!
Насадкадляприготовлениямолочной
Перед очисткой отсоединить сетевой
пены10сильнонагревается.После
кабель от сети. Запрещается
использованиядождатьсяохлаждения,
погружать прибор в воду. Не
толькопослеэтогоприкасаться.
использовать паровые очистители.
●
Протритекорпусмягкойвлажнойтка-
Прибордолженбытьготовкработе.
нью.Запрещаетсяиспользованиегру-
●
Подотверстиенасадкидля
бойтканииличистящихсредств.
приготовлениямолочнойпены10
●
Емкостьдляводы11иблокзаварива-
поставитьпредварительноподогретую
ния24промыватьтольководой.
чашкуилистакан.
●
Крышкуотсекадляхранения26,
●
Поворотнымпереключателем6
заслонкуподдоновдлякапель27и
выбратьфункциюприготовления
изолирующуюоболочкуемкостидля
горячейводы(водыдлячая)
Ê
.
молока33разрешаетсяпротирать
●
Нажатькнопку8
start
,втечение
толькослегкавлажнойсалфеткой.
примерно40секундгорячаявода
Не мыть в посудомоечной машине.
поступаетизотверстиянасадкидля
●
Снятьрешеткуподустройствомразли-
приготовлениямолочнойпены10.
вакофе29 ирешеткуподнасадкойдля
●
Повторнымнажатиемкнопки8
start
приготовлениямолочнойпены30.
можнодосрочноостановитьпроцесс.
Поддондлякапельподустройством
разливакофе28иемкостьдлякофей-
Указание:Температуругорячейводы
нойгущи31вытянутьвперед,опорож-
можноустанавливать(см.раздел
нитьиочистить.Все детали можно
“Элементыуправления.Кнопка
°C
”).
также мыть в посудомоечной маши-
не.
●
Промойтевручнуюиливпосудомоеч-
ноймашинемернуюложку14,сохра-
няющуюароматкрышку16ивнутрен-
нюючастьемкостидлямолока33.
●
Внутреннеепространствоприбора
(нишидляподдонов)протеретьили
пропылесосить.
Важно:Поддондлясборакапель28
необходимоежедневноопорожнятьи
промыватьдляпредотвращения
образованияплесени.
Указание:Еслиприборвхолодном
состояниивключаетсякнопкой2 aили
послеприготовлениякофепереводитсяв
режимa,промывкаприборавыполняет-
сяавтоматически.Такимобразом,
системаочищаетсясамостоятельно.
119

ru
Очистка устройства приготовления
Очистка блока заваривания
молочной пены
(см. также краткую инструкцию)
Устройство приготовления молочной
Дополнительнокпрограммеавтомати-
пены 10 очищать после каждого
ческойочисткиблокзаваривания24сле-
использования!
дуетрегулярноизвлекатьдлячистки.
Возможнапредварительная
●
Нажатькнопку2
aдляпереключения
автоматическаяочисткаустройства
приборавэкономичныйрежим.
приготовлениямолочнойпены10.
●
Полностьюотключитьприборсетевым
●
Надисплее5выбратьсимвол
и
выключателем1 O / I,ниоднакнопка
Ì
нажатькнопку8
start
.
недолжнасветиться.
под вспениватель поставить
●
Сдвинутьвправокнопкуоткрывания
пустой стаКан, опустить в неГо
дверцы23иоткрытьдверцу22блока
всасывающую трубКу
start
заваривания24.
●
Поставитьпустойстаканпод
●
Красныйфиксатор24bнаблоке
устройствоприготовлениямолочной
заваривания24сдвинутьдоупора
пены10иконецтрубкидлямолока10d
влево.
опуститьвстакан.
●
Нажатьнакраснуюнажимнуюклавишу
●
Нажатькнопку8
start
.Автомат
24a,взятьблокзаваривания24запазы
автоматическинаполняетстаканводой
(рис. E)иосторожноизвлечь.
изатемвсасываетводучерезтрубку
●
Промытьблокзаваривания24под
длямолока10dдляпромывки
проточнойводой.
устройства.Процесспромывки
автоматическизавершаетсяпримерно
Важно: Неиспользоватьмоющих
через1минуту.
средствинемытьвпосудомоечной
●
Опорожнитьстаканиочиститьтрубку
машине.
длямолока10d.
●
Внутреннеепространствопротереть
влажнойтряпкой.
Крометого,следуетрегулярно
●
Просушитьблокзаваривания24и
тщательнопромыватьсистемуподачи
внутреннеепространство.
молока(впосудомоечноймашинеили
●
Вставитьблокзаваривания24до
вручную).
упора.
●
Красныйфиксатор24bсдвинутьдо
Разборка устройства приготовления
упоравправоизакрытьдверь22.
молочной пены 10 для очистки:
●
Устройствоприготовлениямолочной
пены10вытянутьизприборавперед.
Хранение
●
Отдельныедетали(рис. С)очистить
принадлежностей
мягкойщеткойсиспользованием
щелочногомоющегораствора.
Вполностьюавтоматическойкофе-
●
Вседеталипромытьчистойводойи
машинеэспрессопредусмотрены
просушить.
специальныеотсекидляхранения
●
Опятьсобратьвседеталиивставить
принадлежностейикраткойинструкции.
доупора.
●
Дляпомещениянахранениемерной
ложки14,трубкидлямолока10dи
К сведению:Вседеталинасадкидля
гибкойтрубки10cснятьемкостьдля
приготовлениямолочнойпены10можно
воды11ипоместитьдеталив
такжемытьвпосудомоечноймашине.
предусмотренныениши13.
120

ru
Длякраткойинструкциипредусмотрен
Сервисные программы
отдельныйотсекврайонеблока
заваривания24.
Совет:См.такжекраткуюинструкциюв
●
Открытьдверцу22блоказаваривания.
отсекедляхранения25.
●
Взятькраснуюкрышку26отсекадля
хранения25заязычокиснятьее.
Надисплее5сопределенной
●
Убратьвнутрькраткуюинструкцию,
регулярностьюпоявляютсянадписи
установитькрышку26изакрыть
провести деКальцинациюили
дверцублоказаваривания22.
необходима чистКа или
запустить caLc‘n‘cLean.
Вэтомслучаеследуетнезамедлительно
Советы по экономии
произвестиочисткуприбораилиудале-
ниенакипиприпомощисоответствую-
энергии
щейсервиснойпрограммы.Повыбору
–
Черезчас(заводскаянастройка)пол-
обеоперацииможнообъединитьвфунк-
ностьюавтоматическаякофе-машина
цииCalc‘n‘Clean(см.раздел
эспрессоавтоматическипереключает-
“Calc‘n‘Clean”).Принарушенииуказаний
сяв“экономичныйрежим”.В„эконо-
повыполнениюсервиснойпрограммы
мичномрежиме“приборрасходует
возможноповреждениеприбора.
оченьмалоэлектроэнергии.
Предварительноустановленноезначе-
Внимание
ние(одинчас)можноизменить(см.
При выполнении сервисной программы
раздел“Установкименю.автоотКл.
всегда использовать средства для
через”).
удаления накипи и очистки согласно
–
Еслиполностьюавтоматическаякофе-
инструкции.
машинаэспрессонеиспользуется,
Запрещается прерывать выполнение
отключитьприборсетевым
сервисной программы!
выключателем1 O / Iнапередней
Не пить применяемые жидкости!
сторонеприбора.
Не допускается использовать уксус,
–
Повозможностинепрерыватьпроцесс
средства на основе уксуса, лимонную
приготовлениякофеилимолочной
кислоту или средства на основе
пены.Преждевременноепрерывание
лимонной кислоты!
приготовлениякофеилимолочной
Запрещается загружать таблетки
пеныприводиткповышенномурасходу
или иные средства для удаления
энергииибыстромузаполнению
накипи в выдвижной отсек для
поддонадлякапель.
молотого кофе 21!
–
Регулярнопроводитьмероприятияпо
Для удаления накипи и очистки
удалениюнакипи,чтобыпредот-
использовать только прилагаемые
вращатьобразованиеизвестковых
таблетки. Они были разработаны
отложений.Известковыеотложения
специально для этой полностью
ведуткповышенномурасходуэнергии.
автоматической кофе-машины
эспрессо.
Специально разработанные для
удаления накипи и очистки таблетки
можно приобрести через торговую
сеть или сервисную службу.
121

ru
Номерзаказа Торговая
Сервисная
К сведению:Еслиактивенфильтрдля
сеть
служба
воды34,появитсясоответствующее
указаниеудалитьфильтр34,послеэтого
Таблетки
TZ60001 310575
повторнонажатьнакнопку8
start
.
дляочистки
снять фильтр для воды
start
Таблеткидля
TZ60002 310967
удаления
добавить 0,5 л воды + средство
накипи
для деКальцинации
start
Важно:Есливемкостьдляводы11
●
Теплуюводузалитьвпустуюемкость
установленфильтр34,обязательно
дляводы11доотметки“0,5l”и
удалитьегопередзапускомсервисной
растворитьвводе2таблеткиSiemens
программы.
дляудалениянакипи.
●
Нажатькнопку8
start
,длительность
выполненияпрограммы
Удаление накипи
приблизительно20минут.
работает проГрамма
и
дет деКальцинация
Эспрессо Ë Í
слишКом мало средства
для деКальцинации
провести деКальцинацию
д
обавить ср-во
КнопКа i 3 сеК.
К сведению:Есливемкостидляводы
11недостаточносредствадляудаления
накипи(декальцинации),появляется
соответствующееуказание.Добавить
Вовремявыполненияотдельных
средстводляудалениянакипии
операцийпоудалениюнакипикнопка8
повторнонажатькнопку8
start
.
start
мигает.Цифрывверхусправа
показываютпродвижениепроцесса.
промыть и заполнить Контейнер
для воды
start
●
Кнопку7 jудерживатьнажатой
●
Промытьемкостьдляводы11и
минимум3секунды.
заполнитьееводойдоотметки“max”.
деКальцинация
start
●
Нажатькнопку8
start
,программа
●
Нажатькнопку8
start
,сообщенияна
удалениянакипидлится
дисплее5проведутпопунктам
приблизительно1минуту,послечего
программы.
выполняетсяпромывка.
опустошить поддон для Капель
работает проГрамма
у
становить поддон для Капель
идет деКальцинация
●
Опорожнитеиустановитеподдондля
о
пустошить поддон для Капель
сборакапель28.
у
становить поддон для Капель
●
Опорожнитеиустановитеподдондля
установить ёмКость 0,5 л под
сборакапель28.
вспениватель молоКа
start
Приборзавершилпрограммуудаления
●
Установитьемкостьобъемоммин.
накипиисноваготовкработе.
0,5лподнасадкудляприготовления
молочнойпены10.
●
Нажатькнопку 8
start
.
122
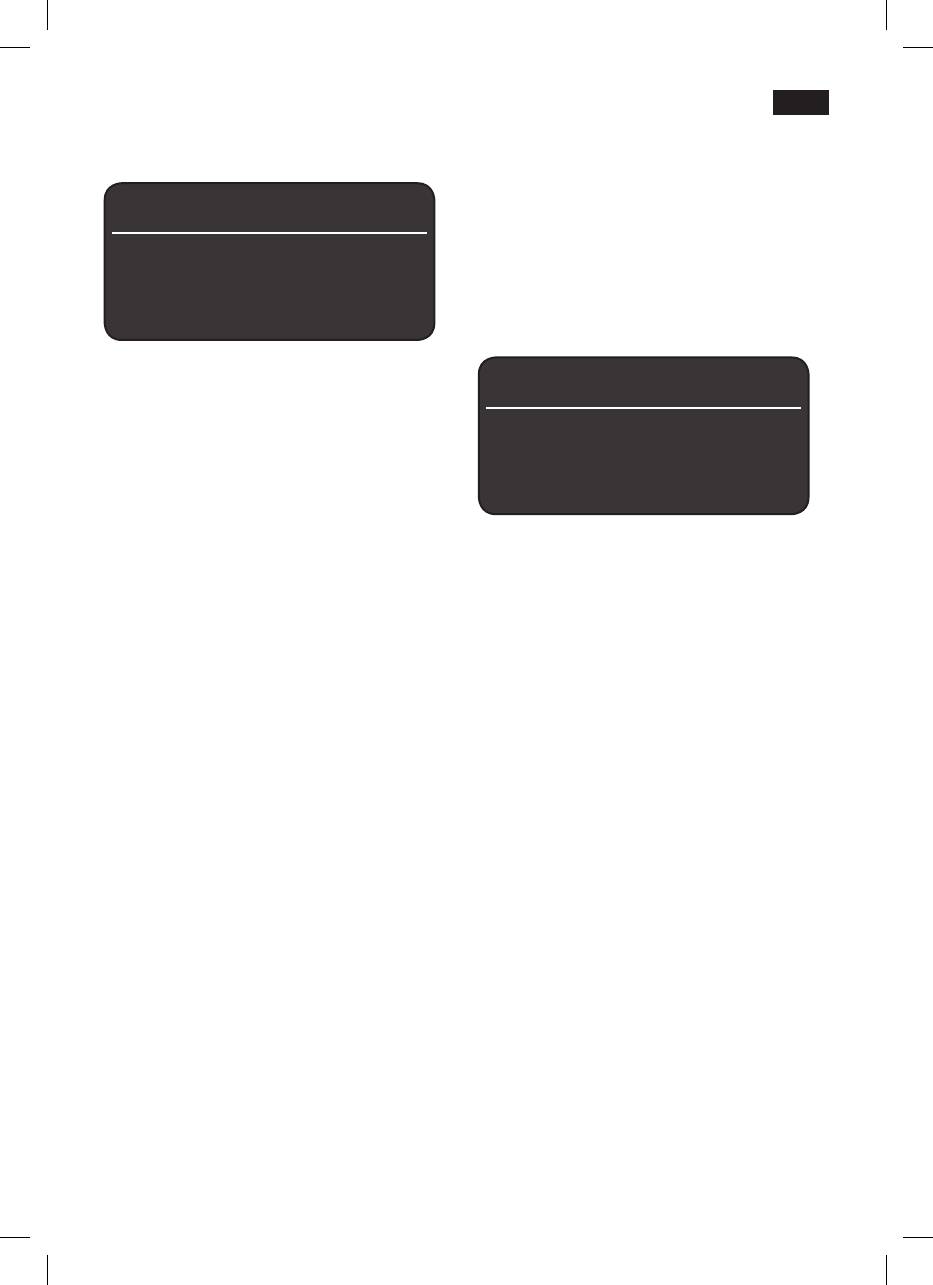
ru
работает проГрамма идет очистКа
Очистка
о
пустошить поддон для Капель
у
становить поддон для Капель
●
Опорожнитеиустановитеподдондля
Эспрессо Ë Í
сборакапель28.
Приборзавершилпрограммуочисткии
необходима чистКа
сноваготовкработе.
КнопКа i 3 сеК.
Calc‘n‘Clean
Вовремявыполненияотдельных
операцийпоочисткекнопка8
start
Эспрессо Ë Í
мигает.Цифрывверхусправа
показываютпродвижениепроцесса.
запустить caLc‘n‘cLean
●
Заполнитьемкостьдляводы11до
отметки“max”.
КнопКа i 3 сеК.
●
Кнопку7 jудерживатьнажатой
минимум3секунды.
очистКа
start
Calc‘n‘Cleanобъединяетфункцииудале-
●
Нажатькнопку8
start
,сообщенияна
ниянакипииочистки.Еслиприближается
дисплее5ведутпопунктам
времявыполненияобеихпрограмм,пол-
программы.
ностьюавтоматическаякофе-машина
эспрессоавтоматическипредлагаетэту
опустошить поддон для Капель
сервиснуюпрограмму.
у
становить поддон для Капель
Вовремявыполненияотдельныхопера-
●
Опорожнитеиустановитеподдондля
цийпрограммыCalc‘n‘Cleanкнопка8
сборакапель28,дваждыпромойте
start
мигает.Цифрывверхусправапока-
устройство.
зываютпродвижениепроцесса.
●
Кнопку7 jудерживатьнажатой
повернуть блоК подачи Кофе
минимум3секунды.
●
Устройстворазливакофе9отвести
влево,чтобыбылслышенщелчокпри
caLc‘n‘cLean
start
фиксации.
●
Нажатькнопку8
start
,сообщенияна
работает проГрамма идет очистКа
дисплее5ведутпопунктам
программы.
отКрыть лотоК с порошКом
●
Открытьвыдвижнойотсекдля
опустошить поддон для Капель
молотогокофе21,нажавнанего.
у
становить поддон для Капель
●
Опорожнитеиустановитеподдондля
добавить чистящие таблетКи
сборакапель28.
s
ieMens и заКрыть лотоК
●
Устройстворазливакофе9отвести
●
Добавитьоднучистящуютаблетку
вправо,чтобыбылслышенщелчокпри
Siemensизакрытьвыдвижнойотсек21.
фиксации.
●
Установитьемкостьобъемоммин.1л
наж ать start
поднасадкудляприготовления
●
Нажатькнопку8
start
,длительность
молочнойпены10.
выполненияпрограммыочистки
●
Нажатькнопку8
start
;прибордважды
приблизительно7минут.
проводитпромывку.
123

ru
работает проГрамма идет очистКа
работает проГрамма
отКрыть лотоК с порошКом
и
дет деКальцинация
●
Открытьвыдвижнойотсекдля
работает проГрамма идет очистКа
молотогокофе21,нажавнанего.
опустошить поддон для Капель
у
становить поддон для Капель
добавить чистящие таблетКи
●
Опорожнитеиустановитеподдондля
s
ieMens и заКрыть лотоК
сборакапель28.
●
Добавитьоднучистящуютаблетку
Приборзавершилпрограммуудаления
Siemensввыдвижнойотсек21и
накипииочисткиисноваготовкработе.
закрытьего.
Важно:Есликакая-либосервисная
К сведению:Еслиактивенфильтрдля
программабылапрервана,например,из-
воды34,появитсяуказаниеудалить
заотключенияэлектроснабжения,
фильтр34;послеэтогоповторнонажать
действоватьследующимобразом:
накнопку8
start
.
●
Промытьемкостьдляводы11и
снять фильтр для воды
start
заполнитьееводойдоотметки“max”.
●
Нажатькнопку8
start
,программа
добавить 0,5 л воды + средство
очисткидлитсяприблизительно3
для деКальцинации
start
минутыипромываетприбор.
●
Теплуюводузалитьвпустуюемкость
дляводы11доотметки“0,5l”ираство-
работает проГрамма идет очистКа
ритьвводе2таблеткиSiemensдля
опустошить поддон для Капель
удалениянакипи
у
становить поддон для Капель
●
Нажатькнопку8
start
,длительность
●
Опорожнитеиустановитеподдондля
выполненияпрограммыприблизитель-
сборакапель28.
но20минут.
Приборсноваготовкработе.
работает проГрамма
и
дет деКальцинация
слишКом мало средства для
деКальцинации
д
обавить ср-во
К сведению: Есливемкостидляводы
11недостаточносредствадляудаления
накипи(декальцинации),появляется
соответствующееуказание.Добавить
средстводляудалениянакипии
повторнонажатькнопку8
start
.
промыть и заполнить Контейнер
для воды
start
●
Промытьемкостьдляводы11и
заполнитьееводойдоотметки“max”.
●
Нажатькнопку8
start
,программа
удалениянакипидлитсяприбли-
зительно1минуту,затемвыполняется
программа
очистки-прибл.7минут-и
промывка.
124
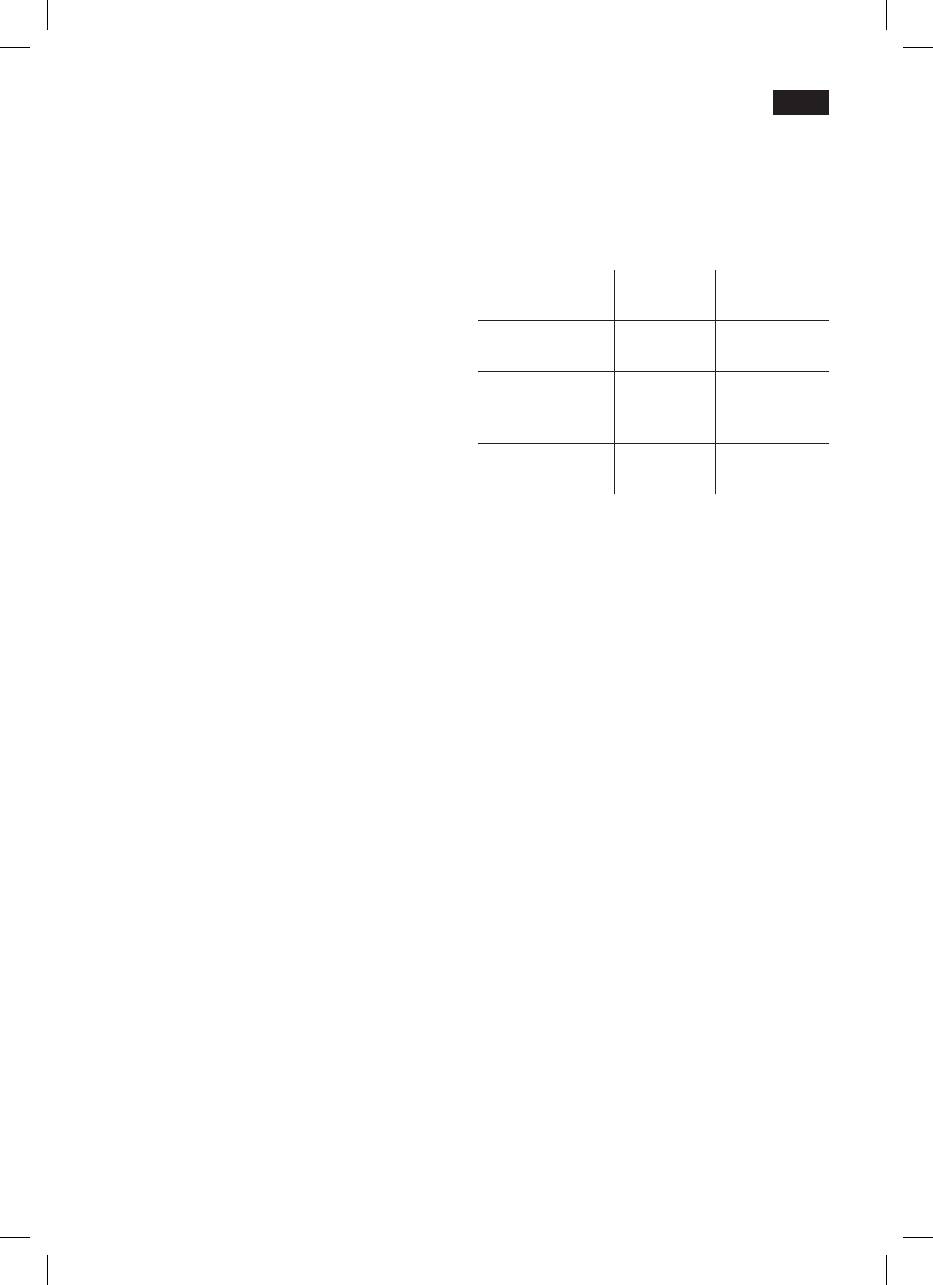
ru
Защита от замерзания
Принадлежности
! Чтобы избежать повреждений в
Черезторговуюсетьилисервисную
результате воздействия холода во
службуможноприобрестиследующие
время транспортировки или хранения,
принадлежности.
прибор необходимо предварительно
полностью опорожнить.
Номерзаказа Торговая
Сервисная
сеть
служба
К сведению:Прибордолженбытьготов
Таблетки
TZ60001 310575
кработе,емкостьдляводы11должна
дляочистки
бытьзаполнена.
●
Поднасадкудляприготовления
Таблеткидля
TZ60002 310967
молочнойпены10установить
удаления
большую,узкуюемкость.
накипи
●
Выбратьфункциюприготовления
Фильтрдля
TZ70003 467873
“молочнойпены”È,запуститьееи
воды
подождатьпримерно15секунд,пока
будетвыходитьпар.
●
Отключитьприборсетевым
выключателем1 O / I.
Условия гарантийного
●
Опорожнитеемкостьдляводы11и
поддондлясборакапель28.
обслуживания
Получитьисчерпывающуюинформацию
обусловияхгарантийногообслуживания
ВыможетевВашемближайшем
Утилизация A
авторизованномсервисномцентреилив
Данныйприборимеетмаркировку
сервисномцентреотпроизводителя
согласноевропейскойдирективе
ООО“БСХБытоваяТехника”,атакже
2002/96/ЕСпоутилизациистарых
найтивфирменномгарантийномталоне,
электрическихиэлектронныхприборов
выдаваемомприпродаже.
(waste electrical and electronic equipment-
WEEE).Этойдирективойопределены
Мыоставляемзасобойправона
действующиенавсейтерриторииЕС
внесениеизменений.
правилаприемаиутилизациистарых
приборов.Информациюобактуальных
возможностяхутилизацииВыможете
получитьвмагазине,вкоторомВы
приобрелиприбор.
125
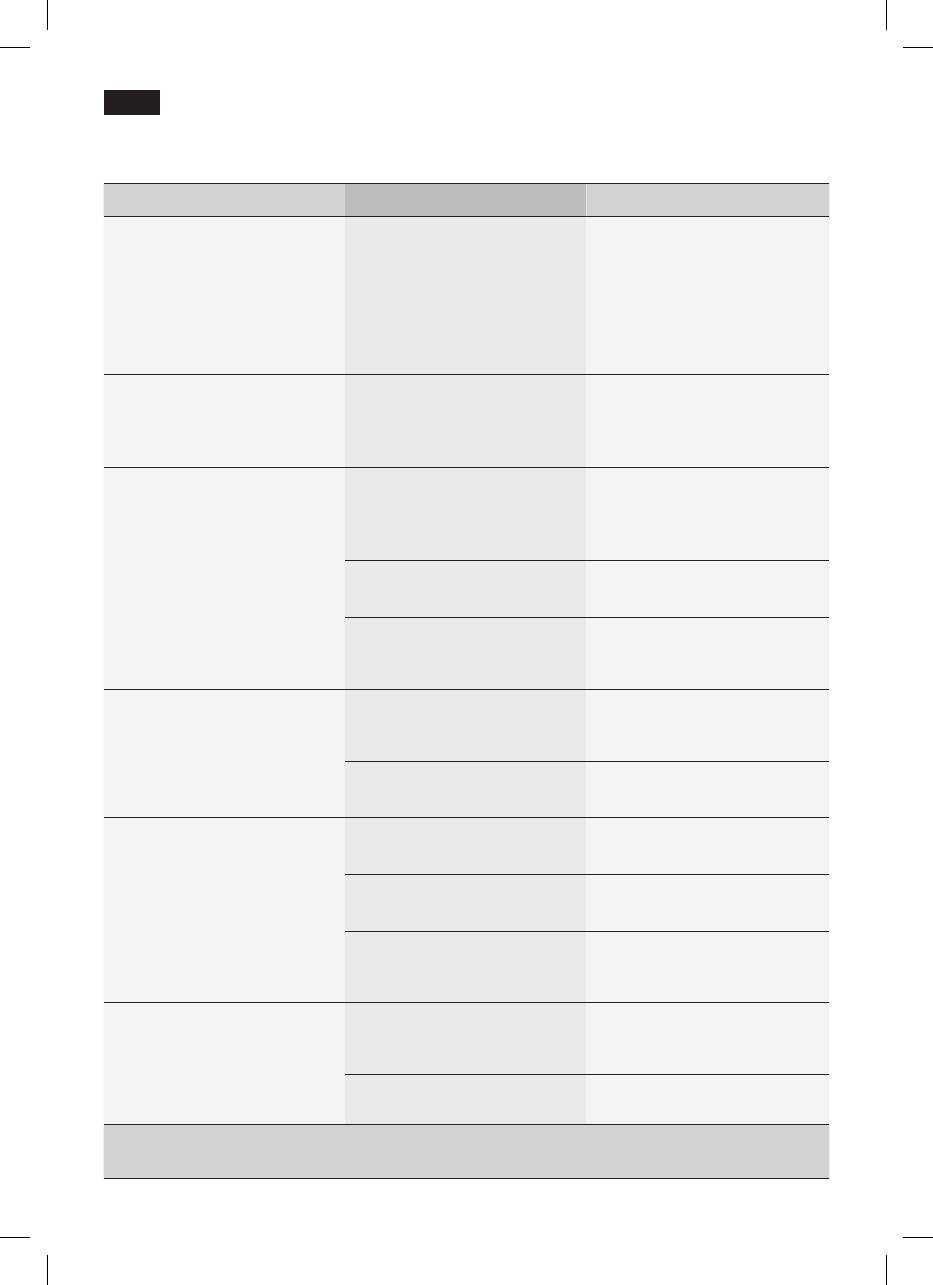
ru
Самостоятельное устранение небольших проблем
Проблема Причина Устранение
Сообщениенадисплее
Зернанепроваливаютсяв
Слегкапостучатьпо
“
заполнить отсеК для
кофемолку
емкостидлякофейных
Кофейных зерен”,хотя
(слишкоммаслянистые
зерен15.Попробовать
емкостьдлякофейных
зерна).
другойсорткофе.
зерен15заполненаили
Пустуюемкостьдля
Кофемолканеразмалы-
кофейныхзерен15
ваеткофейныезерна.
протеретьсухойтканью.
Невозможноприготовле-
Насадкадляприготовле-
Очиститьнасадкудля
ниегорячейводы(для
ниямолочнойпены10или
приготовлениямолочной
чая).
креплениенасадкизасо-
пены10иликрепление
рены.
длянасадки.
Слишкоммалоилинет
Насадкадляприготовле-
Очиститьнасадкудля
молочнойпены
ниямолочнойпены10или
приготовлениямолочной
или
креплениенасадкизасо-
пены10иликрепление
Насадкадляприготовле-
рены.
длянасадки.
ниямолочнойпены10не
Неподходящеемолоко. Использоватьмолокос
всасываетмолоко.
жирностью1,5%.
Насадкадляприготовле-
Правильнособратьнасад-
ниямолочнойпены10
кудляприготовлениямо-
неправильнособрана.
лочнойпены10.
Кофепоступаетпокаплям
Слишкоммелкийпомол.
Установитьболеегрубый
иливообщенетечет.
Кофеслишкомтонкого
помол.Использоватькофе
помола.
болеегрубогопомола.
Сильныеизвестковые
Очиститьприборот
отложениянаприборе.
накипи.
Кофебезтипичнойпенки. Неподходящийсорткофе. Использоватьдругойсорт
кофе.
Используютсянесвеже-
Использоватьсвежие
обжаренныезерна.
кофейныезерна.
Степеньпомолане
Установить
тонкийпомол.
соответствуетсорту
кофейныхзерен.
Кофе
слишком“кислый”. Установленслишком
Установитьболеетонкий
грубыйпомолиликофе
помолилииспользовать
слишкомгрубогопомола.
кофеболеетонкогопомола.
Неподходящийсорткофе. Использоватькофеболее
темнойобжарки.
Если не удается решить проблемы, обязательно свяжитесь с “горячей
линией”!
126

ru
Самостоятельное устранение небольших проблем
Проблема Причина Устранение
Кофеслишком“горький”. Установленслишком
Установитьболеегрубый
тонкийпомолиликофе
помолилииспользовать
слишкомтонкогопомола.
кофеболеегрубогопомола.
Неподходящийсорткофе. Использоватьдругойсорт
кофе.
Сообщениенадисплее
Сбойприбора. Свяжитесьс“горячей
неисправность
линией”.
позвоните в службу
техничесКой
поддержКи.
Фильтрдляводы34 не
Фильтрдляводы34не
Фильтрдляводы34уста-
держитсявемкостидля
вошелвпазы.
новитьвместеподсоеди-
воды11.
нениякемкостидляводы,
сусилиемнажавнанего,
чтобыбылслышенщелчок
прификсации.
Кофейнаягущане
Установленаслишком
Установитеболеегрубую
уплотненаислишком
мелкаяилигрубая
илимелкуюстепень
влажная.
степеньпомола,или
помолаилииспользуйте2
слишкоммалобъем
мерныхложкимолотого
молотогокофе.
кофе.
Сообщениенадисплее
Загрязненблок
Очиститеблок
проверить заварочный
заваривания.
заваривания.
блоК
Слишкоммногомолотого
Очиститеблок
кофевблоке
заваривания.(Следует
заваривания.
закладыватьнеболее2
мерныхложекмолотого
кофе.)
Значительныеотличияв
Вприбореобразовалась
Очиститеприборотнаки-
качествекофеили
накипь.
писпомощьюдвухтабле-
молочнойпены.
токдляудалениянакипи.
Капливодынавнутренней
Поддондлясборакапель
Извлекайтеподдондля
поверхностикорпуса
извлеченслишкомрано.
сборакапельчерез
прибораприизвлечении
несколько
секунд
после
поддонадлясборакапель.
последнего
приготовлениянапитка.
Если не удается решить проблемы, обязательно свяжитесь с “горячей
линией”!
127

128
10/08
DE Deutschland, Germany
BA Bosnia-Herzegovina,
BSH Hausgeräte Service GmbH
Bosna i Hercegovina
Zentralwerkstatt
"HIGH" d.o.o.
Kleine Hausgeräte
Odobašina 57
Trautskirchener Straße 6 – 8
71000 Sarajewo
90431 Nürnberg
Info-Line: 061 10 09 05
Online Auftragsstatus, Pickup
Fax: 033 21 35 13
Service für Kaffeevollautomaten
mailto:delicnanda@hotmail.com
und viele weitere Infos unter:
BE Belgique, België, Belgium
www.siemens-hausgeraete.de
BSH Home Appliances S. A.
Reparaturservice*
(Mo-Fr: 8.00-18.00 h erreichbar):
Tel.: 01801 33 53 03
mailto:cp-servicecenter@
bshg.com
Ersatzteilbestellung*
(365 Tage rund um die Uhr
erreichbar):
Tel.: 01801 33 53 04
Fax: 01801 33 53 08
mailto:spareparts@bshg.com
*) 3,9 Ct./Min. aus dem Festnetz
der T-Com, Mobil ggfs.
abweichend
AE United Arab Emirates,
ΓΪΤ˷ΘϤϟ Δ˷ϴΑήόϟ ΕέΎϣϹ
BSH Home Appliances FZE
Round About 13,
Plot Nr MO-0532A
17312 Jebel Ali Free Zone -
Dubai
Tel.: 04 881 4401
Fax: 04 881 4805
www.siemens-home.ae
AT Österreich, Austria
BSH Hausgeräte
Gesellschaft mbH
Werkskundendienst
für Hausgeräte
Quellenstrasse 2
1100 Wien
Tel.: 0810 240 260
innerhalb Österreichs
zum Regionaltarif
Tel.: 0810 700 400
Hotline für Espresso-Geräte
zum Regionaltarif
Fax: 01 605 75 51 212
mailto:hausgeraete.ad@bshg.com
www.hausgeraete.at
AU Australia
BSH Home Appliances Pty Ltd
7-9 Arco Lane
HEATHERTON, Victoria 3202
Tel.: 1300 368 339
Fax: 1300 306 818
valid only in AUS
mailto:bshau-as@bshg.com
A
CZ ýeská Republika,
Czech Republic
BSH domácí spotĜebiþe s.r.o.
Firemní servis domácích
spotĜebiþĤ
PekaĜská 10b
15000 Praha 5
Tel.: 0251 095 546
Fax: 0251 095 549
www.siemens-spotrebice.cz
venue du Laerbeek 74
DK Danmark, Denmark
Laarbeeklaan 74
Siemens Hvidevareservice
1090 Bruxelles – Brussel
BSH Hvidevarer A/S
Tel.: 070 222 142
Telegrafvej 4
Fax: 024 757 292
2750 Ballerup
mailto:bru-repairs@bshg.com
Tel.: 44 89 89 85
www.siemens.be
Fax: 44 89 89 86
mailto:BSH-Service.dk@
BG Bulgaria
BSHG.com
EXPO2000-service
www.siemens-hvidevarer.com
Ks. Ljulin, bl.549/B - patrer
1359 Sofia
EE Eesti, Estonia
Tel.: 02 826 0148
SIMSON OÜ
Fax: 02 925 0991
Raua 55
mailto:service@expo2000.bg
10152 Tallinn
Tel.: 0627 8730
BH Bahrain,
ϦϳήΤΑ
Fax: 0627 8733
Khalaifat Est.
mailto:teenindus@simson.ee
P.O. BOX 5111
Manama
ES España, Spain
Tel.: 1759 2233
BSH Electrodomésticos
Fax: 1759 3340
España S. A.
mailto:info@khalaifat.com
Servicio BSH al Cliente
Polígono Malpica, Calle D,
CH Schweiz, Suisse,
Parcela 96 A
Svizzera, Switzerland
50016 Zaragoza
BSH Hausgeräte AG
Tel.: 902 11 88 21
Werkskundendienst für
mailto:CAU-Siemens@bshg.com
Hausgeräte
www.siemens-ed.com
Fahrweidstrasse 80
8954 Geroldswil
FI Suomi, Finland
www.siemens-hausgeraete.ch
BSH Kodinkoneet Oy
mailto:ch-info.hausgeraete@
Sinimäentie 8, PL 66
bshg.com
02631 Espoo
Service Tel.: 0848 840 040
Tel.: 020 7510720
Service Fax: 0848 840 041
Fax: 020 7510790
mailto:ch-reparatur@bshg.com
www.siemens-kodinkoneet.com
Ersatzteile Tel.: 0848 880 080
FR France
Ersatzteile Fax: 0848 880 081
BSH Electroménager S.A.S.
mailto:ch-ersatzteil@bshg.com
Service Après-Vente
50 rue Ardoin – BP 47
CY Cyprus, ȀȪʌȡȠȢ
93401 Saint-Ouen cedex
BSH Ikiakes Syskeves-Service
39, Arh. Makaariou III Str
Service Dépannage à Domicile:
2407 Egomi/Nikosia (Lefkosia)
0 825 398 110
(0,15 € TTC/mn)
Tel.: 022 81 95 50
Service Consommateurs:
Fax: 022 65 81 28
0 892 698 110 (0,34 € TTC/mn)
mailto:bsh.service.cyprus@
Service Pièces Détachées et
cytanet.com.cy
A
Kundendienst-Zentren
•
Central-Service-Depots
•
Service Après-Vente
•
Servizio Assistenza
•
Centrale Servicestation
•
Asistencia técnica
•
Servicevaerkter
•
Apparatservice
•
Huolto
ccessoires:
0 892 698 009
(0,34 € TTC/mn)
mailto:soa.consommateurs@
bshg.com
www.siemens-
electromenager.com

GB Great Britain
HU Magyarország, Hungary
BSH Home Appliances Ltd.
BSH Háztartási Készülék
BSH Appliance Care,
Kereskedelmi Kft.
Service Division
Háztartási gépek márkaszervize
Grand Union House
Királyhágó tér 8-9.
Old Wolverton Road
1126 Budapest
www.bshappliancecare.co.uk/
Hibabejelentés
Siemens
Tel.: 01 489 5461
Service Requests (nationwide)
Fax: 01 201 8786
Tel.: 0844 8928999
mailto:hibabejelentes@bsh.hu
mailto:mks-servicerequest@
bshg.com
Spares and Accessories
Tel.: 0844 8928921
mailto:mks-spares@bshg.com
Product Advice
Tel.: 0844 8928927
mailto:mks-productadvice@
bshg.com
Head office
Tel.: 0844 8928922
Fax: 01908 328670
GR Greece, ǼȜȜȐȢ
BSH Ikiakes Siskeves A. B. E.
Kentriko Ipokatastima Service
17 km E.O. Athinon-Lamias &
Potamou 20
145 64 Kifisia
Griechenland – Athen
Tel.: 2104 277 701
Fax: 2104 277 669
Nord-Griechenland – Thessaloniki
Tel.: 2310 479 298
Fax: 2310 475 574
Sued-Griechenland –
Heraklion/Kreta
Tel.: 2810 325 403
Fax: 2810 324 585
Zentral-Griechenland – Patras
Tel.: 2610 330 478
Fax: 2610 331 832
mailto:cs_gr_helpdesk@bshg.com
www.siemens-oikiakes.gr
HK Hong Kong, 㚅
BSH Home Appliances Limited
Unit 1 & 2, 3th Floor
North Block, Skyway House
3 Sham Mong Road
Tai Kok Tsui, Kowloon
Hongkong
Tel.: 2565 6151
Fax: 2565 6252
mailto:service.siemens@
bshg.com
HR Hrvatska, Croatia
Gemma B&D d.o.o.
Prisavlje 2
10000 Zagreb
Tel.: 01 6195 582
Fax: 01 6195 582
mailto:servis@gemma.hr
129
A
lkatrészrendelés
Tel.: 01 489 5463
Fax: 01 201 8786
mailto:alkatreszrendeles@bsh.hu
www.siemens-haztartasi-
gepek.hu
IE Republic of Ireland
BSH Home Appliances Ltd.
BSH Appliance Care,
Service Division
Unit F4, Ballymount Drive
Ballymount Industrial Estate
Walkinstown
Dublin 12
www.bshappliancecare.ie/
siemens
Service Requests, Spares and
A
LB Lebanon, ϥΎѧѧѧѧѧѧѧѧѧϨΒϟ
Teheni, Hana & Co.
Boulevard Dora 4043 Beyrouth
P.O. Box 90449
Jdeideh 1202 2040
Tel.: 01 255 211
Fax: 01 257 359
mailto:Info@Teheni-Hana.com
LT Lietuva, Lithuania
Ogmios pulsas Ltd.
Lukšio g. 23
09132 Vilnius
Tel.: 05 274 1788
Fax: 05 274 1760
ccessories
Tel.: 01450 2655
Fax: 01450 2520
IL Israel, ʬʠʸʹʩ
C/S/B Home Appliance Ltd.
Uliel Building
2, Hamelacha St.
Industrial Park North
71293 Lod
Tel.: 08 9777 222
Fax: 08 9777 245
mailto:csb-serv@zahav.net.il
IS Iceland
Smith & Norland hf.
Noatuni 4
105 Reykjavik
Tel.: 0520 3000
Fax: 0520 3011
www.sminor.is
IT Italia, Italy
BSH Elettrodomestici S.p.A.
Via. M. Nizzoli 1
20147 Milano (MI)
Numero verde 800 018346
mailto:mil-assistenza@bshg.com
www.siemens-elettrodomestici.it
KZ Kazakhstan, Ԕɚɡɚԕɫɬɚɧ
Kombitechnocenter
Seyfulina No:422
480096 Almaty
Tel.: 272 793 333
Fax: 272 798 383
mailto:cts_pavel@bk.ru
mailto:servisotarnyba-bt@ogmios.lt
www.ogmios.lt
LU Luxembourg
BSH électroménagers S. A.
20, Rue des Peupliers
2328 Luxembourg-Hamm
Tel.: 43843 505
Fax: 43843 525
mailto:service-electromenager@
bsh.lu
www.siemens.lu
LV Latvija, Latvia
Sia Olimpeks Elektroniks Ltd.
Bullu street 70c
1067 Riga
Tel.: 07 42 41 37
mailto:bt@olimpeks.lv
SIA Baltijas servisa centrs
Brivibas gatve 201
1039 Riga
Tel.: 670 705 20
Tel.: 670 705 36
Fax: 670 705 24
mailto:domoservice@elkor.lv
www.servisacentrs.lv
ME Crna Gora, Montenegro
Elektronika komerc
Ulica Slobode 17
84000 Bijelo polje
Tel.: 084 432 575
Fax: 084 432 575
mailto:elektronikabsh@cg.yu
MK Macedonia, Makeɞoɧɢɹ
RIMEKO
Partizanski odredi 62 / 13
1000 Skopje
Tel./Fax: 02 3077 744
Tel./Fax: 02 3069 314
Tel./Fax: 02 2549 890
Tel./Fax: 02 2549 775
mailto:rimeko@mt.net.mk
10/08

MT Malta
130
A
plan Limited
A
plan Centre
B – Kara By Pass
B – Kara BKR
Tel.: 021 48 05 90
Fax: 021 48 05 98
mailto:lapap@aplan.com.mt
NL Nederlande, Netherlands
Siemens Nederland N.V.
Werner von Siemensstraat 1
2712 PN Zoetermeer
mailto:infocentrum.nl@
siemens.com
www.siemens.nl/huishouden
Storingsmelding:
Tel.: 070 333 1234
Fax: 070 333 3978
mailto:cp.storingsmelding.nl@
siemens.com
Onderdelenverkoop:
Tel.: 070 333 1234
Fax: 070 333 3980
mailto:CP.Spareparts.nl@
siemens.com
NO Norge, Norway
BSH Husholdningsapparater A/S
Grensesvingen 9
0661 Oslo
Tel.: 22 66 06 00
Fax: 22 66 05 50
5052 Bergen
Tel.: 55 59 68 80
Fax: 55 59 68 90
7037 Trondheim
Tel.: 73 95 23 30
Fax: 73 95 23 40
mailto:hjemmeservice@bshg.com
www.siemens-hvitevarer.com
NZ New Zealand
BSH Home Appliances Ltd.
New Zealand Branch
Building C, 39-43 Apollo Drive
Mairangi Bay, Auckland 1310
Tel.: 09 478 6158
Fax: 09 478 2914
PL Polska, Poland
BSH SprzĊt Gospodarstwa
Domowego Sp. z o.o.
A
PT Portugal
SK Slovensko, Slovakia
BSHP Electrodomésticos, Lda.
Technoservis Bratislava
Rua Alto do Montijo, nº 15
Trhová 38
2790-012 Carnaxide
84108 Bratislava – Doubravka
Tel.: 21 4250 700
Tel.: 02 6446 3643
Fax: 21 4250 701
Fax: 02 6446 3643
mailto:careline.portugal@
TR Türkiye, Turkey
bshg.com
BSH Ev Aletleri Sanayi
www.electrodomesticos.
ve Ticaret A. S.
siemens.pt
Cakmak Mahallesi,
RO România, Romania
Balkan Caddesi No: 51
BSH Electrocasnice srl.
34770 Ümraniye, Istanbul
Sos. Bucuresti-Ploiesti,
Tel.: 0 216 444 6688
nr.17-21, sect.1
Fax: 0 216 528 9188
13682 Bucuresti
mailto:careline.turkey@bshg.com
Tel.: 0801 000 110
www.siemensevaletleri.com
Fax: 021 203 9731
UA Ukraine, ɍɤɪɚʀɧɚ
mailto:service.romania@
Ʉɢɟɜ
bshg.com
ɋɉ "Ɍɪɚɧɫ-ɋɟɪɜɢɫ"
RU Russia, Ɋɨɫɫɢɹ
ɬɟɥ.: 044 568 51 50
OOO "Ȼɋɏ Ȼɵɬɨɜɚɹ ɬɟɯɧɢɤɚ"
ɈɈɈ "Ⱦɨɣɱɷɥɟɤɬɪɨɫɟɪɜɢɫ"
ɋɟɪɜɢɫ ɨɬ ɩɪɨɢɡɜɨɞɢɬɟɥɹ
ɬɟɥ.: 044 467 80 46
Ɇɚɥɚɹ Ʉɚɥɭɠɫɤɚɹ 19
ɈɈɈ "Ɍɪɢ Ɉ ɋɟɪɜɢɫ"
119071 Ɇɨɫɤɜɚ
ɬɟɥ.: 044 565 93 99
ɬɟɥ.: 495 737 2962
www.siemens-pt.com.ua
ɮɚɤɫ: 495 737 2982
mailto:mok-kdhl@bshg.com
XK Kosovo
www.bsh-service.ru
NTP GAMA
Rruga Mag Prishtine-Ferizaj
SE Sverige, Sweden
70000 Ferizaj
BSH Hushållsapparater AB
Tel.: 038 502 448
Röntgenvägen 1
Fax: 029 021 434
Solna
mailto:gama_mb@yahoo.com
Tel.: 087 341 310
Fax: 087 341 321
XS Srbija, Serbia
SZR "SPECIJALELEKTRO"
41104 Göteborg
Bulevar Milutina Milankoviüa 34.
Tel.: 031 636 990
11070 Novi Beograd
Fax: 031 154 820
Tel.: 011 2147 110
21376 Malmö
Tel.: 011 2139 552
Tel.: 040 227 880
Fax: 011 2139 689
Fax: 040 224 353
mailto:spec.el@eunet.yu
mailto:service.stockholm@
ZA South Africa
bshg.com
BSH Home Appliances (Pty) Ltd.
www.siemens-hushall.com
15 th Rd., Randjespark
SG Singapore, ᣂടပ
Private Bag X36, Randjespark
BSH Home Appliances (SEA)
1685 Midrand – Johannesburg
Pte. Ltd.
Tel.: 086 002 6724
38C-38D Jalan Pemimpin
Fax: 011 265 7852
577180 Singapore
mailto:service@bsh.co.za
Tel.: 6350 5000
www.siemensappliances.co.za
Fax: 6350 5050
l. Jerozolimskie 183
mailto:bshsgp.service@
02-222 Warszawa
bshg.com
Centrala Serwisu:
Tel.: 0801 191 534
SI Slovenija, Slovenia
Fax: 022 57 27 709
BSH Hišni aparati d.o.o.
mailto:Serwis.Fabryczny@
Litostrojska 48
bshg.com
1000 Ljubljana
www.siemens-agd.pl
Tel.: 01 583 08 87
Fax: 01 583 08 89
mailto:informacije.servis@
bshg.com
www.siemens-hisniaparati.si
10/08
Siemens Info Line (Mo-Fr: 8.00-18.00 Uhr erreichbar)
Für Produktinformationen sowie Anwendungs-
und Bedienungsfragen zu kleinen Hausgeräten:
Tel.: 01805 547436* oder
unter siemens-info-line@bshg.com
*
) 0,14 EUR/Min aus dem Festnetz der T-Com,
Mobil ggfs. abweichend. Nur für Deutschland gültig!
5090 xxx xxx/8801
de, en, fr, it, nl, da, no, sv, fi,
es, pt, el, tr, pl, hu, bg, ru, ar

5090472695
TK76 de/en/fr/it/nl/ru


