Siemens IC60: instruction
Class: Safety, Home Security
Type:
Manual for Siemens IC60
Table of contents
www.siemens.com/homesecurity
The information in this document contains general descriptions of technical
options available, which do not always have to be present in individual cases.
The required features should therefore be specified in each individual case at
the time of closing the contract.
Subject to change • Order no. A6V10087917 • © Siemens Switzerland Ltd
Building Technologies
IC60 – Security System
Quick Start Guide (EN)
Kurzanleitung (DE)
Guía rápida (ES)
Manual de iniciação rápida (PT)
Guida rapida (IT)
Guide de démarrage rapide (FR)
Hurtigstartveiledning (NO)
Quickstartvejledning (DA)
Beknopte handleiding (NL)
Pikaopas (FI)
Snabbstartguide (SV)
Hızlı Başlangıç Kılavuzu (TR)
Stručná příručka (CS)
Skrócona instrukcja (PL)
Краткое руководство (RU)
Gyors kezdési segédlet (HU)
Stručná príručka (SK)
Εγχειρίδιο γρήγορης εκκίνησης (GR)
Beknopte handleiding (BFL)
Siemens Switzerland Ltd
Building Technologies Group
International Headquarters
Gubelstrasse 22
CH-6301 Zug
Switzerland
quick_start_guide_ic60.indd 2-3
19.11.2007 17:44:13 Uhr
Siemens Building Technologies
Fire Safety & Security Products
01.2008
EN
x
Preparation - General information
–
Before connecting the battery or switching the main power supply on, unplug the in-
ternal siren for the time of the installation (small plug with cable, directly on the left
lower side of the display).
–
If the internal buzzer starts beeping: Press
to silence it.
–
To exit the system at any time: Press and hold the button
.
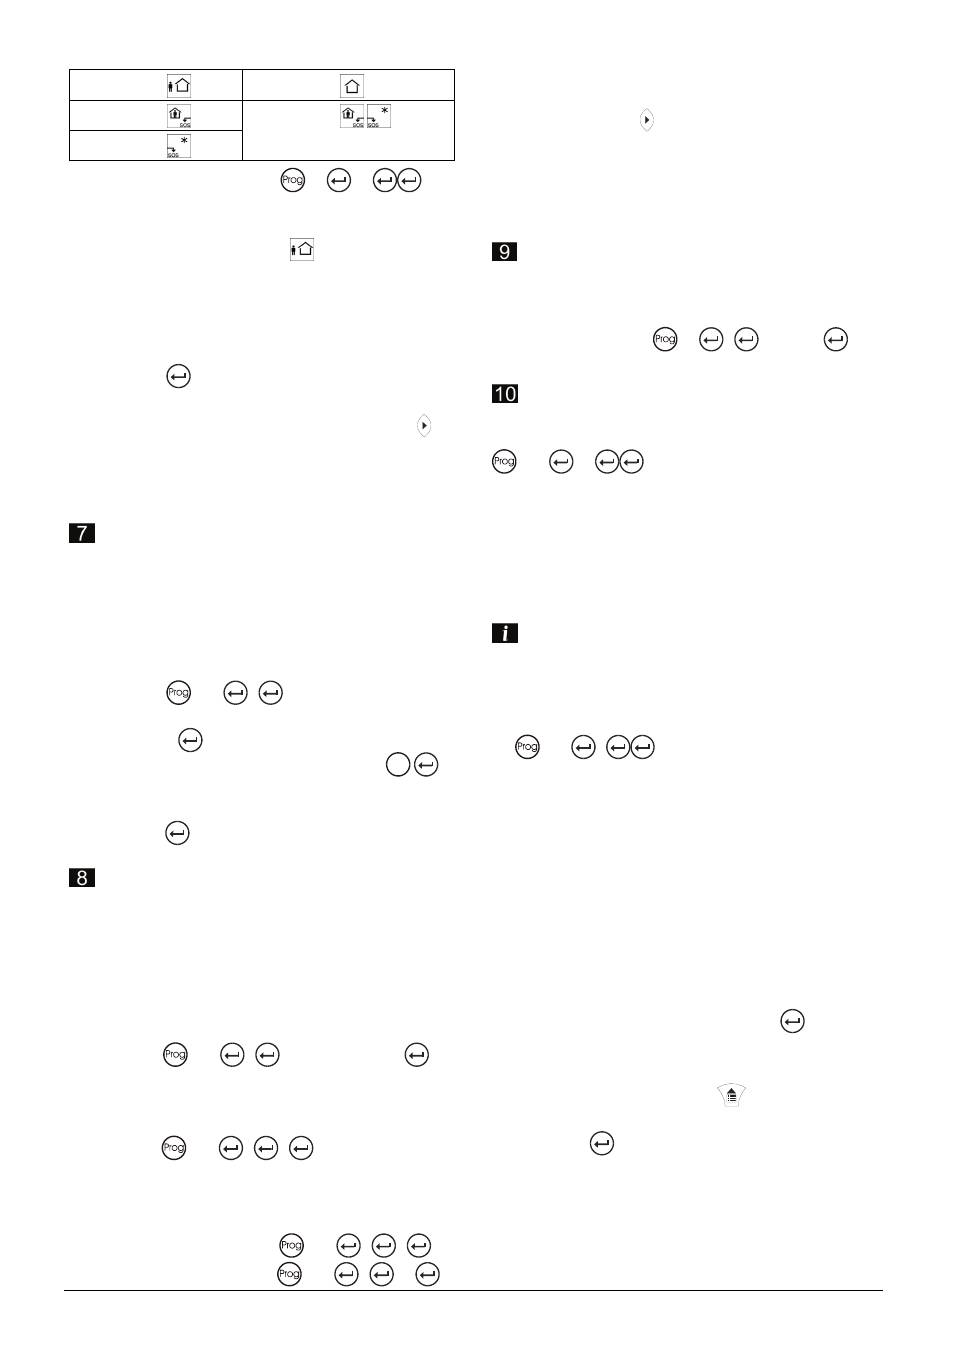
Reset back to factory setting:
–
Reset all pins and numbers: Press
200
9
.
–
Reset all individually changed parameters: Press
200
10
.
Language setting
1.
Press
Ctrl
simultaneously
t
the “Local Mode” opens.
2.
Scroll with the buttons
/
to the posi-
tion “Language” and press
to select.
3.
Scroll with the buttons
/
to the lan-
guage you prefer and press
to save.
4.
To exit press and hold the button
.
Start programming
Programming the system (steps 2 -10) is
only possible in installer mode. To get into
installer mode the system must be disarmed!
1.
Press
user code “
147258
”
t
the displays shows: “CLIENT:USER”.
2.
Press
installer code “
258369
”
t
the displays shows: “ISTALLER:USERS”.
Clock setting
1.
Set time: press
26
1
”
HHMM
”
2.
Set weekday: press
26
2
”
DAY
”
(Sunday =
1
, Monday =
2
…etc.)
3.
Set date: press
26
3
”
DDMMYY
”
4.
Activate automatic daylight saving (default
Europe GMT+1): press
26
4
1
Detectors
Learn the wireless detectors (max.16), be-
fore installing, to the panel. Default settings:
- Zones 1 and 2 are delayed for entry route.
- Zones 3 - 8 are set for normal zones.
- Zones 9 - 16 are set for Stay zones.
We recommend using:
- Zone 1: magnet contact from the entry
door.
- Zone 2: first motion detector for the surveil-
lance of the entry area (control panel).
1.
For zone 1: press
164
1
t
the keypad will start beeping to indicate
that learn mode has been activated.
2.
Press the tamper contact on the detector
or remove the magnet from the door
contact
t
it will send a transmission signal. The
panel will confirm if a detector is found
with the message “Found”.
3.
Press
to confirm.
4.
Repeat actions 1 - 3 to follow up for the
zones 2 - 16 (use the navigation button
to switch to the next zone).
If a detector could not be learned it is either
already learned to the panel, or the transmis-
sion signal was not received - try again.
Already learned detectors can be checked in
“Find Detector” mode: press
166
Entry delay time
The entry delay time is set by default to 20
sec. To change the time (0-9999 seconds)
per zone:
1.
Zone 1: press
144
1
”
seconds
”
2.
Zone 2: press
144
2
”
seconds
”
Exit delay time
The exit delay time is set by default to 30
sec. To change the time (0 - 255 seconds)
per area:
Area A: press
60
1
”
seconds
”
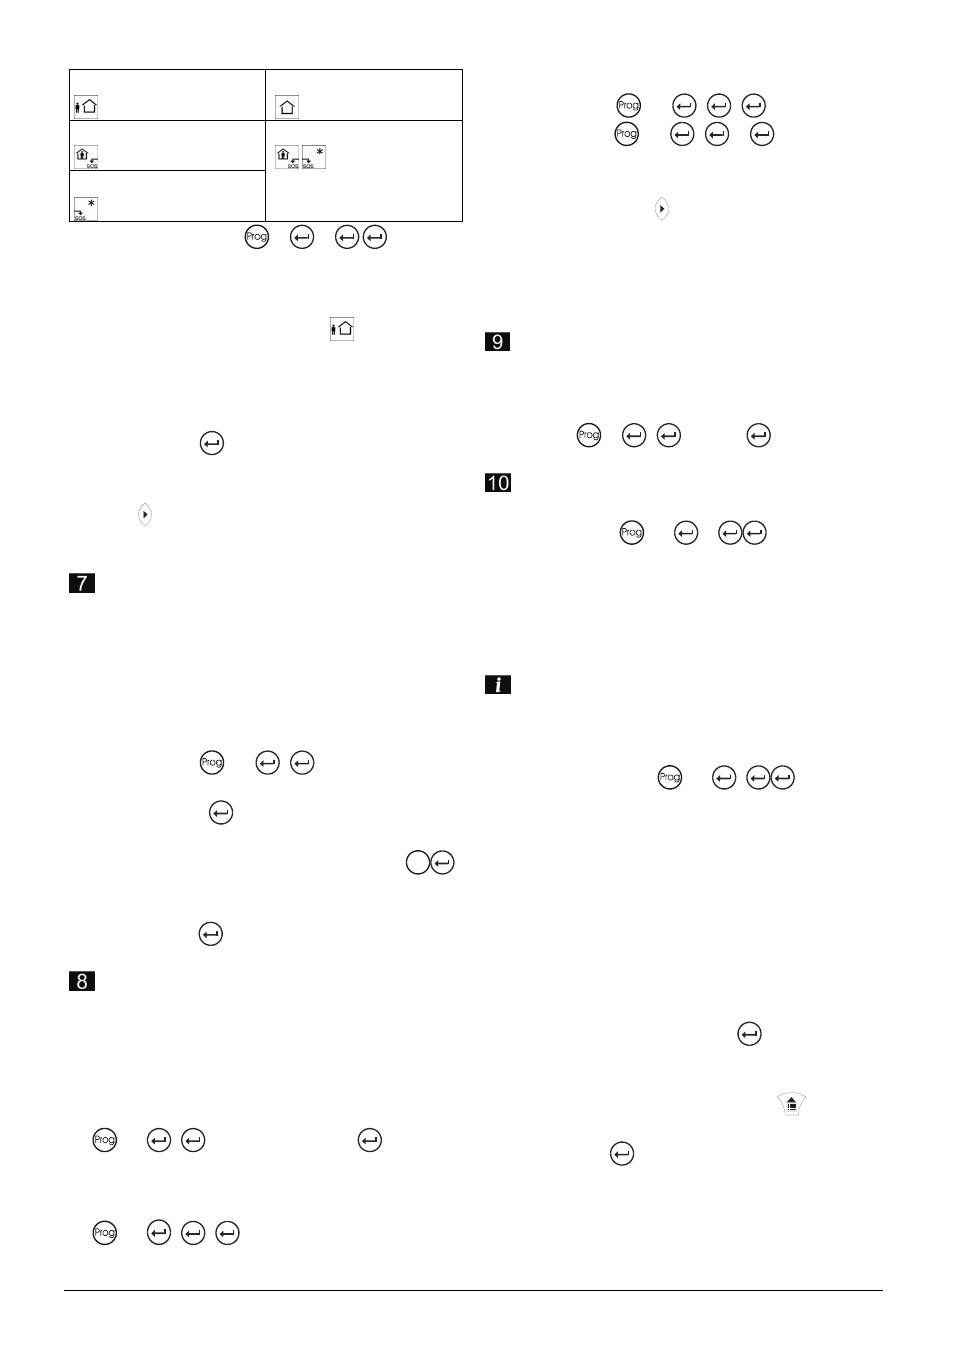
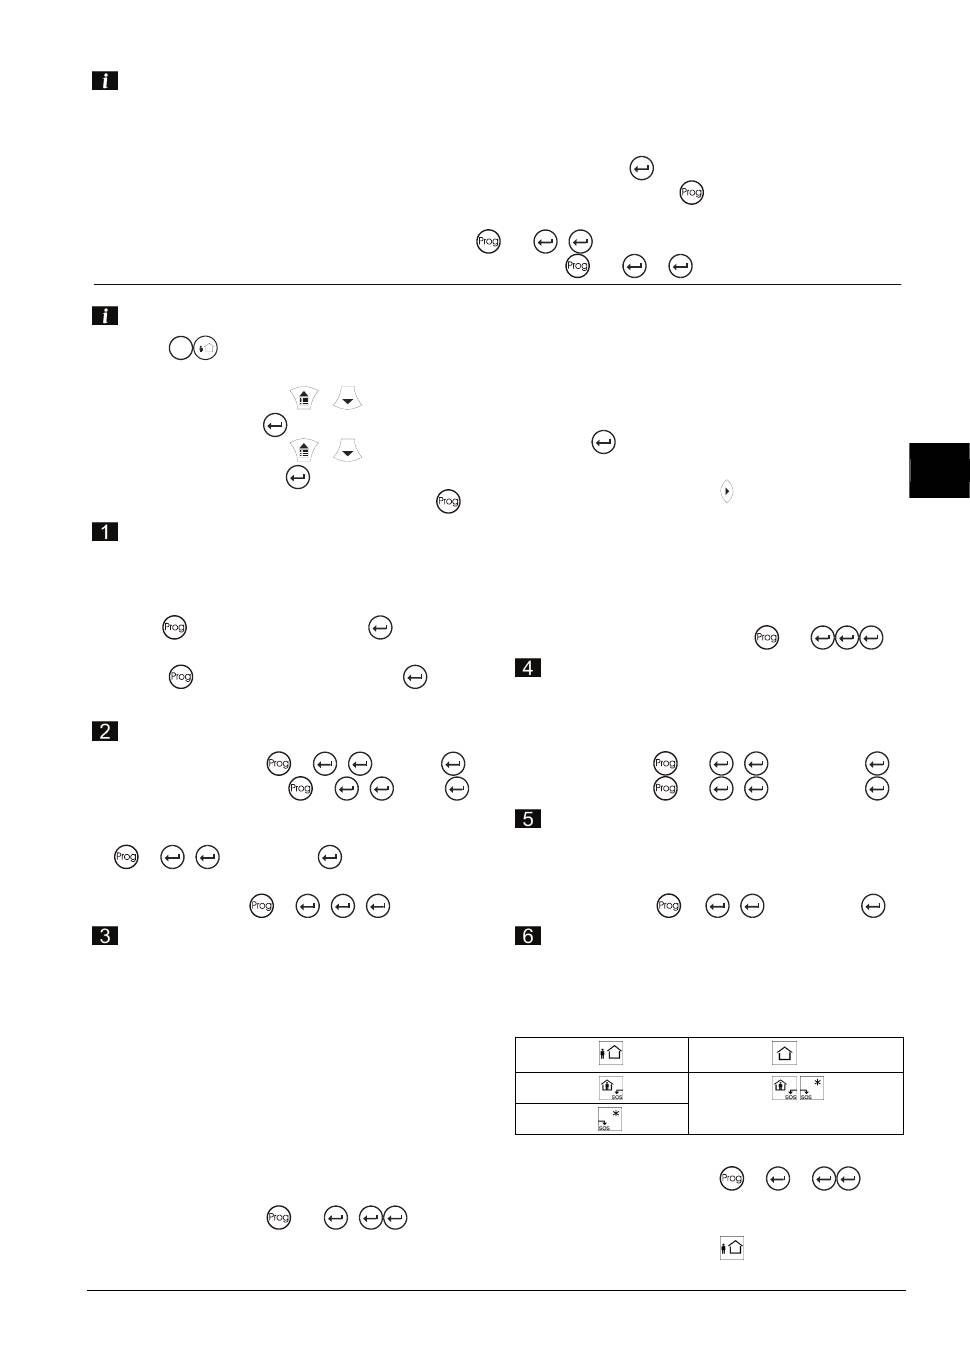
Remote control
Learn a remote control (max. 16) to the
system starting with user number 21 - 25.
Default setting:
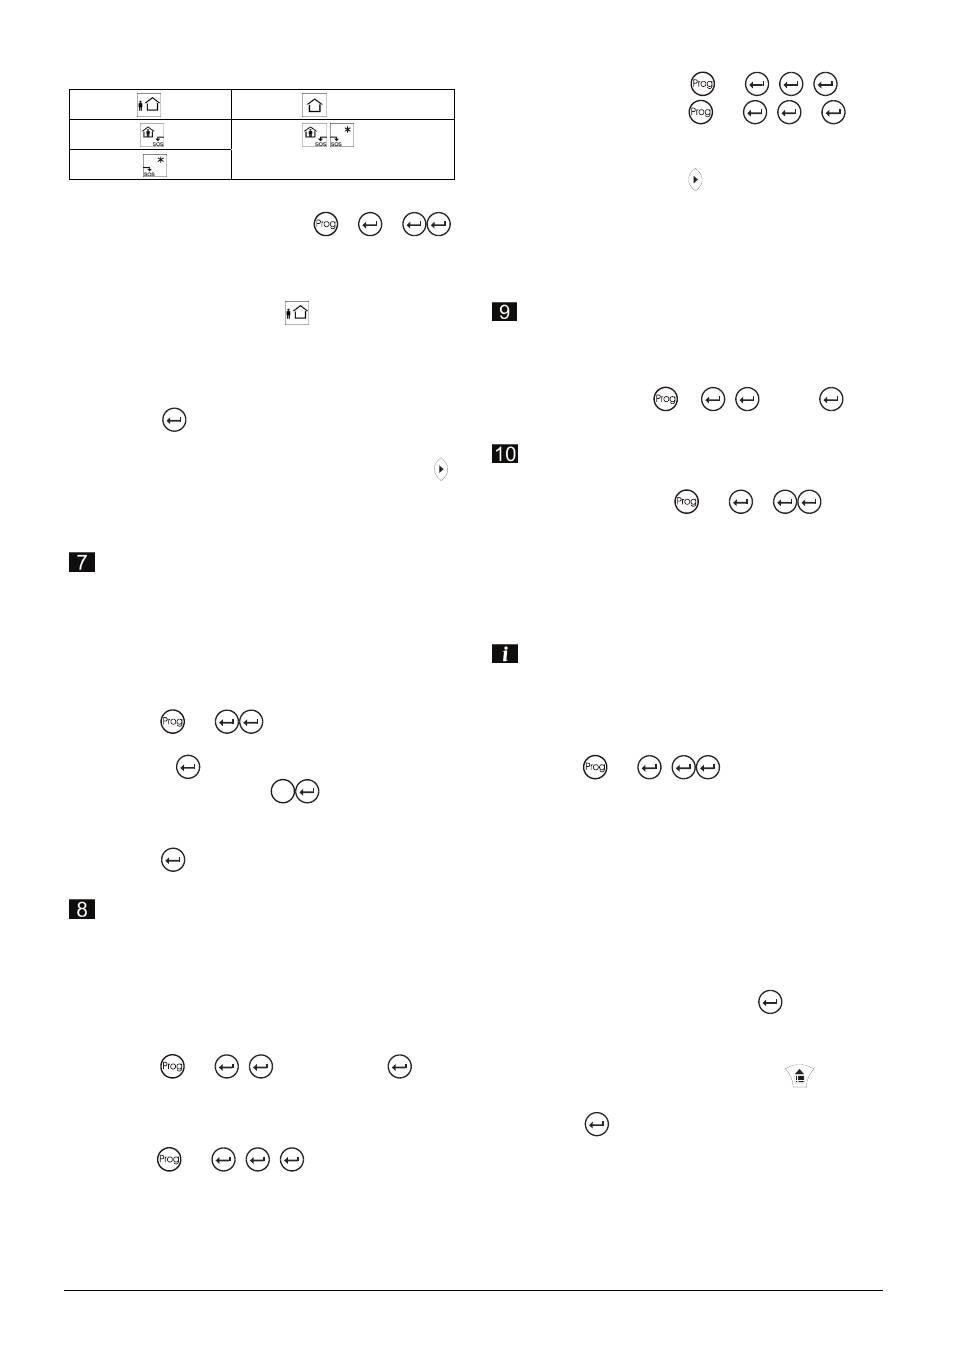
User 21:
ARM User 22:
DISARM
User 23:
STAY
User 25:
FREE
User 24:
(
simultaneously ) PANIC/SOS
1.
Remote control 1: press
18
21
Siemens Building Technologies
Fire Safety & Security Products
01.2008
t
the keypad will start beeping to indicate
that learn mode has been activated.
2.
Press the ARM button
on the remote
control
t
it will send a transmission signal. The
panel will confirm if a user is found with
the message “Found”.
3.
Press
to confirm.
4.
Repeat the actions 1 - 3 to follow up for all
5 buttons (use the navigation button to
switch to the next user number).
For remote control 2 take user numbers 26 -
30 etc.
Telephone connection
To transmit events, the system needs to be
connected to a telephone line. Follow steps
8 - 9 to program the telephone numbers.
If no telephone line is connected, the dialer
must be turned off:
1.
Press
175
1
t
the display shows:
“Dialer A Option 12----7-“.
2.
Press
1
t
the display shows: “-2----7-“.
3.
To check: press
Ctrl
simultaneously
t
the display changes to clear text mode
and shows “Enable Dialer No”.
4.
Press
to go back and continue
with
step 10
“Testing Installation”.
Telephone numbers
The telephone numbers (max. 8) which are
dialed in case of an event can be up to
16 digits long. Default setting: Telephone
number 8 is the call back number of the
Control Monitoring Station (CMS).
1.
Telephone number 1:
press
181
1
“tel.number”
2.
Choose a reporting format for this number.
a)
Number related to a phone:
press
182
1
2
t
an alarm signal will be sent out to this
number when an event occurs.
b)
Call goes out to a CMS station:
CID format: press
182
1
1
SIA format: press
182
1
10
3.
Repeat actions 1 - 2 to follow up for
telephone numbers 2 - 8 (use the naviga-
tion button to switch to the next tele-
phone number).
There are 11 different reporting formats that
can be selected for each telephone number.
The formats are listed in the Installer Manual.
Identification code
When connected to a monitoring station you
can program an individually identification
code:
Area A: press
62
1
”code”
(4 digit code 0-F).
Testing Installation
To test the strength of the signal received on
the panel: press
200
14
Any time a signal is detected, the keypad
beeps and displays the received signal
strength in % for 30 sec.
To test all detectors on their function and
transmission range, change to walk test
mode.
In the walk test mode the panel will not
send out any alarms and the working
range will be less than in the normal op-
erating mode - EN50131 requirement.
1.
Start walk test: press
200
6
t
the keypad will start beeping to indicate
that walk test mode has been activated.
2.
Activate the installed detectors with a
magnet
t
it will send a transmission signal (for more
details see Installation Instruction of the
detector). The panel will give a notification
signal each time a detector signal is re-
ceived and will show the detector number
on the display.
3.
To end this mode: press
.
t
this will take you back to the normal mode.
4.
To check out all received signals in event
log: press
.
5.
To clear events in the log: press
or
enter the installer code (see User Manual
3.15.3).
The programming is finished now and the
system ready to operate.
Don’t forget to reconnect the internal siren!
Siemens Building Technologies
Fire Safety & Security Products
01.2008
DE
x
Vorbereitung - Allgemeine Informationen
–
Bevor Sie die Batterie anschließen oder die Spannungsversorgung einschalten: Schalten
Sie für die Dauer der Installation die interne Sirene aus (kleiner Stecker mit Kabel direkt
links unten am Display).
–
Falls der interne Summer ertönt: Drücken Sie
, um ihn stumm zu schalten.
–
Um das System jederzeit verlassen zu können: Halten Sie die Taste
gedrückt.
Zurücksetzen auf Werkseinstellungen:
–
Um alle PINs und Nummern zurückzusetzen: Drücken Sie
200
9
.
–
Um alle individuell geänderten Parameter zurückzusetzen: Drücken Sie
200
10
.
Spracheinstellung
1.
Drücken Sie gleichzeitig
Ctrl
.
t
Der “lokal. Modus” wird geöffnet.
2.
Scrollen Sie mit den Tasten
/
auf
“Sprache” und drücken Sie
.
3.
Scrollen Sie mit den Tasten
/
zu
der gewünschten Sprache. Zum Speichern
drücken Sie
.
4.
Um die Spracheinstellung zu verlassen, hal-
ten Sie
gedrückt.
Programmierung starten
Die Programmierung des Systems (Abschnitte
2 -10) ist nur im Errichtermodus möglich. Um in
den Errichtermodus zu gelangen, muss das
System unscharf geschaltet sein!
1.
Drücken Sie
Benutzer-Code ”
147258
”
t
Im Display erscheint: KLIENT:BENUTZER
2.
Drücken Sie
Errichter-Code “
258369
”
t
Im Display erscheint: ERRICHT.:BENUTZ.
Uhr einstellen
1.
Uhrzeit einstellen:
26
1
”
HHMM”
2.
Wochentag einstellen:
26
2
”
DAY
”
(Sonntag =
1
, Montag =
2
…usw.)
3.
Datum einstellen:
26
3
”
DDMMYY“
4.
Sommerzeit aktivieren (Standardeinstellung
Europa: GMT+1):
26
4
1
Melder
Lernen Sie die Funkmelder (max.16) vor der
Installation in die Zentrale ein. Standardeinstel-
lungen:
- Zone 1 und 2 vorprogammiert für
Zutrittsverzögerung bei extern und anwesend
- Zone 3 bis 8 vorprogrammiert als
Normalzonen
- Zone 9 bis 16 vorprogrammiert als "Linie bei
anwesend scharf aktiv"
Verwenden Sie:
- Zone 1: Magnetkontakt der Eingangstür.
- Zone 2: Erster Bewegungsmelder für die
Überwachung des Eingangsbereichs
(Zentrale).
1.
Für Zone 1: Drücken Sie
164
1
t
Über die Tastatur ertönt ein akustisches
Signal, das anzeigt, dass der Einlernmodus
aktiviert ist.
2.
Drücken Sie den Sabotagekontakt am Mel-
der oder entfernen Sie den Magnet vom
Türkontakt.
t
Es wird ein Übertragungssignal gesendet.
Wird ein Melder gefunden, bestätigt die
Zentrale dies mit der Meldung “Gefunden”.
3.
Drücken Sie
zur Bestätigung.
4.
Wiederholen Sie die Schritte 1 - 3 für die
Zonen 2 - 16 (wechseln Sie mit der Naviga-
tionstaste zur nächsten Zone).
Falls ein Melder nicht eingelernt werden kann,
war er entweder bereits eingelernt oder das
Übertragungssignal wurde nicht empfangen –
versuchen Sie es erneut.
Ob ein Melder bereits eingelernt wurde, kön-
nen Sie im Modus “Melder finden” herausfin-
den: Drücken Sie
166
.
Eingangsverzögerung
Die Eingangsverzögerung ist standardmäßig
auf 20 s eingestellt. So können Sie die Zeit (0-
9999 Sekunden) für die einzelnen Zonen än-
dern:
1.
Zone 1:
144
1
”
Sekunden
”
2.
Zone 2:
144
2
”
Sekunden
”
Ausgangsverzögerung
Die Eingangsverzögerung ist standardmäßig
auf 30 s eingestellt. So können Sie die Zeit
(0 - 255 Sekunden) für die einzelnen Bereiche
ändern:
Bereich A:
60
1
”
Sekunden
”
Fernbedienung
Lernen Sie Fernbedienungen (max. 16) in das
System ein beginnend mit den Benutzernum-
mern 21 - 25. Standardeinstellung:
Siemens Building Technologies
Fire Safety & Security Products
01.2008
Benutzer 21:
PANIK/SOS
Benutzer 22:
UNSCHARF
Benutzer 23:
ANWESEND SCHARF
Benutzer 25:
FREI
(Funkausgang)
Benutzer 24:
(
gleichzeitig)
PANIKALARM
1.
Fernbedienung 1:
18
21
t
Über die Tastatur ertönt ein akustisches
Signal, das anzeigt, dass der Einlernmodus
aktiviert ist.
2.
Drücken Sie die ARM-Taste
auf der
Fernbedienung.
t
Es wird ein Übertragungssignal gesendet.
Wird ein Melder gefunden, bestätigt die
Zentrale dies mit der Meldung “Gefunden”.
3.
Drücken Sie
zur Bestätigung.
4.
Wiederholen Sie die Schritte 1 - 3 für alle 5
Tasten (wechseln Sie mit der Navigation-
taste zur nächsten Benutzernummer).
Verwenden Sie die 2. Fernbedienung für die
Benutzernummern 26 - 30 etc.
Telefonanschluss
Um Ereignisse übertragen zu können, muss
das System an eine Telefonleitung ange-
schlossen sein. Programmieren Sie die Tele-
fonnummern wie in Abschnitt 8 - 9 beschrie-
ben. Falls keine Telefonleitung angeschlossen
ist, muss die Wähleinrichtung deaktiviert wer-
den:
1.
Drücken Sie
175
1
t
Im Display
erscheint: “Wähler A Optionen 12----7-“.
2.
Drücken Sie
1
t
Im Display erscheint: “-
2----7-“.
3.
Zur Prüfung: Drücken Sie gleichzeitig
Ctrl
.
t
Das Display schaltet um auf Klartextmodus
und es erscheint “Wahl abgeschaltet Nein”.
4.
Drücken Sie
und machen Sie weiter mit
Abschnitt 10
“Anlage testen”.
Telefonnummern
Die Telefonnummern (max. 8), die im Fall eines
Ereignisses gewählt werden, können aus bis zu
16 Ziffern bestehen. Standardeinstellung: Tele-
fonnummer 8 ist die Rufnummer der Überwa-
chungszentrale (CMS).
1.
Telefonnummer
181
1
“Telefonnummer”
2.
Wählen Sie ein Reportformat für diese Num-
mer.
a)
Zu einem Telefon gehörende Nummer:
182
1
2
t
Wenn ein Ereignis eintritt, wird ein Alarmsig-
nal an diese Nummer gesendet.
b)
Anruft geht an eine CMS-Station:
CID-Format:
182
1
1
SIA-Format:
182
1
10
3.
Wiederholen Sie die Schritte 1 - 2 für die
Telefonnummern 2 - 8 (wechseln Sie mit der
Navigationstaste zur nächsten Telefon
nummer).
Sie können für jede Telefonnummer zwischen
11 unterschiedlichen Reportformaten auswäh-
len. Die Formate finden Sie im der Installer
Manual.
Identifikationscode
Wenn das System mit einer Überwachungs-
zentrale verbunden ist, können Sie einen indi-
viduellen Identifikationscode programmieren:
Bereich A:
62
1
”Code”
(4-stelliger Code 0-F).
Anlage testen
Um die Stärke des Empfangssignals zu überprü-
fen, drücken Sie
200
14
Jedes Mal, wenn ein Signal erkannt wird, piept
das Bedienteil und zeigt die Stärke des Emp-
fangssignals 30 s lang in Prozent (%) an.
Um alle Melder auf ihre Funktion und Übertra-
gungsreichweite zu testen, wechseln Sie in den
Walk-Test-Modus.
Im Walk-Test-Modus sendet die Zentrale
keine Alarme und der Funktionsbereich ist
niedriger als im normalen Betriebsmodus
(Anforderungen: EN50131).
1.
Walk Test starten:
200
6
t
Über die Tastatur ertönt ein akustisches
Signal, das anzeigt, dass der Walk-Test-
Modus aktiviert ist.
2.
Aktivieren Sie die installierten Melder mit Hilfe
eines Magneten.
t
Es wird ein Übertragungssignal gesendet
(Einzelheiten finden Sie in der Installationsan-
leitung für die Melder). Die Zentrale sendet bei
jedem empfangenen Meldersignal ein Bestäti-
gungssignal; die Nummer des Melders wird im
Display angezeigt.
3.
Um den Modus zu beenden:
.
t
Sie kehren zurück in den Normalmodus.
4.
Um alle empfangenen Signale im Ereignispro-
tokoll zu überprüfen: Drücken Sie
.
5.
Um Ereignisse aus dem Protokoll zu löschen:
Drücken Sie
oder geben Sie den Errichter-
Code ein (siehe Benutzerhandbuch 3.15.3).
Die Programmierung ist nun abgeschlossen und
das System ist betriebsbereit.
Vergessen Sie nicht, die interne Sirene wieder
anzuschließen!
Siemens Building Technologies
Fire Safety & Security Products
01.2008
ES
x
Preparación – Información general
–
Antes de conectar la batería o el suministro eléctrico principal, desconecte la sirena interna
durante la instalación (enchufe pequeño con cable situado directamente en la parte inferior
izquierda del display).
–
Si el zumbador interno comienza a sonar: pulse
para silenciarlo.
–
Para salir del sistema en cualquier momento: pulse y mantenga pulsada la tecla
.
Reset a ajuste de fábrica:
–
Resetee todos los códigos y números: pulse
200
9
.
–
Resetee todos los parámetros modificados individualmente: pulse
200
10
.
Ajuste del idioma
1.
Pulse simultáneamente
Ctrl
t
El “Modo local” se abre.
2.
Desplácese con las teclas
/
hasta la
posición “Idioma” y pulse
para seleccio-
nar.
3.
Desplácese con las teclas
/
hasta el
idioma que desee ajustar y pulse
para
guardar.
4.
Para salir, pulse y mantenga pulsada la te
cla
.
Inicio de la programación
La programación del sistema (pasos 2 -10) pue-
de llevarse a cabo únicamente en modo de téc-
nico. Para acceder al modo de técnico, el siste-
ma debe estar desarmado.
1.
Pulse
Código usuario “
147258
”
t
el display muestra: “Cliente: Usuar.”.
2.
Pulse
Código técnico “
258369
”
t
el display muestra: “Tecnico: Usuar.”.
Ajuste del reloj
1.
Ajuste de la hora:
pulse
26
1
”
HH:MM
”
2.
Ajuste del día: pulse
26
2
”
Dia
”
(domingo =
1
, lunes =
2
…, etc.)
3.
Ajuste de la fecha:
pulse
26
3
”
DDMMAA
”
4.
Active la memorización automática del hora-
rio de verano (ajuste de fábrica: GMT+1):
pulse
26
4
1
Detectores
Antes de la instalación, dé de alta los detectores
inalámbricos (máx.16) en la central. Ajustes de
fábrica:
- Las zonas 1 y 2 están retardadas para la ruta
de acceso.
- Las zonas 3 - 8 están ajustadas para zonas
normales.
- Las zonas 9 - 16 están ajustadas para zonas
de estancia.
Recomendamos usar:
- Zona 1: contacto magnético de la puerta de
acceso.
- Zona 2: primer detector de movimiento para la
vigilancia de la zona de acceso (central de
control).
1.
Para la zona 1: pulse
164
1
t
El teclado comienza a emitir un pitido a modo
de indicación de que el modo de alta se ha
activado.
2.
Presione el contacto del tamper del detector
o retire el imán del magnético de la
puerta
t
Enviará una señal de transmisión. La central
confirma la señal si se localiza un detector
con el mensaje “Encontrado”.
3.
Pulse
para confirmar.
4.
Repita los pasos 1 - 3 para continuar con las
zonas 2 - 16 (use la tecla de navegación
para pasar a la siguiente zona).
Si no ha sido posible dar de alta un detector,
esto puede deberse a que el detector ya se
había dado de alta con anterioridad o a que no
se ha recibido la señal de transmisión. Inténtelo
de nuevo.
Es posible comprobar los detectores dados de alta
en el modo “Dar de alta”: pulse
166
.
Retardo de acceso
El retardo de acceso viene ajustado de fábrica a
20 segundos. Para cambiar el retardo (0-9999
segundos) para cada zona:
1.
Zona 1: pulse
144
1
”
Segundos
”
2.
Zona 2: pulse
144
2
”
Segundos
”
Retardo de salida
El retardo de salida viene ajustado de fábrica a
30 segundos. Para cambiar el retardo (0 - 255
segundos) para cada zona:
Zona A: pulse
60
1
”
Segundos
”
Control remoto
Dé de alta un control remoto (máx. 16) en el
sistema comenzando con los números de usua-
rio 21 - 25.
Siemens Building Technologies
Fire Safety & Security Products
01.2008
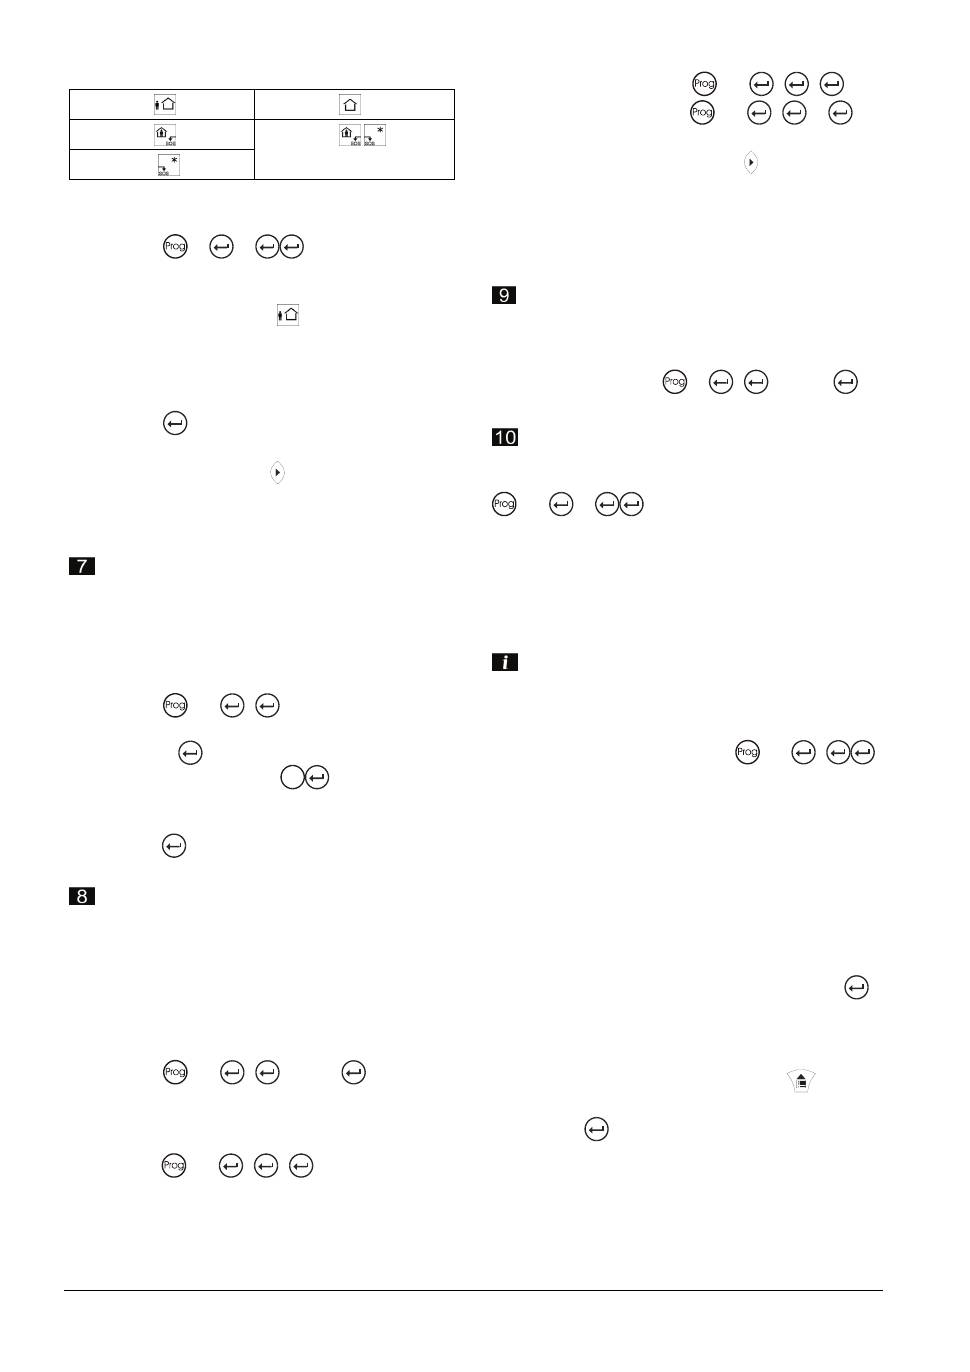
Ajuste de fábrica:
Usuario 21:
ARM
Usuario 22:
DISARM
Usuario 23:
STAY
Usuario 25:
FREE
Usuario 24:
(
simul-
táneamente) PANIC/SOS
1.
Control remoto 1: pulse
18
21
t
El teclado comienza a emitir un pitido a modo
de indicación de que el modo de alta se ha
activado.
2.
Pulse la tecla ARM
del control remoto
t
Enviará una señal de transmisión. La central
confirma la señal si se localiza a un usuario
con el mensaje “Encontrado”.
3.
Pulse
para confirmar.
4.
Repita los pasos 1 - 3 para continuar con las
5 teclas (use la tecla de navegación para
cambiar al siguiente número de usuario).
Para el control remoto 2 utilice los números de
usuario 26 – 30, etc.
Conexión telefónica
Para transmitir incidencias, el sistema debe es-
tar conectado a una línea telefónica. Siga los
pasos 8 - 9 para programar los números de telé-
fono.
Si no hay una línea telefónica conectada, el
marcador telefónico debe desconectarse:
1.
Pulse
175
1
t
el display muestra:
“Opc.A TX telef. 12----7-“.
2.
Pulse
1
t
el display muestra: “-2----7-“.
3.
Para comprobar: pulse
Ctrl
simultánea-
mente
t
El display cambia a modo de texto y muestra
“N.TX telef.habil”.
4.
Pulse
para retrocer y continúe con el
paso 10
“Comprobación de instalación”.
Números de teléfono
Los número de teléfono (máx. 8) marcados
en caso de incidencia pueden tener hasta
16 dígitos. Ajuste de fábrica: el número de telé-
fono 8 corresponde al número de rellamada de
la Central receptora (CRA).
1.
Número de teléfono 1:
pulse
181
1
“Numero telefono”
2.
Seleccione un formato de informe para este
número.
a)
Número relacionado con un teléfono:
pulse
182
1
2
t
En caso de incidencia, se enviará una señal
de alarma a este teléfono.
b)
La llamada se envía a una central CRA:
Formato CID:
pulse
182
1
1
Formato SIA:
pulse
182
1
10
3.
Repita los pasos 1 - 2 para continuar con
los números de teléfono 2 - 8 (use la tecla de
navegación para pasar al siguiente núme-
ro de teléfono).
Existen 11 formatos de informe diferentes que
pueden seleccionarse para cada número de
teléfono. Los formatos se enumeran en el Ma-
nual de técnico.
Código de identificación
Si el sistema está conectado a una central
receptora, podrá programar un código de identi-
ficación individual:
Zona A: pulse
62
1
“Codigo”
(código de 4 dígitos 0-F).
Comprobación de la instalación
Para comprobar la potencia de la señal recibida
en el panel: pulse
200
14
Cada vez que se detecta la señal, el teclado
emite un sonido y muestra la potencia de la se-
ñal recibida en % durante 30 seg.
Para comprobar el funcionamiento de todos los
detectores y el rango de transmisión de los
mismos, cambie al modo de test de paseo.
En el modo de test de paseo, la central no
enviará ninguna alarma y el rango de traba-
jo será inferior al rango en el modo de fun-
cionamiento normal (requisito EN50131).
1.
Inicie el test de paseo: pulse
200
6
t
El teclado comenzará a emitir un pitido a
modo de indicación de que el modo de test
de paseo se ha activado.
2.
Active los detectores instalados con un imán
t
Enviará una señal de transmisión (para más
detalles consulte las instrucciones de instala-
ción del detector). La central emitirá una se-
ñal de notificación cada vez que se reciba
una señal del detector y mostrará en el dis-
play el número del detector.
3.
Para salir de este modo: pulse
.
t
De estar forma regresará al modo normal.
4.
Para comprobar todas las señales recibidas
en el registro de incidencias: pulse
.
5.
Para borrar incidencias del registro: pulse
o introduzca el código del técnico (véase
Manual de usuario 3.15.3).
La programación ha concluido y el
sistema está listo para funcionar.
No olvide conectar de nuevo la sirena interna.
Siemens Building Technologies
Fire Safety & Security Products
01.2008
PT
x
Preparação - informação geral
–
Antes de ligar a bateria ou ligar a alimentação eléctrica, desligue a sirene interna durante o
período de instalação (ficha pequena com cabo, no lado inferior esquerdo do display).
–
Se o buzzer interno começar a tocar: prima
para silenciar.
–
Para sair a qualquer momento: prima longamente o botão
.
Repor definições de fábrica:
–
Repor todos os códigos e números de telefone: prima
200
9
.
–
Repor todos os parâmetros modificados individualmente: prima
200
10
.
Definição do idioma
1.
Prima
Ctrl
simultaneamente
t
o "Modo Local" é aberto.
2.
Percorra com os botões
/
até à
posição "Idioma" e prima
para
seleccionar.
3.
Percorra com os botões
/
até ao
idioma desejado e prima
para guardar.
4.
Para sair, prima longamente o botão
.
Iniciar a programação
A programação do sistema (passos 2 -10)
só é possível no modo Instalador. Para
passar para o modo Instalador, o sistema
deve estar desarmado!
1.
Prima
código do utilizador "
147258
"
t
o display mostra: "UTILIZADOR".
2.
Prima
Codg Instalador "
258369
"
t
o display mostra: "INSTALADORES".
Definição do relógio
1.
Definir o horário:
prima
26
1
"
HHMM
"
2.
Definir o dia da semana:
prima
26
2
"
DIA
"
(Domingo =
1
,
Segunda =
2
…etc.)
3.
Definir a data:
prima
26
3
”
DDMMYY
”
4.
Activar a hora automática de Verão
(predefinido Europa GMT+1):
prima
26
4
1
Detectores
Antes da instalação, programe os
detectores sem fio (máx.16) no painel.
Configurações predefinidas:
-
Zonas 1 e 2 estão configuradas para
caminho de entrada.
- Zonas 3 - 8 estão definidas como zonas
normais.
- Zonas 9 - 16 estão definidas como zonas
parciais.
Nós recomendamos o uso de:
- Zona 1: contacto de abertura de porta de
entrada.
- Zona 2: primeiro detector de movimento
para a vigilância da área de entrada
(painel de controlo).
1.
Para zona 1: prima
164
1
t
o teclado começa a fazer beep para
indicar que o modo de programação foi
activado.
2.
Prima o contacto anti-sabotagem no
detector ou remova o electroíman do
contacto de porta
t
isto envia um sinal de transmissão.
O painel irá confirmar se um detector foi
encontrado com a mensagem
"Encontrado".
3.
Prima
para confirmar.
4.
Repita as acções 1 - 3 para as zonas a
seguir 2 - 16 (use o botão de navegação
para passar para a próxima zona).
Se um detector não puder ser aprendido, ou
já está programado no painel ou o sinal de
transmissão não foi recebido - tente
novamente. Os detectores já programados
podem ser verificados no modo "Procurar
Detector": prima
166
.
Tempo de atraso da entrada
O tempo de atraso da entrada está
predefinido com 20 seg. Para alterar o
tempo (0-9999 segundos) por zona:
1.
Zona 1: prima
144
1
"
segundos
"
2.
Zona 2: prima
144
2
"
segundos
"
Tempo de atraso da saída
O tempo de atraso da saída está
predefinido com 30 seg. Para alterar o
tempo (0 - 255 segundos) por área:
Área A: prima
60
1
"
segundos
"
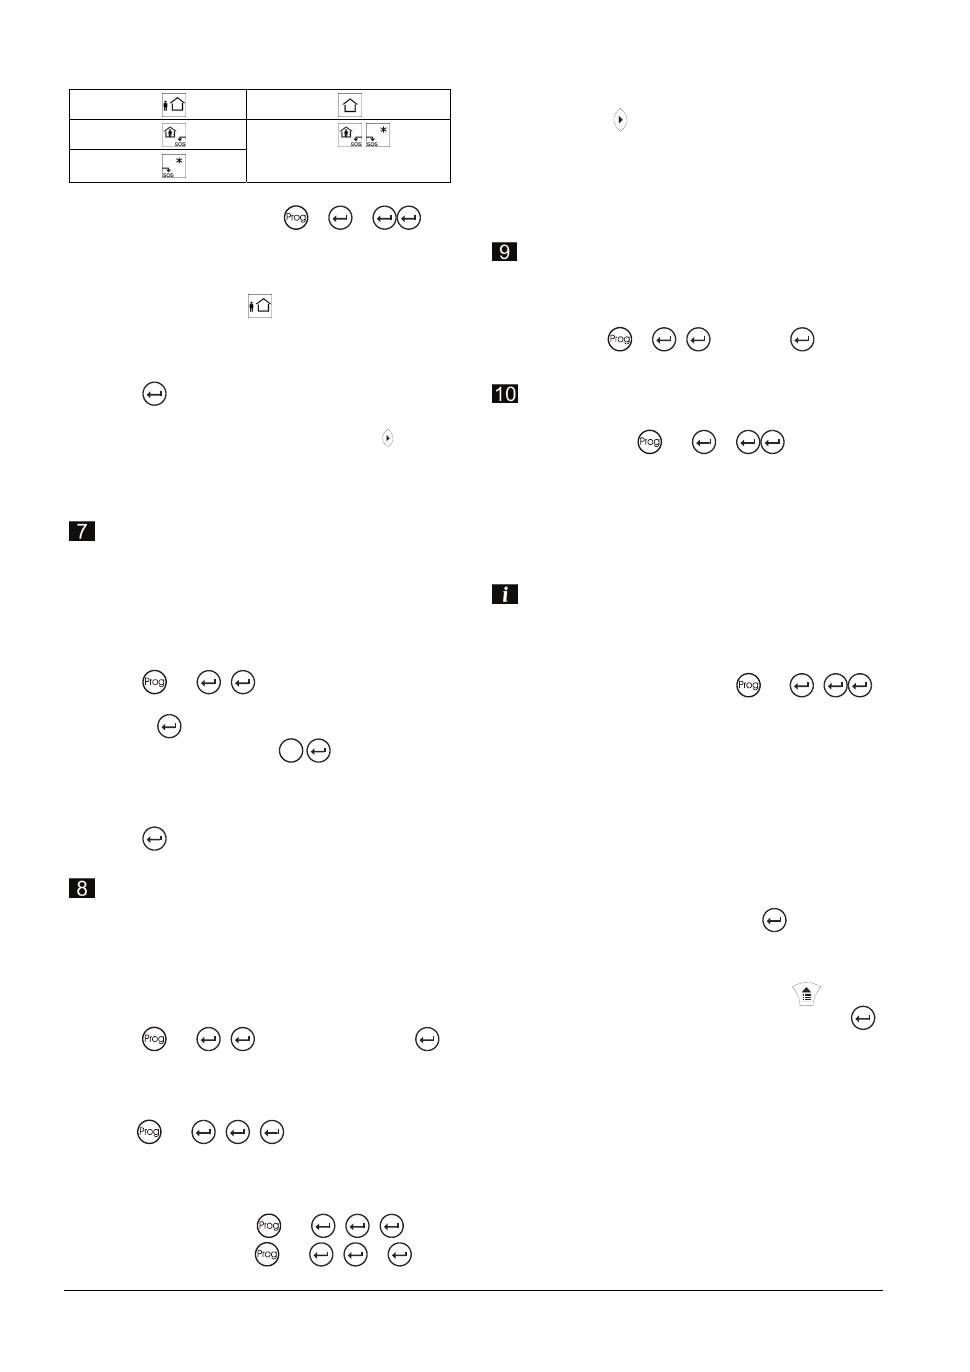
Controlo remoto
Programe um controlo remoto (máx. 16) no
sistema começando com o número do
utilizador 21 - 25. Configuração padrão:
Utilizador 21:
ARMAR
Utilizador 22:
DESARMAR
Utilizador 23:
PARCIAL
Utilizador 25:
LIVRE
Utilizador 24:
(
simultá-
neamente) PANICO/SOS
Siemens Building Technologies
Fire Safety & Security Products
01.2008
1.
Controlo remoto 1: prima
18
21
t
o teclado começa a fazer beep para
indicar que o modo de programação foi
activado.
2.
Prima o botão ARMAR
no controlo
remoto
t
isto envia um sinal de transmissão. O
painel irá confirmar se um utilizador foi
encontrado com a mensagem
"Encontrado".
3.
Prima
para confirmar.
4.
Repita as acções 1 - 3 para todos os 5
botões (use o botão de navegação para
passar para o próximo número).
Para o controlo remoto 2, use os números
do utilizador 26 - 30 etc.
Ligação da linha telefónica
Para transmitir eventos, o sistema deve
estar ligado a uma linha telefónica. Siga os
passos 8 - 9 para programar os números de
telefone.
Se não tiver uma linha telefónica ligada, o
marcador deve ser desactivado:
1.
Prima
175
1
t
o display mostra:
"Opc Marcador A 12----7-".
2.
Prima
1
t
o display mostra: "-2----7-".
3.
Para controlar: prima
Ctrl
simultanea-
mente
t
o display muda para o modo de texto
claro e mostra "Activar Marcador N°".
4.
Prima
para voltar e continuar
com
passo 10
"Testar a instalação".
Números de telefone
Os números de telefone (máx. 8) que são
marcados em caso de evento podem ter até
16 dígitos. Configuração predefinida: o
número de telefone 8 é o número de retorno
da Central de Monitorização de Alarmes
(CMA).
1.
Número de telefone 1:
prima
181
1
"núm.telefone”
2.
Seleccione um formato de relatório para
este número.
a)
Número relacionado com o telefone:
prima
182
1
2
t
um sinal de alarme será enviado para
este número quando ocorre um evento.
b)
A chama vai para uma CMA:
Formato CID: prima
182
1
1
Formato SIA: prima
182
1
10
3.
Repita as acções 1 - 2 para os números
de telefone seguintes 2 - 8 (utilize o
botão de navegação para mudar para
o próximo número de telefone).
Há 11 formatos diferentes de relatório que
podem ser seleccionados para cada
número de telefone. Os formatos estão
listados no manual do instalador.
Código de identificação
Quando conectado a uma estação de
monitoramento, pode programar um código
de identificação individual:
Área A: prima
62
1
"código"
(código 0-F de 4 dígitos).
Testar a instalação
Para testar a força do sinal recebido no
painel: Prima
200
14
Sempre que o sinal for detectado, o teclado
numérico emite um som e apresenta a força
do sinal recebido em % durante 30 seg.
Para testar todos os detectores na sua
função e faixa de transmissão, mude para
ModoTestPassagem.
No ModoTestPassagem, o painel não irá
enviar alarmes e a área de trabalho será
menor do que no modo de operação
normal - requesito EN50131.
1.
Iniciar o Teste Passagem:
prima
200
6
t
o teclado começa a fazer beep para
indicar que o Modo TestPassagem foi
activado.
2.
Active os detectores instalados com um
electroíman
t
isto irá enviar um sinal de transmissão
(para mais detalhes, ver as instruções de
instalação do detector). O painel emitirá
um sinal de notificação cada vez que um
sinal de detector é recebido e irá mostrar
o número do detector no display.
3.
Para terminar este modo: prima
.
t
irá voltar ao modo normal
4.
Para verificar todos os sinais recebidos
no relatório de eventos: prima
.
5.
Para apagar os eventos no relatório:
prima
ou introduza o Cod Instalador
(ver o Manual do Utilizador 3.15.3).
A programação está terminada e o sistema
está pronto a funcionar. Não esqueça de
ligar novamente a sirene interna!
Siemens Building Technologies
Fire Safety & Security Products
01.2008
IT
x
Operazioni preliminari - informazioni generali
–
Prima di collegare la batteria o accendere l'alimentatore principale di corrente, disconnettere la
sirena interna durante l'intera fase d'installazione (spina di dimensioni ridotte con cavo, situata
direttamente sul lato sinistro, in basso, del display).
–
Se il dispositivo interno di segnalazione acustica inizia a suonare, premere
per disattivarlo.
–
Per uscire da sistema in qualsiasi momento, premere e tenere premuto il tasto
.
Ripristino delle impostazioni di fabbrica:
–
Per resettare tutti i pin, nonché i numeri, premere
200
9
.
–
Per resettare tutti i parametri personalizzati, premere
200
10
.
Impostazioni di lingua
1.
Premere
Ctrl
contemporaneamente
t
finché non si apra "M. Loc.".
2.
Posizionarsi con i tasti
/
su "Lingua" e
premere infine
per selezionare.
3.
Selezionare con i tasti
/
la lingua di
preferenza e premere infine
per salvare.
4.
Per uscire, premere e tenere premuto il
tasto
.
Avvio della programmazione
È possibile programmare il sistema (operazioni
2 - 10) solo in modalità "Modo Install.". Per
commutare il sistema in modalità "Modo Install.",
è necessario disattivare le impostazioni di
protezione del sistema.
1.
Premere
Cod. Utente"
147258
"
t
finché non venga visualizzato sul display
"CLIENTE: UTENTI".
2.
Premere
Codice Installatore"
258369
"
t
finché non venga visualizzato sul display
"INSTALL.: UTENTI".
Regolazione dell'orologio
1.
Per regolare l'orologio, premere
26
1
"
HHMM
"
2.
Per impostare un giorno della settimana,
premere
26
2
"
GIORNO
"
(Domenica =
1
, Lunedì =
2
…ecc.)
3.
Per impostare la data, premere
26
3
"
DDMMYY
"
4.
Attivare automaticamente l'orario estivo
(impostazione standard Europa GMT+1),
premere
26
4
1
Rilevatori
Prima dell'installazione, rilevare i rivelatori radio
(max.16) con il pannello.
Impostazioni standard:
- Per le Zone 1 e 2 è impostato un ritardo per il
percorso d'ingresso.
- Le Zone 3 - 8 sono impostate come zone
normali.
- Le Zone 9 - 16 sono impostate come zone
"STAY".
Si raccomanda di utilizzare:
- per la Zona 1: un contatto magnetico collegato
alla porta d'ingresso.
- per la Zona 2: un rivelatore di movimento per
la sorveglianza dell'area d'ingresso (panello di
controllo).
1.
Per la Zona 1 premere
164
1
t
la tastiera emette un segnale acustico
indicante l'attivazione della modalità di
rilevamento.
2.
Premere il contatto del coperchio sul
rivelatore oppure rimuovere il magnete dal
contatto della porta
t
viene emesso un segnale di trasmissione. Se
un rilevatore è stato trovato, il pannello ne dà
conferma con il messaggio "Trovato".
3.
Per confermare, premere
.
4.
Ripetere le operazioni 1 - 3 per impostare
successivamente le Zone 2 - 16 (utilizzare il
tasto di navigazione per passare alla zona
successiva).
Se un rilevatore non viene rilevato, il pannello
ne ha già effettuato il rilevamento o il segnale di
trasmissione non è stato ricevuto. Riprovare.
Per verificare il rilevamento di rilevatori già rilevati
dal pannello, impostare la modalità "Ricerca
rilevatore": premere
166
.
Ritardo d'ingresso
Il ritardo d'ingresso è impostato sul valore
standard di 20 sec. Per modificare l'intervallo di
tempo (0-9999 secondi) per ogni zona:
1.
Zona 1: premere
144
1
"
secondi
"
2.
Zona 2: premere
144
2
"
secondi
"
Ritardo d'uscita
Il ritardo d'uscita è impostato sul valore standard
di 30 sec. Per modificare l'intervallo di tempo
(0 - 255 secondi) per ogni area:
Area A: premere
60
1
"
secondi
"
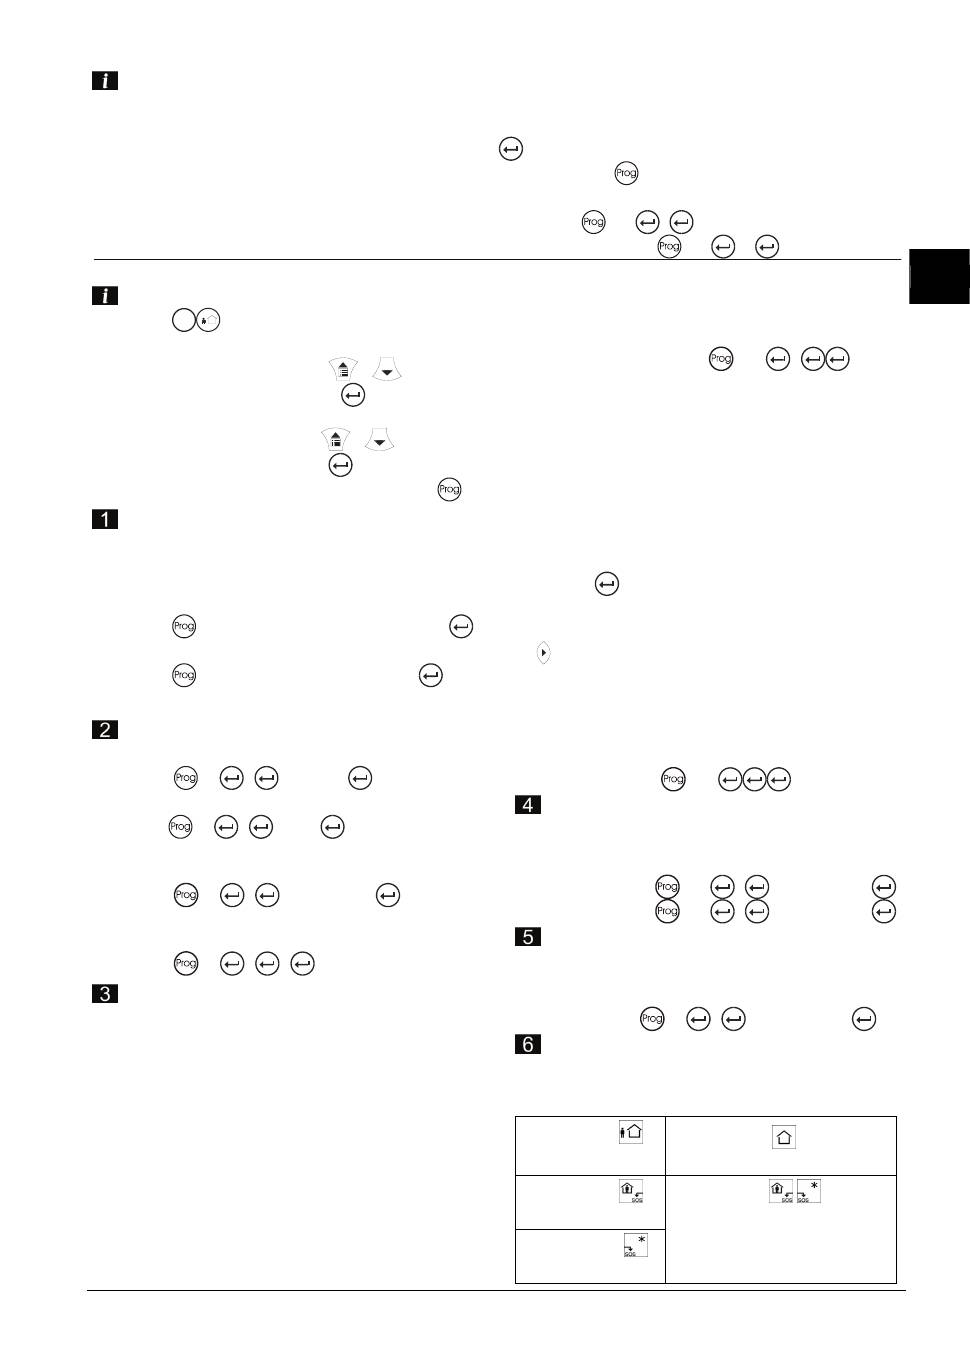
Telecomando
Rilevare un telecomando (max. 16) con il
sistema iniziando dal numero di utente 21 - 25.

Siemens Building Technologies
Fire Safety & Security Products
01.2008
Impostazione standard:
Utente 21:
ARM
Utente 22:
DISARM
Utente 23:
STAY
Utente 25:
FREE
Utente 24:
(
contemporaneamente)
PANIC/SOS
1.
Telecomando 1: premere
18
21
t
la tastiera emette un segnale acustico
indicante l'attivazione della modalità di
rilevamento.
2.
Premere sul telecomando il tasto ARM
.
t
viene emesso un segnale di trasmissione. Se
un utente è stato trovato, il pannello ne dà
conferma con il messaggio "Trovato".
3.
Per confermare, premere
.
4.
Ripetere le operazioni 1 - 3 per impostare
successivamente tutti e 5 i tasti (utilizzare il
tasto di navigazione per passare al
numero di utente successivo).
Per il telecomando 2, utilizzare i numeri di
utente 26 - 30 ecc.
Connessione telefonica
Per poter trasmettere eventi, è necessario
collegare il sistema ad una linea telefonica.
Eseguire le operazioni 8 - 9 per programmare i
numeri telefonici.
Se non si dispone di una connessione
telefonica, è necessario spegnere il
comunicatore:
1.
Premere
175
1
t
sul display viene
visualizzato "Comunicatore Opzione
A 12----7-".
2.
Premere
1
t
sul display viene
visualizzato "-2----7-".
3.
Per effettuare una verifica, premere
Ctrl
contemporaneamente
t
il display commuta in modalità di testo in
chiaro (non cifrato) e visualizza "Abilita
Comunic. Num.".
4.
Premere
per tornare indietro e continuare
con
l'operazione 10
"Testa install.".
Numeri telefonici
I numeri telefonici (max. 8), che vengono
composti al verificarsi di un evento, possono
avere una lunghezza massima di 16 cifre.
Impostazione standard: il numero telefonico 8 è
riservato al servizio di chiamata "call-back"
(richiamo) della Centrale di sorveglianza e
controllo (CMS).
1.
Numero telefonico 1:
premere
181
1
"Num. Tel."
2.
Selezionare un formato di notifica per questo
numero.
a)
Numero relativo ad un telefono:
premere
182
1
2
t
un segnale d'allarme verrà inviato a questo
numero al verificarsi di un evento.
b)
Viene effettuata una chiamata alla centrale di
sorveglianza e controllo (CMS):
Formato CID: premere
182
1
1
Formato SIA: premere
182
1
10
3.
Ripetere le operazioni 1 - 2 per impostare
successivamente i numeri 2 - 8 (utilizzare il
tasto di navigazione per passare al
numero telefonico successivo).
Sono disponibili 11 differenti formati di notifica,
selezionabili per ciascun numero telefonico. Un
elenco dei formati è consultabile nel Manuale
d'installazione.
Codice d'identificazione
Se il sistema è collegato ad una centrale di
sorveglianza e controllo, è possibile
personalizzare il codice d'identificazione:
Area A: premere
62
1
"codice"
(codice di 4 cifre 0-F).
Test d'installazione
Per verificare la forza del segnale ricevuto dalla
centrale: premere
200
14
Ogni volta che viene ricevuto un segnale, la
tastiera emette un beep e visualizza la forza del
segnale ricevuto in % per 30 sec.
Per testare il corretto funzionamento, nonché il
campo di trasmissione di tutti i rilevatori,
commutare il sistema in modalità "Modo Test
Attraversam.".
In modalità "Modo Test Attraversam.", il
pannello non genera alcun allarme e il
campo d'azione è minore al campo d'azione
in normale modalità operativa (in conformità
a EN50131).
1.
Per avviare il test di attraversamento:
premere
200
6
t
la tastiera emette un segnale acustico
indicante l'attivazione della modalità di test di
attraversamento.
2.
Attivare i rilevatori installati con un magnete
t
viene emesso un segnale di trasmissione (per
ulteriori dettagli consultare il Manuale
d'istruzioni del rilevatore). Il pannello emette
un segnale acustico di notifica ogni qualvolta
che il segnale di un rilevatore viene ricevuto; il
numero del rilevatore viene pertanto
visualizzato sul display.
3.
Per uscire da questa modalità, premere
.
t
il sistema ritorna nella normale modalità
operativa.
4.
Per verificare nel registro eventi tutti i segnali
ricevuti, premere
.
5.
Per eliminare gli eventi dal registro eventi,
premere
oppure immettere il Codice
Installatore (v. Manuale dell'utente 3.15.3).
La programmazione è adesso conclusa e il
sistema è pertanto pronto all'uso.
Attenzione: ricollegare la sirena interna!
Siemens Building Technologies
Fire Safety & Security Products
01.2008
FR
x
Préparation – Informations générales
–
Avant de brancher la batterie ou d’activer l’alimentation principale, débrancher la sirène in-
terne pour la durée de l’installation (petite prise + câble, directement sur le côté inférieur gau-
che de l'afficheur).
–
Si le ronfleur interne commence à biper : pressez
pour le faire taire.
–
Pour quitter le système à tout moment : pressez et maintenez le bouton
enfoncé.
Restauration des réglages d’usine :
–
Réinitialiser toutes les broches et tous les numéros : pressez
200
9
.
–
Réinitialiser tous les paramètres modifiés individuellement : pressez
200
10
.
Réglage de la langue
1.
Pressez
Ctrl
simultanément
t
le “Mode local” s’ouvre.
2.
Utilisez les boutons
/
pour atteindre
la position “Langue” et pressez
pour sé-
lectionner.
3.
Utilisez les boutons
/
pour sélection-
ner votre langue préférée et pressez
pour
enregistrer.
4.
Pour quitter, pressez et maintenez le bouton
enfoncé
.
Commencer à programmer
La programmation du système (étapes 2 à 10)
est uniquement possible en mode Installat.
Pour activer le mode Installat., il faut désarmer
le système !
1.
Pressez
Code Util. “
147258
”
t
l’afficheur indique : “CLIENT:UTILIS.”.
2.
Pressez
Code Installat. “
258369
”
t
l’afficheur indique : “INTALLAT. UTILIS”.
Réglage de l’horloge
1.
Réglez l’heure :
pressez
26
1
”
HHMM
”
2.
Réglez le jour de la semaine :
pressez
26
2
”
JOUR
”
(dimanche
=
1
, lundi =
2
…etc.)
3.
Réglez la date : pressez
26
3
”
DDMMYY
”
4.
Activez le réglage automatique d’économie
d’énergie (par défaut Europe GMT+1) :
pressez
26
4
1
Détecteurs
Avant l’installation, procédez à l’apprentissage
des détecteurs sans fil (16 max.) sur le pan-
neau. Réglages par défaut :
- les zones 1 et 2 sont retardées pour le trajet
d’entrée.
- les zones 3 à 8 sont réglées pour les zones
normales.
- les zones 9 à 16 sont réglées pour les zones
Stay.
Nous recommandons d’utiliser :
- Zone 1 : contact à aimant de la porte d’entrée.
- Zone 2 : premier détecteur de mouvement de
surveillance du secteur d’entrée (panneau de
commande).
1.
Pour la zone 1 : pressez
164
1
t
le clavier va commencer à biper pour
indiquer que le mode apprentissage est
activé.
2.
Pressez le contact d’autoprotection sur le
détecteur ou retirez l’aiment du contact de
porte
t
Un signal d’émission sera émis. Le panneau
va confirmer si un détecteur est trouvé en
affichant le message “Trouvé”.
3.
Pressez
pour confirmer.
4.
Répétez les actions 1 à 3 pour paramétrer
les zones 2 à 16 (utilisez le bouton de navi-
gation pour passer à la zone suivante).
Si l’apprentissage d’un détecteur échoue, soit
l'apprentissage a déjà été fait, soit le signal
d’émission n’a pas été reçu - réessayez.
Vous pouvez vérifier les détecteurs déjà appris
en mode “Trouver détecteur” :
pressez
166
.
Retard activation d’entrée
Le retard d’activation d’entrée est réglé par dé-
faut sur 20 s. Pour changer la durée (0-9999
secondes) par zone :
1.
Zone 1 : pressez
144
1
”
secondes
”
2.
Zone 2 : pressez
144
2
”
secondes
”
Retard d’activation de sortie
Le retard d’activation de sortie est réglé par dé-
faut sur 30 s. Pour changer la durée (0 - 255
secondes) par secteur :
Secteur A : pressez
60
1
”
secondes
”
Télécommande
Procédez à l’apprentissage d’une télécom-
mande (16 max.) pour le système commençant
par le numéro d’utilisateur 21 à 25.
Siemens Building Technologies
Fire Safety & Security Products
01.2008
Réglage par défaut :
Utils 21:
ARM
Utilis 22:
DISARM
User 23:
STAY
User 25:
FREE
Utilis 24:
(
simultanément) PANIC/SOS
1.
Télécommande 1 : pressez
18
21
t
le clavier va commencer à biper pour
indiquer que le mode apprentissage est
activé.
2.
Pressez le bouton ARM
sur la télécom-
mande
t
Un signal d'émission sera émis. Le panneau
va confirmer qu’un utilisateur a été trouvé en
affichant le message “Trouvé”.
3.
Pressez
pour confirmer.
4.
Répétez les actions 1 à 3 pour tous les
5 boutons (utilisez le bouton de navigation
pour passer au numéro d’utilisateur suivant).
Pour la télécommande 2, prenez les numéros
d’utilisateur 26 – 30, etc.
Branchement du téléphone
Pour transmettre les événements, le système
doit être connecté à une ligne téléphonique.
Suivez les étapes 8 et 9 pour programmer les
numéros de téléphone.
Si aucune ligne téléphonique n’est connectée, il
faut désactiver le composeur :
1.
Pressez
175
t
l’afficheur indique :
“Trans. Opt. A 12----7-“.
2.
Pressez
1
t
l’afficheur indique : “-2----7-“.
3.
Pour vérifier : pressez
Ctrl
simultanément
t
l’afficheur passe en mode texte et indique
“Activer N° Trans.”.
4.
Pressez
pour revenir en arrière et
continuer par l’étape 10
“Tester l’installation”.
Numéros de téléphone
Les numéros de téléphone (8 max.) composés
en cas d’événement peuvent comporter 16 chif-
fres. Réglage par défaut : Le numéro de télé-
phone 8 est le numéro de rappel du poste
« Control Monitoring Station » (CMS).
1.
Numéro de téléphone 1 :
pressez
181
1
“numéro tél.”
2.
Choisissez un format de rapport pour ce nu-
méro.
a)
Numéro lié à un téléphone :
pressez
182
1
2
t
un signal d’alarme sera envoyé à ce numéro
si un événement survient.
b)
L’appel est envoyé vers un poste CMS :
Format CID : pressez
182
1
1
Format SIA : pressez
182
1
10
3.
Répétez les actions 1 et 2 pour paramétrer
les numéros de téléphone 2 à 8 (utilisez le
bouton de navigation pour passer au nu-
méro de téléphone suivant).
Il existe 11 formats de rapport différents sélec-
tionnables pour chaque numéro de téléphone.
La liste des formats se trouve dans le Manuel de
l’Installateur.
Code d’identification
En cas de connexion avec un poste de contrôle,
vous pouvez programmer un code
d’identification individuel :
Secteur A : pressez
62
1
”code”
(Code 0-F à 4 chiffres).
E
ssai de l’installation
Pour tester l'intensité du signal reçu sur le
panneau, appuyez sur
200
14
Chaque fois qu'un signal est détecté, le clavier
émet un bip sonore et affiche l'intensité du si-
gnal reçu en % pendant 30 secondes.
Pour tester le fonctionnement et le champ de
d’émission de tous les détecteurs, passez en
Mode Test Marche.
En mode Test Marche, le panneau ne va
pas émettre d’alarmes et la plage de travail
sera plus réduite qu’en mode de fonction-
nement normal - exigence EN50131.
1.
Commencez le test de Marche :
pressez
200
6
t
Le clavier va commencer à biper pour
indiquer que le mode Test Marche est activé.
2.
Activez les détecteurs installés à l’aide d’un
aimant
t
Un signal d’émission sera émis (pour de plus
amples détails, voir les instructions
d’installation du détecteur). Le panneau va
émettre un signal de notification à chaque fois
qu’il reçoit un signal de détecteur et affichera
le numéro du détecteur sur l’afficheur.
3.
Pour quitter ce mode, pressez
.
t
vous repasserez en mode normal.
4.
Pour vérifier tous les signaux reçus dans le
journal des événements : pressez
.
5.
Pour effacer les événements du journal :
pressez
ou entrez le code Installat. (voir
Manuel de l’utilisateur 3.15.3).
La programmation est désormais finie et le sys-
tème est prêt à fonctionner.
Ne pas oublier de rebrancher la sirène interne !
Siemens Building Technologies
Fire Safety & Security Products
01.2008
NO
x
Forberedelse – generell informasjon
–
Før du kobler til batteriet eller slår på strømforsyningen, trekk ut pluggen på den
interne sirenen så lenge installasjonen varer (liten plugg med kabel, direkte på venstre
nedre side av displayet).
–
Dersom den interne summeren begynner å pipe: Trykk
for å slå den av.
–
For å gå ut av systemet til enhver tid: Trykk og hold knappen
.
Reset til fabrikkoppsett:
–
Reset alle pinner og nummere: Trykk
200
9
.
–
Reset alle individuelt endrede parametre: Trykk
200
10
.
Språkvalg
1.
Trykk
Ctrl
samtidig
t
“Lokal modus” åpnes.
2.
Rull med knappene
/
til posisjon
“Språk” og trykk
for å velge.
3.
Rull med knappene
/
til språket
du ønsker og trykk
for å lagre.
4.
For å avslutte trykk og hold knappen
.
Starte programmering
Programmere systemet (trinn 2 -10) er bare
mulig i installatormodus. For å gå til
installatormodus må systemet dearmeres!
1.
trykk
brukerkode “
147258
”
t
displayet viser: “CLIENT:USER”.
2.
Trykk
installatorkode “
258369
”
t
displayet viser: “ISTALLER:USERS”.
Stille klokka
1.
Sette tiden: trykk
26
1
”
HHMM
”
2.
Sette ukedag: trykk
26
2
”
DAY
”
(søndag = 1, mandag =
2
…etc.)
3.
Sette dato: trykk
26
3
”
DDMMYY
”
4.
Aktiver sommertid (standard Europa
GMT+1): trykk
26
4
1
Detektorer
Lær inn de trådløse detektorene (maks.16),
til panelet før installasjon. Standard oppsett:
- Soner 1 og 2 er forsinket for
inngangsruten.
- Soner 3 - 8 er satt som normale soner.
- Soner 9 - 16 er satt som oppholdssoner.
Vi anbefaler å bruke:
- Sone 1: magnetkontakt fra inngangsdøren.
- Sone 2: første bevegelsesdetektor for
overvåkning av ingangspartiet
(kontrollpanel).
1.
For sone 1: trykk
164
1
t
tastaturet vil begynne å pipe for å vise at
innlæringsmodus er aktivert.
2.
Trykk manipuleringskontakten på
detektoren eller fjern magneten fra
dørkontakten
t
den vil sende et overføringssignal.
Panelet vil bekrefte dersom en detektor
er funnet med meldingen “Funnet”.
3.
Trykk
for å bekrefte.
4.
Gjenta trinn 1 - 3 for sonene 2 - 16 (bruk
navigasjonsknappen for å skifte til
neste sone).
Dersom en detektor ikke kunne læres inn er
den allerede innlært til panelet eller
overføringssignalet ble ikke mottatt – prøv
på nytt.
Allerede innlærte detektorer kan kontrolleres i
“Finn detektor” modus: trykk
166
.
I
nngang forsinkelsestid
Inngang forsinkelsestid er satt som
standared til 20 sekunder. For å endre tiden:
(0-9999 sekunder) pr. sone:
1.
Sone 1: trykk
144
1
”
sekunder
”
2.
Sone 2: trykk
144
2
”
sekunder
”
Utgang forsinkelsestid
Utgang forsinkelsestid er satt som standard
til 30 sekunder. For å endre tiden (0 - 255
sekunder) pr. område:
Område A: trykk
60
1
”
sekunder
”
Fjernkontroll
Lær inn en fjernkontroll (maks. 16) til
systemet start med brukernummer21 -25.
Standard oppsett:
Bruker 21:
ARM
Bruker 22:
DISARM
Bruker 23:
STAY
Bruker 25:
FREE
Bruker 24:
(
samtidig)
PANIC/SOS
1.
Fjernkontroll 1: trykk
18
21
t
tastaturet vil begynne å pipe for å vise at
innlæringsmodus er aktivert.
2.
Trykk ARM knappen
på fjernkontrollen
Siemens Building Technologies
Fire Safety & Security Products
01.2008
t
den vil sende et overføringssignal.
Panelet vil bekrefte om en bruker er
funnet med meldingen “Funnet”.
3.
Trykk
for å bekrefte.
4.
Gjenta trinn 1 - 3 for å følge opp alle 5
knappene (bruk navigasjonsknappen
for å skifte til neste brukernummer).
For fjernkontroll 2 ta brukernumer 26 - 30
etc.
Telefontilkobling
For å overføre hendelser må systemet være
koblet til en telefonlinje. Følg trinn 8 - 9 for å
programmere telefonnummere.
Dersom ingen telefonlinje er tilkoblet, må
oppringeren slås av:
1.
Trykk
175
1
t
displayet viser:
“Oppringer A opsjon 12----7-“.
2.
Trykk
1
t
displayet viser: “-2----7-“.
3.
For å kontrollere: trykk
Ctrl
samtidig
t
displayet endres for å nullstille
tekstmodus og viser “Aktiver oppringer
nr”.
4.
Trykk
for å gå tilbake og fortsett med
trinn 10 “Test av installasjonen”.
Telefonnummere
Telefornnummer (maks. 8) som ringes ved
en hendelse kan være opp til 16 siffer.
Standard oppsett: telefonnummer 8 er
tilbakering-nummer for alarmsentral (Control
Monitoring Station - CMS).
1.
Telefonnummer 1:
trykk
181
1
”tel.nummer”
2.
Velg et rapportformat for dette nummer.
a)
Nummer relatert til en telefon:
trykk
182
1
2
t
et alarmsignal vil sendes til dette
nummeret ved en hendelse.
b)
Samtalen går til en CMS stasjon:
CID format: trykk
182
1
1
SIA format: trykk
182
1
10
3.
Gjenta trinn 1 - 2 for telefonnummere 2 –
8 (bruk navigasjonsknappen for å
skifte til neste telefonnummer).
Det er 11 ulike rapportformater som kan
velges for hvert telefonnummer. Formatene
finner du i Installasjonsmanualen.
Identifikasjonskode
Ved tilkobling til en alarmsentral kan du
programmere en individuell
identifikasjonskode:
Område A: trykk
62
1
”kode”
(4 siffers kode 0-F).
Test av installasjonen
Slik tester du styrken på signalet som vises
på panelet: trykk
200
14
.
Hver gang du oppdager et signal, piper
tastaturet og viser styrken i % i 30 sekunder
for det mottatte signalet.
For å teste alle detektorne for funksjon og
overføringsområde, skift til gangtest modus.
I gangtest modus vil ikke panelet sende
ut noen alarmer og arbeidsområdet vil
være mindre enn i normal driftsmodus -
EN50131 krav.
1.
Start gangtest: trykk
200
6
t
tastaturet vil begynne å pipe for å
indikere at gangtest modus er aktivert.
2.
Aktiver de installerte detektorne med en
magnet
t
det vil sendes et overføringssignal (for
mer informasjon se
installasjonsanvisningene for detektoren).
Panelet gir et varselsignal hver gang et
detektorsignal registreres og vil vise
detektornummeret på displayet.
3.
For å avslutte denne modus: trykk
.
t
dette tar deg tilbake til normal modus.
4.
For å kontrollere alle mottatte sinaler i
hendelsesloggen: trykk
.
5.
For å slette hendelser i loggen:
trykk
eller gi inn installasjonskoden
(se Brukermanualen 3.15.3).
Programmeringen er nå avsluttet og
systemet er klart for bruk.
Husk å koble til igjen den interne sirenen!

Siemens Building Technologies
Fire Safety & Security Products
01.2008
DA
x
Forberedelse – generelle oplysninger
–
Før tilslutning af batteriet eller strømforsyningen trækkes stikket til den interne sirene
ud (lille stik med kabel på nederste, venstre side af display, mærket ”PIEZO”).
–
Hvis den interne lydgiver begynder at bippe. Tryk på
for at slukke den.
–
Sådan forlader du til enhver tid systemet: Tryk på knappen
og hold den nede.
Gendan fabriksindstillinger:
–
Gendan alle koder og numre: Tryk på
200
9
.
–
Gendan alle ændrede parametre: Tryk på
200
10
.
Indstilling af sprog
1.
Tryk på
Ctrl
samtidigt
t
”Lokalmodus” åbnes.
2.
Rul med knapperne
/
frem til
“Language” og tryk på
for at vælge.
3.
Rul med knapperne
/
til det sprog
du foretrækker og tryk på
for at
gemme.
4.
Tryk på
og hold knappen nede for at
forlade menuen.
Påbegynd programmering
Det er kun muligt at programmere systemet
(trin 2 -10) i installationsmodus. For at få
systemet i installationsmodus skal det være
koblet fra!
1.
Tryk på
brugerkode “
147258
”
t
Skærmen viser: ”KUNDE: BRUGER”.
2.
Tryk på
installationskode“
258369
”
t
Skærmen viser:”INSTALLATØR:BRU-
GERE”.
Indstilling af ur
1.
Indstil tid: Tryk på
26
1
”
TT
MM
”
2.
Indstil ugedag: Tryk på
26
2
”
DAG
”
(søndag =
1
,
mandag =
2
…osv.)
3.
Indstil dato: Tryk på
26
3
”
DDMMÅÅ
”
4.
Aktiver automatisk skift til sommertid
(standard Europa GMT+1): Tryk på
26
4
1
Detektorer
Indlæs de trådløse detektorer (maks.16) til
centralen inden installationen.
Standardindstillinger:
- Zonerne 1 og 2 er forsinkede til
adgangsvej.
- Zonerne 3 - 8 er beregnet til normale
zoner.
- Zonerne 9 - 16 er beregnet til
hjemmezoner.
Vi anbefaler at bruge:
- Zone 1: Magnetkontakt fra indgangsdøren.
- Zone 2: Første bevægelsesdetektor til
overvågning af indgangen
(betjeningspanel).
1.
Til zone 1: Tryk på
164
1
t
Tastaturet begynder at bippe for at vise,
at indlæsningsmodus er aktiveret.
2.
Tryk på følerkontakten på detektoren eller
fjern magneten fra dørkontakten
t
Der sendes et transmissionssignal.
Panelet bekræfter, når en detektor er
fundet med meddelelsen ”Fundet”.
3.
Tryk på
for at bekræfte.
4.
Gentag trin 1-3 for zonerne 2-16 (brug
navigationsknappen for at skifte til den
næste zone).
Hvis en detektor ikke kan indlæses, er den
enten allerede indlæst til panelet, eller
transmissionssignalet blev ikke modtaget –
prøv igen. Allerede indlæste detektorer kan
tjekkes i menuen ”Find detektor”:
Tryk på
166
.
Forsinkelsestid ved indgang
Forsinkelsestiden ved indgang er som
standard sat til 20 sek. Tiden kan ændres
(0-9999 sekunder) pr. zone her:
1.
Zone 1:
144
1
”
sekunder
”
2.
Zone 2:
144
2
”
sekunder
”
Forsinkelsestid ved udgang
Forsinkelsestiden ved udgang er som
standard sat til 30 sek. Tiden kan ændres
(0 - 255 sekunder) pr. område her:
Område A:
60
1
”
sekunder
”
Fjernbetjening
Indlæs en fjernbetjening (maks. 16) til
systemet, begynd med brugernummer 21 - 25.
Siemens Building Technologies
Fire Safety & Security Products
01.2008
Standardindstilling:
Bruger 21:
TIL
Bruger 22:
FRA
Bruger 23:
HJEMME
Bruger 25:
LEDIG
Bruger 24:
(
samtidigt) PANIK/SOS
1.
Fjernbetjening 1:
Tryk på
18
21
t
Tastaturet begynder at bippe for at vise,
at indlæsningsmodus er aktiveret.
2.
Tryk på knappen TIL på
fjernbetjeningen
t
Der sendes et transmissionssignal.
Panelet bekræfter, når en bruger er
fundet med meddelelsen ”Fundet”.
3.
Tryk på
for at bekræfte.
4.
Gentag trin 1-3 for alle 5 knapper (brug
navigationsknappen for at skifte til det
næste brugernummer).
Til fjernbetjening nr. 2, tag brugernumrene
26 – 30 osv.
Telefonforbindelse
For at kunne transmittere hændelser skal
systemet være tilsluttet en telefonlinje. Følg
trin 8-9 for at programmere telefonnumrene.
Hvis der ikke er tilsluttet en telefonlinje, skal
telefonsenderen være slukket:
1.
Tryk på
175
1
t
skærmen viser:
“Tlf. Sender A mulighed 12----7-“.
2.
Tryk på
1
t
skærmen viser: “-2----7-“.
3.
For at tjekke: Tryk på
Ctrl
samtidigt
t
Skærmen skifter til slet tekst-modus og
viser ”Aktiver tastatur nr.”.
4.
Tryk på
for at gå tilbage og fortsætte
med trin 10
“Test af installationen”.
Telefonnumre
Telefonnumrene (maks. 8) som skal
anvendes i tilfælde af en hændelse, kan
have op til 16 cifre. Standardindstilling:
Kortvalgsnummer 8 er
tilbagekaldsnummeret på Control Monitoring
Station (CMS) (Overvågningscentret).
1.
Kortvalgsnummer 1:
Tryk på
181
1
”
tlf.nr.
”
2.
Vælg et indberetningsformat for dette
nummer.
a)
Nummer relateret til en telefon:
Tryk på
182
1
2
t
Der sendes et alarmsignal til dette
nummer, når en begivenhed indtræffer.
b)
Opkaldet går til en CMS-station:
CID-format: Tryk på
182
1
1
SIA-format: Tryk på
182
1
10
3.
Gentag trin 1-2 for kortvalgsnumrene 2-8
(brug navigationsknappen for at skifte
til det næste kortvalgsnummer).
Der kan vælges 11 forskellige
indberetningsformater for hvert
kortvalgsnummer. Formaterne er vist
i installationsvejledningen.
Identifikationskode
Når du er tilsluttet en kontrolcentral, kan du
programmere en individuel
identifikationskode:
Område A: Tryk på
62
1
”kode”
(4-cifret kode 0-F).
Test af installationen
For at teste styrken af det signal, der er
modtaget på panelet: tryk på
200
14
Hver gang at der detekteres et signal,
bipper tastaturet og viser den modtagne
signalstyrke i % i 30 sek.
Skift til gangtestmodus for at teste alle
detektorer for funktion og
transmissionsrækkevidde.
I gangtestmodus vil panelet ikke sende
alarmer og arbejdsrækkevidden vil være
mindre end den normale driftsmodus –
EN50131-krav.
1.
Begynd gangtest: Tryk på
200
6
t
Tastaturet begynder at bippe for at vise,
at gangtestmodus er aktiveret.
2.
Aktiver de installerede detektorer med en
magnet
t
Der sendes et transmissionssignal (for
flere oplysninger, se
installationsvejledningen for detektorer).
Panelet giver en melding, hver gang der
modtages et detektorsignal og
detektornummeret vises på skærmen.
3.
For at afsluttet denne modus: Tryk på
.
t
Derefter vender du tilbage til normal
modus.
4.
For at tjekke alle modtagne signaler
i hændelsesjournalen: Tryk på
.
5.
For at slette hændelser i journalen:
Tryk på
eller indtast installatørkoden
(se Brugervejledning 3.15.3).
Programmeringen er nu afsluttet og
systemet er klar til drift.
Glem ikke at tilslutte den interne sirene igen!
Siemens Building Technologies
Fire Safety & Security Products
01.2008
NL
x
Voorbereiding - algemene informatie
–
Voordat u de batterij aansluit of de netvoeding inschakelt, dient u de interne sirene
gedurende de installatieperiode uit te trekken (kleine stekker met kabel, direct
onderaan links van het display).
–
Als de interne zoemer begint te piepen: druk op
om deze het zwijgen op te leggen.
–
Het systeem op elk moment verlaten: houd de knop
ingedrukt
.
Terugzetten naar fabrieksinstelling:
–
Alle pin's en nummers resetten: druk op
200
9
.
–
Alle individueel gewijzigde parameters resetten: druk op
200
10
.
Taalinstelling
1.
Druk tegelijkertijd op
Ctrl
t
de “Lok. Mode” verschijnt.
2.
Blader met de knoppen
/
naar de
optie “Taal” en druk op
om deze optie
te kiezen.
3.
Blader met de knoppen
/
naar de
taal van uw voorkeur en druk op
om
deze op te slaan.
4.
Houd de knop
ingedrukt om het menu
te verlaten
.
Beginnen met programmeren
Programmeren van het systeem (stappen
2 -10) is alleen mogelijk in de
installatiemodus (Install. Mode). Om in de
installatiemodus te komen, moet het
systeem worden gedeactiveerd!
1.
Druk op
gebruikerscode “
147258
”
t
het display toont: “KLANT:GEBRUIKER”.
2.
Druk op
installateurscode “
258369
”
t
het display toont: “
INSTAL.:GEBRUIKERS
”.
Klokinstelling
1.
Tijd instellen: druk op
26
1
”
HHMM
”
2.
Dag instellen: druk op
26
2
”
DAG
”
(zondag =
1
,
maandag =
2
…enz.)
3.
Datum instellen: druk op
26
3
”
DDMMYY
”
4.
Automatisch zomer-/wintertijd activeren
(standaard Europa GMT+1): druk op
26
4
1
Detectors
Lees de draadloze detectors (max.16), vóór
de installatie, bij de centrale in. Standaard
instellingen:
- zones 1 en 2 worden vertraagd voor
toegangsroute
- zones 3 - 8 worden ingesteld voor normale
zones
- zones 9 - 16 worden ingesteld voor
aanwezigheidszones.
Wij raden aan het volgende te gebruiken:
- zone 1: magneetcontact van de
toegangsdeur
- zone 2: eerste bewegingsdetector voor de
bewaking van de toegangspartitie
(bedieningscentrale).
1.
Voor zone 1: druk op
164
1
t
het keypad begint te piepen om aan te
geven dat de inleesmodus is geactiveerd
2.
Druk op het sabotagecontact op de
detector of verwijder de magneet van het
deurcontact
t
dit verzendt nu een transmissiesignaal.
Als een detector wordt gevonden, geeft
de centrale een bevestiging met de
melding “Gevonden”.
3.
Druk op
voor bevestiging.
4.
Herhaal de handelingen 1 - 3 voor de
zones 2 - 16 (gebruik de navigatieknop
om naar de volgende zone te gaan).
Als een detector niet kon worden ingelezen,
is deze al ingelezen bij de centrale of het
transmissiesignaal werd niet ontvangen -
probeer het opnieuw.
Reeds ingelezen detectors kunnen worden
gecontroleerd in de modus “Zoek detector”:
druk op
166
.
Toegangsvertragingstijd
De toegangsvertragingstijd is standaard
ingesteld op 20 seconden. Om deze tijd (0-
9999 seconden) per zone te wijzigen:
1.
Zone 1: druk op
144
1
”
sec.
”
2.
Zone 2: druk op
144
2
”
sec.
”
Uitgangsvertragingstijd
De uitgangsvertragingstijd is standaard
ingesteld op 30 seconden. Om deze tijd (0 -
255 seconden) per partitie te wijzigen:
Partitie A: druk op
60
1
”
sec.
”
Afstandsbediening
Een afstandsbediening (max. 16) bij het
systeem inlezen te beginnen met
gebruikers-nummers 21 - 25.
Standaard instelling:
Siemens Building Technologies
Fire Safety & Security Products
01.2008
Gebruiker 21:
ARM
Gebruiker 22:
DISARM
Gebruiker 23:
STAY
Gebruiker 25:
FREE
Gebruiker 24:
(simultaneously) PANIC/SOS
1.
Afstandsbediening 1:
18
21
t
het keypad begint te piepen om aan te
geven dat de inleesmodus is geactiveerd
2.
Druk op de knop ARM
op de
afstandsbediening
t
deze zendt een transmissiesignaal. Als
een gebruiker wordt gevonden, geeft de
centrale een bevestiging met de melding
“Gevonden”.
3.
Druk op
voor bevestiging.
4.
Herhaal de handelingen 1 - 3 voor alle
5 knoppen (gebruik de navigatieknop
om naar het volgende gebruikersnummer
te gaan).
Gebruik voor afstandsbediening 2 de
gebruikersnummers 26 - 30 enz.
Telefoonverbinding
Om events door te geven, moet het systeem
verbonden zijn met een telefoonlijn. Volg de
stappen 8 - 9 om de telefoonnummers te
programmeren.
Als geen telefoonlijn is aangesloten, moet
de kiezer worden uitgeschakeld:
1.
Druk op
175
1
t
het display
toont: “Kiezer A Optie 12----7-“.
2.
Druk op
1
t
het display toont: “
-2----7-
“.
3.
Ter controle: druk tegelijkertijd op
Ctrl
t
het display wijzigt naar gewone
tekstmodus en toont “Activeer kiezer nr”.
4.
Druk op
om terug te gaan en ga door
met stap 10
“Installatie testen”.
Telefoonnummers
De telefoonnummers (max. 8) die worden
gekozen bij een event, kunnen maximaal
16 cijfers lang zijn. Standaard instelling:
telefoonnummer 8 is het terugbelnummer
(callback-nummer) van het Control
Monitoring Station (CMS).
1.
Telefoonnummer 1:
druk op
181
1
“tel.nummer”
2.
Kies een doormeldingsformaat voor dit
nummer.
a)
Nummer m.b.t. een telefoon:
druk op
182
1
2
t
een alarmsignaal wordt verzonden naar dit
nummer, als zich een event voordoet
b)
Doormelding gaat naar een CMS station:
CID formaat: druk op
182
1
1
SIA formaat: druk op
182
1
10
3.
Herhaal de handelingen 1 - 2 voor de
telefoonnummers 2 - 8 (gebruik de
navigatieknop om naar het volgende
telefoonnummer te gaan).
Er kan worden gekozen uit 11 verschillende
doormeldingsformaten voor elk
telefoonnummer. De formaten staan
vermeld in de installatiehandleiding.
Identificatiecode
Bij verbinding met een monitoring station
kunt u een individuele identificatiecode
programmeren:
Partitie A: druk op
62
1
”code”
(4-cijferige code 0-F).
Installatie testen
U test de sterkte van het ontvangen signaal
door op het paneel te drukken op
200
14
Wanneer een signaal wordt ontvangen geeft
het paneel een geluidssignaal en wordt de
signaalsterkte in procenten weergegeven,
gedurende 30 seconden.
Om het functioneren en het
transmissiebereik van alle detectors te
testen, gaat u naar de looptestmodus.
In de looptestmodus verstuurt de
centrale geen alarmen en het
werkbereik is minder dan in de normale
werkmodus - eis EN50131.
1.
Start de looptest: druk op
200
6
t
het keypad begint te piepen om aan te
geven dat de looptestmodus is
geactiveerd
2.
Activeer de geïnstalleerde detectors met
een magneet
t
deze verzenden een transmissiesignaal
(raadpleeg voor meer informatie de
Installatie-instructies van de detector).
De centrale geeft telkens wanneer een
detectorsignaal wordt ontvangen een
berichtsignaal en toont het
detectornummer op het display.
3.
Deze modus verlaten: druk op
.
t
u komt terug in de normale modus
4.
Ter controle van alle ontvangen signalen
in het logboek: druk op
.
5.
Om events uit het logboek te verwijderen:
druk op
of voer de installateurscode
in (zie gebruiks-aanwijzing 3.15.3).
Het programmeren is nu voltooid en het
systeem is gereed voor gebruik.
Vergeet niet de interne sirene weer aan te
sluiten!
Siemens Building Technologies
Fire Safety & Security Products
01.2008
FI
x
Valmistelut - Yleistietoa
–
Laitteiston sisäinen sireeni (näytön vasemmassa alalaidassa oleva, pieni, johdon
päässä oleva liitin) pitää irrottaa asennuksen ajaksi, ennen akun liittämistä tai
päävirtalähteen päälle kytkemistä.
–
Jos sisäinen hälytin alkaa soida: Se hiljennetään painamalla
.
–
Järjestelmästä voi poistua milloin vain:
-painiketta pidetään pohjassa
.
Tehdasasetusten palauttaminen:
–
Kaikkien PIN-koodien ja numeroiden nollaus: Painetaan
200
9
.
–
Kaikkien muutettujen parametrien nollaus: Painetaan
200
10
.
Kielen asettaminen
1.
Painetaan samanaikaisesti
Ctrl
t
”Local Mode (Paikallistila)” avautuu.
2.
Selataan “Language (Kieli)” –kohtaan
/
-painikkeilla, ja asetuksiin
siirrytään painamalla
3.
Haluttu kieli valitaan
/
-painikkeilla,
ja asetus valitaan painamalla
.
4.
-painiketta pidetään pohjassa, kun
halutaan poistua asetuksista
.
Ohjelmoimisen aloittaminen
Järjestelmän ohjelmointi (kohdat 2 - 10)
suoritetaan asennustilassa. Järjestelmä on
kytkettävä pois käytöstä ennen
asennustilaan pääsemistä!
1.
Painetaan
user code (käyttäjäkoodi)
“
147258
”
t
näytöllä näkyy: “CLIENT:USER
(ASIAKAS:KÄYTTÄJÄ)”.
2.
Painetaan
installer code
(asennuskoodi)“
258369
”
t
näytöllä näkyy: “INSTALLER:USERS
(ASENNUS:KÄYTTÄJÄT)”.
Kellon asetukset
1.
Ajan asettaminen: painetaan
26
1
”
HHMM (TTMM)
”
2.
Viikonpäivän asettaminen:
painetaan
26
2
”
DAY
”
(Sunnuntai = 1, Maanantai =
2
…jne.)
3.
Päivämäärän asettaminen: painetaan
26
3
”
DDMMYY (PPKKVV)
”
4.
Automaattinen kesä-/talviajan
muuttaminen (oletuksena GMT+1):
painetaan
26
4
1
Tunnistimet
Langattomien tunnistimien (korkeintaan
16 kpl.) asetukset tulee opetella ennen
asentamista paneeliin. Oletusasetukset:
- Alueilla 1 ja 2 on käytössä saapumisreitin
viive.
- Alueet 3 - 8 ovat asetettu tavallisiksi
alueiksi.
- Alueet 9 - 16 ovat asetettu Stay-alueiksi.
Suosittelemme käyttämään seuraavia
asetelmia:
- Alue 1: oven magneettikontakti.
- Alue 2: saapumisalueen/eteisen
ensimmäinen liikkeentunnistin
(ohjauspaneeli).
1.
Alue 1: painetaan
164
1
t
näppäimistö alkaa piipata opettelutilan
aktivoitumisen merkiksi.
2.
Tunnistimen käsittelykontaktia painetaan,
tai magneetti erotetaan ovikontaktista.
t
lähetyssignaali lähetetään. Paneeli
vahvistaa löytäneensä tunnistimen;
ruudulla lukee ”Found (Löydetty)”.
3.
Vahvistetaan painamalla
.
4.
Kohdat 1 - 3 toistetaan alueille 2 – 16
(seuraavalle alueelle vaihdetaan
-
navigointipainikkeella).
Jos jotain tunnistinta ei voi oppia; se on
jo opittu tällä paneelilla, tai signaalia ei
vastaanotettu (yritä uudelleen).
Opitut tunnistimet voi tarkistaa ”Find
Detector (Etsi tunnistin)” -tilassa:
painetaan
166
Saapumisviive
Saapumisviiveen oletusaika on 20 sekuntia.
Aikaa voi muuttaa (0-9999 sekuntia)
alueittain:
1.
Alue 1:
144
1
”
sekunnit
”
2.
Alue 2:
144
2
”
sekunnit
”
Lähtöviive
Lähtöviiveen oletusaika on 30 sekuntia.
Aikaa voi muuttaa (0 - 255 sekuntia)
alueittain:
Alue A: painetaan
60
1
”
sekunnit
”
Kauko-ohjaus
Järjestelmälle voi opettaa kauko-ohjaimia
(korkeintaan 16 kpl.), alkaen
käyttäjänumeroista 21 - 25.
- 1
- 2
