ZyXEL Communications Network Device NXC-8160s: " To configure the NXC-8160 again, you need to use the new IP address to
" To configure the NXC-8160 again, you need to use the new IP address to : ZyXEL Communications Network Device NXC-8160s
ENGLISH
4 Deploy the NXC-8160 in Your Network
After you finish the SSID and wireless security settings, use this section to configure the
NXC-8160’s IP address and connect it to your network.
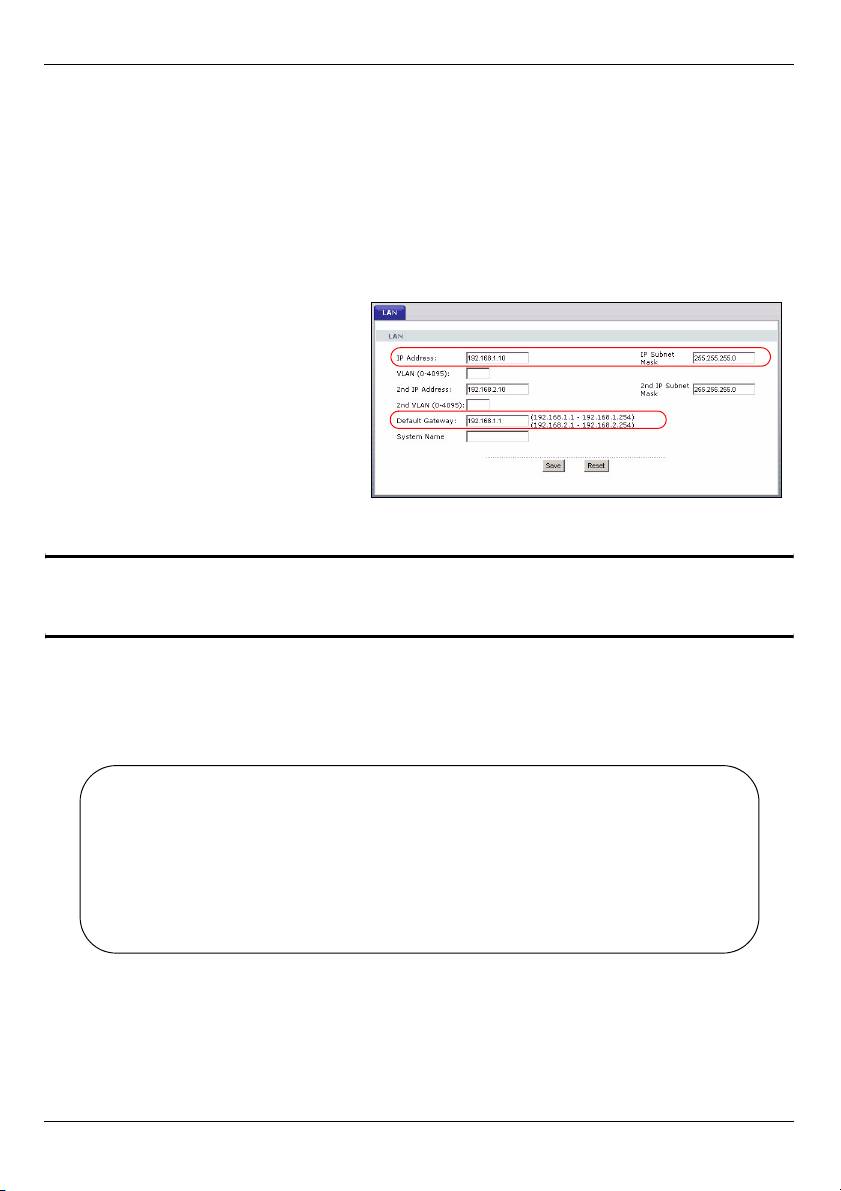
The NXC-8160’s default IP address is 192.168.1.10 and the subnet mask is
255.255.255.0. If your network is in another subnet or someone in your network is using
this IP address, you need to set the NXC-8160 to another IP address.
1 Click LAN on the navigation panel
of the web configurator.
2 Give the NXC-8160 an available
static IP address which is in the
same subnet as your network.
3 Enter the gateway’s IP address.
4 Click Apply and log out of the
web configurator.
5 Disconnect the NXC-8160 from
the computer and connect the NXC-8160 to a modem, router or switch in your network.
" To configure the NXC-8160 again, you need to use the new IP address to
access the web configurator.
Procedure to View a Product’s Certification(s)
1 Go to www.zyxel.com.
2 Select your product from the drop-down list box on the ZyXEL home
page to go to that product's page.
3 Select the certification you wish to view from this page.
6
DEUTSCH
DEUTSCH
Übersicht
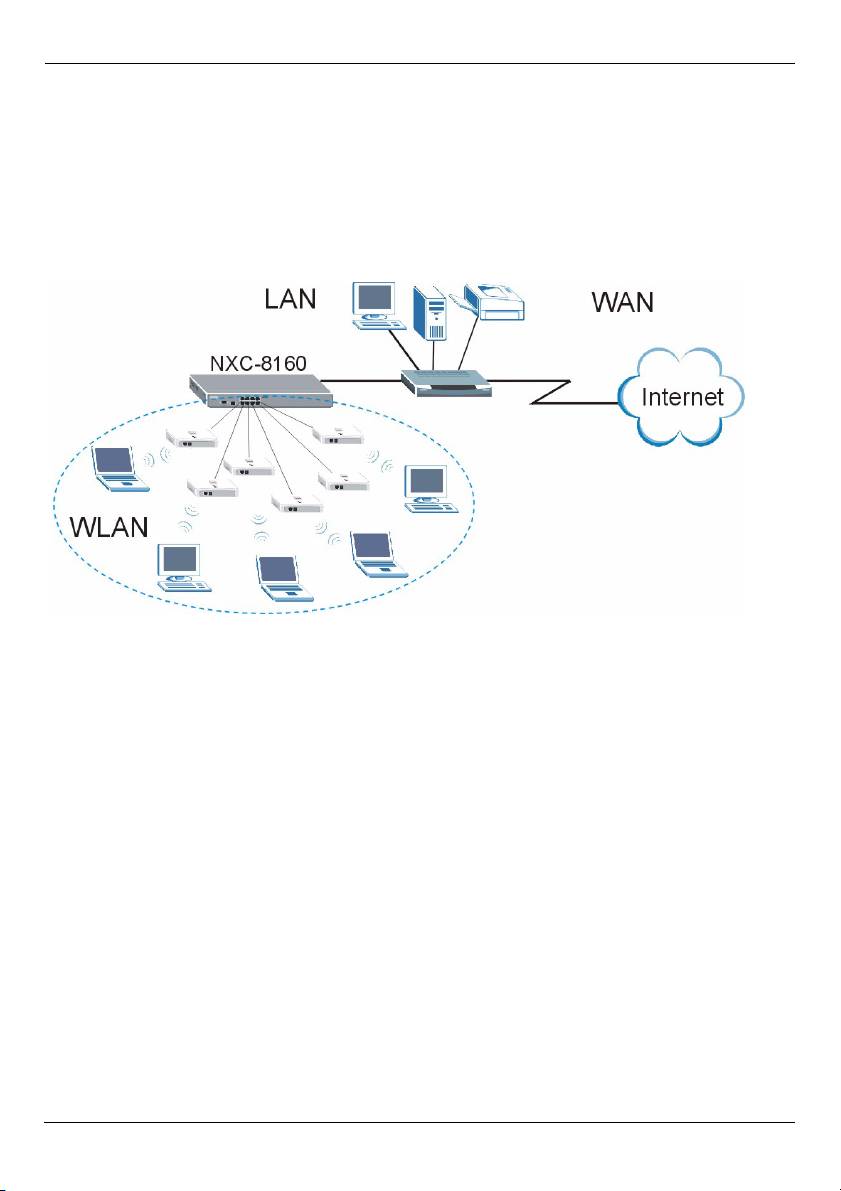
Der NXC-8160 ist ein PoE-WLAN-Controller, der die angeschlossenen Access-Points
(APs) über ein Ethernet-Kabel mit Strom versorgt. Sie können Ihr Drahtlosnetzwerk um bis
zu acht APs erweitern. Alle Einstellungen für die Drahtlosverbindungen und alle
Sicherheitseinstellungen werden auf dem NXC-8160 konfiguriert. Der NXC-8160
ermöglicht über die APs den Zugriff auf das kabelgebundene Netzwerk. Die APs müssen
nicht konfiguriert werden, und sie funktionieren wie Antennen am NXC-8160.
Dieses Benutzerhandbuch enthält die folgenden Kapitel:
1 Anschließen der Hardware
2 Zugreifen auf den Web-Konfigurator
3 Konfigurieren der Drahtloseinstellungen und der Drahtlossicherheitseinstellungen
4 Benutzen des NXC-8160 im Netzwerk
7
DEUTSCH
1 Anschließen der Hardware
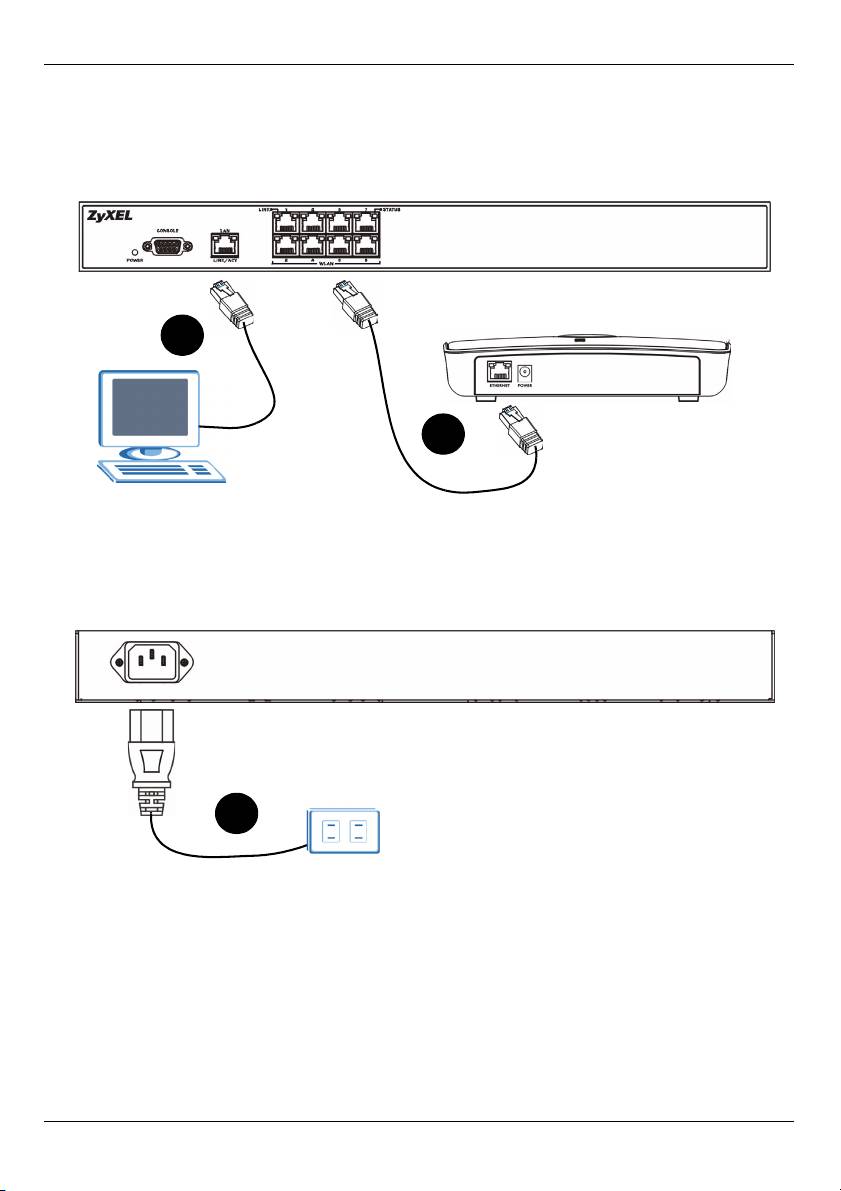
Führen Sie die unten beschriebenen Schritte aus, um den NXC-8160 für die
Erstkonfiguration anzuschließen.
2
1
1 Schließen Sie einen oder mehrere APs mit dem mitgelieferten Ethernet-Kabel an die
WLAN-Ports an. Zum Zeitpunkt der Druckstellung kann nur das Modell NWA-8500 an
den WLAN-Port angeschlossen werden.
2 Schließen Sie Ihren Computer mit einem Ethernet-Kabel an den Anschluss LAN an.
3
3 Verbinden Sie den Netzanschluss an der Rückseite des Geräts mit dem mitgelieferten
Stromkabel an das Stromnetz an.
Schalten Sie das Gerät ein, und prüfen Sie die LED-Anzeigen an der Vorderseite des
Geräts. Die POWER LED leuchtet auf. Die LED-Anzeigen LINK/ACT und LINK beginnen
zu leuchten, wenn die Anschlüsse verbunden sind.
8
Оглавление
- NXC-8160
- " The NXC-8160’s default IP address is 192.168.1.10.
- " To configure the NXC-8160 again, you need to use the new IP address to
- " Die Standard-IP-Adresse des NXC-8160 ist 192.168.1.10.
- " Wenn Sie den NXC-8160 erneut konfigurieren möchten, müssen Sie sich
- " La dirección IP predeterminada del NXC-8160 es 192.168.1.10.
- " Para configurar el NXC-8160 de nuevo, necesita utilizar la nueva dirección
- " L'adresse IP par défaut du NXC-8160 est 192.168.1.10.
- " Pour configurer à nouveau le NXC-8160, vous devez utiliser la nouvelle
- " L'indirizzo IP predefinito del NXC-8160 è 192.168.1.10.
- " Per configurare nuovamente il NXC-8160, è necessario utilizzare il nuovo
- " По умолчанию NXC-8160 имеет IP-адрес 192.168.1.10.
- " Чтобы снова настроить конфигурацию NXC-8160, вам понадобится
- " NXC-8160:s standard-IP-adress är 192.168.1.10.
- " För att konfigurera NXC-8160 igen, måste du använda den nya IP-
- " NXC-8160 的默认 IP 地址是 192.168.1.10。
- " 如要重新配置 NXC-8160,则需要使用新的 IP 地址访问 web 配置程序。
- " NXC-8160 預設的 IP 位址是 192.168.1.10。
- " 要再次設定 NXC-8160,您必需使用新的 IP 位址接取網頁設定介面。
