ZyXEL Communications Draft 802.11n Wireless Broadband 1-NBG-415N: V If you cannot access the Internet, check that you
V If you cannot access the Internet, check that you : ZyXEL Communications Draft 802.11n Wireless Broadband 1-NBG-415N
ENGLISH
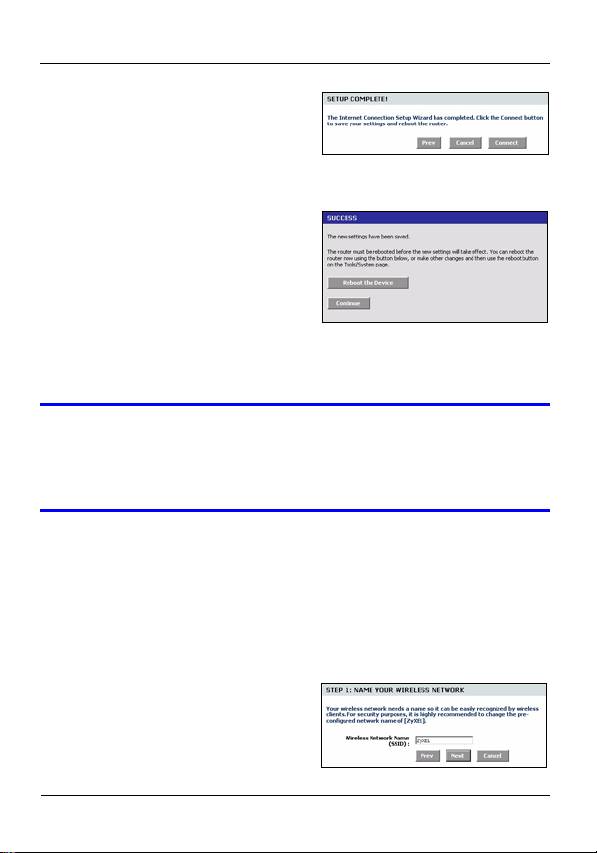
6 In the last wizard screen,
click Connect to save the
settings to the NBG-415N.
7 Click Reboot the Device to
restart the NBG-415N and make the changes take effect.
Wait a couple of minutes for
the NBG-415N to finish
rebooting before accessing it
again.
8 Test your Internet
connection. Launch your
web browser and enter any web site address for example,
http://www.zyxel.com).
V If you cannot access the Internet, check that you
have entered your Internet account information
correctly in the wizard screens.
4 Wireless LAN Wizard Setup
1 Click START > WIZARD > Launch Wireless Security
Setup Wizard to display the first wizard screen. Click
Next in each screen to continue.
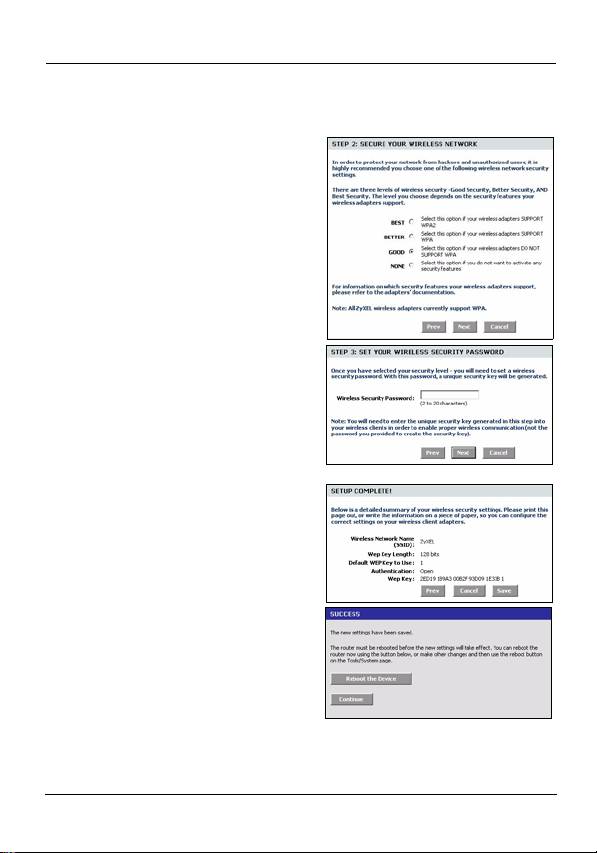
2 In the Wireless Network
Name field, enter a
descriptive name for
identifying the wireless
4
ENGLISH
network. To connect to this wireless network, wireless
clients must associate to this ID. .
3 Follow the on-screen
instruction and select a
wireless security mode.
4 The next screen displays if
you enable a wireless
security mode. Follow the
on-screen instruction to
enter a WEP key or
password.
5 Check your wireless LAN
settings in this screen and
click Save to save the
settings to the NBG-415N.
6 Click Reboot the Device to
restart the NBG-415N and
make the changes take
effect.
7 Wait a couple of minutes for
the NBG-415N to finish
rebooting before accessing it again.
5
ENGLISH
5 Wireless Connection Setup using
Windows® Connect Now
With Windows® Connect Now, you can transfer wireless
settings on your NBG-415N to a USB memory stick and then
save the settings to the wireless client computer(s). This
allows you to easily set up a wireless LAN. To take advantage
of this feature, you need:
• A USB memory stick with at least 300K of available memory.
• Windows XP with Service Pack 2 (SP2).
Follow the steps below to set up a wireless LAN using
Windows® Connect Now.
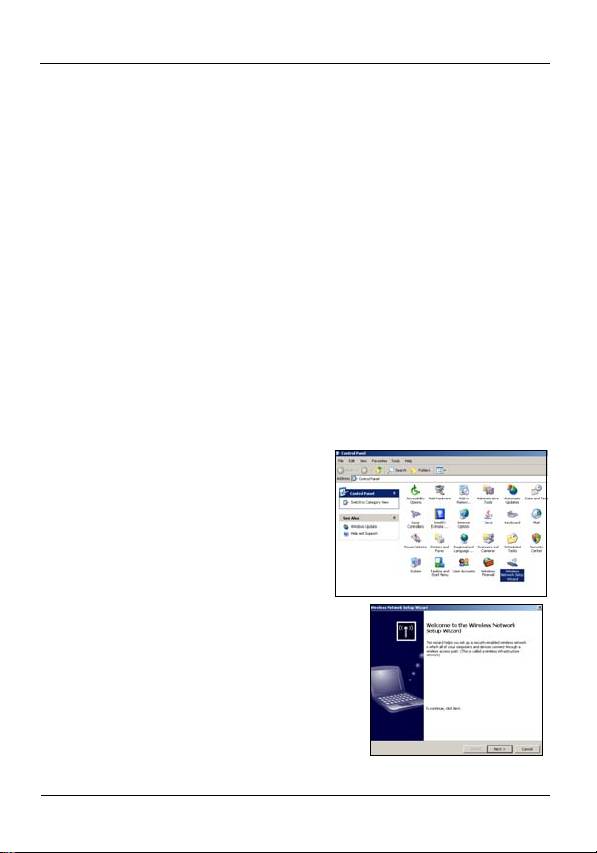
1 Click Start > Control Panel
and double-click Wireless
Network Setup Wizard.
2 The first wizard screen
displays. Click Next in each
screen to continue.
6

ENGLISH
3 Select Set up a new wireless
network to configure a new
wireless network.
4 In the Network name (SSID) field,
specify a unique name to identify
your wireless LAN.
5 Select Automatically assign a
network key to have Windows
create a security key.
6 Select Use WPA encryption
instead of WEP for data
encryption.
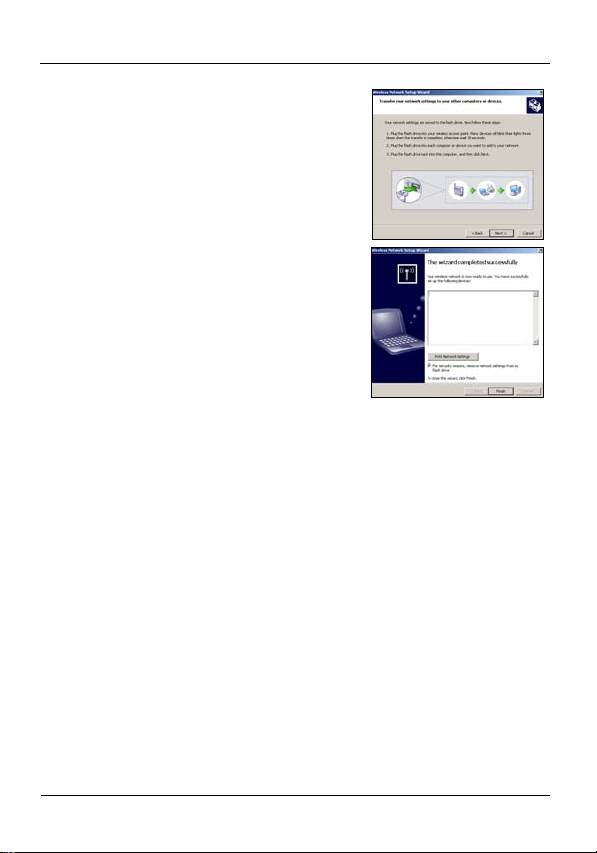
7 Select Use a USB Flash drive to
set up a wireless network.
8 Connect the USB drive to your
computer and specify the drive
letter in the Flash drive field.
7
ENGLISH
9 Follow the instructions on the
screen.
10This screen displays when you
have successfully set up a secure
wireless network. Click Finish.
11From a wireless computer, test
your wireless LAN connection to
the NBG-415N.
Troubleshooting
1 None of the LEDs turn on when the NBG-415N is on.
• Make sure that you use the included power adaptor to
connect to the NBG-415N and that it is plugged into an
appropriate power source.
• Check all cable connections.
• If the LEDs still do not turn on, you may have a hard-
ware problem. In this case, you should contact your
local vendor.
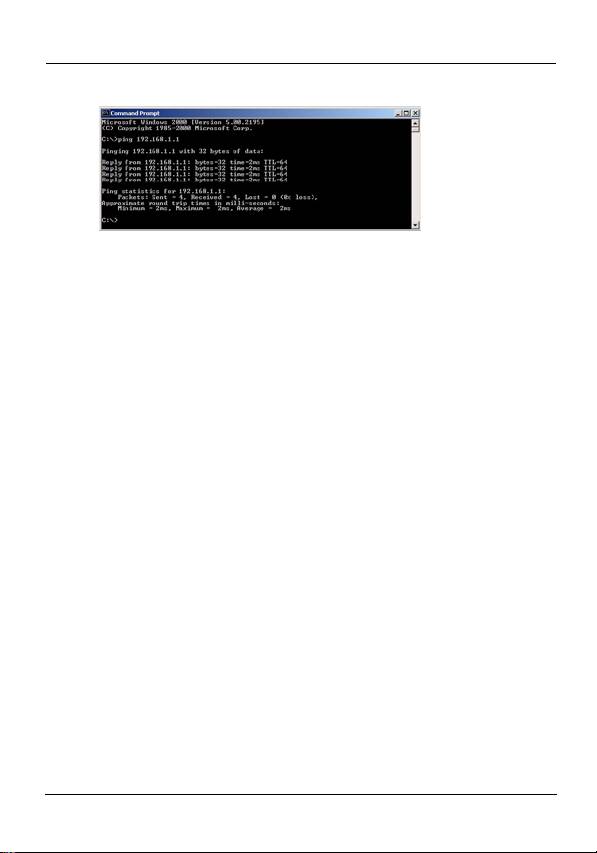
2 I cannot access the NBG-415N from the LAN.
• Check the cable connection between the NBG-415N
and your computer or hub. Refer to Hardware Connec-
tions for details.
8
ENGLISH
• Ping the NBG-415N from a LAN computer.
• Make sure your computer Ethernet card is installed
and functioning properly.
3 I cannot ping any computer on the LAN.
• If the LAN LEDs are off, check the cable connections
between the NBG-415N and your LAN computers.
• Verify that the IP address and subnet mask of the
NBG-415N and the LAN computers are in the same IP
address range.
4 I cannot access the Internet.
• Check the NBG-415N’s connection to the broadband
modem.
• Turn off and on to restart both the broadband modem
and the NBG-415N. If you are using a cable modem,
you must first turn off your cable modem and wait for
about two to three minutes before you connect the
cable modem to the NBG-415N.
• The WAN IP is provided after the ISP verifies the MAC
address, host name or user ID. Find out the verification
method used by your ISP and configure the corre-
sponding fields in the Internet wizard screens or the
advanced WAN screen.
9

ENGLISH
• Check that you have entered your Internet account
information correctly in the wizard screens.
5 I cannot connect to the wireless LAN via the NBG-415N.
• Make sure the ON OFF switch is in the ON position to
enable the wireless LAN on the NBG-415N.
• Make sure the wireless client is set to use the same
wireless LAN and security settings as the NBG-415N.
• Make sure the wireless client is within transmission
range of the NBG-415N.
• Make sure there is no radio interference (for example,
from other wireless LANs or cordless phones).
Set Up Your Computer’s IP Address
This section shows you how to set your Windows NT/2000/XP
computer to automatically get an IP address. Refer to your
User’s Guide for IP address configuration for other Windows
and Macintosh operating systems.
1 In Windows XP, click start, Control Panel. In Windows
2000/NT, click Start, Settings, Control Panel.
2 In Windows XP, click Network Connections. In Windows
2000/NT, click Network and Dial-up Connections.
10
ENGLISH
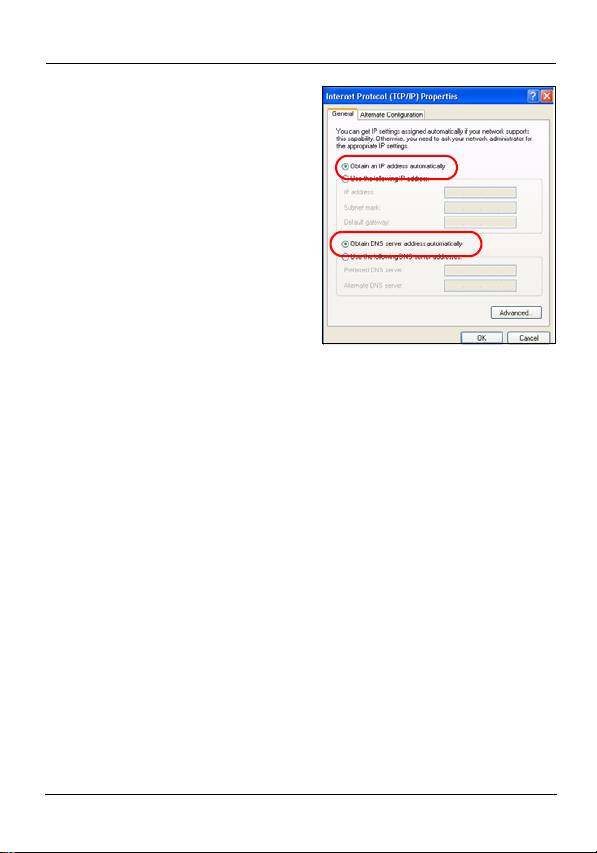
3 Right-click Local Area
Connection and then click
Properties.
4 Select Internet Protocol
(TCP/IP) (under the
General tab in Win XP) and
click Properties.
5 The Internet Protocol TCP/
IP Properties screen opens
(the General tab in
Windows XP).
6 Select the Obtain an IP
address automatically and Obtain DNS server address
automatically options.
7 Click OK to close the Internet Protocol (TCP/IP)
Properties window.
8 Click Close (OK in Windows 2000/NT) to close the Local
Area Connection Properties window.
9 Close the Network Connections screen.
View Your Product’s Certifications
1 Go to www.zyxel.com.
2 Select your product from the drop-down list box on the
ZyXEL home page to go to that product's page.
3 Select the certification you wish to view from this page.
11

ENGLISH
12
DEUTSCH
Einführung
Der NBG-415 ermoglicht den gleichzeitigen Internetzugang
mehrerer Computer in Ihrem Netzwerk.Sie konnen den NBG-
415N auch verwenden, um ein Drahtlosnetzwerk aufzubauen.
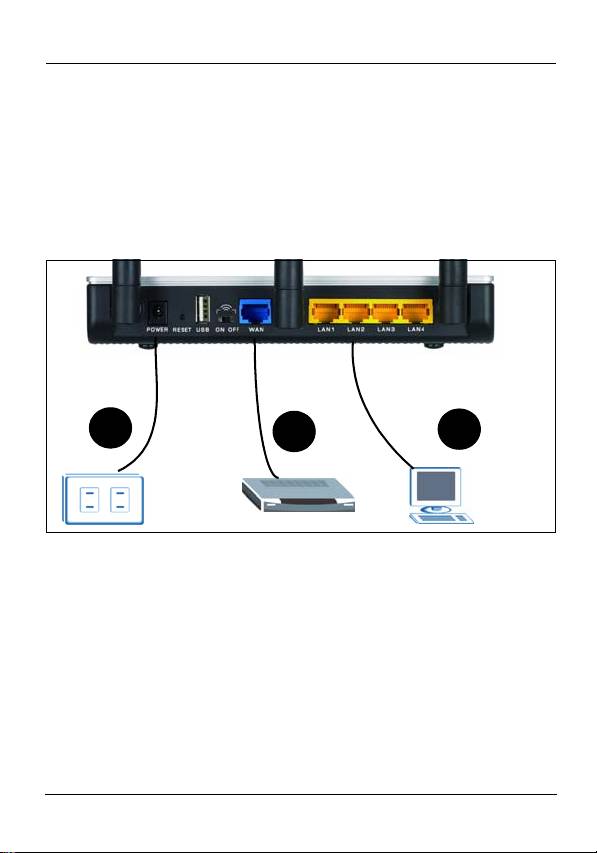
1 Anschließen der Hardware
3
2
1
1LAN: Schließen Sie für den Internetzugang einen
Computer mit einem Ethernet-Kabel an einen LAN-
Anschluss an.
2WAN: Schließen Sie das mit dem DSL-/Kabelmodem
mitgelieferte Ethernet-Kabel an den Ethernet-Anschluss
des DSL-/Kabelmodems an.
3POWER: Verwenden Sie nur den mitgelieferten
Netzadapter, um den Netzanschluss des Geräts
(POWER) mit einer geeigneten Netzsteckdose zu
verbinden.
13
D
EUTSC
H
Оглавление
- ZyXEL NBG-415N
- V If none of the LEDs are on, unplug the device
- V If you cannot access the Internet, check that you
- V Wenn keine der LEDs leuchtet, trennen Sie das
- V Wenn Sie keine Verbindung zum Internet
- V Si ninguno de los LEDs están encendidos,
- V Si no puede acceder a Internet, compruebe si
- V Si aucune LED n'est allumée, débranchez
- V Si vous n'arrivez pas à accéder à Internet,
- V Se nessuno dei LED è acceso, scollegare il
- V Se l'accesso a Internet non funziona, verificare
- V Если ни один из индикаторов не включился,
- V Если вы не можете войти в Интернет, то
- V Om ingen indikatorlampa tänds, koppla bort
- V Om du inte kan koppla upp dig på Internet,
- V 如果 LED 指示燈都沒有亮,請拔除裝置的插頭,
- V 如果無法接取網際網路,請檢查您在精靈畫面中
