Alexika ROCKER 2D basic: Commissioning
Commissioning: Alexika ROCKER 2D basic
13
Commissioning
IKA
®
Rocker 2D basic
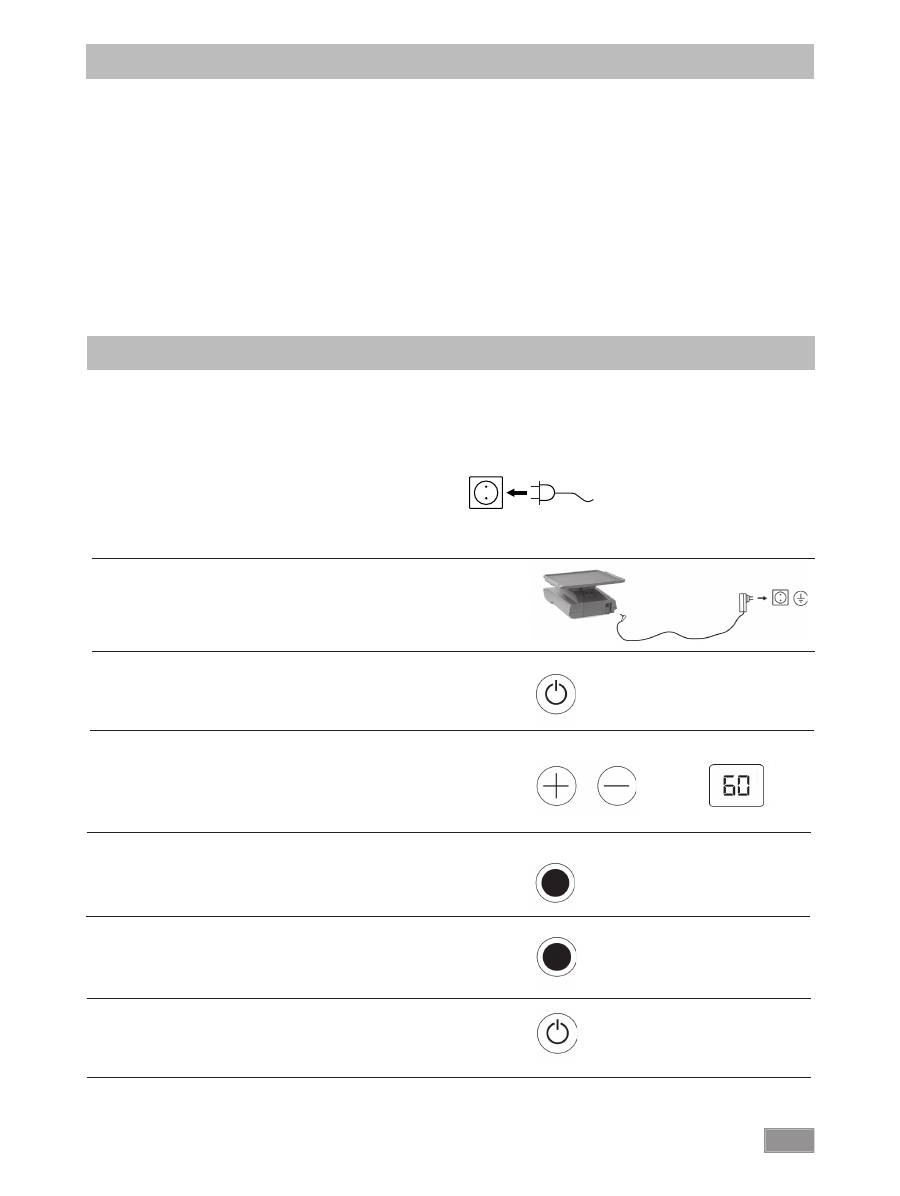
The AC adapter is suitable for 100 V upto 240 V. Insert an appropriate
adapter corresponding to the country, before plugging the AC adapter
into the mains socket.
Switching the device on
Press the "Power" button
(L)
to switch the device on.
Speed setting
Use the "Speed setting" button
(K)
to set the speed to a value between 5
and 80 rpm in units of 1 rpm.
Starting the device
Press the "Start/Stop" button
(F)
to start the shaking process.
Stopping the device
Press the "Start/Stop" button
(F)
to stop the shaking process.
Switching off the device
Press the "Power" button
(L)
to switch the device off.
•
Use
For mixing and agitating liquids.
IKA
®
Rocker 2D basic
- Continuous operation for individual or multiple vessels.
IKA
®
Rocker 2D digital
- Continuous operation for individual or multiple vessels.
- Timer operation for individual or multiple vessels.
Correct use
• Range of use
- Laboratories
- Schools
- Pharmacies
- Universities
The unit is suitable for use in all areas apart from domestic areas
and areas directly connected to a low-voltage supply which also
serves domestic areas.
The safety of the user cannot be guaranteed if the appliance is
operated with accessories that are not supplied or recommended
by the manufacturer or if the appliance is operated improperly
contrary to the manufacturer’s specifi cations or if the appliance
or the printed circuit board are modifi ed by third parties.
• Check that the power supply matches the data on the rating
plate.
• Plug the AC adapter into a standard mains socket in order to
supply the device with power. See the section "Technical data"
for the connection values.
• Also pay attention to the ambient conditions listed in the
“Technical data”.
• The
IKA
®
Rocker 2D basic
does not restart automatically
when power is restored after a power outage. If the
IKA
®
Rocker 2D digital
is running in mode A it does not restart
automatically when power is restored after a power outage.
If these conditions are met the unit is
ready for service when the mains plug
has been plugged in.
14
IKA
®
Rocker 2D digital
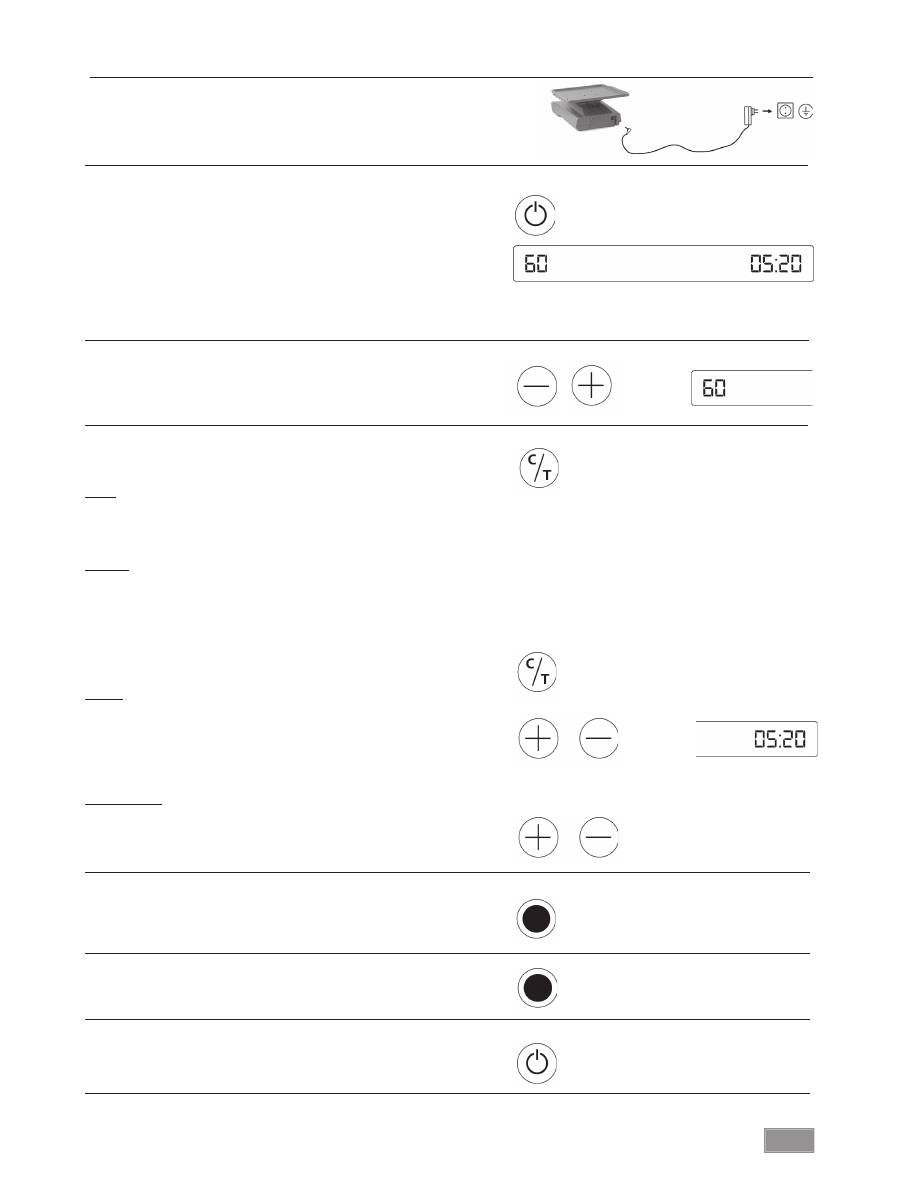
The AC adapter is suitable for 100 V upto 240 V. Insert an appropriate
adapter corresponding to the country, before plugging the AC adapter
into the mains socket.
Switching the device on
Press the "Power" button
(L)
to switch the device on.
The following data appear on the display in the sequence listed:
- the test image
- the software version
- the operating mode
- the values and settings last used
Speed setting
Use the "Speed setting" button
(K)
to set the speed to a value between 5
and 80 rpm in units of 1 rpm.
Timer/Counter
Select "Counter" or "Timer"
(I)
.
Timer
When "Timer" is selected, the set value counts down. Once the timed
shaking cycle has been completed the device switches off automatically.
An acoustic signal beeps three times and the "Timer" LED
(H)
fl ashes red.
Counter
The counter measures the time from the start of shaking to the end.
The "Counter" LED
(G)
fl ashes red.
If the "Start/Stop" button
(F)
is pressed the shaking process stops and
the elapsed time is displayed. If the counter is restarted the measurement
restarts afresh.
To switch from counter to timer or vice versa, press the "Timer" button
(I)
.
Setting
Set the timer from 1 sec to 99 h 59 min using the "Plus/Minus" timer
setting buttons
(J)
.
Press the "Start/Stop" button
(F)
to start the shaker.
The last timer value setting is saved and is loaded for the next shaking
process.
Resetting to 0
To reset the timer, press the "Timer Minus" and "Timer Plus" buttons
(J)
simultaneously.
Starting the device
Press the "Start/Stop" button
(F)
to start the shaking process.
The device starts with the desired settings.
Stopping the device
Press the "Start/Stop" button
(F)
to pause operation.
Switching off the device
Press the "Power" button
(L)
to switch the device off.
15
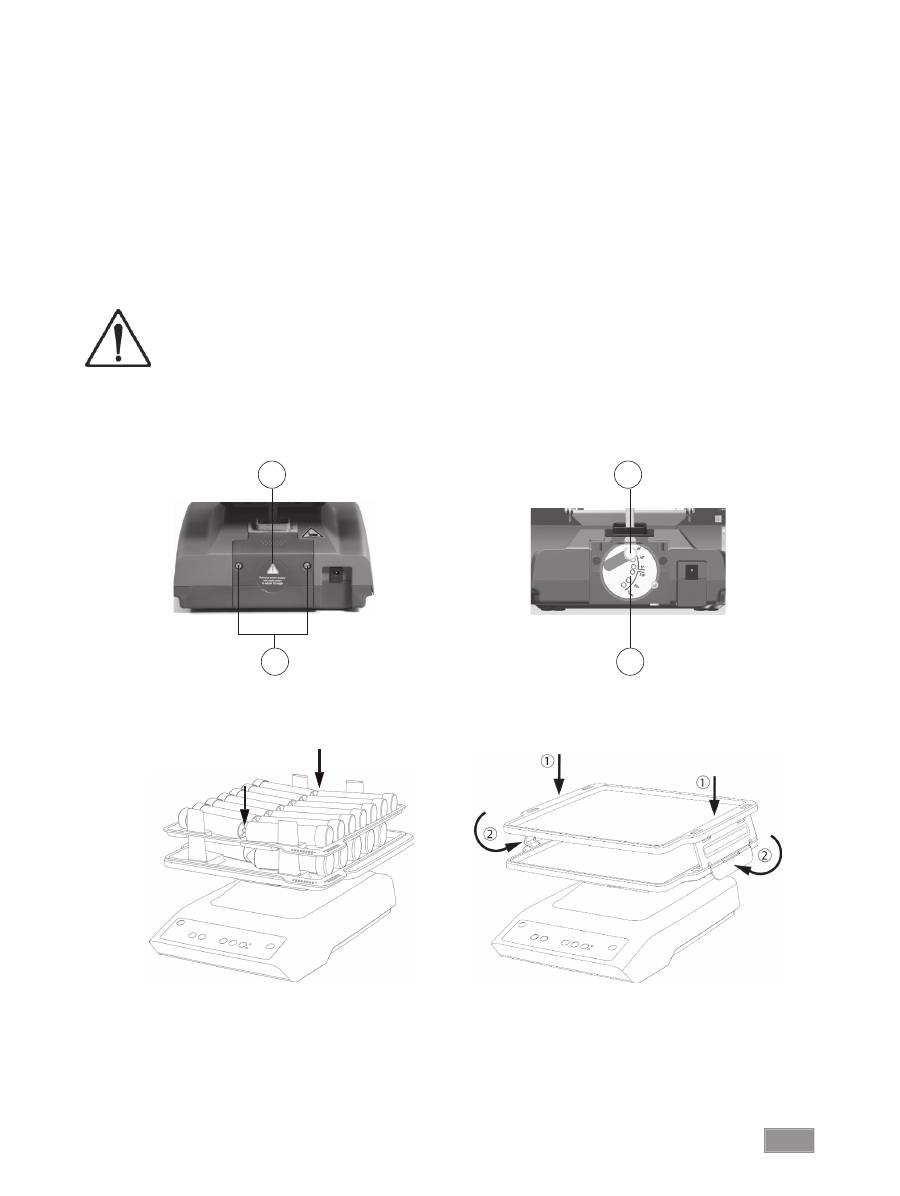
Adjusting the inclination angle of the shaking table
The inclination angle of the shaking table can be adjusted in steps of 2.5° from 2.5 - 15°.
Caution!
Do not remove the cover
(2)
whilst the device is in operation!
Stop the device by pressing the "Start/Stop" button
(F)
. Do not use your hand to stop the device.
Press the "Power" button
(L)
to switch the device off.
- Undo the screws
(1)
to remove the cover
(2)
at the rear of the device.
- Slacken the screw
(3)
and select the desired inclination angle
(4)
. Tighten the screw
(3)
fi nger tight.
- Refi t the cover
(2)
and secure it with the screws
(1)
.
3
4
Use of accessories
2
1
Operating modes A and B
Operating mode A
The device does not restart automatically when power is restored after a power outage.
Operating mode B
The device restarts automatically when power is restored after a power outage, using the set values, and displays the (Pr) symbol to
indicate that there has been a power outage within a certain period of time.
Switching between operating modes
To switch between operating modes, switch the device off, then keep the "Start/Stop" button
(F)
depressed and press the "Power"
button
(L)
.
Оглавление
- EG - Konformitätserklärung Zeichenerklärung
- Auspacken
- Bestimmungsgemäßer Gebrauch
- Zubehör
- Fehlercodes
- Technische Daten
- Contents
- Unpacking
- Commissioning
- Accessories
- Error codes
- Technical data
- Sommaire
- Déballage
- Mise en service
- Accessoires
- Codes d'erreurs
- Caracéristiques techniques
- Содержание
- Распаковка
- Ввод в эксплуатацию
- Принадлежности
- Код ошибки
- Технические данные
- Indicaciones de seguridad
- Avvertenze di sicurezza
- Säkerhetsanvisningar
- Sikkerhedshenvisninger
- Turvallisuusohjeet
- Instruções de segurança
- Υποδείξεις ασφαλείας
- Bezpečnostní upozornění
- Biztonsági utasítások
- Varnostna navodila
- Ohutusjuhised
- Drošības norādes
- Saugos reikalavimai
- Indicaţii de siguranţă
- Notes
- IKA
