ASRock 990FX EXTREME3: 4. Software Support
4. Software Support: ASRock 990FX EXTREME3

4. Software Support
4.1 Install Operating System
®
®
This motherboard supports various Microsoft
Windows
operating systems: 7 /
TM
TM
7 64-bit / Vista
/ Vista
64-bit / XP / XP 64-bit. Because motherboard settings
and hardware options vary, use the setup procedures in this chapter for general
reference only. Refer to your OS documentation for more information.
4.2 Support CD Information
The Support CD that comes with the motherboard contains necessary drivers and
useful utilities that enhances the motherboard’s features.
4.2.1 Running The Support CD
To begin using the support CD, insert the CD into your CD-ROM drive. The CD
automatically displays the Main Menu if “AUTORUN” is enabled in your com-
puter. If the Main Menu does not appear automatically, locate and double click
on the le “ASSETUP.EXE” from the BIN folder in the Support CD to display
the menus.
4.2.2 Drivers Menu
The Drivers Menu shows the available devices drivers if the system detects the
installed devices. Please install the necessary drivers to activate the devices.
4.2.3 Utilities Menu
The Utilities Menu shows the applications software that the motherboard sup-
ports. Click on a specic item then follow the installation wizard to install it.
4.2.4 Contact Information
If you need to contact ASRock or want to know more about ASRock, welcome
to visit ASRock’s website at http://www.asrock.com; or you may contact your
dealer for further information.
61

Installing OS on a HDD Larger Than 2TB in AHCI Mode
®
This motherboard adopts UEFI BIOS that allows Windows
OS to be installed on a
large size HDD (>2TB). Please follow the procedures below to install the operating
system.
®
TM
1. Please make sure to use Windows
Vista
64-bit (with SP1 or above) or
®
Windows
7 64-bit.
2. Press <F2> or <Delete> at system POST. Set AHCI Mode in UEFI Setup Utility >
Advanced > Storage Conguration > SATA Mode.
3. Choose the item “UEFI:xxx“ to boot in UEFI Setup Utility > Boot > Boot Option #1.
®
(“xxx” is the device which contains your Windows
installation les. Normally it is
an optical drive.) You can also press <F11> to launch boot menu at system POST
and choose the item “UEFI:xxx“ to boot.
®
4. Start Windows
installation.
62
Installing OS on a HDD Larger Than 2TB in RAID Mode
®
This motherboard adopts UEFI BIOS that allows Windows
OS to be installed on a
large size HDD (>2TB). Please follow the procedures below to install the operating
system.
®
TM
1. Please make sure to use Windows
Vista
64-bit (with SP1 or above) or
®
Windows
7 64-bit.
2. Press <F2> or <Delete> at system POST. Set RAID Mode in UEFI Setup Utility >
Advanced > Storage Conguration > SATA Mode.
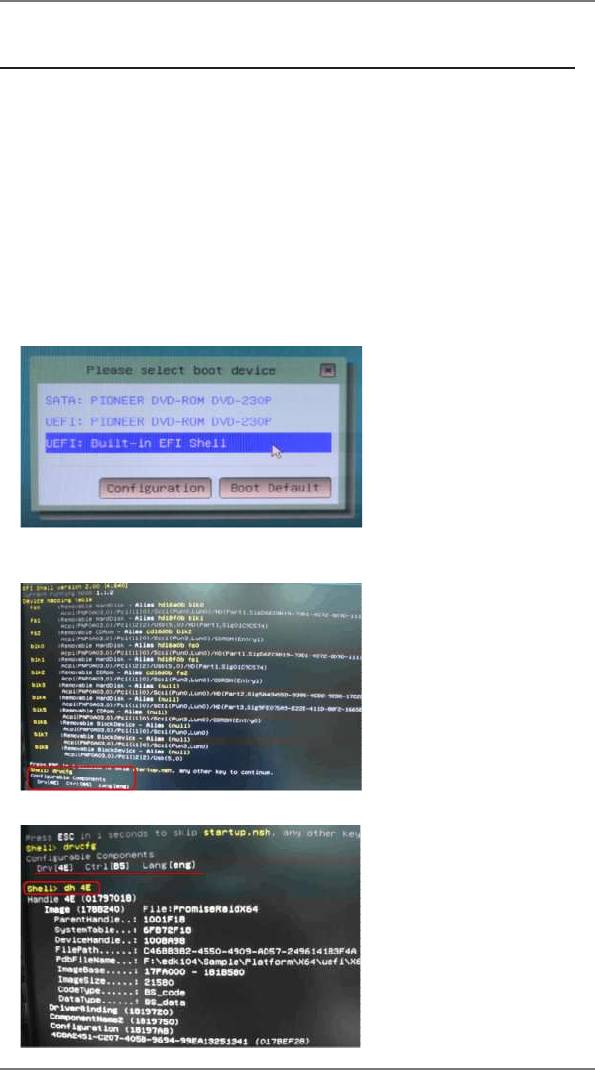
3. Choose onboard RAID 3TB+ unlocker > UEFI Mode For GPT partition. Press
<F10> to save the change and exit.
4. Press <F11> to enter Boot Manual. Choose UEFI : Built - in EFI Shell.
5. Key in drvcfg, for example you will see below:
Drv[4E] Ctrl[B5] Lang[eng]
6. Key in dh [Drv number], for example: key in dh 4E.
63
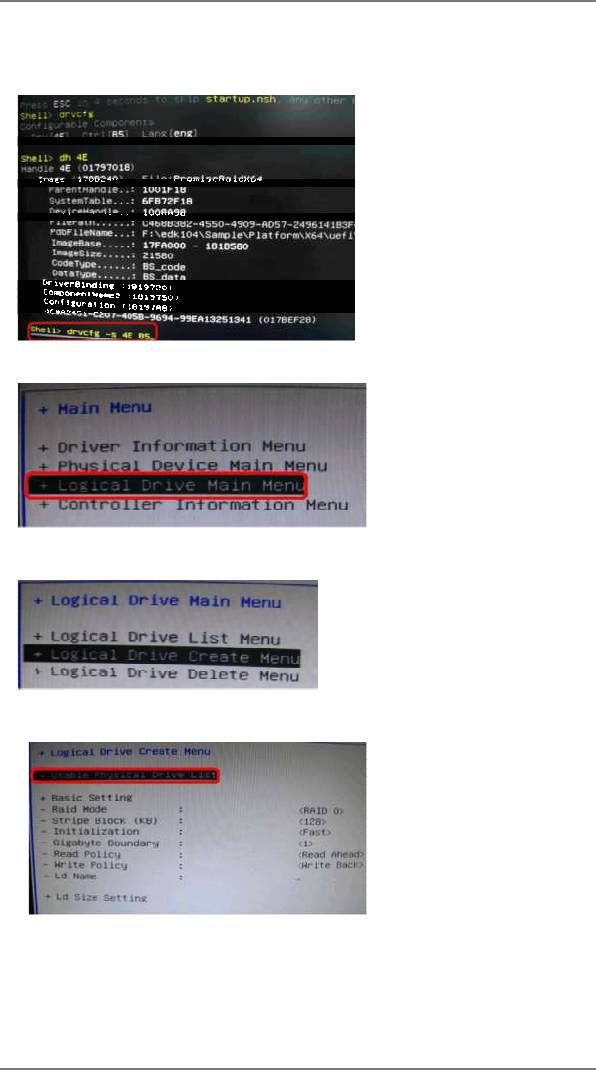
7. And then key in drvcfg –s [Drv number] [Ctrl number] to enter Raid Utility.
For example: key in drvcfg –s 4E B5.
8. Choose Logical Drive Main Menu to set up Raid Drive.
9. Choose Logical Drive Create Menu to create a Raid Drive.
10. Choose Usable Physical Drive List to select Raid HDD.
64
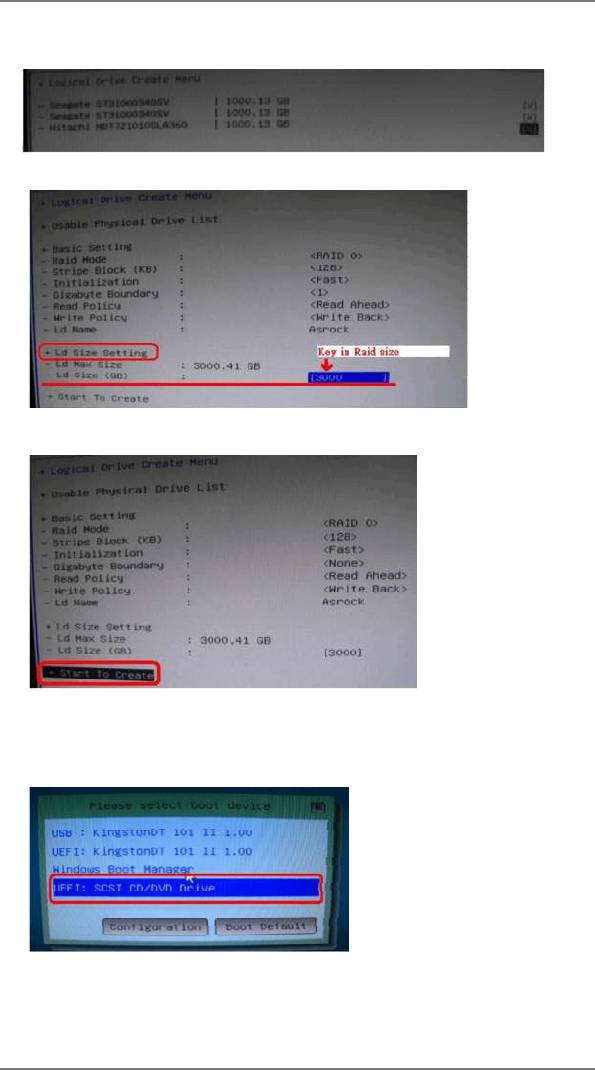
11. Press Space on keyboard to toggle checkbox.
12. Choose Ld Size setting, and key in the Raid size.
13. After set up Raid size, please click Start to Create.
14. Press <F10> to exit Utility.
15. During reboot, please press <F11> to enter Boot Manual. Choose UEFI: SCSI
CD/DVD Drive.
®
TM
* This option only shows on Windows
7 64-bit and Vista
64-bit OS.
65
®
16. Follow Windows
Installation Guide to install OS.
®
TM
If you install Windows
7 64-bit / Vista
64-bit in a large hard disk (ex. Disk
®
volume > 2TB), it may take more time to boot into Windows
or install driver/
utilities. If you encounter this problem, you will need to following instructions
to x this problem.
®
TM
Windows
Vista
64-bit:
®
Microsoft
does not provide hotx for this problem. The steps listed below
®
are Microsoft
's suggested solution:
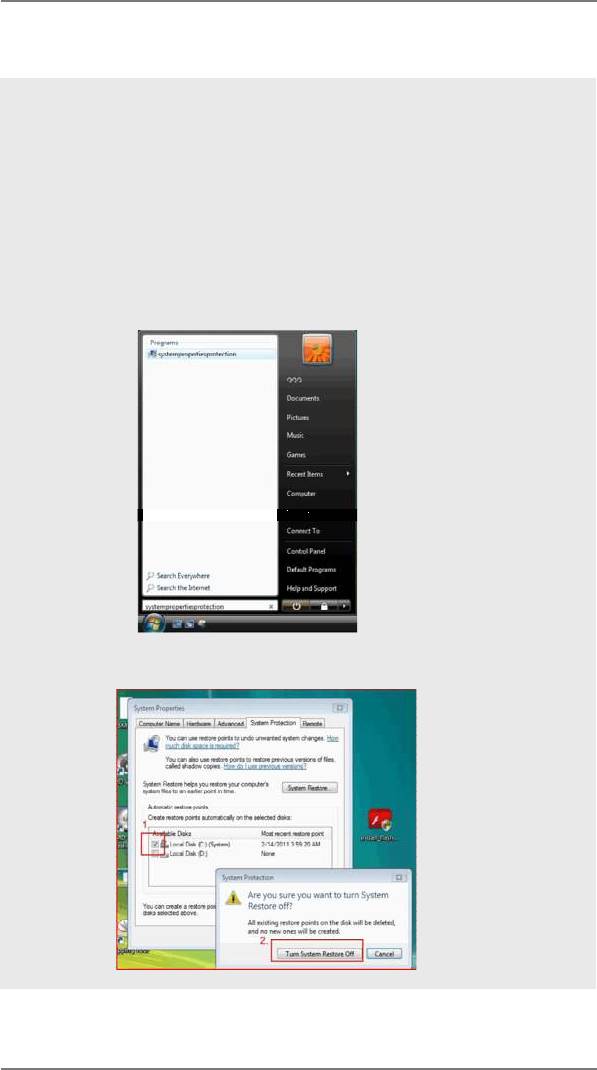
A. Disable System Restore.
a. Type “systempropertiesprotection” in the Start Menu. Then press
"Enter".
b. De-select Local Disks for System Restore. Then Click “Turn System
Restore Off” to conrm. Then Press “Ok”.
66
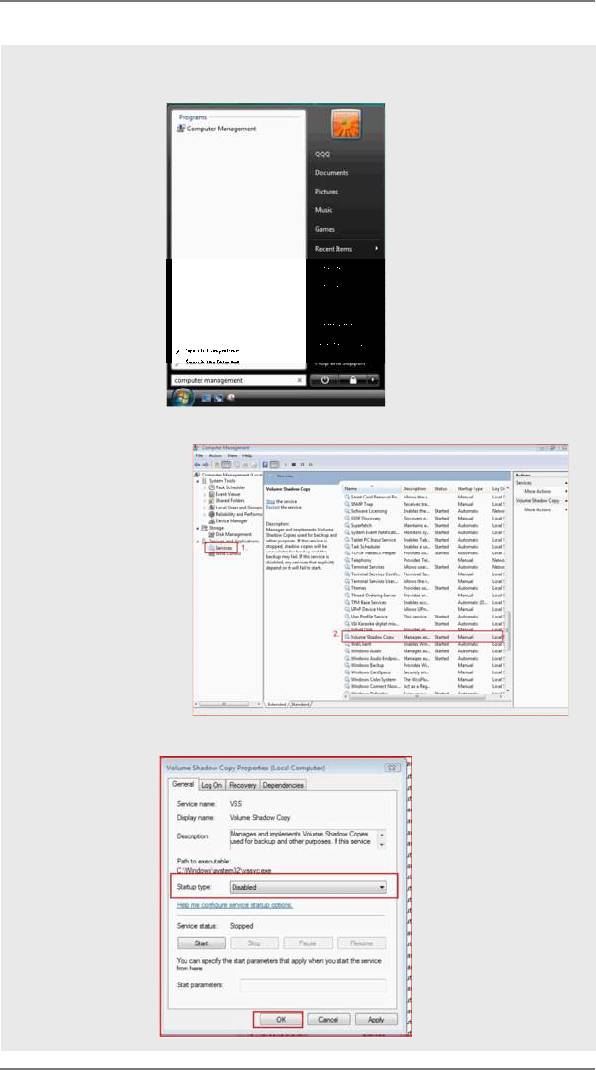
B. Disable “Volume Shadow Copy” service.
a. Type “computer management” in the Start Menu, then press “Enter”.
b. Go to “Services and Applications>Services”; Then double click “Volume
Shadow Copy”.
c. Set “Startup type” to “Disable” then Click “OK”.
67
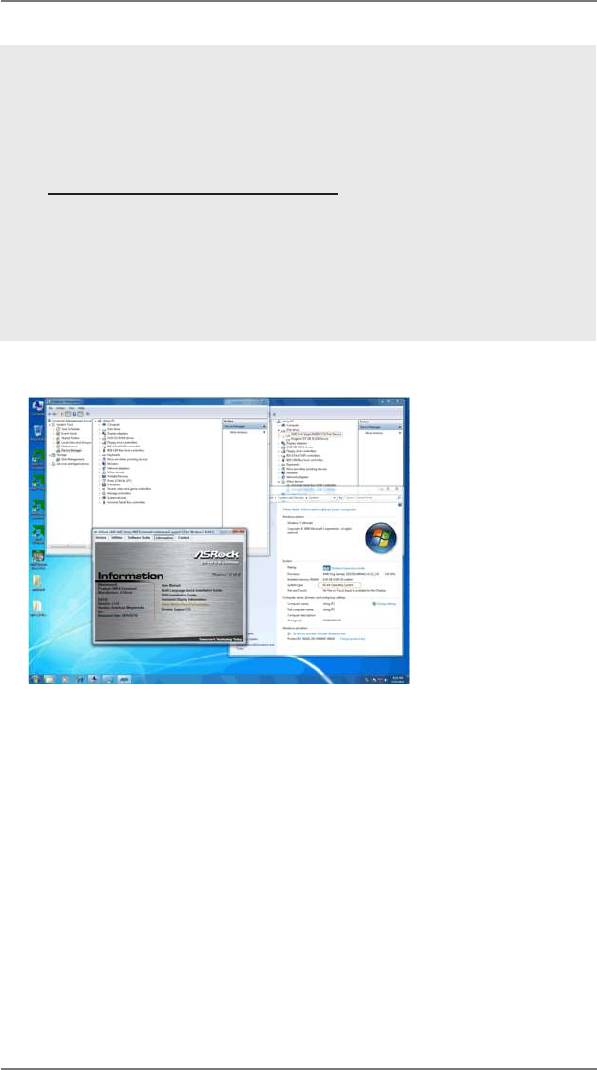
C. Reboot your system.
D. After reboot, please start to install motherboard drivers and utilities.
®
Windows
7 64-bit:
A. Please request the hotx KB2505454 through this link:
http://support.microsoft.com/kb/2505454/
®
B. After installing Windows
7 64-bit, install the hotx kb2505454.
(This may take a long time; >30 mins.)
C. Reboot your system. (It may take about 5 minutes to reboot.)
®
D. Windows
will install this hotx then reboot by itself.
E. Please start to install motherboard drivers and utilities.
17. Finish.
68
Оглавление
- Contents
- 1. Introduction
- 2. Installation
- 3. UEFI SETUP UTILITY
- 4. Software Support


