Yamaha CD-S300: Rear panel connections
Rear panel connections: Yamaha CD-S300
Table of contents
- CAUTION: READ THIS BEFORE OPERATING YOUR UNIT.
- CONTROLS AND FUNCTIONS Front panel
- Rear panel connections
- Remote control
- Program playback
- PLAYING BACK iPod/USB DEVICE Connecting iPod/USB devices Playing back iPod Playing back USB devices
- Disconnecting iPod/USB devices Supported iPod/USB devices
- PLAYABLE DISC AND FILE FORMAT
- PLAYABLE DISC AND FILE FORMAT USING THE ADVANCED SETUP
- TROUBLESHOOTING Problems Possible Causes Solutions
- Problems Possible Causes Solutions SPECIFICATIONS
CONTROLS AND FUNCTIONS
INTRODUCTION
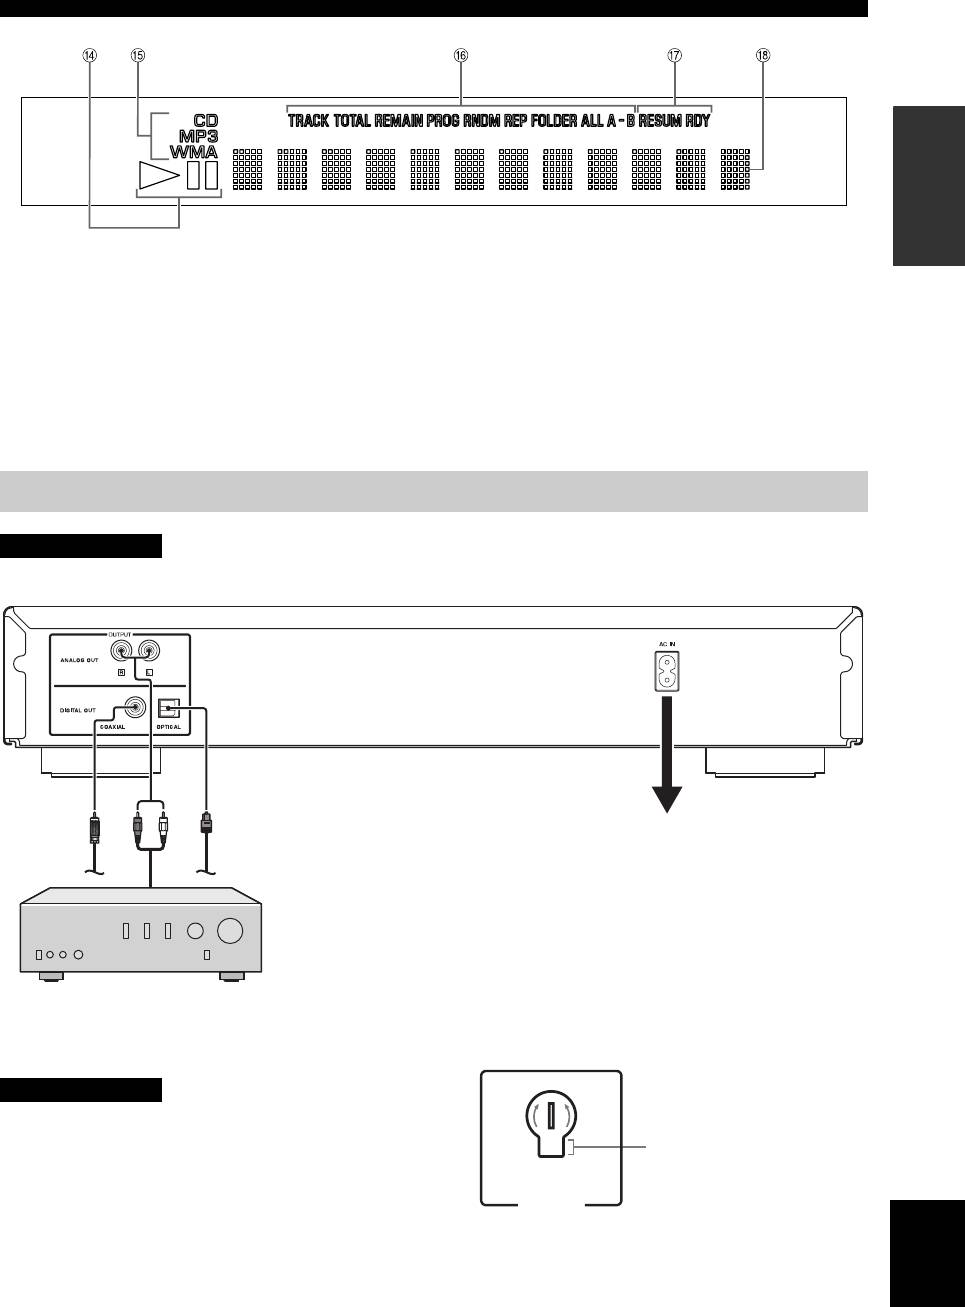
D Playback Status Indicator
G Advanced setup indicator
Lights up when this unit is in the play or pause mode.
Indicates the enabled special modes. See “USING THE
ADVANCED SETUP” (page 9) for details.
E Source type indicator
Indicates the type of content being played back.
H Multi-information display
F Time and playback mode indicator
Indicates the current playback mode and the status of the
time display (see pages 5 and 5 for playback modes, and
page 5 for time display).
Rear panel connections
CAUTION
Before making any connection, switch OFF the power to the unit, the amplifier and any other component.
Audio cable (supplied)
Optical digital cable
cable
Coaxial digital
Connect the supplied power cable into
the AC IN inlet on the rear panel when
all connections are complete, and then
plug in the power cable to the AC outlet.
The audio signals are only output from the ANALOG OUT jacks
when the PURE DIRECT mode is on.
Amplifier
■ VOLTAGE SELECTOR
Voltages are as follows:
(Asia and General models only)
...............AC 110/120/220/230-240 V, 50/60 Hz
CAUTION
The VOLTAGE SELECTOR on the rear panel of this unit
230-
must be set for your local voltage BEFORE plugging the
240V
Voltage indication
power cable into the AC wall outlet. Improper setting of
the VOLTAGE SELECTOR may cause damage to this
VO LTAGE
SELECTOR
unit and create a potential fire hazard.
English
Rotate the VOLTAGE SELECTOR clockwise or
counterclockwise to the correct position using a straight
slot screwdriver.
3 En
