ASRock h81m-itx: Chapter 3 Software and Utilities Operation
Chapter 3 Software and Utilities Operation: ASRock h81m-itx

Chapter 3 Software and Utilities Operation
3.1 Installing Drivers
e Support CD that comes with the motherboard contains necessary drivers and
useful utilities that enhance the motherboard’s features.
Running The Support CD
To begin using the support CD, insert the CD into your CD-ROM drive. e CD
automatically displays the Main Menu if “AUTORUN” is enabled in your computer.
If the Main Menu does not appear automatically, locate and double click on the le
“ASRSETUP.EXE” in the Support CD to display the menu.
Drivers Menu
e drivers compatible to your system will be auto-detected and listed on the
support CD driver page. Please click Install All or follow the order from top to
bottom to install those required drivers. erefore, the drivers you install can work
properly.
Utilities Menu
e Utilities Menu shows the application soware that the motherboard supports.
Click on a specic item then follow the installation wizard to install it.
To improve Windows 7 compatibility, please download and install the following hot x
provided by Microso.
“KB2720599”: http://support.microso.com/kb/2720599/en-us
English
26
H81M-ITX
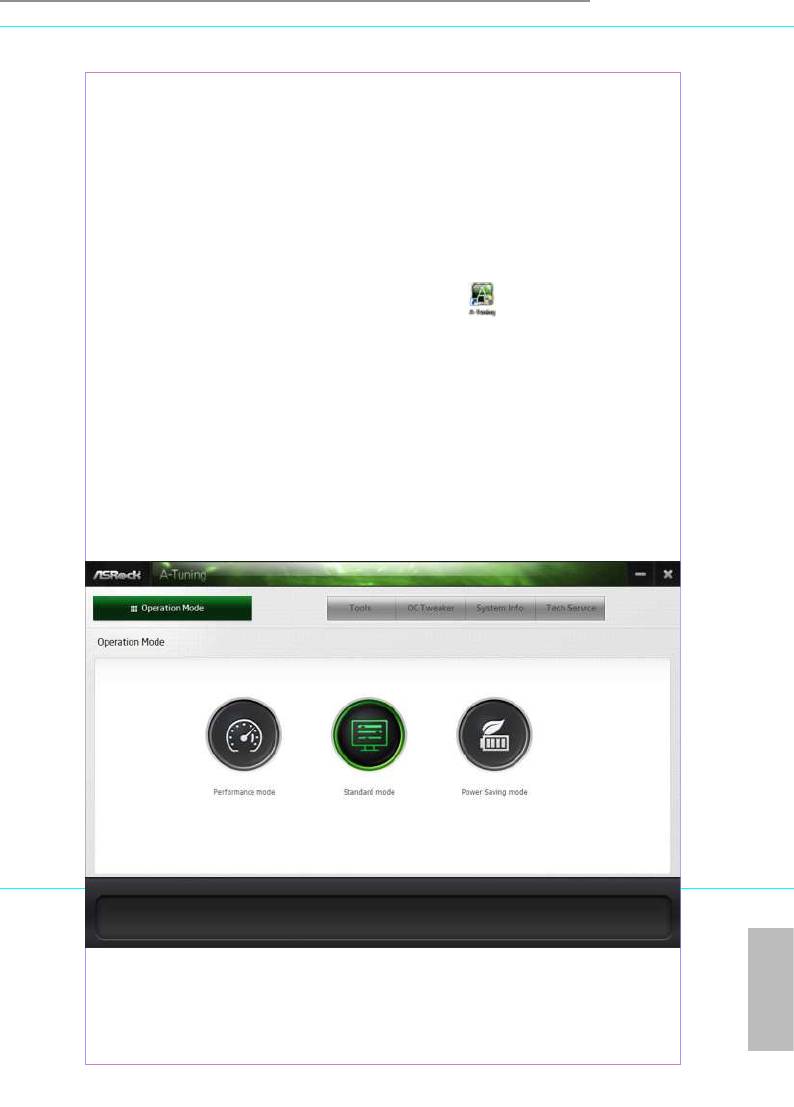
3.2 A-Tuning
A-Tuning is ASRock’s multi purpose soware suite with a new interface, more new
features and improved utilities, including XFast RAM, Dehumidier, Good Night
LED, FAN-Tastic Tuning, OC Tweaker and a whole lot more.
3.2.1 Installing A-Tuning
When you install the all-in-one driver to your system from ASRock’s support CD,
A-Tu ni ng will be auto-installed as well. Aer the installation, you will nd the icon
“A-Tu ning“ on your desktop. Double-click the “A-Tu ning“ icon, A-Tu ning
main menu will pop up.
3.2.2 Using A-Tuning
ere are ve sections in A-Tuning main menu: Operation Mode, Tools, OC
Tweaker, System Info and Tech Service.
Operation Mode
Choose an operation mode for your computer.
English
27
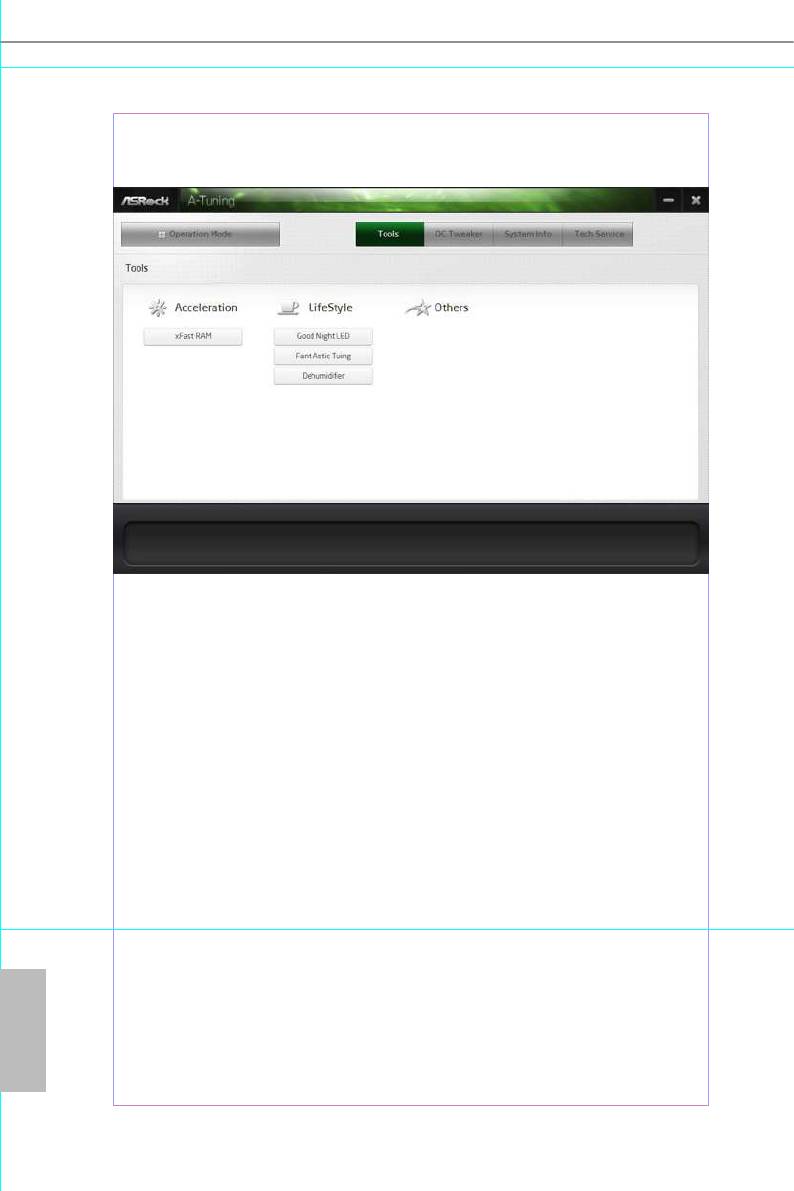
Tools
Various tools and utilities.
XFast RAM
Boost the system’s performance and extend the HDD’s or SDD’s lifespan! Create a
hidden partition, then assign which les should be stored in the RAM drive.
Good Night LED
Switch o the Power/HDD/LAN LEDs when the system is on, and automatically
switch o the Power and Keyboard LEDs when the system enters into Standby/
Hibernation mode.
FAN-Tastic Tuning
Congure up to ve dierent fan speeds using the graph. e fans will automatically
shi to the next speed level when the assigned temperature is met.
Dehumidier
Prevent motherboard damages due to dampness. Enable this function and
congure the period of time until the computer powers on, and the duration of the
dehumidifying process.
English
28
H81M-ITX
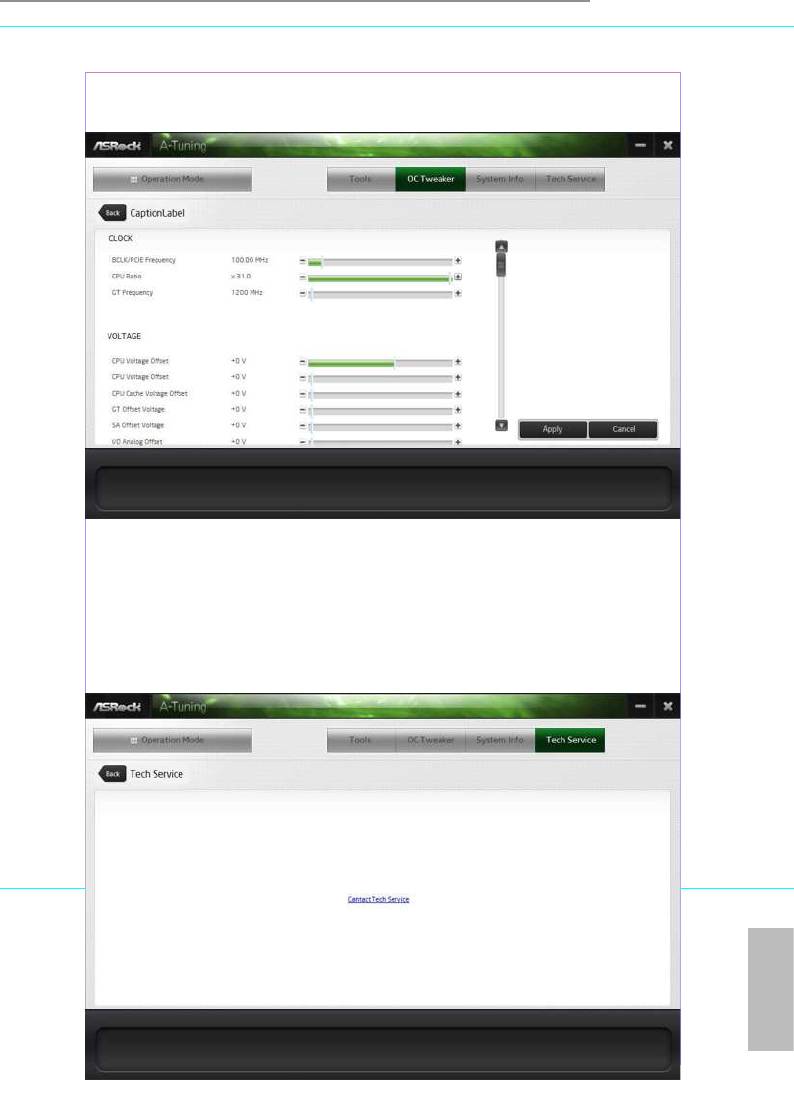
OC Tweaker
Congurations for overclocking the system.
System Info
View information about the system.
Tech Service
Contact Tech Service.
English
29
3.3 Intel® Smart Connect Technology
Intel® Smart Connect Technology is a feature that periodically wakes your computer
from Windows® sleep state to refresh email or social networking applications. It
saves your waiting time and keeps the content always up-to-date.
3.3.1 System Requirements
• Conrm whether your motherboard supports this feature.
• Operating system: Microso Windows 8/7 (32- or 64-bit edition)
• Set the SATA mode to AHCI. If Windows 8/7 is already installed under IDE
mode, directly changing the SATA mode to AHCI may cause Windows 8/7
to crash while booting. If your system is not in AHCI mode, please follow the
instructions below.
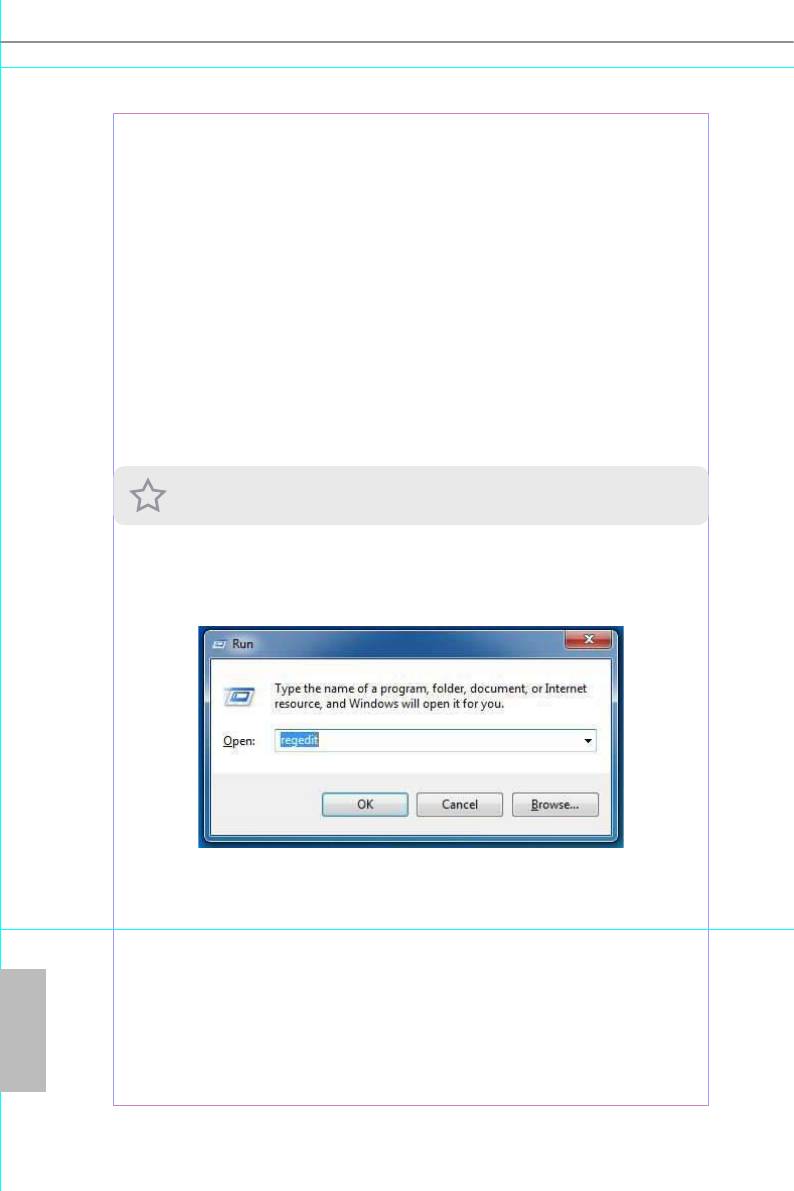
ere are certain risks. Please backup any important data before operating to avoid loss.
1. Press Win + R simultaneously in Windows 8/7, type "Regedit" into the word
box then click OK.
2. Enter into HKEY_LOCAL_MACHINE\SYSTEM\CurrentControlSet\services\
msahci in Windows Registry Editor. Double click on the value Start and
change the value from 3 into 0. Click on OK.
English
30

H81M-ITX
3.3.2 Setup Guide
Installing ASRock Smart Connect Utility
Step 1
Install ASRock Smart Connect Utility, which is located in the folder at the following
path of the Support CD: \ ASRock Utility > Smart Connect.
Step 2
Once installed, run ASRock Smart Connect from your desktop or go to Windows
Start -> All Programs -> ASRock Utility.
English
31
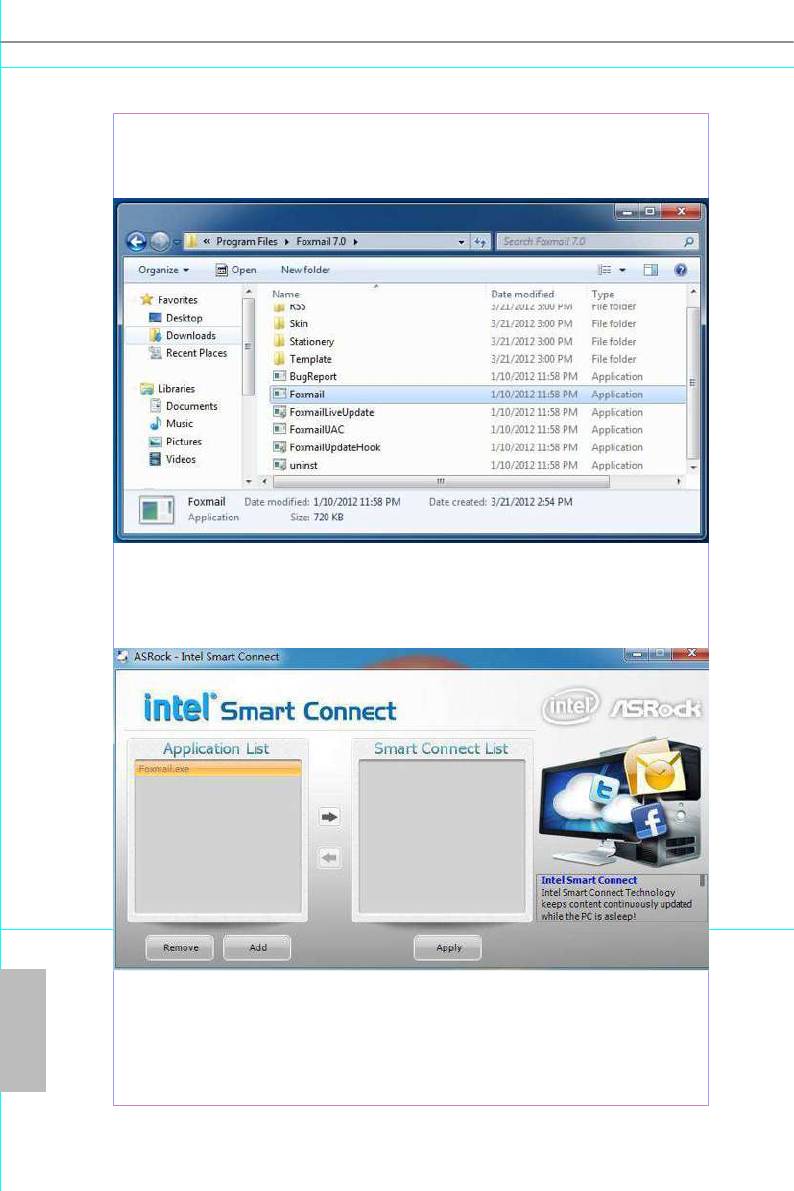
Step 3
Click the Add button. Take Foxmail as an example, add Foxmail to the Application
list.
Step 4
Select Foxmail from the Application List, then click the arrow pointing right to add
this application to the Smart Connect List.
English
Step 5
Click Apply to enable Smart Connect.
32
H81M-ITX
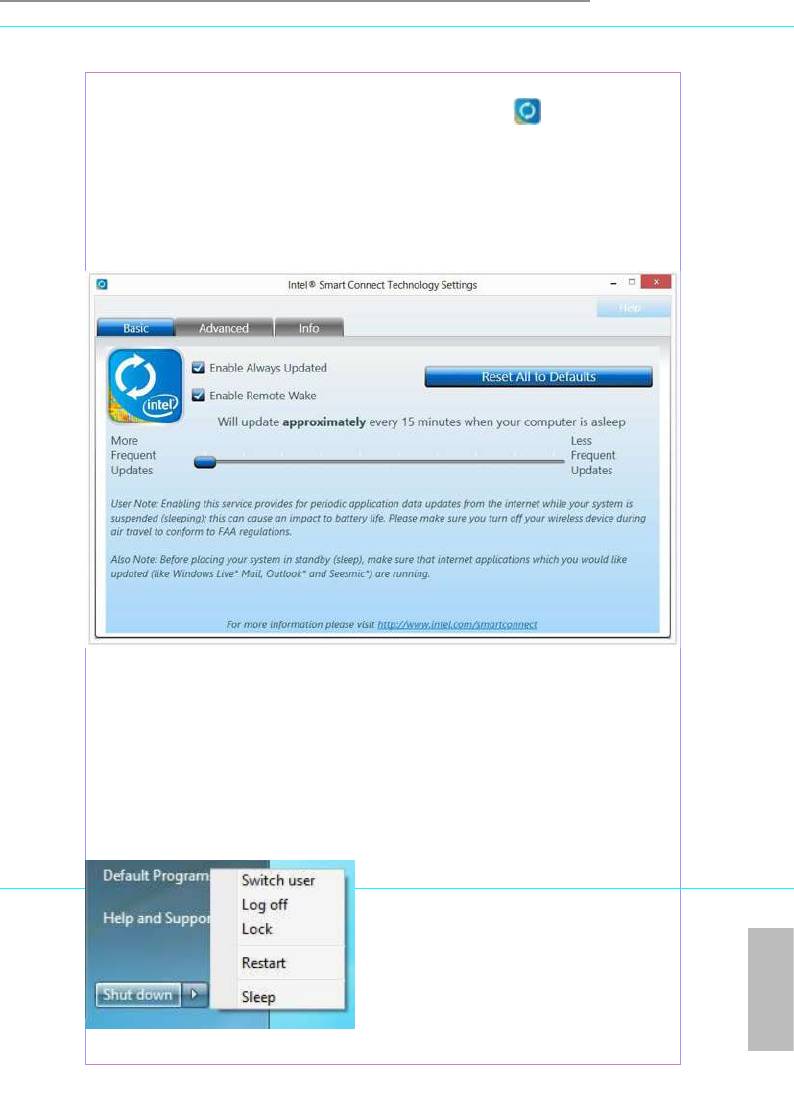
Step 6
Double-click the Intel® Smart Connect Technology Manager icon in the
Windows system tray.
Step 7
Drag the slider to congure how oen the system will connect to the network to
download updates. Shorter durations will provide more frequent updates, but may
cause more power consumption.
Using Smart Connect
1. Keep the applications which you wish to connect to the internet and receive
updates while the system is in sleep state running. Foxmail for instance, keep
Foxmail running.
2. Click on Windows Start -> the arrow next to Shut down, and click on Sleep.
English
3. Windows system will enter sleep state.
33

4. e system will wake up from sleep state periodically, and then start to update
Foxmail. e screen will not display anything so the computer can maintain
minimum power usage. Aerwards, the system will automatically return to
sleep state again.
5. Upon waking up the system, you will nd the new mail that were sent to you
during sleep state are already updated and ready to be read in Foxmail.
English
34
H81M-ITX
3.4 Start8
For those Windows 8 users who miss the Start Menu, Start8 is an ideal solution that
brings back the familiar Start Menu along with added customizations for greater
eciency.
3.4.1 Installing Start8
Install Start8, which is located in the folder at the following path of the Support CD:
\ ASRock Utility > Start8.
3.4.2 Conguring Start8
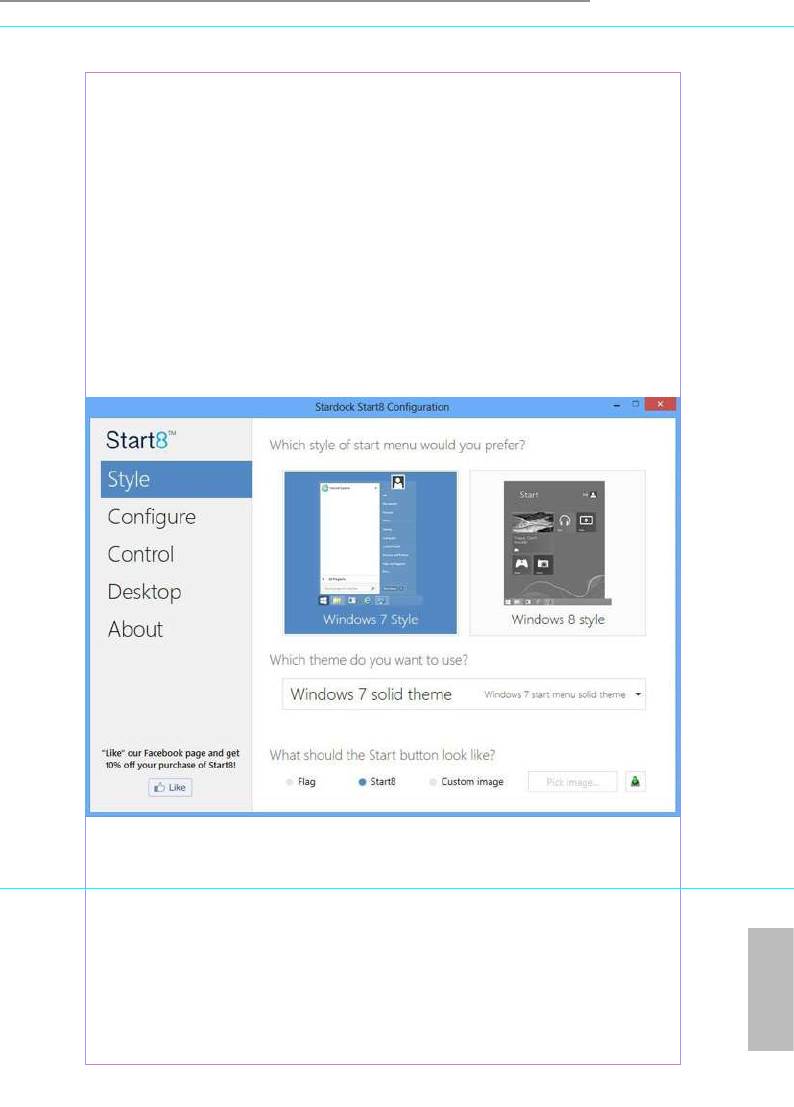
Style
Select between the Windows 7 style and Windows 8 style Start Menu. en select
the theme of the Start Menu and customize the style of the Start icon.
English
35

Congure
Congure provides conguration options, including icon sizes, which shortcuts you
want Start Menu to display, quick access to recently used apps, the functionality of
the power button, and more.
Control
English
36
H81M-ITX
Control lets you congure what a click on the start button or a press on the
Windows key does.
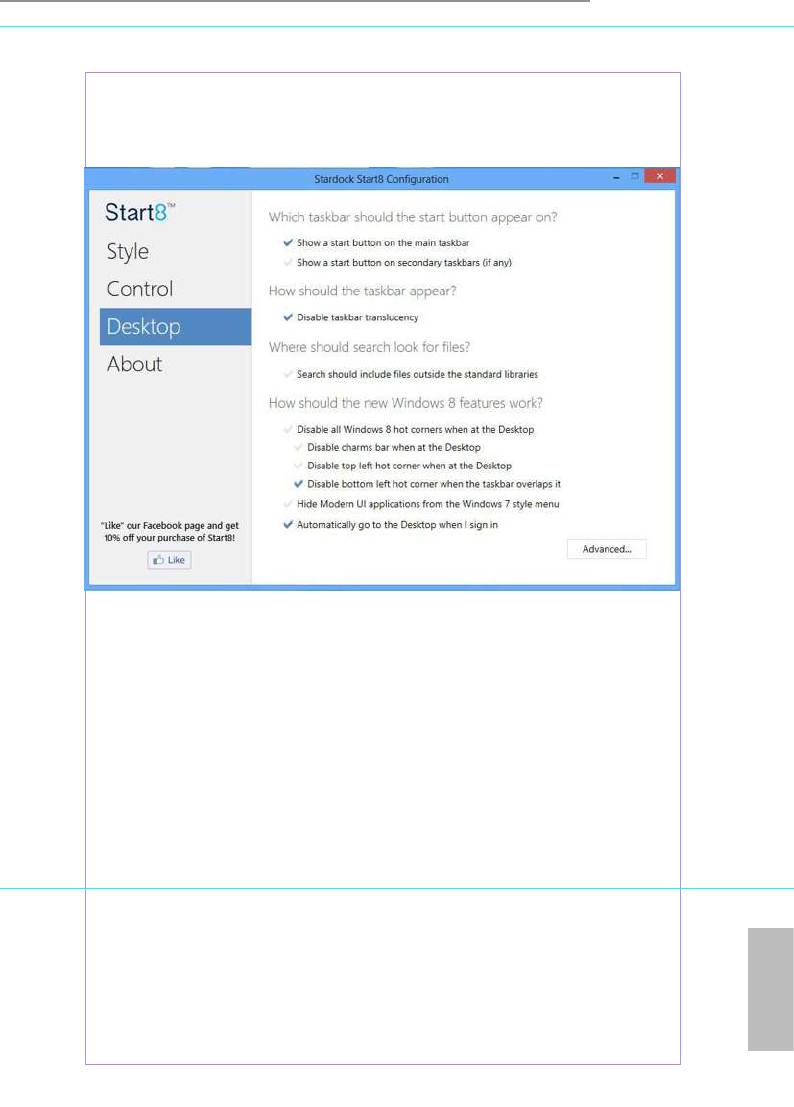
Desktop
Desktop allows you to disable the hot corners when you are working on the desktop.
It also lets you choose whether or not the system boots directly into desktop mode
and bypass the Metro user interface.
About
Displays information about Start8.
English
37
Оглавление
- Chapter 1 Introduction
- Chapter 2 Installation
- Chapter 3 Software and Utilities Operation
- Chapter 4 UEFI SETUP UTILITY


