Panasonic S73MK1E5A: Adjusting Airfl ow Direction
Adjusting Airfl ow Direction: Panasonic S73MK1E5A
Adjusting Airfl ow Direction
This section is described in the instruction manual supplied with the timer remote contoller (CZ-RTC2).
Regarding the high-spec wired remote controller (CZ-RTC3), refer to the Operating Instructions supplied with the model CZ-RTC3.
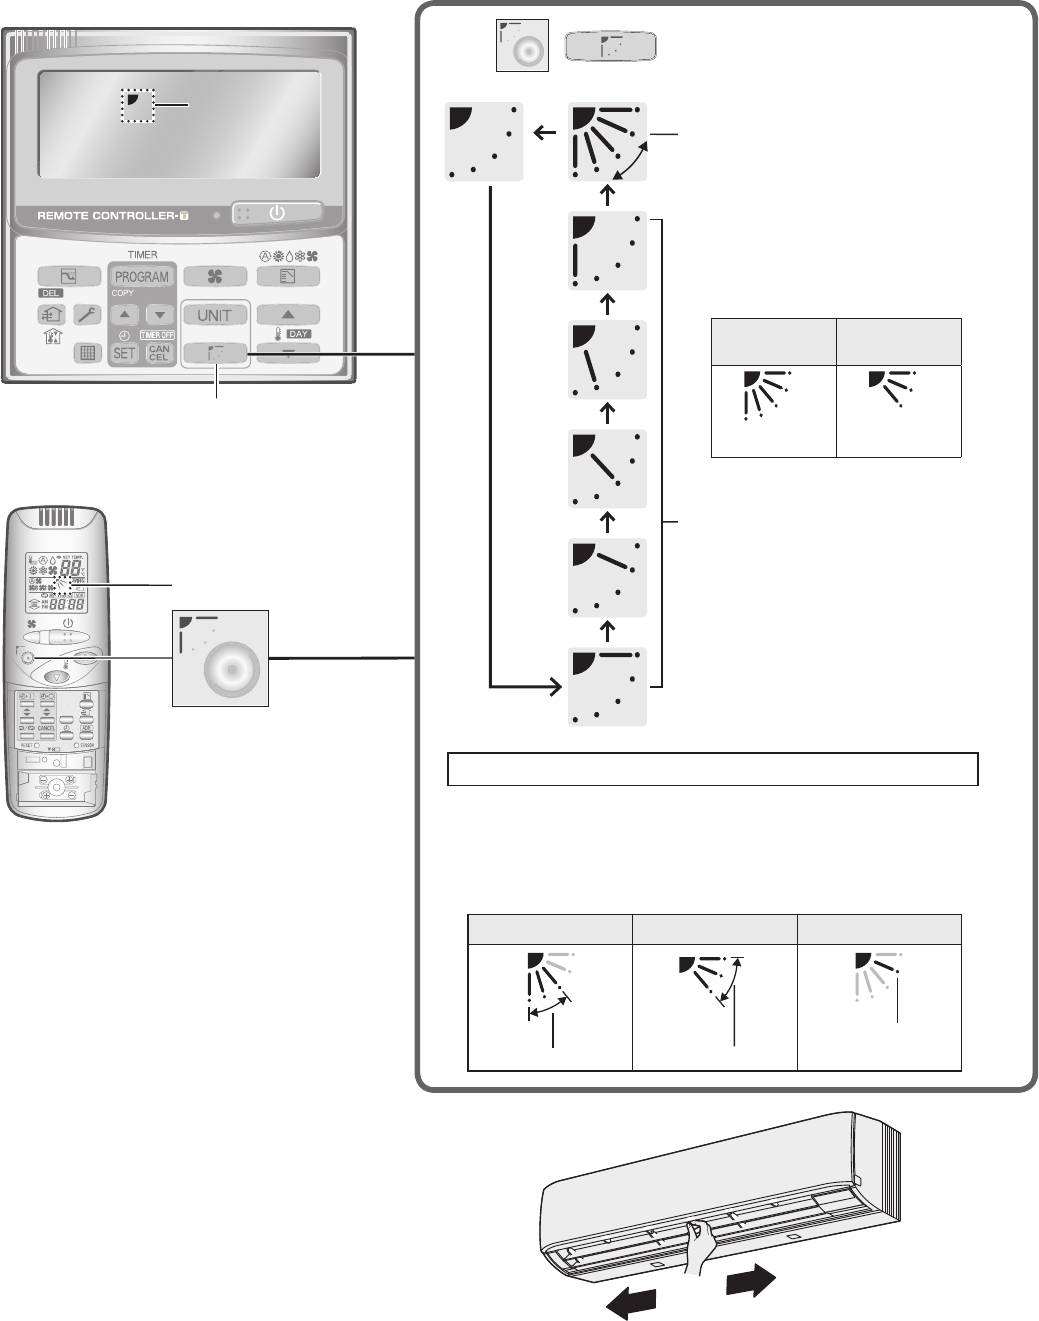
Adjusting the upward and downward motion of airfl ow direction
Using the timer remote controller
Press / to select your desired airfl ow direction.
Airfl ow direction
display
Flap swing motion
Pressing the button during
swing operation can stop the
fl ap at the desired position.
Display when swing operation
is stopped
Fan and
Cooling and
heating
drying
“FLAP” button
(5 levels) (3 levels)
Using the wireless remote controller
Flap fi xed
(5 levels)
Airfl ow direction display
“FLAP” button
Recommended vertical airfl ow direction
Set the fl ap to the downward position for heating operation.
(With the upward setting, warm air cannot reach the fl oor.)
Set the fl ap to the upward position for cooling operation.
(With the downward setting, condensation may drip on to the
fl oor.)
HEAT COOL / DRY FAN
Fixed to this
Recommended
Recommended
position
Adjusting the horizontal airfl ow direction
(Manual)
Move the horizontal airfl ow vanes by hand for adjustment.
6
OI00284010EUall.indb6OI00284010EUall.indb6 2013/11/2914:35:332013/11/2914:35:33
Adjusting airfl ow direction
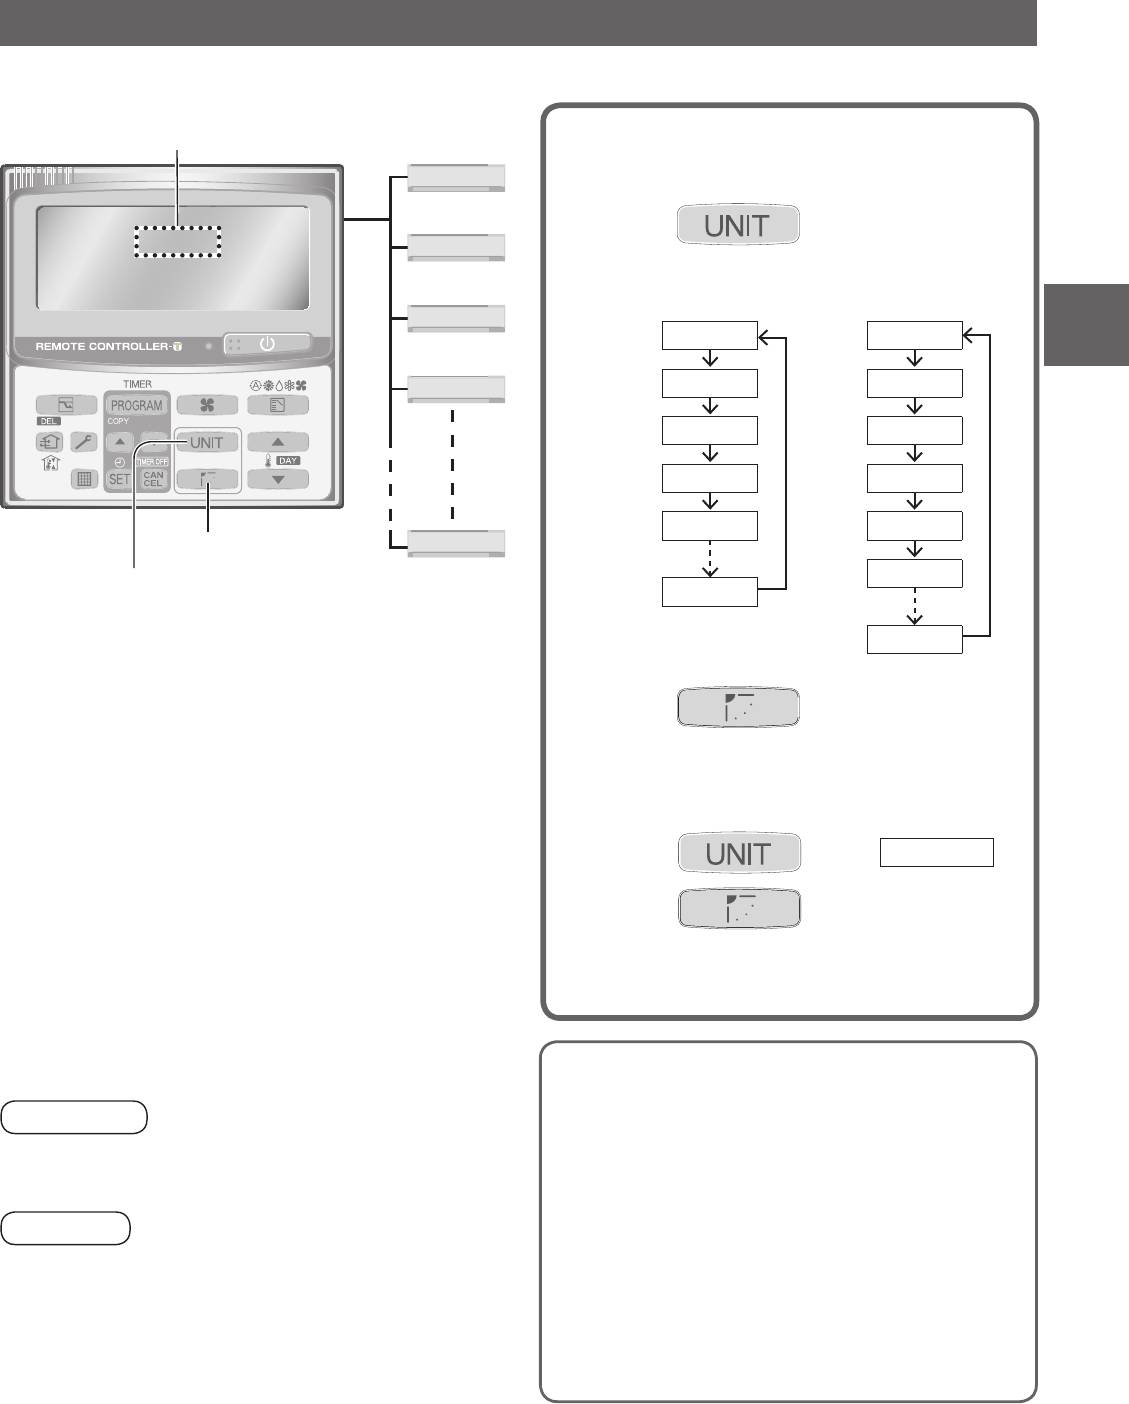
for multiple indoor units (Timer remote controller only)
When operating multiple indoor units using 1 remote controller, airfl ow direction can be adjusted for indoor each unit individually or
all units at the same time.
Unit No.
When setting the airfl ow direction of
each indoor unit individually
1-1
Press to select the Unit No.
1
for adjustment.
e.g.) 1 outdoor unit
e.g.) 2 outdoor units
1-2
and
and
8 indoor units
4 indoor units
ENGLISH
No display
No display
1-3
1-1
1-1
1-4
1-2
1-2
1-3
1-3
1-4
1-4
“FLAP” button
1-8
“UNIT” button
2-1
1-8
Maximum of
8 indoor units
2-4
can be connected.
Press to select your desired
2
airfl ow direction.
When setting the airfl ow direction of
all indoor units at the same time
Press to select
No display
.
1
Press to select your desired
2
airfl ow direction.
Tips for Energy Saving
Avoid
Attention:
Do not block the air intake and outlet of the unit.
Never use your hands to move the fl ap (vertical airfl ow fl ap)
(If either is obstructed, the unit will not function
controlled using the remote controller.
well, causing malfunction.)
During cooling operation, use sunshades, blinds or cur-
tains to prevent direct sunlight from entering the room.
Note
Do
When the air conditioner is turned off, the fl ap automatically
Always keep the air fi lter clean.
moves toward the direction of closing.
(A clogged fi lter will impair the performance of the unit.)
The fl ap (vertical airfl ow fl ap) moves to the upward position
“Maintenance” (P.8)
during standby operation for heating.
To prevent conditioned air from escaping, keep win-
The swing operation starts after the standby operation has
dows, doors and any other openings closed.
fi nished, but “Swing” is indicated on the remote controller
even during the standby operation.
7
OI00284010EUall.indb7OI00284010EUall.indb7 2013/11/2914:35:342013/11/2914:35:34
Table of contents
- Contents
- Precautions for Use
- Names of Parts
- Adjusting Airfl ow Direction
- Maintenance
- Troubleshooting
- Table des matières
- Précautions d’utilisation
- Nom des pièces
- Réglage de la direction du fl ux d’air
- Entretien
- Dépannage
- Índice
- Precauciones de uso
- Nombres de las partes
- Mantenimiento
- Localización y resolución de problemas
- Sicherheitshinweise
- Vorsichtsmaßnahmen für den Gebrauch
- Bezeichnungen der Teile
- Einstellen der Ausblasrichtung
- Wartung
- Fehlerdiagnose
- Indice
- Precauzioni per l’uso
- Nome delle parti
- Manutenzione
- Risoluzione dei problemi
- Veiligheidsmaatregelen
- Voorzorgen in het gebruik
- Namen van de onderdelen
- Onderhoud
- Oplossen van problemen
- Índice
- Precauções de utilização
- Nomenclatura das peças
- Ajuste da direcção do fl uxo de ar
- Manutenção
- Localização e solução de problemas
- Περιεχόμενα
- Προφυλάξεις για χρήση
- Ονόματα μερών
- Ρύθμιση της κατεύθυνσης ροής αέρα
- Συντήρηση
- Αντιμετώπιση προβλημάτων
- Мерки за безопасност
- Предпазни мерки при употреба
- Наименования на компонентите
- Техническо обслужване
- Отстраняване на проблеми
- Меры предосторожности
- Меры предосторожности во время эксплуатации
- Названия частей
- Регулировка направления воздушного потока
- Техническое обслуживание
- Поиск и устранение неисправностей
- Заходи безпеки
- Заходи безпеки під час використання
- Назви деталей
- Регулювання напрямку потоку повітря
- Догляд
- Пошук та усунення несправностей
- Isi
- Petunjuk Penggunaan
- Nama Komponen
- Menyesuaikan Arah Aliran Udara
- Perawatan
- Pemecahan Masalah
- Specifi cations