Panasonic HFS100300E: Supplied Accessories Attaching/Detaching the Lens
Supplied Accessories Attaching/Detaching the Lens: Panasonic HFS100300E
VQT2Z59_E.book 5 ページ 2010年8月25日 水曜日 午後8時21分
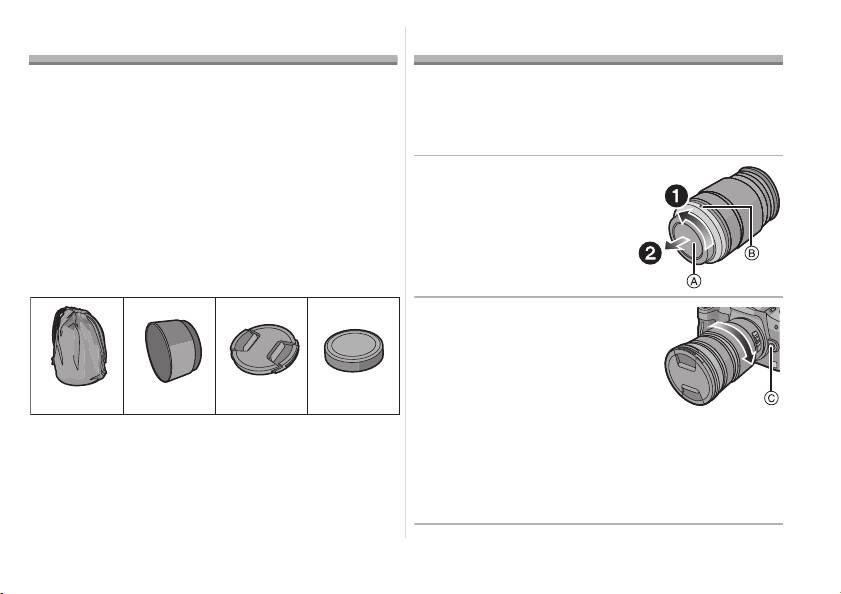
Supplied Accessories
Attaching/Detaching the Lens
[Inspection to be performed when you unpack
≥ Refer also to the camera’s operating instructions
the unit]
for attaching and detaching the lens.
When removing the unit from its packing box, check
∫ Attaching the Lens
that the main unit and the supplied accessories are
≥ Check that the camera is turned off.
there and also check their external appearance and
1 Turn the lens rear
functions to verify that they have not sustained any
cap to detach it.
damage during distribution and transportation.
A: Lens Rear Cap
If you discover any trouble, contact your vendor
before using the product.
Product numbers correct as of October 2010.
These may be subject to change.
312 4
2 Align the lens fitting
marks B (red marks) on
the camera body and the
lens and then rotate the
lens in the direction of
VFC4601 VYC1016 VYF3375 VFC4605
the arrow until it clicks.
• Do not press the lens release
1 Lens Storage Bag
button C when you attach a lens.
2 Lens Hood
• Do not try to attach the lens when holding it at an
3 Lens Cap
angle to the camera body as the lens mount may
4 Lens Rear Cap
get scratched.
(The lens rear cap and lens cap are attached to
• Check that the lens is attached correctly.
the interchangeable lens at the time of purchase.)
5
VQT2Z59
VQT2Z59_E.book 6 ページ 2010年8月20日 金曜日 午後9時17分
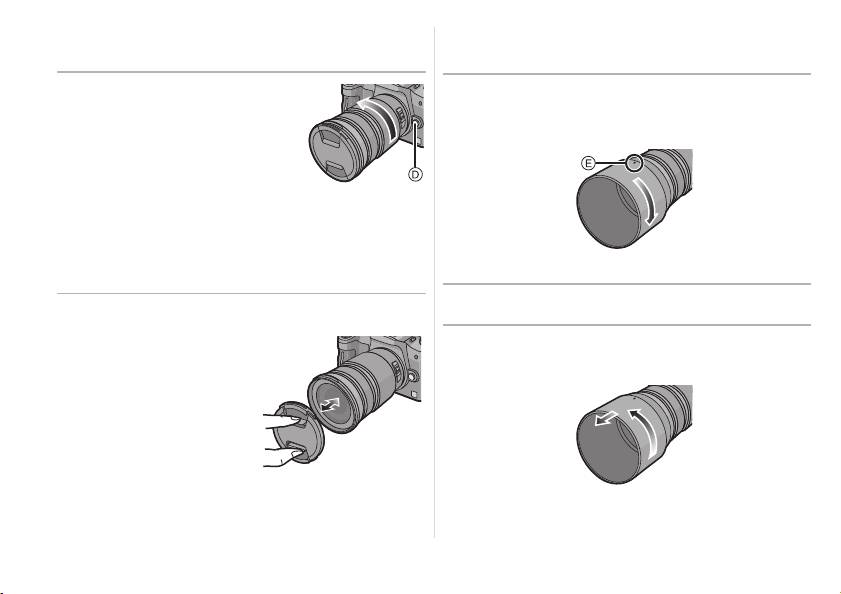
∫ Detaching the Lens
∫ Attaching the Lens Hood
≥ Check that the camera is turned off.
(Supplied Accessory)
Press the lens release
Insert the lens hood into the lens, and
button D while turning
turn in the direction of the arrow until it
the lens as far as
stops.
possible in the direction
of the arrow to detach it.
• Attach the lens rear cap so
that the lens contact point does not get
scratched.
• Attach the body cap to the camera so no dirt or
E: Fit to the mark
dust will get inside the main unit.
∫ Temporarily Storing the Lens Hood
∫ Attaching and Detaching the Lens Cap
≥ Be careful not to lose
1 Turn the lens hood in the direction of the
the lens cap.
arrow to detach it.
6
VQT2Z59
VQT2Z59_E.book 7 ページ 2010年8月20日 金曜日 午後9時17分
≥ You cannot attach a conversion lens or adaptor to
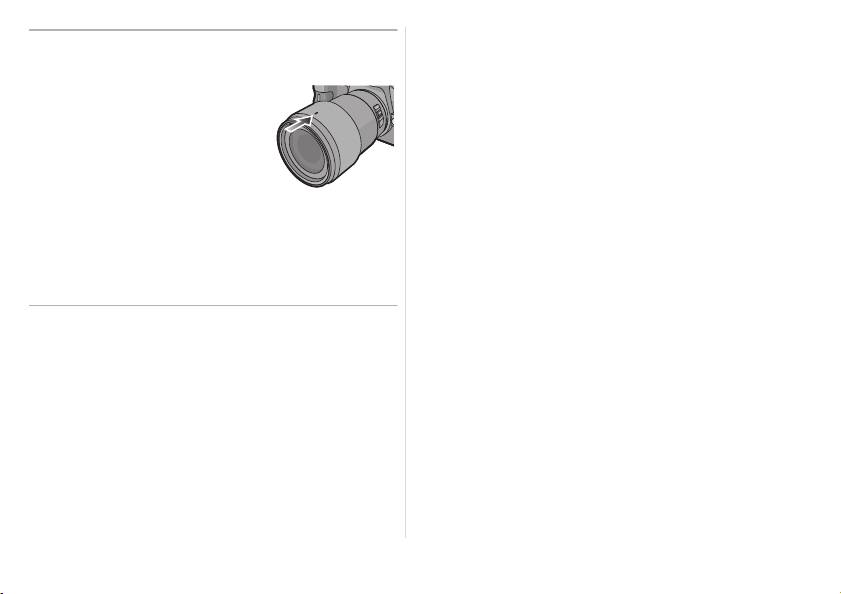
2 Reverse the lens hood and then attach it
this lens. A filter may be used, but attaching any
in the same way as shown previously.
other element may cause damage to the lens.
≥ When taking pictures with
the flash with the lens hood
attached, the lower portion of
the screen may turn dark
(vignetting effect) and the
control of the flash may be
disabled because the photo
flash may be obscured by the lens hood. We
recommend detaching the lens hood.
≥ When using the AF assist lamp in the dark, detach
the lens hood.
∫ Attaching Filters
≥ Vignetting may occur if using 2 or more
MC protectors (optional: DMW-LMCH67) or
PL filters (optional: DMW-LPL67), or if using thick
protectors and/or filters.
≥ The filter may become impossible to remove if
excessively tightened, so please refrain from
tightening it too strongly.
≥ It is possible to attach the lens cap with the filter
already attached.
7
VQT2Z59
Table of contents
- Operating Instructions
- Information for Your Safety
- Supplied Accessories Attaching/Detaching the Lens
- Names and Functions of
- Cautions for Use
- Specifications
- Informationen für Ihre
- Beiliegendes Zubehör Objektiv ansetzen/abnehmen
- Bezeichnungen und
- Vorsichtsmaßnahmen
- Spezifikationen
- Précautions à prendre
- Accessoires fournis Fixation/Retrait de l’objectif
- Noms et fonctions des
- Précautions d’utilisation
- Spécifications
- Información para su
- Accesorios suministrados Unir y quitar el objetivo
- Nombres y funciones de
- Precauciones para el uso
- Especificaciones
- Informazioni per la sua
- Accessori in dotazione Installazione/Rimozione dell’obiettivo
- Nomi e funzioni dei
- Precauzioni per l’uso
- Specifiche
- 安全注意事項
- 提供的附件
- 安裝 / 取下鏡頭
- 元件的名稱及功能
- 使用時的注意事項
- 規格
- Информация для вашей
- Принадлежности,
- Установка/Снятие объектива
- Названия и функции
- Предосторожности при
- Технические характеристики