Xoro HTC 1926D – страница 5
Инструкция к Xoro HTC 1926D
Connection
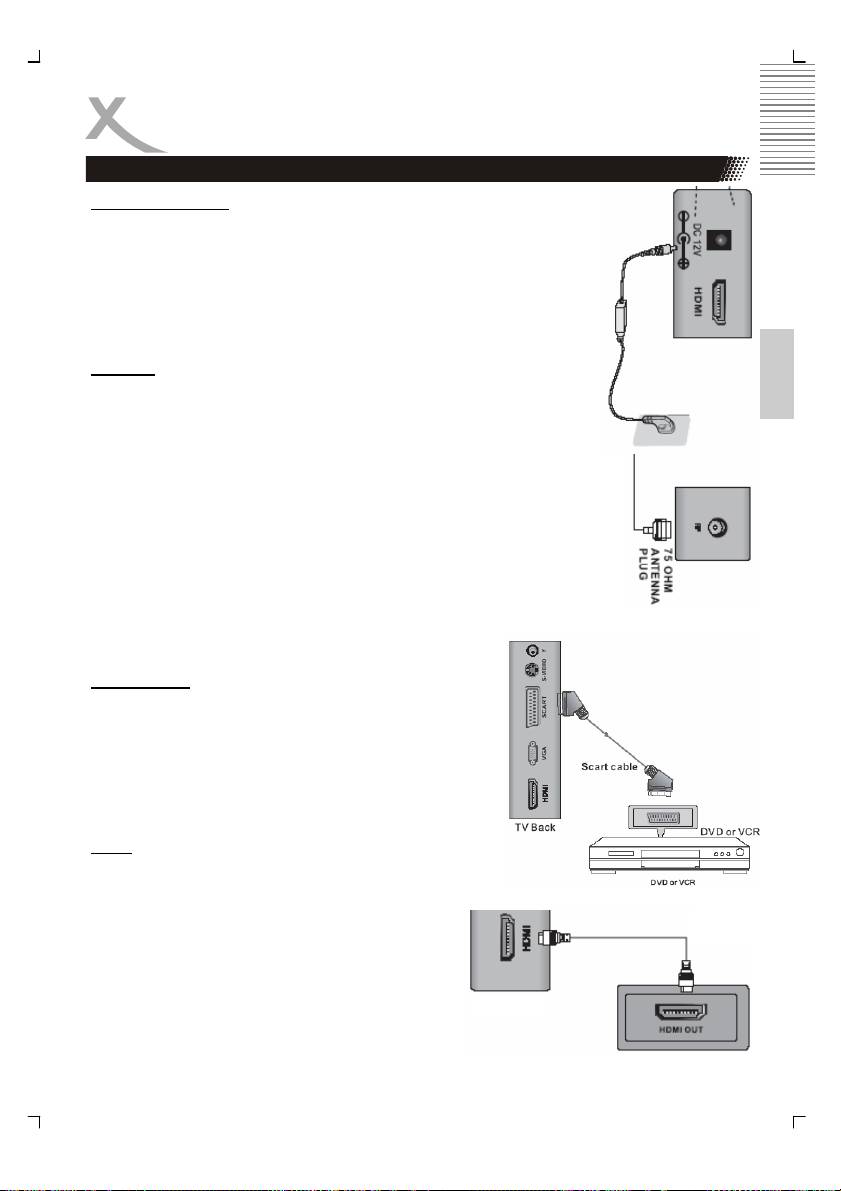
Power connection
Connect the AC/DC power adapter with the DC IN input of the HTC TV
set. After than, please connect the power cable with the wall mounted
power outlet.
On the front side you can see a red LED light. The HTC TV set is now
in Stand-By mode. By pressing the POWER button on the remote con-
trol or on the top side of the device the red LED changes to a green
light.
English
Antenna
The HTC TV set has an analogue and a digital TV Tuner inside. For
receiving analogue TV signals please connect the antenna cable with
the RF connector on the HTC TV set and with the VHF/UHF roof an-
tenna or with a CATV antenna plug.
For receiving digital terrestrial TV signals please connect the HTC TV
set with the RF plug and also with the roof antenna. If no roof antenna is
available, please use indoor aerial.
For activating the analogue TV Tuner, please switch with the SOURCE
button and choose in the popup window „TV“ or “DTV“ for digital terrestrial
TV.
Note:
For getting the best DVB-T reception please uses the roof antenna. If not
possible, than you can connect the HTC TV set with an
active indoor aerial.
SCART Input
Audio– and Video signals from a VCR or a setop box can
be transmitted by SCART. Please connect a SCART
cable with the SCART input on the HTC TV set and with
the SCART output on the VCR or setop box.
Press the SOURCE button and choose „SCART“ in the
popup window and the SCART interface is activated.
HDMI
If you want connect a multimedia device with HDMI like a
game console „PS3“ or a setop box with the HTC TV set,
you can establish a HDMI connection. Please con-
nect the HDMI cable on the HDMI interface on the
HTC TV set and the HDMI output of the multimedia
device.
Please press the SOURCE button and choose
„HDMI“ in the popup window and the HDMI input is
active.
19
Connection
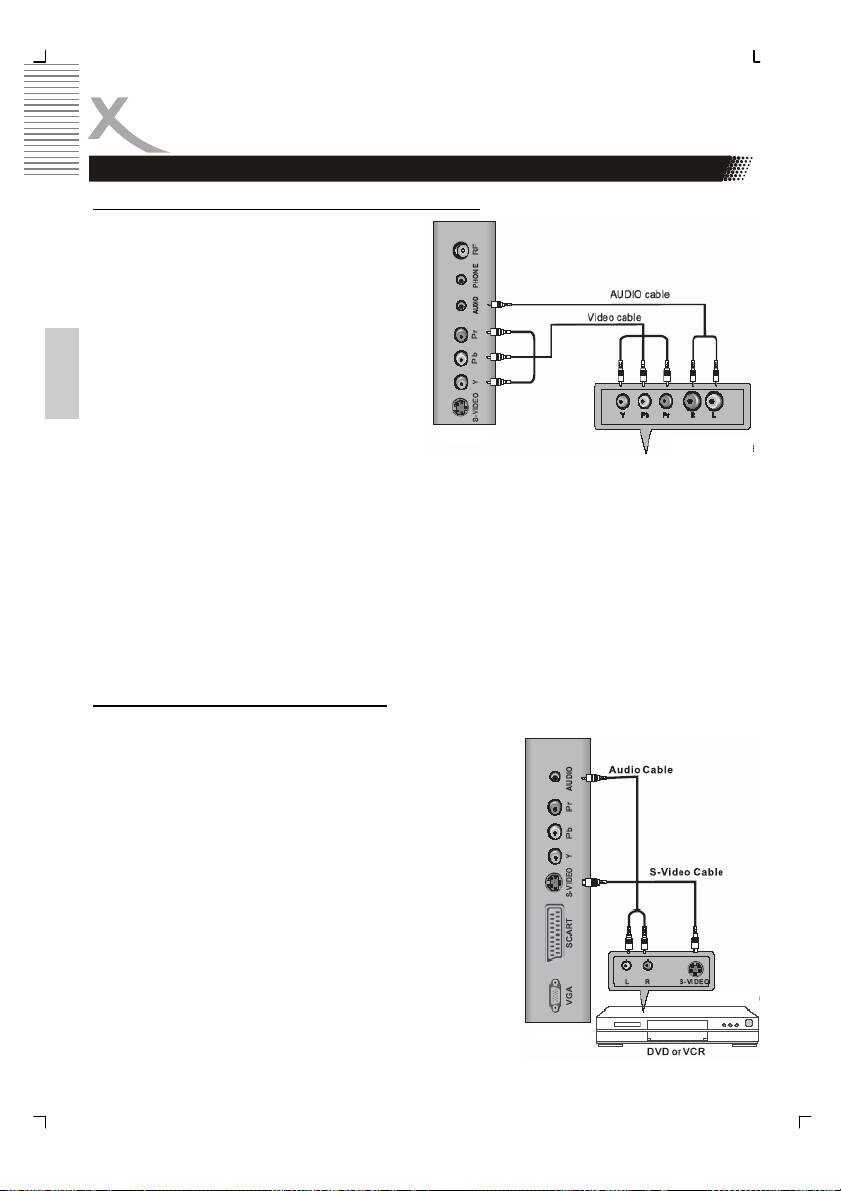
Component Y Pb Pr Video– and Stereo Audio input
If you uses more than one multimedia termi-
nals and the SCART, HDMI and S-Video con-
nection are used, than you connect the next
device by the audio/video component input (Y
Pb Pr). Please connect the wire of an 3-pin
component cable with the YPbPr input of the
HTC TV set and the multimedia device. Please
pay attention to the coloured coding of the
cable, inputs jacks (LCD set) and the video
output jacks (source):
English
• “Y” with the green wire or RCA plug
• “Pb” with the blue wire or RCA plug
• “Pr” with the red wire or RCA plug
With this kind of connection only video signals are transmitted. For listening sound on the TV
you should establish also a sound connection. Please connect the white and red wire of the
2-pin component cable with the AUDIO OUT (source) and the stereo jack with the “AUDIO”
plug of the HTC TV set.
Please press the SOURCE button and choose „YUV“ in the popup window. The YUV input is
active.
Note:
The Audio-adapter cable (RCA to stereo jack) is not part of the accessories.
S-Video Video- und Stereo Audio input
If you uses more than one multimedia terminals and the SCART, HDMI and AV connection
are used, than you connect the next device by the S-Video.
Please connect the S-Video cable with the S-VIDEO input
of the HTC TV set and with the S-Video output of the multi-
media device. With this kind of connection only video sig-
nals are transmitted. For listening sound on the TV you
should establish also a sound connection.
Please connect the white and red wire of the 2-pin compo-
nent cable with the AUDIO OUT (source) and the stereo
jack with the “AUDIO” plug of the HTC TV set.
Please press the SOURCE button and choose „S-Video“ in
the popup window. The S-Video input is active.
Note:
The Audio-adapter cable (RCA to stereo jack) is not part of
the accessories.
20
Connection
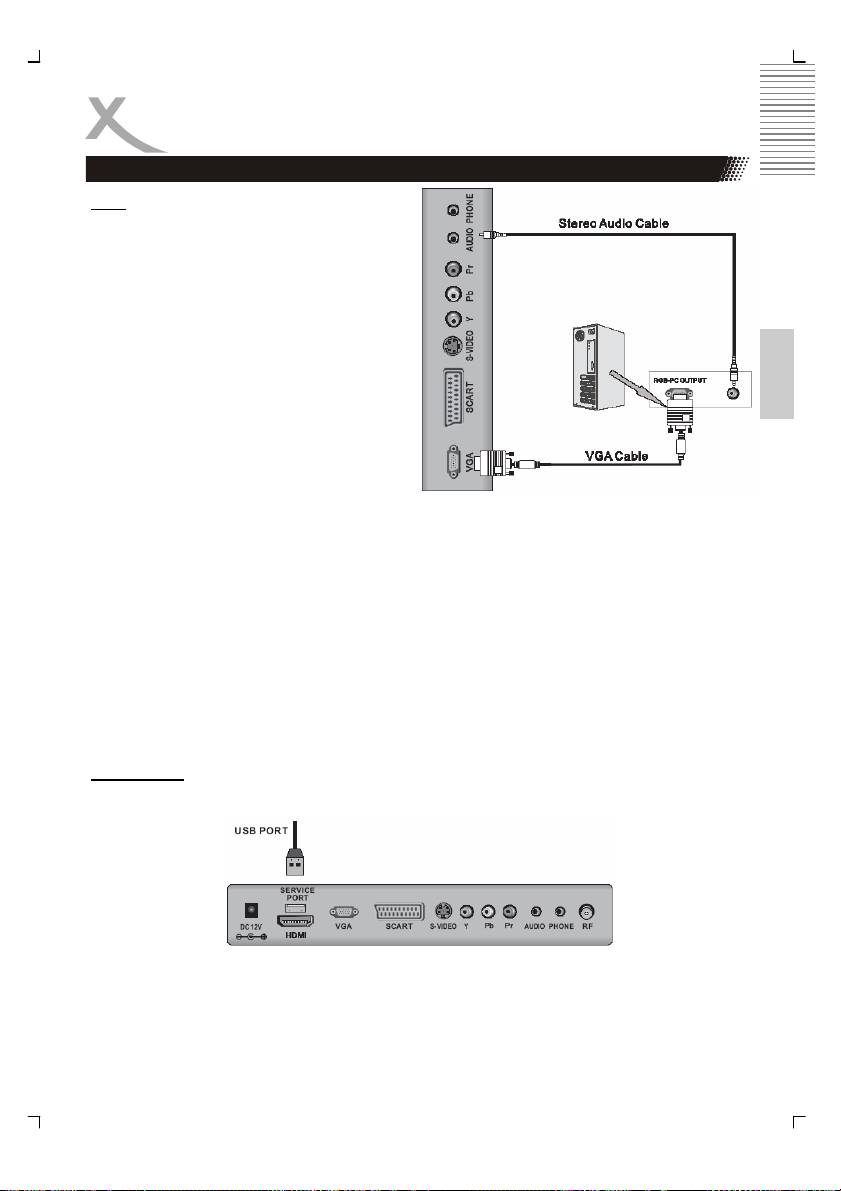
VGA
You can use the HTC TV set as a PC moni-
tor by using the VGA interface. Please con-
nect a VGA cable with the VGA input of the
HTC TV set and with the PC.
With this kind of connection only video sig-
nals are transmitted. For listening sound on
English
the TV you should establish also a sound
connection. Please connect the white and
red wire of the 2-pin component cable with
the AUDIO OUT (source) and the stereo jack
with the “AUDIO” plug of the HTC TV set.
Please press the SOURCE button and
choose „VGA“ in the popup window. The
VGA input is active.
Notes:
1. Before you connect the HTC TV set with the PC, please change the graphic resolu-
tion of the PC to: 640 x 480, 800 x 600 or 1024 x 768.
2. Please establish the connection and switch to „PC-VGA“ input.
3. For displaying the best results, please uses the native resolution of the TV LCD
panel:
• HTC 1526d —> 1366 x 768 Pixel
• HTC 1926d —> 1440 x 900 Pixel
• HTC 2226d —> 1366 x 768 Pixel
Service Port
The service port is only for installing new firmware version (upgrade) for the TV part.
Note:
This USB port can not be used to connect USB-Sticks for playback of audio or video content.
Please connect the USB-Stick with the USB port on the right side.
21
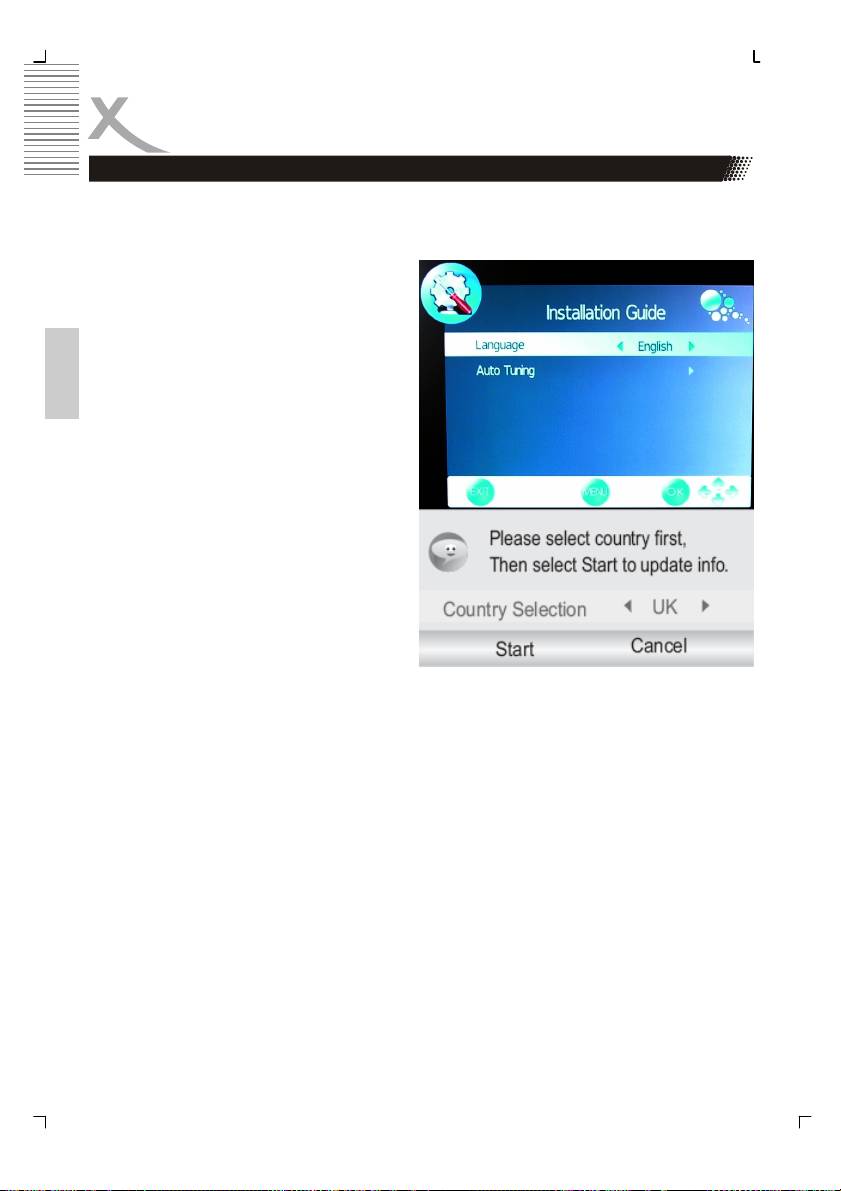
First Time Installation
When you start the HTC TV set the first time and choose TV or DTV, than appears the in-
stallation guide on the screen. With this guide you can search analogue and digital TV chan-
nels. The search routine includes the frequencies of the analogue and digital broadcaster.
1. Please select the OSD language.
You can choose the pre-installed
languages by pressing the ◄ or ►
buttons. If you find your languages,
please confirm the language by
pressing the OK button.
2. Press the ▼ button and navigate to
English
the option „Auto Tuning“. The search
starts when you press the ► button.
3. A new popup window appears on the
screen. There you can see the op-
tion country selection. Please
choose the suitable country by
pressing the ◄ or ► buttons.
4. If you had chosen the country,
please press the ▼ button, so that
the „Start“ field will be marked with
blue and is active. Press the OK
button and the search starts immedi-
ately.
5. A new window opens on the screen,
where the status of the searching is
documented. The values of the
found TV broadcast stations of analogue, digital and Radio are listed.
6. After finishing of the searching, all found TV broadcast station will be saved into the
channel list. You can look at the TV channel list by pressing the LIST button.
Note:
The complete searching needs a couple of minutes.
22
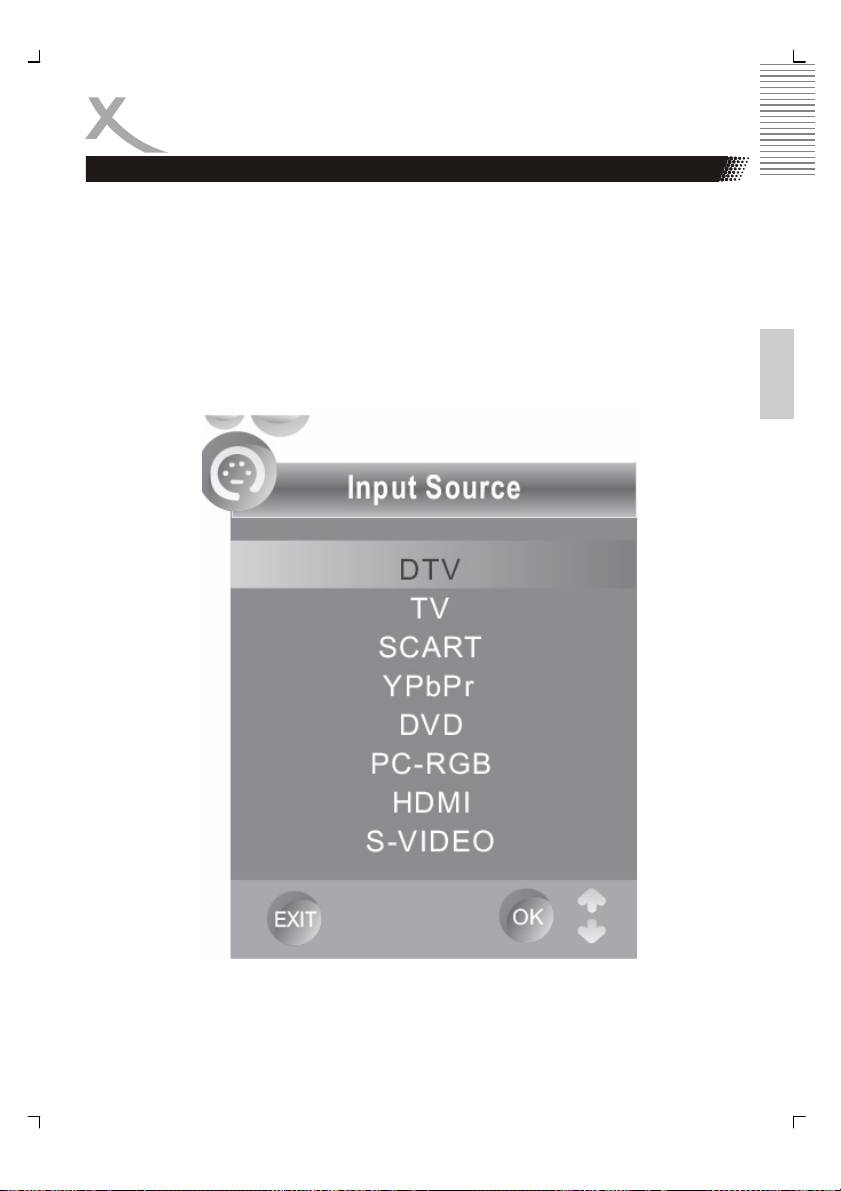
Sources
The single sources and inputs of the HTC TV set can be choose by pressing the SOURCE
button. A popup window appears on the screen. The sources are:
DTV DVB-T TV Tuner
TV Analogue TV Tuner
SCART SCART Video/Audio Input
YPbPr Video component input
DVD Internal DVD Player
English
PC-RGB VGA port
HDMI HDMI Video/Audio input
S-Video S-Video input
There you can choose the source by pressing the ▲/▼ button. Confirm the selected source
with the OK button.
23

DVB-T
If you want to uses the terrestrial digital TV (DVB-T), than you need to change the source
into DTV. Press the SOURCE button and navigate to DTV with the ▲/▼ button. Confirm the
selection DTV by pressing the OK button.
Important buttons and there functions
Channel List
Press the LIST button on the remote control and you gets the provided and receives TV
broadcast stations. By using the ▲/▼ buttons you can select the TV station, which you like.
To disappear thee channel list, press the OK button.
English
Change TV channel
To change to TV channel you can press the P– or P+ button.
Select TV Channel
You have also quick access to the different TV channels by using the numeric buttons.
Last TV channel
Press the RECALL button to go back to the last TV channel.
Change the Volume
By pressing the V– or V+ buttons you can adjust the volume of the speaker.
TV / Radio
Press TV/RADIO button to switch between TV and Radio station.
Note:
Digital Radio will be not transmitted in every country.
EPG
Press EPG button to show the EPG information. For detailed information about the EPG
please refer the section about EPG.
Favourite list
If you had defined some TV or Radio into a favourite list, than you have a quick access to
the favourite list by pressing the FAV button.
24
DVB-T
Important buttons and there functions
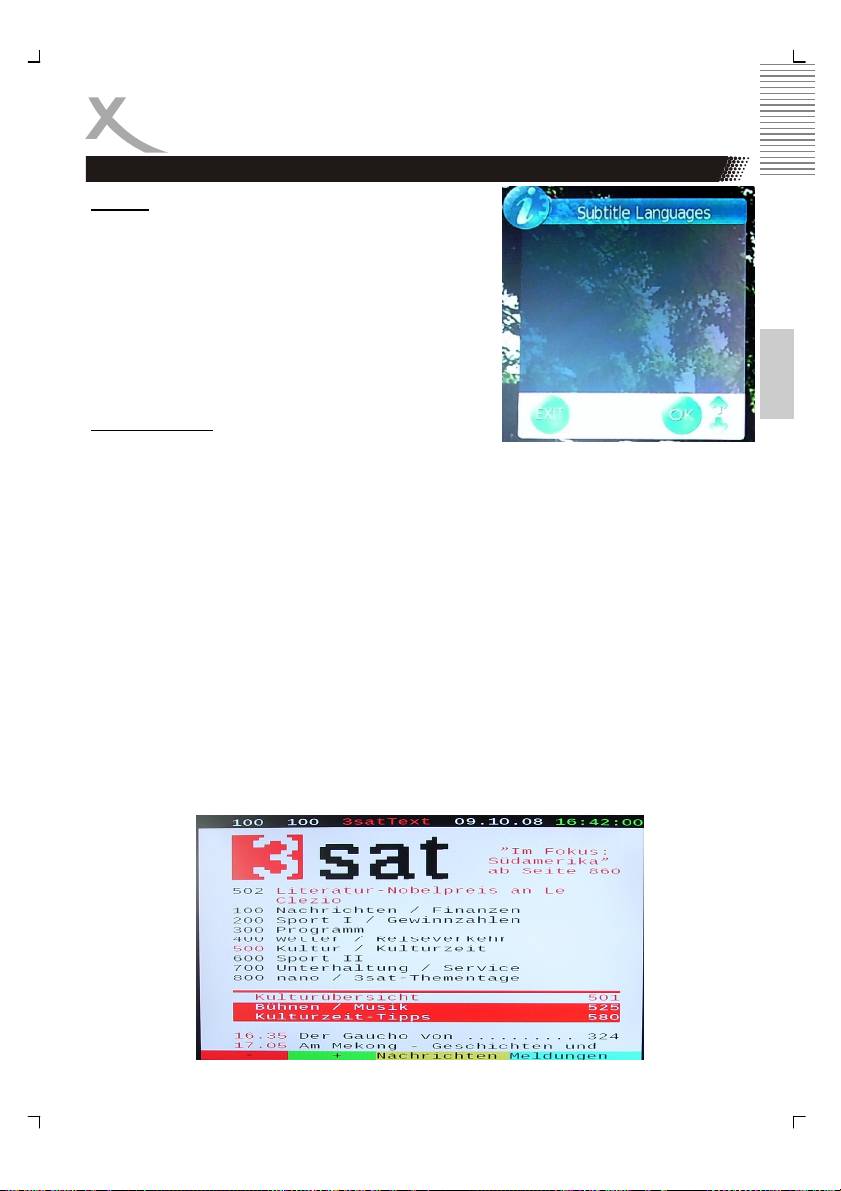
Subtitle
Press SUB-T button to turn on or off the subtitle on the
screen. This function can be activated, if the service is
provide by the TV channel and program. In case that
subtitles are supported, than they will be listed into the
popup window. You can choose the subtitle and start
them with the OK button.
English
Note:
Subtitles are not supported in every country.
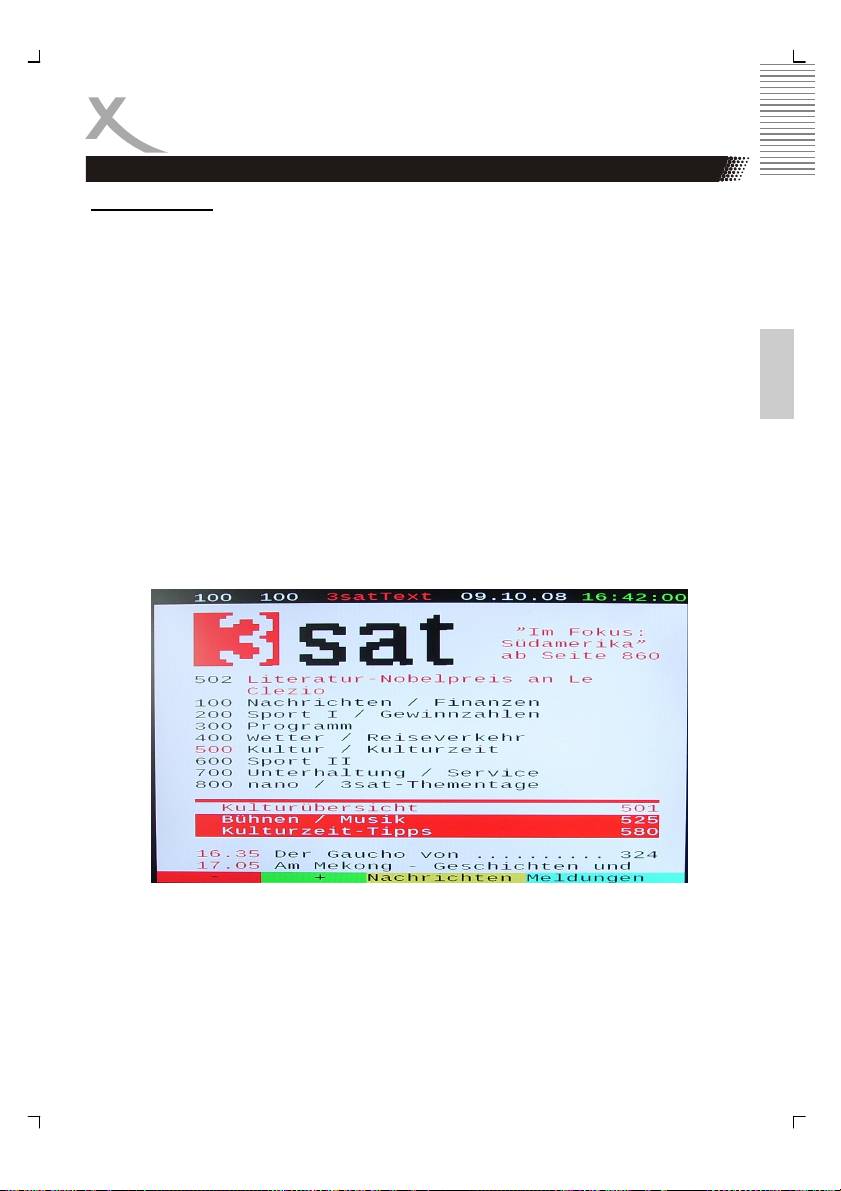
Tele- / Videotext
Press TEXT button to view the videotext information of
the current TV program.
1. With the numeric buttons you can select special videotext pages.
2. On the bottom side of the videotext window you can find four colored fields (Red,
Yellow, Green, Blue). The colored fields corresponds with the colored buttons on the
remote control. Press one of the colored button, the HTC TV set goes directly to this
videotext page.
3. With the RED button you can choose to the previous videotext page.
4. With the GREEN button you can choose the next videotext page.
5. With the YELLOW button you can choose the pre-defined videotext page.
6. With the BLUE button you can choose the pre-defined videotext page.
7. The TEXT button closes the opened videotext window.
8. Press the MIX button and the videotext window gets a transparent background, so
that you watch also the live picture.
9. The INDEX button makes a quick access to the first videotext page (for example
page 100).
10. With the SIZE button you can zoom in the videotext window on full screen size. Than
you can see the first half videotext page. Press again the SIZE button and you can
the second part of the videotext page. By pressing the third time the SIZE button the
videotext window changes to normal size and view.
25
DVB-T
Important buttons and there functions
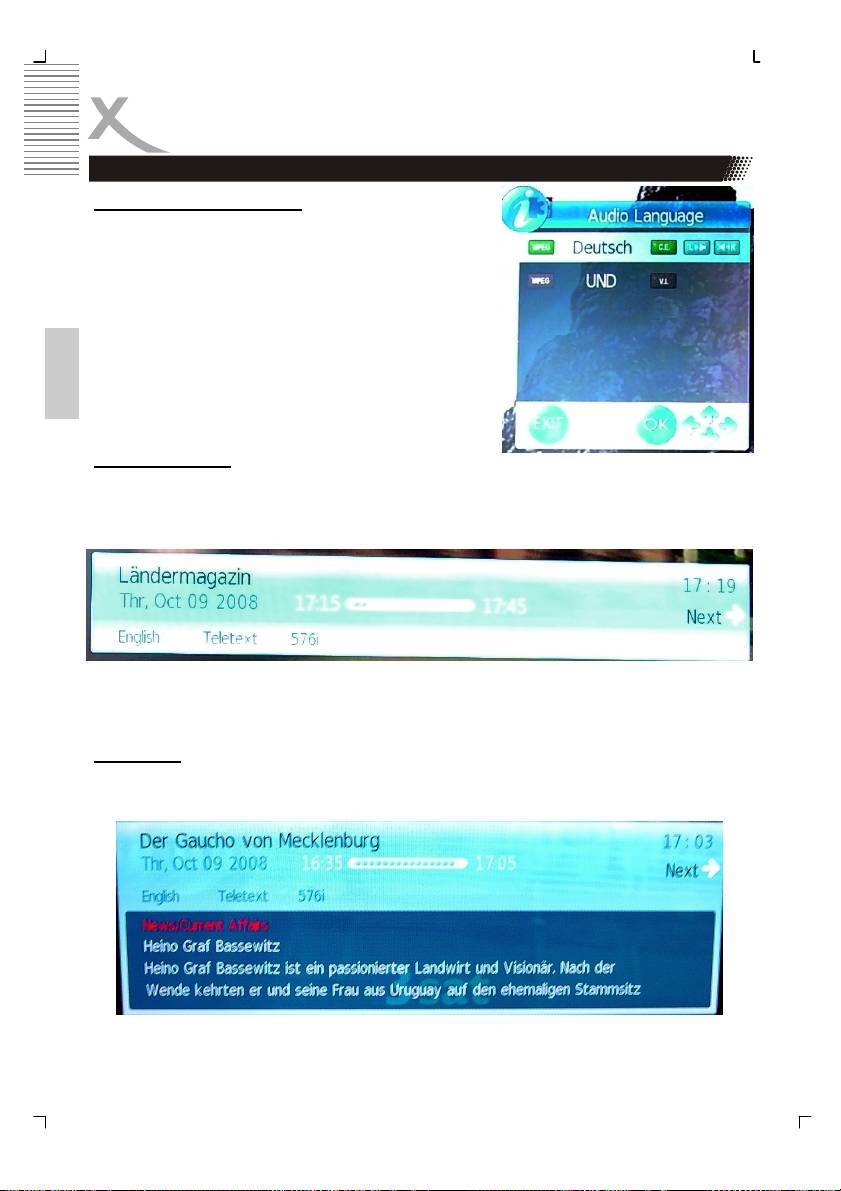
Language or another Audio
Press AUDIO button to change the audio language or
the audio track output. After pressing the AUDIO button
a popup window appears on the screen, where you can
select the preferred audio language or sound mode by
using the ▲/▼ buttons. Confirm the selection by press-
ing the OK button.
Note:
Some broadcaster supports different languages or
sound modes.
English
Quick-Information
Press the OK button during the live picture and a popup window appears on the screen. The
information in the window are TV program title, current date, current time, duration of the
actual TV program, resolution of the transmission (for example 576i) and if videotext is avail-
able.
On the right side you can find an arrow sign. By pressing the ► button you gets information
about the next TV program.
Information
Press the INFO button during the live picture and detailed information are appears on the
screen.
26
DVB-T
Important buttons and there functions
Beside the TV program title, time, date, duration time of the current program title, resolution
of the broadcast and if videotext is available, you can see the detailed EPG information of
the current TV program. With the ▲/▼ buttons you can browse all EPG information, if more
than one page is available. By pressing the ► button you gets information about the next TV
program and there EPG information.
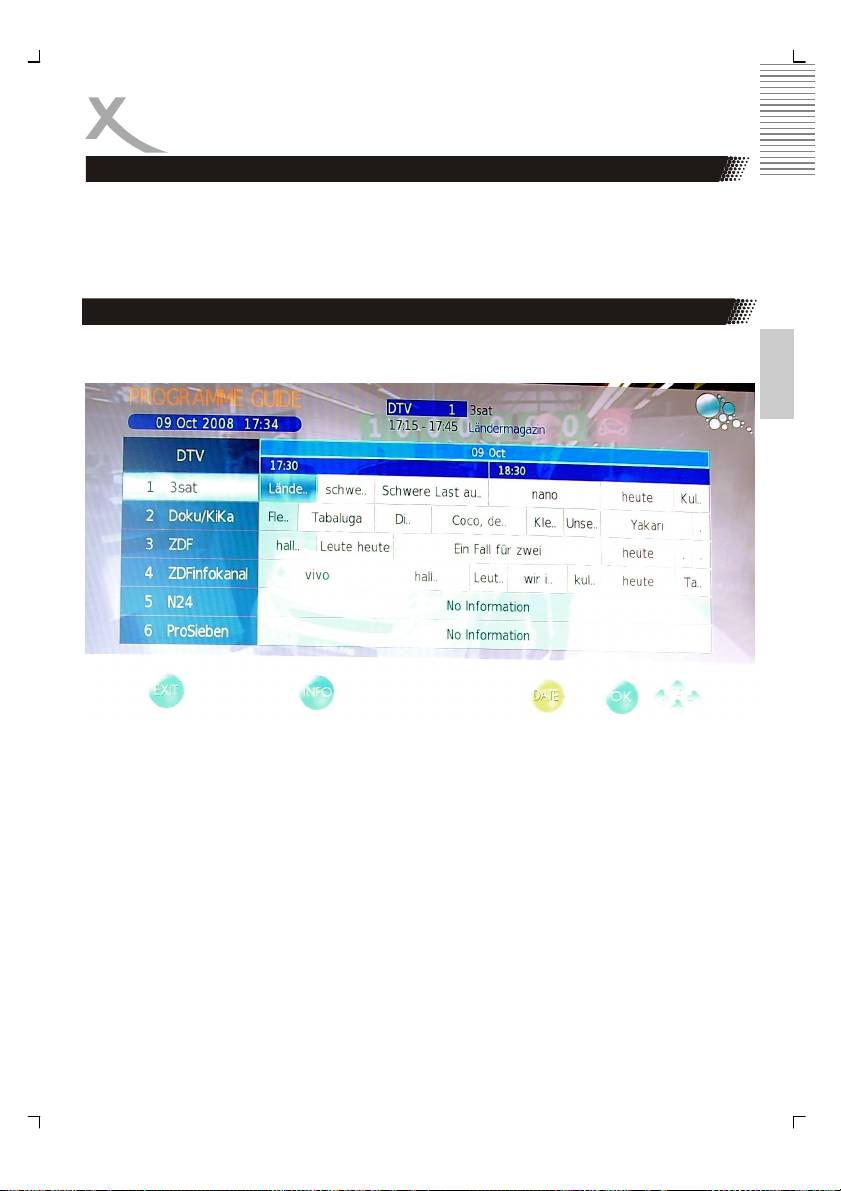
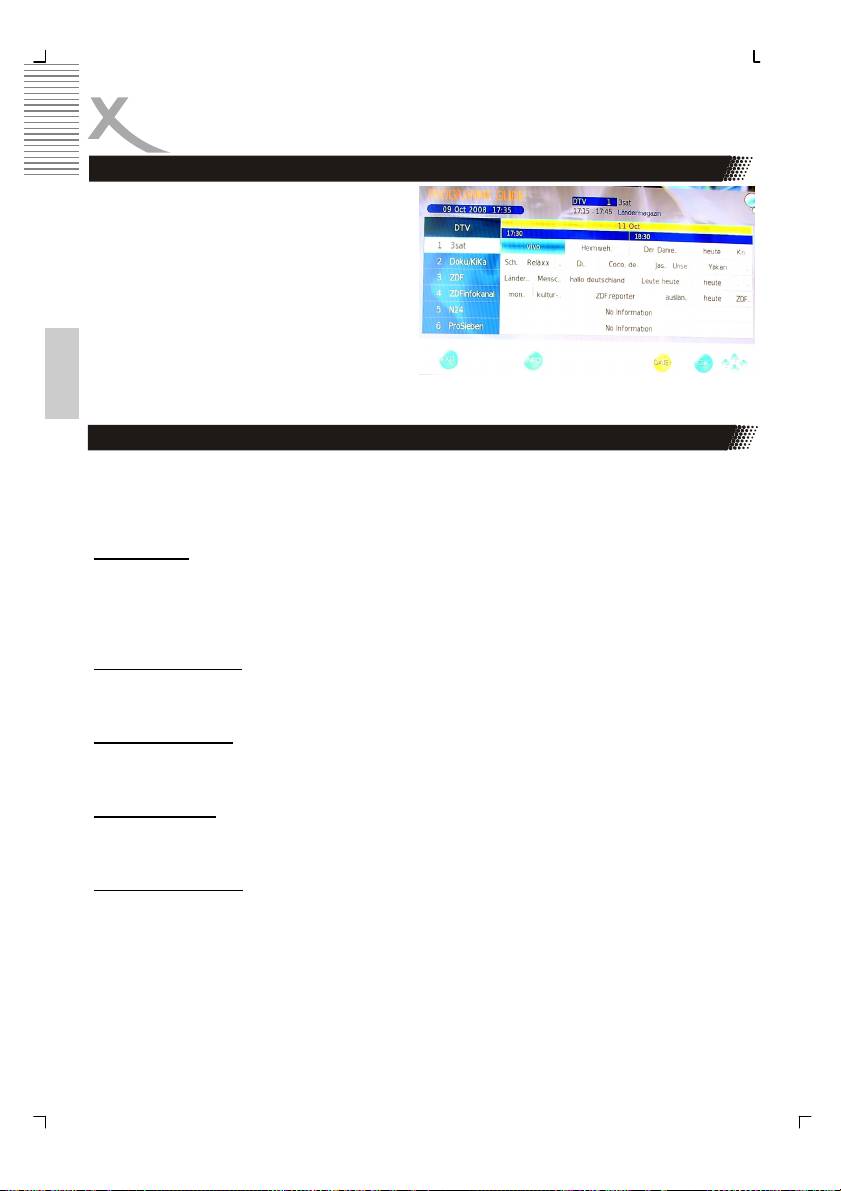
EPG
English
The electronic program guide (EPG) can be activated by pressing the EPG button as well
and the EPG window appears on the screen.
The EPG window is organizes in three sections:
Top Current TV channel number (e.g. DTV 1) and TV broadcast station name
Date, duration time of the current TV program and the TV program title
Middle EPG overview by list
Bottom Buttons for navigation
The active and current TV station and TV program is accentuate in blue. Inside of the TV
station you can navigate with the ◄ or ► buttons to the previous or next TV program. With
the ▲/▼ buttons you can change to the TV broadcast station. Following button help you for
easier navigation:
EXIT Exit of the EPG window
INFO Access to detailed EPG information by each TV program
YELLOW Switches from daily mode to weekly mode
27
DVB-T
EPG
By the weekly mode the date bar changes
from the bright blue into yellow. Now you can
browse to the next date by using the ◄ or ►
buttons.
Press again the YELLOW button and the
displaying changes from the weekly mode
into the daily mode.
Note:
The HTC TV set supports 7-days EPG pre-
English
view.
Analoger TV Tuner
If you want to uses the analogue TV Tuner (Cat TV), than you need to change the source
into TV. Press the SOURCE button and navigate to TV with the ▲/▼ button. Confirm the
selection TV by pressing the OK button.
Channel List
Press the LIST button on the remote control and you gets the provided and receives TV
broadcast stations. By using the ▲/▼ buttons you can select the TV station, which you like.
To disappear thee channel list, press the OK button.
Change TV channel
To change to TV channel you can press the P– or P+ button.
Select TV Channel
You have also quick access to the different TV channels by using the numeric buttons.
Last TV channel
Press the RECALL button to go back to the last TV channel.
Change the Volume
By pressing the V– or V+ buttons you can adjust the volume of the speaker.
28
TV Analog
Tele- / Videotext
Press TEXT button to view the videotext information of the current TV program.
1. With the numeric buttons you can select special videotext pages.
2. On the bottom side of the videotext window you can find four colored fields (Red,
Yellow, Green, Blue). The colored fields corresponds with the colored buttons on the
remote control. Press one of the colored button, the HTC TV set goes directly to this
videotext page.
3. With the RED button you can choose to the previous videotext page.
English
4. With the GREEN button you can choose the next videotext page.
5. With the YELLOW button you can choose the pre-defined videotext page.
6. With the BLUE button you can choose the pre-defined videotext page.
7. The TEXT button closes the opened videotext window.
8. Press the MIX button and the videotext window gets a transparent background, so
that you watch also the live picture.
9. The INDEX button makes a quick access to the first videotext page (for example
page 100).
10. With the SIZE button you can zoom in the videotext window on full screen size. Than
you can see the first half videotext page. Press again the SIZE button and you can
the second part of the videotext page. By pressing the third time the SIZE button the
videotext window changes to normal size and view.
29
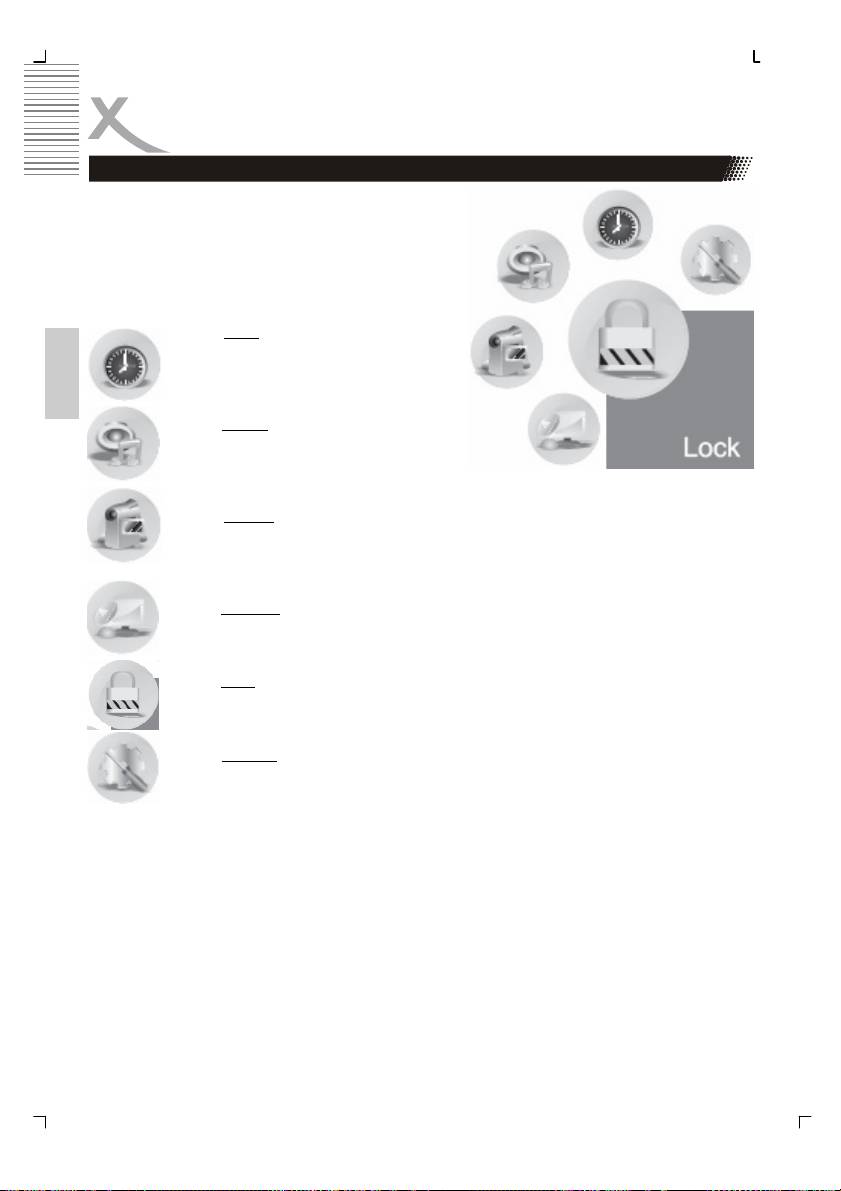
LCD Settings
Press the TV MENU button and you gets access to
the different LCD settings. The beside picture
shows the different categories “Time”, “Channel”,
“Lock”, “Options”, “Sound” and “Picture” which char-
acterizes with symbols. The following description
shows a list of each categories.
Time
Clock, On Time, Off Time, Sleep
timer, Time zone and Auto Stand-
By
English
Sound
Sound mode, Treble, Bass, Bal-
ance, Auto Volume, Surround
Mode
Picture
Picture Mode, Contrast, Brightness, Colour, Sharpness, Hue, Colour
Temperature, Aspect Ratio, Noise Reduction and Screen (only by VGA
mode)
Channel
Auto Search, DTV manual search, TV manual search, Programme Edit
Lock
Lock Channel, Password, Block Channel, Parental Control
Options
Language, Audio language, Subtitle language, Country, Default
After starting the LCD settings you can change the category by using the ◄ or ► buttons.
You can enter in each category by pressing the ▼ button and this category is active.
Each option or setting can be change by ◄ or ► buttons.
To exit the active category please press repeatedly the ▲ button.
To leave the TV settings, press the EXIT or TV MENU button.
30
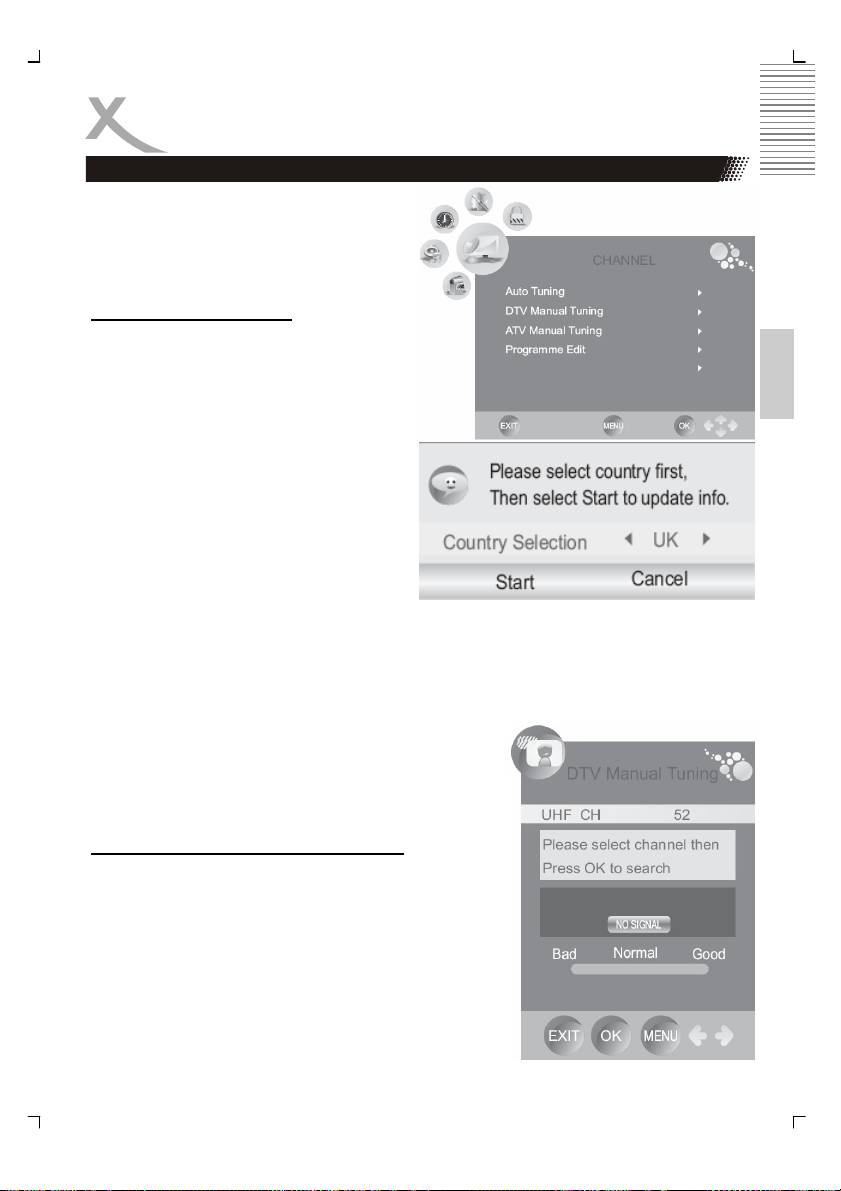
LCD Settings
Channel setting
The channel settings includes the options for
Auto Search (Auto Tuning), DTV manual
Search, ATV manual Search and Programme
Edit.
Auto search (Auto Tuning)
With this setting you can search the TV
English
broadcast station for analogue and digital TV
programs.
1. Press the ▼ button and navigate to
the option „Auto Tuning“. The search
starts when you press the ► button.
2. A new popup window appears on the
screen. There you can see the option
country selection. Please choose the
suitable country by pressing the ◄ or
► buttons.
3. If you had chosen the country, please
press the ▼ button, so that the
„Start“ field will be marked with blue
and is active. Press the OK button
and the search starts immediately.
4. A new window opens on the screen, where the status of the searching is docu-
mented. The values of the found TV broadcast stations of analogue, digital and Ra-
dio are listed.
5. After finishing of the searching, all found TV broadcast station will be saved into the
channel list. You can look at the TV channel list by
pressing the LIST button.
Note:
The complete searching needs a couple of minutes.
DTV Manual Search (DTV Manual Tuning)
Press the ▼ button and navigate to the option “DTV man-
ual Tuning“. The search starts when you press the ►
button.
1. You can change the channel by using ◄ or ►
buttons. So you can define, on which channel
shall be runs the search.
2. Starts the searching by the OK button.
To leave the DTV manual tuning, press the EXIT or TV
MENU button.
31
LCD Settings
Channel setting
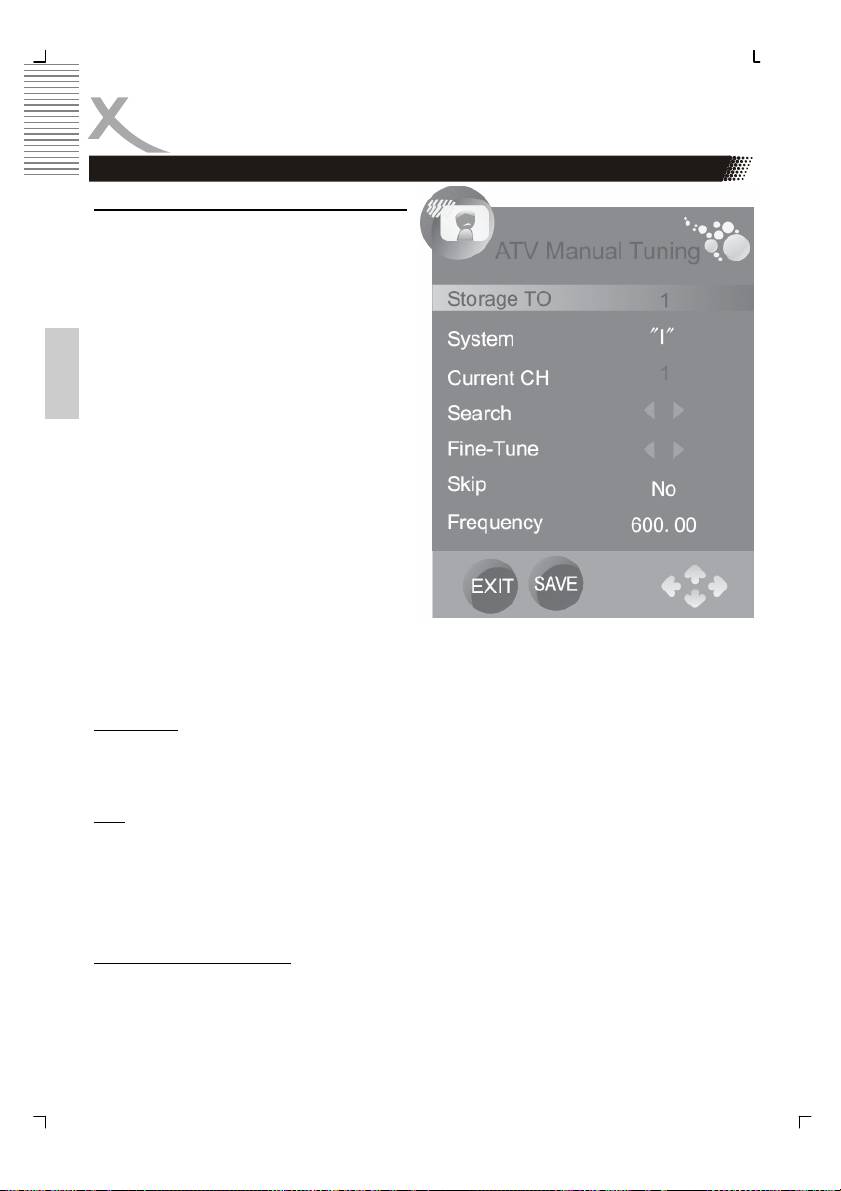
ATV Manual Search (ATV Manual Tuning)
Press the ▼ button and navigate to the op-
tion “ATV manual Tuning“. The search starts
when you press the ► button. The options
are:
• Storage To
• System (B/G for West Europe, I for
UK, D/K for Eastern Europe and
France, L or LL for part of France)
• Current TV channel
English
• Search
• Fine Tuning
• Skip
• Frequency
1. With the ▲/▼ buttons you can
browse to each setting.
2. With the ◄ or ► buttons you can
choose the position in the channel
list, where the found TV channel is
stored.
3. Go to “Audio” and choose the Audio
system by using the ◄ or ► buttons.
4. Go to “Search” and start them by the ► button.
Fine Tuning
By using the ◄ or ► buttons you can start the fine tuning of each TV channel, if the signal is
too weak or distorted.
Skip
By using the ◄ or ► buttons you can activate the Skip function.
• Yes - The channel is skipped by changing the TV channel with the P– or P+ button.
• No - The Skip function is deactivated.
Other buttons for navigation
With the RED button you can save the changes, if you for example has changes the Audio
system.
To leave the ATV manual tuning, press the EXIT or TV MENU button.
32
LCD Settings
Channel setting
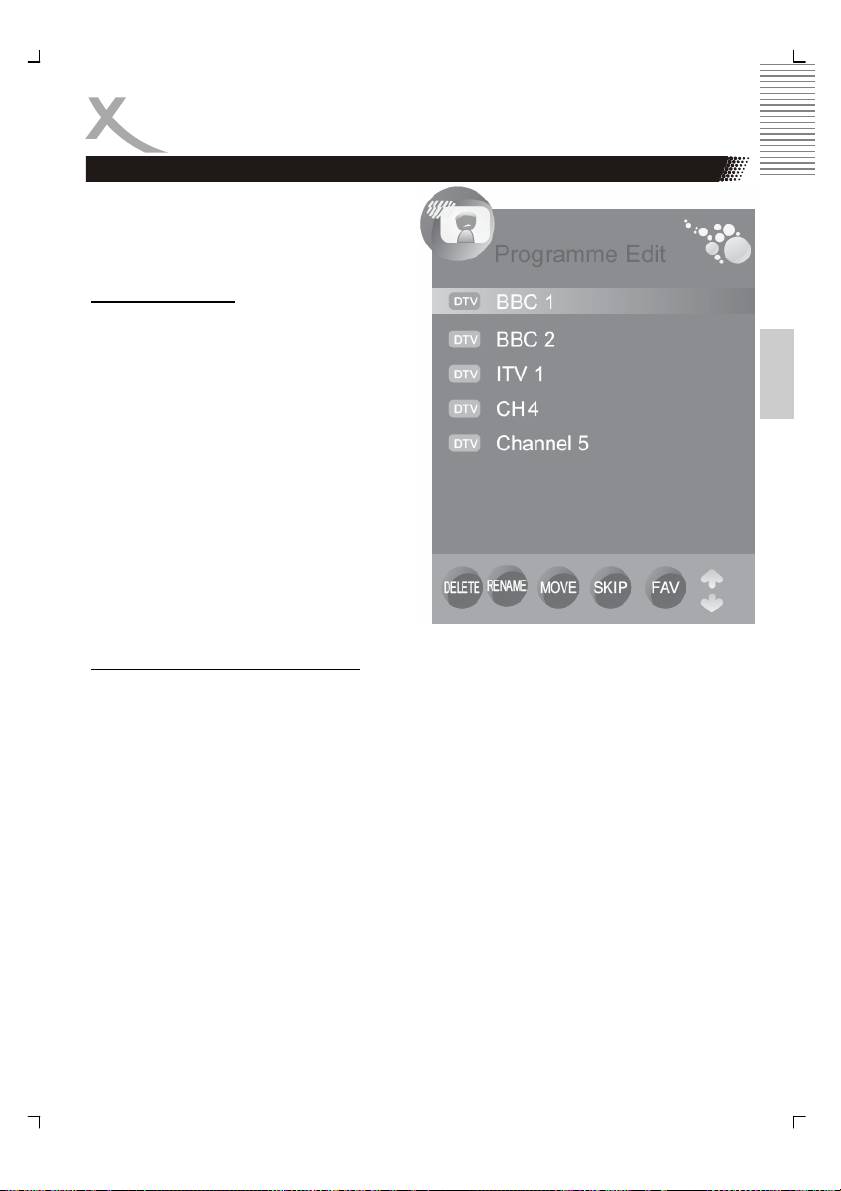
The option “Programme Edit” includes set-
tings for Moving and sorting, Skip and define
Favourites.
Move a TV channel
This option is responsible for sorting the TV
channel, so that you can define your per-
English
sonal view of the TV channel list.
1. With the ▲/▼ buttons you can
choose the TV channel, which shall
be edit.
2. Press the YELLOW button and be-
side the chosen TV channel you can
see now an arrow symbol.
3. Move the TV channel with the ▲/▼
buttons on the position which you
like.
4. Press the TV MENU button to con-
firm and save the moving.
5. To leave the setting press the EXIT
button.
Define TV Channels into Favourites
Here you can define your preferred TV channels into a favourite list. You can activatethe list
by pressing the FAV button.
1. With the ▲/▼ buttons you can choose the TV channel, which shall be edit.
2. Press the FAV button and beside the chosen TV channel you can see now heart
symbol.
3. To leave the setting press the EXIT button.
Note:
If you want to delete a favourite TV channel from the favourite list, than browse the TV chan-
nel which is marked by a heart symbol and press the FAV button. The heart symbol is de-
leted and this TV channel can not seen anymore in the favourite list.
33

LCD Settings
Channel setting
Skip a TV Channel
With this option you can define single TV channel which can not dial anymore by using the
numeric buttons.
1. With the ▲/▼ buttons you can choose the TV channel, which shall be skipped.
2. Press the BLUE button and beside the chosen TV channel you can see now blue
symbol.
3. To leave the setting press the EXIT button.
English
Rename a TV Channel
(only by analogue TV channel possible)
With this option you can rename single analogue TV channel and define a new label.
1. With the ▲/▼ buttons you can choose the TV channel, which shall be skipped.
2. Press the GREEN button and beside the chosen TV channel you can see now
green symbol.
3. With the ▲/▼ buttons you can browse the letters on each place.
4. With the ◄ or ► buttons you can go to the next position.
5. Save the new label of the TV channel by pressing the TV MENU button.
6. To leave the setting press the EXIT button.
Delete a TV Channel
With this option you can delete single TV channel from the TV list.
1. With the ▲/▼ buttons you can choose the TV channel, which shall be skipped.
2. Press the RED button and beside the chosen TV channel you can see now red
symbol.
3. Confirm the deleting by pressing again the RED button.
4. To leave the setting press the EXIT button.
Note:
The selected TV channel is now deleted from the TV channel list.
34
LCD Settings
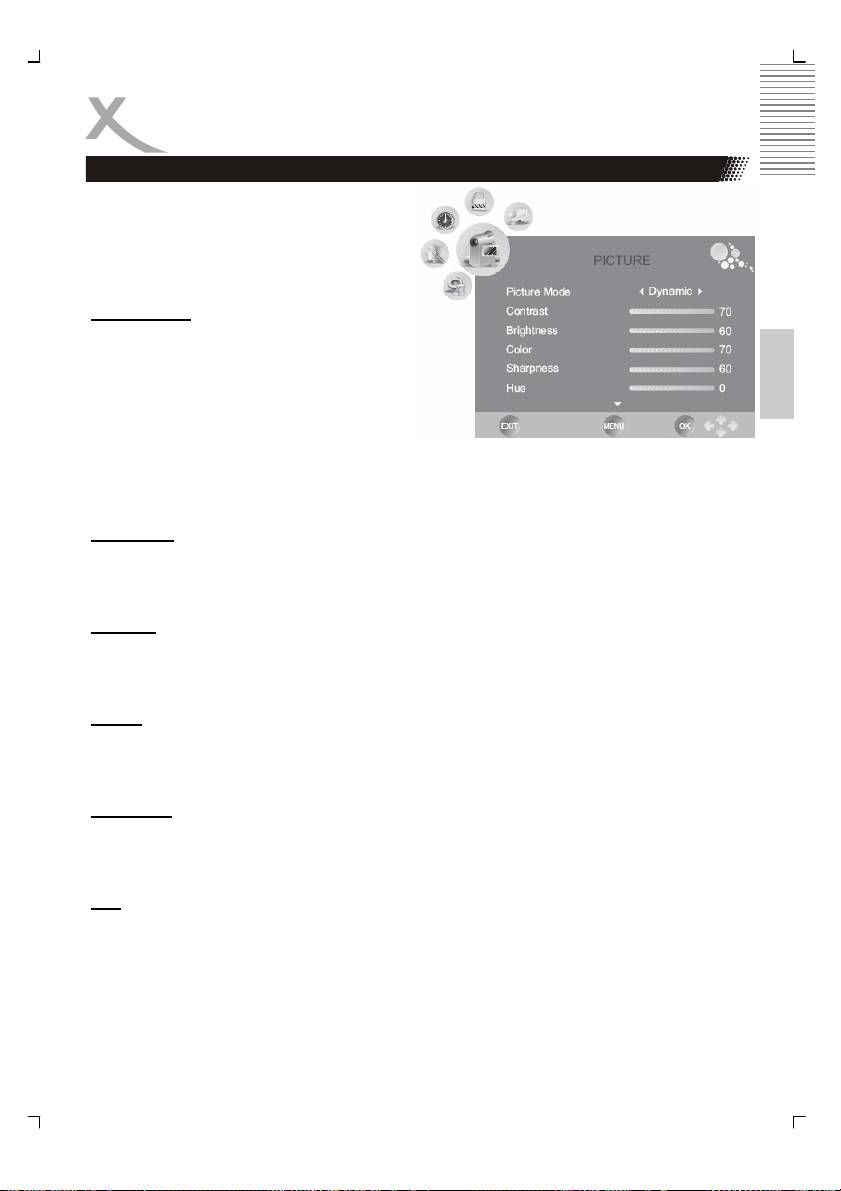
Picture setting
The picture settings includes option for
“Picture Mode”, “Contrast”, “Brightness”,
“Colour”, “Sharpness”, “Hue”, “Colour Tem-
perature”, “Aspect Ratio”, “Noise Reduction”
and “Screen”.
Picture Mode
With the ◄ or ► buttons you can choose the
English
picture mode. The live picture changes to the
preset settings. The presets are:
• Dynamic
• Standard
• Mild
You can define you own settings if you uses the USER options.
Brightness
With the ◄ or ► buttons you can select the level of brightness. This option is only than ac-
tive, when you uses the USER option by the picture mode.
Contrast
With the ◄ or ► buttons you can select the level of contrast. This option is only than active,
when you uses the USER option by the picture mode.
Colour
With the ◄ or ► buttons you can select the level of contrast. This option is only than active,
when you uses the USER option by the picture mode.
Sharpness
With the ◄ or ► buttons you can select the level of sharpness. This option is only than ac-
tive, when you uses the USER option by the picture mode.
Hue
With the ◄ or ► buttons you can select the level of hue. This option is only than active,
when you uses the USER option by the picture mode.
35

LCD Settings
Picture setting
Colour Temperature
With the ◄ or ► buttons you can select the
level of colour temperature. The three preset
options are:
• Cool
• Warm
• Medium
You can define you own settings if you uses
the USER options. Than you can get access
English
to the three colours “Red”, “Green” and
“Blue”. Select the level of each colour by
using the ◄ or ► buttons.
Aspect Ratio
With the ◄ or ► buttons you can select the aspect ratio and changes the view on the
screen. The options are:
• 16:9 - The picture is every time in full screen mode, independent from the supported
aspect ratio.
• 4:3 - The picture view is 4:3 and shows on the left and right side a black bar, inde-
pendent from the supported aspect ratio.
• Auto - The view is defined by the supported aspect ratio and the adjustment is auto-
matically. By 16:9 is the picture in full screen and by 4:3 show the screen the black
bars on the right and left side.
• Zoom 1 - This option can be used for an 4:3 aspect ratio. The picture is zoomed into
full screen by keeping the aspect ratio. Parts of the picture will be cut-off (specially
on the top or bottom side) and can not seen anymore.
• Zoom 2 - This option can be used for an 16:9 widescreen or cinemascope picture.
The picture is zoomed into full screen by keeping the aspect ratio. Parts of the pic-
ture will be cut-off (specially on the right and left side) and can not seen anymore.
By every source except the internal DVD-Player you can change the aspect ratio by press-
ing the ZOOM button on the remote control.
Note:
Do not uses the 4:3 aspect ratio every time, because you can damage the TFT LCD screen.
Noise Reduction
With the ◄ or ► buttons you can activate or deactivate the noise reduction. The option ON
starts the noise reduction and OFF deactivate them.
36
LCD Settings
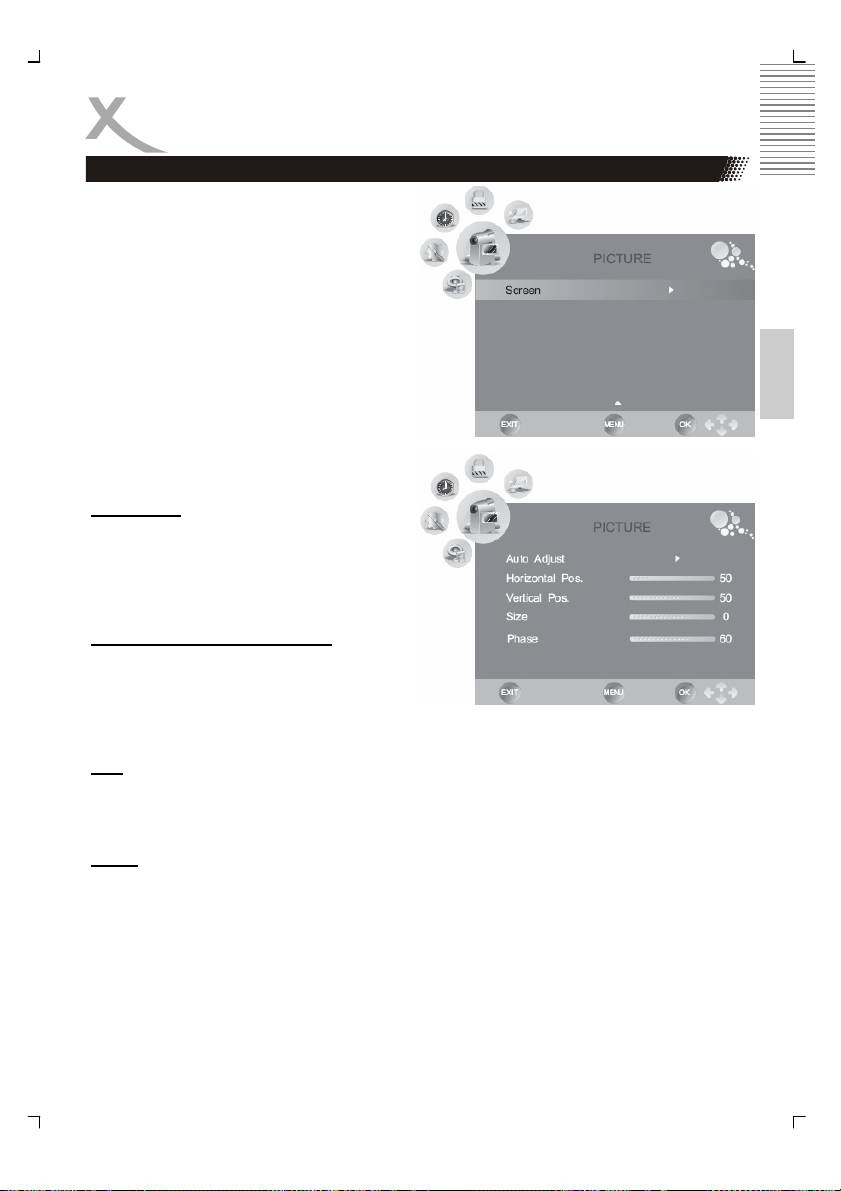
Picture setting
When you uses the VGA input, than you
have several additional options for the adjust-
ment of the picture. These options are behind
the setting SCREEN.
Press the ► button to get access to the
SCREEN options. The sub-options are:
English
• Auto Adjust
• Horizontal Position
• Vertical Position
• Size
• Phase
Auto Adjust
You can uses the Auto adjust option to syn-
chronizes the picture from the PC VGA port
in an optimal way. Press the ► button to
synchronizes the screen display.
Horizontal and Vertical Position
With these option you can adjust the VGA
picture manually on the screen. Press the ◄
or ► buttons and the picture shifts to high
and width.
Size
Press the ◄ or ► buttons to change the size of the VGA picture on the screen, until a stable
image is obtained.
Phase
Use ◄ or ► buttons to adjust the phase of the ADC sampling clock relative to the H-sync
signal, until a stable image is obtained.
Save the new settings by pressing the TV MENU button.
To leave the setting press the EXIT button.
37
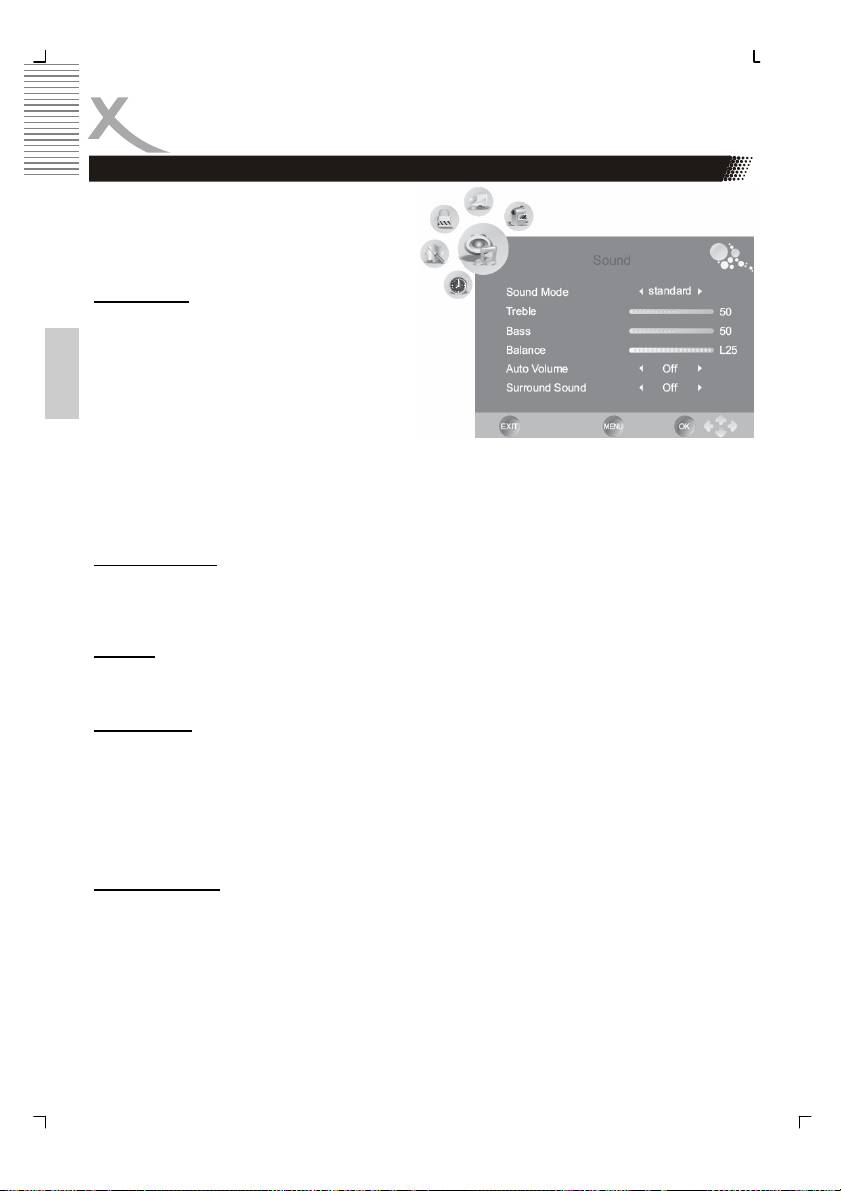
LCD Settings
Sound setting
The sound settings includes options for
“Sound Mode”, “Treble”, “Bass”, “Balance”,
“Auto Volume” and “Surround”.
Sound Mode
With the ◄ or ► buttons you can select the
sound mode. The preset options are:
• Music
English
• Movie
• Sport
• Standard
You can define you own settings if you uses the USER options. Than you have access to
the settings of treble and bass.
Treble and Bass
With the ◄ or ► buttons you can select the level treble and bass. These option are only
than active, when the USER option by sound mode is set.
Balance
With the ◄ or ► buttons you can select the balance.
Auto Volume
With this option you can activate an automatic damping of the volume, if very loud sound
passage are happened. This mode is like a Night Mode. With the ◄ or ► buttons you can
activate or deactivate the damping.
• ON - The damping is active
• OFF - deactivate the damping
Surround Sound
This option activates the surround effects by the sound output. With the ◄ or ► buttons you
can activate or deactivate the surround sound.
• ON - The Surround Sound is active
• OFF - deactivate the Surround Sound
38
