Nikon PC-E Micro NIKKOR 85mm f-2.8D: 5. Using bayonet hood HB-22 6. Determining exposure
5. Using bayonet hood HB-22 6. Determining exposure: Nikon PC-E Micro NIKKOR 85mm f-2.8D
Table of contents
- Notes on Safety Operations
- 1. Nomenclature
- 2. Major features
- 3. Usable cameras and available functions
- Aperture stop-down button (one-touch preset aperture operation)
- Important! 4. Mounting lens
- 5. Using bayonet hood HB-22 6. Determining exposure
- When using other Nikon cameras Determining exposure (with an external exposure meter)
- 7. The shift/tilt function Important The shift function The tilt function
- Revolving
- 8. Focusing
- 9. Depth of field 10. Focusing at a predetermined reproduction ratio 11. Notes on close-up photography and duplication work
- 12. Taking flash pictures using cameras with a built-in flash
- 13. Recommended focusing screens
- 14. Lens care 15. Standard accessories 16. Optional accessories
- 17. Specifications
- Weight: Approx. 635 g (22.4 oz)
c
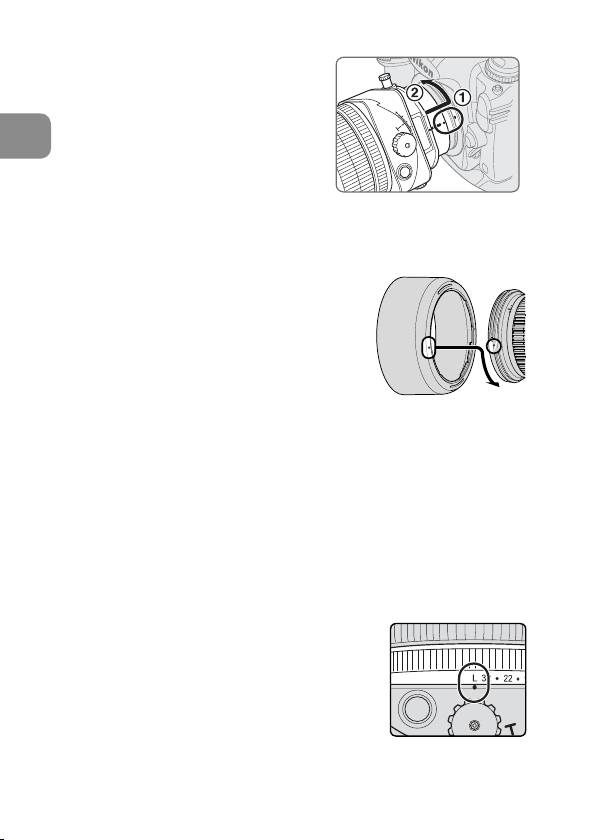
Turn the camera power off, align
the mounting indexes on the lens
and camera and then twist the lens
counterclockwise until it locks into
En
place. (Fig. 4)
•
Mounting the lens to a camera
while camera’s power is on, may
prevent the camera from operating
Fig. 4
correctly.
5. Using bayonet hood HB-22
Align the lens hood attachment index (
)
•
on the hood with the lens hood mounting
index on the lens, and turn the hood
clockwise until it click stops to secure.
(Fig. 5)
• If the lens hood is not correctly attached,
vignetting can occur.
• To facilitate attachment or removal of the
Fig. 5
hood, hold it by its base around the lens hood attachment index
rather than its outer edge.
• To store the lens hood, attach it in the reverse position.
6. Determining exposure
The aperture value displayed in the LCD panel or viewfinder of the
camera may differ from the aperture value set with the lens’ aperture
ring when the focus ring is rotated. In this case, the aperture value
displayed in the LCD panel or viewfinder is the effective aperture.
When using the Nikon D3, D700, D300 or D90 camera
a
Set the shift and tilt amount to 0 by
rotating the shift and tilt knobs. (Fig. 2)
b
Set the camera’s exposure mode.
c
With A or M exposure mode, set the aperture
using the aperture ring or the camera’s
command dial. When using the camera’s
command dial, set the aperture to minimum
Fig. 6
aperture lock (L).
(Fig. 6)
With P or S mode, set the aperture using the camera’s command dial.
24
