JVC GR-DVL9700: 6 EN
6 EN: JVC GR-DVL9700

GETTING STARTED (cont.)
6 EN
Operating Environment
®
®
®
q Personal Computer with Microsoft
Windows
95/Windows
98
®
®
q CPU : Intel
Pentium
or higher processor
q Minimum RAM requirement : 32 MB
q Available Hard Disk space;
MultiMediaNavigator : 20 MB or more
Mr. Photo Gold : up to 140 MB or more
(You can select which applications from Mr. Photo Gold you wish to install.)
q Color display capable of at least 65,536 colors
Recommended 1024 x 768, 16.7 million colors
q 1 free serial transmission port, compatible with 9600 bps or higher transmission rate,
connectable to RS-232C with 9 pin serial connector
(Recommended compatible with UART 16550A)
®
q Mouse (Windows
compatible)
q CD-ROM drive
NOTE
An optional 9 pin serial conversion adapter is required for computers using a serial commu-
nication port other than a standard 9 pin.
®
®
* Intel
and Pentium
are either registered trademarks or trademarks of Intel Corporation.
®
®
* Microsoft
and Windows
are either registered trademarks or trademarks of Microsoft
Corporation in the United States and/or other countries.
* Other product and company names included in this instruction manual are
trademarks and/or registered trademarks of their respective holders.
INSTALLATION
EN 7
INSTALLATION
For details on the basic operations of
®
®
Windows
95/98, please see your Windows
95/98 or PC instruction manual.
®
Starting Windows
95/98
• Quit any other software you are
using. (Check that there are no other
application icons on the task bar.)
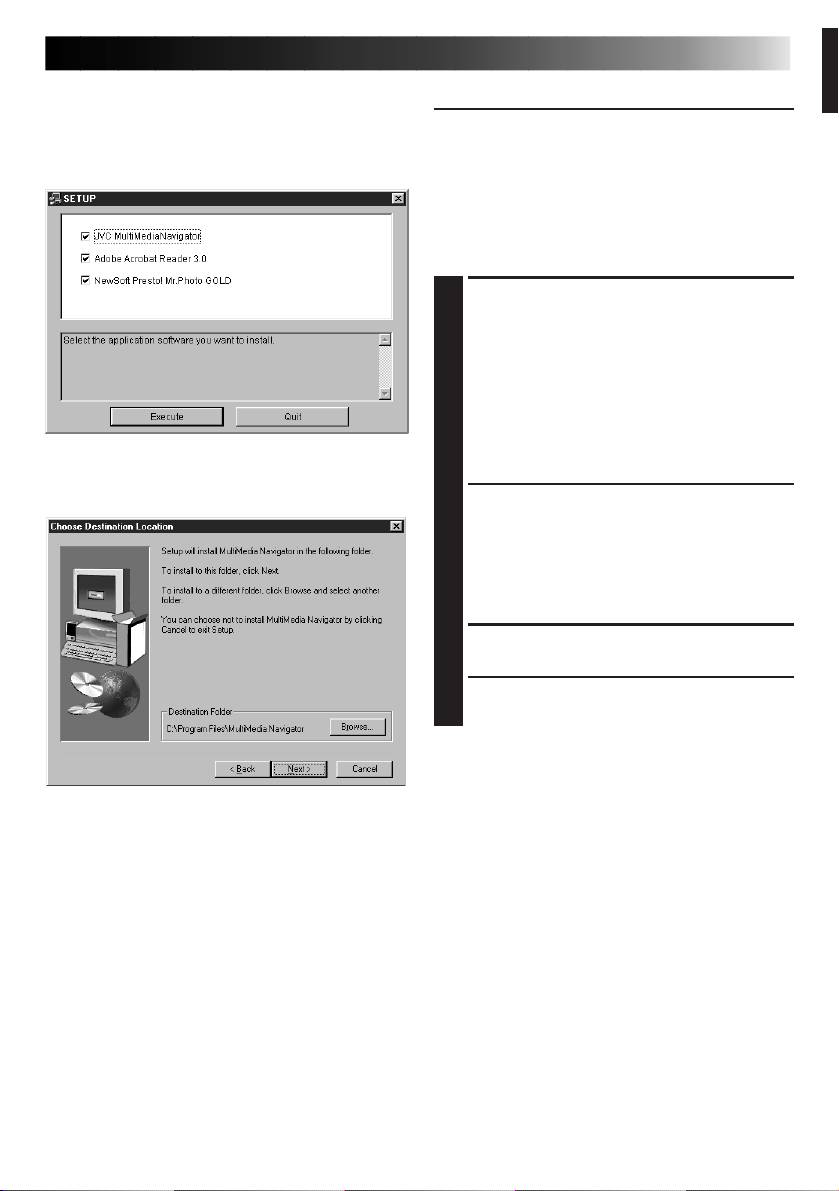
Insert the supplied CD-ROM disc into
1
the CD-ROM drive.
• The SETUP window should appear
after a few moments.
• Perform the following operation if the
setup window does not appear.
1 Double click My Computer.
2 Double click the CD-ROM icon.
3 Go to Step 2.
Click Execute on the SETUP window.
2
• If the application has already been
installed, click on those application
items which do not need to be
installed to remove the check mark
displayed.
Follow the on-screen instructions.
3
Click Quit on the SETUP window when
4
installation is complete.
Table of contents
- 2 EN
- 4 EN
- 6 EN
- 8 EN
- 10 EN
- 12 EN
- 14 EN
- 16 EN
- 18 EN
- 20 EN
- 2 DE
- 4 DE
- 6 DE
- 8 DE
- 10 DE
- 12 DE
- 14 DE
- 16 DE
- 18 DE
- 20 DE
- 2 FR
- 4 FR
- 6 FR
- 8 FR
- 10 FR
- 12 FR
- 14 FR
- 16 FR
- 18 FR
- 20 FR
- 2 NE
- 4 NE
- 6 NE
- 8 NE
- 10 NE
- 12 NE
- 14 NE
- 16 NE
- 18 NE
- 20 NE
- 2 CA
- 4 CA
- 6 CA
- 8 CA
- 10 CA
- 12 CA
- 14 CA
- 16 CA
- 18 CA
- 20 CA
- 2 IT
- 4 IT
- 6 IT
- 8 IT
- 10 IT
- 12 IT
- 14 IT
- 16 IT
- 18 IT
- 20 IT
- 2 DA
- 4 DA
- 6 DA
- 8 DA
- 10 DA
- 12 DA
- 14 DA
- 16 DA
- 18 DA
- 20 DA
- 2 SU
- 4 SU
- 6 SU
- 8 SU
- 10 SU
- 12 SU
- 14 SU
- 16 SU
- 18 SU
- 20 SU
- 2 SV
- 4 SV
- 6 SV
- 8 SV
- 10 SV
- 12 SV
- 14 SV
- 16 SV
- 18 SV
- 20 SV
- 2 NO
- 4 NO
- 6 NO
- 8 NO
- 10 NO
- 12 NO
- 14 NO
- 16 NO
- 18 NO
- 20 NO
- 2 РУ
- 4 РУ
- 6 РУ
- 8 РУ
- 10 РУ
- 12 РУ
- 14 РУ
- 16 РУ
- 18 РУ
- 20 РУ


