Thrustmaster Ferrari GT Experience: ADVANCED FUNCTIONS
ADVANCED FUNCTIONS : Thrustmaster Ferrari GT Experience
5/10
ADVANCED FUNCTIONS
ADJUSTING THE WHEEL’S SENSITIVITY
Your wheel’s steering has 2 sensitivity modes:
- Normal sensitivity (the default mode)
- High sensitivity (must be set)
Setting “High Sensitivity” mode:
Action
LED color
Simultaneously press and release:
the D-Pad (4) + the 2 UP and DOWN levers (1)
FLASHES
SLOWLY
Your wheel’s steering is now more sensitive.
(This procedure must be repeated each time you restart or disconnect your wheel)
Setting “Normal Sensitivity” mode (default mode):
Action
LED color
Simultaneously press and release:
the D-Pad (4) + the 2 UP and DOWN levers (1)
DOES NOT
FLASH
Your wheel’s steering has now returned to normal sensitivity (the default mode)
PROGRAMMING THE WHEEL AND PEDALS
Your wheel is fully programmable:
- All buttons as well as the D-Pad can be switched between themselves.
- All buttons as well as the D-Pad can be programmed onto the 2 pedals.
Examples of possible applications:
- On PS3: Programming L2/R2 or L3/R3 onto the 2 UP and DOWN digital levers (L1/R1).
- Programming a button(s) onto one or both pedals.
- Switching different buttons for greater accessibility.
Programming procedure
Steps
Action
LED color
1
Simultaneously press and release:
SE + ST (5)
OFF
2 Press and release the button to program.
FLASHES
QUICKLY
3
Press and release the button or pedal onto which
ON
you wish to place your function.
Your programming has now taken effect.
(You must repeat this procedure each time you restart or disconnect your wheel)
6/10
Erasing your programming
Steps
Action
LED color
1
Press and hold for 2 seconds:
SE + ST (5)
TURNS OFF
THEN ON AGAIN
Your programming has now been erased.
CONFIGURING THE PEDALS ON PLAYSTATION®3
On PlayStation®3, your wheel’s accelerator and brake controls are in “separate” mode by default,
meaning that the pedals function on independent axes:
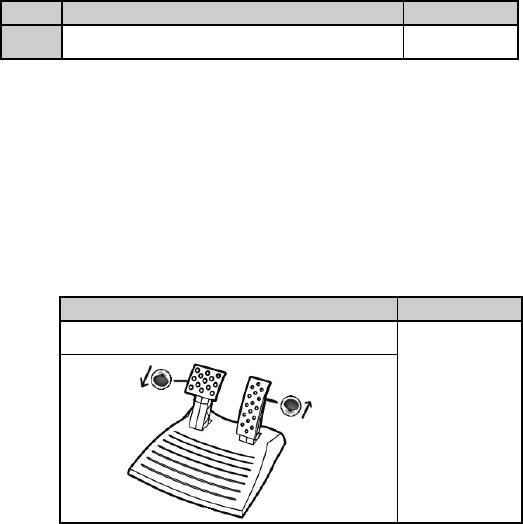
“Accelerator” = “R2” trigger & “Brake” = “L2” trigger
For a different type of control (to limit skidding, for example), you can switch your wheel to “combined” (2
axes) mode: the pedals then function on a single axis.
“Accelerator and Brake” = Up/Down direction on “Right mini-stick”
Setting “Combined Pedals” mode
Action
LED color
Simultaneously press and release:
the 2 pedals (14) + the “Home” button (6)
GREEN
Your pedals are now combined
(You must repeat this procedure each time you restart or disconnect your wheel)
7/10
To return to “Separate Pedals” mode (the default mode)
Action
LED color
Simultaneously press and release:
the 2 pedals (14) + the “Home” button (6)
RED
On PlayStation®3
Your pedals have now returned to the default mode: “Separate”
CONFIGURING THE PEDALS ON PC
Your wheel’s accelerator and brake controls are in “separate” (3 axes) mode by default, meaning that the
pedals function on independent axes.
3 axes mode allows you to considerably improve the precision of your driving.
If your game does not support 3 axes mode, your wheel’s pedals will not function properly. You will then
have to exit the game and select “combined” (2 axes) mode instead.
Mode
LED color
Separate pedals (3 axes)
RED
Combined pedals (2 axes)
GREEN
• Selecting axes via “Software”
(This setting will be saved even after you restart or disconnect your wheel)
On page 1 of the “Control Panel”: Select the mode you wish to use, then click OK.
• Selecting axes via “Hardware”
(This setting will not be saved: It must be repeated each time you restart or disconnect)
(Allows you to select your mode directly in your game’s “Controls” options)
Simultaneously press and release: the 2 pedals (14) + the “Home” button (6)
Оглавление
- User Manual
- PLAYSTATION®3
- PC
- ADVANCED FUNCTIONS
- TROUBLESHOOTING AND WARNINGS
- Manuel de l’utilisateur
- PLAYSTATION®3
- PC
- FONCTIONS AVANCEES
- DEPANNAGE ET AVERTISSEMENT
- Benutzerhandbuch
- PLAYSTATION®3
- PC
- ERWEITERTE FUNKTIONEN
- FEHLERBESEITIGUNG UND WARNUNGEN
- Handleiding
- PLAYSTATION®3
- PC
- GEAVANCEERDE FUNCTIES
- PROBLEMEN OPLOSSEN EN WAARSCHUWINGEN
- Manuale d’uso
- PLAYSTATION®3
- PC
- FUNZIONI AVANZATE
- RISOLUZIONE DEI PROBLEMI E AVVISI
- Manual del usuario
- PLAYSTATION®3
- PC
- FUNCIONES AVANZADAS
- ADVERTENCIAS Y RESOLUCIÓN DE PROBLEMAS
- Manual do Utilizador
- PLAYSTATION®3
- PC
- FUNÇÕES AVANÇADAS
- RESOLUÇÃO DE PROBLEMAS E AVISOS
- Руководство пользователя
- PLAYSTATION®3
- ПК
- ФУНКЦИИ ДЛЯ ОПЫТНЫХ ПОЛЬЗОВАТЕЛЕЙ
- ПОИСК, УСТРАНЕНИЕ НЕИСПРАВНОСТЕЙ И ПРЕДУПРЕЖДЕНИЯ
- Εγχειρίδιο χρήσης
- PLAYSTATION®3
- PC
- ΣΥΝΘΕΤΕΣ ΛΕΙΤΟΥΡΓΙΕΣ
- ΑΝΤΙΜΕΤΩΠΙΣΗ ΠΡΟΒΛΗΜΑΤΩΝ ΚΑΙ ΠΡΟΕΙΔΟΠΟΙΗΣΕΙΣ
- Kullanım Kılavuzu
- PLAYSTATION®3
- PC
- GELİŞMİŞ FONKSİYONLAR
- SORUN GİDERME VE UYARILAR
- Podręcznik użytkownika
- PLAYSTATION® 3
- PC
- FUNKCJE ZAAWANSOWANE
- ROZWIĄZYWANIE PROBLEMÓW I OSTRZEŻENIA


