Sharp Benutzeridentifikation: instruction
Class: Computer equipment, hardware, accessories
Type: The Information/Information display
Manual for Sharp Benutzeridentifikation
Table of contents
- Contents Introduction
- ■ Backing up and clearing data stored with the document filing function ■ About passwords for the Web page
- When the data security kit is installed About confidential folders and confidential files of the document filing function Restrictions on tandem copying and tandem printing
- Security settings in the Web page ■ Procedure for directly printing a file on an FTP server when user authentication is enabled About transfer of copied data to the machine
- ADMINISTRATOR SETTINGS ADMINISTRATOR SETTINGS LIST Using the administrator settings SECURITY SETTINGS
- CLEAR ALL MEMORY
- CLEAR DOCUMENT FILING DATA CLEAR ALL DATA IN JOB STATUS JOBS COMPLETED LIST CLEAR ADDRESS BOOK DATA/IMAGE SEND REGISTERED DATA
- NUMBER OF TIMES DATA CLEAR IS REPEATED POWER UP AUTO CLEAR
- NUMBER OF TIMES AUTO CLEAR AT JOB END PROGRAM IS REPEATED DISABLING OF DOCUMENT FILING DISABLING OF LIST PRINT
- DISABLING OF PRINT JOBS OTHER THAN PRINT HOLD JOB JOB STATUS JOBS COMPLETED LIST DISPLAY SETTINGS
- DISABLING RESEND KEY RELEASE THE LOCK ON DOCUMENT FILING OUTPUT OPERATION PRODUCT KEY
MX-FRX5U.book 1 ページ 2007年3月20日 火曜日 午後5時8分
Data Security Kit
ENGLISH
OPERATION MANUAL
Kit de seguridad de datos
ESPAÑOL
MANUAL DE INSTRUCCIONES
MX-FRX5U
Kit de sécurité des données
FRANÇAIS
MANUEL D'UTILISATION
Daten-Sicherheitspaket
DEUTSCH
BEDIENUNGSHANDBUCH
Kit di protezione dei dati
ITALIANO
MANUALE DI ISTRUZIONI
Gegevensbeveiligingskit
NEDERLANDS
GEBRUIKSAANWIJZING
Datasäkerhetsprogram
SVENSKA
ANVÄNDARMANUAL
Datasikkerhetsprogram
NORSK
GENERELL BRUKERVEILEDNING
This manual contains very important
information. Please keep the manual in a
Tietoturvan ylläpitotyökalut
SUOMI
safe place where it will not be lost.
KÄYTTÖOPAS
MX-FRX5U
Data sikkerhedssæt
DANSK
BETJENINGSVEJLEDNING
APPLICATION
NUMBER
MACHINE SERIAL
POLSKI
NUMBER
MAGYAR
PRODUCT KEY
ČEŠTINA
‚ͬÓÏ ÙÍÛÊÚ˜ Í˝˝˜‰
—ŒÃäÀ⁄
—Œ¤”Õ”’Ã◊Õ” ’‘„ –”‘¿Ÿ”Õœ◊›‘„

MX-FRX5U.book 2 ページ 2007年3月20日 火曜日 午後5時8分

MX-FRX5U.book 1 ページ 2007年3月20日 火曜日 午後5時8分
ENGLISH
Contents
Introduction ...........................................................................................................................1
When the data security kit is installed...................................................................................3
● About confidential folders and confidential files of the document filing function..............3
● Restrictions on tandem copying and tandem printing......................................................3
● Security settings in the Web page...................................................................................4
● About transfer of copied data to the machine..................................................................4
ADMINISTRATOR SETTINGS..............................................................................................5
● ADMINISTRATOR SETTINGS LIST................................................................................5
● Using the administrator settings ......................................................................................5
● SECURITY SETTINGS ...................................................................................................5
● PRODUCT KEY.............................................................................................................11
Introduction
The MX-FRX5U adds a security function to the SHARP Digital Multifunctional System.
When the copy function, printer function, network scanner function, fax function, or Internet
fax function of a SHARP Digital Multifunctional System with the security function is used,
the image data that is generated for the job is encrypted, and when the job is finished, the
encrypted data is immediately erased from memory and the hard disk.
Note:
To ensure that the data security function of the data security kit provides maximum security,
please observe the following:
●
The administrator plays an important role in maintaining security. Exercise appropriate care
in selecting the person that will assume the job of administrator for the data security kit.
● Be sure to change the administrator password immediately each time a new person takes
over as administrator.
● Change the administrator password on a regular basis (at least once every 60 days).
● During the procedure for changing the administrator password, the current administrator
password and new administrator password appear in the display. Be sure to complete the
procedure promptly.
● Do not select a number for the administrator password that can be easily guessed.
● The administrator settings are very important for security management. If it becomes
necessary to leave the machine during use of the administrator settings, be sure to press
the [CA] key to exit the administrator settings. The administrator of the machine should
inform users that they are not to access the administrator settings without permission.
● The customer bears responsibility for control of documents copied and faxes received
using the data security kit.
● Even when the data security kit is installed, note that fax data in the public memory box
used by the facsimile expansion kit (AR-FX8) can be read.
1
MX-FRX5U.book 2 ページ 2007年3月20日 火曜日 午後5時8分
ENGLISH
■ Backing up and clearing data stored with the document filing
function
When the data security kit is installed, data previously stored in the machine with the
document filing function is cleared. Any data that you need to keep is copied to a
computer before the data security kit is installed, and then returned to the machine after
data is cleared from the data security kit following installation. (This work is normally
performed by a service technician at the time of installation.)
Only confidential folders can be used to return data from a computer to the machine
after installation of the data security kit. Before returning data to the machine, create a
confidential folder or folders as needed. For the procedures for storing data on a
computer and returning data from a computer to the machine, see document filing help
in the Web page of the machine.
■ About passwords for the Web page
If incorrect "user" and/or "admin" passwords are entered a total of three times in a row
when attempting to access the Web pages of a machine that has the data security kit
installed, access to pages that require entry of the "user" or "admin" password will be
prohibited for 5 minutes.
NOTE
Some of the procedures for operating the machine change when the data security kit is
installed. The "OPERATION MANUAL (for general information and copier operation)"
explains the procedures for operating the machine when the data security kit is not
installed. This manual explains the changes to those procedures when the data security
kit is installed.
2
MX-FRX5U.book 3 ページ 2007年3月20日 火曜日 午後5時8分
ENGLISH
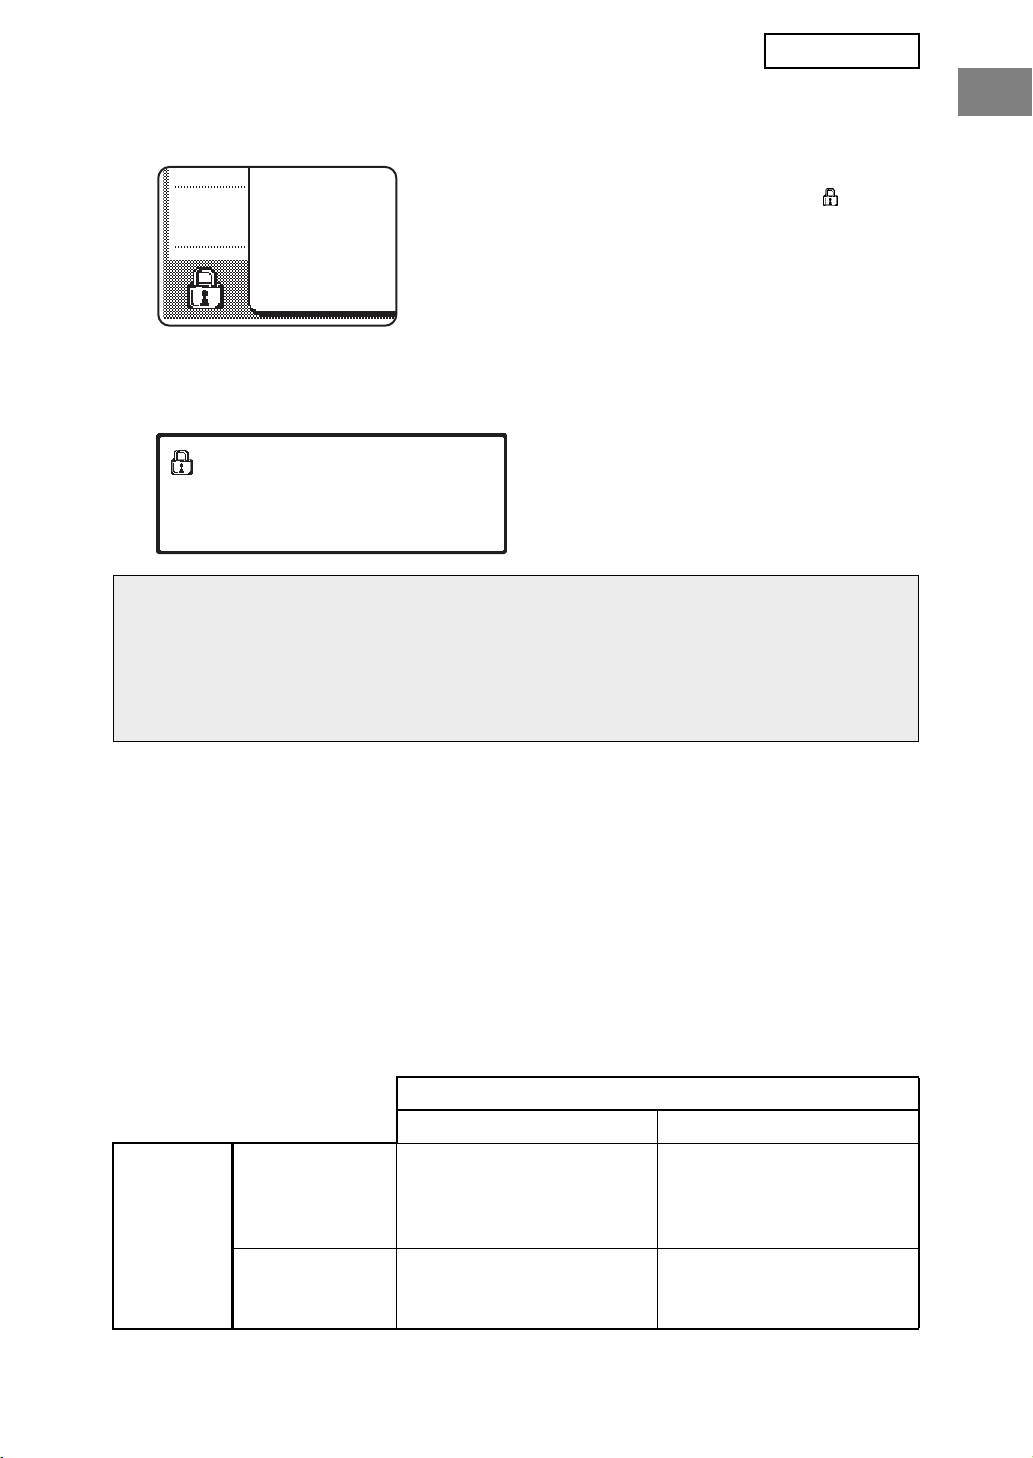
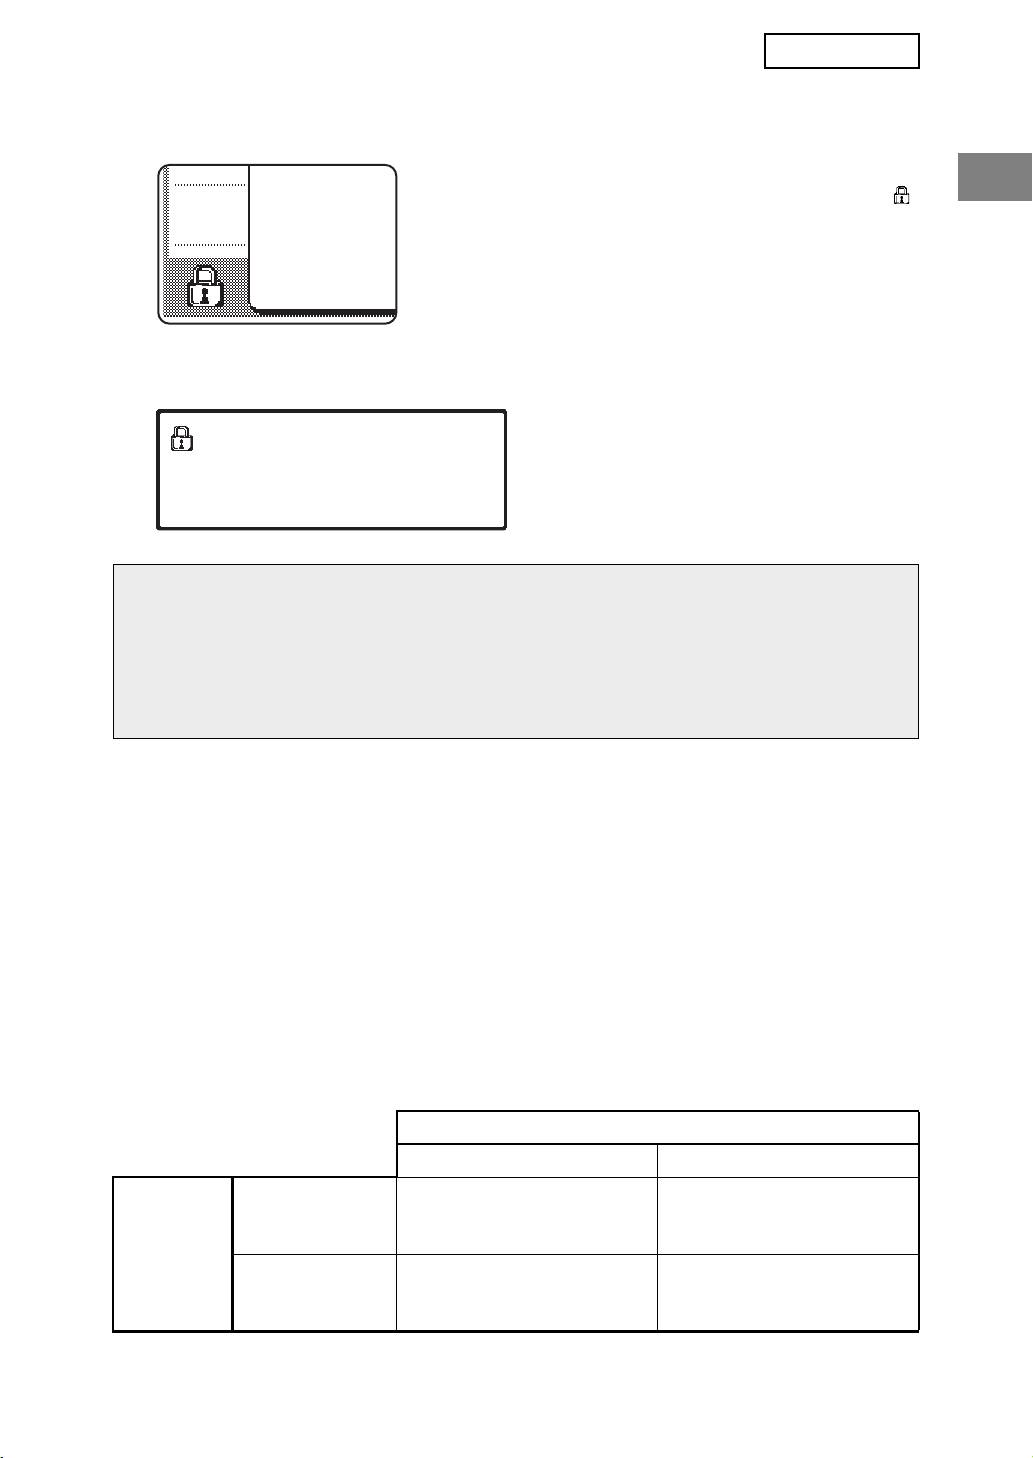
When the data security kit is installed
When the data security kit is installed, the following icon
appears on the touch panel. Touch the icon ( ) to view
information on the data security kit version.
When the data security kit is installed, data remaining in the machine is automatically
erased after each copy and fax job.
When data clearing begins, the following message appears for 6 seconds*.
* The duration of the message display can
DATA IS BEING CLEARED.
be changed with the administrator setting,
"MESSAGE TIME SETTING". (See page
10 of the administrator settings guide.)
NOTE
If the machine power is turned off while image data is being cleared from the hard disk
drive or before jobs are finished, the data may not be completely erased. If you do not
wish to leave partially cleared data when the power is turned off, it is recommended that
you use the administrator setting, "CLEAR ALL MEMORY" (page 6 of this manual), to
complete data clearing before turning off the power.
About confidential folders and confidential files of
the document filing function
If an incorrect password is entered three times in a row for a specific confidential folder or
file on a machine that has the data security kit installed, the folder or file will be locked (no
operation will be permitted using that folder or file). To unlock the folder or file, "RELEASE
THE LOCK ON DOCUMENT FILING OUTPUT OPERATION" (page 11 of this manual) in
the administrator settings must be used.
Restrictions on tandem copying and tandem printing
Tandem copying and tandem printing operate as shown below based on the configuration of
the server machine and client machine (whether or not the data security kit is installed).
Client machine
Data security kit: Yes Data security kit: No
Data security kit:
The tandem function can
The tandem function
Ye s
be used. Data is cleared
cannot be used.
from both the server and
Server
client machines.
machine
Data security kit:
The tandem function can
The regular tandem
No
be used. Data is cleared
function can be used.
from the client machine.
3

ENGLISH
Security settings in the Web page
When the machine is used as a network printer and the Pull Print function is used, the data
security kit enables authentication of the user by means of a "USER NAME" and
"PASSWORD". (The Pull Print function allows a file on a previously stored FTP server to be
printed directly from the operation panel of the machine without using the printer driver; see
"Directly printing a file on an FTP server" on page 5-7 of the "OPERATION MANUAL (for
printer)".)
User authentication is enabled by selecting the "Enable User Authentication" checkbox in
the machine's Web page for Pull Print function settings. (This checkbox appears when the
data security kit is installed, and is initially selected (a checkmark appears)).
System requirements and the procedure for accessing the Web page containing this
checkbox are explained in "REMOTE OPERATION VIA A NETWORK" on page 5-2 of the
"OPERATION MANUAL (for printer)". The checkbox appears in the screen shown in step 2
of "■ Storing an FTP server" on page 5-7 of the "OPERATION MANUAL (for printer)".
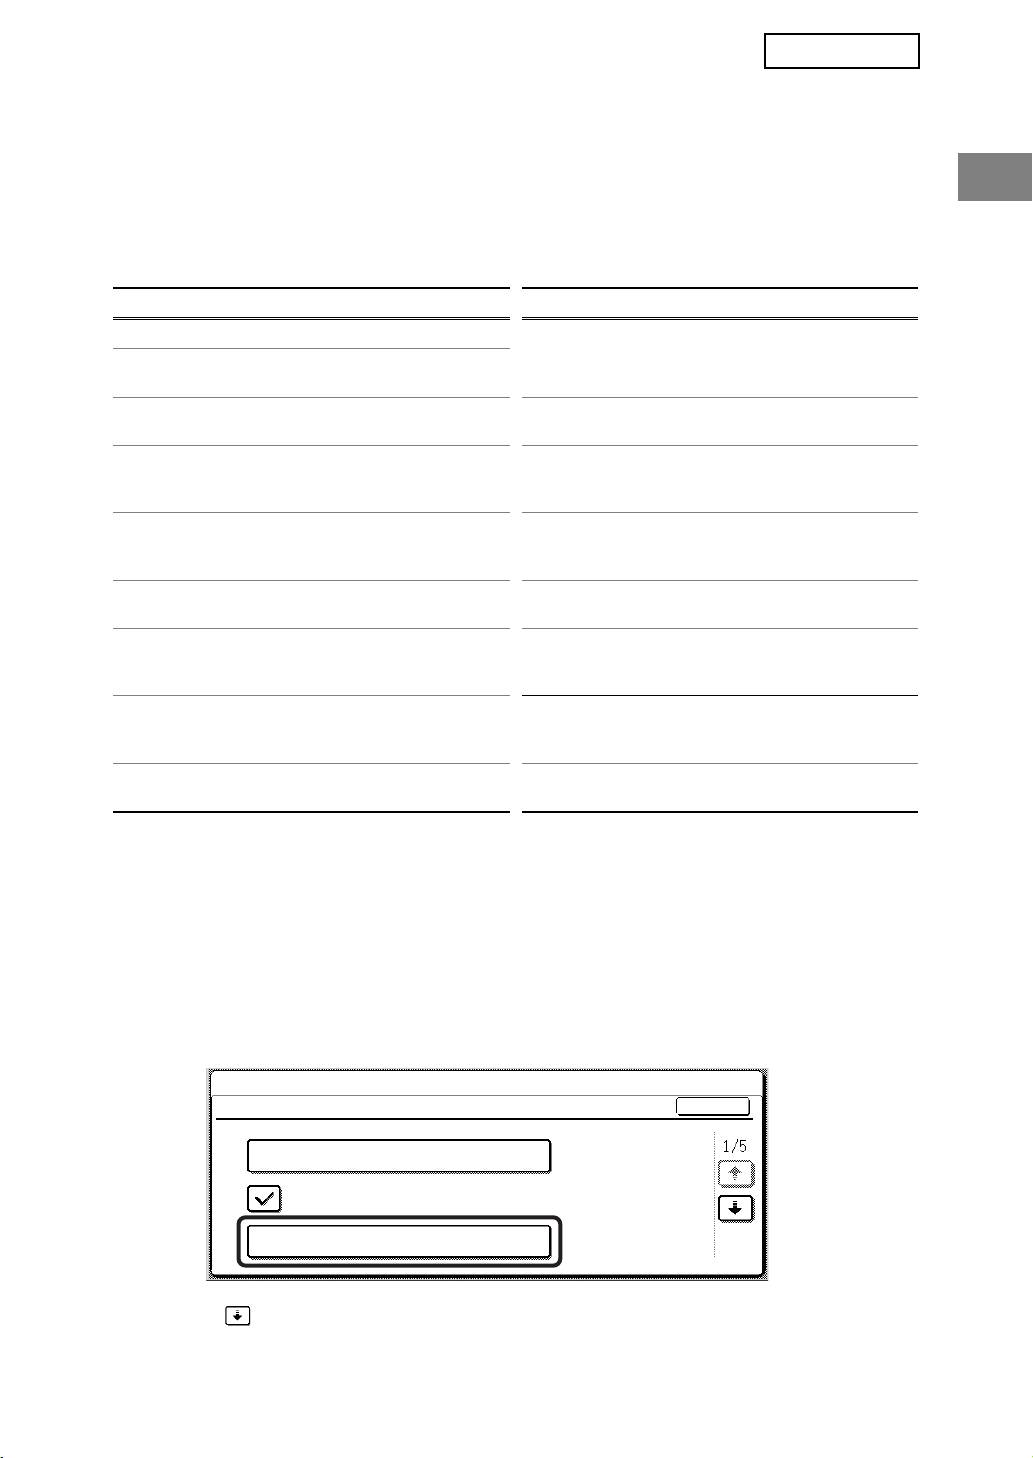
■ Procedure for directly printing a file on an FTP server when
user authentication is enabled
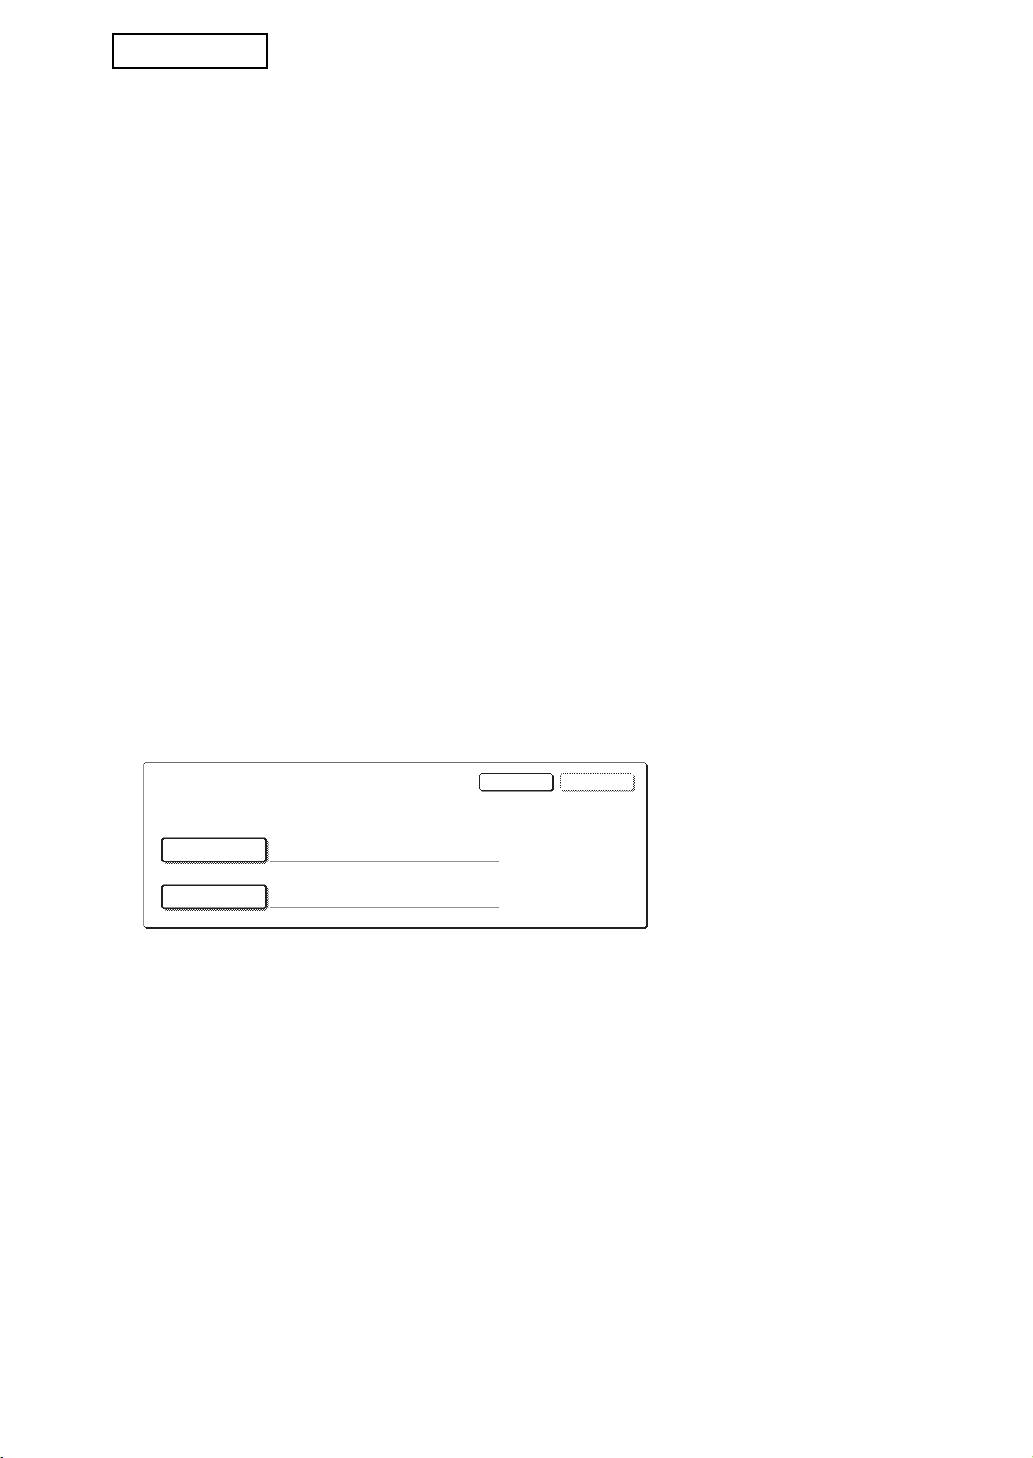
Your user name and password must be entered following selection of the FTP server
that contains the file to be printed from the touch panel of the machine.
When the FTP server is selected in step 3 of "■ Printing a file on an FTP server from the
operation panel of the machine" on page 5-7 of the "OPERATION MANUAL (for printer)",
a screen will appear prompting you to enter your user name and password for the FTP
server.
Press the [USER NAME] key to enter your user name and the [PASSWORD] key to
enter your password. A letter entry screen will appear in each case. When you have
finished entering your user name/password, touch the [OK] key.
After entering your user name and password, continue from step 4 on page 5-8 of the
"OPERATION MANUAL (for printer)".
About transfer of copied data to the machine
When the data security kit is installed and the Web page is used to copy data stored with
the document filing function to a computer, the copied data can only be transferred back to
the original machine from which it was copied; the data cannot be transferred to another
machine even if the machine conditions are the same.
The [Restore from PC] key will only appear in the Web page and transfer of data back to the
machine will only be possible when a confidential folder is selected.
4
OKCANCEL
ENTER THE USER NAME AND PASSWORD FOR FTP SERVER.
USER NAME
PASSWORD
MX-FRX5U.book 4 ページ 2007年3月20日 火曜日 午後5時8分
MX-FRX5U.book 5 ページ 2007年3月20日 火曜日 午後5時8分
ENGLISH
ADMINISTRATOR SETTINGS
Among the administrator settings used by the administrator for the data security kit, this
section explains the settings that are related to the security function.
The following explanations assume that the machine has the printer, fax, network scanner,
and Internet fax functions, and that the application communication module is installed.
ADMINISTRATOR SETTINGS LIST
Setting name
Page
Setting name
Page
SECURITY SETTINGS
DISABLING OF DOCUMENT
CLEAR ALL MEMORY 6
9
FILING
CLEAR DOCUMENT FILING DATA
7 DISABLING OF LIST PRINT 9
CLEAR ALL DATA IN JOB STATUS
DISABLING OF PRINT JOBS
7
10
JOBS COMPLETED LIST
OTHER THAN PRINT HOLD JOB
CLEAR ADDRESS BOOK DATA/
JOB STATUS JOBS COMPLETED
7
10
IMAGE SEND REGISTERED DATA
LIST DISPLAY SETTINGS
NUMBER OF TIMES DATA
8 DISABLING RESEND KEY 11
CLEAR IS REPEATED
RELEASE THE LOCK ON
POWER UP AUTO CLEAR 8
DOCUMENT FILING OUTPUT
11
OPERATION
NUMBER OF TIMES POWER UP
AUTO CLEAR PROGRAM IS
8
REPEATED
PRODUCT KEY
NUMBER OF TIMES AUTO
CLEAR AT JOB END PROGRAM
9 DATA SECURITY KIT 11
IS REPEATED
Using the administrator settings
Follow the procedure on pages 4 and 5 of the administrator settings guide to configure the
settings in the administrator settings.
When the data security kit is installed, entry of the administrator password will be prohibited
for 5 minutes if an incorrect administrator password is entered 3 times in a row.
For explanations of each of the settings, see the following pages.
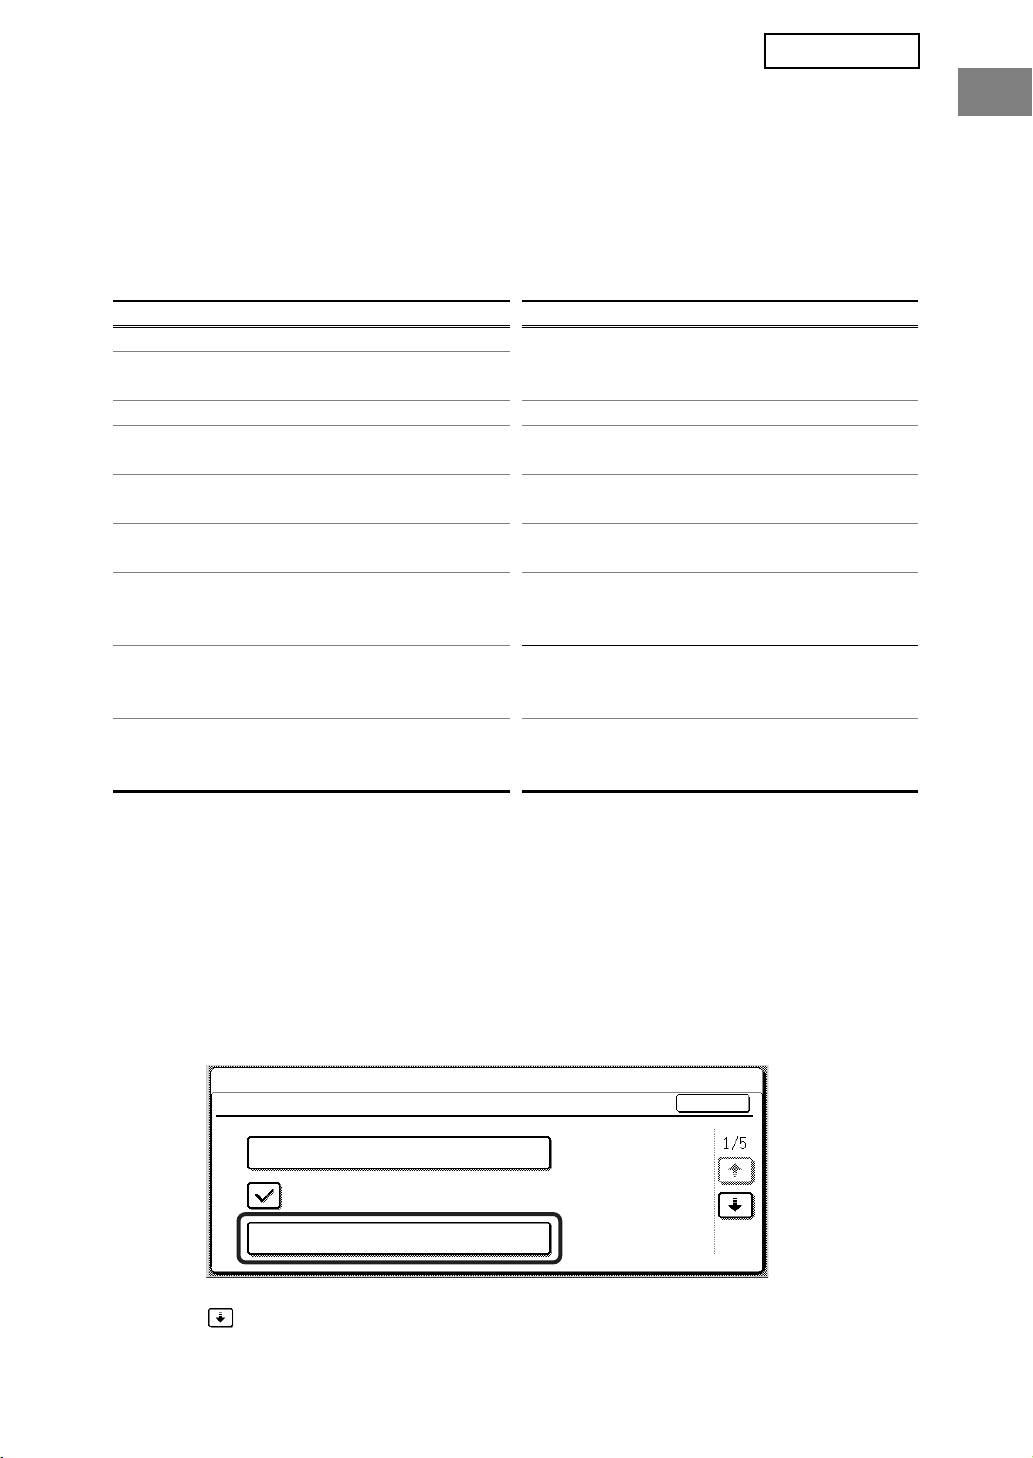
SECURITY SETTINGS
When the data security kit is installed, settings related to security (with the exception of [SSL SETTINGS] and
[ENABLE IPsec]) are added to the settings that appear when the [SECURITY SETTINGS] key is touched.
SYSTEM SETTINGS
SECURITY SETTINGS
OK
SSL SETTINGS
ENABLE IPsec
CLEAR ALL MEMORY
The security settings menu consists of several screens.
Touch the key in the lower right corner of the screen to move to the next screen.
5

MX-FRX5U.book 6 ページ 2007年3月20日 火曜日 午後5時8分
ENGLISH
CLEAR ALL MEMORY
This setting is used to manually clear all data from the memory and hard disk of the
machine.
Note, however, that the following types of data are not cleared with this setting. Use the
"CLEAR ADDRESS BOOK DATA/IMAGE SEND REGISTERED DATA" setting on page 7 to
clear the following types of data
● INDIVIDUAL/GROUP/PROGRAM/RELAY BROADCAST MEMORY BOX*
● SENDER CONTROL LIST
● POLLING MEMORY/CONFIDENTIAL MEMORY BOX*
● SENDER DATA
●
ALLOW/REJECT RECEPTION SETTING DATA (INCLUDING POLLING PASSCODE NUMBER)
● FORWARD INFORMATION
* The image data stored in the MEMORY BOX is cleared to execute this setting (CLEAR
ALL MEMORY).
NOTE
In the event that the data security kit or the machine with the data security kit installed
will be disposed of or ownership will change, the administrator should be sure to run this
setting. When running the setting, the administrator should not leave the machine until it
has been verified that data clearing has been completed.
Touch the [CLEAR ALL MEMORY] key. The following screen appears asking you to confirm
your selection ("YES" or "NO").
[Clear screen 1]
● To return to the "SECURITY SETTINGS"
CLEAR ALL MEMORY.
menu screen, touch the [NO] key.
(EXCLUSIVE OF ADDRESS BOOK/
SENDER LIST DATA.)
● To clear all memory, press the [YES] key.
NO YES
"PLEASE WAIT." appears, and then the
following screen is displayed.
[Clear screen 2]
● While data clearing takes place, the
CLEARING ALL MEMORY. AUTO REBOOT IS
percentage of data cleared and the number of
IMPLEMENTED AFTER CLEARING.
(50.0%) (1/1 time)
repetitions is displayed.
● When the data has been cleared, the power
100%50%0%
CANCEL
briefly turns off and then automatically turns
on again.
If you wish to cancel after data clearing has begun
Touch the [CANCEL] key. The administrator password entry screen will appear. Enter
the administrator password with the numeric keys. As soon as the correct administrator
password is entered, data clearing will stop and the power will turn off briefly and then
turn back on automatically. Note that any data cleared prior to entry of the administrator
password will not be restored (this data is lost).
6

MX-FRX5U.book 7 ページ 2007年3月20日 火曜日 午後5時8分
ENGLISH
CLEAR DOCUMENT FILING DATA
This setting is used to clear data stored using the document filing function. Data set as
"PROTECT" or "CONFIDENTIAL" is also cleared. To clear data stored in the main folder
and custom folder with the "FILE" function, select the "FILE DATA (INCLUDING
PROTECTED/CONFIDENTIAL FILES)" checkbox. To clear data saved using "QUICK
FILE", select the "QUICK FILE DATA (INCLUDING PROTECTED FILES)" checkbox. After
selecting the data to be cleared, touch the [CLEAR] key. A message asking you to confirm
the clear ("YES" or "NO") will appear. Touch the [YES] key to begin clearing the selected
data. During clearing, progress will be shown as a percentage together with the number of
repetitions. When data clearing is finished, the power of the machine will turn off temporarily
and then turn on again automatically.
CLEAR ALL DATA IN JOB STATUS JOBS COMPLETED LIST
This setting is used to clear all data (printer user names, fax/image send destinations,
received fax sender information, and the SharpOSA complete queue*) from the list that
appears when "COMPLETE" is selected in the job status screen (page 1-15 of the
"OPERATION MANUAL (for general information and copier operation)"). To clear the data,
touch the [CLEAR ALL DATA IN JOB STATUS JOBS COMPLETED LIST] key. A message
asking you to confirm the clear ("YES" or "NO") will appear. Touch the [YES] key to begin
clearing the selected data. During clearing, progress will be shown as a percentage
together with the number of repetitions. When data clearing is finished, the power of the
machine will turn off temporarily and then turn on again automatically.
* This appears when the application communication module (MX-AMX2) is installed.
CLEAR ADDRESS BOOK DATA/IMAGE SEND REGISTERED DATA
This setting is used to clear the items indicated below, which cannot be cleared or initialized
using the "CLEAR ALL MEMORY" setting (page 6) or "RESTORE FACTORY DEFAULTS"
(page 15 of the "ADMINISTRATOR SETTINGS GUIDE") setting.
● INDIVIDUAL/GROUP/PROGRAM/RELAY BROADCAST MEMORY BOX
● SENDER CONTROL LIST
● POLLING MEMORY/CONFIDENTIAL MEMORY BOX
● SENDER DATA
● ALLOW/REJECT RECEPTION SETTING DATA (INCLUDING POLLING PASSCODE
NUMBER)
● FORWARD INFORMATION
Select the checkboxes of the items that you wish to clear. (There are two screens. Touch the
or key to move between the screens.) To clear the data, touch the [CLEAR] key. A
message asking you to confirm the clear ("YES" or "NO") will appear. Touch the [YES] key
to begin clearing the selected data. During clearing, progress will be shown as a percentage
together with the number of repetitions. When data clearing is finished, the power of the
machine will turn off temporarily and then turn on again automatically.
7
MX-FRX5U.book 8 ページ 2007年3月20日 火曜日 午後5時8分
ENGLISH
NUMBER OF TIMES DATA CLEAR IS REPEATED
This setting is used to enhance the security function. The number of times data clearing is
repeated when "CLEAR ALL MEMORY", "CLEAR DOCUMENT FILING DATA", "CLEAR
ALL DATA IN JOB STATUS JOBS COMPLETED LIST", or "CLEAR ADDRESS BOOK
DATA/IMAGE SEND REGISTERED DATA" is executed can be set to any number from 1 to
7. The factory setting is 1.
Touch the [NUMBER OF TIMES DATA CLEAR IS REPEATED] key, and set the desired
number of times with the or key.
When finished, touch the [OK] key.
(See "About the repeat setting" on page 9 of this manual.)
POWER UP AUTO CLEAR
This setting is used to automatically clear all data in the machine when the power switch is
turned on. The following selections are available for the data to be cleared: "ALL
MEMORY", "FILE DATA (INCLUDING PROTECTED/CONFIDENTIAL FILES)", "QUICK
FILE DATA (INCLUDING PROTECTED FILES)", "JOB STATUS JOBS COMPLETED
LIST". Select the checkboxes of the data that you wish to have automatically cleared when
the power switch is turned on. (There are two screens. Touch the or key to move
between the screens.) After selecting the data to be cleared, touch the [OK] key.
No checkboxes are initially selected.
NOTE
When there is a stored image send job (fax, network scanner, or Internet fax job)*,
automatic clearing will not take place when the power is turned on.
* This includes received faxes and Internet faxes that have not yet been printed;
however, it does not include data in a fax memory box (except confidential memory
box).
If you wish to cancel after data clearing has begun
See the explanations in "Clear screen 2" and "If you wish to cancel after data clearing
has begun" in "CLEAR ALL MEMORY" on page 6 of this manual.
NUMBER OF TIMES POWER UP AUTO CLEAR PROGRAM IS REPEATED
This setting is used to enhance the security function. The number of times "POWER UP
AUTO CLEAR" is repeated can be set to any number from 1 to 7. The factory setting is 1.
Touch the [NUMBER OF TIMES POWER UP AUTO CLEAR PROGRAM IS REPEATED]
key, and set the desired number of times with the or key.
When finished, touch the [OK] key.
(See "About the repeat setting" on page 9 of this manual.)
NOTE
This setting is only enabled when the "POWER UP AUTO CLEAR" checkbox is
selected.
8
MX-FRX5U.book 9 ページ 2007年3月20日 火曜日 午後5時8分
ENGLISH
NUMBER OF TIMES AUTO CLEAR AT JOB END PROGRAM IS
REPEATED
This setting is used to enhance the security function. The number of times auto clear is
repeated after each job is printed or transmitted can be set to any number from 1 to 7. The
factory setting is 1.
Touch the [NUMBER OF TIMES AUTO CLEAR AT JOB END PROGRAM IS REPEATED]
key, and set the desired number of times with the or key.
When finished, touch the [OK] key.
About the repeat setting
When the repeat setting (number of repetitions) is increased to enhance the security
function, the time required for data clearing increases. It is recommended that you
select repeat settings for "NUMBER OF TIMES DATA CLEAR IS REPEATED",
"NUMBER OF TIMES POWER UP AUTO CLEAR PROGRAM IS REPEATED", and
"NUMBER OF TIMES AUTO CLEAR AT JOB END PROGRAM IS REPEATED" that are
suitable for your security needs and conditions of use.
DISABLING OF DOCUMENT FILING
This setting is used to restrict the filing modes of the document filing function. Document
filing modes (QUICK FILE MODE, SHARING MODE, and CONFIDENTIAL MODE) can be
separately disabled in each mode in which document filing operates (COPY, PRINTER,
SCAN TO HDD, and IMAGE SEND mode).
To disable a filing mode, touch the checkbox of the mode to select it. (There are two
screens. Touch the or key to move between the screens.) After selecting the
desired checkboxes, touch the [OK] key.
When sharing mode or confidential mode is disabled, "Property change" (page 7-21 of the
"OPERATION MANUAL (for general information and copier operation)") is not possible
when manipulating a file that was saved with the document filing function.
When printing with the printer function, filing mode disable settings selected with this setting
will not be indicated in the Job Handling screen of the printer driver (page 4-22 of the
"OPERATION MANUAL (for printer)"). However, if a disabled filing mode is selected when
printing a file, the file will not be saved (only printing will take place).
DISABLING OF LIST PRINT
This setting is used to disable printing of any of the following lists that are printed using
"LIST PRINT" in the system settings (page 2-18 of "OPERATION MANUAL (for general
information and copier operation)").
"ALL CUSTOM SETTING LIST", "SENDING ADDRESS LIST", "SENDER CONTROL
LIST", "DOCUMENT FILING USER / FOLDER LIST"
Select the checkboxes of the lists for which you wish to disable printing and then touch the
[OK] key.
9

MX-FRX5U.book 10 ページ 2007年3月20日 火曜日 午後5時8分
ENGLISH
DISABLING OF PRINT JOBS OTHER THAN PRINT HOLD JOB
If a printed document is left on an output tray after being printed in printer mode, it is
possible that another person might take the document and leak sensitive information. This
setting is used to disable all print jobs other than print jobs that require printing to be
initiated from the operation panel of the machine. To enable this setting, select the
checkbox. To print a job when this setting is enabled, select "Hold Only" in the "Retention"
field of the printer driver and then execute the print command. To begin printing, call up the
file from the operation panel of the machine using the document filing function as explained
in "CALLING UP AND USING A FILE" (page 7-13 of the "OPERATION MANUAL (for
general information and copier operation)". If "Hold After Print" or "Sample Print" is selected
before executing the print command, printing will not take place. However, the job will be
held in the machine and can be printed from the operation panel using "JOB SETTINGS" of
the document filing function in the same way as a "Hold Only" job.
JOB STATUS JOBS COMPLETED LIST DISPLAY SETTINGS
This setting is used to select whether or not the job list that appears when "COMPLETE" is
selected in the job status screen is displayed (page 1-15 of the "OPERATION MANUAL (for
general information and copier operation)"). (The setting can be selected separately for
"PRINT JOB", "SCAN TO", "FAX JOB", "INTERNET-FAX", and "Sharp OSA SCAN"*
modes.) The JOBS COMPLETED list stores and displays printer mode user names, fax/
image send destinations, and received fax sender information. If you do not wish to display
this information for security reasons, use this setting to disable display of the list.
For each of the modes, if you do not wish to display the "COMPLETE" key that is used to
display the JOBS COMPLETED list, remove the checkmark. To have the key displayed,
make sure a checkmark appears. When finished, touch the [OK] key.
* This appears when the application communication module (MX-AMX2) is installed.
10

MX-FRX5U.book 11 ページ 2007年3月20日 火曜日 午後5時8分
ENGLISH
DISABLING RESEND KEY
This setting is used to disable display of the [RESEND] key, which is used to transmit to the
last destination transmitted to. To disable display of the [RESEND] key, touch the checkbox
so that a checkmark appears. When the [RESEND] key is disabled, it will not appear in the
main screens of fax mode, Internet fax mode and scanner mode (page 1-4 of the Facsimile
Expansion Kit AR-FX8 manual and page 1-11 of the "OPERATION MANUAL (for image
send)"). (Normally the key appears in these screens.)
RELEASE THE LOCK ON DOCUMENT FILING OUTPUT OPERATION
This setting is used when a file or folder has been locked (operation is prohibited) due to
entry of an incorrect password. Touch the [RELEASE] key in the "RELEASE THE LOCK ON
DOCUMENT FILING OUTPUT OPERATION" screen to release all locked files and folders.
When there are no locked files or folders, the "RELEASE THE LOCK ON DOCUMENT
FILING OUTPUT OPERATION" is grayed out in the "SECURITY SETTINGS" menu screen.
PRODUCT KEY
To initially enable the security function, you must use a administrator setting to enter the
product key (password). The name of the administrator setting used for this purpose is
"DATA SECURITY KIT". Please ask your dealer for the product key.
Touch the [DATA SECURITY KIT] key, enter the product key with the numeric keys, and then
touch the [ENTER] key.
● If an incorrect number is entered...
A message will appear instructing you to check the product key number again.
● If the correct number is entered...
A message will appear instructing you to turn the power off and then on. Touch the [OK]
key when you have finished reading the message. Turn first the power switch and then the
main power switch off. The security function will be enabled when the power is turned on
again.
Once the security function is enabled, the [DATA SECURITY KIT] key will no longer
appear in the product key entry screen.
11

MX-FRX5U.book 12 ページ 2007年3月20日 火曜日 午後5時8分

MX-FRX5U.book 1 ページ 2007年3月20日 火曜日 午後5時8分
ESPAÑOL
Contenido
Introducción...........................................................................................................................1
Si el kit de seguridad de datos está instalado.......................................................................3
● Acerca de las carpetas confidenciales y los archivos confidenciales de la función
Archivo de documentos ...................................................................................................3
● Restricciones en el copiado en tándem y la impresión en tándem .................................3
● Configuración de seguridad en la página Web................................................................4
● Acerca de la transferencia de datos copiados a la máquina ...........................................4
AJUSTES DEL ADMINISTRADOR.......................................................................................5
● LISTA DE AJUSTES DEL ADMINISTRADOR.................................................................5
● Uso de los ajustes del administrador...............................................................................5
● CONFIGURACION DE SEGURIDAD..............................................................................5
● CLAVE DE PRODUCTO................................................................................................11
Introducción
El MX-FRX5U incorpora una función de seguridad al Sistema multifuncional digital SHARP.
Cuando se emplea la función de copiadora, de impresora, de escáner de red o de fax de un
Sistema multifuncional digital SHARP con la función de seguridad, los datos de imagen
generados para el trabajo se cifran y, una vez finalizado el trabajo, los datos cifrados se
borran inmediatamente de la memoria y del disco duro.
Nota:
Para garantizar que la función de seguridad de datos del kit de seguridad de datos ofrece la
máxima seguridad, siga las siguientes indicaciones:
● El administrador desempeña un papel muy importante en el mantenimiento de la
seguridad. Tenga máxima precaución a la hora de escoger a la persona que asumirá la
tarea de administrador para el kit de seguridad de datos.
● Asegúrese de cambiar la contraseña de administrador inmediatamente cada vez que una
persona nueva pase a ocupar esta función.
● Modifique la contraseña de administrador periódicamente (al menos una vez cada 60
días).
● Durante el proceso de modificación de la contraseña de administrador, la actual y la
nuevo aparecen en la pantalla. Complete el procedimiento con rapidez.
● No defina una contraseña de administrador que pueda adivinarse fácilmente.
● Los ajustes del administrador son fundamentales para la administración de la seguridad.
Si resulta necesario abandonar la máquina durante la realización de los ajustes del
administrador, no olvide pulsar la tecla [CA] para salir de los ajustes del administrador. El
administrador de la máquina debe indicar a los usuarios que no accedan a los ajustes del
administrador sin permiso.
● El cliente asume la responsabilidad del control de los documentos copiados y de los
faxes recibidos utilizando el kit de seguridad de datos.
●
Aunque esté instalado el kit de seguridad de datos, observe que los datos de fax de la placa
de memoria pública utilizada por el kit de expansión de facsímil (AR-FX8) pueden leerse.
1

MX-FRX5U.book 2 ページ 2007年3月20日 火曜日 午後5時8分
ESPAÑOL
■ Realizar una copia de seguridad y borrar los datos
almacenados con la función de archivo de documentos
Si el kit de seguridad de datos está instalado, los datos almacenados anteriormente en
la máquina con la función de archivo de documentos se borran. Cualquier dato que
necesite guardar se copiará en un ordenador antes de instalar el kit de seguridad de
datos y se devolverá a la máquina después de borrar los datos del kit de seguridad de
datos tras la instalación. (Esta operación suele realizarla un técnico de servicio en el
momento de la instalación).
Sólo se pueden utilizar las carpetas confidenciales para devolver datos desde un
ordenador a la máquina tras la instalación del kit de seguridad de datos. Antes de
devolver los datos a la máquina, cree una carpeta o varias carpetas confidenciales, en
función de sus necesidades. Para los procedimientos de almacenamiento de datos en
un ordenador y la devolución de datos desde un ordenador a la máquina, consulte la
ayuda Archivo de documentos en la página Web de la máquina.
■ Acerca de las contraseñas para la página Web
Si introduce una contraseña incorrecta de "user" o "admin" tres veces consecutivas al
intentar acceder a las páginas Web de una máquina que tiene instalado el kit de
seguridad de datos, el acceso a las páginas que requieran la introducción de una
contraseña de "user" o "admin" quedará prohibido durante 5 minutos.
NOTA
Algunos de los procedimientos para utilizar la máquina cambian cuando está instalado
el kit de seguridad de datos. El "MANUAL DE INSTRUCCIONES (información general y
funcionamiento de la copiadora)" detalla los procedimientos de funcionamiento de la
máquina cuando el kit de seguridad de datos no está instalado. Este manual describe
los cambios en los procedimientos cuando el kit de seguridad de datos está instalado.
2
MX-FRX5U.book 3 ページ 2007年3月20日 火曜日 午後5時8分
ESPAÑOL
Si el kit de seguridad de datos está instalado
Si el kit de seguridad de datos está instalado, se mostrará
el siguiente icono en el panel táctil. Pulse el icono ( )
para ver la información sobre la versión del kit de
seguridad de datos.
Si el kit de seguridad de datos está instalado, los datos presentes en la máquina se
borran automáticamente tras cada trabajo de copia y fax.
Cuando comienza el borrado de los datos, aparece el siguiente mensaje durante 6 segundos*.
* La duración del mensaje que aparece en
LOS DATOS SE ESTAN BORRANDO
pantalla puede modificarse mediante el
ajuste del administrador,
"CONFIGURACIÓN DE LA DURACIÓN
DEL MENSAJE". (Vea la página 10 del
Guía de ajustes del administrador.)
NOTA
Si la máquina se desconecta mientras se borran los datos de imagen de la unidad de
disco duro o antes de que se finalicen los trabajos, los datos no se borrarán por
completo. Si no desea que los datos queden parcialmente borrados cuando se
desconecta la alimentación, se recomienda utilizar el ajuste del administrador
"BORRAR TODA LA MEMORIA" (página 6 de este manual), para completar el borrado
de datos antes de desconectar la alimentación.
Acerca de las carpetas confidenciales y los archivos
confidenciales de la función Archivo de documentos
Si introduce una contraseña incorrecta tres veces consecutivas para una carpeta o archivo
confidencial específico en una máquina que tiene instalado el kit de seguridad de datos, la
carpeta o archivo se bloqueará (no se permitirá ninguna operación utilizando esa carpeta o
archivo). Para desbloquear la carpeta o archivo, es necesario utilizar "LIBERAR
OPERACIÓN DE BLOQUEO DE SALIDA DE ARCHIVO DE DOCUMENTOS" (página 11
del presente manual) en los ajustes del administrador.
Restricciones en el copiado en tándem y la
impresión en tándem
El copiado y la impresión en tándem funcionan según se describe a continuación de
acuerdo con la configuración del equipo servidor y el equipo cliente (tanto si está instalado
el kit de seguridad de datos como si no).
Máquina del cliente
Kit de seguridad de datos: Sí
Kit de seguridad de datos: No
Kit de seguridad
Puede utilizarse la función
No puede utilizarse la
de datos: Sí
tándem. Los datos se borran en
función tándem.
Equipo
los equipos servidor y cliente.
servidor
Kit de seguridad
Puede utilizarse la función
Puede utilizarse la función
de datos: No
tándem. Los datos se
tándem regular.
borran del equipo cliente.
3
ESPAÑOL
Configuración de seguridad en la página Web
Cuando la máquina se utiliza como una impresora de red y se emplea la función Activar
impresión, el kit de seguridad de datos habilita la autenticación de usuario mediante un
"NOMBRE DE USUARIO" y una "CONTRASEÑA". (La función Activar impresión permite
imprimir directamente un archivo de un servidor FTP almacenado previamente desde el
panel operativo de la máquina sin utilizar el controlador de la impresora; consulte "Imprimir
directamente un archivo de un servidor FTP" en las páginas 5-7 del "MANUAL DE
INSTRUCCIONES (para la impresora)").
La autenticación de usuario se habilita activando la casilla de verificación "Habilitar
autenticación de usuario" en la página Web de la máquina para las opciones de la función
Activar impresión. (Esta casilla de verificación aparece cuando el kit de seguridad de datos
está instalado, y está activada de manera predeterminada).
Los requisitos del sistema y el procedimiento para acceder a la página Web que contiene esta
casilla de verificación se explican en el apartado "CONFIGURACIÓN DE LA IMPRESORA EN
RED" en las páginas 5-2 del "MANUAL DE INSTRUCCIONES (para la impresora)". La casilla
de verificación aparece en la pantalla mostrada en el paso 2 del apartado "
■
Registrar un
servidor FTP" en las páginas 5-7 del "MANUAL DE INSTRUCCIONES (para la impresora)".
■
Procedimiento para imprimir directamente un archivo de un
servidor FTP cuando la autenticación de usuario está habilitada
El nombre de usuario y la contraseña deben introducirse tras seleccionar el servidor
FTP que contiene el archivo que va a imprimirse desde el panel táctil de la máquina.
Cuando se selecciona el servidor FTP en el paso 3 del apartado "■ Imprimir un archivo
de un servidor FTP desde el panel de control de la impresora" en las páginas 5-7 del
"MANUAL DE INSTRUCCIONES (para la impresora)", aparecerá una pantalla que le
solicitará que introduzca el nombre de usuario y la contraseña para el servidor FTP.
Pulse la tecla [NOMBRE USUARIO] para introducir el nombre de usuario y la tecla
[CONTRASEÑA] para introducir la contraseña. Aparecerá una pantalla de introducción
de caracteres en cada caso. Una vez haya introducido el nombre de usuario/contraseña,
pulse la tecla [OK].
Una vez introducido el nombre de usuario y la contraseña, continúe en el paso 4 en las
páginas 5-8 del "MANUAL DE INSTRUCCIONES (para la impresora)".
Acerca de la transferencia de datos copiados a la
máquina
Cuando el kit de seguridad de datos esté instalado y la página Web se utilice para copiar
datos almacenados con la función Archivo de documentos a un ordenador, los datos
copiados sólo se pueden transferir de vuelta a la máquina original desde la que se han
copiado; los datos no se pueden transferir a otra máquina, aunque las condiciones de ésta
sean las mismas.
La tecla [Restaurar desde el PC] sólo aparecerá en la página Web y la transferencia de datos
de vuelta a la máquina sólo será posible cuando se seleccione una carpeta confidencial.
4
OKCANCELAR
INTRODUCIR EL NOMBRE DE USUARIO Y LA CONTRASEÑA PARA EL SERVIDOR FTP.
NOMBRE USUARIO
CONTRASEÑA
MX-FRX5U.book 4 ページ 2007年3月20日 火曜日 午後5時8分
MX-FRX5U.book 5 ページ 2007年3月20日 火曜日 午後5時8分
ESPAÑOL
AJUSTES DEL ADMINISTRADOR
Entre los ajustes del administrador definidos por el administrador para el kit de seguridad
de datos, esta sección explica los ajustes relacionados con la función de seguridad.
En las siguientes explicaciones se presupone que la máquina tiene funciones de
impresora, fax, escáner de red y fax por internet y que está instalado el módulo de
comunicación de la aplicación.
LISTA DE AJUSTES DEL ADMINISTRADOR
Nombre del ajuste
Página
Nombre del ajuste
Página
CONFIGURACION DE SEGURIDAD
DESACTIVAR EL ARCHIVO DE
BORRAR TODA LA MEMORIA 6
9
DOCUMENTOS
BORRAR DATOS ARCHIVO DE
DESACTIVAR LA IMPRESIÓN
7
9
DOCUMENTOS
DEL LISTADOS
BORRAR TODOS LOS DATOS DE
DESACTIVAR TRABAJOS DE
LA LISTA DE ESTADO DE
7
IMPRESIÓN QUE DISTINTOS A
10
TRABAJOS TERMINADOS
LA IMPRESIÓN EN ESPERA
BORRRAR DATOS LIBRETA DE
AJUSTES DE PANTALLA DE LA
DIRECC./DATOS REGIST.
7
LISTA ESTADO DE TRAB.
10
ENVIADOS
TERMINADOS
NÚMERO DE VECES QUE SE
DESACTIVAR LA TECLA DE
8
11
REPITE EL BORRADO DE DATOS
REENVÍO
LIBERAR OPERACIÓN DE
BORRADO AUTOMATICO AL
8
BLOQUEO DE SALIDA DE
11
ENCENDER
ARCHIVO DE DOCUMENTOS
No. VECES QUE REPITE
PROGRAMA DE BORRADO
8
AUTOM. AL ENCENDER
CLAVE DE PRODUCTO
No VECES QUE REPITE BORRADO
9 KIT DE SEGURIDAD DE DATOS 11
AUTOM. AL FINALIZAR TRABAJO
Uso de los ajustes del administrador
Siga el procedimiento de las páginas 4 y 5 de la Guía de ajustes del administrador para
configurar las opciones de los ajustes del administrador.
Cuando el kit de seguridad de datos está instalado, si se introduce una contraseña de
administrador incorrecta 3 veces consecutivas, la introducción del contraseña de
administrador no estará permitida durante 5 minutos.
Para obtener una descripción de cada una de las opciones, consulte las páginas siguientes.
CONFIGURACION DE SEGURIDAD
Cuando está instalado el kit de seguridad de datos, los ajustes relacionados con la
seguridad, (salvo [CONFIGURACIÓN SSL] y [ACTIVAR IPsec]) se agregan a los ajustes
mostrados cuando se toca la tecla [CONFIGURACION DE SEGURIDAD].
CONFIGURACIONES DEL SISTEMA
CONFIGURACION DE SEGURIDAD
OK
CONFIGURACIÓN SSL
ACTIVAR IPsec
BORRAR TODA LA MEMORIA
El menú de configuración de seguridad consta de varias pantallas.
Pulse la tecla en la esquina inferior derecha de la pantalla para desplazarse a la siguiente pantalla.
5

MX-FRX5U.book 6 ページ 2007年3月20日 火曜日 午後5時8分
ESPAÑOL
BORRAR TODA LA MEMORIA
Este programa se utiliza para borrar manualmente todos los datos de la memoria y el disco
duro de la máquina.
No obstante, observe que los siguientes tipos de datos no se borran con este programa.
Utilice el programa "BORRRAR DATOS LIBRETA DE DIRECC./DATOS REGIST.
ENVIADOS" de la página 7 para borrar los siguientes tipos de datos
● BUZÓN DE EMISIÓN RELÉ INDIVIDUAL/GRUPO/PROGRAMA*
● LISTA DE CONTROL DE REMITENTES
● MEMORIA POLLING/BUZÓN CONFIDENCIAL*
● DATOS DEL REMITENTE
● PERMITIR/RECHAZAR RECEPCIÓN DE DATOS DE AJUSTE (INCLUYENDO EL
NÚMERO DEL CÓDIGO DE ACCESO DE SOLICITUD DE IMPRESORA)
● REENVÍO DE INFORMACIÓN
* Los datos de imagen almacenados en la PLACA DE LA MEMORIA se borran para
ejecutar este programa (BORRAR TODA LA MEMORIA).
NOTA
En caso de que el kit de seguridad de datos o la máquina en la que está instalado el kit
de seguridad de datos se venda o cambie de propietario, el administrador deberá definir
este ajuste. Cuando lo haga, el administrador no debe abandonar la máquina hasta
haber comprobado que la eliminación de datos ha finalizado.
Pulse la tecla [BORRAR TODA LA MEMORIA]. Aparecerá la siguiente pantalla solicitando
que confirme la selección ("SÍ" o "NO").
[Pantalla de borrado 1]
● Para regresar a la pantalla del menú
BORRAR TODA LA MEMORIA.
"CONFIGURACION DE SEGURIDAD", pulse
(EXCLUSIVO DE DATOS DE LIBRETA DE
la tecla [NO].
DIRECCIONES/LISTA DE REMITENTES)
● Para borrar toda la memoria, pulse la tecla
NO SÍ
[SÍ]. Aparecerá el mensaje "ESPERE POR
FAVOR." y, a continuación, se mostrará la
siguiente pantalla.
[Pantalla de borrado 2]
● Mientras se efectúa el borrado de datos, se
BORRADO TOTAL DE MEMORIA.EJECUTANDO
muestra el porcentaje de datos borrados y el
REINICIO AUTOM. DESPUÉS DEL BORRADO
número de repeticiones.
(50.0%) (1/1 tiempo)
●
Cuando se hayan borrado los datos, la
100%50%0%
CANCELAR
alimentación se desconectará brevemente y
luego se volverá a conectar automáticamente.
Si desea cancelar después de que se haya iniciado el borrado de datos
Pulse la tecla [CANCELAR]. Aparecerá la pantalla de entrada de la contraseña de
administrador. Introduzca la contraseña de administrador con el teclado numérico.
Nada más hacerlo, la eliminación de datos se detendrá, se cortará brevemente la
alimentación eléctrica y se volverá a reanudar automáticamente. Tenga en cuenta que
cualquier dato borrado antes de introducir la contraseña de administrador no podrá
restaurarse (esos datos se habrán perdido).
6
")