Olympus DS-3500: Menu items
Menu items: Olympus DS-3500
5 Press the
+
or
–
button to change
Work Type:
When [ PCM ST ] is selected:
the setting.
The Work Type information of the
Recording rate will be fixed at
44.1 kHz/16 bit.
• Pressing the 0 button without
recorded or uploaded files can be
pressing the OK/MENU button
edited with the menu settings of the
When [ MP3 ] is selected:
will cancel the settings and return
recorder.
[ 256 kbps ] or [ 128 kbps ]
you to the previous screen.
• For further details, a complete
• Since the built-in microphone
advanced version of the manual *
6 Press the
OK/MENU
button to
is monaural, even if you enable
(PDF format) is available for
[ PCM ST ] in [ Rec Mode ] the sound
complete the setting.
download at the OLYMPUS website.
recorded through the built-in
• You will be informed that the
* Available in English, French or
microphone will be monaural. In
settings have been established
German.
order to do stereo recording, an
via the screen.
Information:
external stereo microphone will be
7 Press the
F3 (EXIT)
button to close
necessary (optional).
The recorder can display a variety of
the menu screen.
• You cannot select the [ DSS Pro QP ]
information related to the current file.
mode when setting the recorder to
the DSS Classic mode.
Menu items
For details, see “ Recording ” in the
Rec Menu
“ Customizing the recorder ”.
File Menu
VCVA:
EN CS DA DE ES FR NL PL RU SV
Mic Sense:
The VCVA feature extends recording
Priority:
You can switch between two
time and conserves memory by
microphone sensitivities to meet
By default, the F2 button is
stopping recording during silent
recording needs: [ Dictation ] for oral
programmed with the Priority
periods, which helps the playback
dictation and [ Conference ] which
function. The setting can also be
to be more efficient. When the
is suited for situations like meetings
performed from the menu.
microphone senses that sounds
and conferences with a small number
You can set a priority level on each
have reached a preset threshold
of people.
file recorded. You can select “High” or
volume level, the built-in Variable
[ Conference ]:
“Normal”. The default is Normal level.
Control Voice Actuator (VCVA) starts
High-sensitivity mode that records
[ Set ]:
recording automatically, and stops
sounds in all directions.
High level.
when the volume drops below the
[ Dictation ]:
[ Cancel ]:
threshold level.
Low-sensitivity mode suited for
Normal level.
1 Select [
On
].
dictation.
• Each time the F2 ( PRIORITY )
• The setting status will appear on
2 Press the
REC
button to start
button is pressed the Priority level
the display as [
] or [ ].
recording.
will change (High/Normal).
• When the sound volume is lower
Rec Mode:
Pending:
than the preset actuation sound
You can choose between different
When you set [ Pending ] to the file,
level, recording automatically
recording formats.
the file becomes “Pending file”. If
stops after 1 second
“Download file” is set to “Finished file”
1 Select the recording format.
approximately, and [ Standby ]
by ODMS software, the [ Pending ] file
[ DSS ]:
flashes on the display. The record
is not transferred and only [ Finished ]
DSS stands for Digital Speech
indicator light turns on when
file (edited file) will be transferred
Standard, a digital audio file format
recording starts and flashes when
to your PC.
defined by a cooperative venture by
recording pauses.
[ Pending ]:
Olympus and two other companies.
Sets to a file of “Editing” and [
]
DSS format files are easily editable
will appear on the display.
and have a very light file size.
[ Finished ]:
[ PCM ST ] (Stereo):
Sets to a file of “already edited”.
This is an uncompressed audio
format which is used for music CDs
a
File Lock:
and the like.
The File lock function allows you to
[ MP3 ]:
prevent important files from being
MPEG is the international standard
b
accidentally erased.
established by a working group of
[ On ]:
the ISO (International Organization
Locks the file and prevents it from
for Standardization).
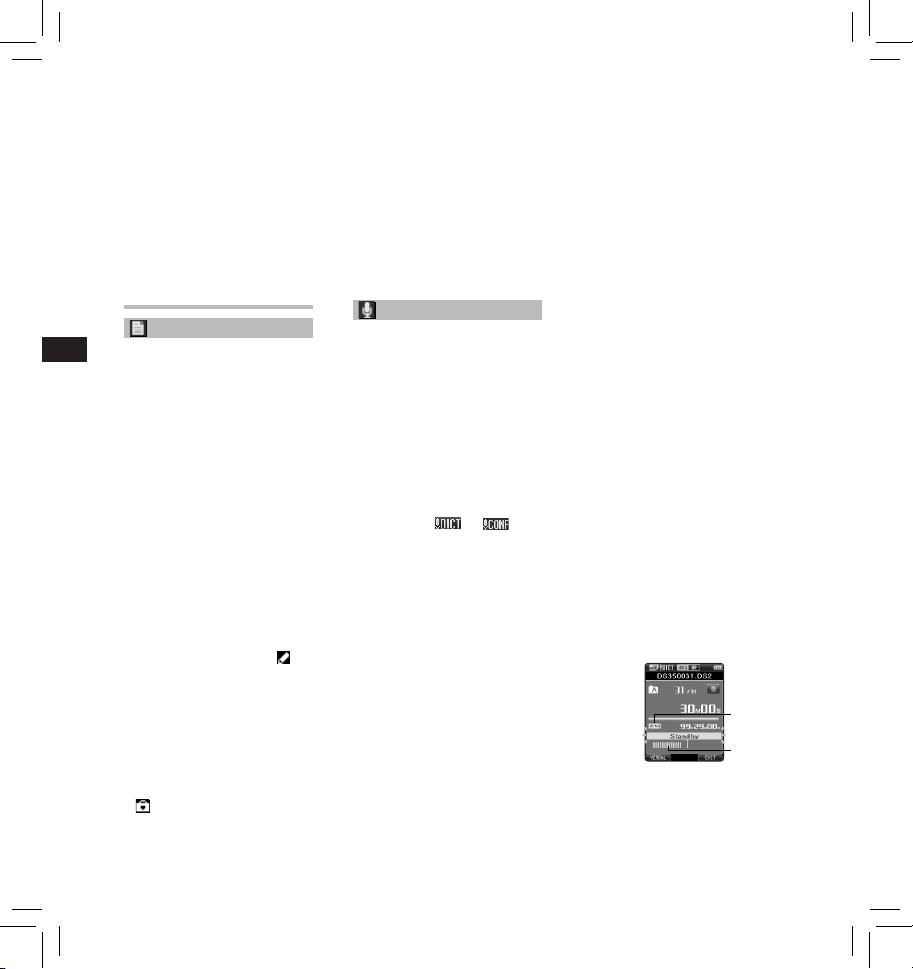
a VCVA indicator
being erased.
2 Select the recording rate.
b Level meter (varies according
[
] will appear on the display.
to the sound volume being
When [ DSS ] is selected:
[ Off ]:
recorded)
[ DSS Pro QP ] (Quality Playback) or
Unlocks the file and allows it to be
[ DSS Pro SP ] (Standard Playback)
erased.
12
Adjust the start/stop actuation
When [Brightness] is selected:
When [Speed] is selected:
level:
[ 01 ] [ 02 ] [ 03 ]:
You can adjust the Cue and
Sets the brightness of the
Review speed level from
While the recorder is in recording
backlight when lit.
[ Speed 1 ] to [ Speed 5 ].
mode, press the 9 or 0 button
• Cue and Review speed level
to adjust the actuation level.
LED:
becomes faster as the numerical
• The VCVA level can be set to any of
You can set it so the record indicator
value becomes larger.
15 different values.
light does not turn on.
• The higher the value is, the more
[ On ]:
Power Save:
sensitive the recorder can react to
LED light will be set.
By default, the recorder will enter
sounds. At the highest value, even
[ Off
]:
into Power Save mode if not used for
the faintest sound will activate
LED light will be canceled.
more than 10 minutes.
recording.
[ 5minutes ] [ 10minutes ] [ 30minutes ]
Beep:
• The VCVA actuation level can be
[ 1hour ]:
adjusted according to the ambient
When the Beep is set to [ On ], the
Set the length of time before the
(background) noise.
recorder will beep in case of error.
recorder will enter into Power Save
[ On ]:
mode.
Beep is enabled.
[ Off ]: Disables this function.
[ Off ]:
• If any button is pressed, time count
Beep is disabled.
will restart.
EN CS DA DE ES FR NL PL RU SV
Language (Lang):
Time & Date:
You can set the language for the
Setting the time and date beforehand
recorder’s user interface.
enables easier file management.
c
[ Čeština ] [ Dansk ] [ Deutsch ] [ English ]
For details, see “ Setting time and
[ Español ] [ Français ] [ Nederlands ]
date [Time & Date] ”.
[ Polski ] [ Русский ] [ Svenska ]:
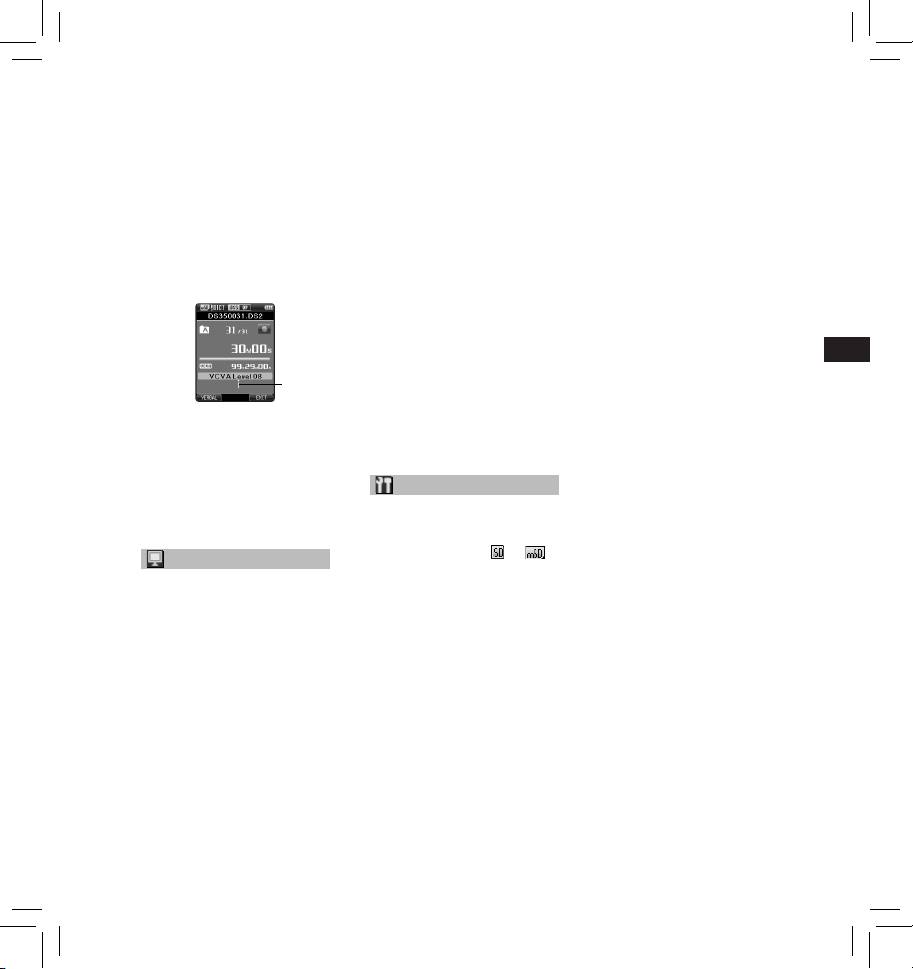
C Start level (moves to the right/
• The languages available may vary
USB Class:
left according to the set level)
depending on the country/region
You can set the USB class of this
• The start/stop actuation level also
where the product is purchased.
recorder with a USB connection to
varies depending on the selected
[ Composite ] or [ Storage Class ].
microphone sensitivity mode.
[ Composite ]:
• To ensure successful recordings,
Device Menu
In the 3 classes of Storage, USB
prior testing and adjustment of
audio and human interface device,
the start/stop actuation level is
Card Select:
USB connection is possible. While
recommended.
connected via USB in [ Composite ],
By default, the recording media is set
the recorder can be used as the USB
to [ SD Card ] by the manufacturer.
speaker and the USB microphone in
• The recording media ([
] or [ ])
LCD/Sound Menu
addition to storage class.
will appear on the display.
[ Storage Class ]:
Backlight:
Cue/Rev:
USB connection is possible in only
The playback sound of Cue and
storage class.
By default, the display will remain lit
for about 10 seconds when a button
Review operation and Cue and
Reset Settings:
on the recorder is pressed.
Review speed can be set.
To reset the menu settings to their
1 Select [
Lighting Time
], [
Dim
1 Select [
Sound
] or [
Speed
].
default values use [ Reset Settings ]
Light Time
] or [
Brightness
].
[ Sound ]:
under [ Device Menu ], or use the
Set the playback sound of Cue
ODMS and DSS Player software.
2 Select the options.
and Review to On or Off.
When [Lighting Time] is selected:
Format:
[ Speed ]:
[ 5seconds ] [ 10seconds ] [ 30seconds ]
Set the Cue and Review speed.
Cards that have been used in non-
[ 1minute ]:
Olympus devices, or cards that are
2 Select the options.
Set the backlight duration.
not recognized by the recorder, must
When [Sound] is selected:
When [Dim Light Time] is
be formatted before they can be used
[ On ]:
selected:
with the recorder.
Activate the playback sound of
[ 30seconds ] [ 1minute ] [ 2minutes ]
• Formatting the card will erase all
Cue and Review.
the stored data, including locked
[ 5minutes ]
[ Off ]:
files.
[ Always On ]:
Disables this function.
For details, see “ Formatting the card
Set the time after which the
[Format] ”.
backlight dims.
13
Card Information:
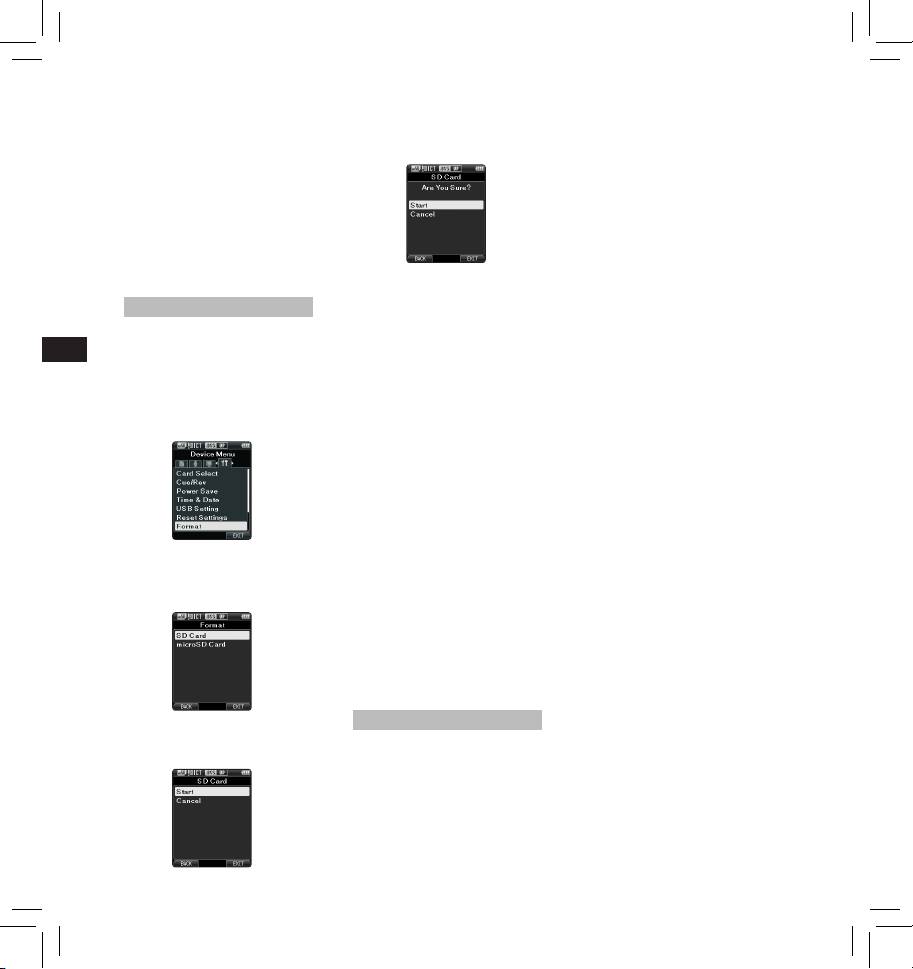
4 Press the
OK/MENU
button to
Administrative settings:
Memory card capacity and remaining
confirm [
Start
] selection.
❏ General
card space for the cards in use will be
5 Press the
+
or
–
button again to
displayed on the recorder.
Accessibility:
select [
Start
] option.
• You can customize / adjust / set /
System Information:
configure various settings related
System information about the
to user authorization, such as
recorder like the [ Model ], [ Version ]
prohibiting both file erasure and
and [ Serial No. ] can be displayed.
Menu settings.
• For further details, a complete
Splash Message:
advanced version of the manual *
(PDF format) is available for
• You can set the contents that
download at the OLYMPUS website.
appear in the message which is
* Available in English, French or
displayed during start-up.
German.
Main Button Guide:
6 Press the
OK/MENU
button again
• You can enable the Main Button
Formatting the card [Format]
to initiate the formatting process.
Guide, which shows the button
• [ Format Done ] displays when
functions on the display.
Cards that have been used in non-
formatting ends.
EN CS DA DE ES FR NL PL RU SV
Alarm:
Olympus devices, or cards that are
Notes:
not recognized by the recorder, must
• You can set occasions for the
• The time required to format a card
be formatted before they can be used
recorder’s alarm or beep noise to
varies according to the capacity of
with the recorder.
sound.
the card to be formatted.
1 Select [
Format
] at the [
Device
❏ Display
Do not interrupt the formatting
• You can select a default pattern for
Menu
] screen, then press the
process with the following actions.
display from 4 patterns.
OK/MENU
button.
Doing so may damage the data or
• The way information is displayed on
the card.
the LCD display can be customized
- Remove the card.
for three different areas.
- Remove the battery.
– The upper part of the screen
• Formatting the card will erase all
displays the recorder's basic
the stored data, including locked
functions.
files.
− The lower part of the screen can
• When an unformatted card is
be used to display information
inserted, the format menu will be
on the file actually selected, like
displayed automatically.
Author ID, Work Type and Option
• Locked SD cards cannot be
Item.
2 Press the
+
or
–
button to select
initialized.
− The right part of the screen can
• Memory cards will be formatted
be used to display the Main
[
SD Card
] or [
microSD Card
],
using quick format. Formatting
Button Guide indicators.
then press the
OK/MENU
button.
the card will reset the information
❏ Device Security
in file management, but the data
You can customize / adjust / set /
inside the card may not be deleted
configure various settings related to
completely. Be careful of data
the recorder’s device lock function.
leakage when disposing or handing
PIN code:
of the card. We recommend that
you physically destroy the card
• Password setting.
when disposing of it.
Device Lock:
• Device lock function On/Off.
• Settings related to the timing for
Customizing the recorder
setting the device lock.
3 Press the
+
or
–
button to select
You can customize various settings
• Changing the number of allowable
[
Start
] option.
of the recorder using the ODMS
input errors (mismatches) for the
software.
password.
For more details, refer to the online
❏ Author List
help for ODMS software.
You can customize / adjust / set /
configure settings related to the
Common settings:
Author.
You can set the default values for
each of the recorder’s Menu items.
14
Table of contents
- Introduction
- Getting started
- Basic operations
- Advanced operations
- Menu items
- Managing files on your PC
- Other information
- Technical assistance and support
- Úvod
- Začínáme
- Základní obsluha
- Pokročilá obsluha
- 1,4,6 1, 4 , 6
- Položky nabídky
- Správa souborů v počítači
- Další informace
- Technická pomoc a podpora
- Introduktion
- Kom godt i gang
- Grundlæggende betjening
- Avanceret betjening
- Menupunkter
- Filhåndtering på din pc
- Øvrige oplysninger
- Teknisk hjælp og support
- Einführung
- Allgemeines
- Grundlegende Bedienung
- Erweiterte Anleitung
- Menüpunkte
- Verwalten von Dateien
- Zusätzliche Informationen
- Technische Hilfe und Support
- Introducción
- Para empezar
- Operaciones Básicas
- Funciones avanzadas
- Elementos del menú
- Administración de
- Otra información
- Asistencia y ayuda técnica
- Introduction
- Préparatifs
- Opérations de base
- Opérations avancées
- Eléments de menu
- Gestion des fichiers sur
- Autres informations
- Assistance technique et soutien
- Inleiding
- Aan de slag
- Basisbewerkingen
- Geavanceerde bewerkingen
- Menuopties
- Bestanden beheren op uw PC
- Overige informatie
- Technische bijstand en ondersteuning
- Wprowadzenie
- Pierwsze kroki
- Podstawowe operacje
- Zaawansowane operacje
- Pozycje menu
- Zarządzanie plikami na
- Inne informacje
- Wsparcie techniczne
- Введение
- Начало работы
- Основные операции
- Расширенные операции
- Пункты меню
- Управление файлами в
- Прочая информация
- Техническая помощь и обслуживание
- Introduktion
- Komma igång
- Grundläggande funktioner
- Avancerade funktioner
- Menyalternativ
- Hantera filer på din PC
- Övrig information
- Teknisk hjälp och support
- Olympus Service Department