Canon PIXMA MP 190: 7 Troubleshooting X Removing Jammed Paper X More Information
7 Troubleshooting X Removing Jammed Paper X More Information: Canon PIXMA MP 190
Table of contents
- Quick Start Guide
- X Preparing the machine X European Union (and EEA) only. X For Customers in Europe, Middle-East, Africa and Russia only
- X Install the software Installing the Printer Driver - Windows Installing the Printer Driver - Macintosh
- Disclaimer About Consumables Trademark Notices
- X How To Use The Documentation Provided
- X Displaying On-screen Manual Stored On The Setup CD-ROM
- X Reading The Document Symbols Used In This Guide Buttons Used In This Guide Terms Used In This Guide
- X Safety Precautions WARNING z Location z Power supply
- z Maintenance z Handling z Others
- CAUTION z Location z Power supply
- z Handling z FINE Cartridges (Ink Cartridges) X Legal Limitations On Use Of Your Product And Use Of Images
- 1 Introduction X Features Of Your Machine
- X Machine Parts And Their Functions Machine z Exterior
- z Rear view and interior
- Operation Panel (10) [ON/OFF] Button
- (11) Black/Color Ink Lamp (12) Paper Lamp (13) [Paper] Button (14) [+] Button
- 2 Copying X Loading Paper X Recommended Paper
- X Setting The Paper Size And Type X Loading Documents X Making Copies X Advanced Copy Feature
- 3 Printing From Your Computer X Printing Documents
- 4 Scanning X Scanning Methods Scanning using the MP Navigator Scanning with the operation panel of the machine Scanning from an application software
- 5 Printing Photographs Directly From A Digital Camera X Connecting To A PictBridge-Compliant Device
- 6 Maintenance X Replacing A FINE Cartridge 3 Push down the empty FINE Cartridge on the tab to release it, then pull out the FINE Cartridge.
- 4 Remove a new FINE Cartridge from its packaging. Then hold the FINE Cartridge as shown and remove the Protective Tape (A).
- 8 Lift the Scanning Unit and put the Scanning Unit Support and Scanning Unit back to its original position. X Cleaning The FINE Cartridge
- 7 Troubleshooting X Removing Jammed Paper X More Information
ENGLISH
7 Troubleshooting
X Removing Jammed Paper
If <E> and <3> are alternately appeared on the LED, follow the procedure below to clear
the paper jam.
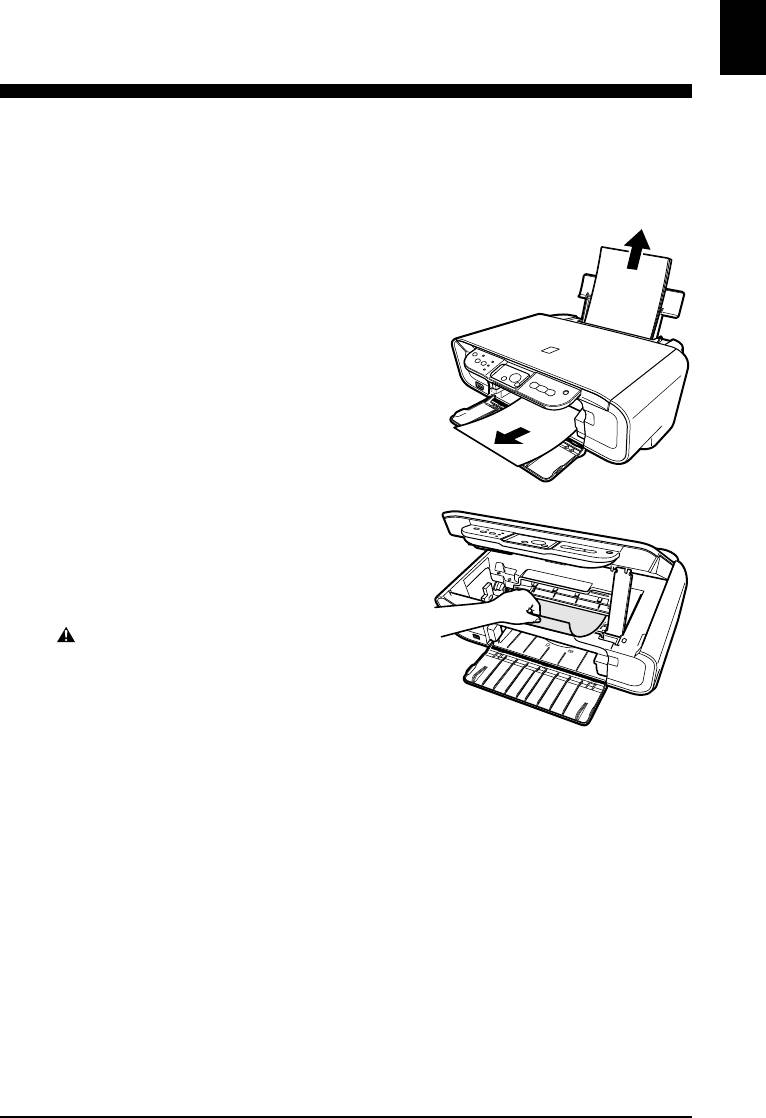
Clearing Jams In The Paper Output Tray
1 Gently pull any jammed paper out of the
Paper Output Tray.
2 Press [Black] or [Color].
Clearing Jams From The Auto Sheet
Feeder
1 Gently pull out any jammed paper from
the Auto Sheet Feeder.
2 Press [Black] or [Color].
Clearing Jams From Inside The Machine
1 Open the Scanning Unit.
2 Gently pull out any jammed paper from
the rollers.
CAUTION
• Be careful not to touch the components inside the
machine at this time, otherwise, print quality may be
reduced.
3 Close the Scanning Unit.
4 Press [Black] or [Color].
X More Information
For details on other troubleshooting, see the User’s Guide.
Chapter 7 Troubleshooting 25


