Parrot ASTEROID Mini – страница 2
Инструкция к Мультимедиа Parrot ASTEROID Mini

English 21
Press the button to get to the track list if
ASTEROID Mini, the 2 devices will
Getting started
a song is currently being played. While
automatically connect when they are
navigating through the menus, press the
turned on (as well as
Bluetooth®
features)
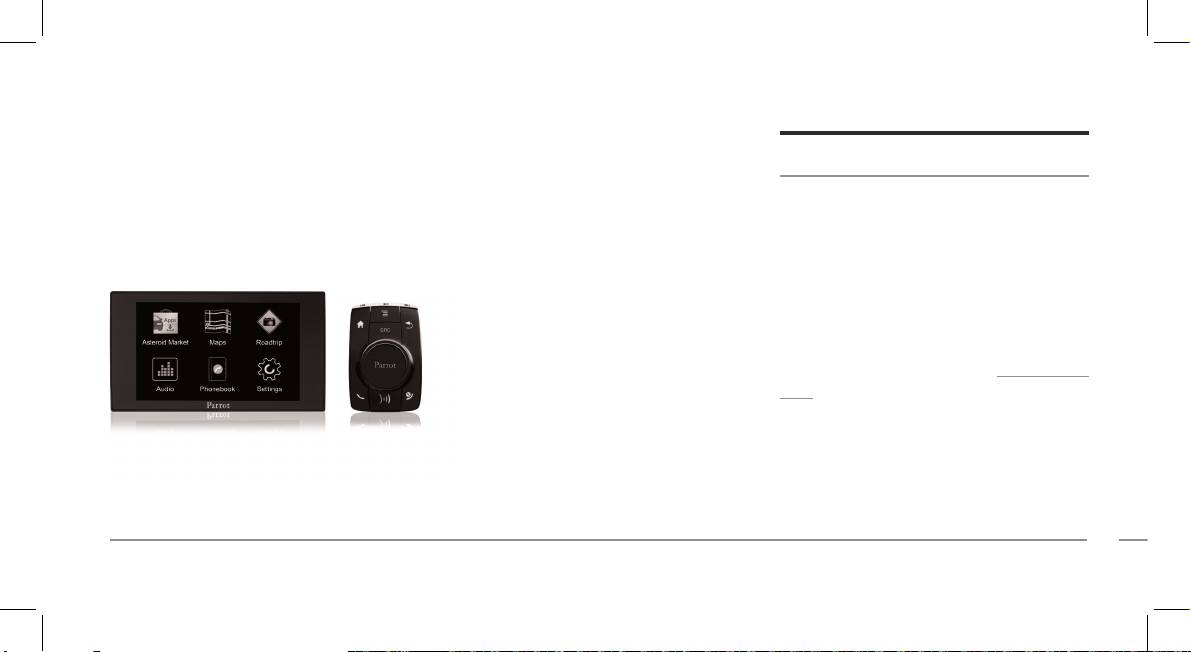
Navigating through the menus
SRC button to get to the Now Playing
and in proximity of each other.
Press the button to access the main
screen.
1.
From your phone, start a
Bluetooth
menu.
peripheral search and select «Parrot
Browse through the menus by turning the
Connecting a phone via Bluetooth
ASTEROID Mini».
jogwheel and confirm by pressing the
Note : Refer to the compatibility page of our
jogwheel.
2.
The pairing procedure depends on
website to check if your phone is
your phone model:
Press the button to get back to previous
compatible with the Parrot ASTEROID Mini
menu.
and to consult the specific pairing
If the phone asks you to enter
procedures fo
r the most common phones :
the
Bluetooth
PIN code, enter
Press the button to access the pop-up
www.parrot.com/uk/compatibility.
“0000”.
menu corresponding to the current
application. The pop-up menu allows you
If you are using the Parrot ASTEROID Mini
If the Parrot ASTEROID Mini
to change several settings or browse more
with your phone for the very first time, you
and your phone display two
easily through the conte
nt of your audio
must initially pair both devices. Once your
codes, verify that the codes are
source or phonebook.
telephone is paired with the Parrot
identical, then either confirm
20 English
21English
or invalidate.
automatically the next time the Parrot
Phone
> The Parrot ASTEROID Mini
ASTEROID Mini and your phone are
screen will display “Pairing
connected.
Receiving a call
successful”.
War ning : Only the contacts stored in the
An incoming call is indicated by a ringtone.
Note: Depending on the model of your
phone memory are synchronized. If your
The name of the caller is announced if his
phone, you may need to authorize the
contacts are stored in your SIM card
number is recorded in the phonebook of
connection to the Parrot ASTEROID Mini to
memory, transfer them
onto your phone
the phone connected to the Parrot
allow further automatic connections. Refer
memory.
ASTEROID Mini.
to the user guide of your phone for more
Note: Depending on the model of your
information.
To answer the call, press the
phone, you may need to authorize the
button. Press the button to end
access to your contacts to the Parrot
Synchronising the phonebook
the call.
ASTEROID Mini. Refer to the user guide of
With most of the phones supporting
your phone for more information.
To refuse the call, press the
Bluetooth technology, the phonebook is
button.
The automatic synchronization is limited
automatically synchronized in the system’s
to 5000 contacts (or phone numbers) for
memory. Each time you change your
each paired phone.
directory, synchronisation will start
22 English
22 English
Making a call via voice recognition
the voice tag is correctly understood.
Music
If it is not the case, a confirmation
You can make a call using voice recognition
message is asked. Confirm by saying
Using vocal music search
directly after automatic synchronization.
«YES» or «CALL».
The Parrot ASTEROID Mini will
The voice recognition function allows you
automatically recognize the contact you
Note: At any time, press the
button to
to select the artist / album you want to
wish to call.
exit voice recognition mode.
hear via voice recognition. This function is
only available if you are using the Parrot
1.
Press the
button to launch the
ASTEROID Mini with a USB / SD / iPod
voice recognition feature.
peripheral.
> The Parrot ASTEROID Mini asks
you the name of the contact you want
1.
Press the
button.
to call.
2.
Say the name of the artist / album
2.
Say the name of the contact and the
when asked to do so.
type of number («WORK»,
> The list of audio sources connected
«MOBILE»...) if there are several
to the Parrot ASTEROID Mini and
numbers associated to your contact.
applications compatible with the
> The call is automatically launched if
vocal music search function which
contain the artist / album that you
4.
Select the track and press the
cable.
selected will appear.
jogwheel.
2.
Press the SRC button until the USB
Note: Check the albums and artists names
Note: To browse more easily through the
source is selected.
in the metadatas of your music files. These
content of your iPod, press the button
3.
Select one of the classification
names may be different from the ones
and select the first letter of your track /
criteria (artist, album, songs, genres,
displayed on your music files titles.
album / artist.
playlist) and press the jogwheel.
iPod
USB storage device
4.
Select the track and press the
jogwheel.
1.
Connect your iPod to the Parrot
The Parrot ASTEROID Mini is compatible
ASTEROID Mini USB cable with the
with the majority of USB keys / MP3 audio
Note: To browse more easily through the
player / external hard drive. There is no
content of your
USB storage device, press
USB / iPod extension lead.
restric
tion in terms of capacity of USB
the button and select the first letter of
2.
Press the SRC button until the iPod
your track / album / artist.
keys.
source is selected.
MP3 (mpeg1 layer3), AAC, WAV, OGG
3.
Select one of the classifi
cation
and WMA formats are supported.
criteria (artist, album, songs, genres,
playlist) and press the jogwheel.
1.
Connect your USB device to the USB
23English

English 23
Making a call via voice recognition
the voice tag is correctly understood.
Music
If it is not the case, a confirmation
You can make a call using voice recognition
message is asked. Confirm by saying
Using vocal music search
directly after automatic synchronization.
«YES» or «CALL».
The Parrot ASTEROID Mini will
The voice recognition function allows you
automatically recognize the contact you
Note: At any time, press the button to
to select the artist / alb
um you want to
wish to call.
exit voice recognition mode.
hear via voice recognition. This function is
only available if you are using the Parrot
1.
Press the button to launch the
ASTEROID Mini with a USB / SD / iPod
voice recognition feature.
peripheral.
> The Parrot ASTEROID Mini asks
you the name of the contact you want
1.
Press the
button.
to call.
2.
Say the name of the artist / album
2.
Say the name of the contact and the
when asked to do so.
type of number («WO
RK»,
> The list of audio sources connected
«MOBILE»...) if there are several
to the Parrot ASTEROID Mini and
numbers associated to your contact.
applications compatible with the
> The call is automatically launched if
vocal music search function which
22 English
23English
contain the artist / album that you
4.
Select the track and press the
cable.
selected will appear.
jogwheel.
2.
Press the SRC button until the USB
Note: Check the albums and artists names
Note: To browse more easily through the
source is selected.
in the metadatas of your music files. These
content of your iPod, press the
button
3.
Select one of the classification
names may be different from the ones
and select the first letter of your track /
criteria (artist, album, songs, genres,
displayed on your music files titles.
album / artist.
p
laylist) and press the jogwheel.
iPod
USB storage device
4.
Select the track and press the
jogwheel.
1.
Connect your iPod to the Parrot
The Parrot ASTEROID Mini is compatible
ASTEROID Mini USB cable with the
with the majority of USB keys / MP3 audio
Note: To browse more easily through the
content of your USB storage device, press
USB / iPod extension lead.
player / external hard drive. There is no
restriction in terms of capacity of USB
the
button and select the first letter of
2.
Press the SRC button until the iPod
your track / album / artist.
keys.
source is selected.
MP3 (mpeg1 layer3), AAC, WAV, OGG
3.
Select one of the classification
and WMA formats are supported.
criteria (artist, album, songs, genres,
playlist) and press the jogwheel.
1.
Connect your USB device to the USB

24 English
24 English
SD card
criteria (artist, album, songs, genres,
phone or
Bluetooth
audio device. To do so,
playlist) and press the jogwheel.
your phone / audio device must support
You can use the following SD cards (with
the
Bluetooth
A2DP profile (Advanced
adapter if necessary) with the Parrot
4.
Select the track and press the
Audio Distribution Profile).
ASTEROID Mini : SD, micro SD , mini SD,
jogwheel.
If you are using a
Bluetooth
audio player
SDHC, mini SDHC, micro SDHC. The SD
Note: To browse more easily through the
for the first time, you have to pair both
card capacity must not exceed 32Gb.
content of your USB storage device, press
devices. If both devices are already paired:
MP3 (Mpeg 1 Layer3), AAC, WAV, OGG
the
button and select the first letter of
and WMA formats are supported.
your track / album / artist.
1.
Press the SRC button until the
Bluetooth Audio source is selected.
1.
Insert the SD card into the
Audio player connected via Bluetooth
2.
Start playback on your
Bluetooth
audio
appropriate slot located on the right
player.
of the screen, with the contact
Note: The Parrot ASTEROID Mini allows you
surface facing you (diagram E p.12).
to use the phone and audio streaming
functions from 2 different phones without
2.
Press the SRC
button until the SD
having to disconnect one of them.
source is selected.
You can use the Parrot ASTEROID Mini to
3.
Select one of the classification
listen to songs stored on your mobile
3.
Enter your PIN c
ode using the
> The message "3G key configured"
Internet
jogwheel, then select OK. Check the
appears.
Connecting a 3G / 4G key
Memorise PIN code option if you
5.
Wait approximately 30 seconds until
would like your PIN code to be stored
the connection is established. You
Note: Refer to the compatibility section of
each time you turn on the Parrot
can also press the
button and
the Parrot ASTEROID Mini on our website to
ASTEROID Mini.
browse the menus while the
get the list of 3G / 4G keys compatible with
the Parrot ASTEROID Mini.
Note: You will be able to change this setting
connection is being established.
by selecting
Settings > Netw ork > 3G Key
.
1.
Connect a 3G key to the Parrot
Sharing a phone 3G connection via Bluetooth
ASTEROID Mini using a USB cable.
4.
Select your APN (Access Point
Name) from the suggested list. This
> A pop-up will appear.
Note: Refer to the compatibility page of our
information is available in the
website
to check if your phone allows 3G
2.
Select OK to activate the 3G
documentation provided with your 3G
connection sharing via Bluetooth and to
connection.
key. If your APN is
not in the list, you
consult the corresponding procedure :
> A Status of 3G connection pop-up
can add it by selecting Settings >
www.parrot.com/uk/compatibility.
appears, followed by another pop-up
Network > 3G Key > Configuration >
If you have a phone that supports the DUN
which asks for your PIN code.
New access point.
(Dial-Up Networking) or PAN (Personal
25English

English 25
SD card
criteria (artist, album, songs, genres,
phone or
Bluetooth
audio device. To do so,
playlist) and press the jogwheel.
your phone / audio device must support
You can use the following SD cards (with
the
Bluetooth
A2DP profile (Advanced
adapter if necessary) with the Parrot
4.
Select the track and press the
Audio Distribution Profile).
ASTEROID Mini : SD, micro SD , mini SD,
jogwheel.
If you are using a
Bluetooth
audio player
SDHC, mini SDHC, micro SDHC. The SD
Note: To browse more easily through the
for the first time, you have to pair both
card capacity must not exceed 32Gb.
content of your USB storage device, press
devices. If both devices are already paired:
MP3 (Mpeg 1 Layer3), AAC, WAV, OGG
the button and select the first letter of
and WMA formats are supported.
your track / album / artist.
1.
Press the SRC button until the
Bluetooth Audio source is selected.
1.
Insert the SD card into the
Audio player connected via Bluetooth
2.
Start playback on your
Bluetooth
audio
appropriate slot located on the right
player.
of the screen, with the contact
Note: The Pa
rrot ASTEROID Mini allows you
surface facing you (diagram E p.12)
.
to use the phone and audio streaming
functions from 2 different phones without
2.
Press the SRC button until the SD
having to disconnect one of them.
source is selected.
You can use the Parrot ASTEROID Mini to
3.
Select one of the classification
listen to songs stored on your mobile
24 English
25English
3.
Enter your PIN c
ode using the
> The message "3G key configured"
Internet
jogwheel, then select OK. Check the
appears.
Connecting a 3G / 4G key
Memorise PIN code option if you
5.
Wait approximately 30 seconds until
would like your PIN code to be stored
the connection is established. You
Note: Refer to the compatibility section of
each time you turn on the Parrot
can also press the
button and
the Parrot ASTEROID Mini on our website to
ASTEROID Mini.
browse the menus while the
get the list of 3G / 4G keys compatible with
the Parrot ASTEROID Mini.
Note: You will be able to change this setting
connection is being established.
by selecting
Settings > Netw ork > 3G Key
.
1.
Connect a 3G key to the Parrot
Sharing a phone 3G connection via Bluetooth
ASTEROID Mini using a USB cable.
4.
Select your APN (Access Point
Name) from the suggested list. This
> A pop-up will appear.
Note: Refer to the compatibility page of our
information is available in the
website to check if your phone allows 3G
2.
Select OK to activate the 3G
documentation provided with your 3G
connection sharing via Bluetooth and to
connection.
key. If your APN is
not in the list, you
consult the corresponding procedure :
> A Status of 3G connection pop-up
can add it by selecting Settings >
www.parrot.com/uk/compatibility
.
appears, followed by another pop-up
Network > 3G Key > Configuration >
If you have a phone that supports the DUN
which asks for your PIN code.
New access point.
(Dial-Up Networking) or PAN (Personal

26 English
26 English
Area Network)
Bluetooth
profiles, the
phone. This procedure will vary
also enables you to recharge your
Bluetooth
connecting your phone to the
according to your phone model.
phone’s battery.
Parrot ASTEROID Mini will allow for
3.
Select your APN (Access Point
sharing of the phone's 3G connection.
Sharing a phone 3G connection via USB
Name) from the suggested list, then
1.
Connect your phone to the Parrot
Note: Refer to the compatibility page of our
check the Select option. You can then
ASTEROID Mini via
Bluetooth
.
website to check if your phone allows 3G
modify this setting by selecting
connection sharing via USB and to consult
Settings >
Mobile Networks settings
2.
On the Parrot ASTEROID Mini,
the corresponding procedure :
> Mobile Access device.
select Settings > Network >
www.parrot.com/uk/compatibility
.
> A pop-up indicating that USB
Bluetooth > Configuration.
connection sharing has been activated
1.
Make sure that your phone’s keypad is
3.
Select your APN (Access Point
will appear.
unlocked.
Name) from the suggested list, then
check Select .
2.
Connect the phone to the Parrot
ASTEROID Market : Using the applications
ASTEROID Mini using a USB cable/
4.
Press the
button and select
Several types of applications are available
micro-USB and the USB extension
Connect.
with the ASTEROID Market : music,
cable provided with the Parrot
geolocation, driver assistance...
5.
Allow connection sharing on your
ASTEROID Mini. This connection
All applications may not be available in all
page on our website www.parrot.com.
Troubleshooting
countries. The use of some applications
may need prior subscription.
Problems while using the phone function
Before you begin
The Parrot ASTEROID Mini is a
Make sure your phone is compatible with
Make sure the “Goodbye” message is
multitasking device: several applications
the Parrot ASTEROID Mini. To do so,
displayed on the Parrot ASTEROID Mini
can run simultaneously. For example, you
refer to the compatibility page on our
screen when you turn the ignition off.
can listen to a Webradio station and use a
website : www.parrot.com/uk/
Refer to the Checking the wiring section
driver assistance application at the same
compatibility.
for more information.
time.
If your phone is compatible with the
Reset the Parrot ASTEROID Mini. To do
For more information about installing and
Parrot ASTEROID Mini and if you
so, select Settings > Advanced settings >
using the available applications, refer
to
already
have the latest software update:
Restore factory settings.
the ASTEROID Market web page :
Make sure you have the latest software
1.
Delete the pairing on the Parrot
www.parrotasteroid.com/
ASTEROID Mini. To do so, tap
update on your Parrot ASTEROID Mini. To
asteroidmarket.
Settings > Advanced settings >
do so, select Sett
ings > About > Device
Factory settings.
Version. Compare this number with the
one on the Parrot ASTEROID Mini support
2.
On your phone, erase the Parrot
27English

English 27
Area Network)
Bluetooth
profiles, the
phone. This procedure will vary
also enables you to recharge your
Bluetooth
connecting your phone to the
according to your phone model.
phone’s battery.
Parrot ASTEROID Mini will allow for
3.
Select your APN (Access Point
sharing of the phone's 3G connection.
Sharing a phone 3G connection via USB
Name) from the suggested list, then
1.
Connect your phone to the Parrot
Note: Refer to the compatibility page of our
check the Select option. You can then
ASTEROID Mini via
Bluetooth
.
website to check if your phone allows 3G
modify this setting by selecting
connection sharing via USB and to consult
Settings > Mobile Networks settings
2.
On the Parrot ASTEROID Mini,
the corresponding procedure :
> Mobile Access device.
select Settings > Network >
www.parrot.com/uk/compatibility.
> A pop-up ind
icating that USB
Bluetooth > Configuration.
connection sharing has been activated
1.
Make sure that your phone’s keypad is
3.
Select your APN (Access Point
will appear.
unlocked.
Name) from the suggested list, then
check Select .
2.
Connect th
e phone to the Parrot
ASTEROID Market : Using the applications
ASTEROID Mini using a USB cable/
4.
Press the
button and select
Several types of applications are available
micro-USB and the USB extension
Connect.
with the ASTEROID Market : music,
cable provided with the Parrot
geolocation, driver assistance...
5.
Allow connection sharing on your
ASTEROID Mini. This connection
26 English
27English
All applications may not be available in all
page on our website www.parrot.com
.
Troubleshooting
countries. The use of some applications
may need prior subscription.
Problems while using the phone function
Before you begin
The Parrot ASTEROID Mini is a
Make sure your phone is compatible with
Make sure the “Goodbye” message is
multitasking device: several applications
the Parrot ASTEROID Mini. To do so,
displayed on the Parrot ASTEROID Mini
can run simultaneously. For example, you
refer to the compatibility page on our
screen when you turn the ignition off.
can listen to a Webradio station and use a
website : www.parrot.com/uk/
Refer to the Checking the wiring section
driver assistance application at the same
compatibility.
for more information.
time.
If your phone is compatible with the
Reset the Parrot ASTEROID Mini. To do
For more information about installing and
Parrot ASTEROID Mini and if you
so, select Settings > Advanced settings >
using the available applications, refer to
already have the latest software update:
Restore factory settings.
the AST
EROID Market web page :
Delete the pairing on the Parrot
Make sure you have the latest software
1.
www.parrotasteroid.com/
ASTEROID Mini. To do so, tap
update on your Parrot ASTEROID Mini. To
asteroidmarket.
Settings > Advanced settings >
do so, select Settings > About > Device
Factory settings.
Version. Co
mpare this number with the
one on the Parrot ASTEROID Mini support
2.
On your phone, erase the Parrot

28 English
28 English
system from the list of
Bluetooth
“Slide to shutdown” appears.
General information
peripherals (or reboot your iPhone).
Note: this procedure will not erase any of
3.
Repeat the pairing procedure for the 2
your data.
devices.
Warranty
Some problems may occur if the iPod / SD
card / USB device is already connected to
Without prejudice of legal warranty, Parrot
Problems while using the music function
the Parrot ASTEROID Mini before you
contractually warrants during 12 months
Reboot your iPod / iPhone before
turn on the ignition. Connect the iPod / SD
from the date of initial purchase by the
connecting it to the Parrot ASTEROID
card / USB device once the ign
ition is
consumer (except wearing parts
Mini. To reboot your iPhone / iPod:
turned on.
guaranteed for 6 months) that the product
is free from defects in materials and
iPod: press Menu and the centre
For more information
workmanship, upon presentation of proof
button simultaneously until the iPod
of purchase (date, place of purchase,
reboots.
Refer to the Parrot ASTEROID Mini
serial number of the product) to the
support page on our website
iPhone: Press the On/Off button and
retailer or Parrot. During the contractual
www.parrot.com
.
the Home button simultaneously
warranty
period, the defective product
until the iPhone reboots. Do not
must be returned in its original packaging
touch the screen when the message
to the after-sales service of the retailer.
After inspection of the product, Parrot will
be invoiced to him.
design or user guide without any
proceed, at its option, to the replacement
restrictions and without any obligation to
Modifications
or the issue a credit note to the exclusion
notify users. As part of our ongoing
The explanations and specifications in this
of any other remedy.
concern to upgrade and improve our
guide are given for information purposes
Warranty does not cover: upgrading of the
products, the product that you have
only and may be modified w
ithout prior
software items of the Parrot products with
purchased may differ slightly from the
notice. They are deemed to be correct at
Bluetooth cell phones for compatibility
model described in this guide. If so, a later
time of going to press. The utmost care
purpose, data recovery, deterioration of
version of this guide might be available in
has been taken when writing this guide,as
the external aspect due to normal wear of
electronic format a
t Parrot’s website at
part of the aim to provide you with
the product, any damage caused by
www.parrot.com.
accurate information. However, Parrot
accide
nt, misuse, misapplication, or non-
Correct disposal of This Product (Waste
shall not be held responsible for any
Parrot products.
Electrical & Electronic Equipment)
consequences arising from any errors or
Parrot is not responsible for storage, loss
omissions in the guide, nor for any damage
or damaged to data during transit or repair.
This marking shown on the product or
or accidental loss of data resulting directly
Any product wrongfully declared to be
its literature, indicates that it should not
or indirectly from the use of the
defective will be returned to sender and
be disposed with other household wastes
information herein. Parrot reserves the
inspection, process and carriage costs will
at the end of its working life. To prevent
right to amend or improve the product
possible harm to the environment or
29English

English 29
system from the list of
Bluetooth
“Slide to shutdown” appears.
General information
peripherals (or reboot your iPhone).
Note: this procedure will not erase any of
3.
Repeat the pairing procedure for the 2
your data.
devices.
Warranty
Some problems may occur if the iPod / SD
card / USB device is already connected to
Without prejudice of legal warranty, Parrot
Problems while using the music function
the Parrot ASTEROID Mini before you
contractually warrants during 12 months
Reboot your iPod / iPhone before
turn on the ignition. Connect the iPod / SD
from the date of initial purchase by the
connecting it to the Parrot ASTEROID
card / USB device once the ign
ition is
consumer (except wearing parts
Mini. To reboot your iPhone / iPod:
turned on.
guaranteed for 6 months) that the product
is free from defects in materials and
iPod: press Menu and the centre
For more information
workmanship, upon presentation of proof
button simultaneously until the iPod
of purchase (date, place of purchase,
reboots.
Refer to the Parrot ASTEROID Mini
serial number of the product) to the
support page on our website
iPhone: Press the On/Off button and
retailer or Parrot. During the contractual
www.parrot.com
.
the Home button simultaneously
warranty
period, the defective product
until the iPhone reboots. Do not
must be returned in its original packaging
touch the screen when the message
to the after-sales service of the retailer.
28 English
29English
After inspection of the product, Parrot will
be invoiced to him.
design or user guide without any
proceed, at its option, to the replacement
restrictions and without any obligation to
Modifications
or the issue a credit note to the exclusion
notify users. As part of our ongoing
The explanations and specifications in this
of any other remedy.
concern to upgrade and improve our
guide are given for information purposes
Warranty does not cover: upgrading of the
products, the product that you have
only and may be modified without pr
ior
software items of the Parrot products with
purchased may differ slightly from the
notice. They are deemed to be correct at
Bluetooth cell phones for compatibility
model described in this guide. If so, a later
time of going to press. The utmost care
purpose, data recovery, deterioration of
version of this guide might be available in
has been taken when writing this guide,as
the external aspect due to normal wear of
electronic format at Parrot’
s website at
part of the aim to provide you with
the product, any damage caused by
www.parrot.com
.
accurate information. However, Parrot
accident, misus
e, misapplication, or non-
Correct disposal of This Product (Waste
shall not be held responsible for any
Parrot products.
Electrical & Electronic Equipment)
consequences arising from any errors or
Parrot is not responsible for storage, loss
omissions in the guide, nor for any damage
or damaged to data during transit or repair.
This marking
shown on the product or
or accidental loss of data resulting directly
Any product wrongfully declared to be
its literature, indicates that it should not
or indirectly from the use of the
defective will be returned to sender and
be disposed with other household wastes
informati
on herein. Parrot reserves the
inspection, process and carriage costs will
at the end of its working life. To prevent
right to amend or improve the product
possible harm to the environment or

30 English
30 English
human health from uncontrolled waste
trademarks of PARROT SA.
All other trademarks mentioned in this
disposal, please separate this from other
guide are protected and are the property
The Bluetooth word mark and logos are
types of wastes and recycle it responsibly
of their respective owners.
registered trademarks owned by
to promote the sustainable reuse of
Bluetooth SIG, Inc. and any use of such
Gracenote, the Gracenote logo and
material resources.
marks by Parrot S.A. is under license.
logotype and "Powered by Gracenote" are
Household users should contact either
Bluetooth QDID : B01
3841, B013839, [-]
either registered trademarks or
the retailer where they purchased this
trademarks of Gracenote Inc. in the United
"Made for iPod / iPhone" means that an
product, or their local government office,
States and/or other countries.
electronic accessory has been designed to
for details of where and how they can take
connect specifically to iPod or iPhone
Identification N. 394 149 496 R.C.S. PARIS
this item for environmentally safe
respectively, and has been certified by the
Parrot S.A.
recycling. Business users should
contact
developer to meet Apple performance
their supplier and the terms and
standards. Apple is not responsible for the
conditions of the purchase contract. This
operation of this device or its compliance
Copyright © 2012 Parrot. All Rights
product should not be mixed with other
with safety and regulatory standards.
Reserved.
commercial wastes for disposal.
iPod and iPhone are trademarks of Apple
Registered Trademarks
Inc, registered in the US
and others
Th
is device complies with Industry Canada
Parrot and the Parrot logo are registered
countries
licence-exempt RSS standard(s).
Operation is subject to the following two
conditions: (1) this device may not cause
interference, and (2) this device must
accept any interference, including
interference that may cause undesired
operation of the device.
This equipment complies with FCC’s and
IC’s RF radiation exposure limits set forth
for an uncontrolled environment.. The
antenna(s) used for this tr
ansmitter must
be installed and operated to provide a
separation distance of at least 20 cm from
all persons and must not be collocated or
operating in conjunction with.
31English

English 31
human health from uncontrolled waste
trademarks of PARROT SA.
All other trademarks mentioned in this
disposal, please separate this from other
guide are protected and are the property
The Bluetooth word mark and logos are
types of wastes and recycle it responsibly
of their respective owners.
registered trademarks owned by
to promote the sustainable reuse of
Bluetooth SIG, Inc. and any use of such
Gracenote, the Gracenote logo and
material resources.
marks by Parrot S.A. is under license.
logotype and "Powered by Gracenote" are
Household users should contact either
Bluetooth Q
DID : B013841, B013839, [-]
either registered trademarks or
the retailer where they purchased this
trademarks of Gracenote Inc. in the United
"Made for iPod / iPhone" means that an
product, or their local government office,
States and/or other countries.
electronic accessory has been designed to
for details of where and how they can take
connect specifically to iPod or iPhone
Identification N. 394 149 496 R.C.S. PARIS
this item for environmentally safe
respectively, and has been certified by the
Parrot S.A.
recycling. Business user
s should contact
developer to meet Apple performance
their supplier and the terms and
standards. Apple is not responsible for the
conditions of the purchase contract. This
operation of this device or its compliance
Copyright © 2012 Parrot. All Rights
product should not be mixed with other
with safety and regulatory standards.
Re
served.
commercial wastes for disposal.
iPod and iPhone are trademarks of Apple
Registered Trademarks
Inc, registered
in the US and others
This device complies with Industry Canada
Parrot and the Parrot logo are registered
countries
30 English
31English
licence-exempt RSS standard(s).
Operation is subject to the following two
conditions: (1) this device may not cause
interference, and (2) this device must
accept any interference, including
interference that may cause undesired
operation of the device.
This equipment complies with FCC’s and
IC’s RF radiation exposure limits set forth
for an uncontrolled environment.. The
antenna(s) used for this transmitter
must
be installed and operated to provide a
separation distance of at least 20 cm from
all persons and must not be collocated or
operating in conjunction with.

Før du starter
Hurtig
OM DENNE VEJLEDNING
Parrot foretrækker at lægge brugervejle-
brugervejledning
dningerne ud online i stedet for at få dem
trykt for at begrænse papirforbruget og
af hensyn til miljøet. Denne korte guide
Indholdsfortegnelse
giver derfor kun de vigtigste anvisninger
Før du starter
s.33
om, hvordan enheden bruges på en nem
Montering
s.34
måde. Du kan finde yderligere oplysnin-
Første gang enheden bruges
s.39
ger under rubrikken Support og downloa-
Telefon
s.41
ding på vores hjemmeside www.parrot.
Musik
s.42
com: komplet vejledning, FAQ, undervis-
Internet
s.45
ningsprogrammer…
Fejlfinding
s.48
Generelle oplysninger
s.50
Bemærk: iPod og iPhone (i funktionen iPod)
kaldes «iPod» i denne vejledning.
Dansk 33

ADVARSLER
OPDATERING
Montering
Funktioner, som kræver længereopmærk-
Du kan hente den sidste nye opdatering
somhed, må kun bruges, når bilen er
til produktet på vores websted www.par-
Bemærk: Vi anbefaler, at du kontakter en
standset. Din egen og de andre trafi-
rot.com under rubrikken Support. Ved
kvalificeret person til at udføre denne mon-
kanters sikkerhed har fortrinsret rem for
hjælp af disse opdateringer kan du drage
tering, f.eks. en autoriseret installatør fra
telefonopkald, musik eller applikationer
fordel af nye funktioner og forbedre dit
vores netværk.
med hjælp under kørsel. Vær ansvar-
produkts kompatibilitet.
lig: Kør forsigtigt og vær opmærksom på
FØR DU STARTER
dine omgivelser. Parrot frasiger sig thvert
Monteringen af Parrot ASTEROID Mini
ansvar, hvis du vælger at tilsidesætte
består i at sætte den ind mellem autora-
denne advarsel.
dioen og bilen.
Brug Parrot ASTEROID Mini med en for-
nuftig lydstyrke, således at du altid kan
Bemærk: Kablerne, der leveres sammen
høre støj udefra under kørslen. Parrot
med Parrot ASTEROID Mini, er udstyret
ASTEROID Mini indeholder magneter af
med ISO-stik. Hvis din autoradio ikke er
typen NdFeB, som kan beskadige gens-
udstyret med ISO-stik, skal du have en ISO
tande, der er følsomme over for magne-
kabel-adapter for at kunne foretage mon-
tiske felter (pacemaker, kreditkort, me-
teringen. Se rubrikken Kompatibilitet med
kaniske ure m.m.).
34 Dansk

biler på supportsiden til Parrot ASTEROID
monteringen. Det er strengt nødvendigt
(Tilslutning 1B på skemaet s.7).
Mini for at kontrollere, om du har brug for
at bruge det ISO-kabel, der følger med
en kabel-adapter.
Parrot ASTEROID Mini.
TILSLUTNING AF
Angivelserne «Tilslutning #» i afsnittede
STRØMFORSYNINGSKABLET
Begynd med at tage den oprindelige au-
nedenfor svarer til de viste tilslutninger
toradio ud af bilen. Denne handling kan
på skemaerne s.6 / 7.
1. Kobl bilens batteri fra før montering
kræve udtræksnøgler.
af strømforsyningskablet.
TILSLUTNING AF LYDKABLET
2. Sæt Parrot ASTEROID Minis
Se det elektriske diagram til din autora-
Forbind bilens lydledninger med Parrot
ISO-hanstik ind i autoradioen
dio. Inden det Parrot ASTEROID Minis
ASTEROID Minis stik (Tilslutning 1A
(tilslutning 3).
forskellige dele fastgøres i kabinen, skal
og 2). Hvis bilen har et lydsystem med
de forskellige kabler tilsluttes ved styre-
3. Forbind bilens ledningsnet med
forstærker, skal du bruge Jack Line Out
boksen. Før komponenterne sættes helt
Parrot ASTEROID Minis ISO-huns-
Front og Line Out Rear på styreboksen
fast, skal kablernes længde kontrolleres
tik (tilslutning 4).
for at undgå problemer med mætning af
og man skal tjekke, at placeringen er valgt
lyden (smæld i højttalerne, permanent
således, at kablernes længde er tils-
Kablets røde ledning skal svare til +12V
baggrundsstøj m.m.). Forbind disse Line
trækkelig til at forbinde de forskellige
konstant, den orange ledning til 12V ef-
Out med dit lydsystem ved at bruge et
dele med hinanden. Kontroller, at Parrot
tertænding og den sorte ledning til stel.
eller to jack-kabler til at forbinde Par-
ASTEROID Minis kabler ikke har fået
Kontroller, at den orange ledning ikke er
rot ASTEROID Mini med dit lydsystem
knæk eller er blevet klemt fast under
Dansk 35

forbundet med 12V konstant, da du ri-
mute indgangen og forbind den dernæst
Advarsel: Rør ikke ved styreboksen, når den
sikerer at aflade bilens batteri. Bemærk:
med den frie, gule ledning på ISO-kablet
er i drift. Dens overflade kan blive meget
For at kontrollere monteringen, skal du
(tilslutning 5).
varm.
først forbinde skærmen uden at placere
den på instrumentbrættet. Se afsnittet
MONTERING AF STYREBOKSEN
KONTROL AF MONTERINGEN
Kontroller monteringen for yderligere
Undgå at montere boksen i nærheden af
Tænd og sluk derefter for tændingen
oplysninger. På visse biler er der ikke +12V
bilens varmesystem eller klimaanlæg eller
i bilen, når Parrot ASTEROID Mini er
efter tænding på bilens stik. Det er såle-
et sted, der udsættes for sollys. Sørg for
monteret: Meddelelsen ”Farvel” skal
des nødvendigt at tilslutte den orange
at boksen ikke kan bevæge sig efter mon-
vises på skærmen.
strømledning til sikringsboksen eller til en
tering. Sørg for at bevare en fri afstand
Hvis det ikke er tilfældet, skal der byttes
anden strømkilde efter tænding.
omkring produktets køler for at gøre det
om på den røde og orange ledning. Den
lettere at udlede varme.
røde ledning til strømforsyningska-
TILSLUTNING AF MUTE KABLET
Når boksen er monteret, må den ikke
blet skal være tilsluttet 12V konstant,
Mute funktionen giver mulighed for at
forceres, når autoradioen sættes ind.
den orange ledning til 12V eftertæn-
aryde autoradioens lyd for at lytte til
Hvis der ikke er plads nok bagved autora-
ding og den sorte ledning til stel. Dette
Parrot ASTEROID Mini (musik, samtaler
dioen, kan du f.eks. overveje at afmontere
gøres ganske enkelt ved at bytte om på
osv.). Valget af Mute indgangen (Mute
handskerummet.
de to kabelsko på Parrot kabelføringen
in 1, mute in 2 eller mute in 3) aænger af
(tilslutning 6).
din autoradios konfiguration. Identificer
36 Dansk

MONTERING AF MIKROFONEN
MONTERING AF USB KABLERNE
tilslutte din 3G-nøgle direkte til Parrot
ASTEROID Mini. Brug det medfølgende
Vi anbefaler at glide kablet ind i renden
Forbind USB kablerne med Parrot
USB-kabel for at montere den på instru-
bagved dørens gummiliste. Hvis kablet
ASTEROID Mini. Vi anbefaler, at
mentbrættet (eller ethvert andet ryddet
passerer ovenover pedalerne, skal du
du tilslutter alle kablerne ved Parrot
område).
sørge for at det sidder godt fast.
ASTEROID Mini, også selv om du ikke
nødvendigvis skal bruge dem. Før de
MONTERING AF GPS-DONGLEN
Advarsel: Før ikke mikrofonens kabel ind i
relevante stik ud af kortlommen eller
varmesystemet, ventilationssystemet, kli-
handskerummet. For at gøre det, kan
Sæt GPS-donglen fast på
maanlægget eller foran bilens airbag i siden.
det være nødvendigt at bore et hul inde i
en plan overflade i en zone
instrumentbrættet. Undgå så vidt muligt
uden forhindringer inde i
Sørg for, at mikrofonen monteres så tæt
at anvende USB-forlængerledninger på
kabinen.Atermiske forru-
på brugerens hoved som muligt. Den
flere meter.
der og ruder med indlagt
ideelle afstand er 60 cm. Det er bedst at
Det USB kabel, som du forbinder med
antenne kan forringe GPS-modtagelsen
montere mikrofonen i nærheden af ba-
iPod forlængerledningen, skal tilsluttes
og svække nøjagtigheden af oplysninger
kspejlet. Ret mikrofonen mod brugerens
ved den hvide USB port, der er forudset
fra navigationsprogrammer. Donglens
mund.
hertil. Benævnelsen «iPod» er angivet
GPS-antenne sidder ved siden, hvor der
ovenover denne port.
står «Parrot ASTEROID GPS» og hvor
Med henblik på at garantere en opti-
der sidder et stjerneformet logo. Dette
mal modtagelseskvalitet må du ikke
logo skal altid være vendt op mod himlen.
Dansk 37

Vis din bil har en atermisk forrude, skal
• Rengør overfladen før holderen
• Rengør overfladen før holderen
GPS-donglen sættes fast på forruden i
limes på.
limes på.
en ikke atermisk zone. Siden ed det st-
• Når holderen er sat op, skal du vente
• Når holderen er sat op, skal du vente
jerneformede logo skal limes på forruden
i 2 timer, før du håndterer den.
i 2 timer, før du håndterer den.
(skema B s.8).
MONTERING AF SKÆRMEN
Husk at tage skærmen ud, når du forlader
Bemærk: Forrudens ikke atermiske zone
bilen for at undgå indbrud og at udsætte
aænger af din bilmodel. Den befinder sig
Advarsel: Undgå en montering, der kan
den for sol i længere tid.
som regel ved bakspejlet.
vanskeliggøre brugen af vigtige betjeninger
eller reducere chauørens udsyn. Installer
MONTERING
Hvis din bil ikke har en atermisk forrude,
ikke skærmen et sted, hvor den kan blive
AF FJERNBETJENINGEN
sæt GPS-donglen fast på instrument-
slynget frem ved udløsningen af en airbag
brættet. Siden med det stjerneformede
eller i nærheden af bilens åbninger til udluf-
Lim holderen til ernbetjeningen fast på
logo skal være synig (skema A s.9).
tning eller klimaanlæg.
instrumentbrættet ved hjælp af den me-
dfølgende klæbestrimmel.
For at sikre en god fastgørelse af holde-
Lim plasticholderen fast på instrument-
For at sikre en god fastgørelse af holde-
ren:
brættet (skema C s.10).
ren:
For at sikre en god fastgørelse af holde-
• Brug den dobbeltsidede klæbestri-
• Rengør overfladen før holderen
ren:
mmel.
limes på.
38 Dansk

• Når holderen er sat op, skal du vente
For at forbinde ernbetjeningen med
Første gang
i 2 timer, før du håndterer den.
styreboksen (skema D s.11):
enheden bruges
1. Tag den runde del i plastic bag på
Fjernbetjeningen kan strømforsynes på
ernbetjeningen af ved at dreje den
2 måder: med et batteri eller ved at for-
SÅDAN NAVIGERER
med uret.
binde den med styrboksen.
DU GENNEM MENUERNE
2. Sæt kablet i det sted, der er forudset
Tryk på tasten for at få adgang til hove-
For at strømforsyne ernbetjeningen
til batteriet, og drej det mod uret.
dmenuen.
med batteri (skema D s.11):
3. Forbind kablets anden ende med
1. Tag den runde del i plastic bag på
styreboksen ved siden af USB stik-
Du navigerer gennem menuerne ved at
ernbetjeningen af ved at dreje den
kene (skema s.6).
dreje på drejeknappen og godkender ved
med uret.
at trykke på drejeknappen.
For at vende tilbage til forrige menu, tryk
2. Sæt et batteri af typen 3V CR2032
på tasten .
ind det sted, der er forudset til det.
Sørg for at batteriet vender rigtigt.
Tryk på tasten for at få adgang til den
3. Sæt den runde del i plastic i igen ved
kontekstuelle menu, der svarer til den
at dreje den mod uret.
igangværende applikation. Den konteks
Dansk 39

tuelle menu gør det muligt bl.a. at få ad-
Hvis det er første gang, du bruger en te-
• Hvis Parrot ASTEROID Mini
gang til yderligere funktioner, ændre visse
lefon sammen med Parrot ASTEROID
og din telefon viser to koder,
indstillinger eller hurtigt gennemse ind-
Mini, skal du først parre de to enheder.
skal du kontrollere, om disse
holdet i telefonlisten eller lydkilden.
Når din telefon er blevet parret med
koder er identiske og dernæst
Under afspilning af en musikfil, tryk på
Parrot ASTEROID Mini, vil forbindelsen
bekræfte eller aræfte.
tasten for at vende tilbage til menuen.
mellem de to enheder blive oprettet au-
> Skærmen på Parrot
Omvendt skal du trykke på tasten SRC
tomatisk, hver gang der tændes for dem
ASTEROID Mini viser «Parring
for at vende tilbage til afspilleren, når du
i nærheden af hinanden med aktiveret
udført».
navigerer gennem menuerne.
Bluetooth® funktion.
Bemærk: På visse telefoner skal du autori-
1. Søg på telefonen efter perifere
TILSLUTNING AF
sere forbindelsen med Parrot ASTEROID
Bluetooth enheder og vælg dernæst
EN TELEFON VIA BLUETOOTH
Mini for at tillade automatisk forbindelse.
”Parrot ASTEROID Mini”.
Læs telefonens brugervejledning for yderli-
Bemærk: Se siden med kompatibilitet
2. Fremgangsmåden for parring
gere oplysninger.
på vores hjemmeside for at undersøge,
aænger derefter af din telefon-
om din telefon er kompatibel med Parrot
model:
SYNKRONISERING AF
ASTEROID Mini og se den tilsvarende
TELEFONENS TELEFONLISTE
fremgangsmåde for parring:
• Hvis telefonen beder dig om at
www.parrot.com/uk/compatibility.
indtaste en Bluetooth PIN-
Med de fleste Bluetooth-telefoner
kode, indtast «0000».
synkroniseres telefonlisten automa-
40 Dansk
