Dimplex SRX 160C: инструкция
Раздел: Бытовая, кухонная техника, электроника и оборудование
Тип: Кулер для воды
Инструкция к Кулеру для воды Dimplex SRX 160C
- 1 -
Dimplex SmartRad fan convector
Models: SRX 070C, SRX 120C & SRX 160C
PLEASE STORE THESE INSTRUCTIONS IN A SAFE PLACE.
Important safety information
The air inlet and outlet guards must not be covered or
blocked.
Before performing maintenance work on the device, discon-
nect it from the power supply.
THE DEVICE MUST BE GROUNDED.
The heater must not be installed directly below a permanently
installed socket. Combustible materials or liquids and other
highly flammable furnishings must be kept away from the
heater.
For the necessary minimum distances (in mm), see fig. 4.
Install the device such that it is not possible for someone in
the bath or shower to touch the control elements.
The heater must not be operated in very dusty areas.
This device is not suitable for children or persons who cannot
use the device safely as a result of physical or mental disability
or reduced perception without the assistance or supervision
of another person. Children should be supervised to ensure
they do not play with the device.
A warning symbol is attached to the heater. This in-
dicates that the device must not be covered.
The operating instructions belong to the device and
must be stored in a safe place. If the owner changes, the op-
erating instructions should be passed on to the new owner.
IMPORTANT – If the mains cable of the device is damaged, it
must be replaced by the manufacturer, a customer service
representative or a similarly qualified person.
Always ensure proper operation.
Device description
The SmartRad model is a fan convector for heating or cooling
living spaces. The fan convector is intended for connection to a
central heating system. The fan convector is designed for use in
heat pump systems, but when being used for heating only it can
also be operated in conjunction with other heating systems, e.g.
with oil or gas boilers. The device draws in air from the under-
side. This is heated or cooled, depending on the mode of opera-
tion, in the heat exchanger and discharged at the top.
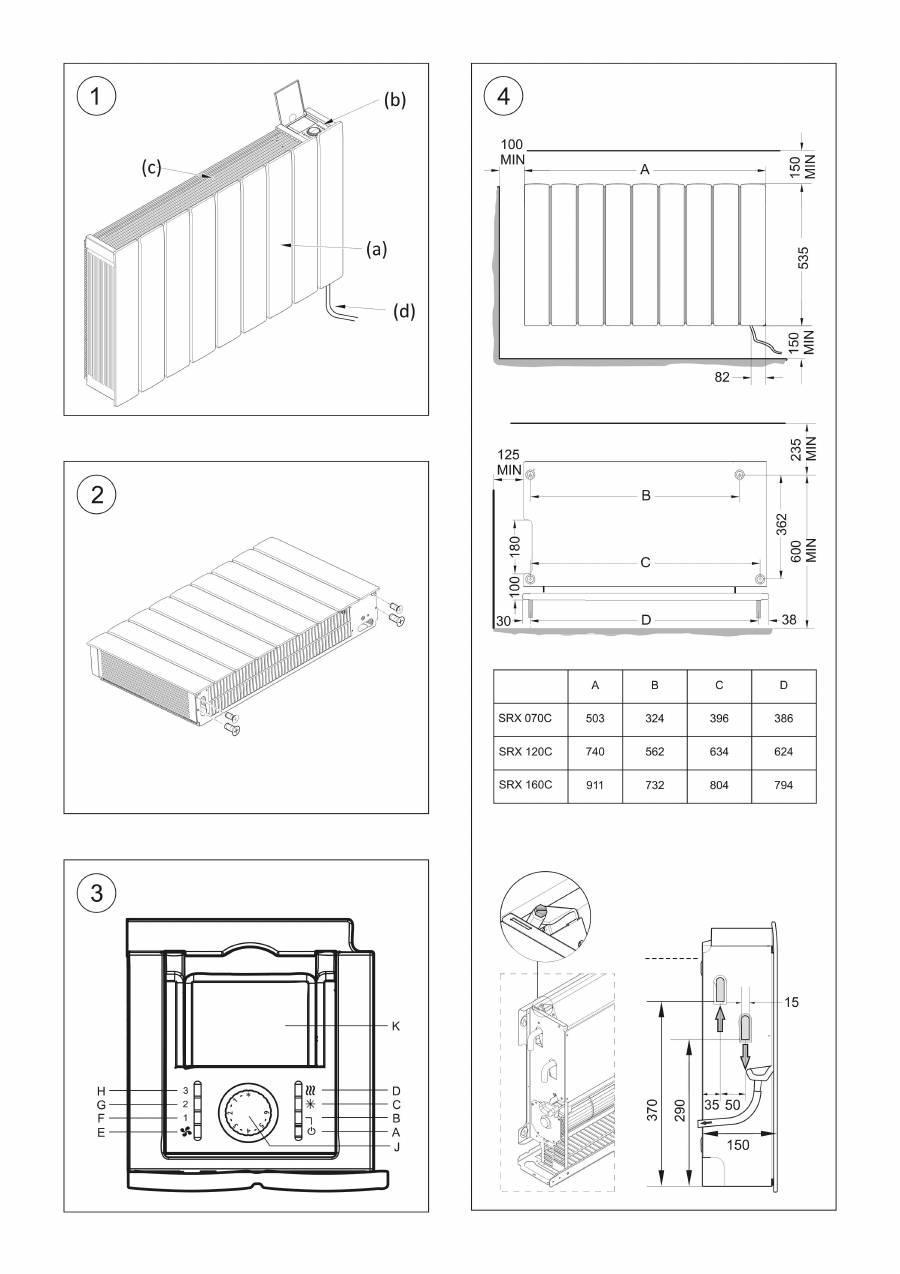
Fig. 1:
(a) Casing cover
(b) Control panel
(c) Air outlet guard
(d) 1 m connection cable
Fan convectors may only be used in central heating systems
with a closed control circuit.
The heating system must be operated as a dual-pipe system.
The devices must be of a sufficient rating such that they can
compensate for heat losses in the room.
The cooling function will only work in suitable systems, e.g.
in combination with a reversible heat pump with both heat-
ing and cooling modes.
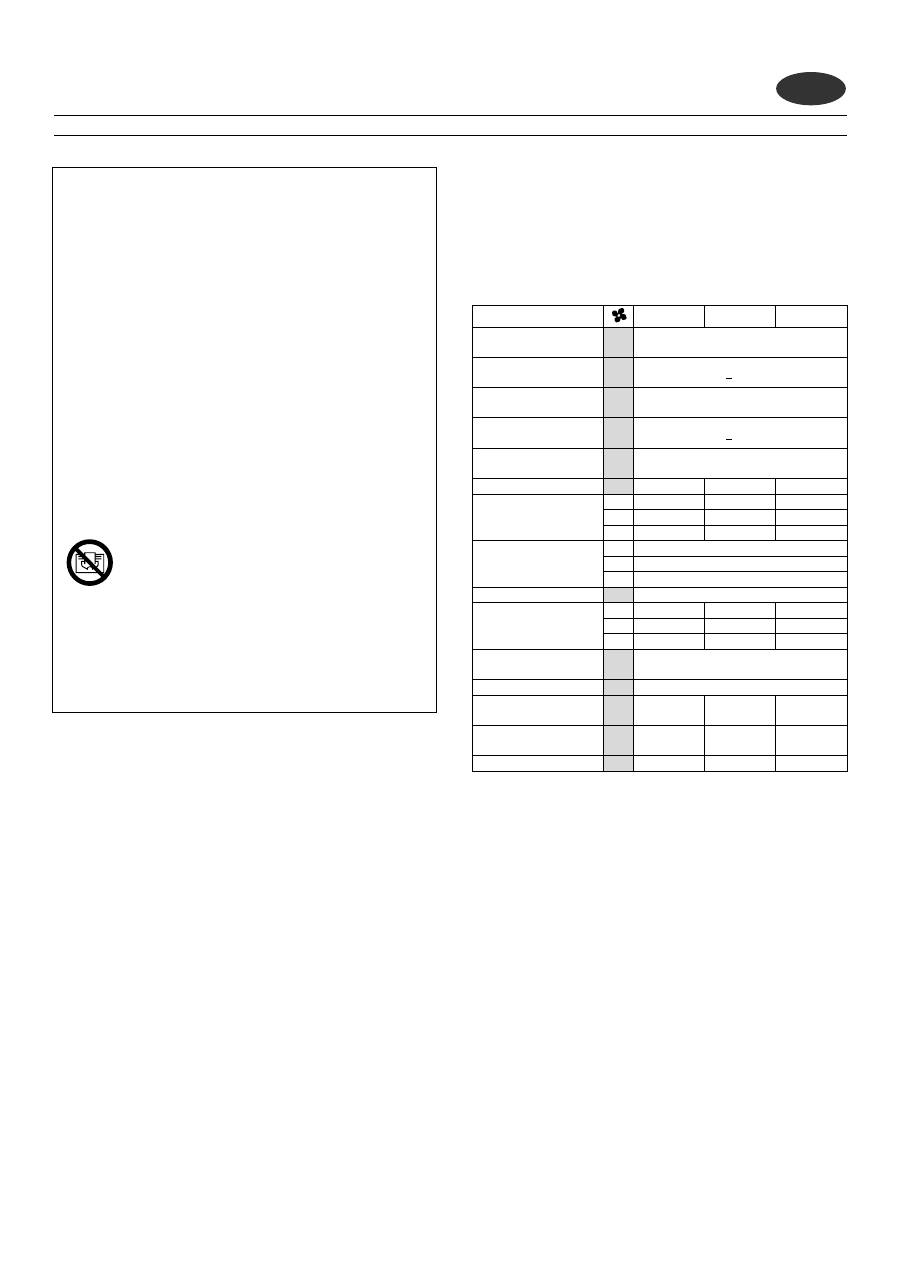
Technical data
SRX 070C
SRX 120C
SRX 160C
Setting range
of thermostat (°C)
5 - 30
Flow temperature (°C) in
heating mode
> 25
Maximum permissible
flow temperature (°C)
85
Flow temperature (°C) in
cooling mode
< 20
Permissible operating
overpressure (MPa)
1
Pressure drop (kPa)
11,3
13,1
13,7
Air volume flow (m³/h)
3
228
410
540
2
125
225
300
1
60
120
160
Sound pressure level at 1
m (dB(A))
3
47
2
38
1
27
Nominal voltage
~ 230-240 V, 50 Hz
Power consumption
of fan (W)
3
26
56
50
2
19
36
33
1
16
24
23
Standby energy
consumption (W)
< 1
Protection category
IP 20
Volume of
heat exchanger (ml)
230
385
555
Dimensions
W x H x D (mm)
503 x 530 x
145
740 x 530 x
145
911 x 530 x
145
Weight (kg)
12
15
17,5
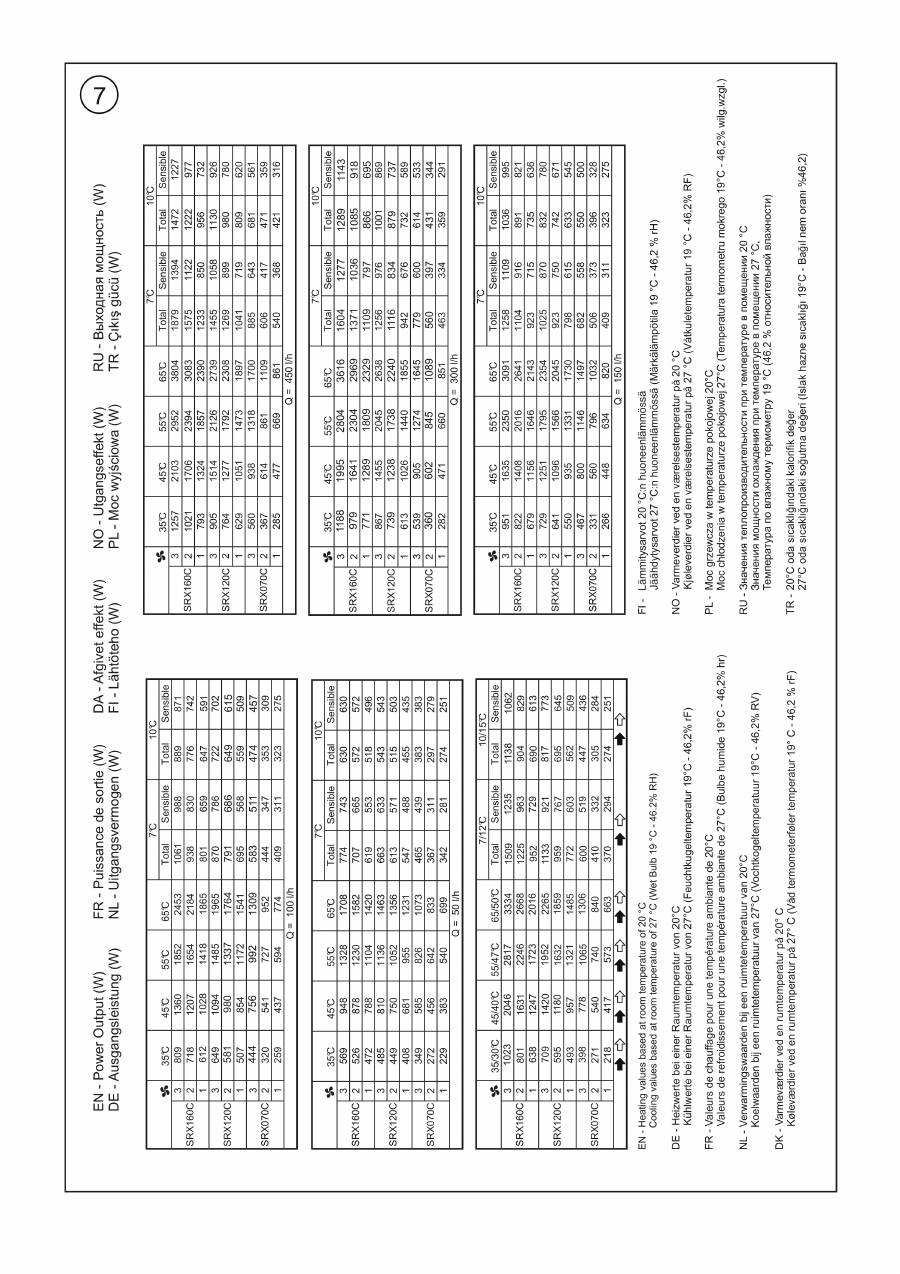
For more technical data, refer to table in fig. 7.
Installation preparation
Remove packaging material.
Unscrew the four fixing screws from underside of device (see
fig. 2) to remove casing cover. Store casing cover such that it
cannot be damaged during installation.
Fixing to the wall
For drywalls, use suitable fixing material (not supplied)!
Draw and drill four holes on a sturdy wall as shown in fig. 4. All
dimensions are in mm.
Insert dowels and pre-fit the two top screws (don't completely
screw in yet).
Hang device on the two top screws.
Insert and tighten the two bottom screws, then tighten the two
top screws.
EN
Оглавление
- Dimplex SmartRad fan convector
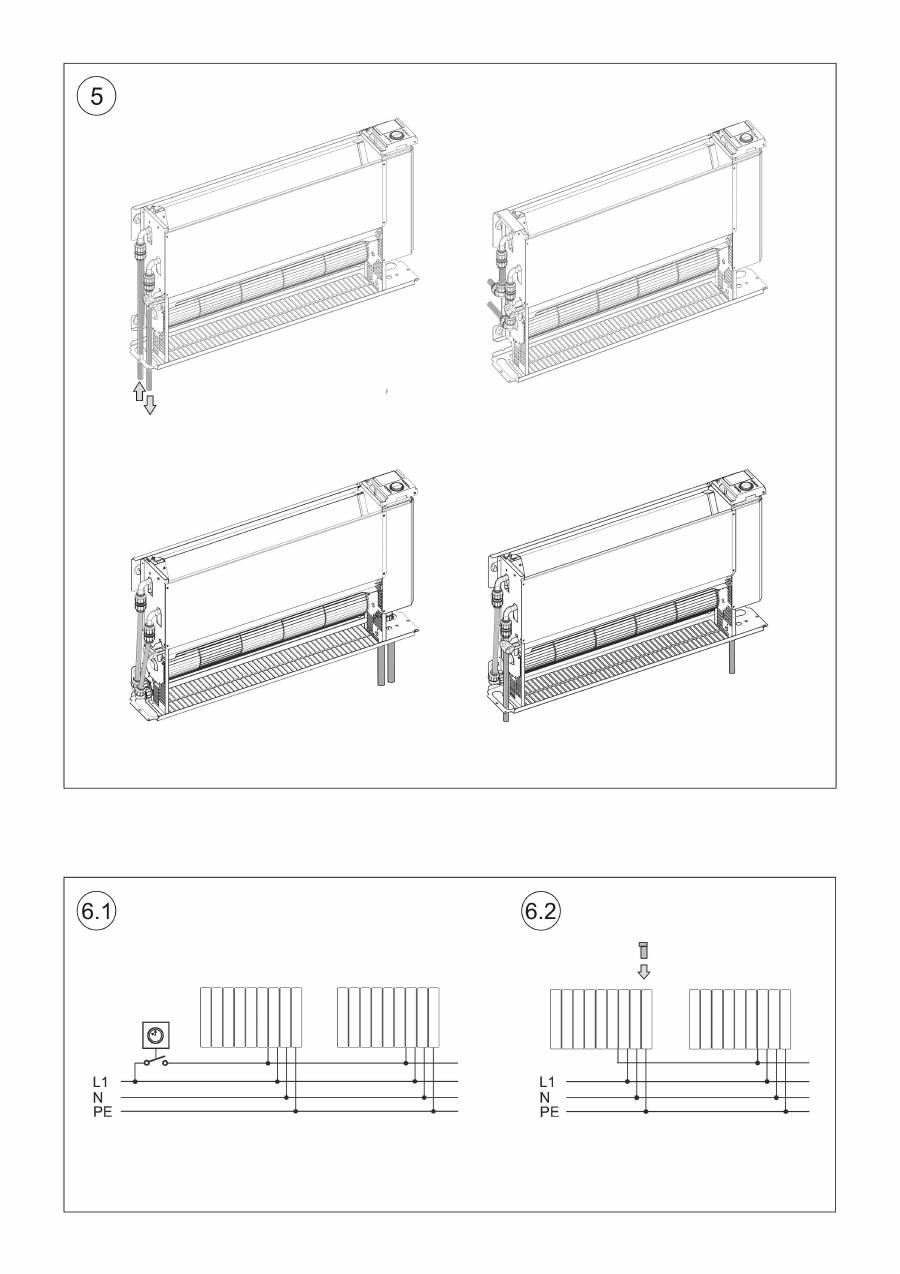
- Hydraulic connection
- Cooling mode
- Dimplex SmartRad Gebläsekonvektor
- Hydraulischer Anschluss
- Betrieb Kühlung
- Ventilo-convecteur Dimplex SmartRad
- Raccordement hydraulique
- Mode Refroidissement
- Dimplex SmartRad ventilatorconvector
- Hydraulische aansluiting
- Koelmodus
- Dimplex SmartRad ventilatorkonvektor
- Rørtilslutning
- Drift afkøling
- Dimplex SmartRad -puhallinkonvektori
- Hydrauliliitäntä
- Käyttö, jäähdytys
- Dimplex SmartRad viftekonvektor
- Hydraulisk tilkopling
- Drift avkjøling
- Konwektor wentylatorowy Dimplex SmartRad
- Podłączenie hydrauliczne
- Eksploatacja w trybie chłodzenia
- Фанкойл Dimplex SmartRad
- Гидравлическое подключение
- Режим обогрева
- Dimplex SmartRad Vantilatörlü Konvektör
- Hidrolik Bağlantı
- Soğutma İşletimi
- Garantie, Kundendienst – gültig für Deutschland
