Yamaha KMA-500: CONNECTIONS
CONNECTIONS: Yamaha KMA-500
Table of contents
- IMPORTANT SAFETY INSTRUCTIONS
- FCC INFORMATION (for US customers)
- Caution: Read this before operating your unit
- CONTENTS
- HANDLING PRECAUTIONS BEFORE CONNECTING
- NAMES OF PARTS AND THEIR FUNCTIONS Front panel
- NAMES OF PARTS AND THEIR FUNCTIONS Rear panel
- NAMES OF PARTS AND THEIR FUNCTIONS
- SYSTEM CONNECTIONS
- CONNECTIONS
- CONNECTIONS
- CONNECTIONS
- CONFIGURATION DIAGRAM
- REMOTE CONTROL
- REMOTE CONTROL
- GENERAL OPERATION
- SETUP MODE ■ Menus in Setup mode
- ■ Setup mode table
- TROUBLESHOOTING Problems Possible causes Solutions MAINTENANCE
- AFTER-SALES SERVICING KARAOKE ETIQUETTE
- SPECIFICATIONS
CONNECTIONS
1. External remote control satellite
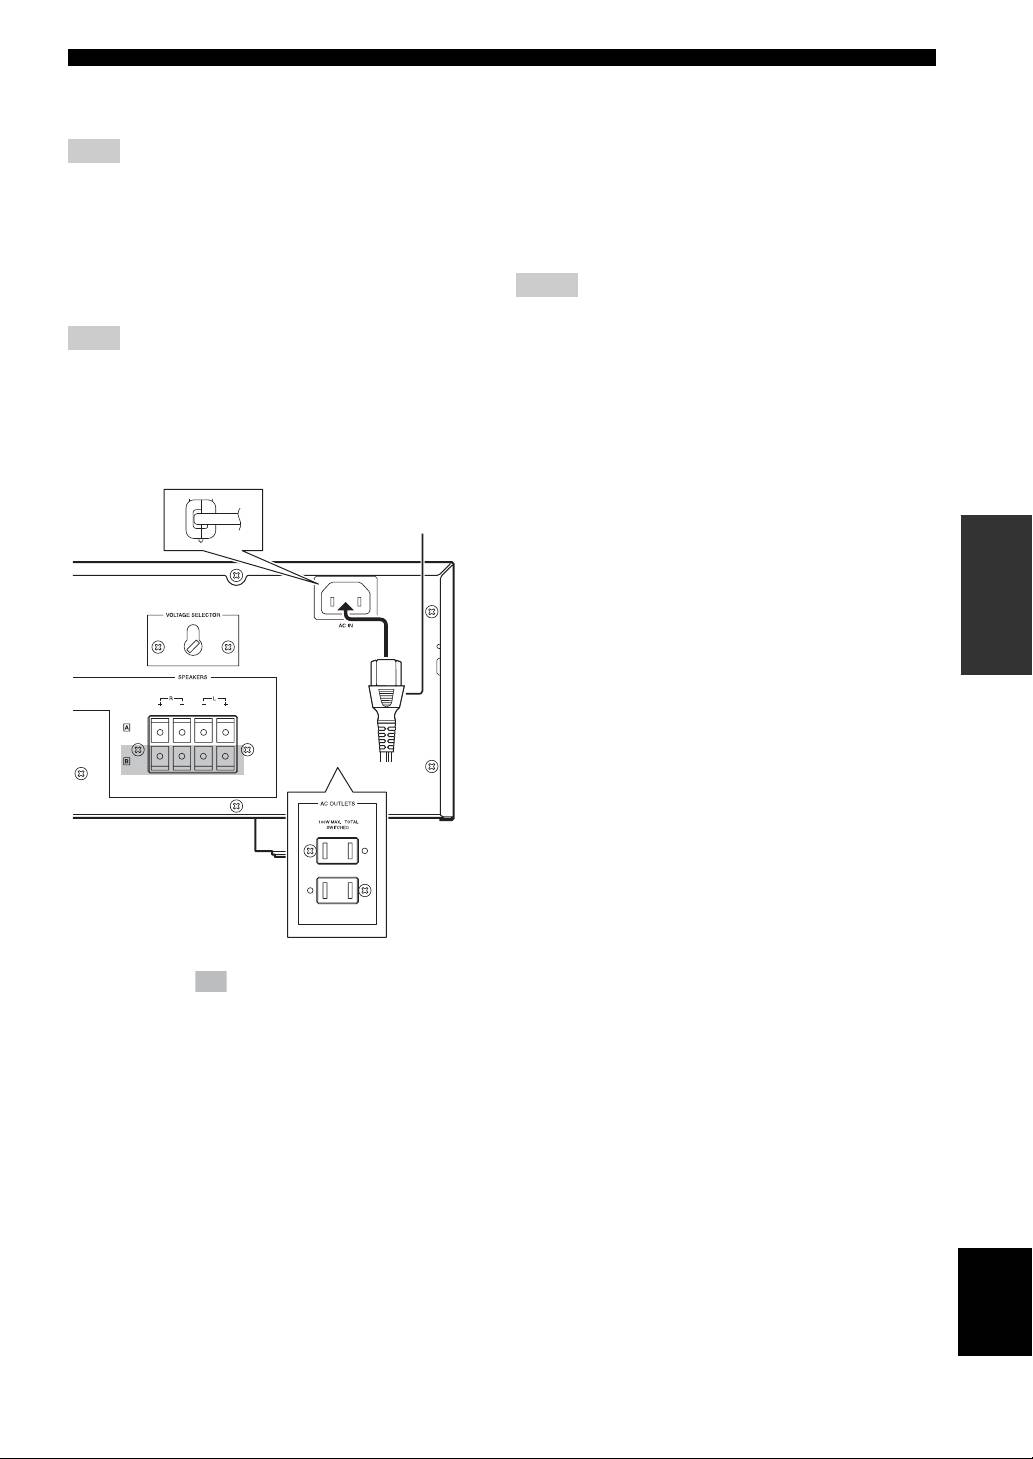
AC OUTLETS
Connect to +5V_OUT, REMOTE and GND.
(SWITCHED. U.S.A. model only)
Use these outlets to connect the power cables from your
Note
other components to this unit. The power to AC
By connecting the remote control satellite to this input, this unit
OUTLETS is controlled by POWER on the front panel of
can receive the signal of the remote control.
this unit. The outlets supply power to any connected
component whenever the power of this unit is turned on.
2. REMOTE (Direct)
Total power consumption is 100 W.
Connect to REMOTE (Direct) and GND.
Connect to the infrared diode output (open collector) of
Notes
RMC.
• Be careful that the total power consumption does not exceed the
Note
wattage marked on the rear panel. Do not connect appliances
other than system components to the power outlets of this unit.
By connecting the REMOTE (Direct) to this input, this unit can
• Do not connect a TV set to this unit; even if it indicates a power
receive the signal of the REMOTE.
consumption value below the permissible value when the TV
power is turned on.
■ Power related switch and connections
on the rear panel
Supplied power cable
(Except U.S.A. model)
OPERATION
(Asia model)
The shaded part ( ) is provided for KMA-700 only.
The parts in the sub illustrations are provided for U.S.A.
model only.
AC IN
(Except U.S.A. model)
Connect the supplied power cable to AC IN.
Power cable
Plug the power cable into the AC wall outlet after all other
connections are complete.
VOLTAGE SELECTOR
(Except U.S.A. model)
English
VOLTAGE SELECTOR on the rear panel of this unit
must be set for your local main voltage BEFORE plugging
the power cable into the AC wall outlet.
9 En
