Toshiba JournE Scan: Cleaning the image sensor Calibrating the Scanner
Cleaning the image sensor Calibrating the Scanner: Toshiba JournE Scan
Table of contents
- Important Safety Instructions
- n When handling the power cable/cord, follow these precautions:
- n Attaching the power cable/cord
- Introduction Checking the Components Parts of the Scanner and Their Functions Front view
- No. Name Function/description No. Name Function/description Rear view
- Using the Scanner Preparation
- Making a Scan
- Scanning to a Digital Photo Frame Connecting the Scanner to a Computer System requirements (for computer)
- Making connection More Information Suitable and unsuitable types of originals
- Orientation of the original and scanned image Cropping on scanned images
- Care and Maintenance Cleaning the Scanner Cleaning the roller
- Cleaning the image sensor Calibrating the Scanner
- Troubleshooting
- Specifications
- TOSHIBA Support Copyright Statement Disclaimer Trademarks
- Regulatory Statements Working Environment
- Additional Environments not Related to EMC Following Information is Only for EU-member States
14 User’s Manual
EN
UM_EEMEA_Scan_1108.book Page 14 Monday, December 15, 2008 2:26 PM
5. When the cleaning process is completed, the cleaning sheet will be ejected
from the feeding slot, and the Power indicator will go off. Remove the cleaning
sheet, and keep it away from dust.
Cleaning the image sensor
1. With the scanner power off and disconnected from
the power supply, insert the sensor cleaning swab
into one end of the output slot.
2. Gently slide the sensor cleaning swab to the other
end of the output slot. Repeat two or three times
consecutively.
3. Remove the sensor cleaning swab, store it in a safe place and keep it away
from dust.
Calibrating the Scanner
If the scanned image looks fuzzy or there are strange stripes on it, then the
scanner needs to be calibrated in order for the sensor to resume its original
precision. To calibrate the scanner:
1. Follow the instructions on how to clean the roller and image sensor, and then
follow the instructions in “Preparation” on page 8 to prepare the scanner for
scanning.
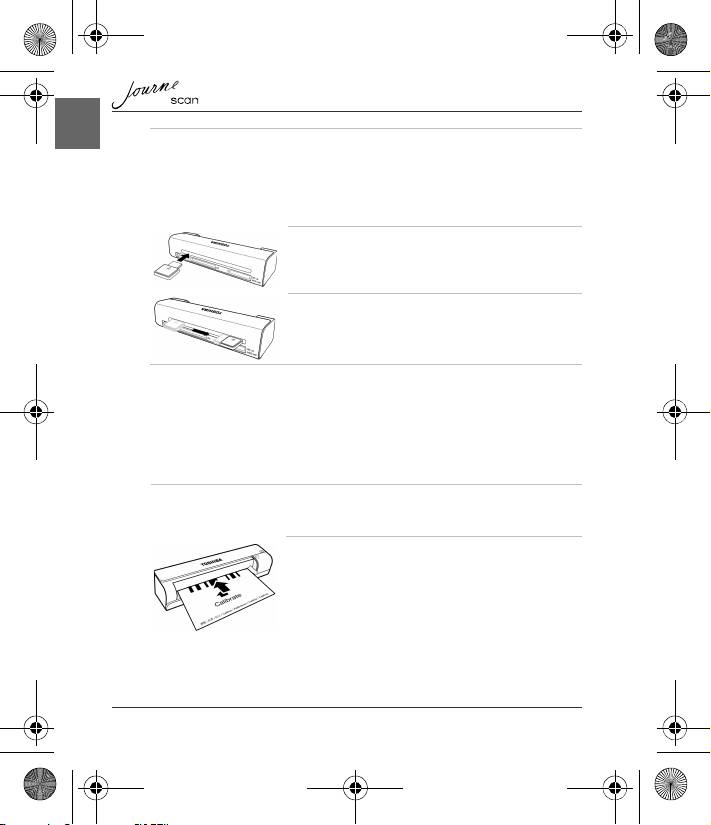
2. Insert the calibration card as shown. The scanner
will scan the pattern on the calibration card and
perform calibration to the sensor inside
automatically. Make sure that the calibration card is
inserted in the correct direction.
