Yamaha NS-P280: Connecting the power cables Using the Subwoofer Setting the subwoofer volume
Connecting the power cables Using the Subwoofer Setting the subwoofer volume: Yamaha NS-P280
Table of contents
- Precautions
- Precautions
- Contents Package contents Installing the speakers
- Installing the speakers Installing the front, center, and Wall-mounting the speakers surround speakers Installing the subwoofer
- Connecting the speakers Connection diagram
- Connecting the power cables Using the Subwoofer Setting the subwoofer volume
- Frequency characteristics Troubleshooting
- Specifications
■
Operating the speaker terminals
■
Connecting the speakers
Connect each speaker to the appropriate speaker
Negative (–)
Positive (+)
English
terminals on your amplifier by using the cables you
Note: Make sure the
prepared earlier. See the “Connection diagram” on
terminal is gripping
page 3 for reference.
the bare wire, not
2
Make sure you connect the speakers with the correct
the insulation.
11
polarity—positive (+) terminals to positive (+)
33
terminals, and negative (–) terminals to negative (–)
1
Press and hold the terminal tab.
terminals. If you get them crossed over, the sound will
be unnatural and lack bass.
2
Insert the bare wire.
In your AV receiver’s speaker size settings, specify
3
Release the tab so that it closes securely on the
small (or “S”) for all of the NS-P280 speakers.
bare wire, not the insulation.
If you’re connecting the subwoofer to a Yamaha DSP
4
Test the security of the connection by pulling
amplifier or AV receiver, connect to its SUBWOOFER
gently on the cable.
or LOW PASS output.
Notes
Connecting the power cables
•Make sure the bare wires do not touch each other, as
this could damage the speaker or the amplifier.
Once you’ve completed all of the speaker and
•If the connections are faulty, you will hear no sound
subwoofer connections, plug the subwoofer, amplifier,
from the speakers.
and your other AV components into suitable AC wall
outlets.
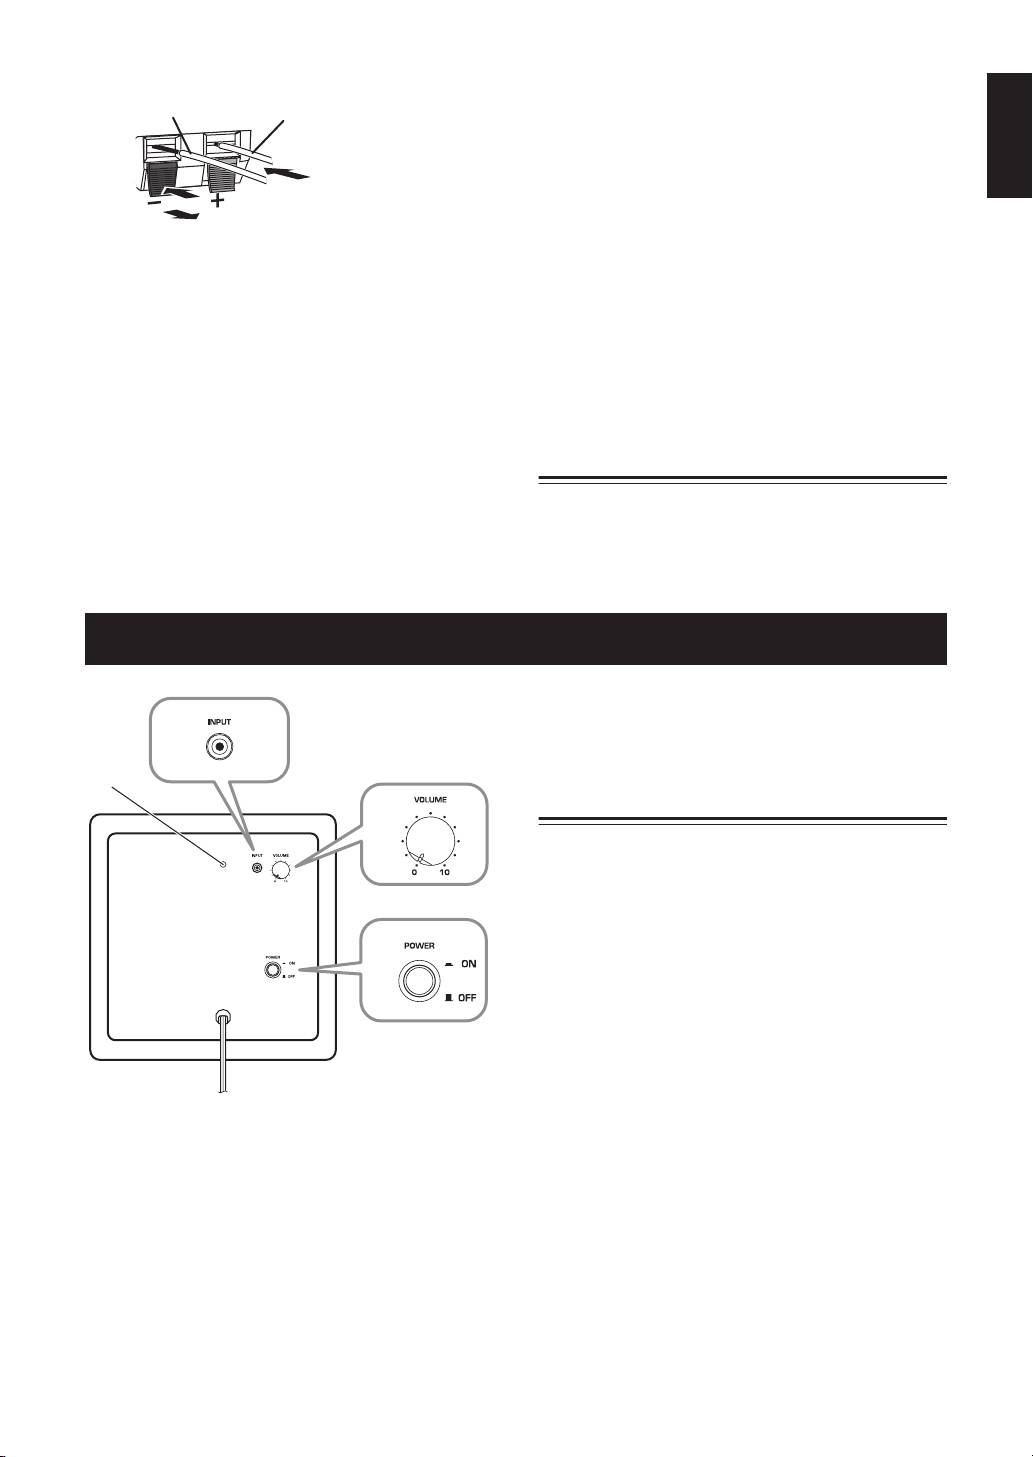
Using the Subwoofer
4
POWER switch
2
Set this to ON to turn on the subwoofer. Set it to
OFF to turn off the subwoofer.
1
Setting the subwoofer volume
3
The very first time you use the subwoofer, you need to
set the volume balance between the subwoofer and the
front speakers as follows.
1
Turn on your other AV components.
4
2
Set the subwoofer’s VOLUME control to
minimum (0).
3
Set the subwoofer’s POWER switch to ON.
The power indicator on the rear panel lights up.
4
Play a audio source that contains low-
Rear panel
frequency bass sounds. Set the amplifier’s
volume control to a suitable level.
1
Power indicator
5
Turn the subwoofer’s VOLUME control up
Lights up when the POWER switch is set to ON;
gradually until you achieve a good balance
goes off when the POWER switch is set to OFF.
between the subwoofer and the other
2
INPUT jack
speakers.
Input jack for connecting the line-level subwoofer
output on your amplifier.
Notes
3
VOLUME control
•Once the subwoofer volume has been set, you can
Adjusts the volume of the subwoofer. Turn it
leave the subwoofer’s VOLUME control set as it is
clockwise to increase the volume;
and use your amplifier’s volume control to adjust the
volume of the entire system.
counterclockwise to decrease the volume.
4
En


