Yamaha NS-9900: SUPPLIED ACCESSORIES ATTACHING THE STANDS
SUPPLIED ACCESSORIES ATTACHING THE STANDS: Yamaha NS-9900
Table of contents
- PRECAUTIONS PRECAUTIONS WHEN POSITIONING THE SPEAKERS
- SUPPLIED ACCESSORIES ATTACHING THE STANDS
- PLACING THE SPEAKERS
- CONNECTING TO YOUR AMPLIFIER
- REMOVING THE FRONT COVER SPECIFICATIONS
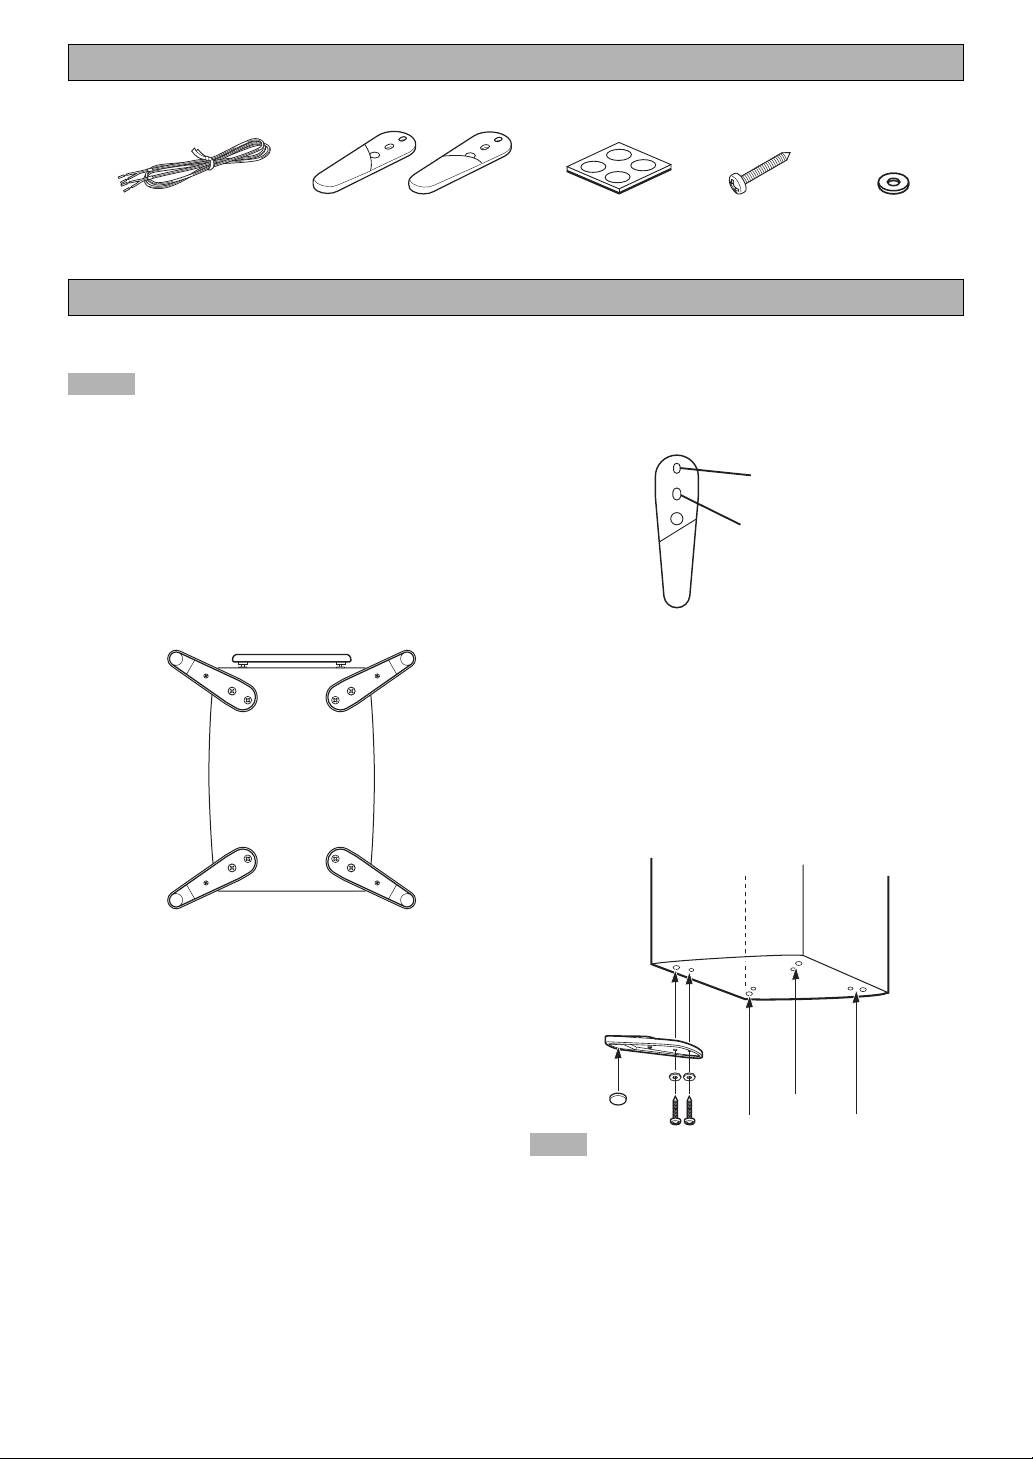
SUPPLIED ACCESSORIES
L
R
Speaker cable
Stand
Non-skid pad
Screw
Washer x 8
(4 m) x 1
(R x 2, L x 2)
(1 set: 4 pcs)
(M4, 25 mm)
x 8
ATTACHING THE STANDS
When placing the speakers, be sure to use the stands to
How to attach
increase stability.
1 Put a screw through a washer, then through the
Notes
inner hole of the stand, and screw it into the outside
• The provided stands are in two types. Two stands are
hole of the speaker. Do not tighten too much at this
for the right side and others are for the left side. Attach
point.
each stand to the proper position on the bottom of the
speaker by following the figure below.
Outer hole
• When attaching the stands to the speaker, have another
person support it.
R
• To attach the stands to the speaker, be sure to lay down
Inner hole
the speaker while the front is facing up. We recommend
using a blanket or cushion (thickness of 3 cm or more)
to raise the speaker from the floor.
Front
2 Put a screw through a washer, then through the
(L) (R)
outer hole of the stand, and screw it into the other
hole on the base of the speaker.
3 Tighten both of the screws firmly.
4 Attach a pad to the bottom of the end portion of the
stand.
5 Attach the other stands to the other corners of the
base of the speaker in the same way and confirm
that all 4 stands have been firmly attached.
(R) (L)
Back
View from the bottom of the speaker
Use the 8 specified holes located on the base of the speaker.
Note
Be careful not to apply force to the side of the speaker,
otherwise the speaker may fall causing damage to the
speaker or personal injury.
2 En
