Yamaha AX-497: Connecting the banana plug (With the exception of Asia, Korea, U.K. and
Connecting the banana plug (With the exception of Asia, Korea, U.K. and: Yamaha AX-497
Table of contents
- CAUTION: READ THIS BEFORE OPERATING YOUR UNIT.
- FEATURES SUPPLIED ACCESSORIES
- POWER CONTROLS AND FUNCTIONS Front panel
- VOLUME Opening and closing the front panel door
- Remote control
- Installing batteries in the remote control Using the remote control
- Rear panel
- Connecting speakers and other components
- Connecting the banana plug (With the exception of Asia, Korea, U.K. and
- Connecting the power supply cord
- Play the source. Playing a source
- Press STANDBY/ON on the front panel again
- Adjusting the tonal quality
- Recording a source to a tape or an MD
- AX-397
- General TROUBLESHOOTING Problem
- Remote control Problem
- SPECIFICATIONS
9
CONNECTIONS
PREP
ARA
TION
English
1
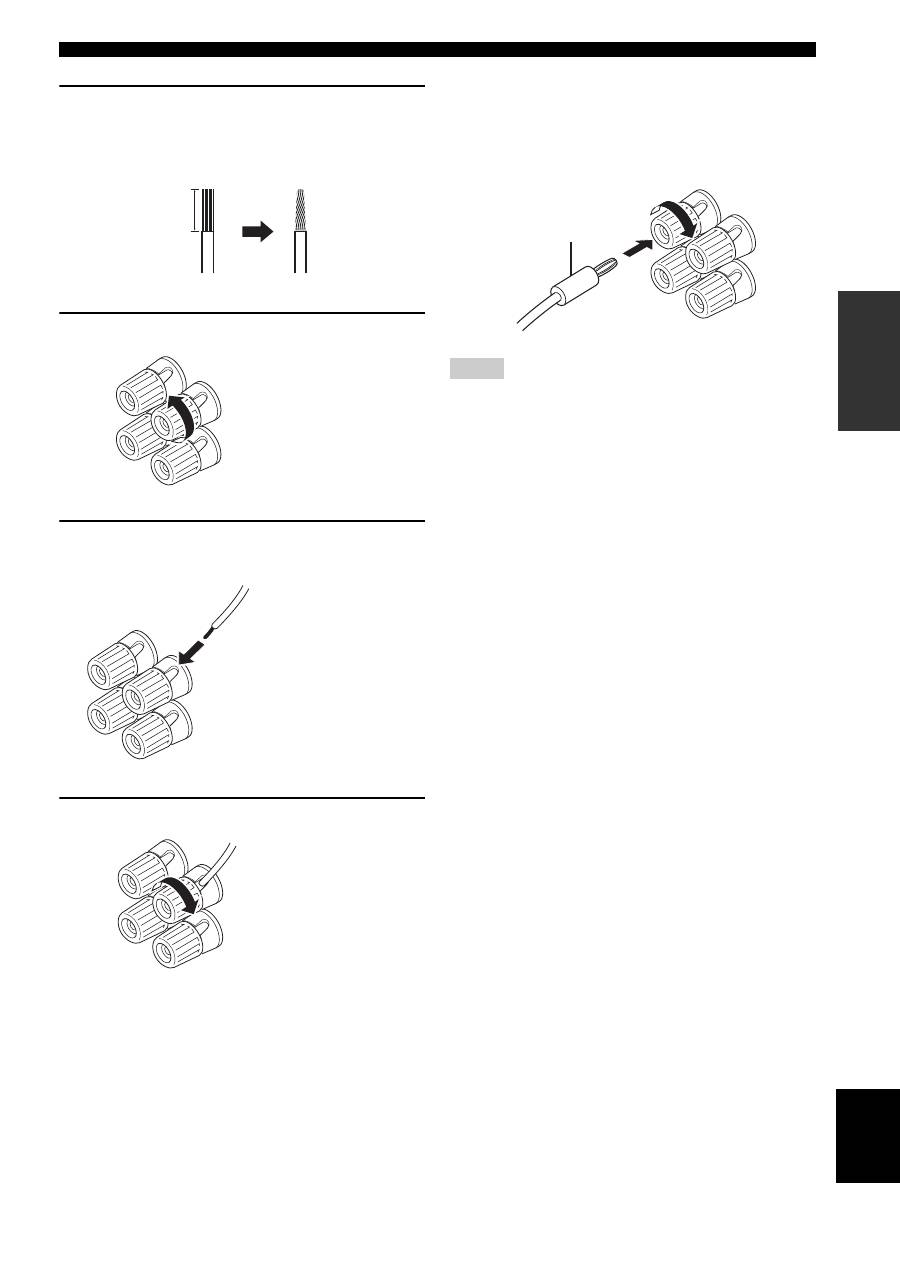
Remove approximately 10 mm (3/8 in) of
insulation from the end of each speaker
cable and twist the exposed wires of the
cable together to prevent short circuits.
2
Unscrew the knob.
3
Insert one bare wire into the hole in the side
of each terminal.
4
Tighten the knob to secure the wire.
■
Connecting the banana plug
(With the exception of Asia, Korea, U.K. and
Europe models)
First, tighten the knob and then insert the banana plug into
the end of the corresponding terminal.
• One or two speaker sets can be connected to this unit. If you use
only one speaker set, connect it to either the SPEAKERS A or B
terminals.
• Use speakers with the specified impedance shown on the rear
panel of this unit.
10 mm (3/8 in)
Red: positive (+)
Black: negative (–)
Red: positive (+)
Black: negative (–)
Red: positive (+)
Black: negative (–)
Notes
Banana plug
