Yamaha AX-397: Connecting the power supply cord
Connecting the power supply cord: Yamaha AX-397
Table of contents
- CAUTION: READ THIS BEFORE OPERATING YOUR UNIT.
- FEATURES SUPPLIED ACCESSORIES
- CONTROLS AND FUNCTIONS
- CONTROLS AND FUNCTIONS Remote control sensor Opening and closing the front panel door
- Remote control
- Installing batteries in the remote control Using the remote control
- Rear panel
- Connecting speakers and other components
- Remove approximately 10 mm (3/8 in) of insulation from the end of each speaker cable and twist the exposed wires of the cable together to prevent short circuits. Connecting the banana plug (With the exception of Asia, Korea, U.K. and Europe models)
- Connecting the power supply cord
- Play the source. Playing a source
- Adjust the tonal quality by using the BASS, TREBLE, BALANCE and LOUDNESS controls or the CD/DVD DIRECT AMP switch on the front panel.
- Adjusting the BALANCE control Using the CD/DVD DIRECT AMP switch Using the PURE DIRECT switch Adjusting the BASS and TREBLE controls Adjusting the LOUDNESS control Adjusting the tonal quality
- AX-497 Recording a source to a tape or an MD
- AX-397
- General TROUBLESHOOTING Problem
- Remote control Problem
- SPECIFICATIONS
10
CONNECTIONS
■
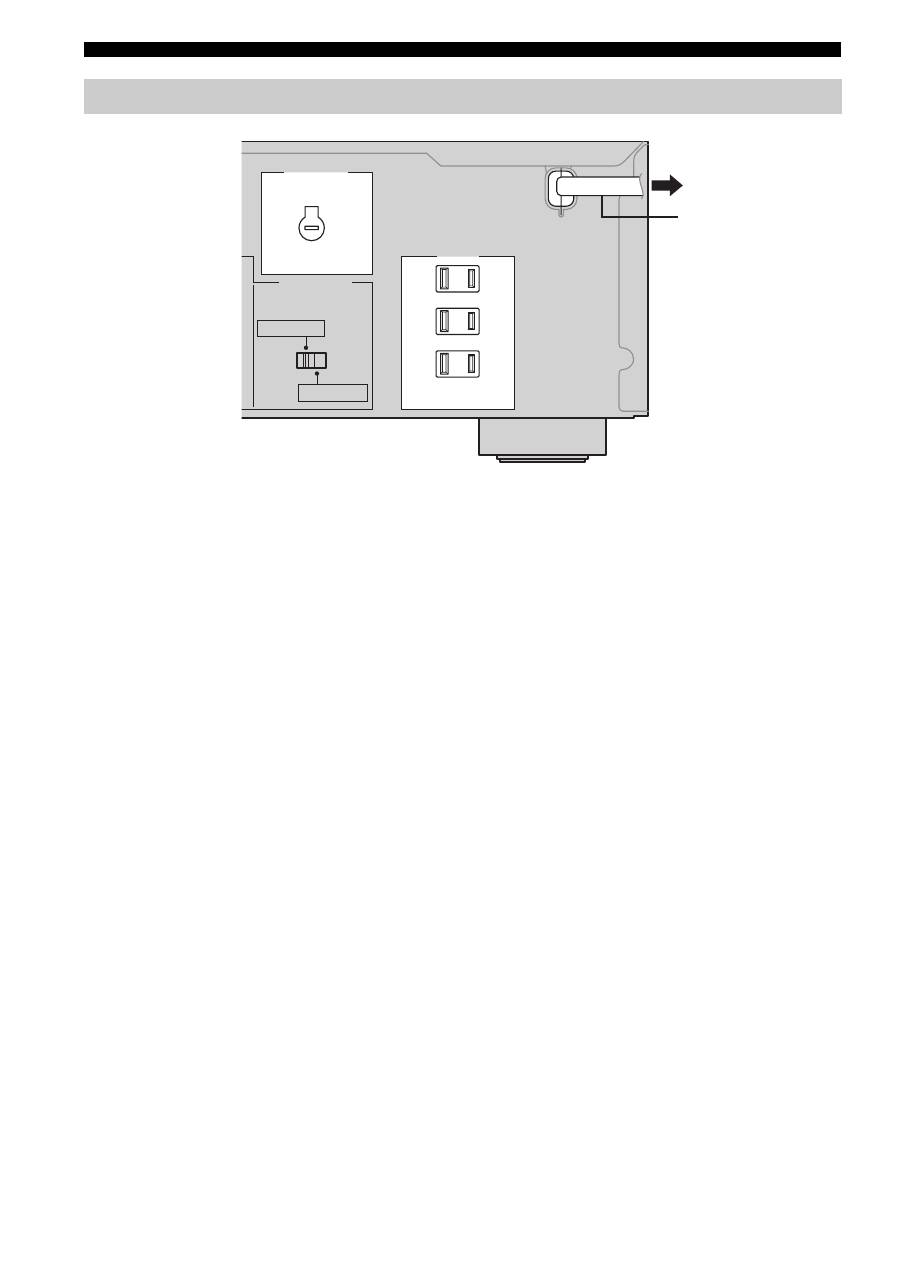
Connecting the AC power supply cord
Plug the power supply cord into the AC wall outlet after
all other connections are complete.
■
AC OUTLET(S) (SWITCHED)
U.K. and Australia models ..................................... 1 outlet
Korea model .............................................................. None
Other models ........................................................ 3 outlets
Use these outlets to connect the power cords from your
other components to this unit. The power to the AC
OUTLET(S) is controlled by POWER or STANDBY/ON
on the front panel of this unit (or on the remote control).
The outlet(s) supply power to any connected component
whenever the power of this unit is turned on. For
information on the maximum power (total power
consumption of components), see “SPECIFICATIONS”
on page 18.
■
VOLTAGE SELECTOR
(Asia and General models only)
The VOLTAGE SELECTOR on the rear panel of this unit
must be set for your local main voltage BEFORE plugging
the power supply cord into the AC wall outlet.
Voltages are as follows:
Asia model.......................... AC 220/230–240 V, 50/60 Hz
General model ...... AC 110/120/220/230–240 V, 50/60 Hz
Connecting the power supply cord
AC OUTLETS
VOLTAGE SELECTOR
IMPEDANCE SELECTOR
SWITCHED
100W MAX. TOTAL
A OR B: 4
Ω
MIN / SPEAKER
A+B: 8
Ω
MIN / SPEAKER
A OR B: 6
Ω
MIN / SPEAKER
A+B: 12
Ω
MIN / SPEAKER
(General model)
To an AC wall outlet
AC power supply cord
