Fieldmann FZV 2001-E: instruction
Class: Gardening equipment
Type:
Manual for Fieldmann FZV 2001-E

FZV 2001-E

2
English .................................................................................................................................................. 7 - 20
Čeština .............................................................................................................................................. 21 - 33
Slovenčina ...................................................................................................................................... 35 - 48
Magyarul .......................................................................................................................................... 49 - 62
Polski ................................................................................................................................................... 63 - 77
Русский ................................................................................................................................................ 79 - 94
FZV 2001-E
3
1
4
FZV 2001-E
2
3
4
5
5
6
6
FZV 2001-E
7
Table of contents
- FZV 2001-E
- Verticutter
- 1. GENERAL SAFETY INSTRUCTIONS
- 2. EXPLANATION FOR INSTRUCTION PLATES ON THE MACHINE
- 3. MACHINE DESCRIPTION AND DELIVERY CONTENT
- 4. SAFETY INSTRUCTIONS
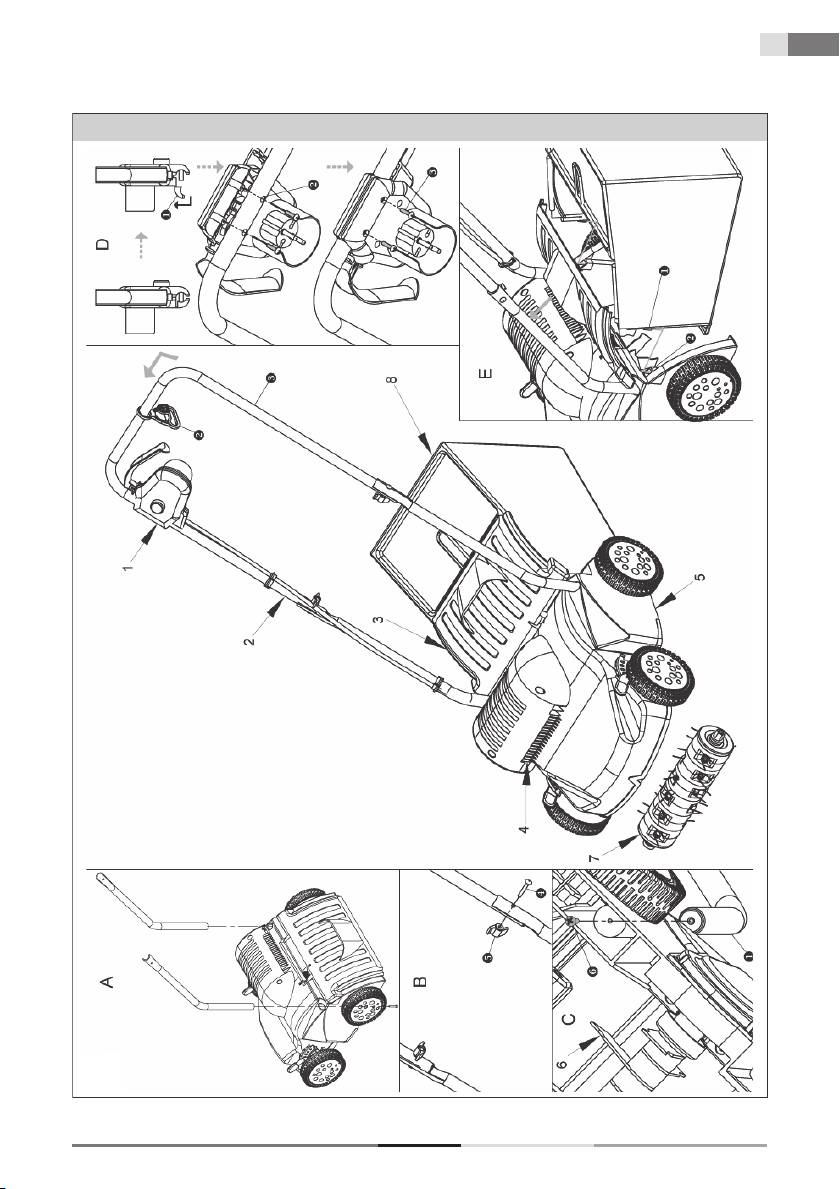
- 5. MACHINE ASSEMBLY (Fig. 1)
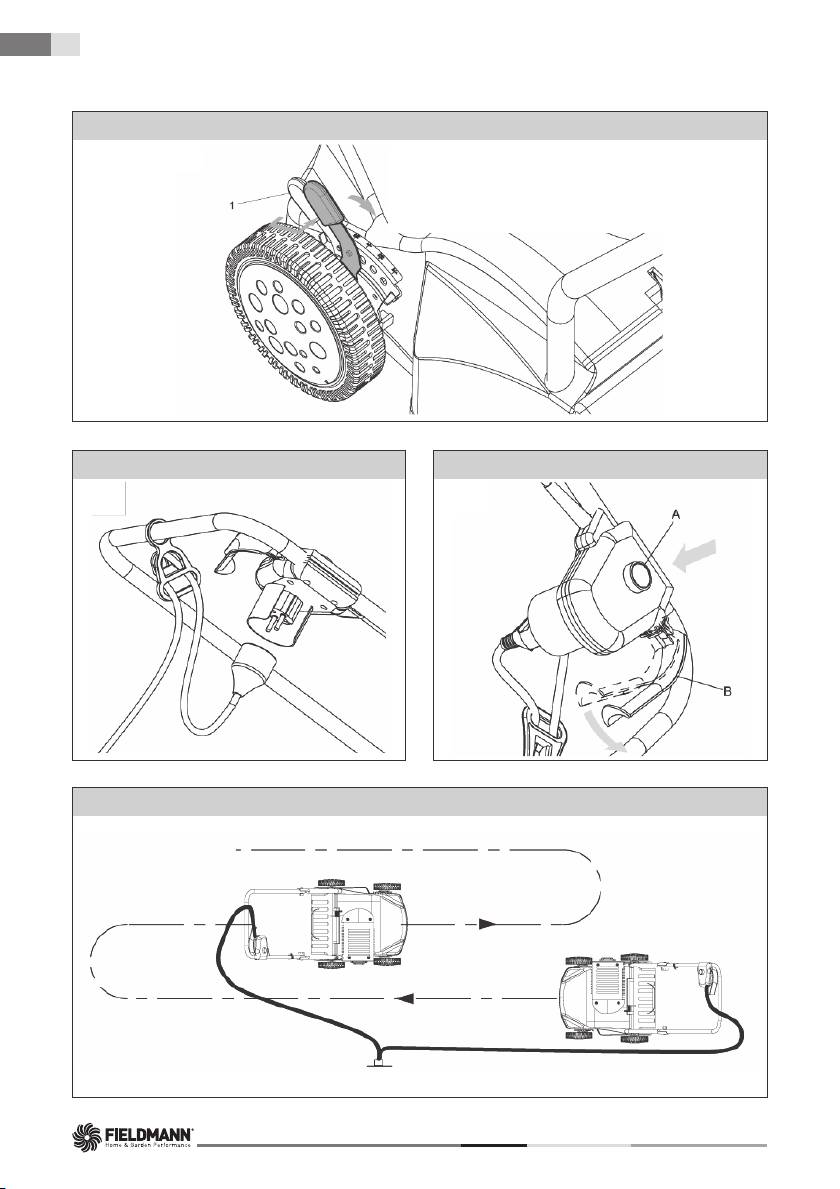
- 6. SWITCHING-ON
- 7. VERTICUTTING
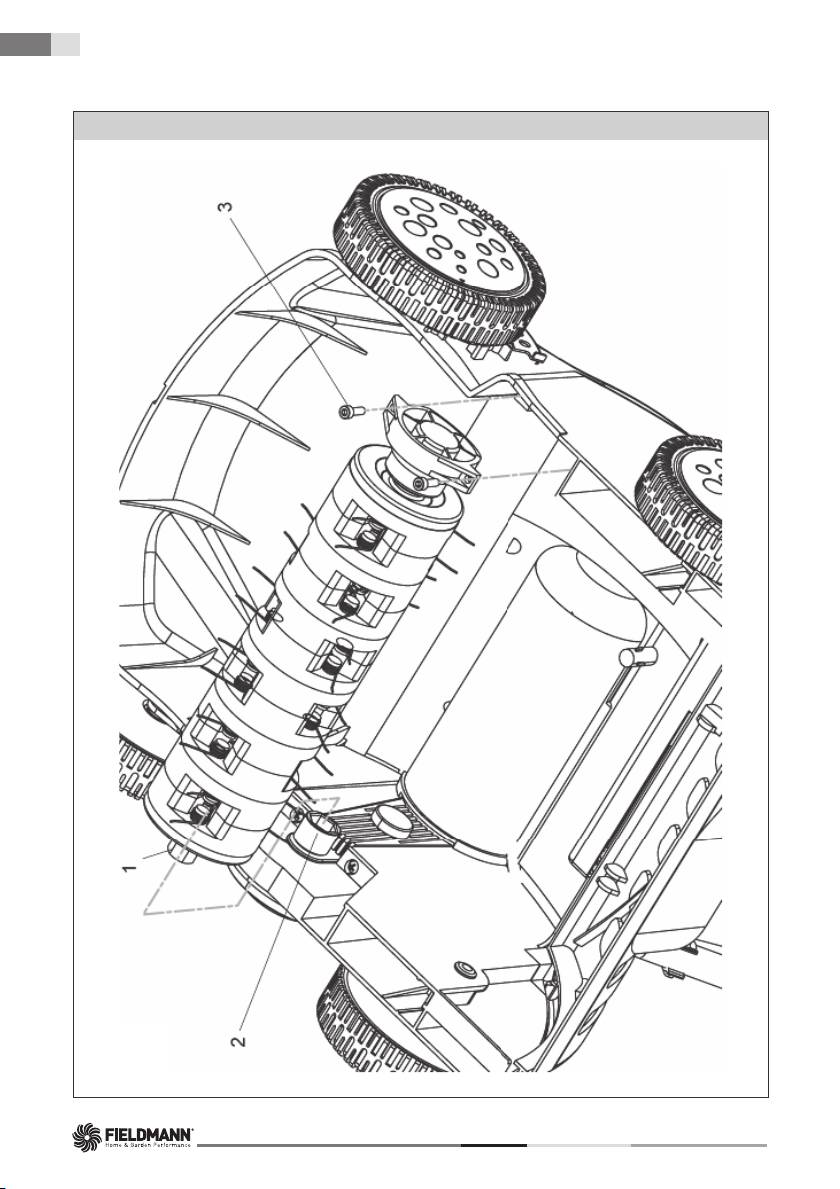
- 9. CLEANING
- 10. WHAT TO DO “IF…”
- 11. TECHNICAL DATA
- 13. DISPOSAL
- Vertikulátor
- 1. VŠEOBECNÉ BEZPEČNOSTNÍ PŘEDPISY
- 3. POPIS STROJE A OBSAH DODÁVKY
- 5. MONTÁŽ STROJE (Obr. 1)
- 6. SPOUŠTĚNÍ
- 7. VERTIKULACE
- 9. ČIŠTĚNÍ
- 10. CO DĚLAT “KDYŽ…”
- 11. TECHNICKÉ ÚDAJE
- 13. LIKVIDACE
- Vertikulátor
- 1. VŠEOBECNÉ BEZPEČNOSTNÉ PREDPISY
- 2. VYSVETLENIE ŠTÍTKOV S POKYNMI NA STROJI
- 3. POPIS STROJA A OBSAH DODÁVKY
- 5. MONTÁŽ STROJA (Obr. 1)
- 6. SPÚŠŤANIE
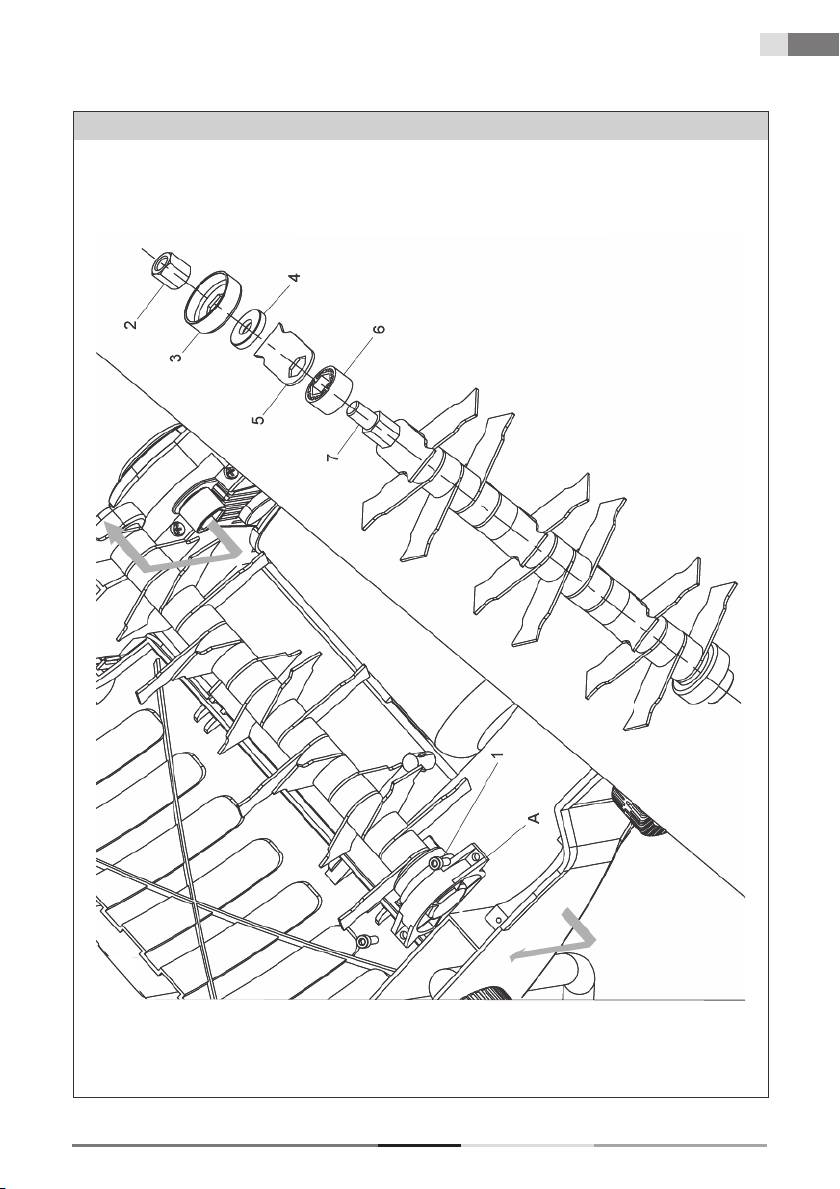
- 8. ČEPELE (Obr. 6)
- 9. ČISTENIE
- 10. CO DĚLAT “KDYŽ…”
- 11. TECHNICKÉ ÚDAJE
- 13. LIKVIDÁCIA
- Gyepszellőztető
- 1. ÁLTALÁNOS BIZTONSÁGI ELŐÍRÁSOK
- 2. AGÉP CÍMKÉI ÉS AZOK MAGYARÁZATA
- 3. A GÉP LEÍRÁSA ÉS A SZÁLLÍTMÁNY TARTALMA
- 4. BIZTONSÁGI UTASÍTÁSOK
- 5. A GÉP SZERELÉSE (1. ábra)
- 6. INDÍTÁS
- 7. GYEPSZELLŐZTETÉS
- 9. TISZTÍTÁS
- 10. MIT TEGYEK, “HA…”
- 11. MŰSZAKI ADATOK
- 13. LIKVIDÁLÁS
- Napowietrzacz
- 1. OGÓLNE PRZEPISY BEZPIECZEŃSTWA
- 2. OBJAŚNIENIE TREŚCI TABLICZKI ZNAMIONOWEJ I ZALECEŃ PODANYCH NA MASZYNIE
- 3. OPIS MASZYNY I ZAKRES DOSTAWY
- 5. MONTAŻ MASZYNY (Rys. 1)
- 6. URUCHOMIENIE
- 7. NAPOWIETRZANIE
- 8. OSTRZA (Rys. 6)
- 9. CZYSZCZENIE
- 10. CO ROBIĆ “KIEDY…”
- 11. DANE TECHNICZNE
- 13. LIKWIDACJA
- Вертикуттер
- 1. ОБЩИЕ ПРАВИЛА БЕЗОПАСНОСТИ
- 2. ОПИСАНИЕ ТАБЛИЧЕК С УКАЗАНИЯМИ НА УСТРОЙСТВЕ
- 3. ОПИСАНИЕ УСТРОЙСТВА И КОМПЛЕКТ ПОСТАВКИ
- 4. УКАЗАНИЯ ПО ТЕХНИКЕ БЕЗОПАСНОСТИ
- 5. СБОРКА УСТРОЙСТВА (Рис. 1)
- 6. ЗАПУСК
- 7. СКАРИФИКАЦИЯ
- 9. ЧИСТКА
- 10. ЧТО ДЕЛАТЬ, ЕСЛИ …
- 11. ТЕХНИЧЕСКИЕ ДАННЫЕ
- 13. УТИЛИЗАЦИЯ
