Canon VIXIA HF G30: COPY
COPY: Canon VIXIA HF G30
Table of contents
- COPY
Getting Started
Getting Started
This manual will get you started on using your camcorder's Wi-Fi functions. To learn more about Wi-Fi
functions and to see more detailed procedures, refer to the full-version Instruction Manual (PDF file on
the supplied CD-ROM). When this manual refers you to a section in the camcorder's Instruction
Manual, use the table of contents or the PDF's search feature to help find the section. To install the full-
version Instruction Manual, see Installing the Camcorder's Instruction Manual (PDF file) in the supplied
3
Quick Guide.
The following are basic terms used frequently in this text.
Access point
A wireless access point (WAP) is a device that allows wireless devices, like your camcorder, to connect
to a wired network (including to the Internet) using the Wi-Fi standard. In most cases, this will be your
wireless router.
SSID
Service Set Identifier. This is simply the public name of a Wi-Fi network.
Wi-Fi network
A group of computers and/or other devices in your home, office, or other location connected
wirelessly using Wi-Fi.
Introduction to Wi-Fi
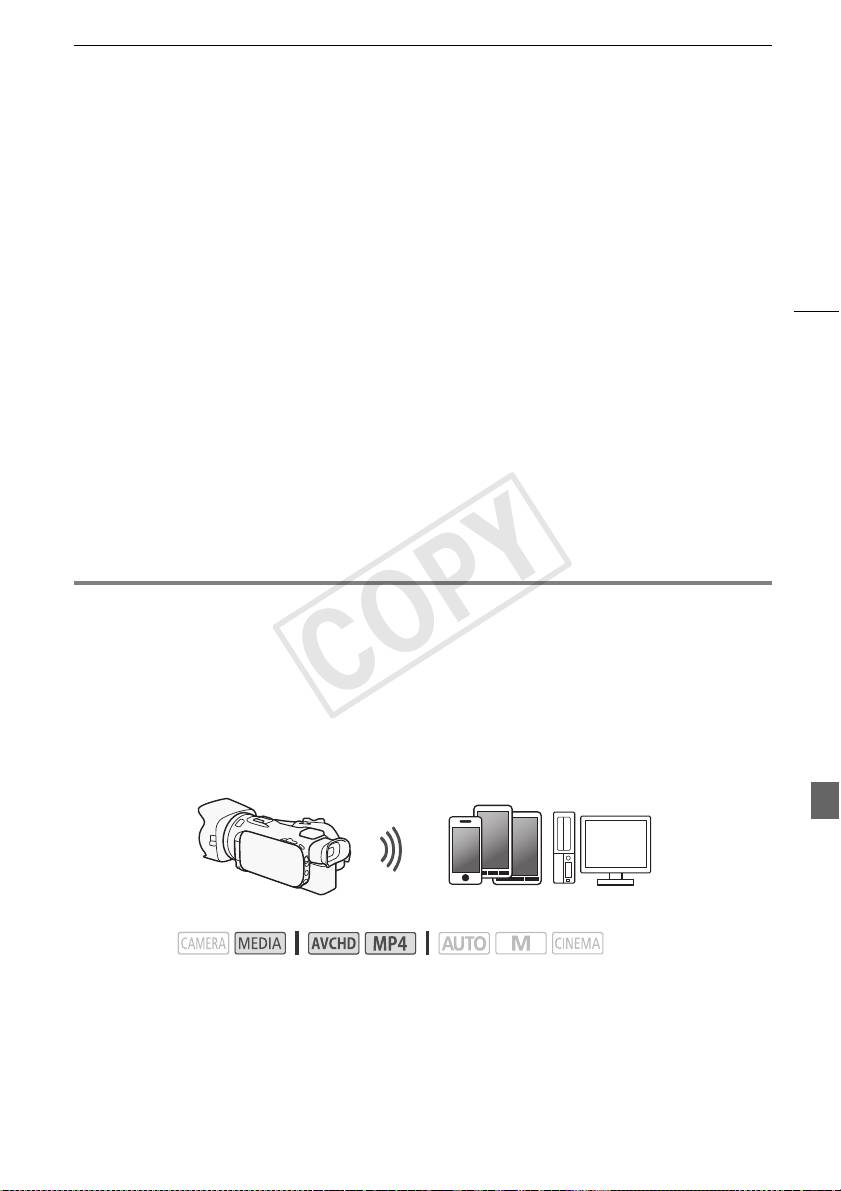
When you use the camcorder’s Wi-Fi function to connect to a smartphone or tablet, you can wirelessly
save, play back and upload your recordings. You can even use a smartphone or tablet (iOS or Android
1
device
) as a remote control and record using the device’s Web browser.
1
“iOS device” is used in this text to refer to Wi-Fi-enabled iPhones, iPods and iPads while "Android
device" refers to Wi-Fi-enabled Android smartphones and tablets.
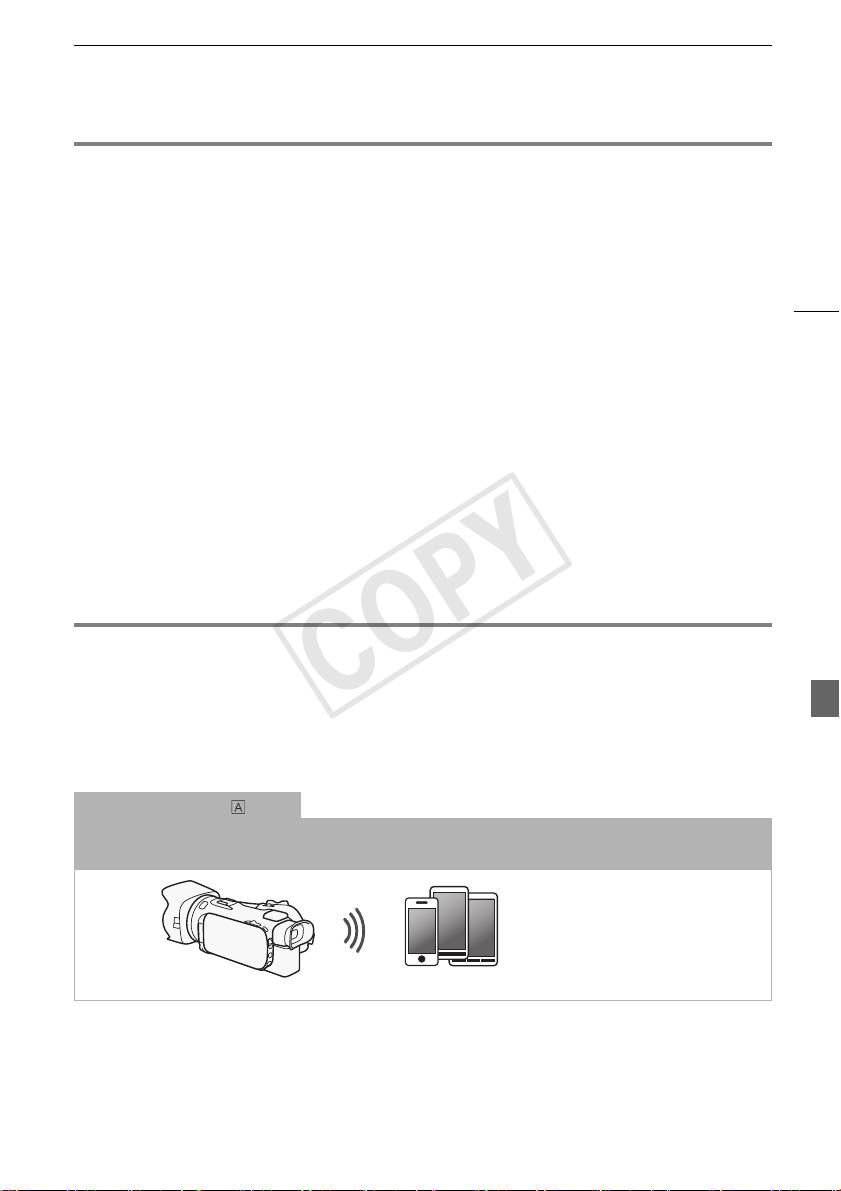
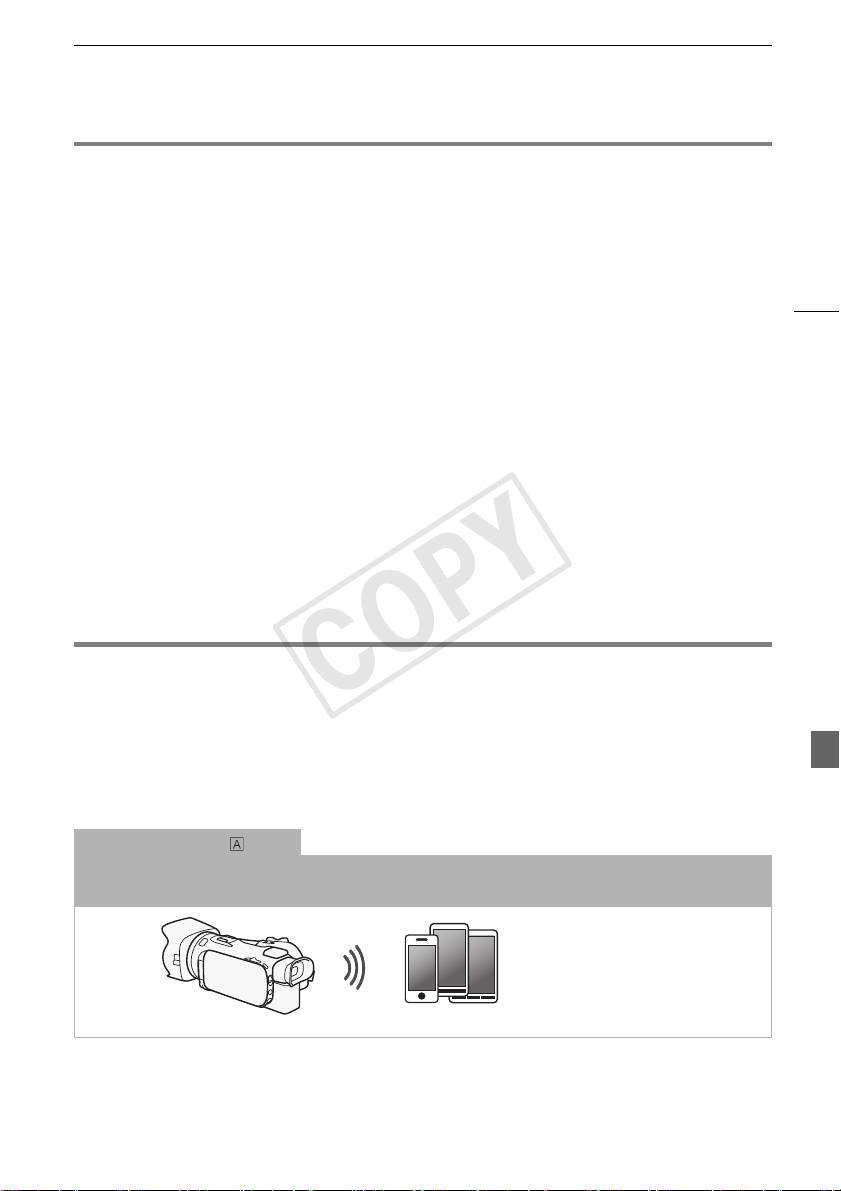
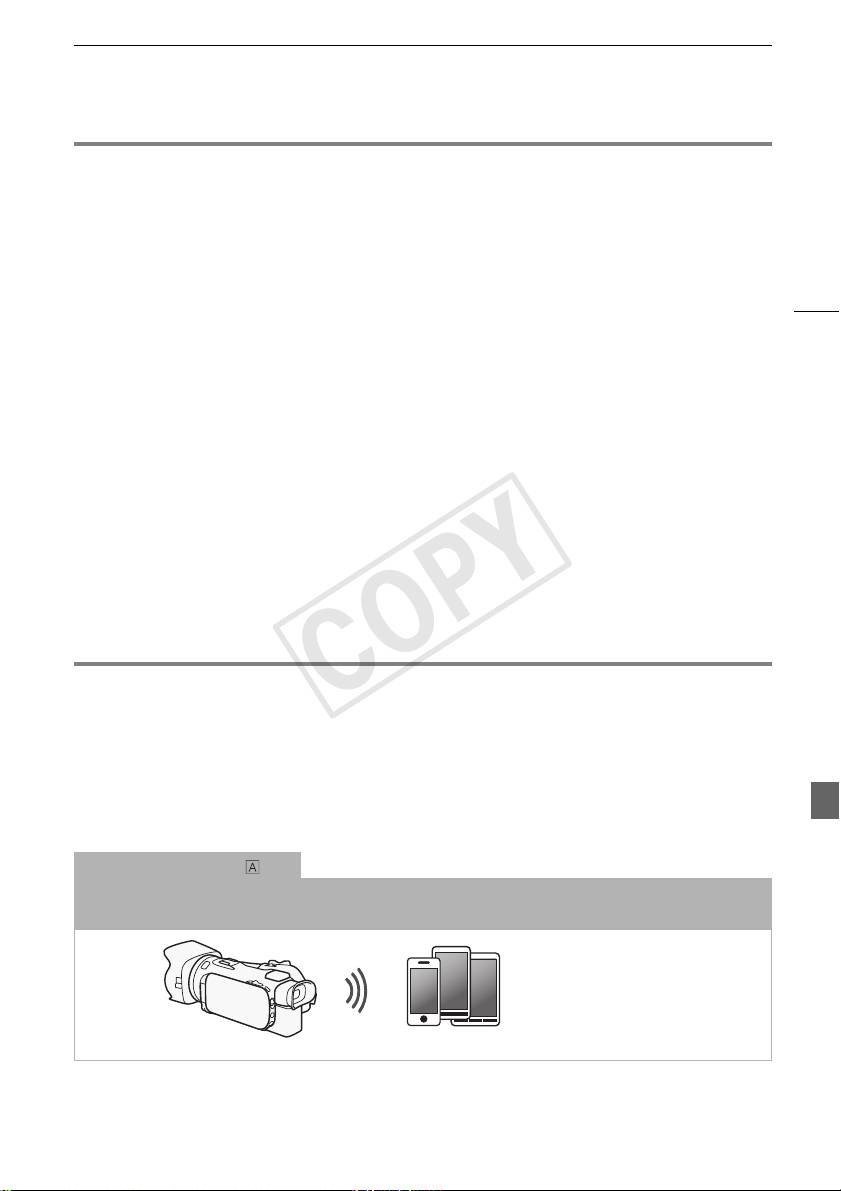
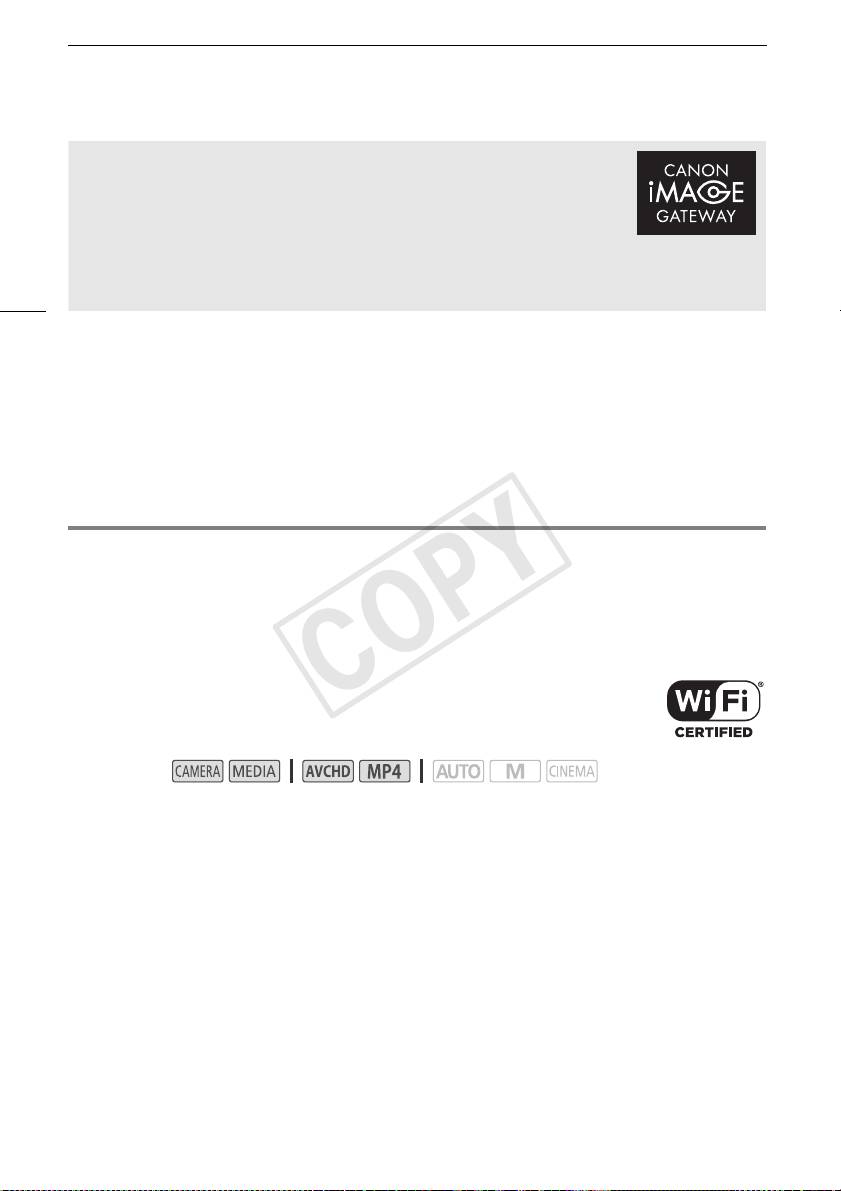
Wi-Fi connection
When you use the Wi-Fi Remote app, you can use your iOS or Android device to remotely control the camcorder and
make recordings (A 6).
iOS or Android device
COPY

Introduction to Wi-Fi
Wi-Fi connection
2
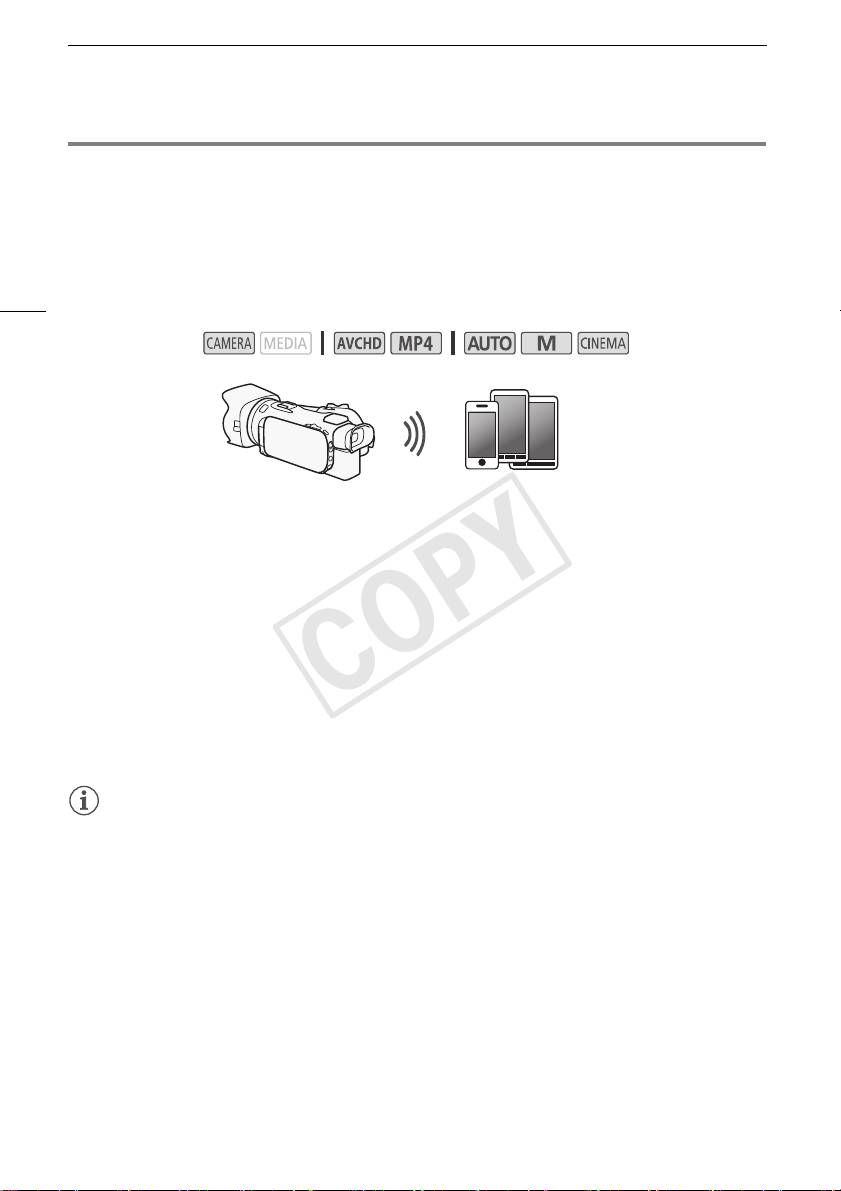
Wirelessly connect the camcorder to your iOS device, Android device or computer
and use the device’s Web
browser to view recordings in the camcorder (A 7).
2
You can also use a computer connected via an access point.
4
iOS device, Android device, etc.
Wi-Fi connection
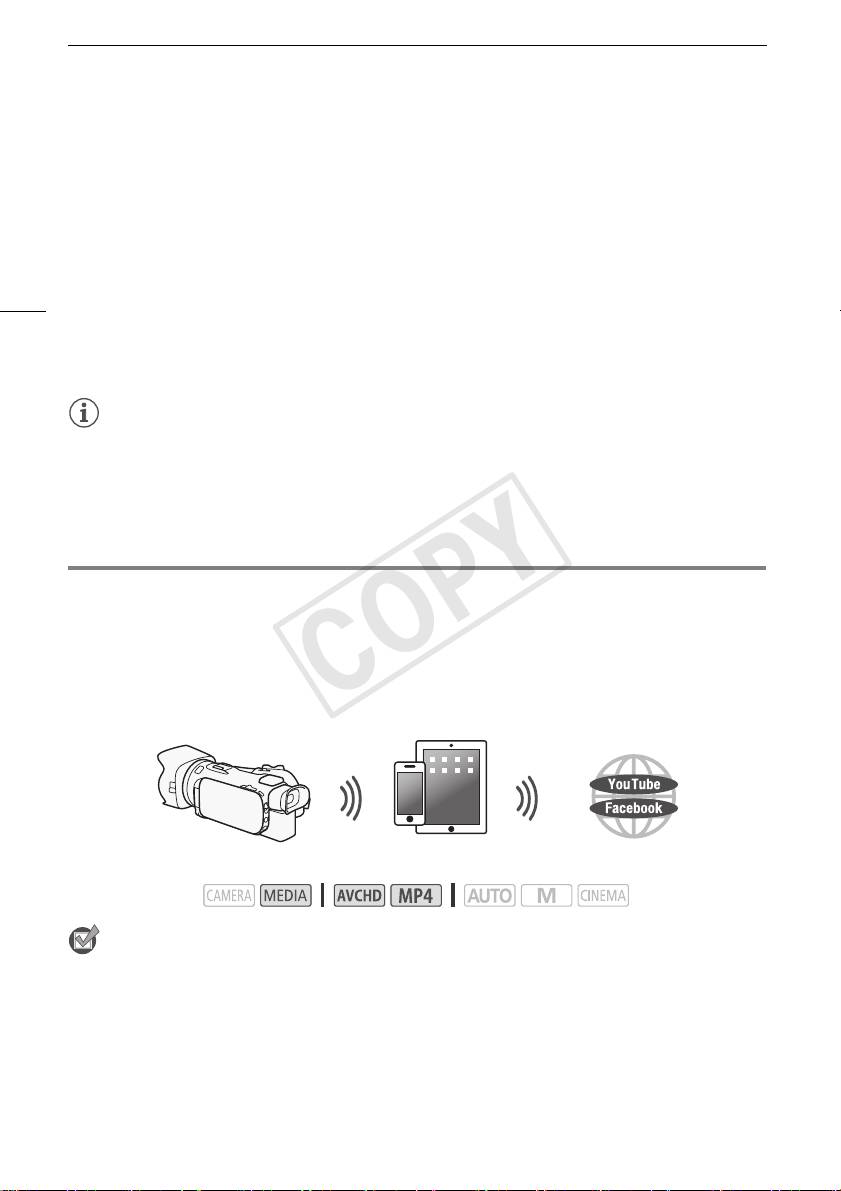
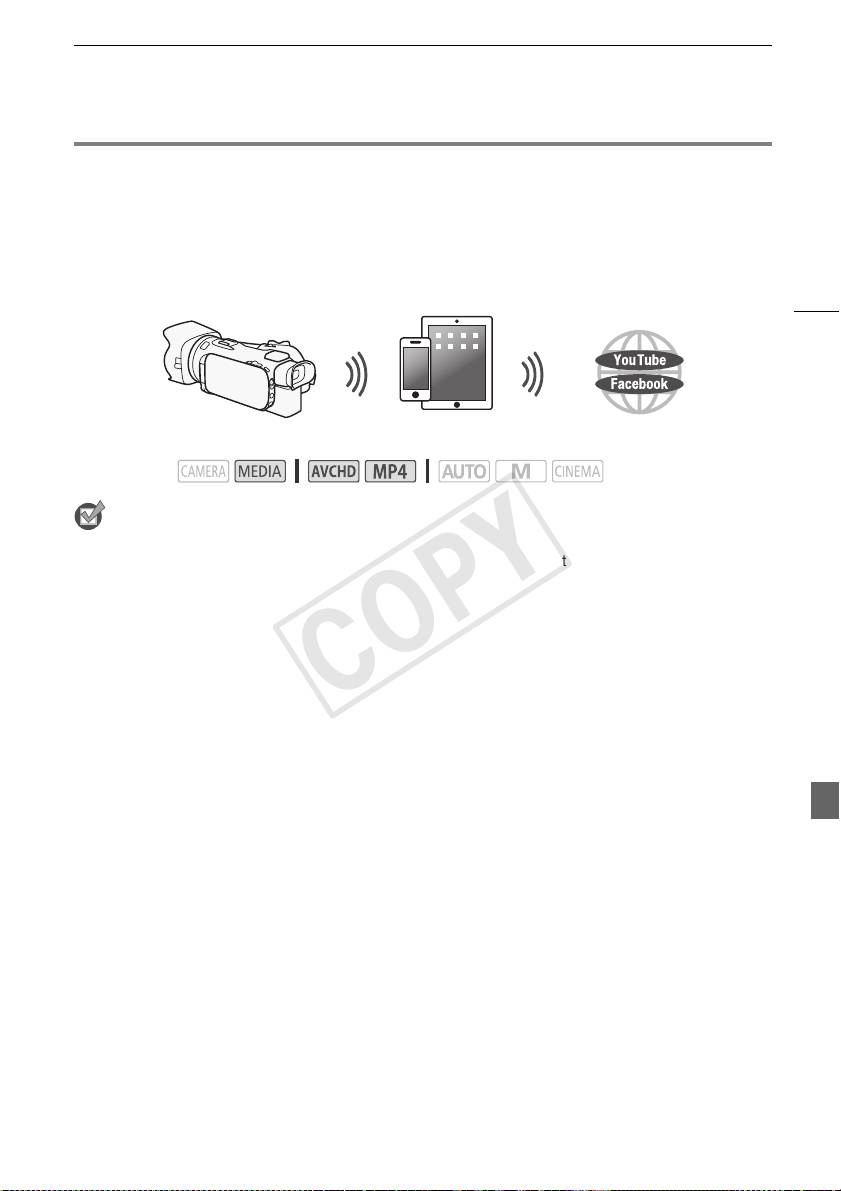
3
After you download the Movie Uploader app
, wirelessly connect the camcorder to an iOS device (A 8) to save,
play back and upload your recordings. You can even use this connection type if you plan to share videos on YouTube
and Facebook on the go.
3
The Movie Uploader app, provided by PIXELA, is available for free from the App Store.
iOS device
Wi-Fi connection
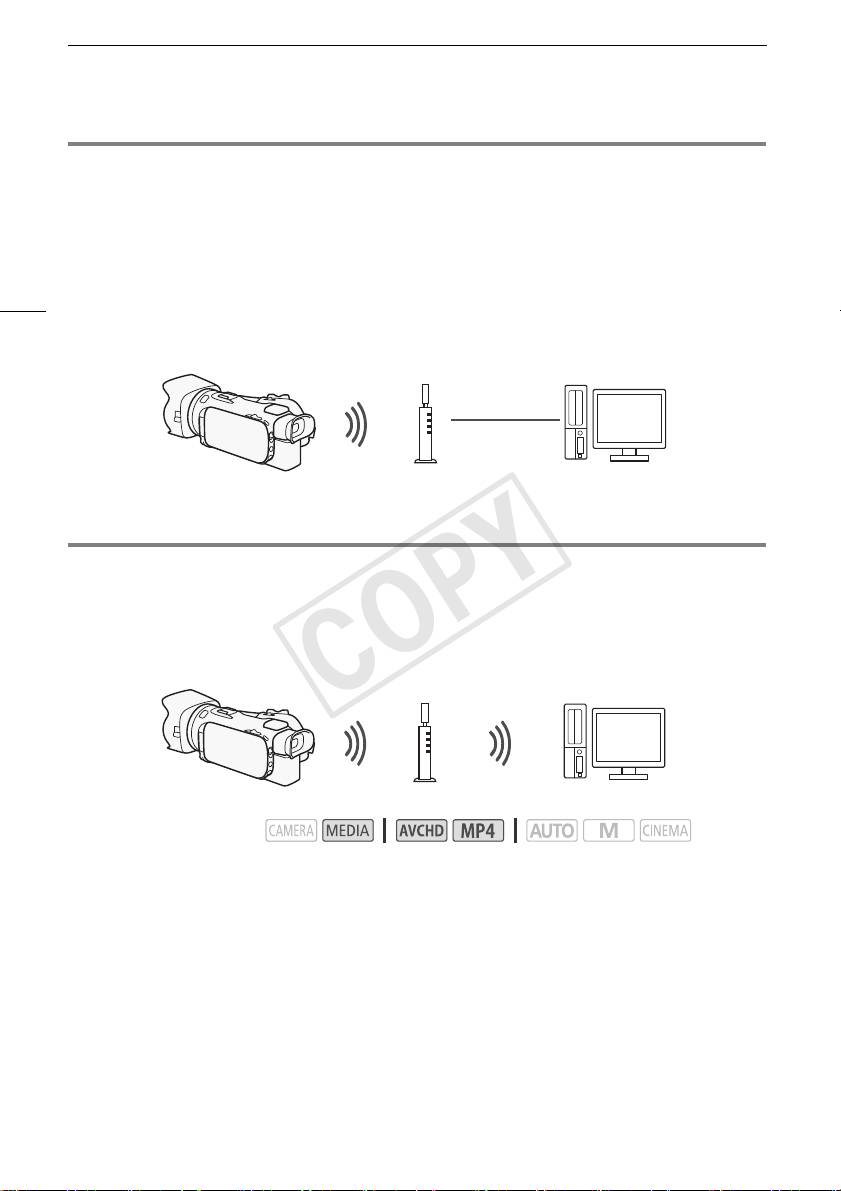
Wirelessly connect the camcorder to a wireless router (access point) on a Wi-Fi network (A 11). Use this
connection if you plan to save your recordings on a computer or FTP server (A 10).
Access point Computer
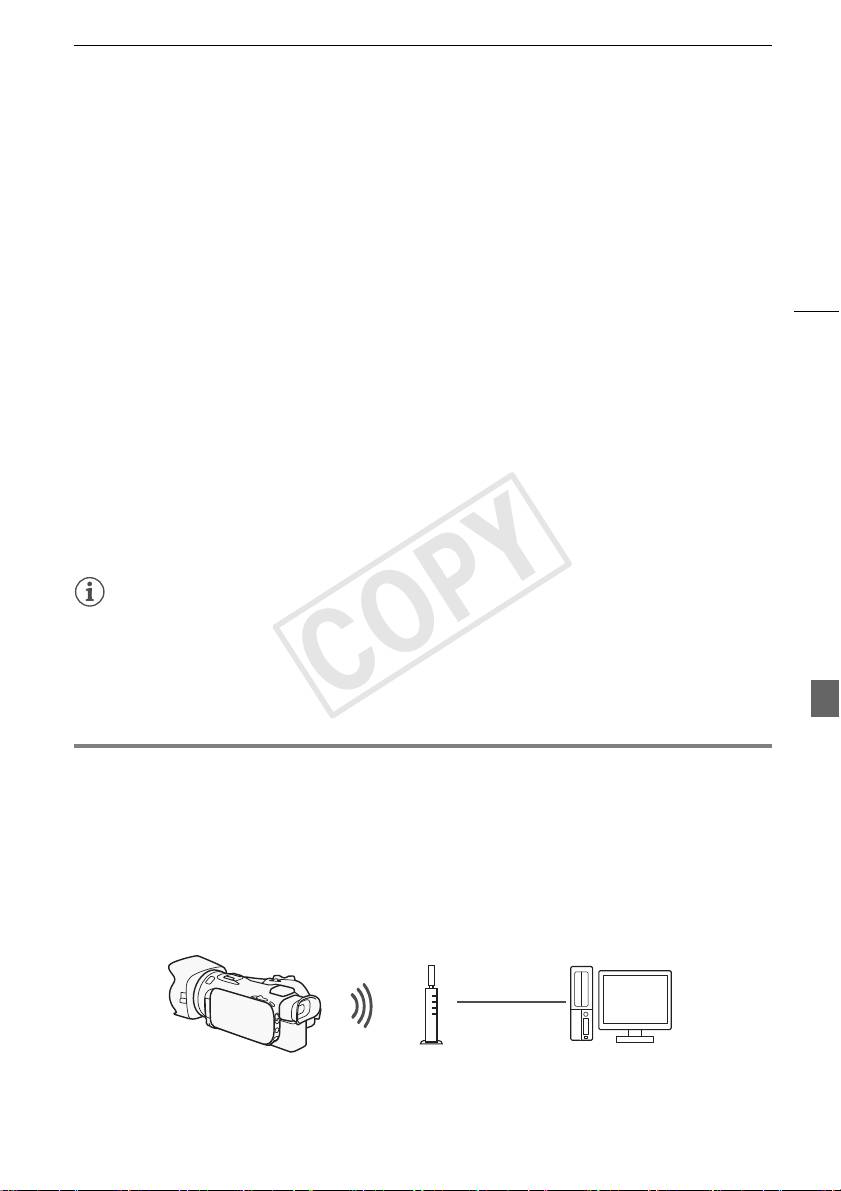
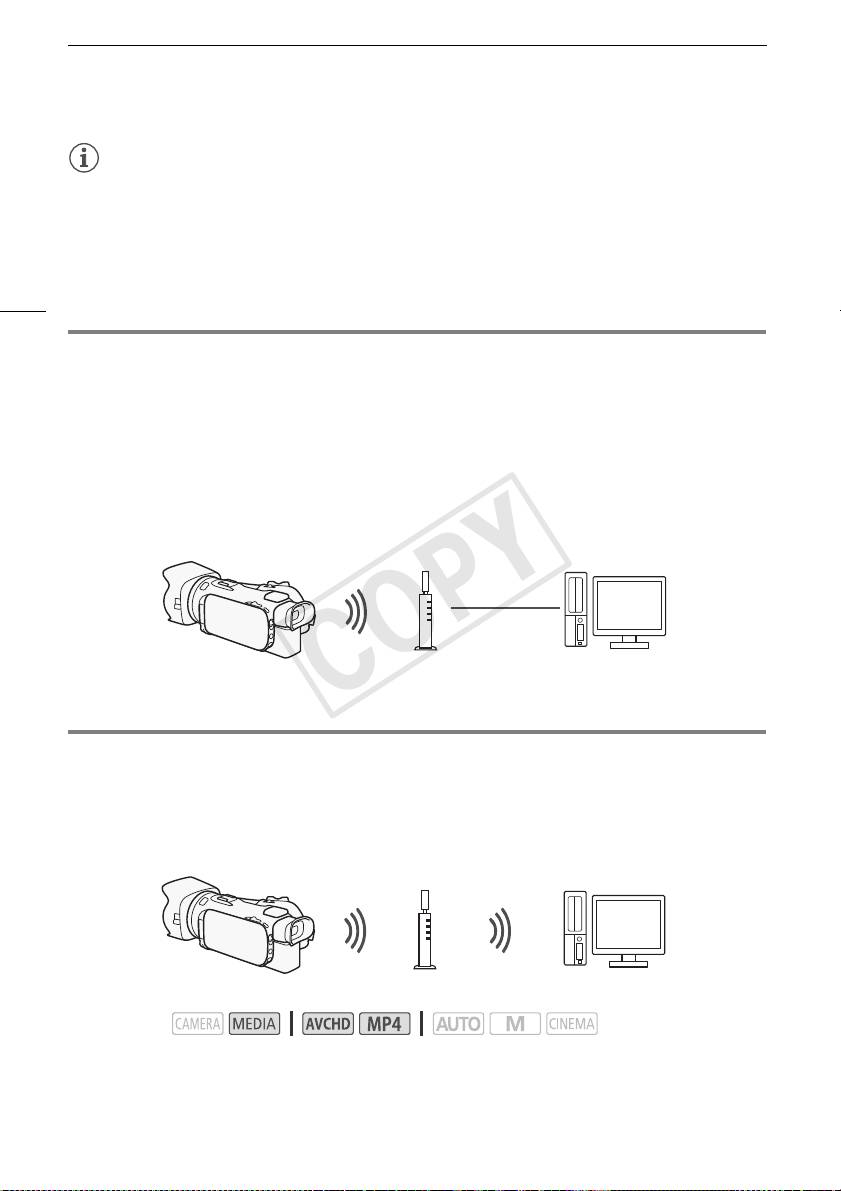
Wi-Fi connection
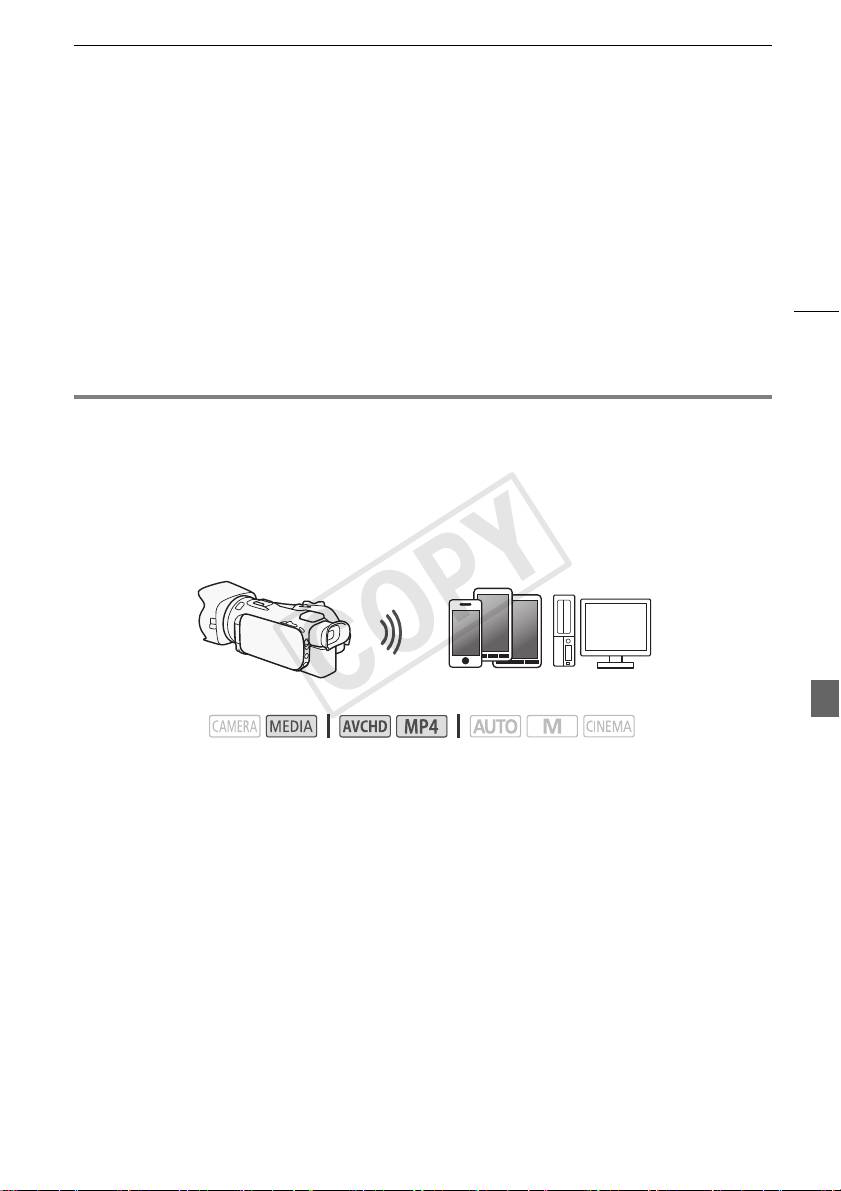
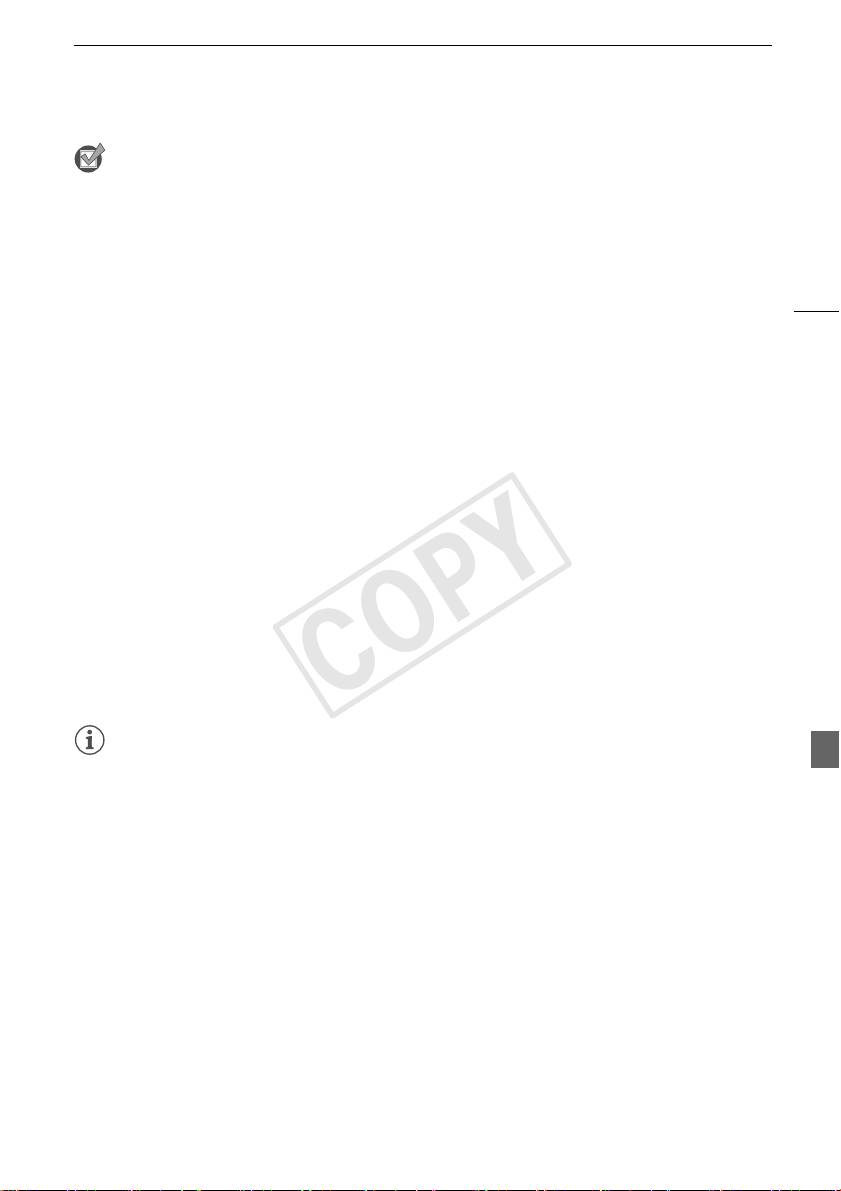
Wirelessly connect the camcorder to a network and use the media server function and play back your recordings on
a device connected to the network using a LAN cable (A 9).
LAN cable
Access point
Computer
COPY
Introduction to Wi-Fi
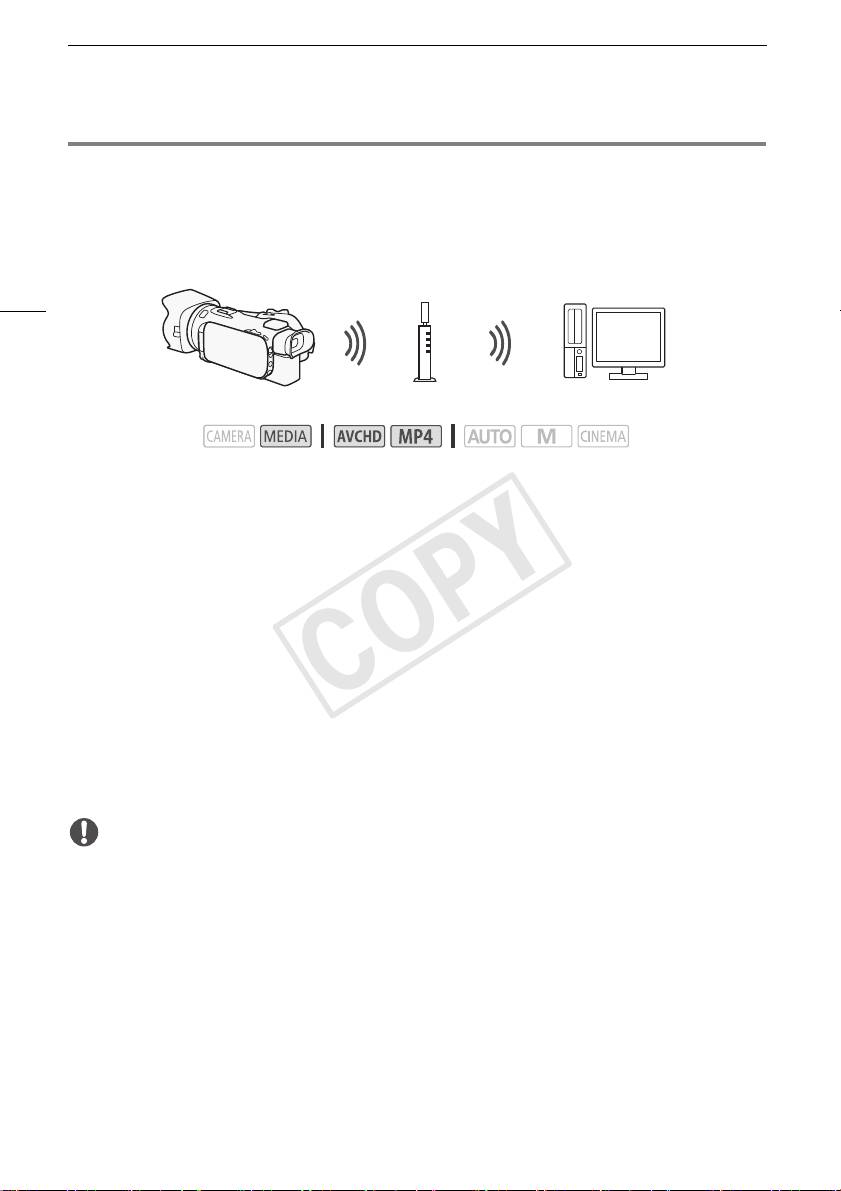
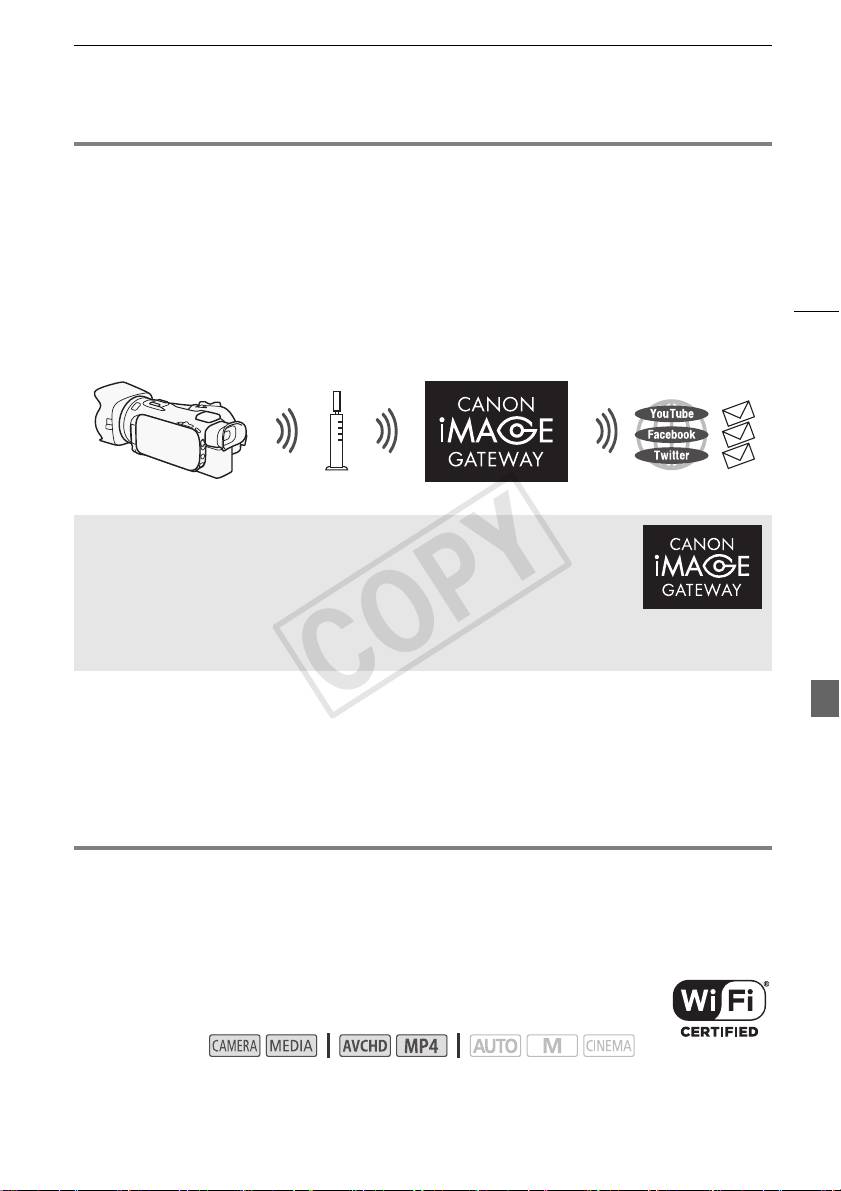
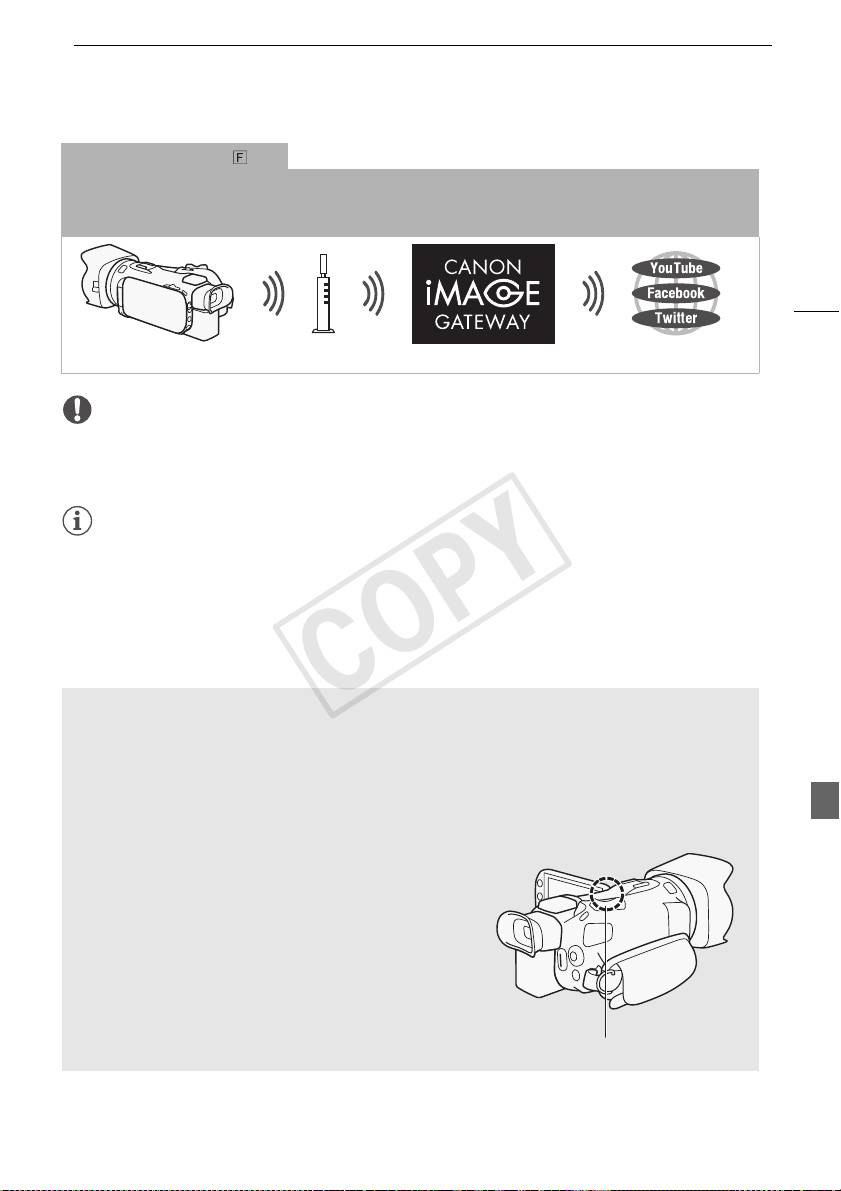
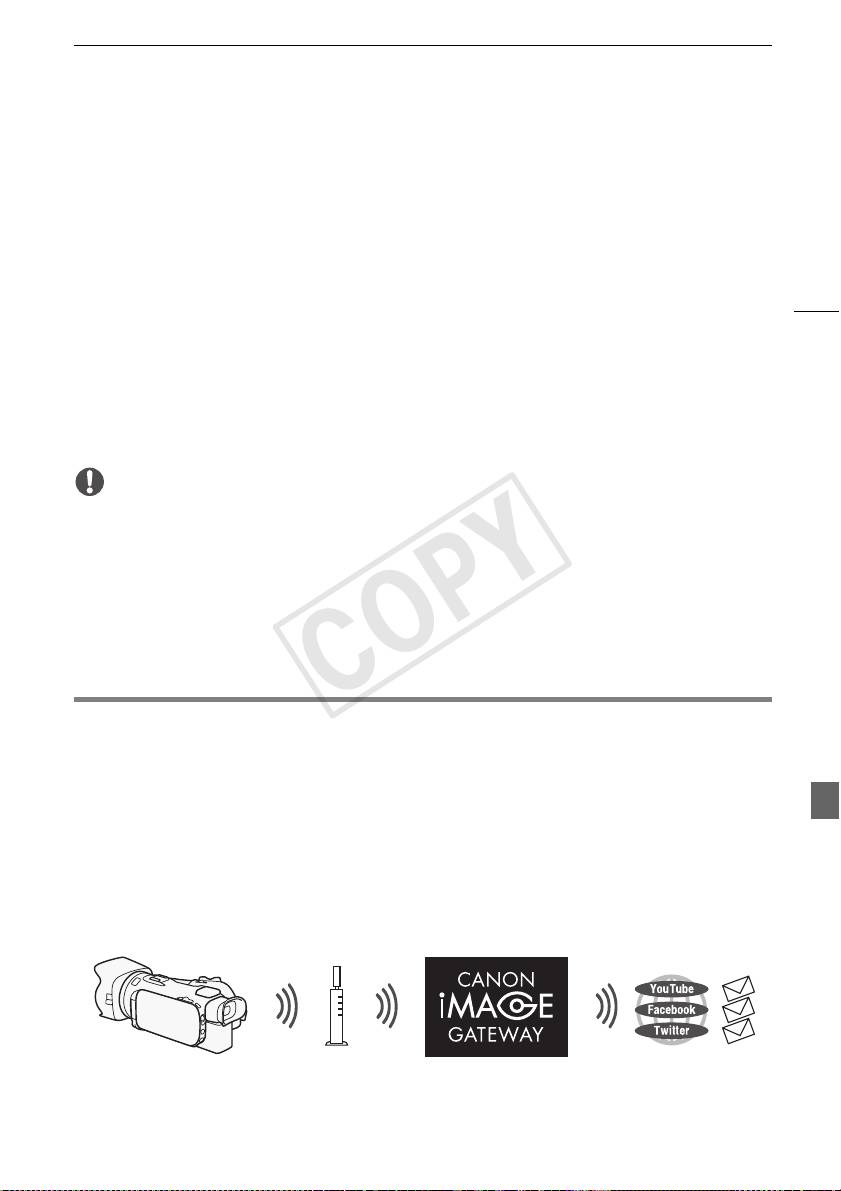
Wi-Fi connection
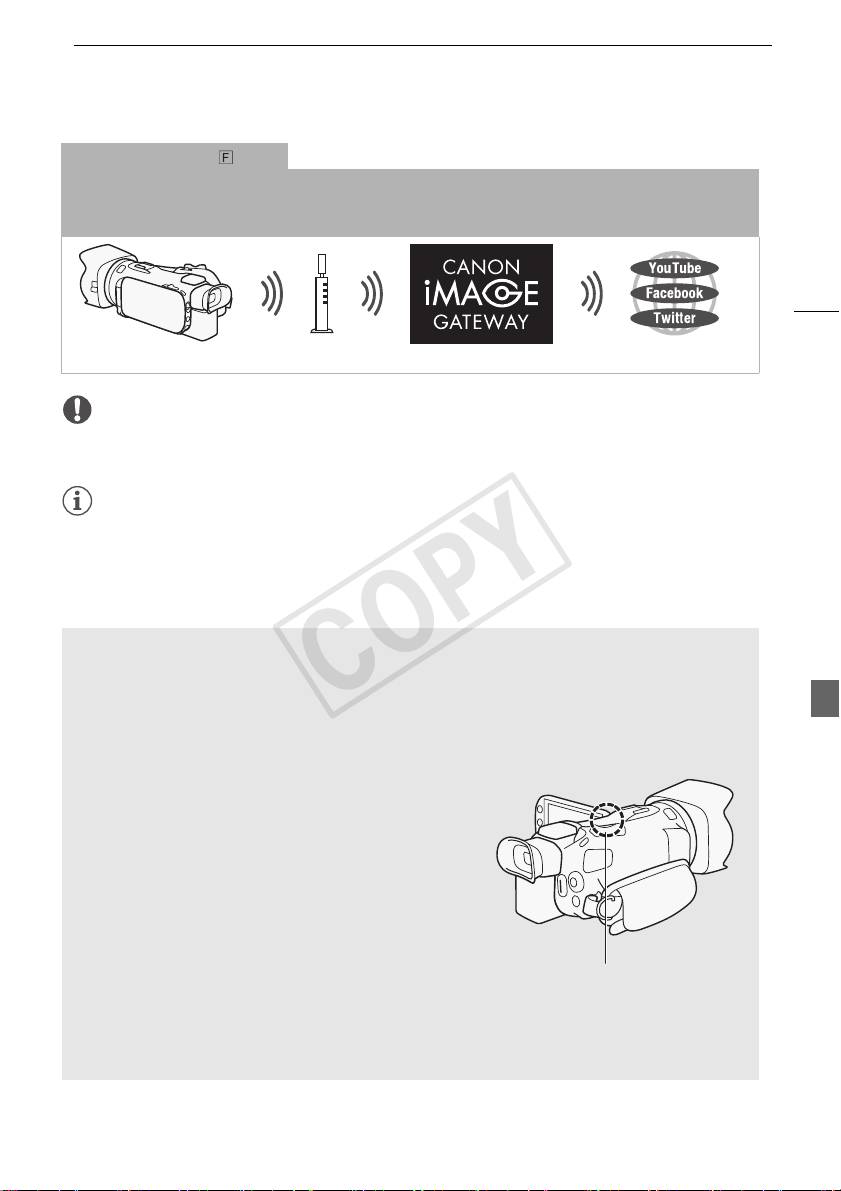
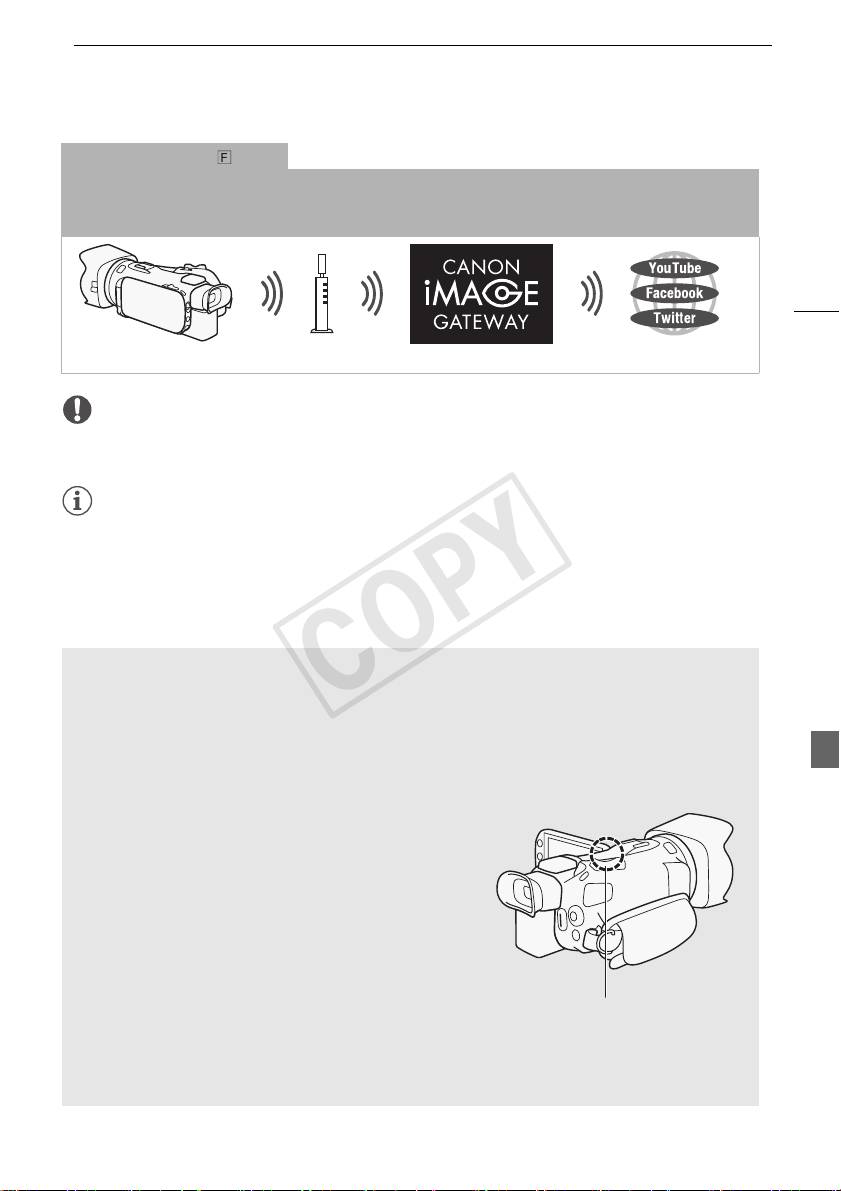
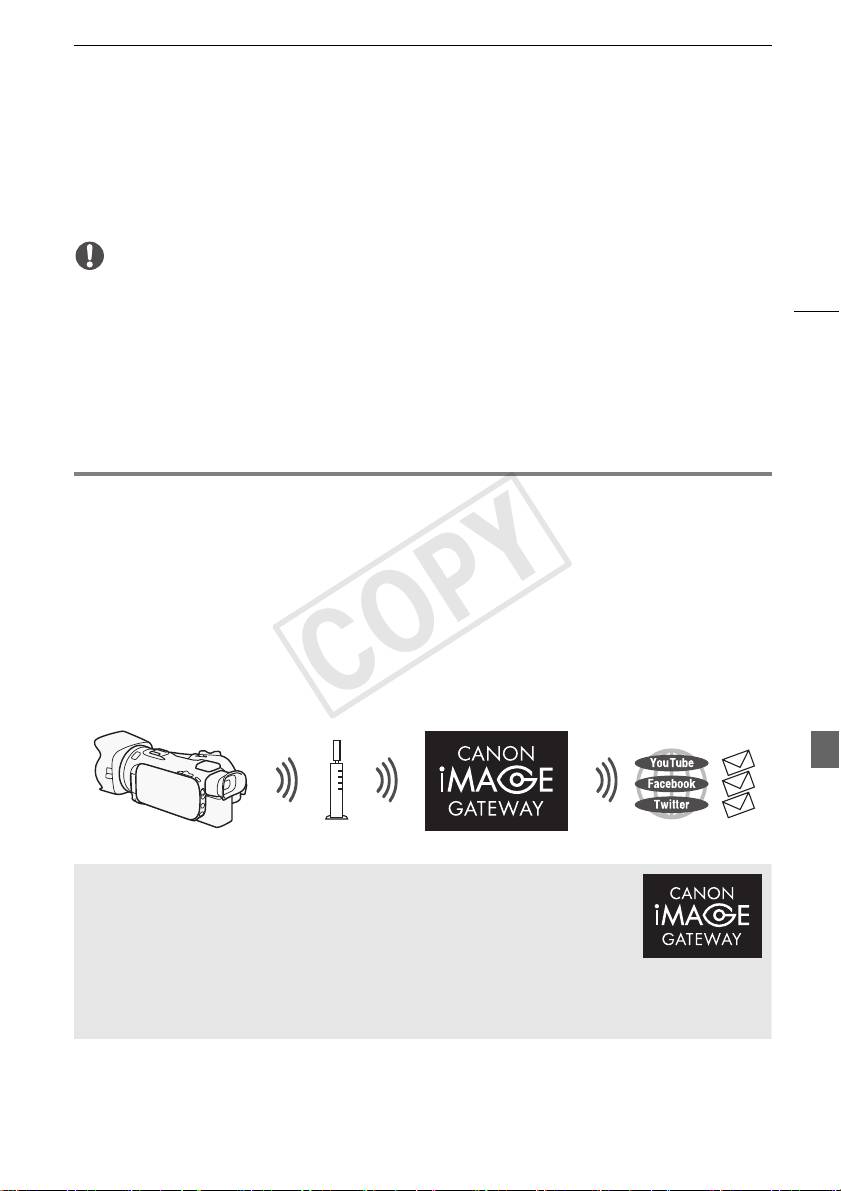
Wirelessly connect the camcorder to a wireless router (access point) on a Wi-Fi network. Use this connection if you
plan to connect to CANON iMAGE GATEWAY (A 11). After doing so, you can even share videos on YouTube and
Facebook.
5
Access point
IMPORTANT
• Using an unprotected Wi-Fi network can expose your files and data to monitoring by unauthorized
third parties. Be aware of the risks involved.
NOTES
• While using Wi-Fi functions other than remotely controlling the camcorder using the Wi-Fi Remote
application, do not open the double memory card slot cover.
• While using Wi-Fi functions other than remotely controlling the camcorder using the Wi-Fi Remote
application, the camcorder’s automatic power off function will be disabled.
Before using Wi-Fi functions
Based on the function, the camcorder will wirelessly connect to a Wi-Fi-enabled device, such as a
smartphone, directly or to a Wi-Fi network via an access point (wireless router)*. After selecting the
function you want to use, follow the onscreen directions to connect the camcorder.
* Depending on the manufacturer, the access point may be referred to using a different name, such
as wireless LAN router or wireless network router.
About the Wi-Fi antenna
When using the camcorder's Wi-Fi functions, do not cover
the back portion of the camcorder with your hand or other
object. The Wi-Fi antenna is located in the back portion and
covering it may interfere with wireless signals.
Wi-Fi antenna
About the camcorder’s Wi-Fi standard
For details about the camcorder's Wi-Fi standard, refer to About the camcorder's Wi-Fi standard in
the camcorder's Instruction Manual (PDF file).
COPY
Remote Operation Via the Wi-Fi Remote Application
Remote Operation Via the Wi-Fi Remote Application
You can operate the camcorder remotely via Wi-Fi Remote, a Web browser application that can be
accessed using the Web browser* of devices compatible with Wi-Fi networks**. The Wi-Fi Remote
application lets you monitor the image through live view, start and stop recording, and remotely control
the shooting mode, exposure, white balance, aperture, gain, shutter speed, focus and zoom.
* A Web browser that has JavaScript and cookies enabled is required.
6
** For details about compatible devices, operating systems, Web browsers, etc. please visit your local
Canon Web site.
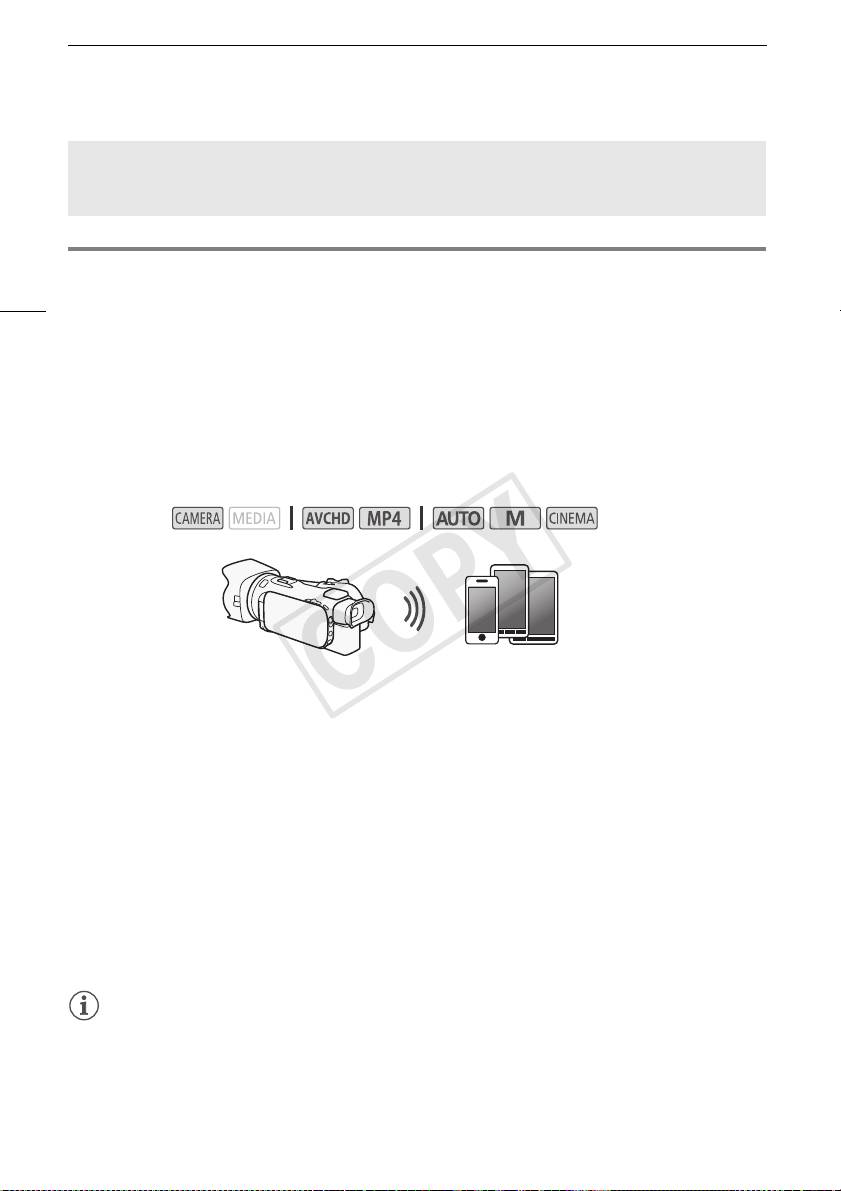
Operating modes:
iOS or Android device
Setting the Camcorder's Password
For Wi-Fi functions that require an iOS or Android device, you will need to set the camcorder's
password. After you enter the password once, you will not need to enter it again (unless you reset or
overwrite the camcorder's settings).
1 Open the [Smartphone Connection] screen.
[FUNC.] > [MENU] > p/s* > [Wi-Fi] > [Smartphone Connection]
* Touch s for the Remote Browse and Media Server functions.
2 Touch the camcorder's password.
3 Enter an 8-character password and touch [OK].
4Touch [K] and then touch [X].
NOTES
• After setting the camcorder's password, it will not be displayed on the screen for you to check.
Please make a note of your password so that you do not forget it. To change the password, perform
the procedure above again.
Operating the Camcorder Remotely
1 Camcorder: Open the [Wi-Fi Remote] screen.
[FUNC.] > [„ Wi-Fi Remote]
2 Camcorder: Touch [ON].
• The camcorder’s SSID (network name) and the URL to be entered in the Web browser will
appear.
• The camcorder will be ready to connect with the device.
COPY
Remote Browse: Viewing Recordings Using a Web Browser on Your iOS or Android Device
3 iOS/Android device: Activate Wi-Fi in the settings screen.
• The network names of detected access points will appear.
4 iOS/Android device: Touch the access point with the same SSID displayed in step 2.
• If you have performed this procedure before and you have not changed the camcorder's
password, the connection will be established automatically.
5 iOS/Android device: Enter the camcorder’s password set previously.
6 iOS/Android device: Enter the URL displayed on the camcorder’s screen into the Web
7
browser to start the Wi-Fi Remote application.
• For details about this function, refer to Remote Operation Via the Wi-Fi Remote Application in the
camcorder's Instruction Manual (PDF file).
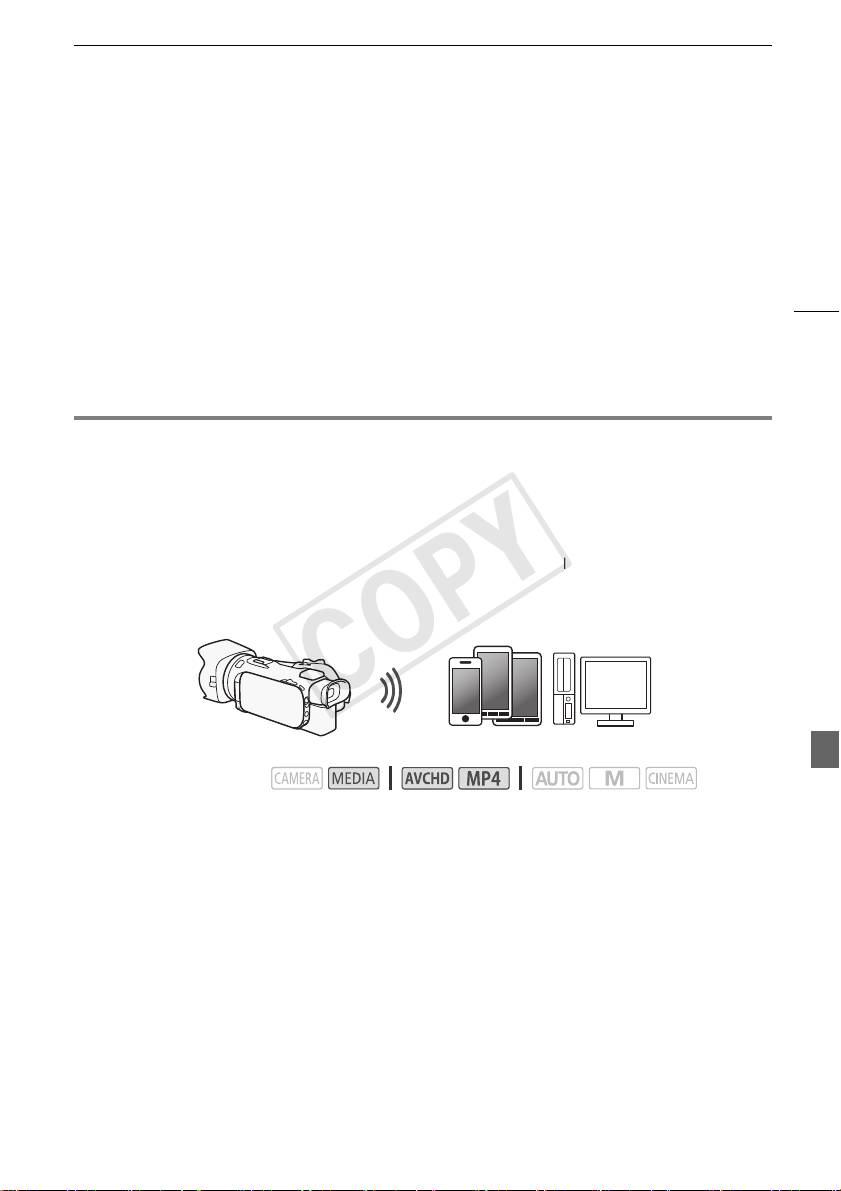
Remote Browse: Viewing Recordings Using a Web Browser on
Your iOS or Android Device
With the Remote Browse function, you can use the Web browser on your iOS device, Android device,
computer or similar device to show a list of recordings in the camcorder, play them back and even
download them.* This conveniently allows you to view your recordings while you are out.
* Depending on the device, OS, browser, movie format and recording mode, you may not be able to play
back or download recordings. For details, visit your local Canon Web site.
iOS device, Android device, etc.
Operating modes:
1 Camcorder: Open the desired index screen.
2 Camcorder: Open the [Playback via Browser] screen.
[MENU] > s > [Wi-Fi] > [Playback via Browser]
• The camcorder’s SSID (network name) will appear.
• The camcorder will be ready to connect with the device.
• To set or change the camcorder's password, perform the procedure in Setting the Camcorder's
Password (A 6) starting from step 2.
3 iOS/Android device: Activate Wi-Fi in the settings screen.
• The network names of detected access points will appear.
4 iOS/Android device: Touch the access point with the same SSID displayed in step 2.
• If you have performed this procedure before and you have not changed the camcorder's
password, the connection will be established automatically.
5 iOS/Android device: Enter the camcorder's password set previously.
• [Connected] will appear on the camcorder’s screen and the connection will be established.
6 iOS/Android device: Start the Web browser.
COPY
Uploading Recordings Using an iOS Device
7 iOS/Android device: Enter the URL that appears on the camcorder’s screen into the Web
browser’s address bar.
• The Remote Browse screen will appear.
• As long as you do not change the port settings, the URL is always the same so you may find it
convenient to bookmark the URL.
8 iOS/Android device: Touch [6·] on the upper left of the screen and open the desired
index screen. Next, touch the desired recording.
8
• For movies, touch the playback icon to start playback. For photos, the photo will be displayed.
9 Camcorder: Touch [End] > [OK] when finished.
• For details about this function, refer to Remote Browse: Viewing Recordings Using a Web
Browser on Your iOS or Android Device in the camcorder's Instruction Manual (PDF file).
NOTES
• The following types of MP4 scenes will be recognized as multiple files on other devices.
- Scenes exceeding 4 GB
- Scenes recorded at 35 Mbps exceeding 30 minutes
- Scenes recorded with a recording mode other than 35 Mbps exceeding 1 hour
• Only one device may be connected to the camcorder at a time.
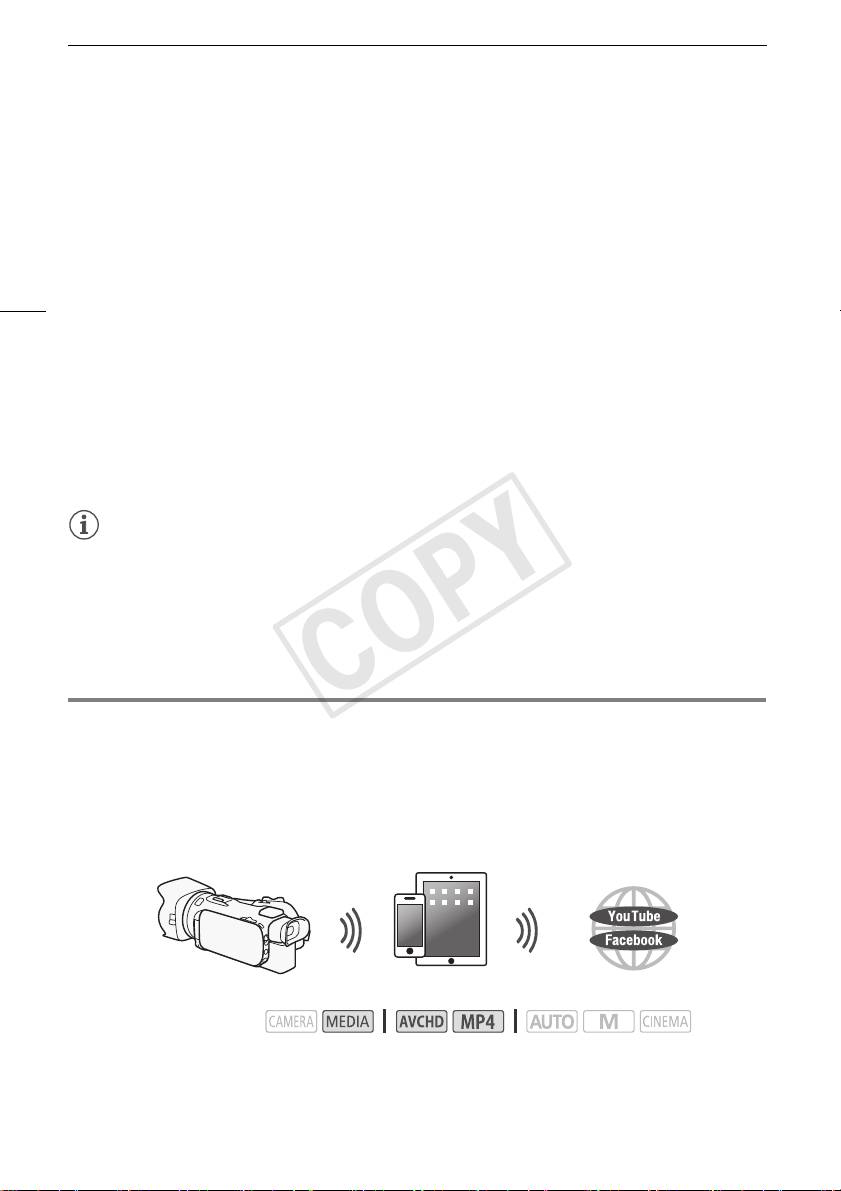
Uploading Recordings Using an iOS Device
Using the Movie Uploader app* for iOS devices, you can wirelessly connect the camcorder to the
device to upload your movies to YouTube and your movies and photos to Facebook even when you
are away from your home network. You can even save** and play back MP4 movies and photos on
the iOS device.
* The Movie Uploader app, provided by PIXELA, is available for free from the App Store.
** Not available for MP4 movies recorded at 35 Mbps.
iOS device
Operating modes:
POINTS TO CHECK
• Before you perform this procedure for the first time, install the Movie Uploader app on your iOS
device. The app can be downloaded for free from the following site.
http://appstore.com/movieuploader
1 Camcorder: Open the desired movie index screen.
COPY
Playback on a Computer
2 Camcorder: Open the [Movie Uploader] screen.
[MENU] > s > [Wi-Fi] > [Movie Uploader]
• The camcorder’s SSID (network name) will appear.
• The camcorder will be ready to connect with the iOS device.
• To set or change the camcorder's password, perform the procedure in Setting the Camcorder's
Password (A 6) starting from step 2.
3 iOS device: Activate Wi-Fi in the settings screen.
9
• The network names of detected access points will appear.
4 iOS device: Touch the access point with the same SSID displayed in step 2.
• If you have performed this procedure before and you have not changed the camcorder's
password, the connection will be established automatically.
5 iOS device: Enter the camcorder's password set previously.
• [Connected] will appear on the camcorder’s screen and the connection will be established.
6 iOS device: Use the Movie Uploader app to upload the camcorder’s movies (and photos, if
applicable).
• For details about the Movie Uploader app, visit PIXELA’s Web site.
http://www.pixela.co.jp/oem/canon/e/movieuploader/ (English only)
• For details about this function, refer to Uploading Recordings Using an iOS Device in the
camcorder's Instruction Manual (PDF file).
NOTES
• The following types of MP4 scenes will be recognized as multiple files on other devices.
- Scenes exceeding 4 GB
- Scenes recorded at 35 Mbps exceeding 30 minutes
- Scenes recorded with a recording mode other than 35 Mbps exceeding 1 hour
Playback on a Computer
Using the Media Server function, you can wirelessly view your movies and photos from your computer
or similar device. You will need an access point connected to your home network and software
installed on your computer that can play back movies and photos on the media server. We
recommend that you connect the computer to the access point using a LAN cable. Refer also to the
instruction manuals for the computer, software and access point.
• For details about this function, refer to Playback on a Computer in the camcorder's Instruction
Manual (PDF file).
LAN cable
Access point
Computer
COPY
Transferring Files to a Computer or FTP Server
Transferring Files to a Computer or FTP Server
You can wirelessly transfer files (recordings) directly to a computer or an FTP server. You will need a
correctly configured FTP server. During the manual setup procedure, you will need to enter the FTP
server's IP address, port, user name, password and file transfer destination (where the files will be
transferred to).
10
Access point
Computer
Operating modes:
1 Camcorder: Open the desired movie index screen.
2 Open the [FTP Transfer] screen.
[MENU] > s > [Wi-Fi] > [FTP Transfer]
3 Enter the FTP server's IP address for [FTP Server] and the port number for [Port].
4 Touch [Next].
5 Enter the user name and password and then touch [Next].
6 Enter [/] for [Destination Folder] and then touch [OK].
• Depending on the FTP server's settings, the required text for the port number and destination
folder may differ. Check the settings on your FTP server.
• The camcorder will connect to the access point selected in Wi-Fi Connection Using an Access
Point (A 11).
7 When [Save the access point] appears on the screen, touch [OK] and then perform the
procedure in Wi-Fi Connection Using an Access Point (A 11).
• For details about this function, refer to Transferring Files to a Computer or FTP Server in the
camcorder's Instruction Manual (PDF file).
IMPORTANT
• Observe the following precautions when transferring files. Failing to do so may interrupt the transfer
and incomplete files may remain at the transfer destination.
- Do not open the double memory card slot cover.
- Do not disconnect the power source or turn off the camcorder.
• If the file transfer is interrupted, select [New files] and perform the file transfer again.
• If incomplete files remain at the transfer destination, check the content and make sure they are safe
to delete before deleting them.
COPY
Sharing Recordings with CANON iMAGE GATEWAY
Sharing Recordings with CANON iMAGE GATEWAY
After you register for CANON iMAGE GATEWAY*, you will be able to access various Web services**.
You will be able to upload movies and photos to online albums, share the albums on Twitter, upload
movies to Facebook and YouTube, send links to your online albums by e-mail to friends and family,
and more! To use this function, you will need an access point connected to the Internet.
• For details about this function, refer to Sharing Recordings with CANON iMAGE GATEWAY in the
11
camcorder's Instruction Manual (PDF file).
* Availability differs from area to area.
** “Web services” is used in this text to refer to various Internet services supported by CANON iMAGE
GATEWAY.
Wireless router
(access point)
CANON iMAGE GATEWAY
CANON iMAGE GATEWAY is a site that provides various photo-related services
for owners of qualified Canon products. After you complete the free registration
online, you can use the Web services, create online photo albums, and more.
Visit Canon’s Web site for information on registration and countries/regions
where you can use this service.
http://canon.com/cig
General requirements
• Computer with the supplied software ImageBrowser EX and CameraWindow correctly installed.
For details on installing the software, refer to Saving MP4 Movies and Photos Using ImageBrowser
EX in the camcorder's Instruction Manual (PDF file).
• Completed free registration online for CANON iMAGE GATEWAY.
• Account settings for YouTube, Facebook and Twitter (depending on the services you plan to use).
Wi-Fi Connection Using an Access Point
The camcorder can connect to a Wi-Fi network using a wireless router (access point) and even
remember the settings for the four most recently used access points.
General requirements
• Correctly configured router that uses a Wi-Fi protocol used by the camcorder, is
Wi-Fi certified (bears the logo shown on the right) and is on your home network.
Operating modes:
Select the desired connection method.
COPY

Troubleshooting
Options
[WPS: Button]* Simply press and hold the WPS button on your access point and then touch the
camcorder’s screen. This is the easiest connection method if you are using a WPS-compatible
router.
[WPS: PIN Code]* Access the access point’s configuration screen using your Web browser. The
camcorder will give you a PIN code, which you will enter into the browser. You will need a WPS-
compatible router and a computer or other device connected to it. For details, see Wi-Fi Protected
12
Setup (WPS) in the camcorder's Instruction Manual (PDF file).
[Search for Access Points] Following the camcorder’s onscreen instructions, you select your
access point from a list of detected SSIDs and then enter your password. For details, see Searching
for Access Points in the camcorder's Instruction Manual (PDF file).
[Manual Setup] You manually enter the access point’s SSID, password and other network settings.
This method is recommended for advanced users of Wi-Fi networks. For details, see Manual Setup
in the camcorder's Instruction Manual (PDF file).
* WPS, which stands for Wi-Fi Protected Setup, is a standard that makes connecting to a access point
easier.
Wi-Fi Protected Setup (WPS)
If your access point is WPS-compatible (bears the logo shown on the right),
connecting the camcorder to it can be very easy. With WPS, you will either use
the [WPS: Button] method or [WPS: PIN Code] method (see the description in
the previous section). If you cannot successfully connect the camcorder using
WPS, try using the [Search for Access Points] method. Refer also to the router’s instruction manual.
Troubleshooting
If you cannot successfully establish a Wi-Fi connection, check below. Refer also to the instruction
manual of the other Wi-Fi-enabled devices you are using. Consult your dealer or a Canon Service
Center if the problem persists.
Cannot connect with the Wi-Fi-enabled device.
- The effective communication range between the camcorder and device may vary depending on
the strength of the wireless signal. Try using the camcorder closer to the device.
- Cordless phones, microwave ovens, refrigerators and other appliances in the line of sight
between the wireless router and the camcorder may interfere with the wireless signal. Try using
the camcorder in a location farther away from such appliances.
COPY

Troubleshooting
List of Messages
(in alphabetical order)
Refer to the following if a message appears on the camcorder’s screen. If a message not listed below
appears, refer to List of Messages in the camcorder's Instruction Manual (PDF file).
Another user is already controlling the camcorder. Try again later.
- This message appears on the screen of the Wi-Fi device. Multiple Wi-Fi devices are trying to
connect with the camcorder. Make sure only one Wi-Fi device is trying to connect and then
touch Retry.
13
Memory card cover is open
- The memory card cover was opened while the memory card was being accessed. Stop the
Wi-Fi function in use and end the Wi-Fi connection.
Wi-Fi connection terminated
- Cordless phones, microwave ovens, refrigerators and other appliances may interfere with the
wireless signal. Try using the camcorder in a location farther away from such appliances.
- The camcorder may not be able to connect to the wireless router if too many devices are
accessing the wireless access point.
COPY

Table des matières
Fonctions Wi-Fi
03 Démarrage
03 Présentation du Wi-Fi
06 Commande à distance via l'application Wi-Fi Distant
07 Navigateur distant : visionner les enregistrements avec un navigateur Web sur votre
périphérique iOS ou Android
08 Transfert des enregistrements en utilisant un périphérique iOS
2
10 Lecture sur un ordinateur
10 Transfert des fichiers sur un ordinateur ou un serveur FTP
11 Partage des enregistrements avec CANON iMAGE GATEWAY
12 Connexion Wi-Fi utilisant un point d’accès
13 Dépannage
Marques de commerce
• Microsoft et Windows sont des marques de commerce ou des marques déposées de Microsoft Corporation aux
États-Unis et/ou dans les autres pays.
• App Store, iPad, iPhone, iPod, iTunes et Mac OS sont des marques de commerce d'Apple Inc., enregistrées aux
États-Unis et dans les autres pays.
• Google, Android, Google Play, YouTube sont des marques commerciales de Google Inc.
• Facebook est une marque déposée de Facebook, Inc.
• IOS est une marque commerciale ou déposée de Cisco aux Etats-Unis et dans d’autres pays et est utilisée avec
une licence.
• Le nom et les repères Twitter sont des marques commerciales de Twitter, Inc.
• Wi-Fi est une marque de commerce de Wi-Fi Alliance.
• Wi-Fi Certified, WPA, WPA2, et le logo Wi-Fi Certified sont des marques de commerce de Wi-Fi Alliance.
• WPS, lorsqu’il est utilisé pour les réglages du caméscope, les affichages sur l’écran et dans ce manuel, signifie
Wi-Fi Protected Setup.
• Le repère d’identification de réglage protégé Wi-Fi est un repère de Wi-Fi Alliance.
• JavaScript est une marque commerciale ou une marque commerciale déposée d’Oracle Corporation, de ses
filiales ou de ses sociétés affiliées aux États-Unis et dans d’autres pays.
• Les autres noms et produits non mentionnés ci-dessus peuvent être des marques de commerce ou des marques
déposées de leurs compagnies respectives.
COPY
Démarrage
Démarrage
Ce manuel vous aide à commencer à utiliser les fonctions Wi-Fi de votre caméscope. Pour en savoir
plus sur les fonctions Wi-FI et connaître des procédures plus détaillées, reportez-vous à la version
complète du manuel d'instruction (fichier PDF sur le CD-ROM fourni). Lorsque ce manuel vous renvoie
à une section dans le manuel d’instructions du caméscope, utilisez la table des matières ou la fonction
de recherche du PDF pour trouver la dite section. Pour installer la version complète du manuel
3
d’instructions, reportez-vous à Installation du manuel d'instruction du caméscope (fichier PDF) dans le
guide rapide fourni.
Vouci les termes de base utilisés fréquemment dans ce texte.
Point d’accès
Un point d’accès sans fil (WAP) est un dispositif qui permet aux appareils sans fil, tels que votre
caméscope, de se connecter à un réseau câblé (y compris Internet) en utilisant le standard Wi-Fi.
Dans la plupart des cas, c’est votre routeur sans fil.
Réseau Wi-Fi
Un ensemble d’ordinateurs et/ou d’autres dispositifs à votre domicile, bureau, ou tout autre endroit
connecté sans fil avec la Wi-Fi.
SSID
Service Set Identifier (identifiant du service). C’est simplement le nom public d’un réseau Wi-Fi.
Présentation du Wi-Fi
Lorsque vous utilisez la fonction Wi-Fi du caméscope pour la connexion à un smartphone ou une
tablette, vous pouvez sauvegarder, lire et transférer vos enregistrements sans fil. Vous pouvez même
1
utiliser un smartphone ou une tablette (périphérique iOS ou Android
) comme télécommande et
enregistrer avec le navigateur web du périphérique.
1
“Périphérique iOS” est utilisé dans ce manuel pour faire référence aux iPhones, iPods et iPads
compatibles Wi-Fi tandis que “périphérique Android” fait référence aux smartphones et aux tablettes
Android.
Connexion Wi-Fi
Lors de l'utilisation de l'App Wi-Fi Distant, vous pouvez utiliser votre périphérique iOS ou Android pour commander le
caméscope à distance et faire des enregistrements (A 6).
Périphérique iOS ou Android
COPY

Présentation du Wi-Fi
Connexion Wi-Fi
2
Connectez sans fil le caméscope à votre périphérique iOS, votre périphérique Android ou votre ordinateur
et utilisez
le navigateur Web pour visionner les enregistrements du caméscope (A 7).
2
Vous pouvez aussi utiliser un ordinateur connecté via un point d’accès.
4
Périphérique iOS, périphérique Android, etc.
Connexion Wi-Fi
3
Après avoir téléchargé Movie Uploader
, connectez sans fil le caméscope à un périphérique iOS (A 8) pour
sauvegarder, lire et transférer vos enregistrements. Vous pouvez même utiliser ce type de connexion si vous projetez
de partager des séquences vidéo sur YouTube et Facebook où que vous soyez.
3
L’application Movie Uploader, fournie par PIXELA, est disponible gratuitement dans App Store.
Périphérique iOS
Connexion Wi-Fi
Connectez sans fil le caméscope à un routeur sans fil (point d'accès) sur un réseau Wi-Fi (A 12). Utilisez cette
connexion si vous projetez de sauvegarder vos enregistrements sur un ordinateur ou un serveur FTP (A 10).
Point d'accès Ordinateur
Connexion Wi-Fi
Connectez sans fil le caméscope à un réseau et utilisez la fonction de serveur multimédia et lisez vos enregistrement
sur un périphérique connecté au réseau en utilisant un câble LAN (A 10).
Câble réseau
Point d'accès
Ordinateur
COPY
Présentation du Wi-Fi
Connexion Wi-Fi
Connectez sans fil le caméscope à un routeur sans fil (point d'accès) sur un réseau Wi-Fi. Utilisez cette connexion si
vous projetez de vous connectez à CANON iMAGE GATEWAY (A 11). Après cela, vous pouvez même partager des
séquences vidéo sur YouTube et Facebook.
5
Point d'accès
IMPORTANT
• L’utilisation d’un réseau Wi-Fi non protégé peut exposer vos fichiers et vos données à la surveillance
de tiers non autorisés. Soyez conscient des risques que vous encourez.
NOTES
• Lors de l'utilisation d'autres fonctions Wi-Fi que la commande à distance du caméscope en utilisant
l'application Wi-Fi Distant, n'ouvrez pas la double fente de carte mémoire.
• Lors de l'utilisation de fonctions Wi-Fi autres que la commande à distance du caméscope via
l'application Wi-Fi Distant, la fonction de mise hors tension automatique du caméscope ne
fonctionne pas.
Avant d’utiliser les fonctions Wi-Fi
Selon la fonction, le caméscope se connecte sans fil à un appareil Wi-Fi, tel qu’un smartphone, ou
directement à un réseau Wi-Fi via un point d’accès (routeur sans fil)*. Après avoir sélectionné la
fonction que vous voulez utiliser, suivez les instructions sur l’écran pour la connexion au
caméscope.
* En fonction du fabricant, le point d'accès peut être défini par un autre nom, tel que routeur LAN
sans fil ou routeur réseau sans fil.
À propos de l’antenne Wi-Fi
Lors de l’utilisation des fonctions Wi-Fi du caméscope, ne
recouvrez pas la partie arrière du caméscope avec votre
main ou un autre objet. L’antenne Wi-Fi est située sur la
partie arrière et la recouvrir peut interférer avec les signaux
sans fil.
Antenne Wi-Fi
À propos du standard Wi-Fi du caméscope
Pour plus de détails sur le standard Wi-Fi du caméscope, reportez-vous à À propos du standard
Wi-Fi du caméscope dans le manuel d'instructions du caméscope (fichier PDF).
COPY

Commande à distance via l'application Wi-Fi Distant
Commande à distance via l'application Wi-Fi Distant
Vous pouvez commander le caméscope à distance via Wi-Fi Distant, une application web qui est
accessible en utilisant le navigateur web* de périphériques compatibles avec les réseaux Wi-Fi**.
L'application Wi-Fi Distant vous permet de contrôler l'image grâce à une vue en direct, le démarrage
et l'arrêt de l'enregistrement, et la commande à distance du mode de prise de vue, de l'exposition, de
la balance des blancs, de l'ouverture, du gain, de la vitesse d'obturation et du zoom.
6
* Un navigateur web compatible avec JavaScript et les cookies est requis.
** Pour les détails sur les périphériques compatibles, les systèmes d'exploitation, les navigateurs web,
etc, veuillez visiter votre site Web Canon local.
Modes de fonctionnement :
Périphérique iOS ou Android
Réglage du mot de passe du caméscope
Pour les fonctions Wi-Fi qui nécessitent un périphérique iOS ou Android, vous devez régler le mot de
passe du caméscope. Après avoir entré une fois le mot de passe, vous n'avez pas besoin de l'entrer à
nouveau (sauf si les réglages du caméscope sont réinitialisés ou écrasées).
1 Ouvrez l'écran [Régl. de connex. smartphone].
[FUNC.] > [MENU] > p/s* > [Wi-Fi] > [Régl. de connex. smartphone]
* Touchez s pour les fonction de Navigateur distant et de Serveur multimédia.
2 Touchez le mot de passe du caméscope.
3 Entrez un mot de passe de 8 caractères touchez [OK].
4 Touchez [K] puis touchez [X].
NOTES
• Après le réglage du mot de passe du caméscope, il n'apparaît pas sur l'écran pour vérification.
Veuillez noter votre mot de passe de façon à ne pas l'oublier. Pour chanter le mot de passe, réalisez
de nouveau la procédure ci-dessus.
Commande à distance du caméscope
1 Caméscope : ouvrez l'écran [Wi-Fi Distant].
[FUNC.] > [„ Wi-Fi Distant]
2 Caméscope : touchez [ON].
• Le code SSID du caméscope (nom de réseau) et l'URL à entrer dans le navigateur web
apparaissent.
• Le caméscope sera prêt pour la connexion avec le périphérique.
COPY
Navigateur distant : visionner les enregistrements avec un navigateur Web sur votre périphérique
3 Périphérique iOS/Android : activez le Wi-Fi dans l’écran de réglage.
• Les noms de réseau des points d’accès détectés apparaissent.
4 Périphérique iOS/Android : touchez le point d'accès avec le même SSID affiché à
l'étape 2.
• Si vous avez déjà réalisé cette procédure et que vous n'avez pas changé le mot de passe du
caméscope, la connexion est établie automatiquement.
5 Périphérique iOS/Android : entrez le mot de passe du caméscope réglé précédemment.
7
6 Périphérique iOS/Android : entrez l'URL affiché sur l'écran du caméscope sur le
navigateur Web pour démarrer l'application Wi-Fi Distant.
• Pour les détails sur cette fonction, reportez-vous à Commande à distance via l'application Wi-Fi
Distant dans le manuel d’instructions du caméscope (fichier PDF).
Navigateur distant : visionner les enregistrements avec un
navigateur Web sur votre périphérique iOS ou Android
Avec la fonction de navigateur distant, vous pouvez utiliser le navigateur Web de votre périphérique
iOS, périphérique Android, ordinateur ou périphérique similaire pour montrer une liste
d’enregistrements dans le caméscope, les lire et même les télécharger.* Ceci vous permet de
visualiser de manière pratique vos enregistrements lorsque vous êtes à l’extérieur.
* En fonction du périphérique, du SE, du navigateur, du format de film et du mode d'enregistrement,
vous ne pourrez peut-être pas lire ou télécharger des enregistrements. Pour les détails, veuillez visiter
votre site Internet Canon local.
Périphérique iOS, périphérique Android, etc.
Modes de fonctionnement :
1 Caméscope : ouvrez l’écran d’index souhaité).
2 Caméscope : ouvrez l'écran [Lecture via navigateur].
[MENU] > s > [Wi-Fi] > [Lecture via navigateur]
• Le SSID du caméscope (nom du réseau) apparaît.
• Le caméscope est prêt pour la connexion avec le périphérique.
• Pour régler ou changer le mot de passe du caméscope, réalisez la procédure de Réglage du mot
de passe du caméscope (A 6) à partir de l'étape 2.
3 Périphérique iOS/Android : activez le Wi-Fi dans l’écran de réglage.
• Les noms de réseau des points d’accès détectés apparaissent.
4 Périphérique iOS/Android : touchez le point d'accès avec le même SSID affiché à
l'étape 2.
• Si vous avez déjà réalisé cette procédure et que vous n'avez pas changé le mot de passe du
caméscope, la connexion est établie automatiquement.
COPY
Transfert des enregistrements en utilisant un périphérique iOS
5 Périphérique iOS/Android : entrez le mot de passe du caméscope réglé précédemment.
• [Connecté] apparaît sur l’écran du caméscope et la connexion est établie.
6 Périphérique iOS/Android : démarrez le navigateur Web.
7 Périphérique iOS/Android : saisissez l’URL qui apparaît sur l’écran du caméscope dans la
barre d’adresse du navigateur Web.
• L’écran de navigation à distance apparaît.
• Tant vous ne changez pas les réglages du port, l'URL reste le même, il peut alors s'avérer
8
pratique de le mettre en signet.
8 Périphérique iOS/Android : touchez [6·] en haut à gauche de l’écran et ouvrez l’écran
d’index souhaité. Touchez ensuite l'enregistrement souhaité.
• Pour les séquences vidéo, touchez l'icône de lecture pour démarrer la lecture. Pour les photos, la
photo sélectionnée s’affiche.
9 Caméscope : touchez [Fin] > [OK] lorsque vous avez terminé.
• Pour les détails sur cette fonction, reportez-vous à Navigateur distant : visionner les
enregistrements avec un navigateur Web sur votre périphérique iOS ou Android dans le manuel
d’instructions du caméscope (fichier PDF).
NOTES
• Les types suivants des scènes MP4 sont reconnus comme fichiers multiples sur d’autres
dispositifs.
- Scènes dépassant 4 Go
- Scènes enregistrées à 35 Mbps dépassant les 30 minutes
- Scènes enregistrées avec un mode d'enregistrement autre que 35 Mbps dépassant 1 heure
• Un seul périphérique à la fois peut être connecté au caméscope.
Transfert des enregistrements en utilisant un périphérique iOS
Avec l’application Movie Uploader* pour les périphériques iOS, vous pouvez raccorder le caméscope
sans fil au périphérique pour transférer vos séquences vidéo sur YouTube et vos séquences vidéo et
photos sur Facebook, même quand vous êtes éloigné de votre réseau domestique. Vous pouvez
même sauvegarder** et lire vos séquences vidéo MP4 et photos sur un périphérique iOS.
* L’application Movie Uploader, fournie par PIXELA, est disponible gratuitement dans App Store.
** Non disponible pour les séquences vidéo MP4 enregistrées à 35 Mbps.
Périphérique iOS
Modes de fonctionnement :
COPY
Transfert des enregistrements en utilisant un périphérique iOS
À VERIFIER
• Avant d’effectuer cette procédure pour la première fois, installez l’app Movie Uploader sur votre
périphérique iOS. L'app peut être téléchargée gratuitement à partir du site suivant.
http://appstore.com/movieuploader
1 Caméscope : ouvrez l’écran d’index des séquences vidéo souhaité.
9
2 Caméscope : ouvrez l'écran [Movie Uploader].
[MENU] > s > [Wi-Fi] > [Movie Uploader]
• Le SSID du caméscope (nom du réseau) apparaît.
• Le caméscope sera prêt pour la connexion avec le périphérique iOS.
• Pour régler ou changer le mot de passe du caméscope, réalisez la procédure de Réglage du mot
de passe du caméscope (A 6) à partir de l'étape 2.
3 Périphérique iOS : activez le Wi-Fi dans l’écran de réglage.
• Les noms de réseau des points d’accès détectés apparaissent.
4 Périphérique iOS : touchez le point d'accès avec le même SSID affiché à l'étape 2.
• Si vous avez déjà réalisé cette procédure et que vous n'avez pas changé le mot de passe du
caméscope, la connexion est établie automatiquement.
5 Périphérique iOS : entrez le mot de passe du caméscope réglé précédemment.
• [Connecté] apparaît sur l’écran du caméscope et la connexion est établie.
6 Périphérique iOS : utilisez l’application Movie Uploader pour transférer les séquences
vidéo du caméscope (et les photos si cet possible).
• Pour en savoir plus sur l'app Movie Uploader, consultez le site web PIXELA.
http://www.pixela.co.jp/oem/canon/e/movieuploader/ (anglais uniquement)
• Pour les détails sur cette fonction, reportez-vous à Transfert des enregistrements en utilisant un
périphérique iOS dans le manuel d’instructions du caméscope (fichier PDF).
NOTES
• Les types suivants des scènes MP4 sont reconnus comme fichiers multiples sur d’autres
périphériques.
- Scènes dépassant 4 Go
- Scènes enregistrées à 35 Mbps dépassant les 30 minutes
- Scènes enregistrées avec un mode d'enregistrement autre que 35 Mbps dépassant 1 heure
COPY
Lecture sur un ordinateur
Lecture sur un ordinateur
Vous pouvez, avec la fonction de serveur multimédia, lire à distance des séquences vidéo et des
photos à partir de votre ordinateur ou tout autre périphérique similaire. Vous aurez besoin d’un point
d'accès sur votre réseau principal et d'un logiciel installé sur votre ordinateur qui peut lire les
séquences vidéo et les photos sur le serveur multimédia. Nous vous recommandons de connecter
l’ordinateur au point d’accès à l’aide d’un câble LAN. Reportez-vous au manuel d’instructions de
10
l’ordinateur, du logiciel et du point d’accès.
• Pour les détails sur cette fonction, reportez-vous à Lecture sur un ordinateur dans le manuel
d’instructions du caméscope (fichier PDF).
Câble réseau
Point d'accès
Ordinateur
Transfert des fichiers sur un ordinateur ou un serveur FTP
Vous pouvez transférer sans fil les fichiers (enregistrements) directement sur un ordinateur ou un
serveur FTP. Vous devez configurer correctement le serveur FTP. Pendant la procédure de
configuration manuelle, vous devez saisir l'adresse IP du serveur FTP, le port, le nom de l'utilisateur, le
mot de passe et la destination du transfert de ficher (où les fichiers doivent être transférés).
Point d'accès
Ordinateur
Modes de fonctionnement :
1 Caméscope : ouvrez l’écran d’index des séquences vidéo souhaité.
2 Ouvrez l'écran [Transfert FTP].
[MENU] > s > [Wi-Fi] > [Transfert FTP]
3 Entrez l'adresse IP du serveur FTP pour [Serveur FTP] et le numéro de port pour [Port].
4 Touchez [Suivant].
5 Entrez le nom de l'utilisateur et le mot de passe, puis touchez [Suivant].
6 Entrez [/] pour [Dossier de destination] puis touchez [OK].
• En fonction des réglages du serveur FTP, le texte requis pour le numéro de port et le dossier de
destination peut différer. Vérifiez les réglages sur votre serveur FTP.
• Le caméscope se connecte au point d'accès sélectionné dans Connexion Wi-Fi utilisant un point
d’accès (A 12).
COPY
Partage des enregistrements avec CANON iMAGE GATEWAY
7 Quand [Sauvegarde du point d'accès] apparaît sur l'écran, touchez [OK] puis réalisez la
procédure de Connexion Wi-Fi utilisant un point d’accès (A 12).
• Pour les détails sur cette fonction, reportez-vous à Transfert des fichiers sur un ordinateur ou un
serveur FTP dans le manuel d’instructions du caméscope (fichier PDF).
IMPORTANT
• Respectez les précautions suivantes lors du transfert des fichiers. Sinon, le transfert risque d'être
11
interrompu et des fichiers incomplets peuvent rester à la destination du transfert.
- N’ouvrez pas le couvercle du logement de la double fente de carte mémoire.
- Ne déconnectez pas l’alimentation électrique et ne mettez pas le caméscope hors tension.
• Si le transfert de fichier est interrompu, sélectionnez [Nouveaux fichiers] et réalisez de nouveau le
transfert de fichiers.
• Si des fichiers incomplets restent à la destination de transfert, vérifiez le contenu et assurez-vous
qu’il n’y a pas de danger de les effacer avant de procéder.
Partage des enregistrements avec CANON iMAGE GATEWAY
Une fois inscrit dans CANON iMAGE GATEWAY*, vous pourrez accéder à divers services Web**. Vous
pourrez transférer des séquences vidéo et des photos dans un album en ligne, partager les albums
sur Twitter, transférer des séquences vidéo sur Facebook et YouTube, envoyer des liens à vos albums
en ligne par e-mail à votre famille et vos amis, et plus encore ! Pour utiliser cette fonction, vous aurez
besoin d’un point d’accès connecté à internet.
• Pour les détails sur cette fonction, reportez-vous à Partage des enregistrements avec CANON
iMAGE GATEWAY dans le manuel d’instructions du caméscope (fichier PDF).
* La disponibilité diffère d'un endroit à l'autre.
**“Services Web” est utilisé dans ce texte pour désigner plusieurs services Internet compatibles avec
CANON iMAGE GATEWAY.
Routeur sans fil
(point d'accès)
CANON iMAGE GATEWAY
CANON iMAGE GATEWAY est un site qui procure divers services relatifs aux
photos pour les propriétaires des produits qualifiés Canon. Une fois l’inscription
gratuite en ligne terminée, vous pouvez utiliser les services Web, créer des
albums photos en ligne et plus encore. Visitez le site Web de Canon pour les
informations sur l’inscription et les pays/régions où vous pouvez utiliser ce
service.
http://canon.com/cig
COPY
Connexion Wi-Fi utilisant un point d’accès
Configuration générale requise
• Ordinateur avec le logiciel fourni ImageBrowser EX et CameraWindow correctement installé. Pour
les détails sur l’installation du logiciel, reportez-vous à Sauvegardes de séquences vidéo MP4 et de
photos en utilisant ImageBrowser EX dans le manuel d’instructions du caméscope (fichier PDF).
• Complétez l’inscription gratuite en ligne à CANON iMAGE GATEWAY.
• Réglages de compte pour YouTube, Facebook et Twitter (en fonction des services que vous
planifiez d’utiliser).
12
Connexion Wi-Fi utilisant un point d’accès
Le caméscope peut se connecter à un réseau Wi-Fi via un routeur sans fil (point d’accès) et même
retenir les réglages des quatre points d’accès récemment utilisés.
Configuration générale requise
• Un routeur correctement configuré utilisant le protocole Wi-Fi utilisé par le
caméscope, est certifié Wi-Fi (il porte le logo montré ci-à droite) et se trouve sur
le réseau local.
Modes de fonctionnement :
Sélectionnez la méthode de connexion souhaitée.
Options
[WPS : bouton]* Maintenez tout simplement la touche WPS enfoncée sur votre point d'accès, puis
touchez l’écran de votre caméscope. C’est la méthode de connexion la plus facile si vous utilisez un
routeur compatible WPS.
[WPS : code PIN]* Accédez à l'écran de configuration du point d'accès en utilisant votre navigateur
web. Le caméscope vous donne un code PIN que vous saisissez dans le navigateur. Vous avez
besoin d’un routeur compatible WPS et d'un ordinateur ou autre appareil connecté. Pour les détails,
reportez-vous à Wi-Fi Protected Setup (WPS) dans le manuel d’instructions du caméscope (fichier
PDF).
[Recherchez des points d’accès] En suivant les instructions sur l'écran du caméscope, vous
pouvez sélectionner votre point d'accès à partir d'une liste des SSID détectés, puis saisir votre mot
de passe. Pour les détails, reportez vous à Recherche des points d’accès dans le manuel
d’instructions du caméscope (fichier PDF).
[Configuration manuelle] Saisissez manuellement le SSID du point d'accès, le mot de passe et les
autres réglages de réseau. Cette méthode est recommandée pour les utilisateurs expérimentés des
réseaux Wi-Fi. Pour les détails, reportez-vous à Réglage manuel dans le manuel d’instructions du
caméscope (fichier PDF).
* WPS, qui veut dire configuration protégée Wi-Fi (Wi-Fi Protected Setup), est un standard qui permet
d’effectuer facilement la connexion à un
point d'accès.
COPY
Dépannage
Wi-Fi Protected Setup (WPS)
Si votre point d'accès est compatible WPS (comportant le logo indiqué à
droite), la connexion au caméscope peut être très facile. Avec WPS, vous
utilisez la méthode [WPS : bouton], ou la méthode [WPS : code PIN] (reportez-
vous à la description dans la section précédente). Si vous ne réussissez pas à
connecter le caméscope avec WPS, essayez la méthode [Recherchez des points d’accès].
13
Dépannage
Si vous n’arrivez pas à établir une connexion Wi-Fi avec succès, vérifiez ce qui suit. Reportez-vous
aussi au manuel d’instruction des autres dispositifs activés par Wi-Fi que vous utilisez. Consultez votre
revendeur ou un centre de service après-vente Canon si le problème persiste.
Impossible de se connecter avec le dispositif activé par Wi-Fi.
- La plage de connexion effective entre le caméscope et le dispositif peut varier en fonction de la
force du signal sans fil. Essayez d'utiliser le caméscope plus près du dispositif.
- Les téléphones sans fil, les fours à micro-ondes, les réfrigérateurs et les autres appareils situés
dans la ligne de vue entre le routeur sans fil et le caméscope peuvent interférer avec le signal
sans fil. Essayez d'utiliser le caméscope dans un endroit plus éloigné de tels appareils.
Liste des messages
(par ordre alphabétique)
Consultez ce qui suit si un message apparaît sur l'écran du caméscope. Si un message non listé ci-
dessous apparaît, reportez-vous à Liste des messages dans le manuel d’instructions du caméscope
(fichier PDF).
Another user is already controlling the camcorder. Try again later.
(Un autre utilisateur commande déjà le caméscope. Essayez de nouveau plus tard.)
- Ce message apparaît sur l’écran du dispositif Wi-Fi. Plusieurs dispositifs Wi-Fi tentent de se
connecter au caméscope. Vérifiez qu’un seul dispositif Wi-Fi tente de se connecter, puis
touchez Retry.
Connexion Wi-Fi terminée
- Les téléphones sans fil, les fours à micro-ondes, les réfrigérateurs et les autres appareils
peuvent interférer avec le signal sans fil. Essayez d’utiliser le caméscope dans un endroit plus
éloigné de tels appareils.
- Le caméscope peut ne pas être capable de se connecter au point d’accès si trop d’appareils
sont en cours d’accès.
Le couvercle de la carte mémoire est ouvert
- Le cache de la carte mémoire est ouvert pendant l’accès à la carte mémoire. Arrêtez la fonction
Wi-Fi en cours d’utilisation et interrompez la connexion Wi-Fi.
COPY

Inhaltsverzeichnis
Kabellose Funktionen
Wi-Fi Functions
03 Erste Schritte
03 Einführung in Wi-Fi
06 Bedienung aus der Ferne über die Applikation Wi-Fi Fernbedienung
07 Remote-Browser: Betrachten von Aufnahmen auf Ihrem iOS-
oder Android-Gerät
09 Hochladen von Aufnahmen mit einem iOS-Gerät
2
10 Wiedergeben auf einem Computer
10 Übertragen von Dateien auf einen Computer oder FTP-Server
11 Freigeben von Aufnahmen über CANON iMAGE GATEWAY
12 Kabellose Verbindung bei Verwendung eines Accesspoints
14 Fehlersuche
Warenzeichenangaben
• Microsoft und Windows sind Warenzeichen oder eingetragene Warenzeichen der Microsoft Corporation in den
USA und/oder anderen Ländern.
• App Store, iPad, iPhone, iPod, iTunes und Mac OS sind Warenzeichen von Apple Inc., die in den USA und
anderen Ländern eingetragen sind.
• Google, Android, Google Play und YouTube sind Warenzeichen von Google Inc.
• Facebook ist ein eingetragenes Warenzeichen von Facebook, Inc.
• IOS ist ein Warenzeichen oder eingetragenes Warenzeichen von Cisco in den USA und anderen Ländern und wird
unter Lizenz verwendet.
• Der Name 'Twitter' und die Twitter-Zeichen sind Warenzeichen von Twitter, Inc.
• Wi-Fi ist ein eingetragenes Warenzeichen der Wi-Fi Alliance.
• Wi-Fi Certified, WPA, WPA2 und das Logo Wi-Fi Certified sind Warenzeichen der Wi-Fi Alliance.
• WPS wie in den Camcordereinstellungen, Bildschirmanzeigen und in dieser Bedienungsanleitung verwendet
bezeichnet das Wi-Fi Protected Setup.
• Wi-Fi Protected Setup Identifier Mark ist eine Marke der Wi-Fi Alliance.
• JavaScript ist eine Marke oder eingetragene Marke der Oracle Corporation, mit dieser verbundener Unternehmen
oder Tochterunternehmen in den USA und anderen Ländern.
• Die übrigen Namen und Produkte, die oben nicht erwähnt werden, können Warenzeichen oder eingetragene
Warenzeichen ihrer jeweiligen Firmen sein.
COPY
Erste Schritte
Erste Schritte
In diesem Handbuch werden Sie mit den ersten Schritten zur Verwendung der Wi-Fi-Funktionen Ihres
Camcorders vertraut gemacht. Mehr Informationen über die kabellosen Funktionen und über die
Vorgänge im Einzelnen finden Sie in der Vollversion der Bedienungsanleitung (PDF-Datei auf der
mitgelieferten CD-ROM). Wenn im vorliegenden Handbuch auf einen Abschnitt in der
Bedienungsanleitung des Camcorders verwiesen wird, finden Sie diesen Abschnitt anhand des
3
Inhaltsverzeichnisses oder mit der PDF-Suchfunktion. Zum Installieren der Vollversion der
Bedienungsanleitung lesen Sie den Abschnitt Installieren der Bedienungsanleitung des Camcorders
(PDF-Datei) in der mitgelieferten Kurzanleitung.
Die folgenden Grundbegriffe werden häufig in dieser Anleitung verwendet.
Accesspoint
Ein kabelloser Accesspoint (WAP) ist ein Gerät, mit dem kabellose Geräte wie dieser Camcorder
mithilfe des Wi-Fi-Standards eine Verbindung mit einem kabellosen Netzwerk (mit Internet)
herzustellen. In den meisten Fällen ist dies Ihr W-LAN-Router.
SSID
Service Set Identifier. Dies ist der öffentliche Name eines Wi-Fi-Netzwerks.
Wi-Fi-Netzwerk
Eine Gruppe von mithilfe von Wi-Fi kabellos verbundenen Computern und/oder anderen Geräten in
einer Wohnung, einem Büro oder an einem anderen Ort.
Einführung in Wi-Fi
Wenn Sie mit den Camcorder über Wi-Fi-mit einem Smartphone oder Tablet-Computer verbinden,
können Sie Ihre Aufnahmen kabellos speichern, wiedergeben und hochladen. Sie können sogar ein
1
Smartphone oder einen Tablet-Computer (iOS- oder Android-Gerät
) als Fernbedienung verwenden
und Aufnahme über den Webbrowser steuern.
1
"iOS-Gerät" bezieht sich in diesem Text auf iPhones, iPods und iPads mit Wi-Fi-Funktion, während sich
"Android-Gerät" auf Android-Smartphones und Tablet-Computer bezieht.
Kabellose Verbindung
Wenn Sie die Applikation Wi-Fi Fernbedienung verwenden, können Sie Ihr iOS- oder Adroid-Gerät als Fernbedienung
zum Steuern des Camcorders und zum Erstellen von Aufnahmen nutzen. (A 6).
iOS- oder Android-Gerät
COPY

Einführung in Wi-Fi
Kabellose Verbindung
2
Schließen Sie den Camcorder kabellos an Ihr iOS- oder Android-Gerät oder einen Computer an
und verwenden Sie
den Webbrowser des Geräts zum Ansehen von Aufnahmen im Camcorder (A 7).
2
Sie können außerdem einen über einen Accesspoint verbundenen Computer verwenden.
4
iOS-Gerät, Android-Gerät usw.
Kabellose Verbindung
3
Schließen Sie nach dem Herunterladen der App Movie Uploader
den Camcorder kabellos an ein iOS-Gerät an
(A 9), um Ihre Aufnahmen zu speichern, wiederzugeben und hochzuladen. Sie können diese Verbindungsart sogar
verwenden, wenn Sie vorhaben, von unterwegs Videos auf YouTube oder Facebook freizugeben.
3
Die von PIXELA angebotene App Movie Uploader ist im App Store kostenlos erhältlich.
iOS-Gerät
Kabellose Verbindung
Schließen Sie den Camcorder kabellos an einen Accespoint eines Wi-Fi-Netzwerks an (A 12). Verwenden Sie diese
Verbindung, wenn Sie vorhaben, Ihre Aufnahmen auf einem Computer oder FTP-Server zu sichern (A 10).
Accesspoint Computer
Kabellose Verbindung
Schließen Sie den Camcorder kabellos an ein Netzwerk an und benutzen Sie seine Funktion als Medienserver, um
Ihre Aufnahmen auf einem Gerät wiederzugeben, das über ein LAN-Kabel mit dem Netzwerk verbunden ist (A 10).
LAN-Kabel
Accesspoint
Computer
COPY
Einführung in Wi-Fi
Kabellose Verbindung
Schließen Sie den Camcorder kabellos an einen Accespoint eines Wi-Fi-Netzwerks an. Verwenden Sie diese
Verbindung, wenn Sie vorhaben, mit CANON iMAGE GATEWAY eine Verbindung herzustellen (A 11). Danach
können Sie sogar Videos auf YouTube und Facebook zur Ansicht zur Verfügung stellen.
5
Accesspoint
WICHTIG
• Bei Benutzung eines ungeschützten Wi-Fi-Netzwerks besteht die Möglichkeit, dass Ihre Dateien
und Daten nicht autorisierten Dritten zugänglich werden. Beachten Sie die damit verbundenen
Risiken.
HINWEISE
• Solange Sie kabellose Funktionen außer der Fernbedienung des Camcorders mit der Applikation
Wi-Fi Fernbedienung benutzen, öffnen Sie die Abdeckung des doppelten Speicherkartenschlitzes
nicht.
• Während Sie andere kabellose Funktionen außer denen zur Fernsteuerung des Camcorders über
die Applikation Wi-Fi Fernbedienung benutzen, wird die automatische Abschaltfunktion des
Camcorders außer Betrieb gesetzt.
Vor dem Verwenden der kabellosen Funktionen
In Abhängigkeit von der Funktion wird der Camcorder kabellos mit einem Wi-Fi-fähigen Gerät, wie
zum Beispiel einem Smartphone, oder über einen Accesspoint (W-LAN-Router)* direkt mit einem
Wi-Fi-Netzwerk verbunden. Stellen Sie nach Auswählen der gewünschten Funktion gemäß den
Anweisungen auf dem Bildschirm eine Verbindung mit dem Camcorder her.
* Je nach Hersteller kann der Accesspoint auch anders bezeichnet werden, zum Beispiel WLAN-
Router oder Router für kabelloses Netzwerk.
Hinweise zur Wi-Fi-Antenne
Decken Sie mit Ihrer Hand oder einem anderen Gegenstand
nicht den hinteren Teil des Camcorders ab, wenn Sie die
Wi-Fi-Funktionen des Camcorders benutzen. Die Wi-Fi-
Antenne befindet sich im hinteren Teil und das Abdecken
kann zu einer Störung bei der Übertragung der Signale
führen.
Wi-Fi-Antenne
COPY
Bedienung aus der Ferne über die Applikation Wi-Fi Fernbedienung
Informationen zum W-LAN-Standard des Camcorders
Einzelheiten zu den kabellosen Standards des Camcorders finden Sie unter Informationen zum W-
LAN-Standard des Camcorders in der Bedienungsanleitung des Camcorders (PDF-Datei).
Bedienung aus der Ferne über die Applikation Wi-Fi
6
Fernbedienung
Mit Wi-Fi Fernbedienung ermöglicht die Bedienung des Camcorders aus der Ferne. Auf diese
Webbrowser-Applikation* können Sie über den Webbrowser von Geräten zugreifen, die mit Wi-Fi-
Netzwerken** kompatibel sind. Mit der Applikation Wi-Fi Fernbedienung können Sie die Bilder in Live-
Übertragung überwachen, die Aufnahme starten und anhalten und Aufnahmemodus, Belichtung,
Weißabgleich, Blende, Verstärkung, Verschlussgeschwindigkeit, Scharfeinstellung und Zoom aus der
Ferne steuern.
* Ein Webbrowser mit aktivem JavaScript und Cookies ist erforderlich.
** Einzelheiten zu kompatiblen Geräten, Betriebssystemen, Webbrowsern usw. finden Sie auf Ihrer
lokalen Canon-Webseite.
Betriebsarten:
iOS- oder Android-Gerät
Einstellen des Kennworts für den Camcorder
Für kabellose Funktionen, für die ein iOS- oder Android-Gerät erforderlich ist, müssen Sie das
Kennwort des Camcorders einstellen. Nachdem Sie das Kennwort einmal eingegeben haben,
brauchen Sie es nicht wieder einzugeben (sofern Sie die Camcordereinstellungen nicht zurücksetzen
oder überschreiben).
1 Öffnen Sie den Bildschirm [Verb.-Einst. für Smartphone].
[FUNC.] > [MENU] > p/s* > [Wi-Fi] > [Verb.-Einst. für Smartphone]
* Berühren Sie s für die Funktionen Remote-Browse und Media-Server.
2 Berühren Sie das Kennwort des Camcorders.
3 Geben Sie ein Kennwort aus 8 Buchstaben oder Zahlen ein und berühren Sie [OK].
4 Berühren Sie [K] und dann [X].
HINWEISE
• Nachdem Sie das Kennwort des Camcorders eingestellt haben, wird es nicht noch einmal auf dem
Bildschirm zur Kontrolle angezeigt. Bitte notieren Sie sich Ihr Kennwort, damit Sie es nicht
vergessen. Um das Kennwort zu ändern, führen Sie den obigen Vorgang noch einmal aus.
COPY
Remote-Browser: Betrachten von Aufnahmen auf Ihrem iOS- oder Android-Gerät
Den Camcorder aus der Ferne bedienen
1 Camcorder: Öffnen Sie den Bildschirm [Wi-Fi-Fernbed.].
[FUNC.] > [„ Wi-Fi-Fernbed.]
2 Camcorder: Berühren Sie [ON].
• Die SSID (Netzwerkname) des Camcorders und die URL, die in den Webbrowser eingetragen
werden muss, werden angezeigt.
• Der Camcorder kann nun mit dem Gerät verbunden werden.
7
3 iOS/Android-Gerät: Aktivieren Sie Wi-Fi im Einstellungsbildschirm.
• Die Netzwerknamen erkannter Accesspoints werden angezeigt.
4 iOS/Android-Gerät: Berühren Sie den Accesspunkt mit derselben SSID, die in Schritt 2
angezeigt wird.
• Wenn Sie diesen Vorgang bereits ausgeführt und das Kennwort des Camcorders nicht geändert
haben, wird die Verbindung automatisch hergestellt.
5 iOS/Android-Gerät: Geben Sie das zuvor eingestellte Kennwort des Camcorders ein.
6 iOS/Android-Gerät: Geben Sie die auf dem Bildschirm des Camcorders angezeigte URL in
den Webbrowser ein, um die Applikation Wi-Fi Fernbedienung zu starten.
• Einzelheiten zu dieser Funktion finden Sie unter Bedienung aus der Ferne über die Applikation
Wi-Fi Fernbedienung in der Bedienungsanleitung des Camcorders (PDF-Datei).
Remote-Browser: Betrachten von Aufnahmen auf Ihrem
iOS- oder Android-Gerät
Mithilfe der Remote-Browser-Funktion können Sie mit dem Webbrowser eines iOS-Geräts, Android-
Geräts, Computers oder ähnlichen Geräts eine Liste der Aufnahmen im Camcorder anzeigen, die
Aufnahmen wiedergeben und sogar herunterladen.* So können Sie Ihre Aufnahmen auch unterwegs
bequem ansehen.
* Je nach dem Gerät, Betriebssystem, Browser, Filmformat und Aufnahmemodus können Sie die
Aufnahmen möglicherweise nicht wiedergeben oder herunterladen. Ausführliche Informationen finden
Sie auf Ihrer lokalen Canon-Website.
iOS-Gerät, Android-Gerät usw.
Betriebsarten:
1 Camcorder: Öffnen Sie die gewünschte Indexansicht.
COPY

Remote-Browser: Betrachten von Aufnahmen auf Ihrem iOS- oder Android-Gerät
2 Camcorder: Öffnen Sie den Bildschirm [Wiedergabe via Browser].
[MENU] > s > [Wi-Fi] > [Wiedergabe via Browser]
• Die SSID (Netzwerkname) erscheint.
• Der Camcorder kann nun mit dem Gerät verbunden werden.
• Um das Kennwort des Camcorders einzustellen oder zu ändern, führen Sie die unter Einstellen
des Kennworts für den Camcorder (A 6) beschriebenen Schritte aus und beginnen Sie dabei
mit Schritt 2.
8
3 iOS/Android-Gerät: Aktivieren Sie Wi-Fi im Einstellungsbildschirm.
• Die Netzwerknamen erkannter Accesspoints werden angezeigt.
4 iOS/Android-Gerät: Berühren Sie den Accesspunkt mit derselben SSID, die in Schritt 2
angezeigt wird.
• Wenn Sie diesen Vorgang bereits ausgeführt und das Kennwort des Camcorders nicht geändert
haben, wird die Verbindung automatisch hergestellt.
5 iOS/Android-Gerät: Geben Sie das zuvor eingestellte Kennwort des Camcorders ein.
• [Verbunden] wird auf dem Camcorderbildschirm angezeigt und die Verbindung wird hergestellt.
6 iOS/Android-Gerät: Starten Sie den Webbrowser.
7 iOS/Android-Gerät: Geben Sie die auf dem Camcorderbildschirm angezeigte
Internetadresse in die Webbrowser-Adressleiste ein.
• Der Bildschirm für Remote-Browser wird angezeigt.
• Wenn Sie die Anschlusseinstellungen nicht ändern, bleibt die URL immer identisch, so dass es
sinnvoll sein kann, sie mit einem Lesezeichen zu versehen.
8 iOS/Android-Gerät: Berühren Sie [6·] links oben im Bildschirm und öffnen Sie die
gewünschte Indexansicht. Berühren Sie als nächstes die gewünschte Aufnahme.
• Für Filme berühren Sie das Symbol für die Wiedergabe, um die Wiedergabe zu starten. Bei Fotos
wird das Foto angezeigt.
9 Camcorder: Berühren Sie [Ende] > [OK], wenn Sie fertig sind.
• Einzelheiten zu dieser Funktion finden Sie unter Remote-Browser: Betrachten von Aufnahmen
auf Ihrem iOS- oder Android-Gerät in der Bedienungsanleitung des Camcorders (PDF-Datei).
HINWEISE
• Die folgenden Arten von MP4-Szenen werden als mehrere Dateien auf anderen Geräten erkannt:
- Szenen, deren Dateigröße 4 GB übersteigt
- Szenen, die bei 35 Mbps aufgezeichnet wurden und länger als 30 Minuten sind
- Szenen, die mit einem anderen Aufnahmemodus als 35 Mbps aufgezeichnet wurden und länger
als eine Stunde sind
• Es kann immer nur ein Gerät an den Camcorder angeschlossen werden.
COPY
Hochladen von Aufnahmen mit einem iOS-Gerät
Hochladen von Aufnahmen mit einem iOS-Gerät
Mit der App* Movie Uploader für iOS-Geräte können Sie den Camcorder kabellos mit dem Gerät
verbinden, um Filme auf YouTube oder Filme und Fotos auf Facebook hochzuladen, selbst wenn Sie
sich nicht in Ihrem Heimnetzwerk befinden. Sie können sogar MP4-Filme und Fotos auf dem iOS-
Gerät speichern** und wiedergeben.
* Die von PIXELA angebotene App Movie Uploader ist im App Store kostenlos erhältlich.
9
**Nicht für MP4-Filme verfügbar, die bei 35 Mbit/s aufgezeichnet wurden.
iOS-Gerät
Betriebsarten:
ÜBERPRÜFEN SIE
• Bevor Sie diese Schritte zum ersten Mal ausführen, müssen Sie die App Movie Uploader auf Ihrem
iOS-Gerät installieren. Die App kann kostenlos von der folgenden Seite heruntergeladen werden:
http://appstore.com/movieuploader
1 Camcorder: Öffnen Sie die gewünschte Indexansicht.
2 Camcorder: Öffnen Sie den Bildschirm [Movie Uploader].
[MENU] > s > [Wi-Fi] > [Movie Uploader]
• Die SSID (Netzwerkname) erscheint.
• Der Camcorder kann nun mit dem iOS-Gerät verbunden werden.
• Um das Kennwort des Camcorders einzustellen oder zu ändern, führen Sie die unter Einstellen
des Kennworts für den Camcorder (A 6) beschriebenen Schritte aus und beginnen Sie dabei
mit Schritt 2.
3 iOS-Gerät: Aktivieren Sie Wi-Fi im Einstellungsbildschirm.
• Die Netzwerknamen erkannter Accesspoints werden angezeigt.
4 iOS-Gerät: Berühren Sie den Accesspunkt mit derselben SSID, die in Schritt 2 angezeigt
wird.
• Wenn Sie diesen Vorgang bereits ausgeführt und das Kennwort des Camcorders nicht geändert
haben, wird die Verbindung automatisch hergestellt.
5 iOS-Gerät: Geben Sie das zuvor eingestellte Kennwort des Camcorders ein.
• [Verbunden] wird auf dem Camcorderbildschirm angezeigt und die Verbindung wird hergestellt.
6 iOS-Gerät: Verwenden Sie die App Movie Uploader, um die Filme (beziehungsweise Fotos)
vom Camcorder hochzuladen.
• Einzelheiten zur App Movie Uploader finden Sie auf der Webseite von PIXELA
http://www.pixela.co.jp/oem/canon/e/movieuploader/ (nur auf Englisch).
• Einzelheiten zu dieser Funktion finden Sie unter Hochladen von Aufnahmen mit einem iOS-Gerät
in der Bedienungsanleitung des Camcorders (PDF-Datei).
COPY
Wiedergeben auf einem Computer
HINWEISE
• Die folgenden Arten von MP4-Szenen werden auf anderen Geräten als mehrere Dateien erkannt:
- Szenen, deren Dateigröße 4 GB übersteigt
- Szenen, die bei 35 Mbit/s aufgezeichnet wurden und länger als 30 Minuten sind
- Szenen, die mit einem anderen Aufnahmemodus als 35 Mbps aufgezeichnet wurden länger als
eine Stunde sind
10
Wiedergeben auf einem Computer
Mit der Media-Server-Funktion können Sie Filme und Fotos auf Ihrem Computer oder einem ähnlichen
Gerät kabellos ansehen. Sie benötigen einen mit Ihrem Heimnetzwerk verbundenen Accesspoint und
Software, die auf Ihrem Computer installiert wird und Filme und Fotos auf dem Media-Server
wiedergeben kann. Es wird empfohlen, den Computer mit einem LAN-Kabel mit dem Accesspoint zu
verbinden. Lesen Sie dazu auch die Bedienungsanleitungen für den Computer, die Software und den
Accesspoint.
• Einzelheiten zu dieser Funktion finden Sie unter Wiedergeben auf einem Computer in der
Bedienungsanleitung des Camcorders (PDF-Datei).
LAN-Kabel
Accesspoint
Computer
Übertragen von Dateien auf einen Computer oder FTP-Server
Sie können Dateien (Aufnahmen) kabellos direkt auf einen Computer oder FTP-Server übertragen.
Dazu brauchen Sie einen korrekt konfigurierten FTP-Server. Während des manuellen Einrichtens
müssen Sie die IP-Adresse des FTP-Servers, den Anschluss, den Nutzernamen, das Kennwort und
den Zielort eingeben, an den die Daten übertragen werden sollen.
Accesspoint
Computer
Betriebsarten:
1 Camcorder: Öffnen Sie die gewünschte Indexansicht.
2 Öffnen Sie den Bildschirm [FTP-Übertragung].
[MENU] > s > [Wi-Fi] > [FTP-Übertragung]
COPY
Freigeben von Aufnahmen über CANON iMAGE GATEWAY
3 Geben Sie die IP-Adresse des FTP-Servers für [FTP-Server] und die Anschlussnummer für
[Anschluss] ein.
4 Berühren Sie [Weiter].
5 Geben Sie den Benutzernamen und das Kennwort ein und berühren Sie dann [Weiter].
6 Geben Sie [/] für [Zielordner] ein und berühren Sie dann [OK].
• Je nach den Einstellungen des FTP-Servers können die Texte für die Anschlussnummer und den
Zielordner unterschiedlich sein. Überprüfen Sie die Einstellungen auf Ihrem FTP-Server.
11
• Der Camcorder stellt die Verbindung zu dem Accesspoint her, der unter Kabellose Verbindung bei
Verwendung eines Accesspoints (A 12) gewählt wurde.
7 Wenn [Accesspoint speichern] auf dem Bildschirm erscheint, berühren Sie [OK] und gehen
Sie dann wie unter Kabellose Verbindung bei Verwendung eines Accesspoints (A 12)
beschrieben vor.
• Einzelheiten zu dieser Funktion finden Sie unter Übertragen von Dateien auf einen Computer oder
FTP-Server in der Bedienungsanleitung des Camcorders (PDF-Datei).
WICHTIG
• Beachten Sie Folgendes, wenn Sie Dateien übertragen. Anderenfalls kann die Übertragung
unterbrochen werden und unvollständige Dateien können am Übertragungsziel verbleiben.
- Öffnen Sie nicht die Abdeckung der beiden Speicherkartensteckplätze.
- Trennen Sie den Camcorder nicht von der Stromquelle und schalten Sie ihn nicht aus.
• Falls die Dateienübertragung unterbrochen wird, wählen Sie [Neue Dateien] und führen Sie die
Übertragung noch einmal aus.
• Falls im Übertragungsziel unvollständige Dateien verbleiben, prüfen Sie den Inhalt und vergewissern
Sie sich, dass sie gesichert wurden, bevor Sie sie löschen.
Freigeben von Aufnahmen über CANON iMAGE GATEWAY
Nachdem Sie sich bei CANON iMAGE GATEWAY* registriert haben, können Sie auf verschiedene
Webservices** zugreifen. Sie können Filme und Fotos in Online-Alben hochladen, die Alben auf Twitter
zur Ansicht zur Verfügung stellen, Filme auf Facebook und YouTube hochladen, Freunden und
Verwandten per E-Mail Links zu Ihren Online-Alben senden usw.! Um diese Funktion verwenden zu
können, brauchen Sie einen mit dem Internet verbundenen Accesspoint.
• Einzelheiten zu dieser Funktion finden Sie unter Freigeben von Aufnahmen über CANON iMAGE
GATEWAY in der Bedienungsanleitung des Camcorders (PDF-Datei).
* Verfügbarkeit ist gebietsabhängig.
** “Webservices” beziehen sich in diesem Text auf verschiedene durch CANON iMAGE GATEWAY
unterstützte Webservices.
WLAN-Router
(Accesspoint)
COPY
Kabellose Verbindung bei Verwendung eines Accesspoints
CANON iMAGE GATEWAY
CANON iMAGE GATEWAY ist eine Website, die verschiedene fotobezogene
Dienste für Besitzer berechtigter Canon-Produkte bietet. Nach der kostenlosen
Online-Registrierung können Sie die Webservices nutzen, Online-Fotoalben
erstellen usw. Auf der Canon-Website finden Sie Informationen zur
Registrierung und zu den Ländern/Regionen, in denen dieser Dienst genutzt
werden kann.
12
http://canon.com/cig
Allgemeine Anforderungen
• Computer, auf dem die mitgelieferten Programme ImageBrowser EX und CameraWindow
vorschriftsgemäß installiert wurden. Ausführliche Informationen zum Installieren der Software finden
Sie unter Speichern von MP4-Filme und Fotos mit ImageBrowser EX in der Bedienungsanleitung
des Camcorders (PDF-Datei).
• Kostenlose Online-Registrierung für CANON iMAGE GATEWAY wurde ausgeführt.
• Kontoeinstellungen für YouTube, Facebook und Twitter (je nach den Diensten, die Sie zu nutzen
beabsichtigen).
Kabellose Verbindung bei Verwendung eines Accesspoints
Der Camcorder kann über einen WLAN-Router (Accesspoint) mit einem Wi-Fi-Netzwerk verbunden
werden und kann sich darüber hinaus die Einstellungen für die vier zuletzt verwendeten Accesspoints
merken.
Allgemeine Anforderungen
• Ein korrekt konfigurierter Router, der das vom Camcorder verwendete Wi-Fi-
Protokoll verwendet, Wi-Fi-zertifiziert ist (das rechts gezeigte Logo trägt) und in
Ihrem Heim-Netzwerk ist.
Betriebsarten:
Wählen Sie die gewünschte Verbindungsmethode.
COPY

Kabellose Verbindung bei Verwendung eines Accesspoints
Optionen
[WPS: Taste]* Drücken und halten Sie einfach die WPS-Taste auf Ihrem Accesspoint und berühren
Sie dann den Camcorderbildschirm. Dies ist die einfachste Verbindungsmethode, wenn Sie einen
WPS-kompatiblen Router verwenden.
[WPS: PIN-Code]* Greifen Sie auf den Konfigurationsbildschirm des Accesspoints mit Ihrem
Webbrowser zu. Der Camcorder gibt einen PIN-Code an, den Sie in den Browser eingeben. Ein
WPS-kompatibler Router und ein Computer oder ein anderes Gerät müssen angeschlossen sein.
Ausführliche Informationen finden Sie unter Wi-Fi Protected Setup (WPS) in der Bedienungsanleitung
13
des Camcorders (PDF-Datei).
[Accesspoints suchen] Folgen Sie den auf dem Bildschirm gezeigten Anweisungen des
Camcorders, wählen Sie einen Accesspoint aus einer Liste von erkannten SSIDs und geben Sie Ihr
Kennwort ein. Ausführliche Informationen finden Sie unter Suchen nach Accesspoints in der
Bedienungsanleitung des Camcorders (PDF-Datei).
[Manuelle Einrichtung] Sie geben manuell die SSID und das Kennwort des Accesspoints sowie
andere Netzwerkeinstellungen ein. Diese Methode wird für fortgeschrittene Benutzer von Wi-Fi-
Netzwerken empfohlen. Ausführliche Informationen finden Sie unter Manuelle Einrichtung in der
Bedienungsanleitung des Camcorders (PDF-Datei).
* WPS, eine Abkürzung für Wi-Fi Protected Setup, ist ein Standard, mit dem die Verbindung mit einem
Accesspoint
erleichtert wird.
Wi-Fi Protected Setup (WPS)
Wenn Ihr Accesspoint WPS-kompatibel ist (trägt das rechts abgebildete
Logo), ist das Herstellen einer Verbindung sehr einfach. Mit WPS verwenden
Sie entweder die Methode [WPS: Taste] oder [WPS: PIN-Code] (siehe die
Beschreibung im vorherigen Abschnitt). Wenn Sie mit WPS keine Verbindung
mit dem Camcorder herstellen können, verwenden Sie die Methode [Accesspoints suchen].
Informationen hierzu finden Sie auch in der Bedienungsanleitung des Routers.
COPY

Fehlersuche
Fehlersuche
Wenn Sie keine WLAN-Verbindung herstellen können, lesen Sie die nachstehenden Informationen.
Nehmen Sie auch die Bedienungsanleitung der anderen Wi-Fi-fähigen Geräte, die Sie benutzen, zur
Hilfe. Falls sich das Problem nicht beheben lässt, wenden Sie sich an Ihren Händler oder ein Canon-
Kundendienstzentrum.
14
Es ist keine Verbindung mit dem Wi-Fi-fähigen Gerät möglich.
- Der effektive Kommunikationsbereich zwischen Camcorder und Gerät kann je nach der Stärke
des kabellosen Signals unterschiedlich sein. Versuchen Sie, den Camcorder in geringerer
Entfernung zum Gerät zu verwenden.
- Kabellose Telefone, Mikrowellenöfen, Kühlschränke oder andere Geräte, die sich auf der
direkten Linie zwischen W-LAN-Router und Camcorder befinden, können das kabellose Signal
stören. Versuchen Sie, den Camcorder etwas weiter entfernt von solchen Geräten zu benutzen.
Liste der Meldungen
(in alphabetischer Reihenfolge)
Bei Anzeige einer der unten stehenden Meldungen auf dem Camcorderbildschirm lesen Sie die
angegebenen Informationen zur Behebung des Problems. Wenn eine Meldung angezeigt wird, die
nicht unten aufgeführt ist, lesen Sie die Liste der Meldungen in der Bedienungsanleitung des
Camcorders (PDF-Datei).
Another user is already controlling the camcorder. Try again later.
(Ein anderer Benutzer steuert bereits den Camcorder. Versuchen Sie es später noch einmal.)
- Diese Meldung erscheint auf dem Bildschirm des Wi-Fi-Geräts. Mehrere Wi-Fi-Geräte
versuchen, mit dem Camcorder zu verbinden. Stellen Sie sicher, dass nur ein Wi-Fi-Gerät
versucht zu verbinden, und berühren Sie dann 'Retry'.
Abdeckung für Speicherkarte ist offen
- Die Speicherkartenabdeckung wurde geöffnet, während auf die Speicherkarte zugegriffen
wurde. Beenden Sie die verwendete Wi-Fi-Funktion und heben Sie die kabellose Verbindung
auf.
Wi-Fi-Verbindung wurde unterbrochen
- Vergewissern Sie sich, dass der Camcorder und der Accesspoint dieselbe Authentifizierungs-/
Verschlüsselungsmethode verwenden.
- Falls der Accesspoint Filter für MAC-Adressen verwendet, geben Sie die MAC-Adresse des
Camcorders in den Konfigurationsbildschirm des Accesspoints ein.
COPY

MEMO
. . . . . . . . . . . . . . . . . . . . . . . . . . . . . . . . . . . . . . . . . . . . . . . . . . . . . . . . . . . . . . . . . . . . . . . . . . . . . . . . . . .
. . . . . . . . . . . . . . . . . . . . . . . . . . . . . . . . . . . . . . . . . . . . . . . . . . . . . . . . . . . . . . . . . . . . . . . . . . . . . . . . . . .
. . . . . . . . . . . . . . . . . . . . . . . . . . . . . . . . . . . . . . . . . . . . . . . . . . . . . . . . . . . . . . . . . . . . . . . . . . . . . . . . . . .
. . . . . . . . . . . . . . . . . . . . . . . . . . . . . . . . . . . . . . . . . . . . . . . . . . . . . . . . . . . . . . . . . . . . . . . . . . . . . . . . . . .
. . . . . . . . . . . . . . . . . . . . . . . . . . . . . . . . . . . . . . . . . . . . . . . . . . . . . . . . . . . . . . . . . . . . . . . . . . . . . . . . . . .
. . . . . . . . . . . . . . . . . . . . . . . . . . . . . . . . . . . . . . . . . . . . . . . . . . . . . . . . . . . . . . . . . . . . . . . . . . . . . . . . . . .
. . . . . . . . . . . . . . . . . . . . . . . . . . . . . . . . . . . . . . . . . . . . . . . . . . . . . . . . . . . . . . . . . . . . . . . . . . . . . . . . . . .
. . . . . . . . . . . . . . . . . . . . . . . . . . . . . . . . . . . . . . . . . . . . . . . . . . . . . . . . . . . . . . . . . . . . . . . . . . . . . . . . . . .
. . . . . . . . . . . . . . . . . . . . . . . . . . . . . . . . . . . . . . . . . . . . . . . . . . . . . . . . . . . . . . . . . . . . . . . . . . . . . . . . . . .
. . . . . . . . . . . . . . . . . . . . . . . . . . . . . . . . . . . . . . . . . . . . . . . . . . . . . . . . . . . . . . . . . . . . . . . . . . . . . . . . . . .
. . . . . . . . . . . . . . . . . . . . . . . . . . . . . . . . . . . . . . . . . . . . . . . . . . . . . . . . . . . . . . . . . . . . . . . . . . . . . . . . . . .
. . . . . . . . . . . . . . . . . . . . . . . . . . . . . . . . . . . . . . . . . . . . . . . . . . . . . . . . . . . . . . . . . . . . . . . . . . . . . . . . . . .
. . . . . . . . . . . . . . . . . . . . . . . . . . . . . . . . . . . . . . . . . . . . . . . . . . . . . . . . . . . . . . . . . . . . . . . . . . . . . . . . . . .
. . . . . . . . . . . . . . . . . . . . . . . . . . . . . . . . . . . . . . . . . . . . . . . . . . . . . . . . . . . . . . . . . . . . . . . . . . . . . . . . . . .
. . . . . . . . . . . . . . . . . . . . . . . . . . . . . . . . . . . . . . . . . . . . . . . . . . . . . . . . . . . . . . . . . . . . . . . . . . . . . . . . . . .
. . . . . . . . . . . . . . . . . . . . . . . . . . . . . . . . . . . . . . . . . . . . . . . . . . . . . . . . . . . . . . . . . . . . . . . . . . . . . . . . . . .
. . . . . . . . . . . . . . . . . . . . . . . . . . . . . . . . . . . . . . . . . . . . . . . . . . . . . . . . . . . . . . . . . . . . . . . . . . . . . . . . . . .
. . . . . . . . . . . . . . . . . . . . . . . . . . . . . . . . . . . . . . . . . . . . . . . . . . . . . . . . . . . . . . . . . . . . . . . . . . . . . . . . . . .
. . . . . . . . . . . . . . . . . . . . . . . . . . . . . . . . . . . . . . . . . . . . . . . . . . . . . . . . . . . . . . . . . . . . . . . . . . . . . . . . . . .
. . . . . . . . . . . . . . . . . . . . . . . . . . . . . . . . . . . . . . . . . . . . . . . . . . . . . . . . . . . . . . . . . . . . . . . . . . . . . . . . . . .
. . . . . . . . . . . . . . . . . . . . . . . . . . . . . . . . . . . . . . . . . . . . . . . . . . . . . . . . . . . . . . . . . . . . . . . . . . . . . . . . . . .
. . . . . . . . . . . . . . . . . . . . . . . . . . . . . . . . . . . . . . . . . . . . . . . . . . . . . . . . . . . . . . . . . . . . . . . . . . . . . . . . . . .
. . . . . . . . . . . . . . . . . . . . . . . . . . . . . . . . . . . . . . . . . . . . . . . . . . . . . . . . . . . . . . . . . . . . . . . . . . . . . . . . . . .
. . . . . . . . . . . . . . . . . . . . . . . . . . . . . . . . . . . . . . . . . . . . . . . . . . . . . . . . . . . . . . . . . . . . . . . . . . . . . . . . . . .
. . . . . . . . . . . . . . . . . . . . . . . . . . . . . . . . . . . . . . . . . . . . . . . . . . . . . . . . . . . . . . . . . . . . . . . . . . . . . . . . . . .
. . . . . . . . . . . . . . . . . . . . . . . . . . . . . . . . . . . . . . . . . . . . . . . . . . . . . . . . . . . . . . . . . . . . . . . . . . . . . . . . . . .
COPY

Indice
Funzioni Wi-Fi
03 Per cominciare
03 Introduzione al Wi-Fi
06 Operazioni a distanza tramite l'applicazione Telecomando Wi-Fi
07 Visualizzazione a distanza: visualizzazione delle registrazioni con un browser Web su
un dispositivo iOS o Android
08 Caricamento di registrazioni con un dispositivo iOS
2
10 Riproduzione su un computer
10 Trasferimento di file sul computer o un server FTP
11 Condividere registrazioni con CANON iMAGE GATEWAY
12 Connessione Wi-Fi tramite un punto di accesso
13 Risoluzione dei problemi
Riconoscimento dei marchi di fabbrica
• Microsoft e Windows sono marchi di fabbrica o marchi registrati di Microsoft Corporation negli Stati Uniti e/o altri
paesi.
• App Store, iPad, iPhone, iPod, iTunes e Mac OS sono marchi di Apple Inc., registrati negli Stati Uniti e in altri
paesi.
• Google, Android, Google Play, YouTube sono marchi di Google Inc.
• Facebook è un marchio registrato di Facebook, Inc.
• IOS è un marchio o un marchio registrato di Cisco negli USA e in altri paesi ed è utilizzato su licenza.
• Il nome e i marchi Twitter sono marchi di Twitter, Inc.
• Wi-Fi è un marchio di fabbrica registrato di Wi-Fi Alliance.
• Wi-Fi Certified, WPA, WPA2 e il logo di Wi-Fi Certified sono marchi di fabbrica di Wi-Fi Alliance.
• WPS nelle impostazioni della videocamera, nelle indicazioni su schermo e in questo manuale significa
“configurazione Wi-Fi protetta”.
• Il marchio Wi-Fi Protected Setup Identifier Mark è un marchio di Wi-Fi Alliance.
• JavaScript è un marchio o marchio registrato di Oracle Corporation, delle rispettive filiali o delle consociate, negli
Stati Uniti e in altri paesi.
• Altri nomi e prodotti non citati potrebbero essere marchi di fabbrica o marchi registrati delle rispettive società.
COPY
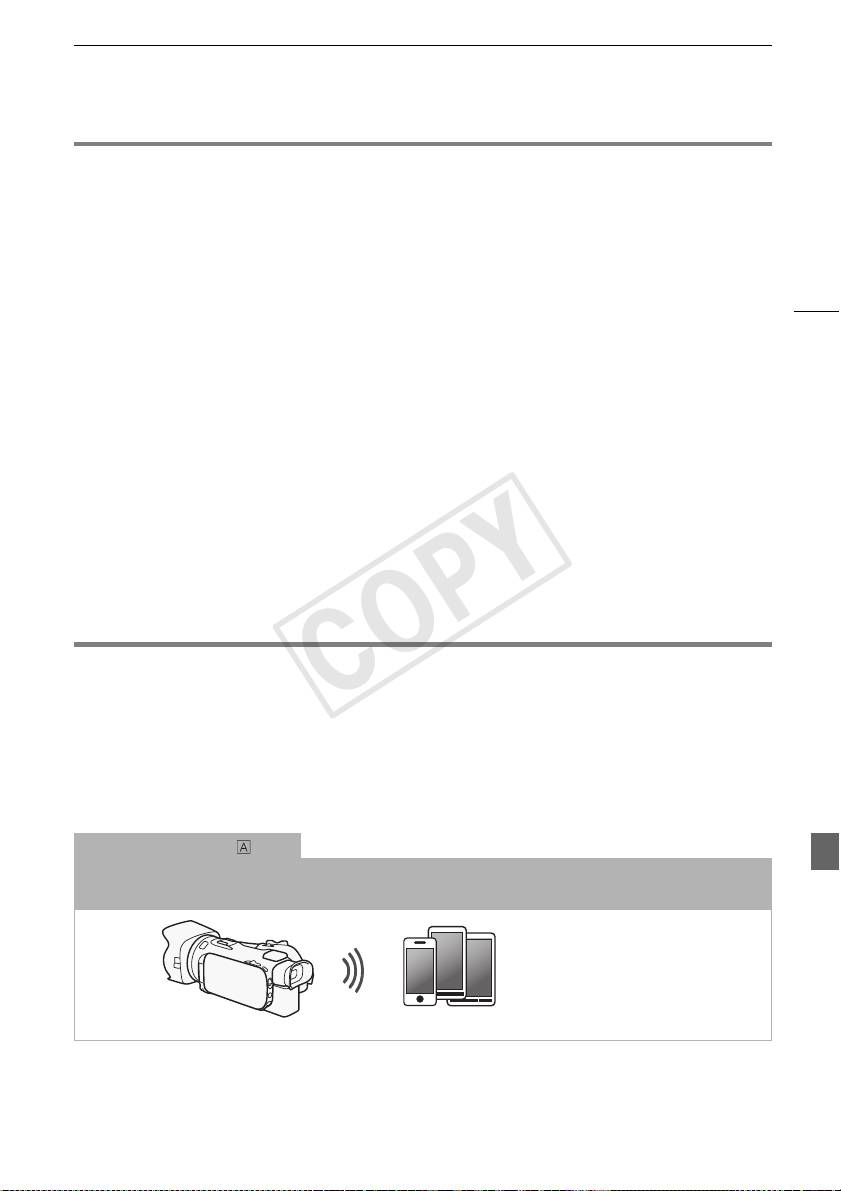
Per cominciare
Per cominciare
Questo manuale consente di iniziare ad usare le funzioni Wi-Fi della videocamera. Per maggiori
informazioni sulle funzioni Wi-Fi e sulle procedure dettagliate, consultate la versione intergrale del
manuale di istruzioni (file PDF sul CD-ROM allegato). Quando il presente manuale rimanda a una
sezione del Manuale di istruzioni, potete utilizzare il sommario o la funzione di ricerca del PDF per
trovare rapidamente la sezione desiderata. Per installare il Manuale di istruzioni completo, fate
3
riferimento alla sezione Installazione del manuale di istruzioni della videocamera (file PDF) della Guida
rapida fornita.
Di seguito si riportano le definizioni di alcuni termini utilizzati frequentemente nel testo.
Punto di accesso
Un punto di accesso wireless (WAP) è un dispositivo che permette ad apparecchi wireless come, ad
esempio, la videocamera, di connettersi a una rete cablata (anche internet) utilizzando lo standard Wi-
Fi. Molto probabilmente, il vostro router wireless sarà di questo tipo.
Rete Wi-Fi
Un gruppo di computer o di altri dispositivi in casa, ufficio o altro luogo, connessi in modalità wireless
tramite Wi-Fi.
SSID
Service Set Identifier. Si tratta del nome pubblico di una rete Wi-Fi.
Introduzione al Wi-Fi
Quando si utilizzano le funzioni Wi-Fi della videocamera per collegarsi a uno smartphone o un tablet,
potete salvare, riprodurre e caricare le vostre registrazioni in wireless. Potete anche utilizzare uno
1
smartphone o tablet (dispositivi iOS o Android
) come telecomando e registrare utilizzandone il
browser di navigazione.
1
Nel manuale, il termine "dispositivo iOS" indica iPhone, iPod e iPad con funzione Wi-Fi attivata mentre il
termine "dispositivo Android" indica smartphone e tablet Android con funzione Wi-Fi attivata.
Connessione Wi-Fi
Con l'applicazione Telecomando Wi-Fi potete utilizzare il vostro dispositivo iOS o Android per azionare la
videocamera a distanza e registrare (A 6).
Dispositivo iOS o Android
COPY
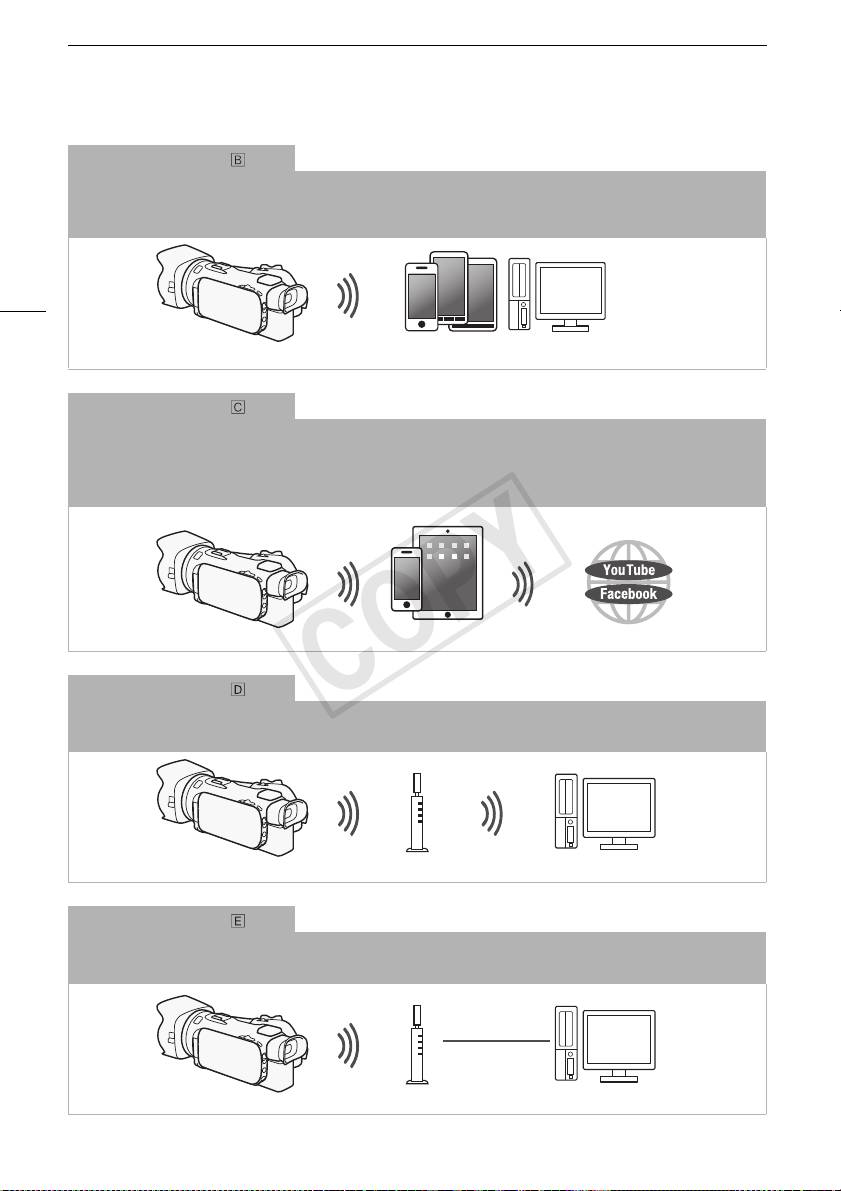
Introduzione al Wi-Fi
Connessione Wi-Fi
2
Connettete in wireless la videocamera al dispositivo iOS o Android o a un computer
e utilizzatene il browser Web
per visualizzare le registrazioni della videocamera (A 7).
2
Potete anche utilizzare un computer collegato tramite punto di accesso.
4
Dispositivi iOS, Android etc.
Connessione Wi-Fi
3
Dopo aver scaricato la app Movie Uploader
, potrete connettere in wireless la videocamera a un dispositivo iOS
(A 8) per salvare, riprodurre e caricare le registrazioni. Potete anche usare questo tipo di connessione se
desiderate caricare subito i video su YouTube e Facebook.
3
La app Movie Uploader di PIXELA è disponibile gratuitamente su App Store.
Dispositivo iOS
Connessione Wi-Fi
Connettete la videocamera a un router wireless (punto di accesso) su una rete Wi-Fi (A 12). Usate questa
connessione se desiderate salvare le registrazioni sul computer o su un server FTP (A 10).
Punto di accesso Computer
Connessione Wi-Fi
Connettete la videocamera a una rete wireless e utilizzate la funzione media server per riprodurre le registrazioni su
un dispositivo collegato in rete tramite cavo LAN (A 10).
Cavo LAN
Punto di accesso
Computer
COPY
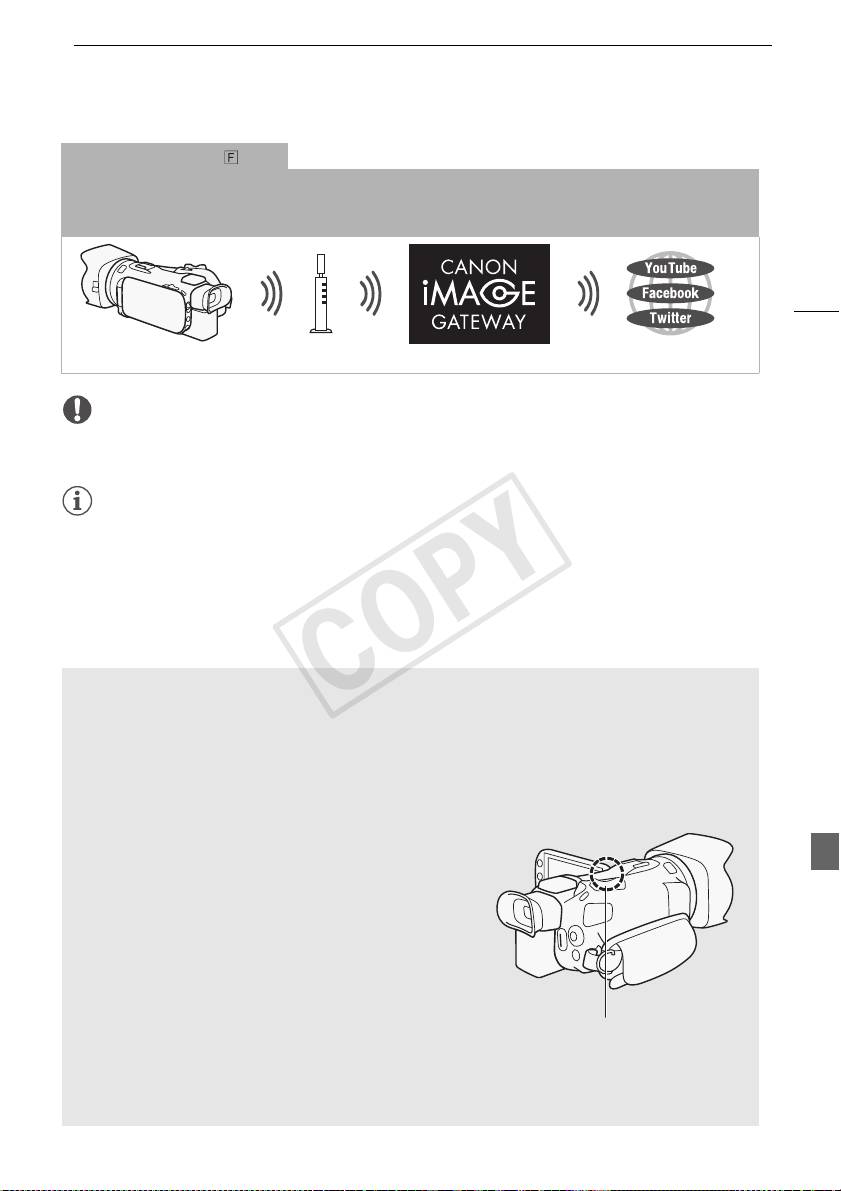
Introduzione al Wi-Fi
Connessione Wi-Fi
Connettete la videocamera a un router wireless (punto di accesso) su una rete Wi-Fi. Utilizzate questa connessione
se prevedete di connettervi al servizio CANON iMAGE GATEWAY (A 11). Dopo averlo fatto, potrete anche
condividere video su YouTube e Facebook.
5
Punto di accesso
IMPORTANTE
• Utilizzare una rete Wi-Fi non protetta può comportare il rischio che i file e i dati siano visibili da terzi
non autorizzati. Considerate sempre il possibile pericolo.
NOTE
• Quando utilizzate una funzione Wi-Fi che non sia il controllo a distanza della videocamera con
l'applicazione Telecomando Wi-Fi, non aprite il coperchio del doppio alloggiamento per schede di
memoria.
• Quando utilizzate funzioni Wi-Fi che non siano il controllo a distanza della videocamera tramite
l'applicazione Telecomando Wi-Fi, la funzione di spegnimento automatico della videocamera verrà
disattivata.
Prima di utilizzare le funzioni Wi-Fi
A seconda della funzione, la videocamera si collegherà via wireless a un dispositivo Wi-Fi, ad
esempio uno smartphone, oppure direttamente a una rete Wi-Fi tramite un punto di accesso (router
wireless)*. Dopo aver selezionato la funzione desiderata, seguite le istruzioni a schermo per
connettere la videocamera.
* I diversi fabbricanti possono riferirsi al punto di accesso con nomi diversi, ad esempio router di rete
wireless, o router LAN wireless.
Informazioni sull'antenna Wi-Fi
Quando utilizzate le funzioni Wi-Fi della videocamera, fate
attenzione a non coprirne il retro con la mano o altri oggetti.
L’antenna Wi-Fi si trova sul retro dell’apparecchio e coprirla
può comportare dei disturbi al segnale wireless.
Antenna Wi-Fi
Standard Wi-Fi della videocamera
Per i dettagli sullo standard Wi-Fi della videocamera consultate Wi-Fi standard della videocamera
sul manuale di istruzioni della videocamera (file PDF).
COPY
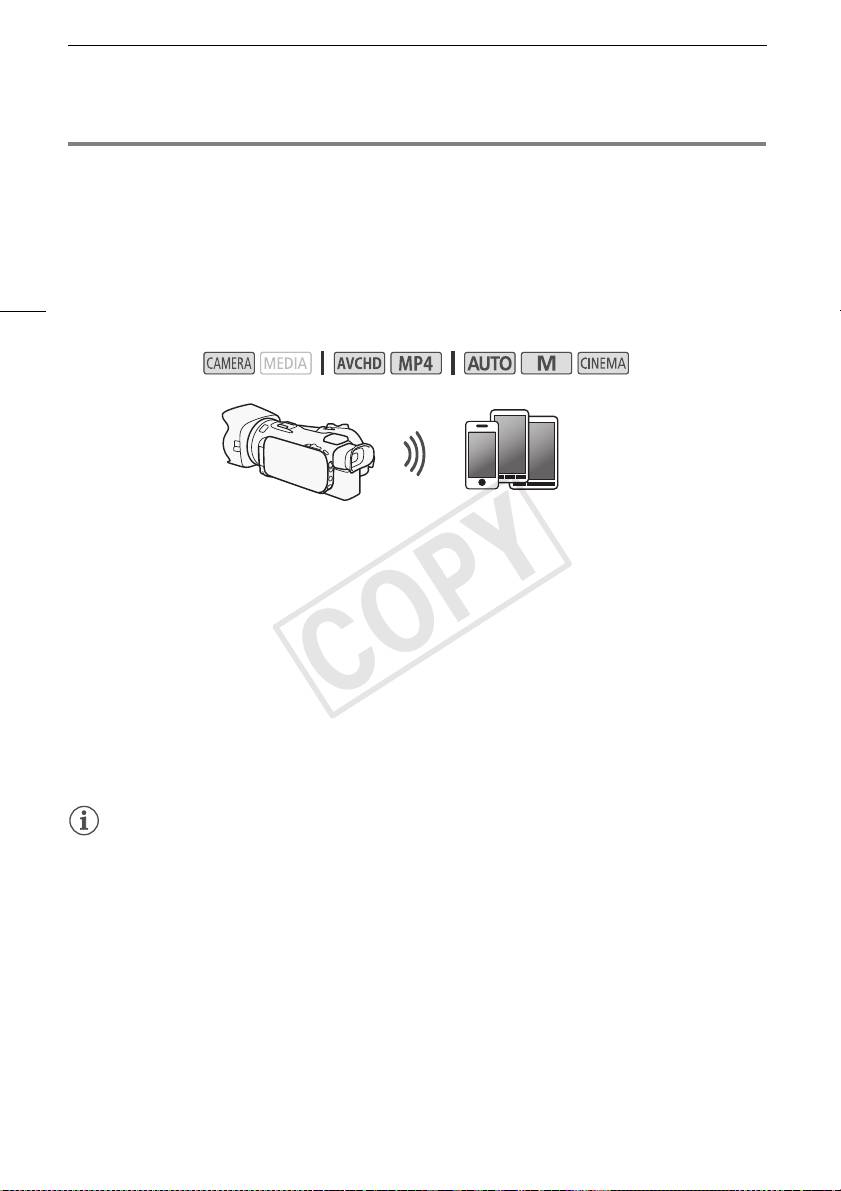
Operazioni a distanza tramite l'applicazione Telecomando Wi-Fi
Operazioni a distanza tramite l'applicazione Telecomando Wi-Fi
Con Telecomando Wi-Fi, un'applicazione di navigazione in rete accessibile dal browser* dei dispositivi
compatibili con le reti Wi-Fi**, potete far funzionare la videocamera a distanza. L'applicazione
Telecomando Wi-Fi vi permette di controllare le immagini tramite visualizzazione diretta, avviare e
fermare la registrazione e controllare a distanza modalità di ripresa, esposizione, bilanciamento del
bianco, apertura, guadagno, velocità dell'otturatore, messa a fuoco e zoom.
6
* È necessario un browser di navigazione con JavaScript e cookie abilitati.
** Per i dettagli su dispositivi compatibili, sistemi operativi, browser web etc, visitate il sito Canon del
vostro Paese.
Modalità operative:
Dispositivo iOS o Android
Impostazione della password della videocamera
Per le funzioni Wi-Fi che richiedono un dispositivo iOS o Android è necessario impostare la password
della videocamera. Una volta inserita la password, non sarà più necessario specificarla (a meno che le
impostazioni della videocamera non vengano ripristinate o sovrascritte).
1 Aprite la schermata [Impostazioni smartphone].
[FUNC.] > [MENU] > p/s* > [Wi-Fi] > [Impostazioni smartphone]
* Toccate s per le funzioni di visualizzazione a distanza e media server.
2 Toccate la password della videocamera.
3 Inserite una password di 8 caratteri e poi toccate [OK].
4 Toccate [K] e poi [X].
NOTE
• Dopo che la password della videocamera è stata impostata, non sarà più visibile sullo schermo.
Annotatela per non rischiare di dimenticarla. Per cambiare la password, ripetete la procedura di cui
sopra.
Uso della videocamera a distanza
1 Videocamera: aprite la schermata [Telecomando Wi-Fi].
[FUNC.] > [„ Telecomando Wi-Fi]
2 Videocamera: toccate [ON].
• Appariranno SSID (nome di rete) della videocamera e URL da inserire nel browser di rete.
• La videocamera è ora pronta per connettersi con il dispositivo.
COPY
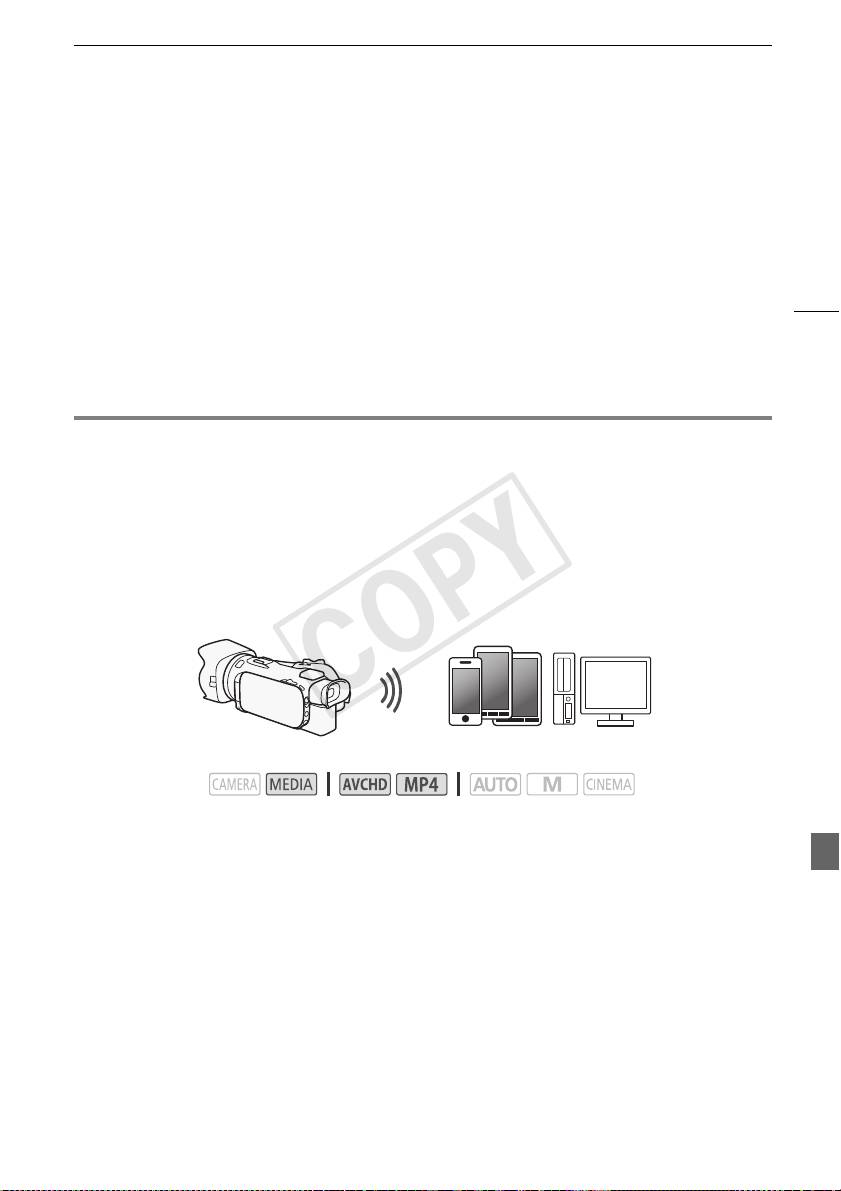
Visualizzazione a distanza: visualizzazione delle registrazioni con un browser Web su un dispositivo
3 Dispositivo iOS/Android: attivate la funzione Wi-Fi nella schermata delle impostazioni.
• Verranno visualizzati i nomi dei punti di accesso individuati.
4 Dispositivo iOS/Android: toccate il punto di accesso con lo stesso SSID indicato nella
fase 2.
• Se avete già compiuto la procedura in precedenza e non avete cambiato la password, la
connessione avverrà automaticamente.
5 Dispositivo iOS/Android: inserite la password che avete impostato per la videocamera.
7
6 Dispositivo iOS/Android: digitate nel browser web l'URL indicato sullo schermo della
videocamera in modo da avviare l'applicazione Telecomando Wi-Fi.
• Per maggiori dettagli su questa funzione, consultate Operazioni a distanza tramite l'applicazione
Telecomando Wi-Fi nel manuale di istruzioni della videocamera (file PDF).
Visualizzazione a distanza: visualizzazione delle registrazioni
con un browser Web su un dispositivo iOS o Android
La funzione di visualizzazione a distanza consente di utilizzare il browser Web su dispositivi iOS,
Android, computer o altri apparecchi simili in uso per visualizzare un elenco delle registrazioni
contenute nella videocamera, riprodurle e scaricarle.* Questa funzione vi consente di vedere le
registrazioni anche quando siete fuori casa.
* A seconda di alcune variabili (il dispositivo in uso, il sistema operativo e il browser, il formato e la
modalità di registrazione del filmato) potrebbe non essere sempre possibile riprodurre o scaricare le
registrazioni. Per ulteriori dettagli visitate il sito internet Canon del vostro paese.
Dispositivi iOS, Android etc.
Modalità operative:
1 Videocamera: aprire lo schermo indice desiderato.
2 Videocamera: aprite la schermata [Riproduzione via browser].
[MENU] > s > [Wi-Fi] > [Riproduzione via browser]
• Apparirà il SSID (nome rete) della videocamera.
• La videocamera è ora pronta per connettersi con il dispositivo.
• Per impostare o modificare la password della videocamera, effettuate la procedura indicata in
Impostazione della password della videocamera (A 6) cominciando dalla fase 2.
3 Dispositivo iOS/Android: attivate la funzione Wi-Fi nella schermata delle impostazioni.
• Verranno visualizzati i nomi dei punti di accesso individuati.
4 Dispositivo iOS/Android: toccate il punto di accesso con lo stesso SSID indicato nella
fase 2.
• Se avete già compiuto la procedura in precedenza e non avete cambiato la password, la
connessione avverrà automaticamente.
COPY
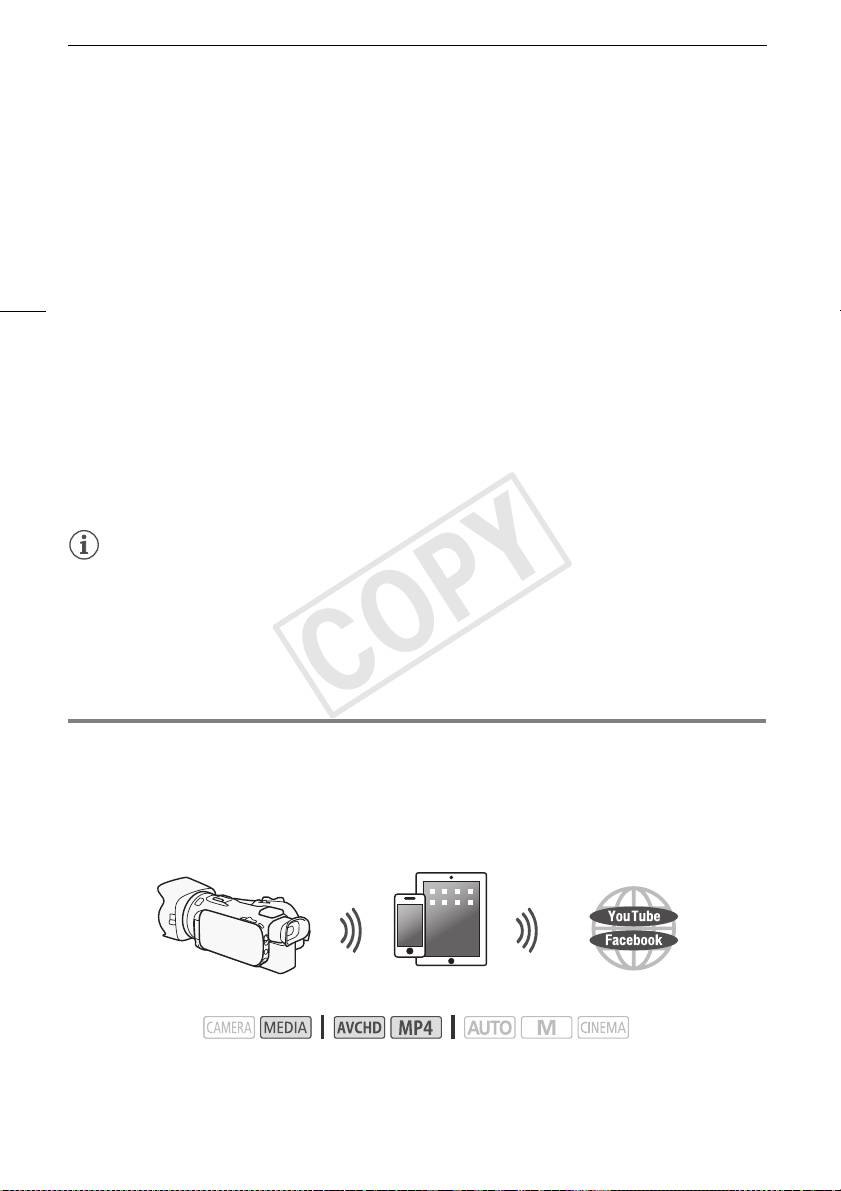
Caricamento di registrazioni con un dispositivo iOS
5 Dispositivo iOS/Android: inserite la password che avete impostato per la videocamera.
• Il messaggio [Connesso] verrà visualizzato sullo schermo della videocamera e la connessione
verrà stabilita.
6 Dispositivo iOS/Android: avviate il browser Web.
7 Dispositivo iOS/Android: immettete l'URL visualizzata sullo schermo della videocamera
nella barra degli indirizzi del browser Web.
• Apparirà la schermata di visualizzazione a distanza.
8
• Finché non modificherete le impostazioni della porta, l'URL sarà sempre la stessa e può risultare
comodo salvarla con un segnalibro.
8 Dispositivo iOS/Android: toccate [6·] nella sezione superiore sinistra dello schermo
per aprire lo schermo indice desiderato. Ora toccate la registrazione desiderata.
• Per i filmati, toccate l'cona di riproduzione per avviare la riproduzione. Per le foto: la foto verrà
visualizzata.
9 Videocamera: al termine, toccate [Fine] > [OK].
• Per maggiori dettagli su questa funzione, consultate Visualizzazione a distanza: visualizzazione
delle registrazioni con un browser Web su un dispositivo iOS o Android nel manuale di istruzioni
della videocamera (file PDF).
NOTE
• I seguenti tipi di scene MP4 saranno riconosciuti come file separati su altri dispositivi.
- Scene di dimensioni superiori a 4 GB
- Scene registrate a 35 Mbps di durata superiore a 30 minuti
- Scene registrate con una modalità di registrazione diversa da 35 Mbps e di durata superiore a
1ora
• Alla videocamera si può collegare un solo dispositivo alla volta.
Caricamento di registrazioni con un dispositivo iOS
Utilizzando la app Movie Uploader* per dispositivi iOS potete collegare in wireless la videocamera al
dispositivo e caricare i vostri filmati su YouTube e filmati e foto su Facebook anche se siete lontani dalla
vostra rete domestica. Potete persino salvare** e riprodurre filmati MP4 e foto sul dispositivo iOS.
* La app Movie Uploader di PIXELA è disponibile gratuitamente su App Store.
** Non disponibile per i filmati MP4 registrati a 35 Mbps.
Dispositivo iOS
Modalità operative:
COPY

Caricamento di registrazioni con un dispositivo iOS
PUNTI DA CONTROLLARE
• Prima di eseguire questa procedura per la prima volta, installate la app Movie Uploader sul
dispositivo iOS. L'applicazione può essere scaricata gratuitamente da questo sito:
http://appstore.com/movieuploader
1 Videocamera: aprite la schermata indice desiderata per i filmati.
9
2 Videocamera: aprite la schermata [Movie Uploader].
[MENU] > s > [Wi-Fi] > [Movie Uploader]
• Apparirà il SSID (nome rete) della videocamera.
• La videocamera è ora pronta per connettersi con il dispositivo iOS.
• Per impostare o modificare la password della videocamera, effettuate la procedura indicata in
Impostazione della password della videocamera (A 6) cominciando dalla fase 2.
3 Dispositivo iOS: attivate la funzione Wi-Fi nella schermata delle impostazioni.
• Verranno visualizzati i nomi dei punti di accesso individuati.
4 Dispositivo iOS: toccate il punto di accesso con lo stesso SSID indicato nella fase 2.
• Se avete già compiuto la procedura in precedenza e non avete cambiato la password, la
connessione avverrà automaticamente.
5 Dispositivo iOS: inserite la password che avete impostato per la videocamera.
• Il messaggio [Connesso] verrà visualizzato sullo schermo della videocamera e la connessione
verrà stabilita.
6 Dispositivo iOS: utilizzate l'app Movie Uploader per caricare i filmati della videocamera (ed
eventualmente le foto).
• Per i dettagli sull'app Movie Uploader, visitate il sito PIXELA:
http://www.pixela.co.jp/oem/canon/e/movieuploader/ (solo in inglese)
• Per maggiori dettagli su questa funzione, consultate Caricamento di registrazioni con un
dispositivo iOS nel manuale di istruzioni della videocamera (file PDF).
NOTE
• I seguenti tipi di scene MP4 saranno riconosciuti come file separati su altri dispositivi.
- Scene di dimensioni superiori a 4 GB
- Scene registrate a 35 Mbps di lunghezza superiore a 30 minuti
- Scene registrate con una modalità di registrazione diversa da 35 Mbps e di durata superiore a
1ora
COPY
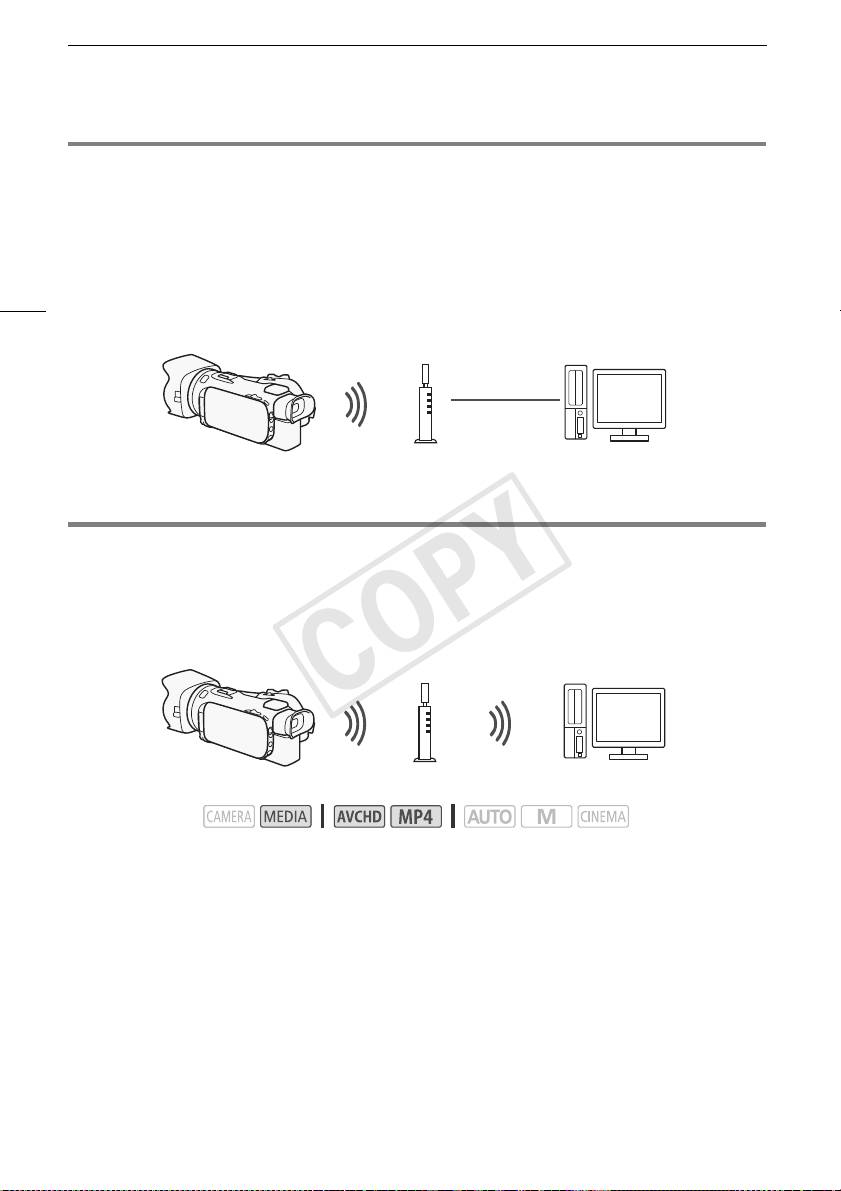
Riproduzione su un computer
Riproduzione su un computer
Con la funzione Media Server (Server multimediale), potete visualizzare filmati e foto da un computer o
un dispositivo simile connesso tramite WiFi. Questa funzione richede la presenza di un punto di
accesso collegato alla rete domestica e l'installazione di software sul computer in grado di riprodurre
filmati e foto su server multimediali. Si consiglia di connettere il computer al punto di accesso mediante
cavo LAN. Consultate anche i manuali di istruzioni del computer, del software e del punto di accesso.
10
• Per maggiori dettagli su questa funzione, consultate Riproduzione su un computer nel manuale di
istruzioni della videocamera (file PDF).
Cavo LAN
Punto di accesso
Computer
Trasferimento di file sul computer o un server FTP
I file (registrazioni) si possono trasferire direttamente in wireless sul computer o un server FTP. Per
l'operazione è necessario che il server FTP sia configurato correttamente. Durante la configurazione
manuale dovrete specificare indirizzo IP del server FTP, porta, nome dell'utente, password e
destinazione per il trasferimento dei file (cioè dove desiderate trasferire i file).
Punto di accesso
Computer
Modalità operative:
1 Videocamera: aprite la schermata indice desiderata per i filmati.
2 Aprite la schermata [Trasferimento FTP].
[MENU] > s > [Wi-Fi] > [Trasferimento FTP]
3 Specificate l'indirizzo IP del server FTP per [Server FTP] e il numero della porta per [Porta].
4 Toccate [Avanti].
5 Inserite il nome dell'utente e la password e poi toccate [Avanti].
6 Inserite [/] per [Cartella di destinazione] e toccate [OK].
• A seconda delle impostazioni del server FTP, il testo necessario per numero della porta e cartella
di destinazione può essere diverso. Controllate le impostazioni sul vostro server FTP.
• La videocamra si connetterà al punto di accesso selezionato in Connessione Wi-Fi da un punto di
accesso (A 12).
COPY
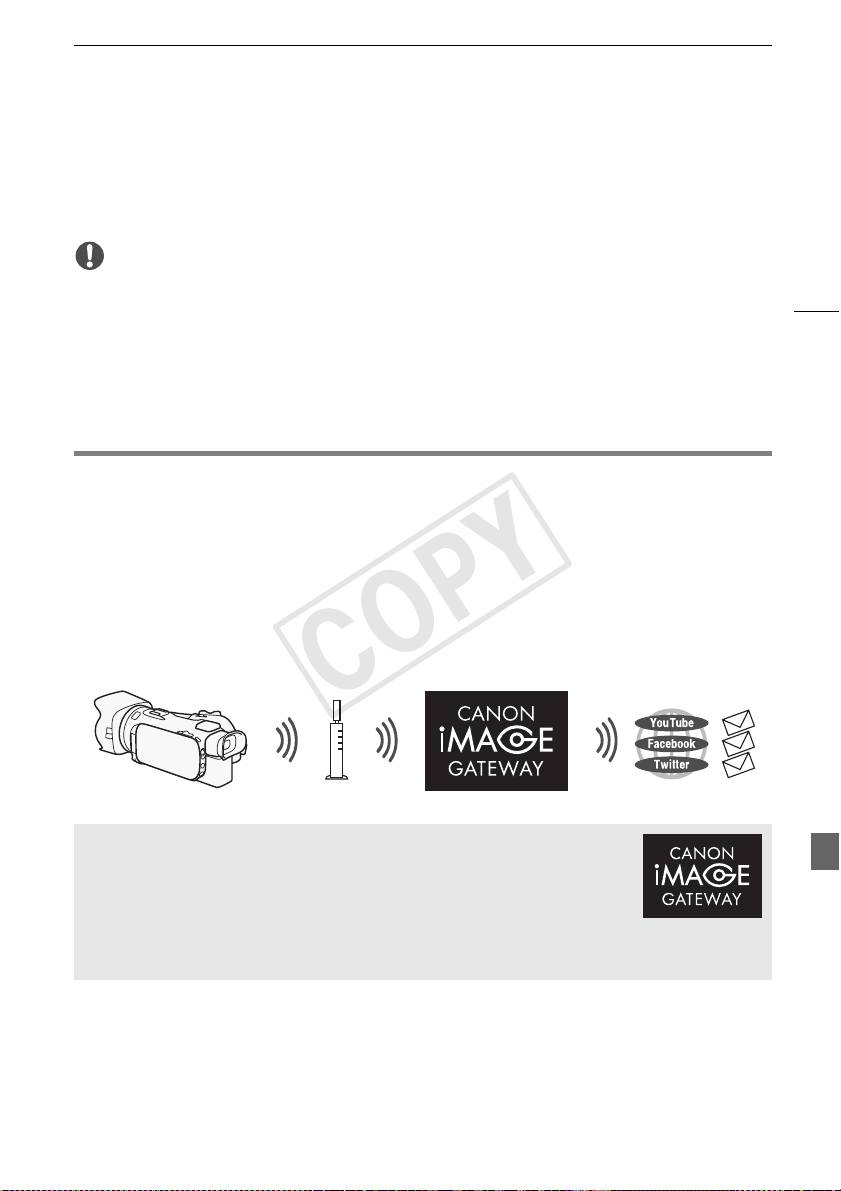
Condividere registrazioni con CANON iMAGE GATEWAY
7 Quando sullo schermo appare [Salvare il punto di accesso], toccate [OK] e andate avanti
con la procedura indicata in Connessione Wi-Fi tramite un punto di accesso (A 12).
• Per maggiori dettagli su questa funzione, consultate Trasferimento di file sul computer o un server
FTP nel manuale di istruzioni della videocamera (file PDF).
IMPORTANTE
• Quando trasferite dei file, osservate le precauzioni riportate qui di seguito. In caso contrario, il
11
trasferimento potrebbe interrompersi e i file incompleti rimanere nella destinazione.
- Se l'alloggiamento della scheda di memoria doppia è aperto.
- Non scollegate la sorgente di alimentazione né spegnete la videocamera.
• Se il trasferimento si interrompe, selezionate [Nuovi file] e ripetete l'operazione.
• Se nella destinazione del trasferimento restano dei file incompleti, controllatene il contenuto e
accertatevi che siano effettivamente da eliminare.
Condividere registrazioni con CANON iMAGE GATEWAY
Dopo aver completato la registrazione su CANON iMAGE GATEWAY*, potrete accedere a vari servizi
Web**. Potrete caricare filmati e foto su album online e condividerli su Facebook e Twitter, caricare
filmati su YouTube, inviare per e-mail i collegamenti dei vostri album online ad amici e parenti, e molto
altro ancora! Per utilizzare questa funzione è necessario un punto di accesso connesso a Internet.
• Per maggiori dettagli su questa funzione, consultate Condividere registrazioni con CANON iMAGE
GATEWAY nel manuale di istruzioni della videocamera (file PDF).
* La disponibilità varia a seconda dell'area.
** Il termine “servizi Web” viene utilizzato in questo documento per indicare vari servizi Internet supportati
da CANON iMAGE GATEWAY.
Router wireless
(punto di accesso)
CANON iMAGE GATEWAY
CANON iMAGE GATEWAY è un sito che offre vari servizi ai proprietari di
specifici prodotti Canon. Dopo aver completato la registrazione gratuita online,
potrete usare servizi Web offerti, creare album fotografici online ed altro ancora.
Visitate il sito Web di Canon per maggiori informazioni sulla registrazione e sui
paesi in cui il servizio è disponibile.
http://canon.com/cig
COPY
Connessione Wi-Fi tramite un punto di accesso
Requisiti generali
• Computer con i software forniti ImageBrowser EX e CameraWindow correttamente installati. Per
informazioni dettagliate su come installare il software, consultate Salvataggio di filmati MP4 foto con
ImageBrowser EX nel manuale di istruzioni della videocamera (file PDF).
• Completate la registrazione gratuita online su CANON iMAGE GATEWAY.
• Impostazioni dell'account per YouTube, Facebook e Twitter (a seconda del servizio che prevedete di
utilizzare).
12
Connessione Wi-Fi tramite un punto di accesso
La videocamera può connettersi a una rete Wi-Fi mediante un router wireless (punto di accesso) e
persino ricordare le impostazioni di connessione degli ultimi quattro punti di accesso utilizzati.
Requisiti generali
• Router configurato correttamente e che utilizza un protocollo Wi-Fi usato dalla
videocamera, è certificato Wi-Fi (ha il logo mostrato a destra) ed è sulla vostra
rete domestica.
Modalità operative:
Scegliete il metodo di connessione desiderato.
Opzioni
[WPS: Pulsante]* Semplicemente premete e mantenete premuto il pulsante WPS sul vostro punto
di accesso, quindi toccate lo schermo della videocamera. Questo è il metodo di connessione più
semplice se si utilizza un router compatibile con la modalità WPS.
[WPS: Codice PIN]* Con il browser di navigazione, accedete alla schermata di configurazione del
punto di accesso. La videocamera vi fornirà un codice PIN che dovrete immettere nel browser.
Questa opzione richiede un router compatibile con la modalità WPS e un computer o un altro
dispositivo connesso ad esso. Per ulteriori informazioni, consultate Configurazione Wi-Fi protetta
(WPS) nel manuale di istruzioni della videocamera (file PDF).
[Cercare punti di accesso] Seguendo le istruzioni su schermo della videocamera, selezionate il
punto di accesso dall'elenco di SSID rilevati e poi digitate la vostra password. Per ulteriori
informazioni, consultate Ricerca di punti di accesso nel manuale di istruzioni della videocamera (file
PDF).
[Impostazione manuale] Immettete manualmente il nome SSID del punto di accesso, la password
e le altre impostazioni di rete. Questo metodo è consigliato per gli utenti esperti di reti Wi-Fi. Per
ulteriori informazioni, consultate Configurazione manuale nel manuale di istruzioni della videocamera
(file PDF).
* La modalità WPS (Wi-Fi Protected Setup) è uno standard che facilita la connessione a un punto di
accesso
.
COPY

Risoluzione dei problemi
Configurazione Wi-Fi protetta (WPS)
Se il vostro punto di accesso è compatibile con WPS (e riporta il logo mostrato
a destra), la connessione della videocamera diventa facilissima. Con la
modalità WPS, utilizzerete il metodo [WPS: Pulsante] o il metodo [WPS:
Codice PIN] (vedere anche la descrizione nella sezione precedente). Se non
riuscite a connettervi correttamente con la modalità WPS, potete provare a utilizzare il metodo
[Cercare punti di accesso]. Consultate anche il manuale di istruzioni del router.
13
Risoluzione dei problemi
Se non riuscite a stabilire una connessione Wi-Fi, consultate i punti descritti di seguito. Consultate
anche il manuale di istruzioni degli altri dispositivi Wi-Fi utilizzati. Se il problema persiste, rivolgetevi al
vostro rivenditore oppure a un centro di assistenza Canon.
Non è possibile connettersi con il dispositivo Wi-Fi.
- Il raggio di comunicazione effettivo tra la videocamera e il dispositivo può variare in base
all’intensità del segnale. Provate ad avvicinare la videocamera al dispositivo.
- La presenza di telefoni portatili, forni a microonde, frigoriferi o altri dispositivi posti tra la
videocamera e il router wireless potrebbe causare interferenze nel segnale wireless. Provate ad
allontanare la videocamera da tali apparecchi.
Elenco dei messaggi
(in ordine alfabetico)
Fate riferimento alle seguenti indicazioni se viene visualizzato un messaggio sullo schermo della
videocamera. Se viene visualizzato un messaggio non incluso nel seguente elenco, consultate Elenco
dei messaggi nel manuale di istruzioni della videocamera (file PDF).
Another user is already controlling the camcorder. Try again later.
(La videocamera è già controllata da un altro utente. Ritentare più tardi.)
- Questo messaggio viene visualizzato sullo schermo del dispositivo Wi-Fi. Stanno cercando di
connettersi con la videocamera più dispositivi Wi-Fi. Assicurarsi che cerchi di connettersi un
solo dispositivo Wi-Fi, quindi toccare Retry.
Connessione Wi-Fi interrotta
- Telefoni portatili, apparecchiature a microonde, frigoriferi e altri elettrodomestici possono
interferire con il segnale wireless. Provate a usare la videocamera allontanandovi di più da tali
apparecchi.
- La videocamera potrebbe non riuscire a connettersi al punto di accesso se è già utilizzato da
troppi dispositivi.
Coperchio scheda aperto
- È stato aperto il coperchio dell’alloggiamento della scheda di memoria durante l’accesso alla
scheda. Arrestate la funzione Wi-Fi in uso e terminate la connessione Wi-Fi.
COPY

Índice
Funciones Wi-Fi
Wi-Fi Functions
03 Introducción
03 Introducción a Wi-Fi
06 Operación remota a través de la aplicación Wi-Fi Remoto
07 Navegador remoto: Visualización de grabaciones utilizando
un navegador web en su dispositivo iOS o Android
08 Carga de grabaciones utilizando un dispositivo iOS
2
10 Reproducción en un ordenador
10 Transferencia de archivos a un ordenador o un servidor FTP
11 Uso compartido de grabaciones con CANON iMAGE GATEWAY
12 Conexión Wi-Fi mediante un punto de acceso
13 Problemas y soluciones
Recocimientos de marcas comerciales
• Microsoft y Windows son marcas comerciales o marcas registradas de Microsoft Corporation en los Estados
Unidos y/o en otros países.
• App Store, iPad, iPhone, iPod, iTunes y Mac OS son marcas comerciales de Apple Inc., registradas en los EE.UU.
y en otros países.
• Google, Android, Google Play y YouTube son marcas comerciales de Google Inc.
• Facebook es una marca registrada de Facebook, Inc.
• IOS es una marca comercial o marca comercial registrada de Cisco en EE. UU. y otros países y se utiliza bajo
licencia.
• El nombre y las marcas de Twitter son marcas comerciales de Twitter, Inc.
• Wi-Fi es una marca registrada de la Wi-Fi Alliance.
• Wi-Fi Certified, WPA, WPA2, y el logotipo Wi-Fi Certified son marcas comerciales de la Wi-Fi Alliance.
• WPS, como se usa en los ajustes de la videocámara, en las indicaciones en pantalla y en este manual, significa
Wi-Fi Protected Setup (configuración Wi-Fi protegida).
• La marca de identificador Wi-Fi Protected Setup es una marca de la Wi-Fi Alliance.
• JavaScript es una marca comercial o una marca comercial registrada de Oracle Corporation, sus filiales o sus
subsidiarias en los Estados Unidos y en otros países.
• Otros nombres y productos no mencionados arriba pueden ser marcas comerciales o marcas registradas de sus
respectivas compañías.
COPY
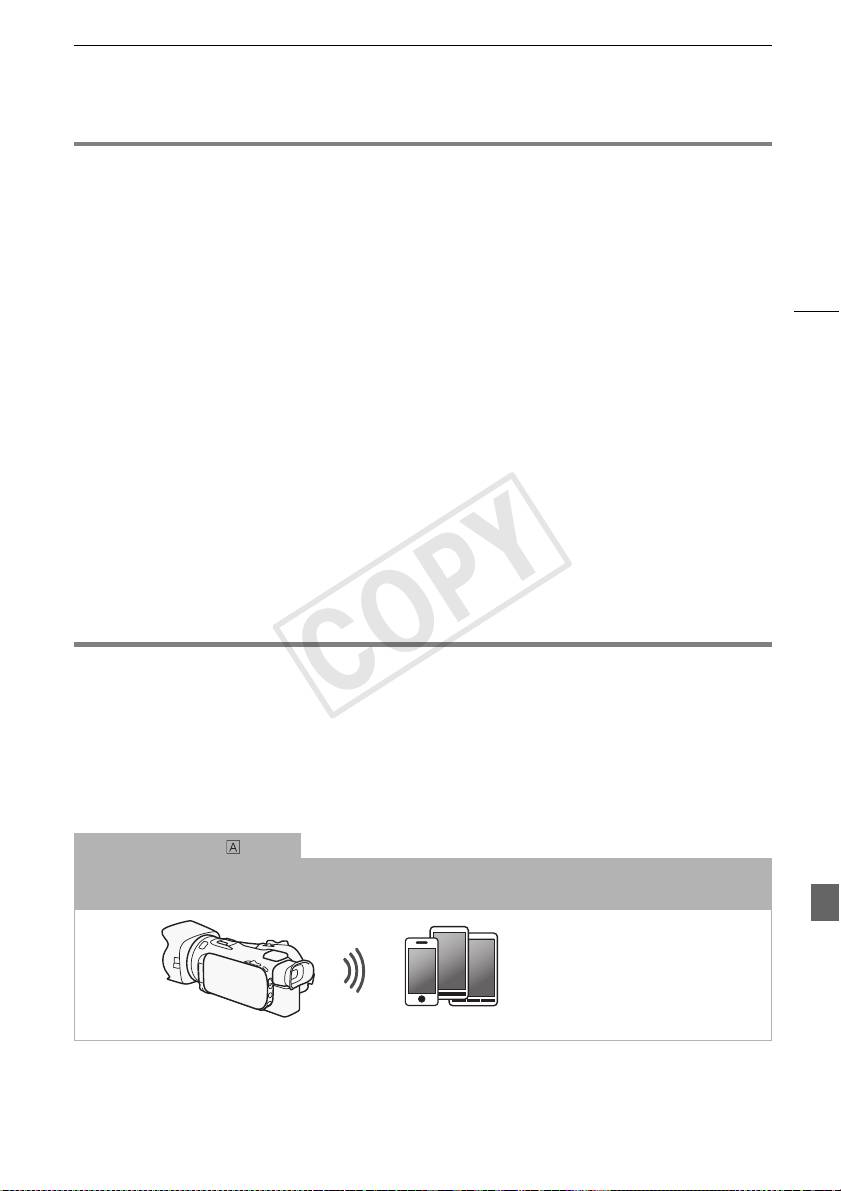
Introducción
Introducción
Este manual le introducirá en el uso de las funciones Wi-Fi de su videocámara. Para saber más acerca
de las funciones Wi-Fi y para ver procedimientos más detallados, consulte la versión completa del
manual de instrucciones (archivo PDF en el CD-ROM suministrado). Si el manual hace referencia a
una sección en el Manual de instrucciones de la videocámara, utilice el índice o la opción de
búsqueda de PDF como ayuda para encontrar la sección. Para instalar la versión completa del
3
Manual de instrucciones, consulte Instalación del Manual de Instrucciones de la Videocámara (archivo
PDF) en la Guía rápida suministrada.
Los términos que aparecen a continuación se utilizan con frecuencia en este texto.
Punto de acceso
Un punto de acceso inalámbrico (WAP) es un dispositivo que permite que dispositivos inalámbricos,
como su videocámara, se conecten a una red con cable (incluyendo Internet) usando el estándar
Wi-Fi. En la mayoría de los casos, será su enrutador inalámbrico.
Red Wi-Fi
Un grupo de ordenadores y otros dispositivos de los que disponga en su hogar, oficina u otra
ubicación que se encuentren conectados de manera inalámbrica mediante Wi-Fi.
SSID
Service Set Identifier. Es, sencillamente, el nombre público de una red Wi-Fi.
Introducción a Wi-Fi
Utilizando las funciones Wi-Fi de la videocámara para conectarla a un smartphone o tablet, puede
guardar, reproducir y cargar sus grabaciones de forma inalámbrica. Incluso puede utilizar un
1
smartphone o tablet (iOS o dispositivo Android
) como control remoto y efectuar grabaciones
utilizando el navegador de web del dispositivo.
1
“Dispositivo iOS” se utiliza en este texto para referirse a iPhones, iPods y iPads compatibles con Wi-Fi,
mientras que “dispositivo Android” se refiere a smartphones y tablets Android compatibles con Wi-Fi.
Conexión Wi-Fi
Usando la aplicación Wi-Fi Remoto, podrá utilizar su dispositivo iOS o Android para controlar la videocámara de
forma remota y realizar grabaciones (A 6).
Dispositivo iOS o Android
COPY
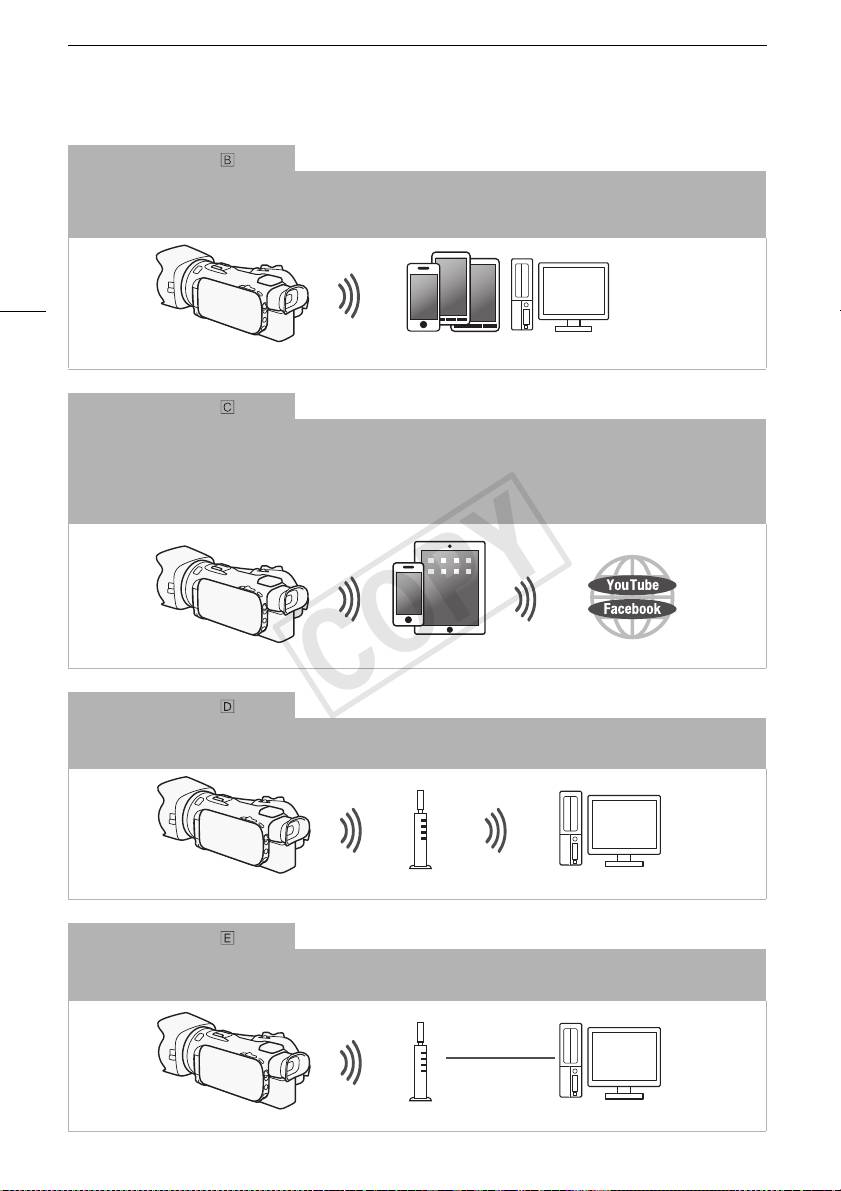
Introducción a Wi-Fi
Conexión Wi-Fi
2
Conecte de manera inalámbrica la videocámara a su dispositivo iOS, dispositivo Android o a su ordenador
y utilice
el navegador web del dispositivo para ver las grabaciones de la videocámara (A 7).
2
También puede utilizar un ordenador conectado mediante un punto de acceso.
4
Dispositivo iOS, dispositivo Android, etc.
Conexión Wi-Fi
3
Después de descargar la aplicación Movie Uploader
, conecte la videocámara de manera inalámbrica a un
dispositivo iOS (A 8) para guardar, reproducir y cargar sus grabaciones. Incluso puede utilizar este tipo de
conexión para compartir vídeos en YouTube y Facebook mientras se desplaza.
3
La aplicación Movie Uploader, suministrada por PIXELA, se encuentra disponible de manera gratuita
en App Store.
Dispositivo iOS
Conexión Wi-Fi
Conecte la videocámara inalámbricamente a un enrutador inalámbrico (punto de acceso) en una red Wi-Fi (A 12).
Utilice esta conexión si va a guardar sus grabaciones en un ordenador o servidor FTP (A 10).
Punto de acceso Ordenador
Conexión Wi-Fi
Conecte inalámbricamente la videocámara a una red y utilice la función de servidor multimedia y reproduzca sus
grabaciones en un dispositivo conectado a la red utilizando un cable LAN (A 10).
Cable LAN
Punto de acceso
Ordenador
COPY
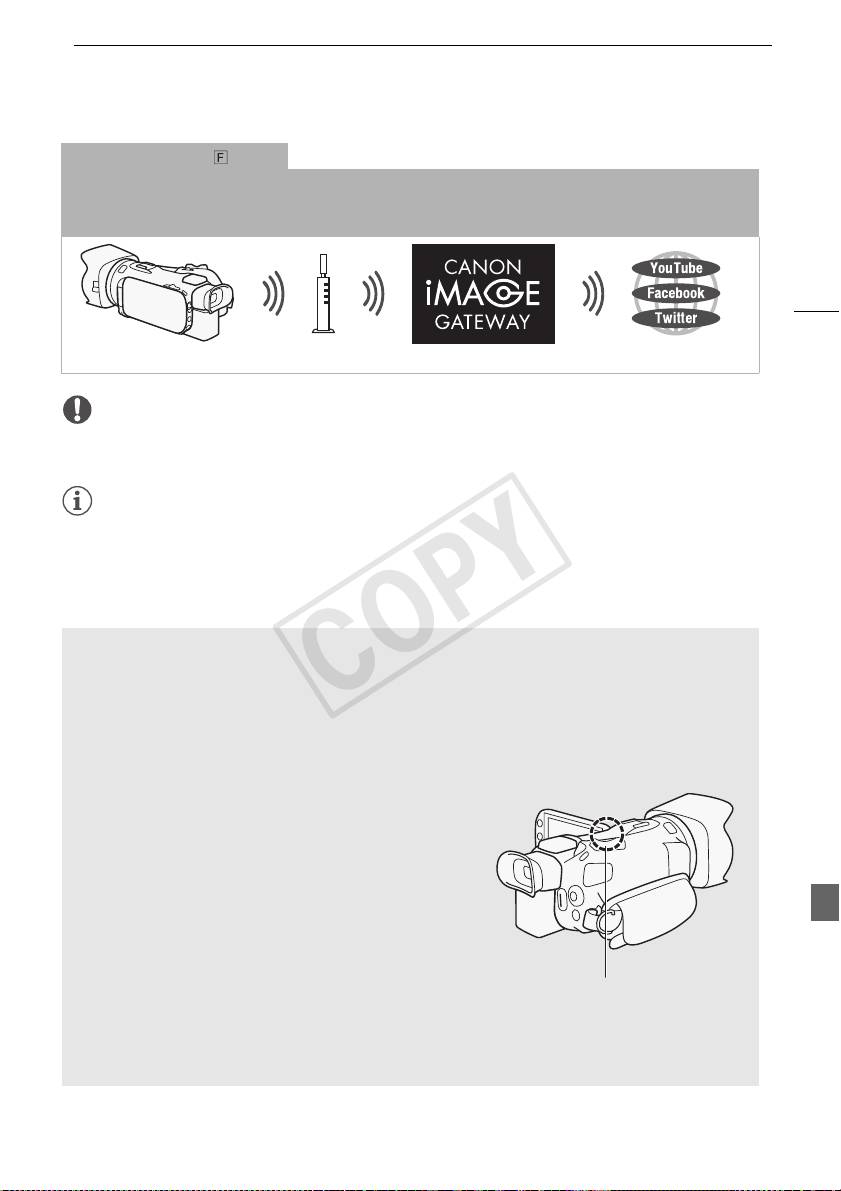
Introducción a Wi-Fi
Conexión Wi-Fi
Conecte la videocámara inalámbricamente a un enrutador inalámbrico (punto de acceso) en una red Wi-Fi. Utilice
esta conexión si va a conectarse a CANON iMAGE GATEWAY (A 11). Una vez esté conectado, podrá compartir
vídeos en YouTube y Facebook.
5
Punto de acceso
IMPORTANTE
• El uso de una red Wi-Fi desprotegida puede exponer sus archivos y datos al monitoreo por parte de
terceras partes no autorizadas. Tenga presente los riesgos que esto trae consigo.
NOTAS
• Mientras se utilizan funciones Wi-Fi que no sean el control remoto de la videocámara utilizando la
aplicación Wi-Fi Remoto, no abra la cubierta de la ranura para tarjeta de memoria doble.
• Mientras se utilizan funciones Wi-Fi que no sean del control remoto de la videocámara utilizando la
aplicación Wi-Fi Remoto, la función de apagado automático de la videocámara estará desactivada.
Antes de utilizar las funciones Wi-Fi
Dependiendo de la función, la videocámara se conectará de manera inalámbrica a un dispositivo
compatible con Wi-Fi, como un smartphone, o directamente a una red Wi-Fi a través de un punto
de acceso (enrutador inalámbrico)*. Una vez seleccionada la función que va a utilizar, siga las
indicaciones en pantalla para conectar la videocámara.
* Dependiendo del fabricante, es posible que se haga referencia al punto de acceso utilizando un
nombre diferente, como enrutador LAN inalámbrico o enrutador de red inalámbrica.
Acerca de la antena Wi-Fi
Cuando use las funciones Wi-Fi de la videocámara, no
cubra la parte trasera de la videocámara con la mano u otro
objeto. La antena de Wi-Fi se encuentra en la parte
posterior y si la cubre puede interferir con las señales
inalámbricas.
Antena Wi-Fi
Acerca del estándar Wi-Fi de la videocámara
Para los detalles acerca del estándar Wi-Fi de la videocámara, consulte Acerca del estándar Wi-Fi
de la videocámara en el manual de instrucciones de la videocámara (archivo PDF).
COPY
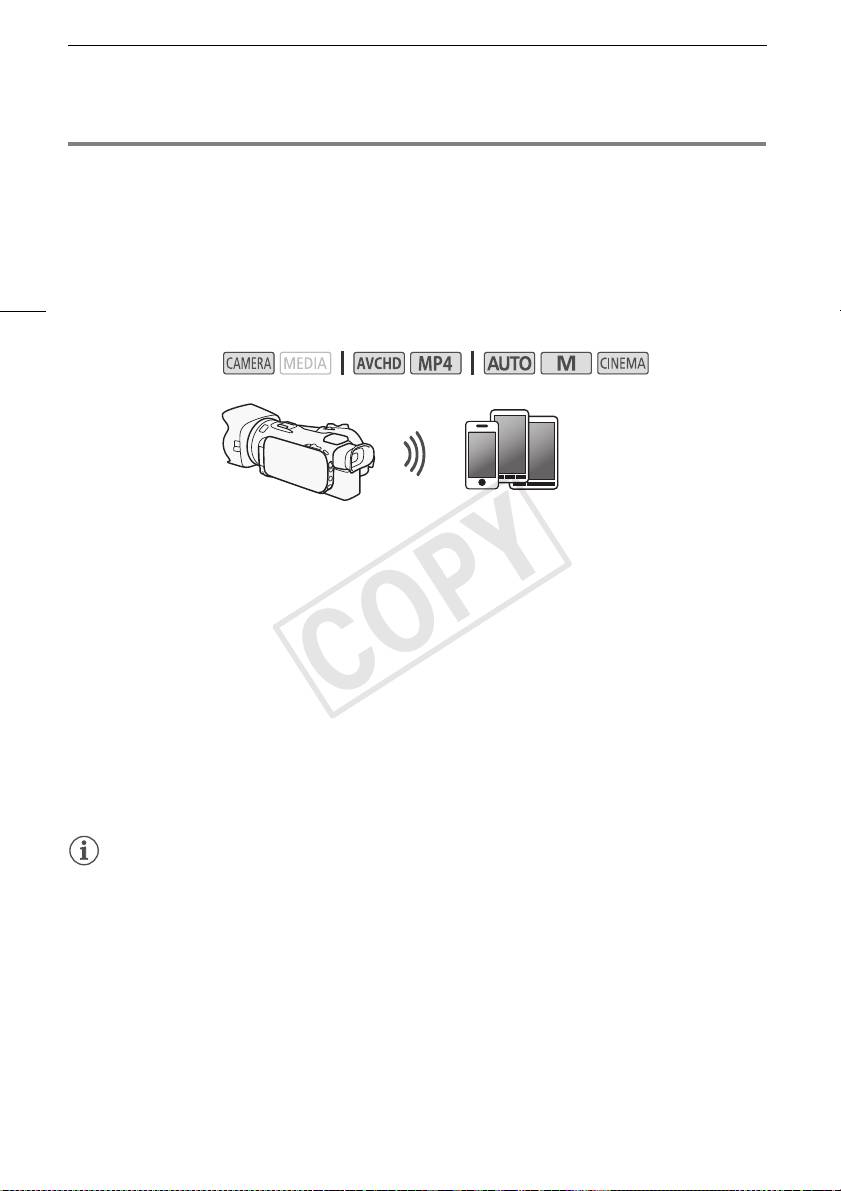
Operación remota a través de la aplicación Wi-Fi Remoto
Operación remota a través de la aplicación Wi-Fi Remoto
Puede operar la videocámara de forma remota a través de Wi-Fi Remoto, una aplicación para
navegador de web a la cual puede accederse usando el navegador de web* dispositivos compatibles
con redes Wi-Fi**. La aplicación Wi-Fi Remoto le permite monitorizar la imagen mediante una vista en
vivo, iniciar y parar la grabación y controlar de manera remota del modo de toma, abertura, balance
del blanco, abertura, ganancia, velocidad de obturación, enfoque y zoom.
6
* Se requiere un navegador de web con JavaScript y cookies activadas.
** Para los detalles acerca de dispositivos compatibles, sistemas operativos, navegadores de web, etc.,
visite el sitio web local de Canon.
Modos de operación:
Dispositivo iOS o Androi
Configuración de la contraseña de la videocámara
Para funciones Wi-Fi que requieren un dispositivo iOS o Android, necesitará configurar la contraseña
de la videocámara. Una vez que introduzca la contraseña una vez, no necesitará introducirla
nuevamente. Después que introduzca la contraseña una vez, no necesitará introducir la nuevamente
(a menos que restablezca o sobrescriba los ajustes de la videocámara).
1 Abra la pantalla [Ajustes conexión smartphone].
[FUNC.] > [MENU] > p/s* > [Wi-Fi] > [Ajustes conexión smartphone]
* Toque s para las funciones Navegador remoto y Servidor multimedia.
2 Toque la contraseña de la videocámara.
3 Introduzca una contraseña de 8 caracteres y toque [Aceptar].
4Toque [K] y luego toque [X].
NOTAS
• Después de configurar la contraseña de la videocámara, la misma no aparecerá en la pantalla para
que pueda verificarla. Asegúrese de apuntar su contraseña para que no se le olvide. Para cambiar
la contraseña, ejecute nuevamente el procedimiento anterior.
Operación remota de la videocámara
1 Videocámara: Abra la pantalla [Wi-Fi remoto].
[FUNC.] > [„ Wi-Fi remoto]
2 Videocámara: Toque [ON].
• Aparecerán el SSID (nombre de red) de la videocámara y la URL que se introducirá en el
navegador de web.
• La videocámara estará lista para conectarse al dispositivo.
COPY
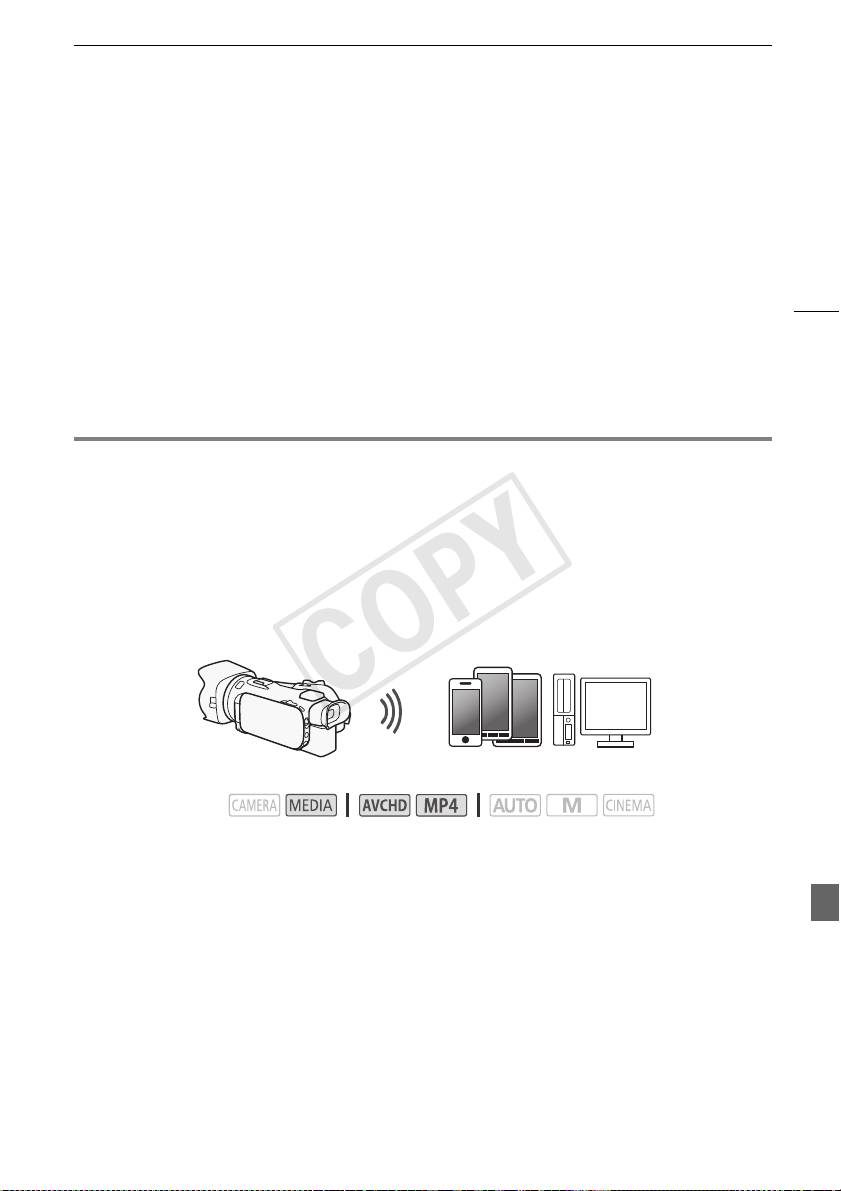
Navegador remoto: Visualización de grabaciones utilizando un navegador web en su dispositivo
3 Dispositivo iOS/Android: Active las funciones Wi-Fi en la pantalla de configuración.
• Aparecerán los nombres de red de los puntos de acceso detectados.
4 Dispositivo iOS/Android: Toque el punto de acceso con el mismo SSID visualizado en el
paso 2.
• Si ya ha realizado este procedimiento antes, y no ha cambiado la contraseña de la videocámara,
la conexión se establecerá automáticamente.
5 Dispositivo iOS/Android: Introduzca la contraseña de la videocámara configurada
7
previamente.
6 Dispositivo iOS/Android: Introduzca la URL visualizada en la pantalla de la videocámara
en la barra de dirección del navegador web para iniciar la aplicación Wi-Fi Remoto.
• Para conocer más detalles acerca de esta función, consulte Operación remota a través de la
aplicación Wi-Fi Remoto en el Manual de instrucciones de la videocámara (archivo PDF).
Navegador remoto: Visualización de grabaciones utilizando un
navegador web en su dispositivo iOS o Android
Con la función de navegador remoto, puede utilizar el navegador web en su dispositivo iOS,
dispositivo Android, ordenador o dispositivo similar para mostrar una lista de grabaciones en la
videocámara, reproducirlas e incluso descargarlas.* Esto le permite ver cómodamente sus
grabaciones mientras está fuera.
* Con algunos dispositivos, sistemas operativos, navegadores, formatos de vídeo y modos de
grabación, es posible que no se puedan reproducir o descargar grabaciones. Para obtener más
información, visite el sitio web local de Canon.
Dispositivo iOS, dispositivo Android, etc.
Modos de operación:
1 Videocámara: Abra la pantalla del índice que desea consultar.
2 Videocámara: Abra la pantalla [Reproducción vía navegador].
[MENU] > s > [Wi-Fi] > [Reproducción vía navegador]
• Aparecerá el SSID (nombre de red) de la videocámara.
• La videocámara estará lista para conectarse al dispositivo.
• Para configurar o cambiar la contraseña de la videocámara, ejecute el procedimiento en
Configuración de la contraseña de la videocámara (A 6) a partir del paso 2.
3 Dispositivo iOS/Android: Active las funciones Wi-Fi en la pantalla de configuración.
• Aparecerán los nombres de red de los puntos de acceso detectados.
4 Dispositivo iOS/Android: Toque el punto de acceso con el mismo SSID visualizado en el
paso 2.
• Si ya ha realizado este procedimiento antes, y no ha cambiado la contraseña de la videocámara,
la conexión se establecerá automáticamente.
COPY
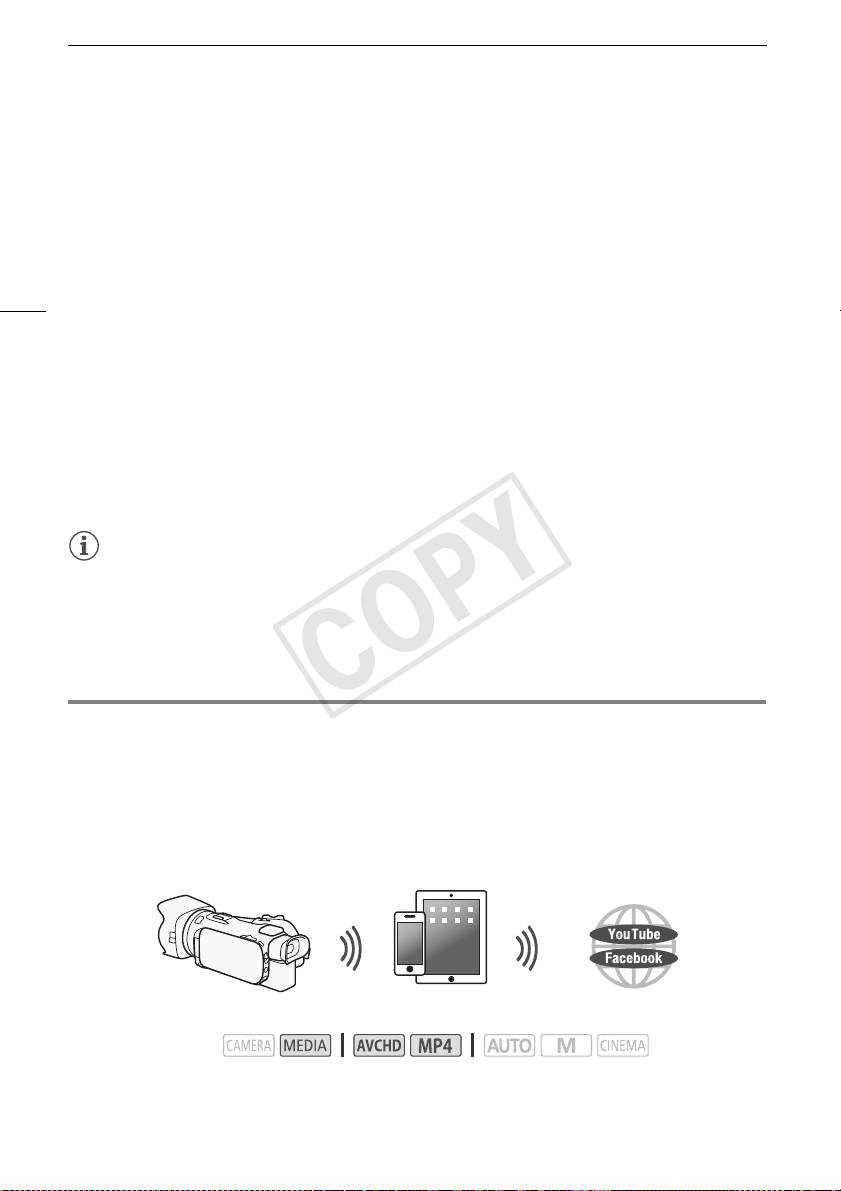
Carga de grabaciones utilizando un dispositivo iOS
5 Dispositivo iOS/Android: Introduzca la contraseña de la videocámara configurada
previamente.
• En la pantalla de la videocámara aparecerá [Conectado] y se establecerá la conexión.
6 Dispositivo iOS/Android: Inicie el navegador web.
7 Dispositivo iOS/Android: Introduzca la URL que aparece en la pantalla de la videocámara
en la barra de dirección del navegador web.
• Aparecerá la pantalla del navegador remoto.
8
• Mientras no cambie los ajustes del puerto, la URL siempre es la misma, por lo que quizás le
resulte cómodo guardar la URL como favorita.
8 Dispositivo iOS/Android: Toque [6·] en la parte superior izquierda de la pantalla y
abra la pantalla del índice deseada. A continuación, toque la grabación deseada.
• Para vídeos, toque el icono de reproducción para comenzar la reproducción. Para fotos, se
visualizará la foto seleccionada.
9 Videocámara: Cuando termine, toque [Fin] > [Aceptar].
• Para conocer más detalles acerca de esta función, consulte Navegador remoto: Visualización de
grabaciones utilizando un navegador web en su dispositivo iOS o Android en el Manual de
instrucciones de la videocámara (archivo PDF).
NOTAS
• Los siguientes tipos de escena MP4 se reconocerán como archivos múltiples en otros dispositivos.
- Escenas que superan los 4 GB
- Escenas grabadas a 35 Mbps que superan los 30 minutos
- Escenas grabadas con un modo de grabación distinto a 35 Mbps que superan 1 hora
• A la videocámara solo puede estar conectado a la vez un dispositivo.
Carga de grabaciones utilizando un dispositivo iOS
Mediante la aplicación Movie Uploader* para dispositivos iOS, puede conectar inalámbricamente la
videocámara al dispositivo para cargar sus vídeos a YouTube y sus vídeos y fotos a Facebook incluso
cuando está lejos de su red doméstica. Incluso puede guardar** y reproducir vídeos MP4 y fotos en el
dispositivo iOS.
* La aplicación Movie Uploader, suministrada por PIXELA, se encuentra disponible de manera gratuita
en App Store.
**No disponible para vídeos MP4 grabados a 35 Mbps.
Dispositivo iOS
Modos de operación:
COPY

Carga de grabaciones utilizando un dispositivo iOS
PUNTOS A COMPROBAR
• Antes de seguir este procedimiento por primera vez, instale la aplicación Movie Uploader en su
dispositivo iOS. La aplicación puede descargarse de manera gratuita del siguiente sitio.
http://appstore.com/movieuploader
1 Videocámara: Abra la pantalla de índice de vídeo deseada.
9
2 Videocámara: Abra la pantalla [Movie Uploader].
[MENU] > s > [Wi-Fi] > [Movie Uploader]
• Aparecerá el SSID (nombre de red) de la videocámara.
• La videocámara estará lista para conectarse al dispositivo iOS.
• Para configurar o cambiar la contraseña de la videocámara, ejecute el procedimiento en
Configuración de la contraseña de la videocámara (A 6) a partir del paso 2.
3 Dispositivo iOS: Active las funciones Wi-Fi en la pantalla de configuración.
• Aparecerán los nombres de red de los puntos de acceso detectados.
4 Dispositivo iOS: Toque el punto de acceso con el mismo SSID visualizado en el paso 2.
• Si ya ha realizado este procedimiento antes, y no ha cambiado la contraseña de la videocámara,
la conexión se establecerá automáticamente.
5 Dispositivo iOS: Introduzca la contraseña de la videocámara configurada previamente.
• En la pantalla de la videocámara aparecerá [Conectado] y se establecerá la conexión.
6 Dispositivo iOS: Utilice la aplicación Movie Uploader para cargar los vídeos de la
videocámara (y fotos, si correspondiera).
• Para obtener más información acerca de la aplicación Movie Uploader, visite el sitio web de
PIXELA.
http://www.pixela.co.jp/oem/canon/e/movieuploader/ (sólo en inglés)
• Para conocer más detalles acerca de esta función, consulte Carga de grabaciones utilizando un
dispositivo iOS en el Manual de instrucciones de la videocámara (archivo PDF).
NOTAS
• Los siguientes tipos de escena MP4 se reconocerán como archivos múltiples en otros dispositivos.
- Escenas que superan los 4 GB
- Escenas grabadas a 35 Mbps que superan los 30 minutos
- Escenas grabadas con un modo de grabación distinto a 35 Mbps que superan 1 hora
COPY
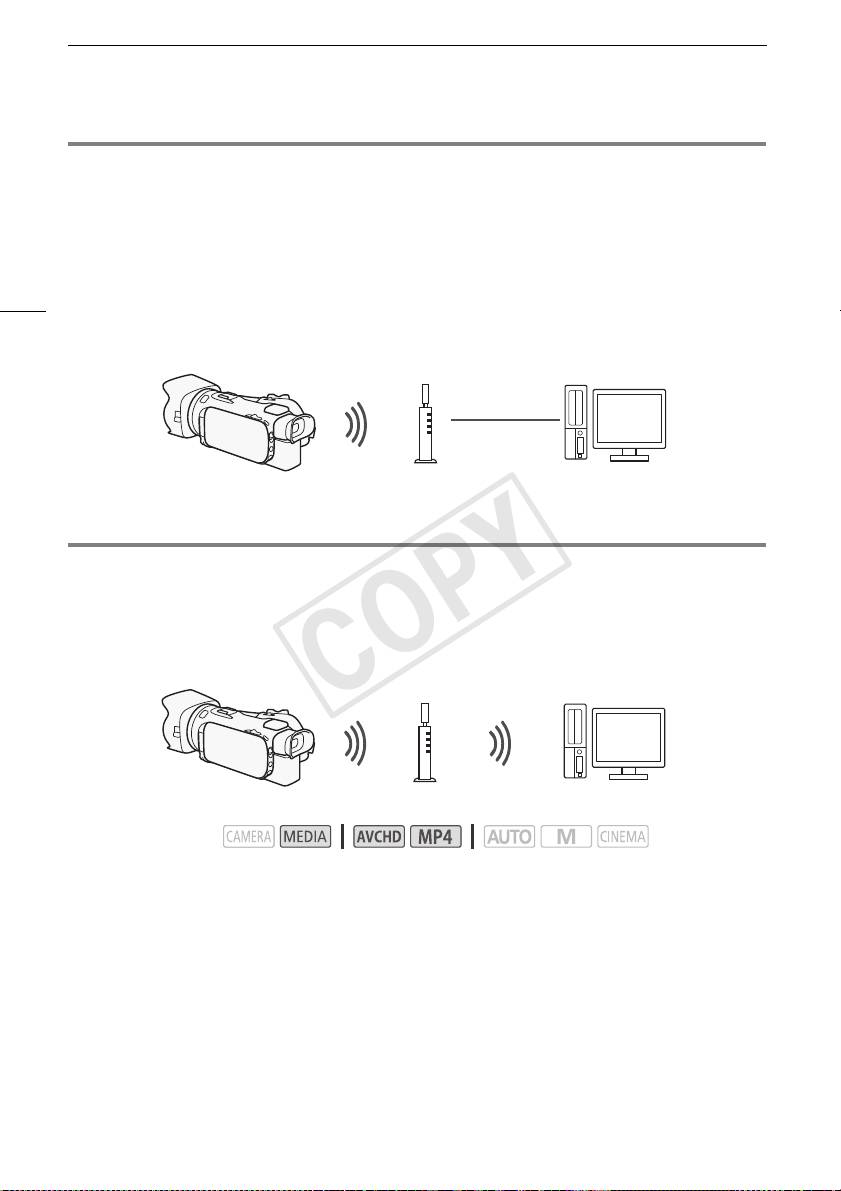
Reproducción en un ordenador
Reproducción en un ordenador
Al utilizar la función de servidor multimedia, puede visualizar de forma inalámbrica vídeos y fotos en su
ordenador o dispositivo similar. Necesitará un punto de acceso conectado a su red doméstica y tener
instalado en su ordenador un software que pueda reproducir vídeos y fotos del servidor multimedia.
Le recomendamos que conecte el ordenador al punto de acceso con un cable LAN. Consulte
también los manuales de instrucciones del ordenador, software y punto de acceso para obtener más
10
información.
• Para conocer más detalles acerca de esta función, consulte Reproducción en un ordenador en el
Manual de instrucciones de la videocámara (archivo PDF).
Cable LAN
Punto de acceso
Ordenador
Transferencia de archivos a un ordenador o un servidor FTP
Puede transferir archivos (grabaciones) de forma inalámbrica directamente a un ordenador o un
servidor FTP. Necesitará un servidor FTP correctamente configurado. Durante el procedimiento de
configuración manual, necesitará introducir la dirección IP del servidor FTP, puerto, nombre de
usuario, contraseña y destino de transferencia del archivo (lugar al que se transferirán los archivos).
Punto de acceso
Ordenador
Modos de operación:
1 Videocámara: Abra la pantalla de índice de vídeo deseada.
2 Abra la pantalla [Transferencia FTP].
[MENU] > s > [Wi-Fi] > [Transferencia FTP]
3 Introduzca la dirección IP del servidor FTP para [Servidor FTP] y el número de puerto para
[Puerto].
4Toque [Siguiente].
5 Introduzca el nombre de usuario y la contraseña y luego toque [Siguiente].
6 Introduzca [/] para [Carpeta de destino] y luego toque [Aceptar].
• Dependiendo de los ajustes del servidor FTP, el texto requerido para el número de puerto y la
carpeta de destino puede variar. Verifique los ajustes en su servidor FTP.
• La videocámara se conectará al punto de acceso seleccionado en Conexión Wi-Fi mediante un
punto de acceso (A 12).
COPY
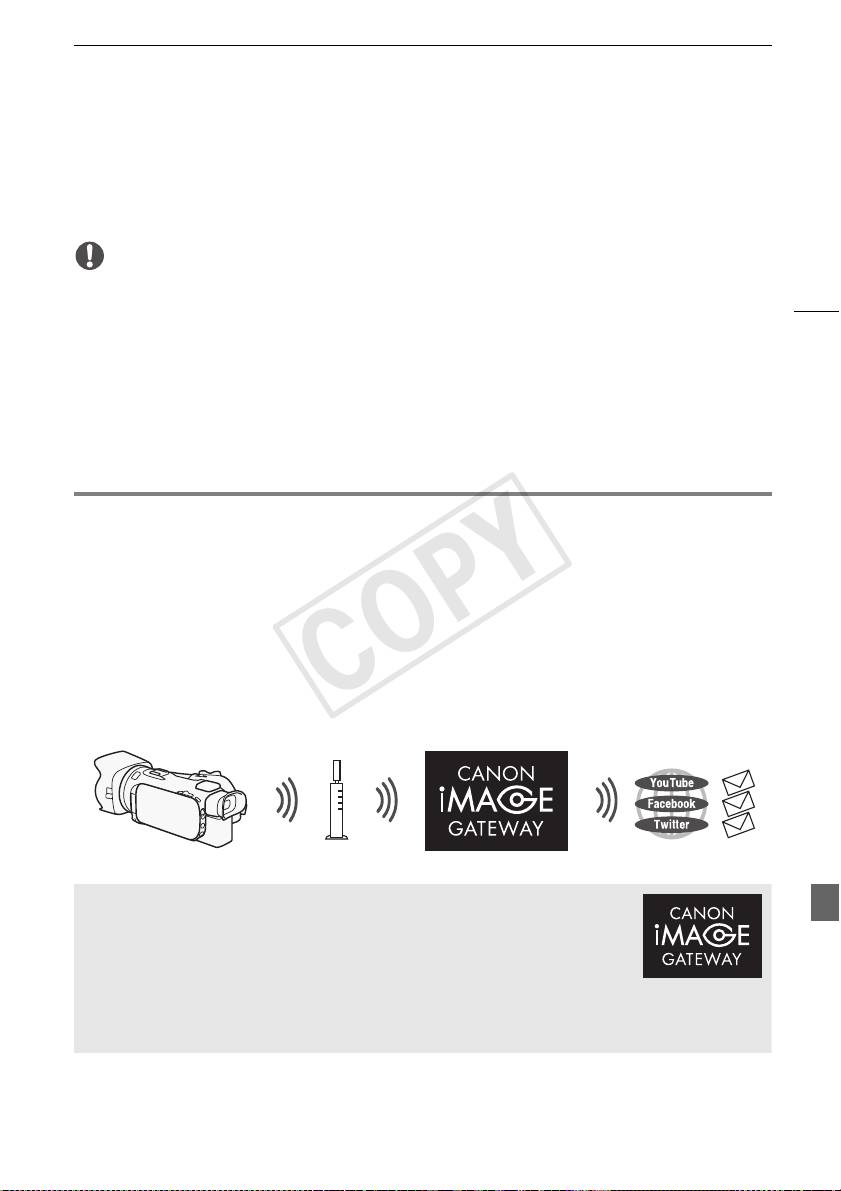
Uso compartido de grabaciones con CANON iMAGE GATEWAY
7 Cuando [Guardar el punto de acceso] aparezca en la pantalla, toque [Aceptar] y siga el
procedimiento que se describe en Conexión Wi-Fi mediante un punto de acceso (A 12).
• Para conocer más detalles acerca de esta función, consulte Transferencia de archivos a un
ordenador o un servidor FTP en el Manual de instrucciones de la videocámara (archivo PDF).
IMPORTANTE
• Tenga en cuenta las siguientes precauciones para transferir archivos. No hacer esto pudiera
11
interrumpir la transferencia y los archivos incompletos podrían permanecer en el destino de
transferencia.
- No abra la cubierta de la ranura para tarjeta de memoria dual.
- No desconecte la alimentación o apague la videocámara.
• Si se interrumpe la transferencia de archivo, seleccione [Archivos nuevos] y ejecute nuevamente la
transferencia de archivo.
• Si en el destino de la transferencia permanecen archivos incompletos, verifique el contenido y antes
de eliminarlos asegúrese de que sea seguro hacer esto.
Uso compartido de grabaciones con CANON iMAGE GATEWAY
Una vez registrado en CANON iMAGE GATEWAY*, podrá acceder a varios servicios web**. Podrá
cargar vídeos y fotos en álbumes en línea, compartir los álbumes en Twitter, cargar vídeos en
Facebook y YouTube, enviar enlaces a sus álbumes en línea por correo electrónico a amigos y
familiares, y mucho más. Para utilizar esta función, necesitará un punto de acceso conectado a
Internet.
• Para conocer más detalles acerca de esta función, consulte Uso compartido de grabaciones con
CANON iMAGE GATEWAY en el Manual de instrucciones de la videocámara (archivo PDF).
* La disponibilidad diferirá según el área.
** En este texto el término “servicios web” hace referencia a varios servicios de Internet compatibles con
CANON iMAGE GATEWAY.
Enrutador inalámbrico
(punto de acceso)
CANON iMAGE GATEWAY
CANON iMAGE GATEWAY es un sitio que proporciona varios servicios
relacionados con la fotografía a propietarios de productos Canon cualificados.
Una vez completado el registro gratuito en línea, podrá utilizar los servicios web,
crear álbumes de fotos en línea y mucho más. Visite el sitio web de Canon para
obtener información sobre el registro y los países y regiones en los que se
puede utilizar este servicio.
http://canon.com/cig
COPY
Conexión Wi-Fi mediante un punto de acceso
Requisitos generales
• Un ordenador con el software suministrado ImageBrowser EX y CameraWindow correctamente
instalado. Para obtener más información sobre la instalación del software, consulte Guardado de
vídeos MP4 y fotos utilizando ImageBrowser EX en el Manual de instrucciones de la videocámara
(archivo PDF).
• Complete el registro gratuito en línea de CANON iMAGE GATEWAY.
• Configuración de cuenta de YouTube, Facebook y Twitter (según los servicios que vaya a utilizar).
12
Conexión Wi-Fi mediante un punto de acceso
La videocámara puede conectarse con una red Wi-Fi mediante un enrutador inalámbrico (punto de
acceso) e incluso memorizar los ajustes de los cuatro puntos de acceso más utilizados recientemente.
Requisitos generales
• Enrutador configurado correctamente que utiliza un protocolo Wi-Fi utilizado por
la videocámara, posee el certificado Wi-Fi (lleva el logotipo que aparece a la
derecha) y está en una red doméstica.
Modos de operación:
Seleccione el método de conexión deseado.
Opciones
[WPS: Botón]* No tiene más que mantener presionado el botón WPS de su punto de acceso y
luego tocar la pantalla de la videocámara. Es el método de conexión más sencillo cuando se usa un
enrutador compatible con WPS.
[WPS: Código PIN]* Acceda a la pantalla de configuración del punto de acceso con su navegador
web. La videocámara le dará un código PIN, que deberá introducir en el navegador. Necesitará un
enrutador compatible con WPS y un ordenador u otro dispositivo conectados a él. Si desea obtener
más información, consulte Configuración Wi-Fi protegida (WPS) en el Manual de instrucciones de la
videocámara (archivo PDF).
[Buscar puntos de acceso] Siguiendo las instrucciones en pantalla de la videocámara, seleccione
su punto de acceso desde una lista de SSID detectadas e introduzca su contraseña. Si desea
obtener información detallada, consulte Búsqueda de puntos de acceso en el Manual de
instrucciones de la videocámara (archivo PDF).
[Configuración manual] El SSID del punto de acceso, la contraseña y otros ajustes de red se
introducen de forma manual. Este método se recomienda a los usuarios avanzados de redes Wi-Fi.
Si desea obtener información detallada, consulte Configuración manual en el Manual de
instrucciones de la videocámara (archivo PDF).
* WPS, que son las iniciales de Wi-Fi Protected Setup (Configuración Wi-Fi Protegida), es un estándar
que facilita la conexión a un
punto de acceso.
COPY

Problemas y soluciones
Configuración Wi-Fi protegida (WPS)
Si el punto de acceso es compatible con WPS (lleva el logotipo que aparece a
la derecha), puede resultar muy fácil conectar la videocámara. Con WPS se
pueden utilizar los métodos [WPS: Botón] o [WPS: Código PIN] (vea la
descripción en la sección anterior). Si no puede conectar correctamente la
videocámara mediante WPS, pruebe a utilizar el método [Buscar puntos de acceso]. Consulte el
manual de instrucciones del enrutador.
13
Problemas y soluciones
Si no puede establecer correctamente una conexión Wi-Fi, compruebe lo siguiente. Consulte también
el manual de instrucciones de los demás dispositivos compatibles con Wi-Fi que esté utilizando. Si el
problema persiste, póngase en contacto con su proveedor o con un centro de servicio Canon.
No se puede conectar con el dispositivo compatible con Wi-Fi.
- El alcance de comunicación efectiva entre la videocámara y el dispositivo puede variar
dependiendo de la potencia de la señal inalámbrica. Intente usando la videocámara más cerca
del dispositivo.
- Los teléfonos inalámbricos, los hornos de microondas, los refrigeradores y otros equipos
electrodomésticos en la línea de visión entre el enrutador inalámbrico y la videocámara pueden
interferir con la señal inalámbrica. Intente usando la videocámara en un lugar más alejado de
esos equipos electrodomésticos.
Lista de mensajes
(en orden alfabético)
Consulte la siguiente información si aparece un mensaje en la pantalla de su videocámara. Si aparece
un mensaje distinto a los que se indican aquí, consulte Lista de mensajes en el Manual de
instrucciones de la videocámara (archivo PDF).
Another user is already controlling the camcorder. Try again later.
(Otro usuario ya está controlando la videocámara. Vuelva a intentarlo más tarde.)
- Este mensaje aparece en la pantalla del dispositivo Wi-Fi. Varios dispositivos Wi-Fi están
intentando conectar con la videocámara. Asegúrese de que únicamente un dispositivo Wi-Fi
está intentando conectar y luego toque Retry.
La conexión Wi-Fi ha terminado
- Hay equipos, entre ellos teléfonos inalámbricos, hornos de microondas y refrigeradores, que
pueden interferir con la señal inalámbrica. Intente usando la videocámara en un lugar más
alejado de esos equipos electrodomésticos.
- Es posible que la videocámara no se conecte al punto de acceso si hay demasiados
dispositivos accediendo a él.
La tapa de la tarjeta de memoria está abierta
- La cubierta de la tarjeta de memoria se encontraba abierta mientras se estaba accediendo a la
tarjeta de memoria. Detenga la función Wi-Fi que esté utilizando e interrumpa la conexión
Wi-Fi.
COPY

Содержание
Функции Wi-Fi
Wi-Fi Functions
03 Начальная подготовка
03 Введение в Wi-Fi
06 Дистанционное управление с помощью приложения дистанционно по Wi-Fi
08 Дистанционный просмотр: просмотр записей с
помощью веб-браузера на устройстве iOS или Android
09 Отправка записей с помощью устройства iOS
2
10 Воспроизведение на компьютере
11 Передача файлов на компьютер или FTP-сервер
12 Совместное использование записей с помощью портала CANON iMAGE
GATEWAY
13 Подключение Wi-Fi с помощью точки доступа
14 Устранение неполадок
Товарные знаки
• Microsoft и Windows являются товарными знаками либо зарегистрированными товарными знаками
корпорации Microsoft в США и/или других странах.
• App Store, iPad, iPhone, iPod, iTunes и Mac OS являются товарными знаками корпорации Apple Inc,
зарегистрированными в США и других странах.
• Google, Android, Google Play и YouTube являются товарными знаками корпорации Google Inc.
• Facebook является товарным знаком корпорации Facebook, Inc.
• IOS является товарным знаком или зарегистрированным товарным знаком компании Cisco в США и
других странах и используется по лицензии.
• Название и логотипы Twitter являются товарными знаками корпорации Twitter, Inc.
• Wi-Fi является товарным знаком альянса Wi-Fi Alliance.
• Wi-Fi Certified, WPA, WPA2 и логотип Wi-Fi Certified являются товарными знаками альянса Wi-Fi Alliance.
• WPS при использовании в параметрах видеокамеры, в экранной индикации и в данном Руководстве
означает Wi-Fi Protected Setup.
• Идентификационный знак Wi-Fi Protected Setup является знаком альянса Wi-Fi Alliance.
• JavaScript является товарным знаком или зарегистрированным товарным знаком корпорации Oracle
Corporation, ее филиалов и дочерних компаний в США и других странах.
• Прочие названия и изделия, не упомянутые выше, могут быть товарными знаками или
зарегистрированными товарными знаками соответствующих компаний.
COPY
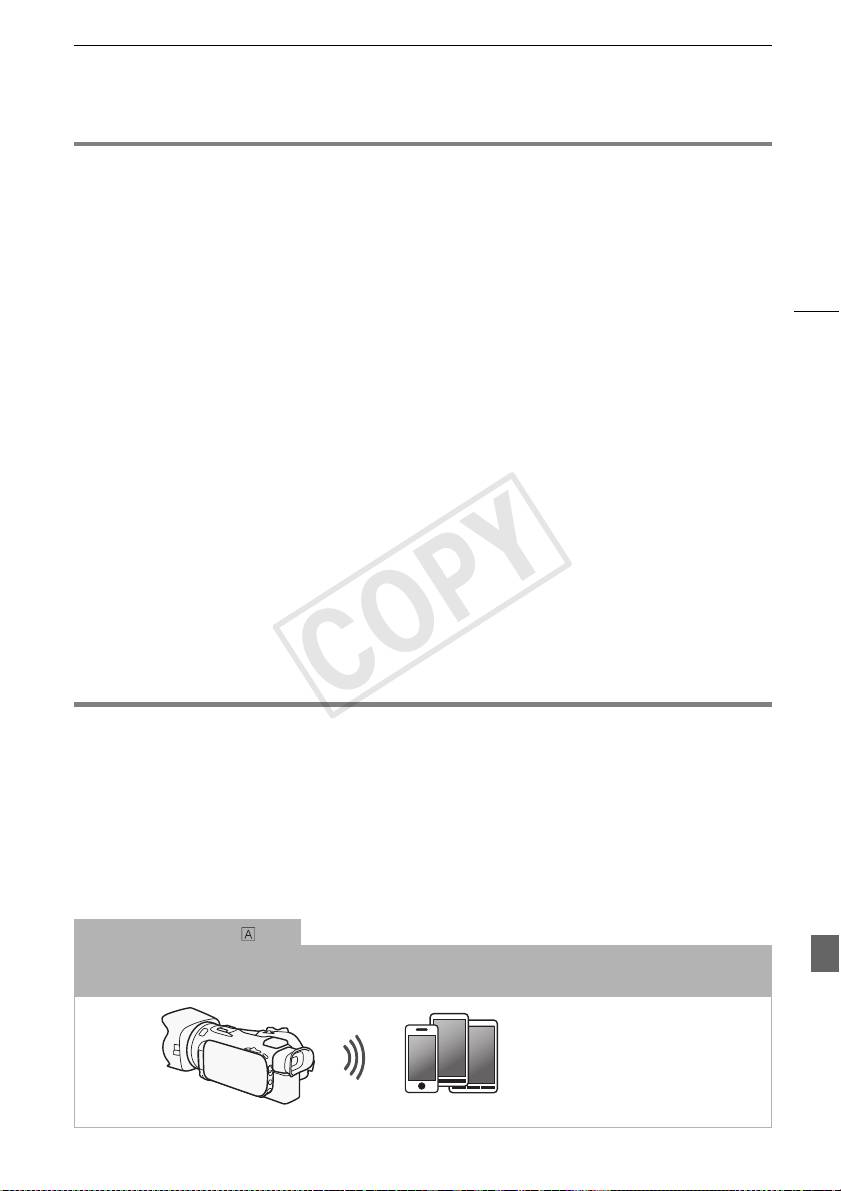
Начальная подготовка
Начальная подготовка
Настоящее руководство содержит начальные сведения, необходимые для использования
функций Wi-Fi видеокамеры. Подробные сведения о функциях Wi-Fi и более подробное
описание процедур см. в полной версии Руководства по эксплуатации (PDF-файл на
прилагаемом компакт-диске). Когда в данном руководстве приводится ссылка на раздел
Руководства по эксплуатации видеокамеры, для поиска этого раздела используйте
3
содержание или функцию поиска в PDF-файле. Порядок установки полной версии
Руководства по эксплуатации см. в разделе Установка Руководства по эксплуатации
видеокамеры (PDF-файл) в прилагаемом Кратком руководстве.
Ниже перечислены основные термины, часто встречающиеся в тексте.
SSID
Сокращение от английского Service Set Identifier (идентификатор набора сетевых служб). Это
просто открытое имя сети Wi-Fi.
Сеть Wi-Fi
Группа компьютеров и/или других устройств у вас дома, в офисе или другом местоположении,
между которыми установлено беспроводное соединение Wi-Fi.
Точка доступа
Беспроводная точка доступа (WAP) представляет собой устройство, позволяющее другим
беспроводным устройствам (например, видеокамере) подключаться к проводной сети
(включая Интернет) с использованием стандарта Wi-Fi. В большинстве случаев это будет
беспроводной маршрутизатор.
Введение в Wi-Fi
При использовании предусмотренной в видеокамере функции Wi-Fi для подключения к
смартфону или планшетному компьютеру, можно сохранять, воспроизводить и отправлять
записи по беспроводному соединению. Можно даже использовать смартфон или планшетный
1
компьютер (устройство iOS или Android
) в качестве пульта ДУ и производить съемку с
помощью веб-браузера на этом устройстве.
1
Термин «устройство iOS» используется в этом документе для обозначения устройств iPhone,
iPod и iPad с поддержкой Wi-Fi, а термин «устройство Android» означает смартфоны и
планшетные компьютеры с поддержкой Wi-Fi, работающие под управлением ОС Android.
Подключение Wi-Fi
С помощью приложения дистанционно по Wi-Fi можно использовать устройство iOS или Android для
дистанционного управления видеокамерой и съемкой (A 6).
Устройство iOS или Android
COPY
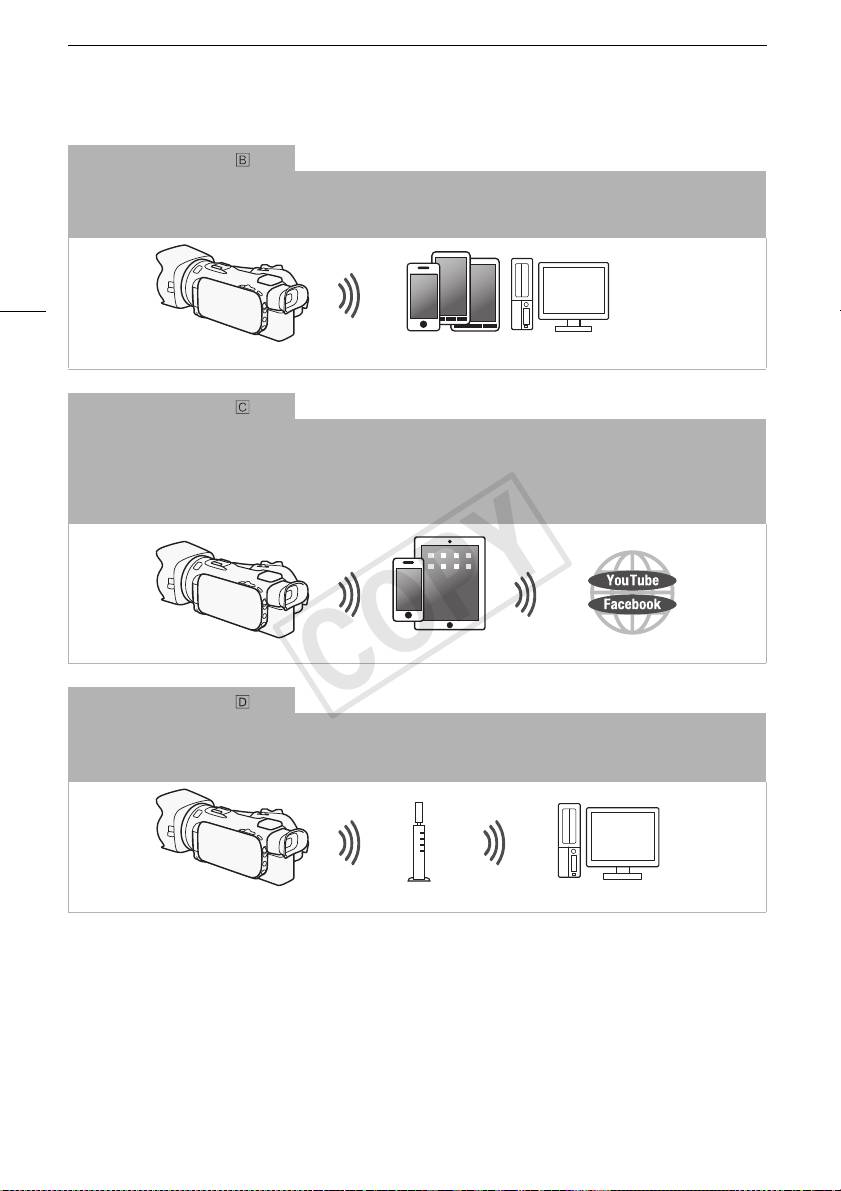
Введение в Wi-Fi
Подключение Wi-Fi
По беспроводному соединению подключите видеокамеру к устройству iOS, устройству Android или к
2
компьютеру
и с помощью веб-браузера этого устройства просматривайте записи из видеокамеры (A 8).
2
Можно также использовать компьютер, подключенный через точку доступа.
4
Устройство iOS, Android и т. п.
Подключение Wi-Fi
3
После загрузки приложения Movie Uploader
подключите видеокамеру по беспроводному соединению к
устройству iOS (A 9) для сохранения, воспроизведения и отправки своих записей. С помощью соединения
этого типа можно даже публиковать видеозаписи на сайтах YouTube и Facebook, находясь вне дома.
3
Приложение Movie Uploader, предоставляемое компанией PIXELA, бесплатно и доступно на
сайте App Store.
Устройство iOS
Подключение Wi-Fi
По беспроводной сети подключите видеокамеру к беспроводному маршрутизатору (точке доступа) сети Wi-Fi
(A 13). Используйте это соединение, если планируется сохранять записи в компьютере или на FTP-сервере
(A 11).
Точка доступа Компьютер
COPY
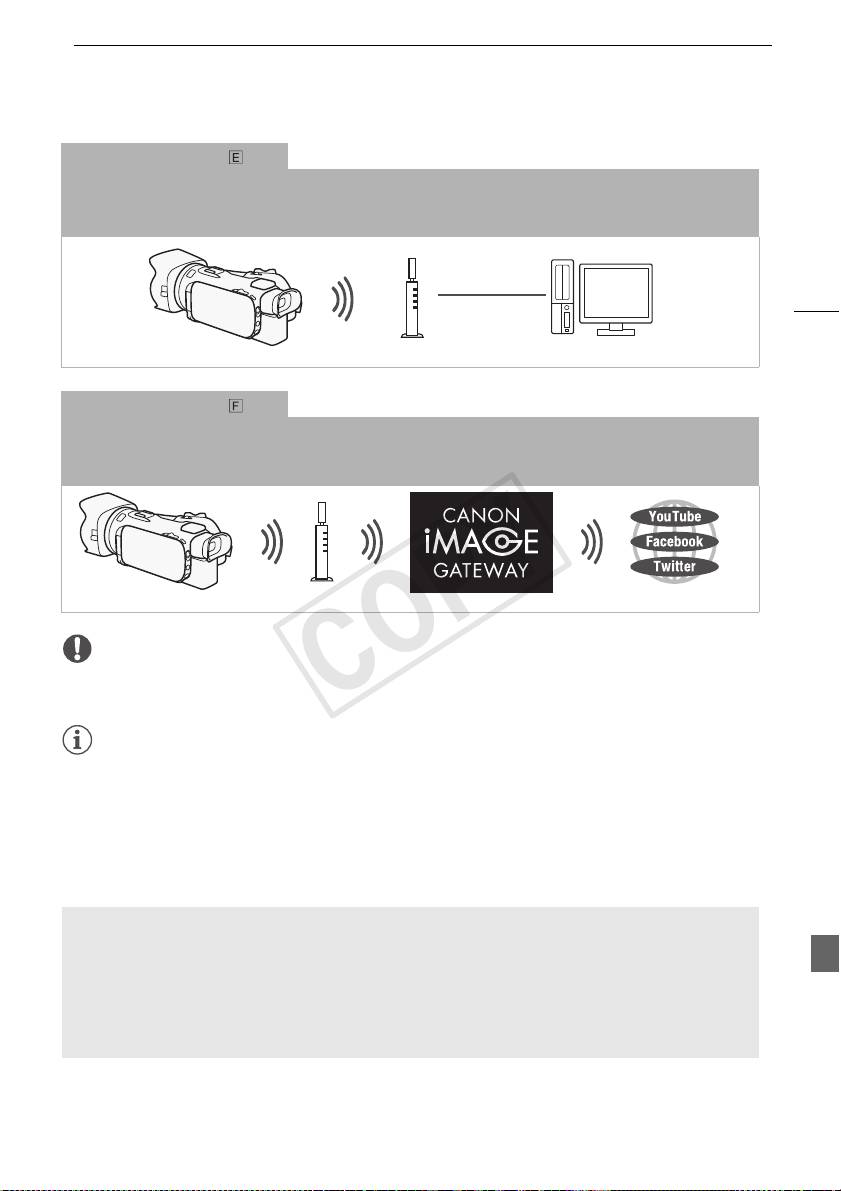
Введение в Wi-Fi
Подключение Wi-Fi
Подключите видеокамеру к сети по беспроводному соединению, используйте функцию сервера мультимедиа
и воспроизводите свои записи на устройстве, подключенном к сети с помощью кабеля локальной сети
(A 10).
5
Кабель локальной
сети
Точка доступа
Компьютер
Подключение Wi-Fi
По беспроводной сети подключите видеокамеру к беспроводному маршрутизатору (точке доступа) сети Wi-Fi.
Используйте это соединение, если планируется подключение к порталу CANON iMAGE GATEWAY (A 12).
После этого можно даже публиковать видеофильмы на сайтах YouTube и Facebook.
Точка доступа
ВАЖНО
• При использовании незащищенной сети Wi-Fi доступ к Вашим файлам и данным могут
получить неуполномоченные сторонние лица. Учитывайте связанные с этим риски.
ПРИМЕЧАНИЯ
• При использовании любых других функций Wi-Fi, кроме дистанционного управления
видеокамерой с помощью приложения дистанционно по Wi-Fi, не открывайте крышку
сдвоенного гнезда карт памяти.
• При использовании любых других функций Wi-Fi, кроме дистанционного управления
видеокамерой с помощью программы дистанционно по Wi-Fi, функция автоматического
выключения питания видеокамеры отключается.
Перед использованием функций Wi-Fi
С помощью этой функции видеокамера будет устанавливать беспроводное соединение с
устройством, поддерживающим Wi-Fi (например, смартфоном), или напрямую с сетью Wi-Fi
через точку доступа (беспроводной маршрутизатор)*. Выбрав функцию, которую требуется
использовать, следуйте указаниям на экране для подключения видеокамеры.
* В зависимости от производителя, точка доступа может называться иначе, например
беспроводной маршрутизатор локальной сети или беспроводной сетевой маршрутизатор.
COPY
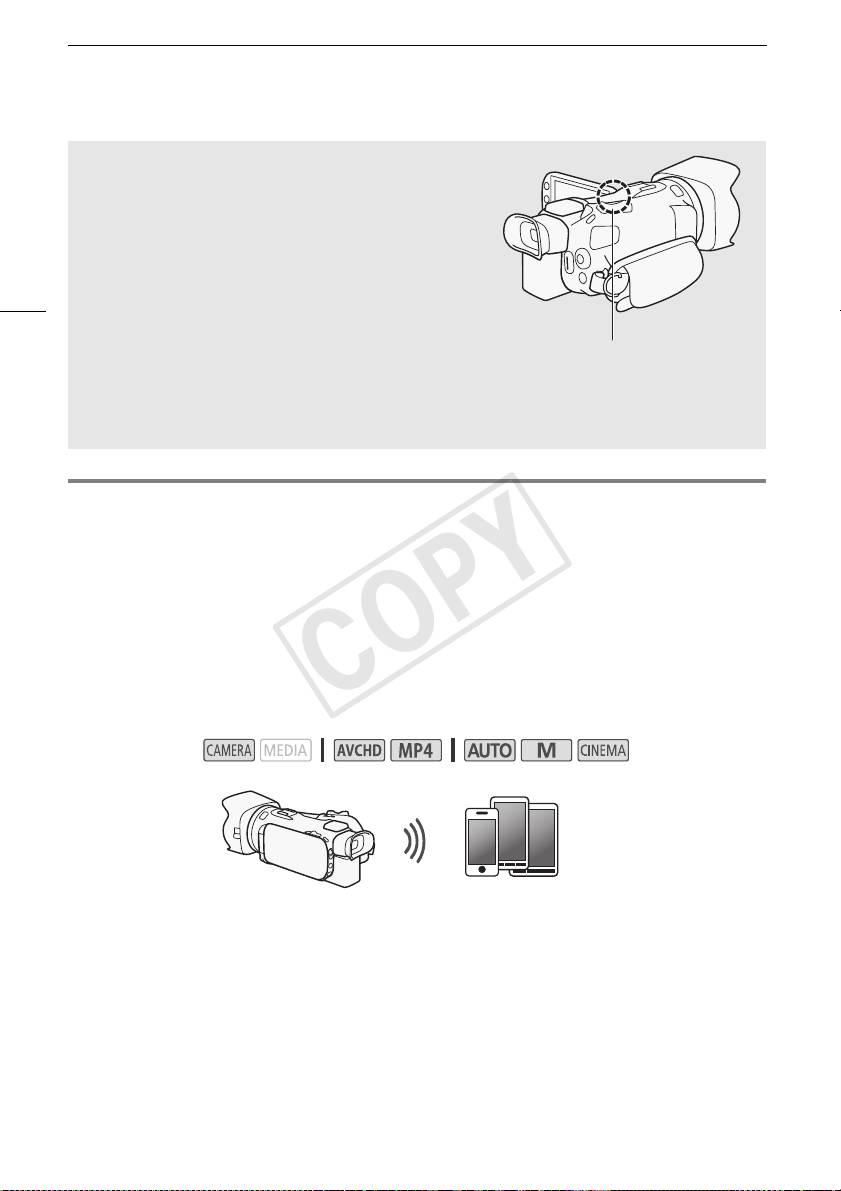
Дистанционное управление с помощью приложения дистанционно по Wi-Fi
Об антенне Wi-Fi
При использовании функций Wi-Fi видеокамеры не
закрывайте заднюю часть видеокамеры рукой или
каким-либо предметом. Антенна Wi-Fi расположена в
задней части, при ее закрытии возможны помехи
беспроводным сигналам.
6
Антенна Wi-Fi
О стандарте Wi-Fi видеокамеры
Подробные сведения о стандарте Wi-Fi видеокамеры см. в разделе О стандарте Wi-Fi
видеокамеры Руководства по эксплуатации видеокамеры (PDF-файл).
Дистанционное управление с помощью приложения
дистанционно по Wi-Fi
Видеокамерой можно дистанционно управлять с помощью приложения дистанционно по Wi-Fi.
Это приложение работает в веб-браузере* и доступно из веб-браузера устройств,
совместимых с сетями Wi-Fi**. Приложение дистанционно по Wi-Fi позволяет контролировать
изображения в режиме реального времени, запускать и останавливать съемку, а также
дистанционно управлять режимом съемки, экспозицией, балансом белого, диафрагмой,
усилением, выдержкой затвора, фокусировкой и зумированием.
* Требуется веб-браузер с поддержкой JavaScript и файлов cookie.
** Подробные сведения о совместимых устройствах, операционных системах, веб-браузерах и т.
п. см. на локальном веб-сайте Canon.
Режимы работы:
Устройство iOS или Android
COPY

Дистанционное управление с помощью приложения дистанционно по Wi-Fi
Установка пароля видеокамеры
Для функций Wi-Fi, в которых используется устройство iOS или Android, необходимо задать
пароль видеокамеры. После того как пароль введен, его не потребуется вводить снова (пока
параметры видеокамеры не будут сброшены или перезаписаны).
1 Откройте экран [Парам. подкл. к смартфону].
[FUNC.] > [MENU] > p/s* > [Wi-Fi] > [Парам. подкл. к смартфону]
* Нажмите s для функций дистанционного просмотра или сервера мультимедиа.
7
2 Нажмите пароль видеокамеры.
3 Введите пароль длиной 8 символов и нажмите [OK].
4Нажмите [K], затем [X].
ПРИМЕЧАНИЯ
• После задания пароля видеокамеры он не отображается на экране для проверки. Запишите
пароль, чтобы не забыть его. Для изменения пароля снова выполните эту процедуру.
Дистанционное управление видеокамерой
1 Видеокамера: откройте экран [Дистанц. по Wi-Fi].
[FUNC.] > [„ Дистанц. по Wi-Fi]
2 Видеокамера: нажмите [ON].
• Отображаются имя SSID видеокамеры (имя сети) и URL-адрес, который требуется вводить
в веб-браузере.
• Видеокамера будет готова для соединения с устройством.
3 Устройство iOS/Android: включите Wi-Fi на экране настройки.
• Отображаются имена сетей для обнаруженных точек доступа.
4 Устройство iOS/Android: нажмите точку доступа с тем же именем SSID, что и на
шаге 2.
• Если эта процедура уже выполнялась ранее и пароль видеокамеры не изменялся,
соединение будет установлено автоматически.
5 Устройство iOS/Android: введите ранее заданный пароль видеокамеры.
6 Устройство iOS/Android: введите в веб-браузер отображаемый на экране
видеокамеры URL-адрес, чтобы запустить приложение дистанционно по Wi-Fi.
• Подробнее об этой функции см. в разделе Дистанционное управление с помощью
приложения дистанционно по Wi-Fi в Руководстве по эксплуатации видеокамеры
(PDF-файл).
COPY
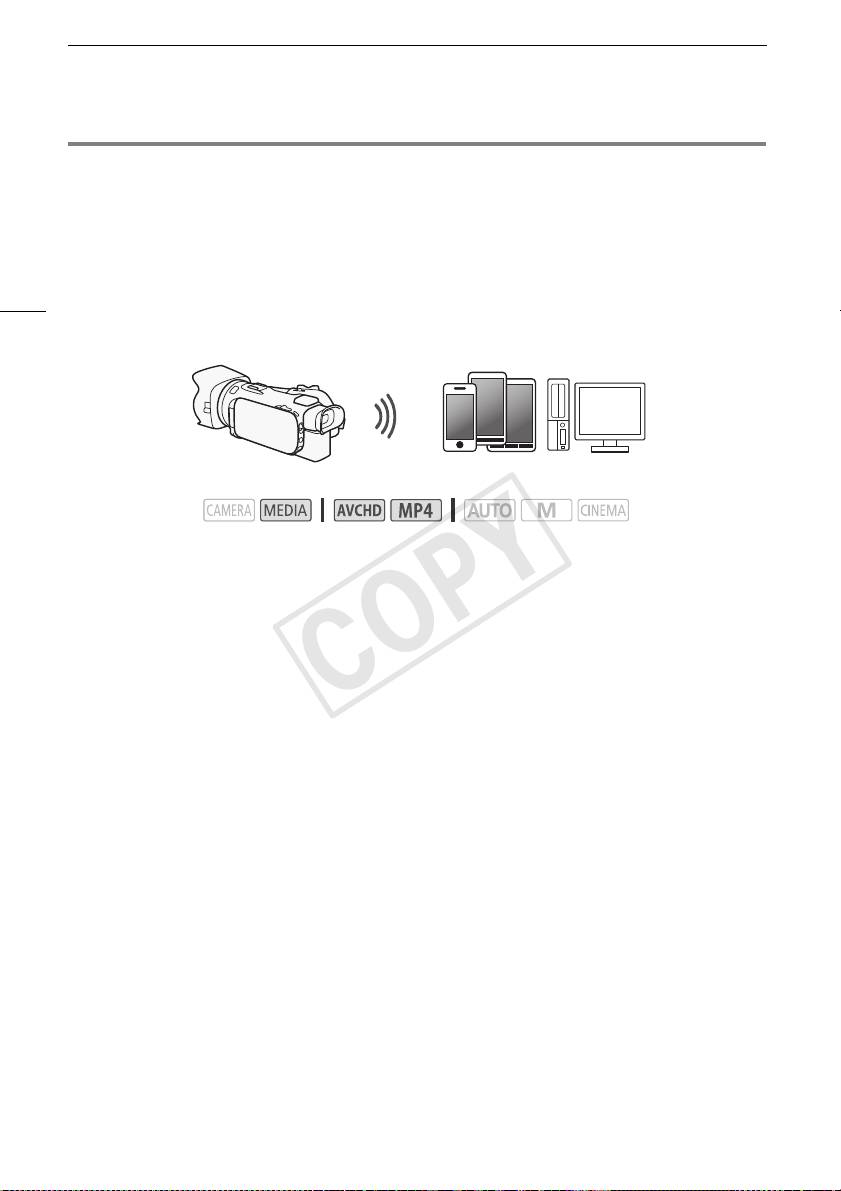
Дистанционный просмотр: просмотр записей с помощью веб-браузера на устройстве iOS
Дистанционный просмотр: просмотр записей с помощью
веб-браузера на устройстве iOS или Android
С функцией дистанционного просмотра можно использовать веб-браузер устройства iOS,
устройства Android, компьютера или аналогичного устройства для просмотра списка записей в
видеокамере, их воспроизведения и даже их загрузки.* Это удобно для просмотра записей вне
8
дома.
* В зависимости от устройства, операционной системы, браузера, формата видеофильмов и
режима записи воспроизведение или загрузка записей может оказаться невозможной. Для
получения более подробных сведений посетите местный веб-сайт Canon.
Устройство iOS, Android и т. п.
Режимы работы:
1 Видеокамера: откройте требуемый индексный экран.
2 Видеокамера: откройте экран [Воспроизвед. в браузере].
[MENU] > s > [Wi-Fi] > [Воспроизвед. в браузере]
• Отображается имя SSID (имя сети).
• Видеокамера будет готова для соединения с устройством.
• Чтобы задать или изменить пароль видеокамеры, выполните процедуру из раздела
Установка пароля видеокамеры (A 7), начиная с шага 2.
3 Устройство iOS/Android: включите Wi-Fi на экране настройки.
• Отображаются имена сетей для обнаруженных точек доступа.
4 Устройство iOS/Android: нажмите точку доступа с тем же именем SSID, что и на
шаге 2.
• Если эта процедура уже выполнялась ранее и пароль видеокамеры не изменялся,
соединение будет установлено автоматически.
5 Устройство iOS/Android: введите ранее заданный пароль видеокамеры.
• На экране видеокамеры отображается сообщение [Соединение установлено.], и
устанавливается соединение.
6 Устройство iOS/Android: запустите веб-браузер.
7 Устройство iOS/Android: введите URL-адрес, отображаемый на экране
видеокамеры, в адресную строку веб-браузера.
• Открывается экран дистанционного просмотра.
• Если настройки порта не изменялись, URL-адрес остается постоянным, поэтому может
быть удобно занести его в закладки.
8 Устройство iOS/Android: нажмите [6·] в левом верхнем углу экрана и откройте
требуемый индексный экран. Затем нажмите требуемую запись.
• В случае видеофильмов для запуска воспроизведения нажмите значок воспроизведения.
В случае фотографий отображается фотография.
COPY
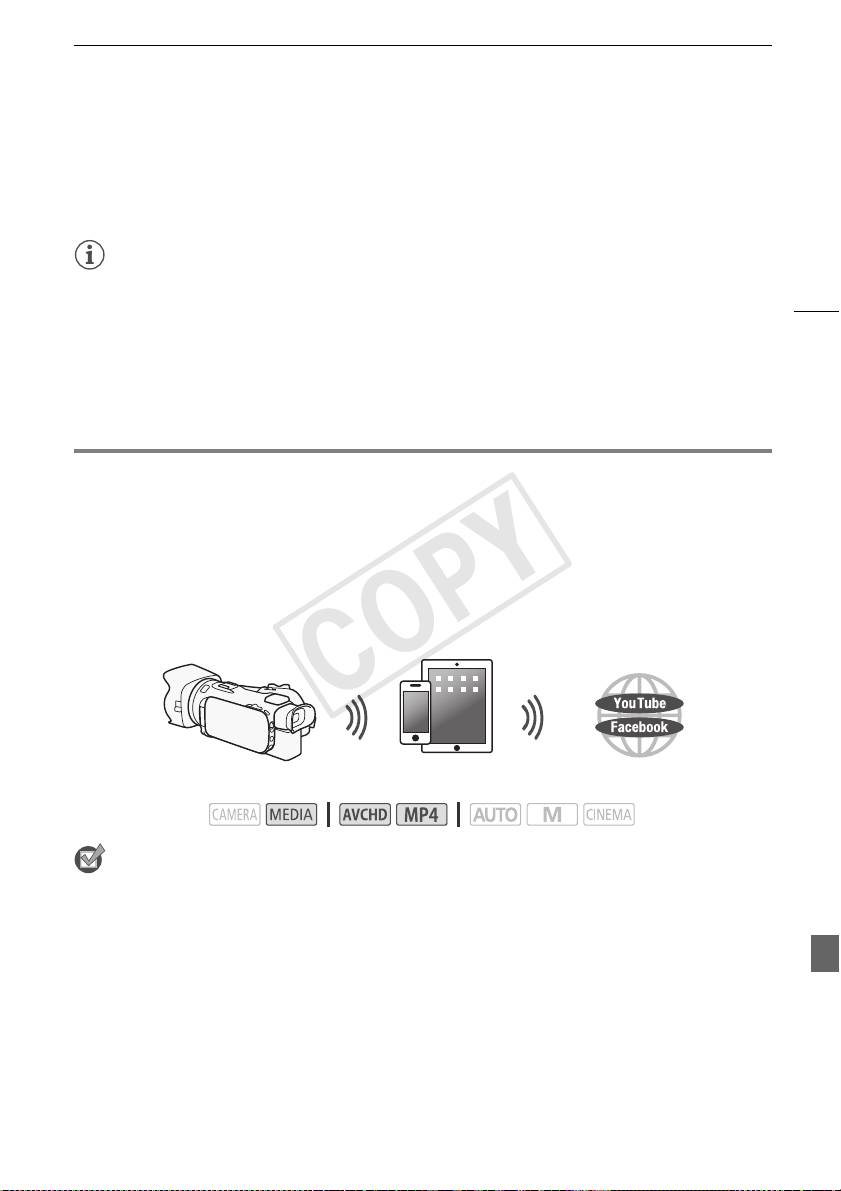
Отправка записей с помощью устройства iOS
9 Видеокамера: после завершения нажмите [Кнц] > [OK].
• Подробнее об этой функции см. в разделе Дистанционный просмотр: просмотр записей с
помощью веб-браузера на устройстве iOS или Android в Руководстве по эксплуатации
видеокамеры (PDF-файл).
ПРИМЕЧАНИЯ
• Следующие типы эпизодов MP4 распознаются на других устройствах как несколько файлов.
9
- Эпизоды размером более 4 Гбайт.
- Эпизоды, записанные со скоростью потока данных 35 Мб/с, длительность которых
превышает 30 мин.
- Эпизоды, записанные с качеством видео, отличным от 35 Мб/с, длительность которых
превышает 1 ч.
• Одновременно к видеокамере может быть подключено только одно устройство.
Отправка записей с помощью устройства iOS
С помощью приложения Movie Uploader* для устройств iOS можно по беспроводному
соединению подключить видеокамеру к устройству и отправлять видеофильмы на веб-сайт
YouTube или видеофильмы и фотографии на веб-сайт Facebook, даже находясь вдали от своей
домашней сети. На устройстве iOS можно даже сохранять** и воспроизводить видеофильмы
MP4 и фотографии.
* Приложение Movie Uploader, предоставляемое компанией PIXELA, бесплатно и доступно на
сайте App Store.
** Недоступно для видеофильмов MP4, записанных с качеством 35 Мб/с.
Устройство iOS
Режимы работы:
ЧТО СЛЕДУЕТ ПРОВЕРИТЬ
• Перед первым выполнением этой процедуры установите на свое устройство iOS
приложение Movie Uploader. Это приложение доступно для бесплатной загрузки со
следующего сайта.
http://appstore.com/movieuploader
1 Видеокамера: откройте требуемый индексный экран видеофильмов.
2 Видеокамера: откройте экран [Movie Uploader].
[MENU] > s > [Wi-Fi] > [Movie Uploader]
• Отображается имя SSID (имя сети).
• Видеокамера будет готова для соединения с устройством iOS.
• Чтобы задать или изменить пароль видеокамеры, выполните процедуру из раздела
Установка пароля видеокамеры (A 7), начиная с шага 2.
COPY
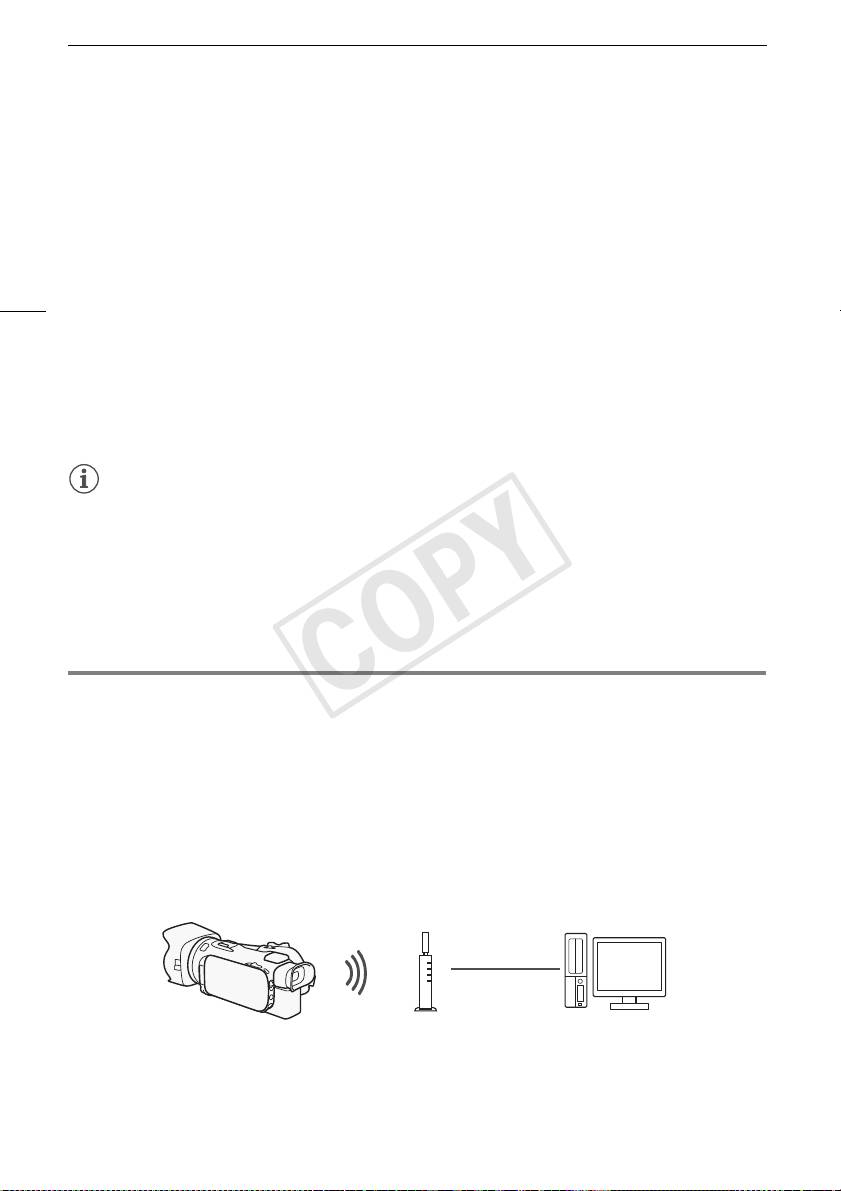
Воспроизведение на компьютере
3 Устройство iOS: включите Wi-Fi на экране настройки.
• Отображаются имена сетей для обнаруженных точек доступа.
4 Устройство iOS: нажмите точку доступа с тем же именем SSID, что и на шаге 2.
• Если эта процедура уже выполнялась ранее и пароль видеокамеры не изменялся,
соединение будет установлено автоматически.
5 Устройство iOS: введите ранее заданный пароль видеокамеры.
• На экране видеокамеры отображается сообщение [Соединение установлено.], и
10
устанавливается соединение.
6 Устройство iOS: используйте приложение Movie Uploader для отправки
видеофильмов (и фотографий, если применимо) из видеокамеры.
• Подробные сведения о приложении Movie Uploader см. на веб-сайте PIXELA.
http://www.pixela.co.jp/oem/canon/e/movieuploader/ (только на английском языке)
• Подробнее об этой функции см. в разделе Отправка записей с помощью устройства iOS в
Руководстве по эксплуатации видеокамеры (PDF-файл).
ПРИМЕЧАНИЯ
• Следующие типы эпизодов MP4 распознаются на других устройствах как несколько файлов.
- Эпизоды размером более 4 Гбайт.
- Эпизоды, записанные со скоростью потока данных 35 Мб/с, длительность которых
превышает 30 мин.
- Эпизоды, записанные с качеством видео, отличным от 35 Мб/с, длительность которых
превышает 1 ч.
Воспроизведение на компьютере
С помощью функции «Сервер мультимедиа» можно по беспроводному соединению
просматривать видеофильмы и фотографии на компьютере или аналогичном устройстве. Для
этого требуется точка доступа, подключенная к домашней сети, а на компьютер должно быть
установлено программное обеспечение, способное воспроизводить видеофильмы и
фотографии с сервера мультимедиа. Компьютер рекомендуется подключать к точке доступа с
помощью кабеля локальной сети. Также см. инструкции по эксплуатации компьютера,
программного обеспечения и точки доступа.
• Подробнее об этой функции см. в разделе Воспроизведение на компьютере в Руководстве
по эксплуатации видеокамеры (PDF-файл).
Кабель
локальной сети
Точка доступа
Компьютер
COPY

Передача файлов на компьютер или FTP-сервер
Передача файлов на компьютер или FTP-сервер
Предусмотрена возможность беспроводной передачи файлов (записей) напрямую в
компьютер или на FTP-сервер. Во время процедуры ручной настройки потребуется ввести IP-
адрес FTP-сервера, порт, имя пользователя, пароль и место назначения для передачи файлов
(место, в которое будут передаваться файлы).
11
Точка доступа
Компьютер
Режимы работы:
1 Видеокамера: откройте требуемый индексный экран видеофильмов.
2 Откройте экран [Передача по FTP].
[MENU] > s > [Wi-Fi] > [Передача по FTP]
3 Введите IP-адрес FTP-сервера для параметра [FTP-сервер] и номер порта для
параметра [Порт].
4 Нажмите [Далее].
5 Введите имя пользователя и пароль, затем нажмите [Далее].
6 Введите [/] для параметра [Папка назначения], затем нажмите [OK].
• В зависимости от параметров FTP-сервера необходимые значения для номера порта и
конечной папки могут различаться. Проверьте параметры на FTP-сервере.
• Видеокамера подключается к точке доступа, выбранной в разделе Подключение Wi-Fi с
помощью точки доступа (A 13).
7 Когда на экране появится сообщение [Сохранение точки доступа], нажмите [OK],
затем выполните процедуру из раздела Подключение Wi-Fi с помощью точки
доступа (A 13).
• Подробнее об этой функции см. в разделе Передача файлов на компьютер или FTP-
сервер в Руководстве по эксплуатации видеокамеры (PDF-файл).
ВАЖНО
• При передаче файлов соблюдайте следующие меры предосторожности. Нарушение этих
требований может привести к прерыванию передачи, а в месте назначения передачи могут
остаться неполные файлы.
- не открывайте крышку сдвоенного гнезда карт памяти;
- не отсоединяйте источник питания и не выключайте видеокамеру;
• Если передача файла была прервана, выберите пункт [Новые файлы] и повторите передачу
файла.
• Если в месте назначения передачи остались неполные версии файлов, перед удалением
этих файлов поверьте их содержимое и убедитесь в том, что файлы можно безопасно
удалить.
COPY
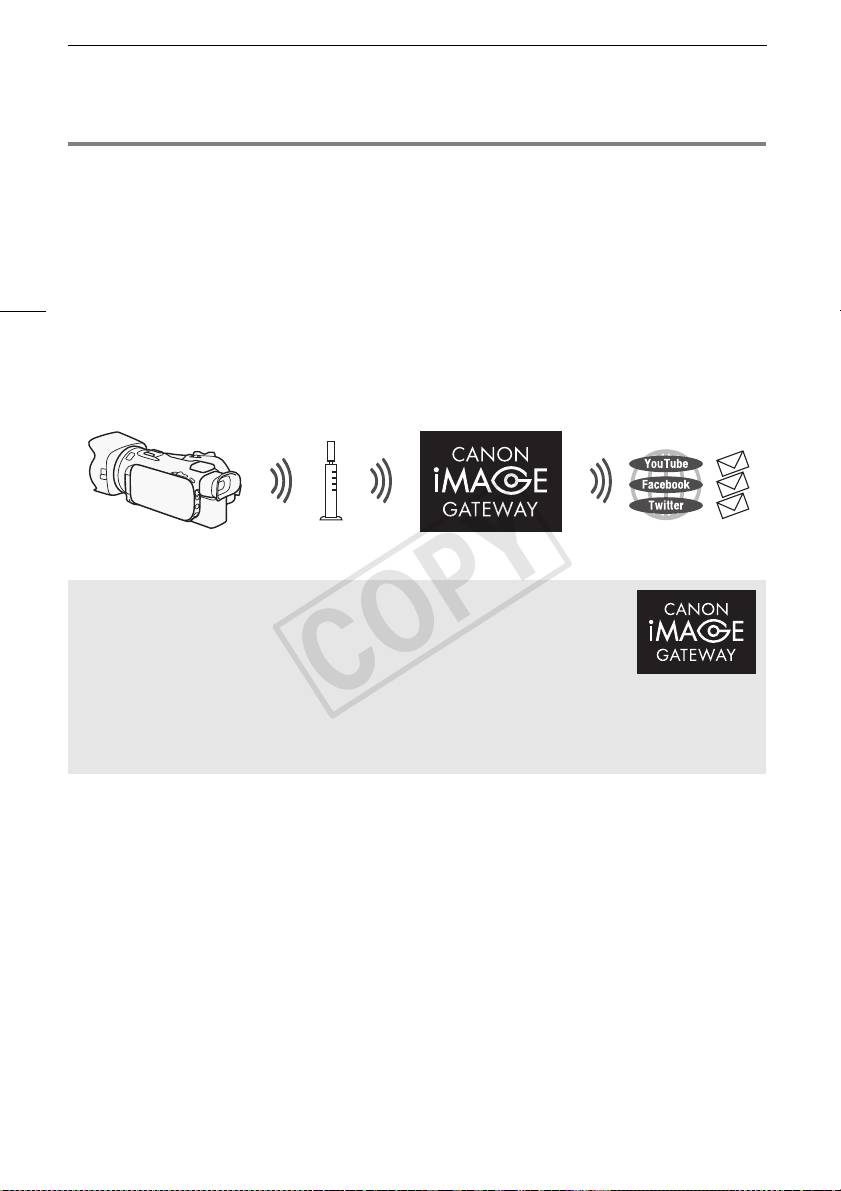
Совместное использование записей с помощью портала CANON iMAGE GATEWAY
Совместное использование записей с помощью портала
CANON iMAGE GATEWAY
После регистрации на портале CANON iMAGE GATEWAY* открывается доступ к различным
веб-службам**. Можно отправлять видеофильмы и фотографии в интернет-альбомы,
публиковать альбомы на сайте Twitter, отправлять видеофильмы на сайты Facebook и YouTube,
12
отправлять ссылки на свои интернет-альбомы друзьям и членам семьи, а также многое другое!
Для использования этой функции требуется точка доступа с выходом в Интернет.
• Подробнее об этой функции см. в разделе Совместное использование записей с помощью
портала CANON iMAGE GATEWAY в Руководстве по эксплуатации видеокамеры (PDF-файл).
* Доступность зависит от региона.
** Термин «веб-службы» используется в этом тексте для обозначения различных интернет-служб,
поддерживаемых порталом CANON iMAGE GATEWAY.
Беспроводной
маршрутизатор
(точка доступа)
CANON iMAGE GATEWAY
Портал CANON iMAGE GATEWAY – это сайт, предоставляющий
различные связанные с фотографией услуги владельцам
соответствующих продуктов Canon. После бесплатной интернет-
регистрации вы сможете пользоваться различными интернет-службами,
создавать фотоальбомы и многое другое. Для получения информации о
регистрации, странах и регионах, в которых можно пользоваться этой
службой, посетите веб-сайт компании Canon.
http://canon.com/cig
Общие требования
• Компьютер с правильно установленным прилагаемым программным обеспечением
ImageBrowser EX и CameraWindow. Подробные сведения по установке этого программного
обеспечения см. в разделе Сохранение видеофильмов MP4 и фотографий с помощью
ImageBrowser EX в Руководстве по эксплуатации видеокамеры (PDF-файл).
• Выполненная бесплатная интернет-регистрация на портале CANON iMAGE GATEWAY.
• Параметры учетных записей для сайтов YouTube, Facebook и Twitter (в зависимости от
служб, которые планируется использовать).
COPY
Подключение Wi-Fi с помощью точки доступа
Подключение Wi-Fi с помощью точки доступа
Видеокамера может подключаться к сети Wi-Fi с использованием беспроводного
маршрутизатора (точки доступа) и даже запоминать настройки для 4 последних
использовавшихся точек доступа.
Общие требования
13
• Правильно настроенный маршрутизатор, в котором используется
применяемый в видеокамере протокол Wi-Fi, с сертификацией Wi-Fi
(имеется показанный справа логотип) и расположенный в домашней сети.
Режимы работы:
Выберите требуемый способ подключения.
Варианты
[WPS: кнопка]* Просто нажмите кнопку WPS на точке доступа и удерживайте ее нажатой,
затем нажмите на экран видеокамеры. Это самый простой способ, если используется WPS-
совместимый маршрутизатор.
[WPS: PIN-код]* Откройте экран настройки точки доступа в своем веб-браузере.
Видеокамера выдаст PIN-код, который требуется ввести в браузере. Требуется WPS-
совместимый маршрутизатор и подключенный к нему компьютер или другое устройство.
Подробные сведения см. в разделе Функция безопасной настройки WPS в Руководстве по
эксплуатации видеокамеры (PDF-файл).
[Поиск точек доступа] В соответствии с инструкциями на экране видеокамеры требуется
выбрать точку доступа из списка обнаруженных SSID и ввести пароль. Подробные сведения
см. в разделе Поиск точек доступа в Руководстве по эксплуатации видеокамеры (PDF-файл).
[Ручная настройка] Требуется вручную ввести имя SSID точки доступа, пароль и другие
параметры сети. Этот способ рекомендуется для опытных пользователей сетей Wi-Fi.
Подробные сведения см. в разделе Ручная настройка в Руководстве по эксплуатации
видеокамеры (PDF-файл).
* WPS (от английского Wi-Fi Protected Setup – защищенная настройка Wi-Fi) представляет собой
стандарт, упрощающий подключение к
точке доступа.
Функция безопасной настройки WPS
Если точка доступа WPS-совместима (имеет показанный справа
логотип), подключить к ней видеокамеру очень просто. Стандарт WPS
позволяет использовать способ [WPS: кнопка] или [WPS: PIN-код] (см.
описание в предыдущем разделе). Если не удается успешно подключить
видеокамеру с использованием функции WPS, попробуйте способ [Поиск точек доступа].
См. также инструкцию по эксплуатации маршрутизатора.
COPY

Устранение неполадок
Устранение неполадок
Если не удается установить соединение Wi-Fi, см. ниже. Также ознакомьтесь с инструкциями
по эксплуатации других используемых устройств с поддержкой Wi-Fi. Если устранить
неполадку не удалось, обратитесь к дилеру или в сервисный центр Canon.
14
Не удается подключиться к устройству, поддерживающему Wi-Fi.
- Эффективный радиус связи между видеокамерой и устройством может изменяться в
зависимости от мощности беспроводного сигнала. Попробуйте использовать
видеокамеру ближе к устройству.
- Беспроводные телефоны, микроволновые печи, холодильники и другие приборы,
находящиеся между беспроводным маршрутизатором и видеокамерой, могут создавать
помехи для беспроводного сигнала. Попробуйте использовать видеокамеру подальше от
подобных приборов.
Список сообщений
(в алфавитном порядке)
Если на экране видеокамеры появилось сообщение, см. приведенный ниже список. Если
сообщение отсутствует в приведенном ниже списке, см. раздел Список сообщений в
Руководстве по эксплуатации видеокамеры (PDF-файл).
Another user is already controlling the camcorder. Try again later.
(Видеокамерой уже управляет другой пользователь. Повторите попытку позже.)
- Это сообщение появляется на экране устройства с поддержкой Wi-Fi. К видеокамере
пытаются подключиться несколько устройств с поддержкой Wi-Fi. Убедитесь, что
пытается подключиться только одно устройство с поддержкой Wi-Fi, затем нажмите
«Retry».
Wi-Fi-соединение разорвано.
- Беспроводные телефоны, микроволновые печи, холодильники и другие приборы могут
создавать помехи беспроводному сигналу. Попробуйте использовать видеокамеру
подальше от подобных приборов.
- Подключение видеокамеры к точке доступа может оказаться невозможным, если к
точке доступа обращается слишком много устройств.
Крышка гнезда карты памяти открыта
- При обращении к карте памяти была открыта крышка отсека карты памяти. Остановите
используемую функцию Wi-Fi и завершите соединение Wi-Fi.
COPY

MEMO
. . . . . . . . . . . . . . . . . . . . . . . . . . . . . . . . . . . . . . . . . . . . . . . . . . . . . . . . . . . . . . . . . . . . . . . . . . . . . . . . . . .
. . . . . . . . . . . . . . . . . . . . . . . . . . . . . . . . . . . . . . . . . . . . . . . . . . . . . . . . . . . . . . . . . . . . . . . . . . . . . . . . . . .
. . . . . . . . . . . . . . . . . . . . . . . . . . . . . . . . . . . . . . . . . . . . . . . . . . . . . . . . . . . . . . . . . . . . . . . . . . . . . . . . . . .
. . . . . . . . . . . . . . . . . . . . . . . . . . . . . . . . . . . . . . . . . . . . . . . . . . . . . . . . . . . . . . . . . . . . . . . . . . . . . . . . . . .
. . . . . . . . . . . . . . . . . . . . . . . . . . . . . . . . . . . . . . . . . . . . . . . . . . . . . . . . . . . . . . . . . . . . . . . . . . . . . . . . . . .
. . . . . . . . . . . . . . . . . . . . . . . . . . . . . . . . . . . . . . . . . . . . . . . . . . . . . . . . . . . . . . . . . . . . . . . . . . . . . . . . . . .
. . . . . . . . . . . . . . . . . . . . . . . . . . . . . . . . . . . . . . . . . . . . . . . . . . . . . . . . . . . . . . . . . . . . . . . . . . . . . . . . . . .
. . . . . . . . . . . . . . . . . . . . . . . . . . . . . . . . . . . . . . . . . . . . . . . . . . . . . . . . . . . . . . . . . . . . . . . . . . . . . . . . . . .
. . . . . . . . . . . . . . . . . . . . . . . . . . . . . . . . . . . . . . . . . . . . . . . . . . . . . . . . . . . . . . . . . . . . . . . . . . . . . . . . . . .
. . . . . . . . . . . . . . . . . . . . . . . . . . . . . . . . . . . . . . . . . . . . . . . . . . . . . . . . . . . . . . . . . . . . . . . . . . . . . . . . . . .
. . . . . . . . . . . . . . . . . . . . . . . . . . . . . . . . . . . . . . . . . . . . . . . . . . . . . . . . . . . . . . . . . . . . . . . . . . . . . . . . . . .
. . . . . . . . . . . . . . . . . . . . . . . . . . . . . . . . . . . . . . . . . . . . . . . . . . . . . . . . . . . . . . . . . . . . . . . . . . . . . . . . . . .
. . . . . . . . . . . . . . . . . . . . . . . . . . . . . . . . . . . . . . . . . . . . . . . . . . . . . . . . . . . . . . . . . . . . . . . . . . . . . . . . . . .
. . . . . . . . . . . . . . . . . . . . . . . . . . . . . . . . . . . . . . . . . . . . . . . . . . . . . . . . . . . . . . . . . . . . . . . . . . . . . . . . . . .
. . . . . . . . . . . . . . . . . . . . . . . . . . . . . . . . . . . . . . . . . . . . . . . . . . . . . . . . . . . . . . . . . . . . . . . . . . . . . . . . . . .
. . . . . . . . . . . . . . . . . . . . . . . . . . . . . . . . . . . . . . . . . . . . . . . . . . . . . . . . . . . . . . . . . . . . . . . . . . . . . . . . . . .
. . . . . . . . . . . . . . . . . . . . . . . . . . . . . . . . . . . . . . . . . . . . . . . . . . . . . . . . . . . . . . . . . . . . . . . . . . . . . . . . . . .
. . . . . . . . . . . . . . . . . . . . . . . . . . . . . . . . . . . . . . . . . . . . . . . . . . . . . . . . . . . . . . . . . . . . . . . . . . . . . . . . . . .
. . . . . . . . . . . . . . . . . . . . . . . . . . . . . . . . . . . . . . . . . . . . . . . . . . . . . . . . . . . . . . . . . . . . . . . . . . . . . . . . . . .
. . . . . . . . . . . . . . . . . . . . . . . . . . . . . . . . . . . . . . . . . . . . . . . . . . . . . . . . . . . . . . . . . . . . . . . . . . . . . . . . . . .
. . . . . . . . . . . . . . . . . . . . . . . . . . . . . . . . . . . . . . . . . . . . . . . . . . . . . . . . . . . . . . . . . . . . . . . . . . . . . . . . . . .
. . . . . . . . . . . . . . . . . . . . . . . . . . . . . . . . . . . . . . . . . . . . . . . . . . . . . . . . . . . . . . . . . . . . . . . . . . . . . . . . . . .
. . . . . . . . . . . . . . . . . . . . . . . . . . . . . . . . . . . . . . . . . . . . . . . . . . . . . . . . . . . . . . . . . . . . . . . . . . . . . . . . . . .
. . . . . . . . . . . . . . . . . . . . . . . . . . . . . . . . . . . . . . . . . . . . . . . . . . . . . . . . . . . . . . . . . . . . . . . . . . . . . . . . . . .
. . . . . . . . . . . . . . . . . . . . . . . . . . . . . . . . . . . . . . . . . . . . . . . . . . . . . . . . . . . . . . . . . . . . . . . . . . . . . . . . . . .
. . . . . . . . . . . . . . . . . . . . . . . . . . . . . . . . . . . . . . . . . . . . . . . . . . . . . . . . . . . . . . . . . . . . . . . . . . . . . . . . . . .
COPY

目录
Wi-Fi 功能
Wi-Fi Functions
03 入门
03 Wi-Fi 简介
06 通过 Wi-Fi 远程应用程序远程操作
07 远程浏览:在 iOS 或 Android 设备上使用网络浏览器查看记录
2
08 上传记录到 iOS 设备
09 在计算机上播放
10 传输文件到计算机或 FTP 服务器
11 使用接入点的 Wi-Fi 连接
12 故障排除
商标声明
• Microsoft 和 Windows 是微软公司 (Microsoft Corporation)在美国和 / 或其他国家
(地区)的商标或注册商标。
• App Store、iPad、iPhone、iPod、iTunes 和 Mac OS 是苹果公司 (Apple Inc.) 在美国和
其他国家 (地区)注册的商标。
• Google、Android、Google Play 是 Google Inc. 的商标。
• iOS 是 Cisco 在美国和其他国家 (或地区)的商标或注册商标,许可使用。
• Wi-Fi 是 Wi-Fi 联盟的注册商标。
• Wi-Fi Certified、WPA、WPA2 和 Wi-Fi Certified 徽标是 Wi-Fi 联盟的商标。
• 用于摄像机设置、屏幕显示以及本手册中的 WPS 表示 Wi-Fi Protected Setup (Wi-Fi
保护设置)。
• Wi-Fi Protected Setup 标识符标记是 Wi-Fi 联盟的标记。
• JavaScript是Oracle Corporation及其附属公司或子公司在美国和其他国家/地区的商
标或注册商标。
• 以上未提及的其他名称和产品可能为其各自公司的商标或注册商标。
COPY
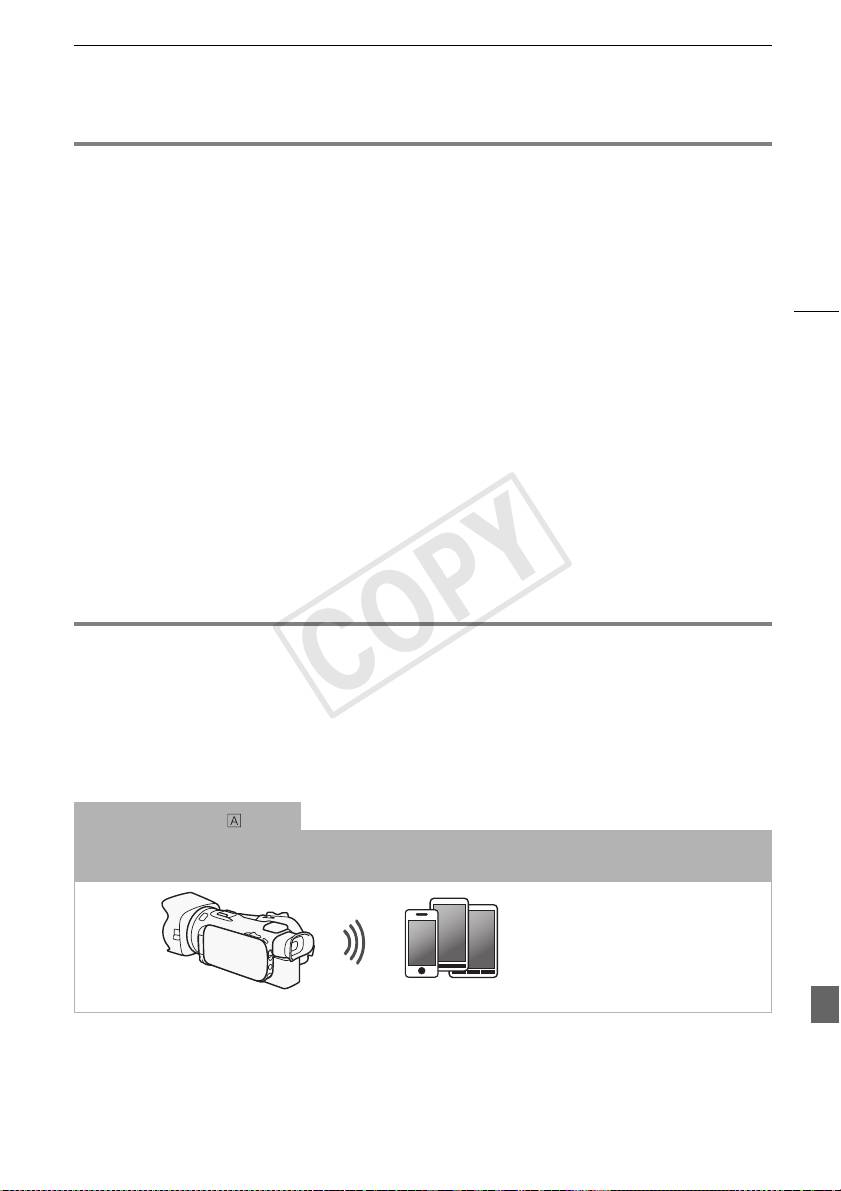
入门
入门
本说明书将向您介绍使用摄像机的 Wi-Fi 功能的基本知识。如需了解有关 Wi-Fi 功能的
详细信息以及查看更详细的步骤,请参阅完整版使用说明书 (随附 CD-ROM 上的 PDF 文
件)。如果本说明书提示您参考摄像机使用说明书中的某个章节,请通过目录或 PDF 的
搜索功能来帮助查找。要安装完整版的使用说明书,请参阅随附的快速指南中的
安装摄
像机的使用说明书 (PDF 文件)
。
3
以下为本文中经常用到的基本术语。
接入点 ( 访问点 )
无线接入点 (WAP) 是允许无线设备 (例如摄像机)通过 Wi-Fi 标准连接到有线网络 (包
括因特网)的设备。 大多数情况下是指无线路由器。
SSID
Service Set Identifier (服务集标识符)。 Wi-Fi 网络的公开名称。
Wi-Fi 网络
位于您的家庭、办公室或其他地点的一组计算机和 / 或其他设备,它们之间通过 Wi-Fi
无线连接。
Wi-Fi 简介
使用摄像机的 Wi-Fi 功能连接到智能手机或平板电脑时,您可以无线方式保存并播放记
1
录。 您甚至可以将智能手机或平板电脑 (iOS 或 Android 设备
)用作遥控器并使用设
备的网络浏览器进行记录。
1
本文用 “iOS 设备”指代启用了 Wi-Fi 的 iPhone、iPod 和 iPad,并用 “Android 设备”指代启用了
Wi-Fi 的 Android 智能手机和平板电脑。
Wi-Fi 连接
当使用 Wi-Fi 远程应用程序时,您可使用 iOS 或 Android 设备来远程控制摄像机并进行
记录 (A 6)。
iOS 或 Android 设备
COPY
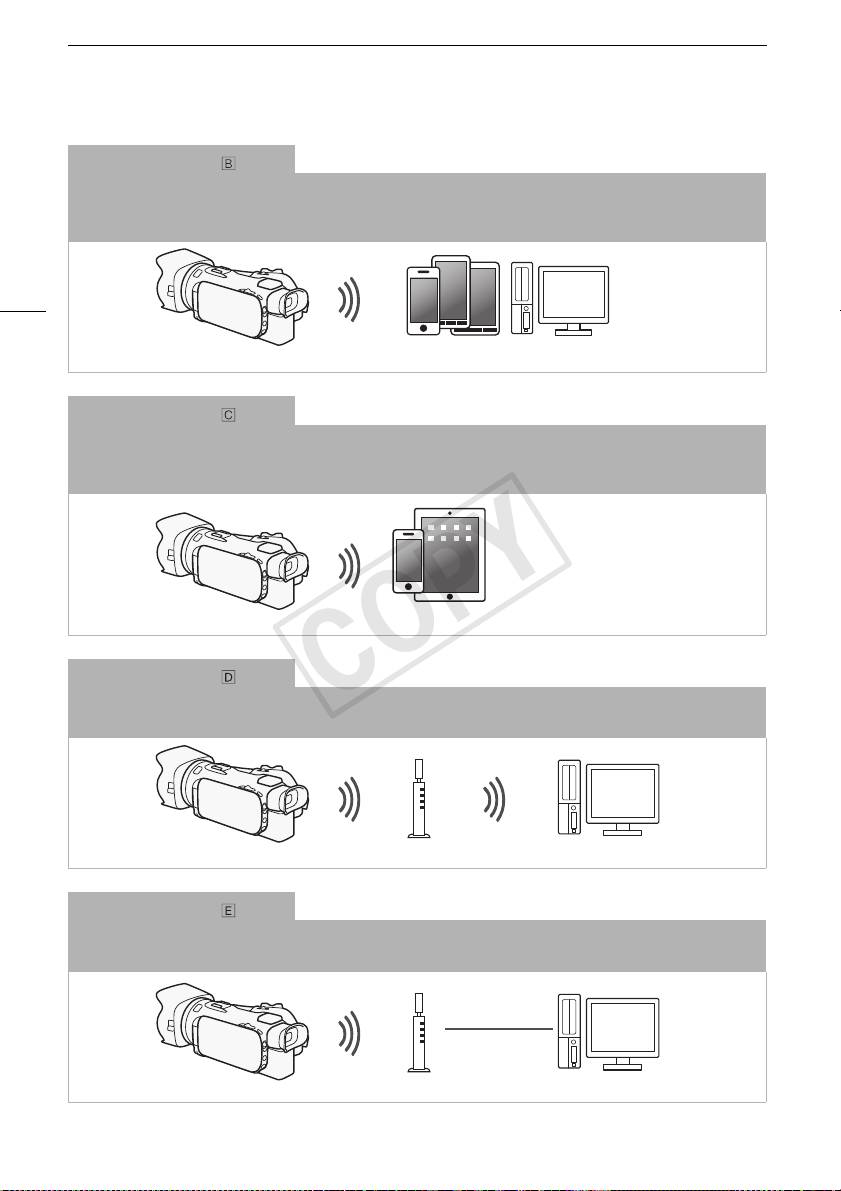
Wi-Fi 简介
Wi-Fi 连接
2
以无线方式将摄像机连接至 iOS 设备、Android 设备或计算机
并使用设备的网络浏览
器来查看摄像机中的记录 (A 7)。
2
也可使用通过接入点连接的计算机。
4
iOS 设备、Android 设备等
Wi-Fi 连接
在下载 Movie Uploader app3 后,以无线方式将摄像机连接到 iOS 设备 (A 8),从而
保存并播放记录。
3
Movie Uploader 应用程序由 PIXELA 提供,可从 App Store 免费下载。
iOS 设备
Wi-Fi 连接
以无线的方式将摄像机连接到 Wi-Fi 网络上的一个无线路由器 (接入点)(A 11)。
如果您计划在计算机或 FTP 服务器上保存记录则使用此连接 (A 10)。
接入点 计算机
Wi-Fi 连接
以无线方式将摄像机连接至网络,使用媒体服务器功能并使用 LAN 网线在连接至该网络
的设备上播放记录 (A 9)。
LAN 网线
接入点
计算机
COPY
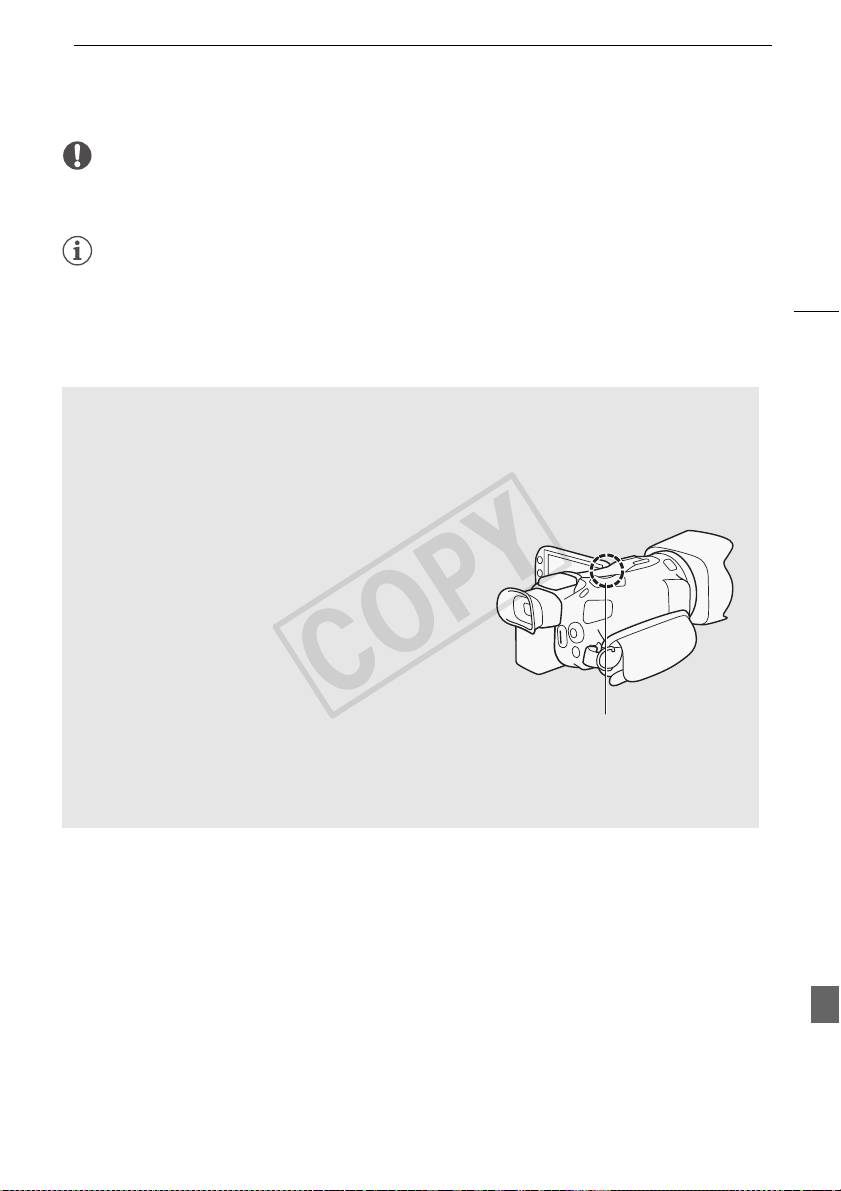
Wi-Fi 简介
重
5
要
• 使用不受保护的 Wi-Fi 网络可能会使文件和数据暴露,从而被未经授权的第三方监测
到。 请注意可能引起的风险。
注
• 使用 Wi-Fi 功能(除使用 Wi-Fi 远程应用程序远程控制摄像机)时,切勿打开双存储卡
插槽盖。
• 使用 Wi-Fi 功能(除使用 Wi-Fi 远程应用程序远程控制摄像机)时,摄像机的自动关闭
功能将无法使用。
使用 Wi-Fi 功能之前
根据具体功能,摄像机将使用无线方式连接至启用 Wi-Fi 的设备 (如智能手机),或
*
通过接入点 (无线路由器)
直接连接至 Wi-Fi 网络。 在选择要使用的功能之后,根
据屏幕上的指示连接摄像机。
*
根据具体制造商接入点可能被称为不同的名称,如无线 LAN 路由器或无线网络路由器。
关于 Wi-Fi 天线
使用摄像机的 Wi-Fi 功能时,请勿用手或其他物体
遮住摄像机的背面。Wi-Fi 天线位于背面,遮住天线
可能会干扰无线信号。
Wi-Fi 天线
关于摄像机的 Wi-Fi 标准
有关摄像机 Wi-Fi 标准的详细信息,请参阅摄像机使用说明书 (PDF 文件)中的
关于
摄像机的 Wi-Fi 标准
。
COPY
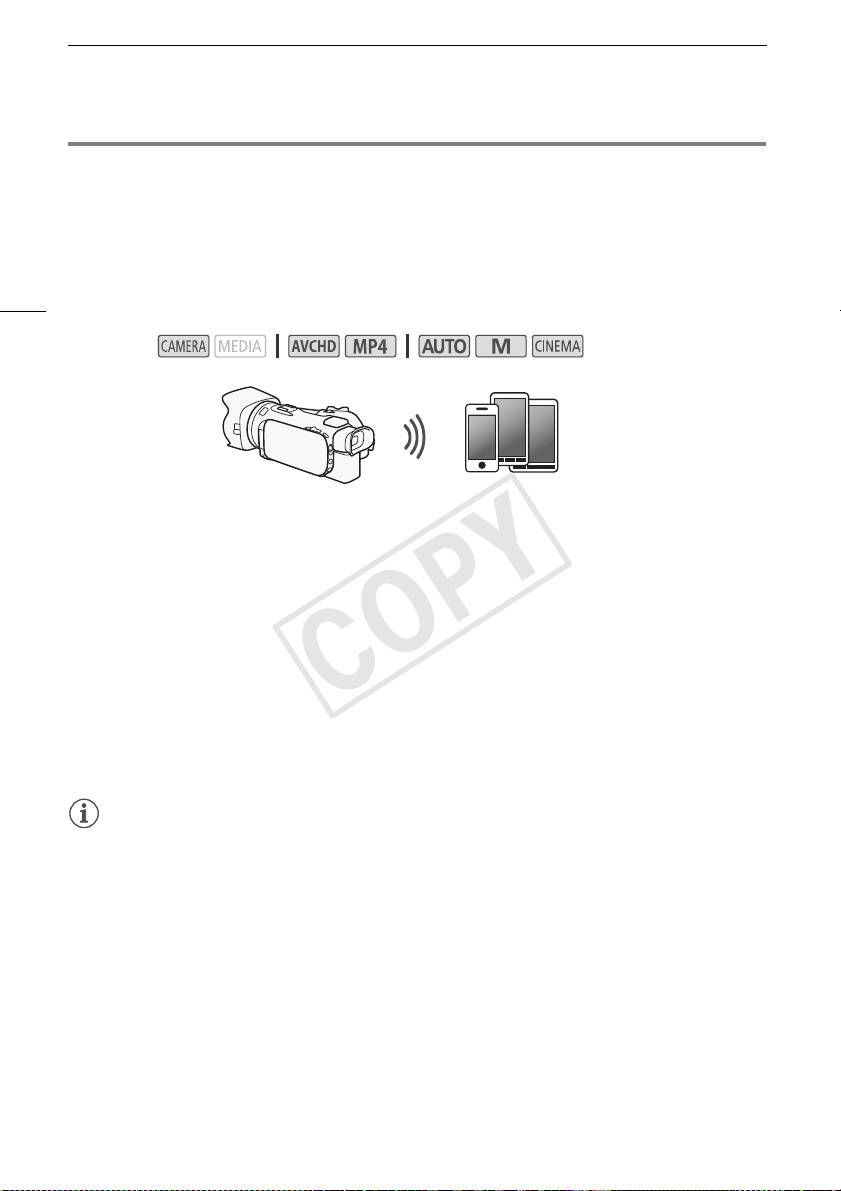
通过 Wi-Fi 远程应用程序远程操作
通过 Wi-Fi 远程应用程序远程操作
*
可通过 Wi-Fi 远程应用程序远程操作摄像机,这是一个使用兼容 Wi-Fi 网络
的设备网
**
络浏览器
进行访问的网络浏览器应用程序。 该 Wi-Fi 远程应用程序让您通过实时取景
监控图像,启动和停止记录以及远程控制拍摄模式、曝光、白平衡、光圈、增益、快门
速度、对焦和变焦。
*
6
有关兼容设备、操作系统、网络浏览器等详细信息,请访问您当地的佳能网站。
**
需要已启用 JavaScript 和 Cookie 的网络浏览器。
操作模式:
iOS 或 Android 设备
设置摄像机密码
对于要求具备 iOS 或 Android 设备的 Wi-Fi 功能,您将需要设置摄像机密码。 输入一次
密码后,无需再次输入 (除非重置或覆盖摄像机的设置)。
1 打开 [ 智能手机连接设置 ] 屏幕。
*
[FUNC.] > [MENU] > p/s
> [Wi-Fi] > [ 智能手机连接设置 ]
*
触摸 s 进入远程浏览和媒体服务器功能。
2 触摸摄像机密码。
3 输入 8 个字符的密码并触摸 [ 确定 ]。
4触摸[K],然后触摸 [X]。
注
• 设置摄像机密码后,密码不会显示在屏幕上供您查看。 请记下密码,以防忘记。 要更
改密码,再次执行上述步骤。
远程操作摄像机
1 摄像机: 打开 [Wi-Fi 远程 ] 屏幕。
[FUNC.] >[„ Wi-Fi 远程 ]
2 摄像机: 触摸 [ON]。
• 将显示本摄像机的 SSID (网络名称)和输入网络浏览器的 URL。
• 摄像机准备好与该设备连接。
COPY
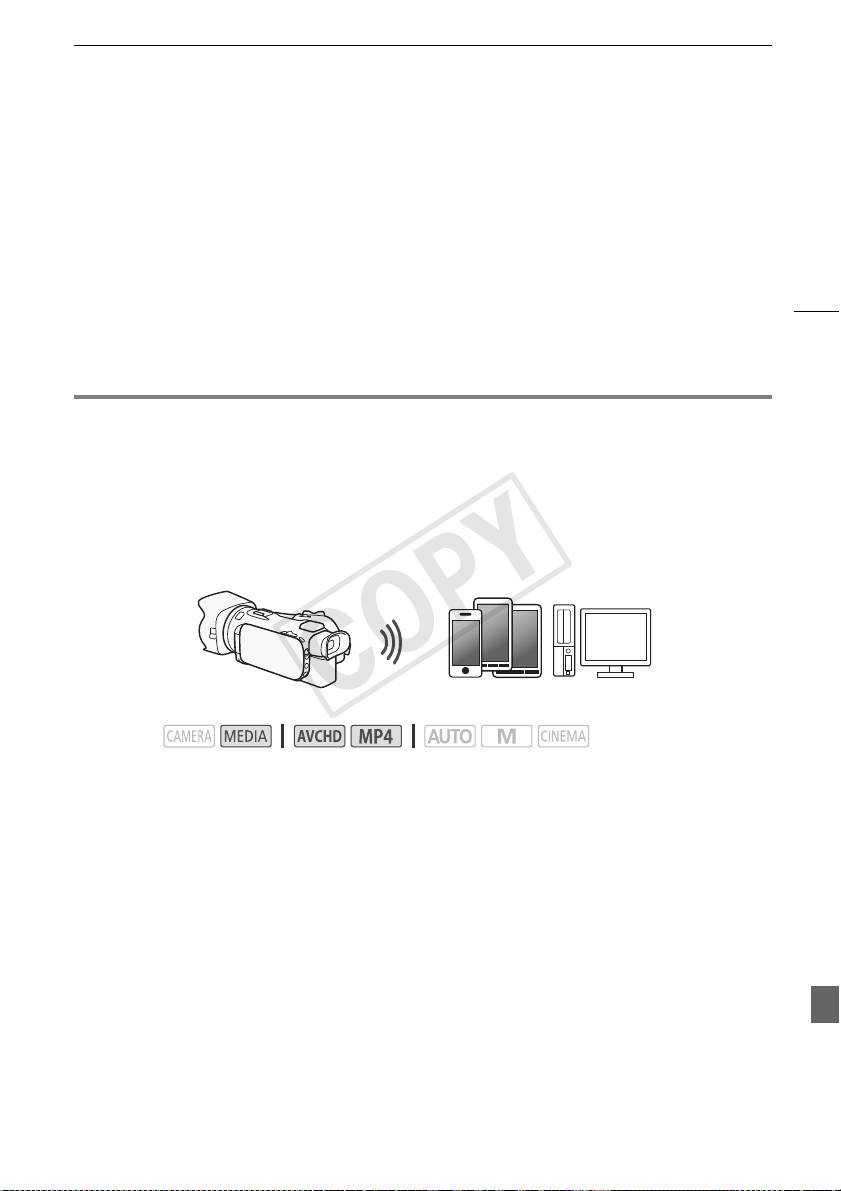
远程浏览:在 iOS 或 Android 设备上使用网络浏览器查看记录
3 iOS/Android 设备: 在设置屏幕中激活 Wi-Fi。
• 将出现检测到的接入点的网络名称。
4 iOS/Android 设备: 触摸和步骤 2 中显示的 SSID 相同的接入点。
• 如果之前已执行过该步骤并且未更改摄像机密码,连接将自动建立。
5 iOS/Android 设备: 输入之前设置的摄像机密码。
6 iOS/Android 设备: 将摄像机屏幕上显示的 URL 输入网络浏览器以启动 Wi-Fi 远
7
程应用程序。
• 有关该功能的详细信息,请参考摄像机使用说明书 (PDF 文件)中的
通过 Wi-Fi 远程
应用程序远程操作
。
远程浏览:在 iOS 或 Android 设备上使用网络浏览器查看记
录
借助远程浏览功能,可使用 iOS 设备、Android 设备、计算机或类似设备上的网络浏览
*
器来显示摄像机中的记录列表、播放记录,甚至可以下载记录
。此功能对于在外出时查
看记录非常方便。
*
根据设备、操作系统、浏览器、影片格式和记录模式,可能无法播放或下载记录。 有关详细信息,
请访问您当地的佳能网站。
iOS 设备、Android 设备等
操作模式:
1 摄像机: 打开所需的索引屏幕。
2 摄像机: 打开 [ 通过浏览器播放 ] 屏幕。
[MENU] > s > [Wi-Fi] > [ 通过浏览器播放 ]
• 将出现摄像机的 SSID (网络名称)。
• 摄像机准备好与该设备连接。
• 要设置或更改摄像机密码,执行
设置摄像机密码
(A 6) 中所述步骤,由步骤 2 开始。
3 iOS/Android 设备: 在设置屏幕中激活 Wi-Fi。
• 将出现检测到的接入点的网络名称。
4 iOS/Android 设备: 触摸和步骤 2 中显示的 SSID 相同的接入点。
• 如果之前已执行过该步骤并且未更改摄像机密码,连接将自动建立。
5 iOS/Android 设备: 输入之前设置的摄像机密码。
• 摄像机屏幕上将会出现 [ 已连接 ],并且将建立连接。
6 iOS/Android 设备: 启动网络浏览器。
COPY
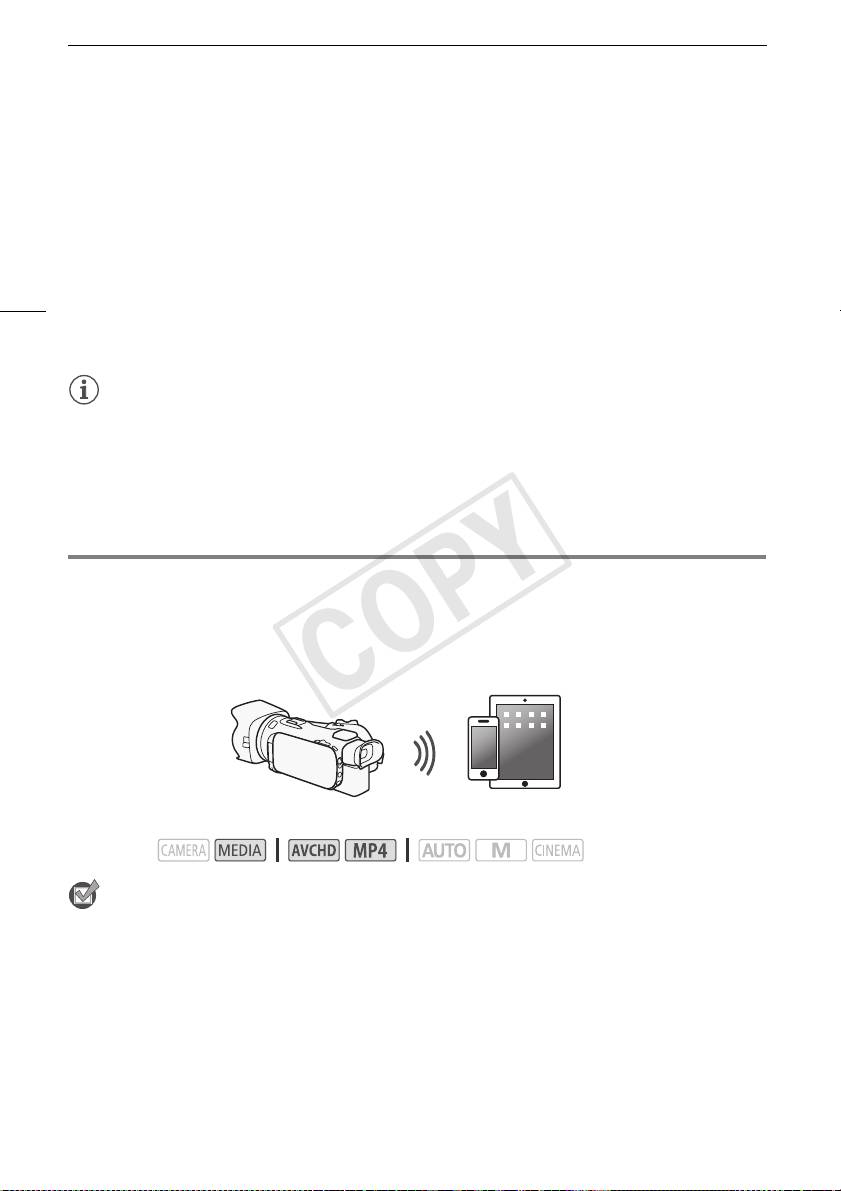
上传记录到 iOS 设备
7 iOS/Android 设备: 将摄像机屏幕上出现的 URL 输入网络浏览器的地址栏。
• 此时将出现远程浏览屏幕。
• 只要不更改端口设置,URL 总是相同的,因此您会发现标记 URL 极为便捷。
8 iOS/Android 设备: 触摸屏幕左上角的 [6·] 并打开所需的索引屏幕。 接下
来,触摸所需的记录。
• 对于影片,触摸播放图标以开始播放。如果选择的是照片,则将显示所选照片。
8
9 摄像机: 完成时触摸 [ 结束 ] > [确定]。
• 有关该功能的详细信息,请参考摄像机使用说明书 (PDF 文件)中的
远程浏览:在
iOS 或 Android 设备上使用网络浏览器查看记录
。
注
• 下列各类 MP4 场景在其他设备上将被当作是多个文件。
- 超过 4 GB 的场景
- 以 35 Mbps 记录的超过 30 分钟的场景
- 以非 35 Mbps 的记录模式记录且超过 1 小时的场景
• 一次只能将一台设备连接至摄像机。
上传记录到 iOS 设备
*
针对 iOS 设备使用 Movie Uploader app
,则可以无线方式将摄像机连接到该设备以上传
**
影片。 此外,您甚至可以在 iOS 设备上保存
并播放 MP4 影片及照片。
*
Movie Uploader 应用程序由 PIXELA 提供,可从 App Store 免费下载。
**
不适用于以 35 Mbps 记录的 MP4 影片。
检
查
要点
iOS 设备
操作模式:
• 在首次执行该步骤之前,请在iOS 设备上安装 Movie Uploader应用程序。 该应用程序可
从以下网址免费下载:
http://appstore.com/movieuploader
1 摄像机: 打开所需的影片索引屏幕。
COPY
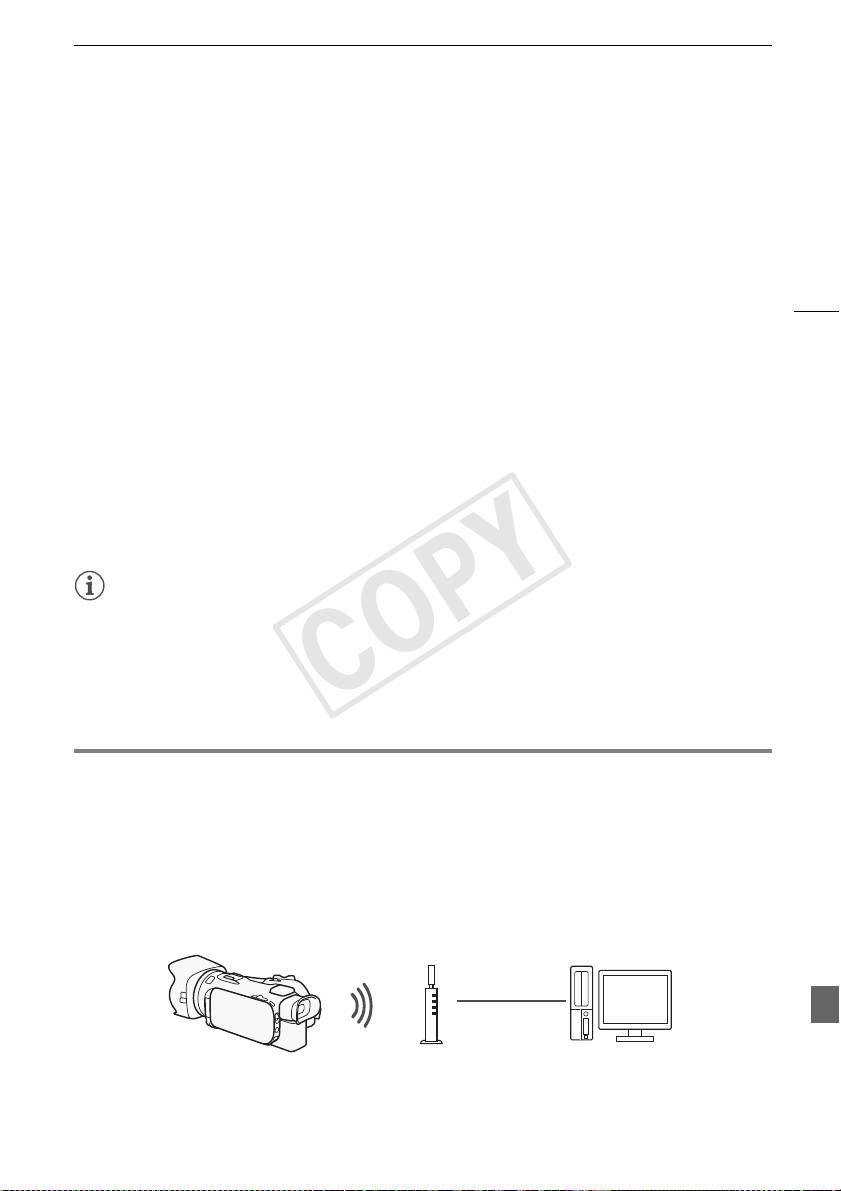
在计算机上播放
2 摄像机: 打开 [Movie Uploader] 屏幕。
[MENU] > s > [Wi-Fi] > [Movie Uploader]
• 将出现摄像机的 SSID (网络名称)。
• 摄像机准备好与 iOS 设备连接。
• 要设置或更改摄像机密码,执行
设置摄像机密码
(A 6) 中所述步骤,由步骤 2 开始。
3 iOS 设备: 在设置屏幕中激活 Wi-Fi。
9
• 将出现检测到的接入点的网络名称。
4 iOS 设备: 触摸和步骤 2 中显示的 SSID 相同的接入点。
• 如果之前已执行过该步骤并且未更改摄像机密码,连接将自动建立。
5 iOS 设备: 输入之前设置的摄像机密码。
• 摄像机屏幕上将会出现 [ 已连接 ],并且将建立连接。
6 iOS 设备: 使用 Movie Uploader app 来上传摄像机的影片 (和照片,如果适
用)。
• 有关 Movie Uploader 应用程序的详细信息,请访问 PIXELA 网站。
http://www.pixela.co.jp/oem/canon/e/movieuploader/ (仅英语版本)
• 有关该功能的详细信息,请参考摄像机使用说明书 (PDF 文件)中的
上传记录到 iOS
设备
。
注
• 下列各类 MP4 场景在其他设备上将被当作是多个文件。
- 超过 4 GB 的场景
- 以 35 Mbps 记录的超过 30 分钟的场景
- 以非 35 Mbps 的记录模式记录且超过 1 小时的场景
在计算机上播放
通过媒体服务器功能,可从计算机或类似设备上以无线方式查看影片和照片。 此时需要
一个连接到家庭网络的接入点,并且在计算机上安装可播放媒体服务器中的影片和照片
的软件。 我们建议使用 LAN 网线将计算机连接至接入点。 另请参阅计算机、软件和接入
点的使用说明书。
• 有关该功能的详细信息,请参考摄像机使用说明书 (PDF 文件)中的
在计算机上播
放
。
LAN 网线
接入点
计算机
COPY
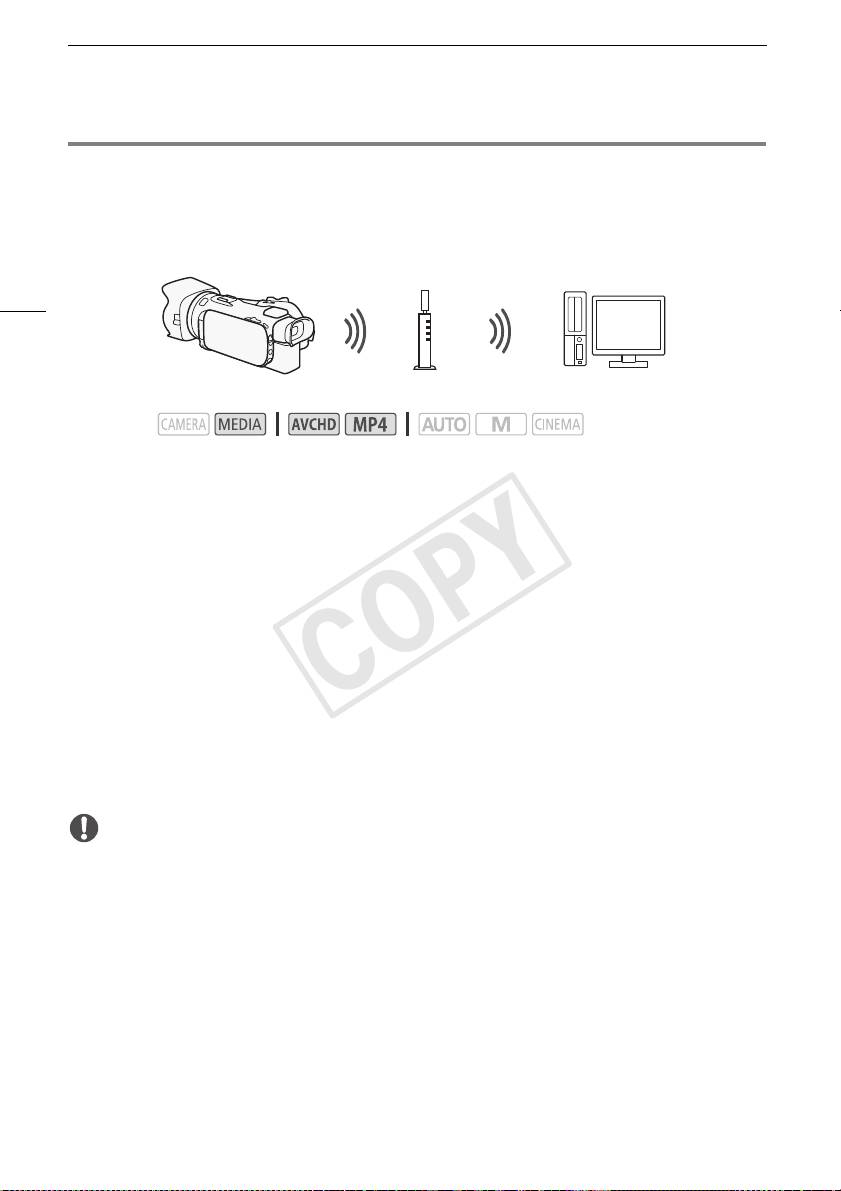
传输文件到计算机或 FTP 服务器
传输文件到计算机或 FTP 服务器
您可直接无线传输文件 (记录)到计算机或 FTP 服务器。 您需要正确配置的 FTP 服务
器。 在手动设置步骤中,您需要输入 FTP 服务器的 IP 地址、端口、用户名、密码和文件
传输目的地 (文件将传输到的地方)。
10
1 摄像机: 打开所需的影片索引屏幕。
2 打开[FTP传输]屏幕。
[MENU] > s > [Wi-Fi] > [FTP 传输 ]
3 为 [FTP 服务器 ] 输入 FTP 服务器的 IP 地址并且为 [ 端口 ] 输入端口号。
4 触摸 [ 下一画面 ]。
5 输入用户名和密码然后触摸 [ 下一画面 ]。
6 为 [ 目标文件夹 ] 输入 [/] 然后触摸 [ 确定 ]。
• 根据 FTP 服务器的设置不同,端口号和目标文件夹所需的文本也有所不同。检查 FTP
服务器上的设置。
• 摄像机将连接
使用接入点的 Wi-Fi 连接
(A 11) 中选择的接入点。
7 当屏幕上出现 [ 保存访问点 ] 时,触摸 [ 确定 ] 然后执行
使用接入点进行 Wi-Fi
连接
中的步骤 (A 11)。
• 有关该功能的详细信息,请参考摄像机使用说明书 (PDF 文件)中的
传输文件到计算
机或 FTP 服务器
。
重
要
接入点
计算机
操作模式:
• 传输文件时遵循以下注意事项。 未进行此操作可能中断传输,并且不完整的文件可能
将留在传输目的地。
- 请勿打开双存储卡插槽盖。
- 请不要断开电源或关闭摄像机。
• 如果文件传输已中断,选择 [ 未传输的文件 ] 并再次执行文件传输。
• 如果不完整的文件留在传输目的地,在将其删除之前,请检查内容并确保可以安全删
除。
COPY
使用接入点的 Wi-Fi 连接
使用接入点的 Wi-Fi 连接
摄像机可以使用无线路由器 (接入点)连接至 Wi-Fi 网络,并且甚至可以记住四个最近
使用的接入点的设置。
总体要求
• 已正确配置使用摄像机所用的 Wi-Fi 协议且通过 Wi-Fi 认证(具有右侧
11
所示的徽标)的路由器,并且此路由器位于一个家庭网络中。
操作模式:
选择所需连接方式。
选项
[WPS: 按钮 ]* 只需按住接入点上的 WPS 按钮,然后触摸摄像机的屏幕。 如果使用兼
容 WPS 的路由器,这是最简单的连接方法。
[WPS: PIN 码 ]* 使用网络浏览器访问接入点的配置屏幕。 摄像机将为您提供一个需
要在浏览器中输入的 PIN 码。 您将需要一个兼容 WPS 的路由器及计算机或其他与之连
接的设备。 有关详细信息,请参考摄像机使用说明书 (PDF 文件)中的
Wi-Fi
Protected Setup (Wi-Fi 保护设置)(WPS)
。
[ 搜索访问点 ] 遵照摄像机屏幕上的说明,从检测到的 SSID 列表中选择您的接入点,
然后输入密码。 有关详细信息,请参考摄像机使用说明书 (PDF 文件)中的
搜索接入
点
。
[ 手动设置 ] 手动输入接入点的 SSID、密码和其他网络设置。推荐 Wi-Fi 网络的高级
用户使用该方法。 有关详细信息,请参考摄像机使用说明书 (PDF 文件)中的
手动设
置
。
*
WPS 代表 Wi-Fi Protected Setup (Wi-Fi 保护设置),是一种将与接入点的连接变得更容易的标
准。
Wi-Fi Protected Setup (Wi-Fi 保护设置)(WPS)
如果接入点兼容 WPS (右侧显示有相应徽标),则连接摄像机与该
接入点就非常简单。 通过 WPS,您可使用 [WPS: 按钮 ] 方法或
[WPS: PIN 码 ] 方法 (请参阅上一节的说明)。 如果无法使用 WPS
成功连接摄像机,请尝试使用 [ 搜索访问点 ] 方法。 另请参阅路由
器的使用说明书。
COPY

故障排除
故障排除
如果无法成功建立 Wi-Fi 连接,请检查下列设置。另请参阅所使用的其他启用了 Wi-Fi
的设备的使用说明书。如果问题仍未能解决,请与经销商或佳能快修中心联系。
无法与启用了 Wi-Fi 的设备连接。
12
- 摄像机与设备之间的有效通信距离因无线信号的强度而异。请尝试靠近设备使用摄像
机。
- 无线路由器与摄像机之间的无绳电话、微波炉、冰箱和其他装置可能会干扰无线信
号。请尝试在远离上述装置的位置使用摄像机。
提示信息列表
(按拼音顺序排列)
如果有提示信息出现在摄像机的屏幕上,请参考以下内容。如果出现的提示信息未在下
面列出,请参考摄像机使用说明书 (PDF 文件)中的
提示信息列表
。
Another user is already controlling the camcorder. Try again later.
( 其他用户已经控制摄像机。 稍后再试。)
- 该提示信息出现在 Wi-Fi 设备的屏幕上。多个 Wi-Fi 设备正在尝试与摄像机连接。请确
保只有一个 Wi-Fi 设备在尝试与摄像机连接,然后触摸 [Retry]。
Wi-Fi 连接已终止
- 无绳电话,微波炉,冰箱和其他装置可能会干扰无线信号。请尝试在远离上述装置的
位置使用摄像机。
- 如有过多的设备在访问接入点,则摄像机可能无法连接至接入点。
存储卡盖开启
- 访问存储卡时,存储卡盖为打开状态。请停止正在使用的 Wi-Fi 功能,并中断 Wi-Fi 连
接。
COPY

For the contact information of your local Canon office, refer to the back
cover of the camcorder's Quick Guide.
Pour savoir comment contacter votre centre Canon local, reportez-vous à
la couverture-dos du guide rapide du caméscope.
Kontaktinformationen zu Ihrer nächstgelegenen Canon Vertretung finden
Sie auf der Rückseite des Camcorder-Kurzanleitung.
Per conoscere il centro Canon più vicino, consultate la retrocopertina del
guida rapida della videocamera.
Para la información de contacto de su oficina Canon local, consulte la
contraportada del guía breve de la videocámara.
Контактную информацию местного офиса Canon см. на задней
обложке краткое руководство видеокамеры.
有关当地佳能办事处的联系信息,请参阅摄像机快速指南的封底。
初版:2013.04.01
PUB. DIM-1076-000 © CANON INC. 2013
COPY
