Beko TS1 66020: 3 Installation
3 Installation : Beko TS1 66020
3 Installation
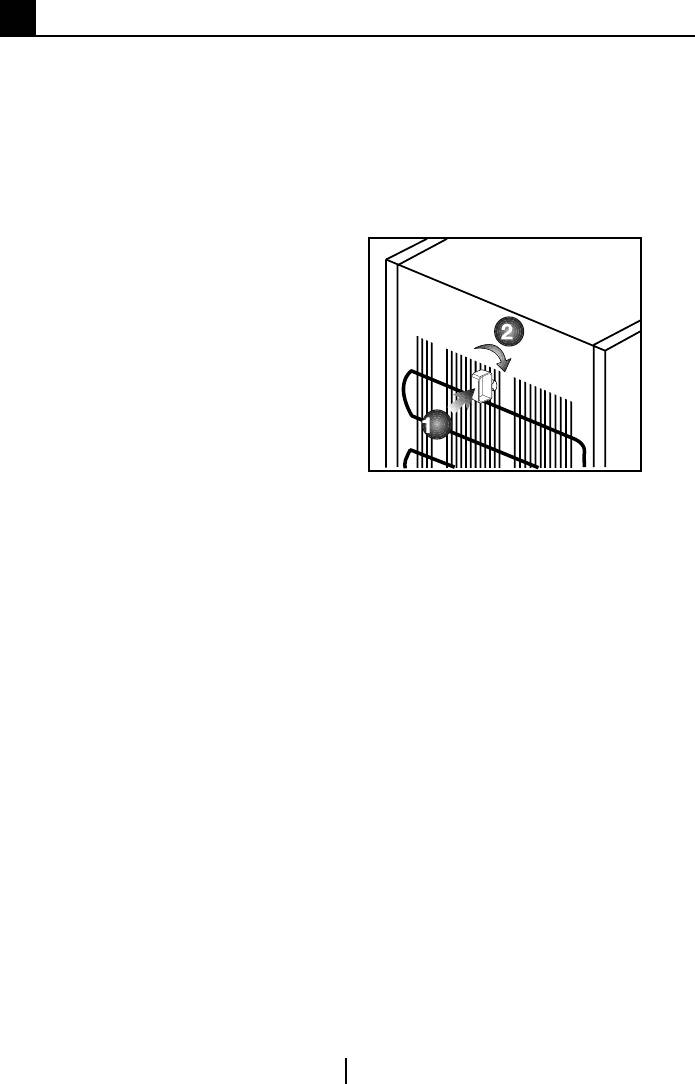
2. You can install the 2 plastic wedges
B Please remember that the
as illustrated in the figure. Plastic
manufacturer shall not be held liable if
wedges will provide the required
the information given in the instruction
distance between your freezer and
manual is not observed.
the wall in order to allow the air
circulation. (The illustrated figure is
Points to be considered
only an example and does not match
when re-transporting your
exactly with your product.)
freezer
1. Your freezer must be emptied and
cleaned prior to any transportation.
2. Shelves, accessories, crisper and
etc. in your freezer must be fastened
securely by adhesive tape against any
jolt before repackaging.
3. Packaging must be tied with thick
tapes and strong ropes and the
rules of transportation printed on the
package must be followed.
3. Clean the interior of the freezer as
recommended in the “Maintenance
Please do not forget…
and cleaning” section.
Every recycled material is an
indispensable source for the nature and
4. Plug the freezer into the wall outlet.
for our national resources.
When the fridge door is open the
If you wish to contribute to recycling the
fridge compartment interior light will
packaging materials, you can get further
come on.
information from the environmental
5. You will hear a noise as the
bodies or local authorities.
compressor starts up. The liquid and
gases sealed within the refrigeration
Before operating your
system may also give rise to noise,
freezer
even if the compressor is not running
Before starting to use your freezer
and this is quite normal.
check the following:
6. Front edges of the freezer may feel
1. Is the interior of the freezer dry and
warm. This is normal. These areas
can the air circulate freely in the rear of
are designed to be warm to avoid
it?
condensation.
Electric connection
Connect your product to a grounded
socket which is being protected by a
fuse with the appropriate capacity.
Important:
8
EN

• The connection must be in
Placing and Installation
compliance with national regulations.
1. Install your freezer to a place that
• The power cable plug must be easily
allows ease of use.
accessible after installation.
2. Keep your freezer away from heat
• The specified voltage must be equal
sources, humid places and direct
to your mains voltage.
sunlight.
• Extension cables and multiway plugs
3. There must be appropriate air
must not be used for connection.
ventilation around your freezer in order
to achieve an efficient operation.
B A damaged power cable must be
If the freezer is to be placed in a recess
replaced by a qualified electrician.
in the wall, there must be at least 5 cm
B Product must not be operated before
distance with the ceiling and at least 5
it is repaired! There is danger of
cm with the wall.
electric shock!
If the floor is covered with a carpet,
your product must be elevated 2.5 cm
Disposing of the packaging
from the floor.
4. Place your freezer on an even floor
The packing materials may be
surface to prevent jolts.
dangerous for children. Keep the
5. Do not keep your freezer in ambient
packing materials out of the reach
temperatures under 10°C.
of children or dispose them of by
classifying them in accordance
with the waste instructions. Do not
dispose them of along with the normal
household waste.
The packing of your freezer is
produced from recyclable materials.
Disposing of your old freezer
Dispose of your old machine without
giving any harm to the environment.
• You may consult your authorized
dealer or waste collection center of
your municipality about the disposal of
your freezer.
Before disposing of your freezer, cut
out the electric plug and, if there are
any locks on the door, make them
inoperable in order to protect children
against any danger.
9
EN
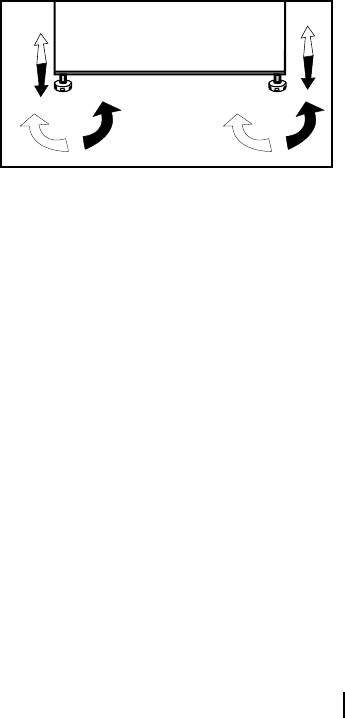
Adjusting the feet
If your refrigerator is unbalanced;
You can balance your refrigerator by
turning the front legs as shown in the
illustration below. The corner where
the leg exists is lowered when you turn
it in the direction of black arrow and
raised when you turn in the opposite
direction. Taking help from someone to
slightly lift the refrigerator will facilitate
this process.
10
EN
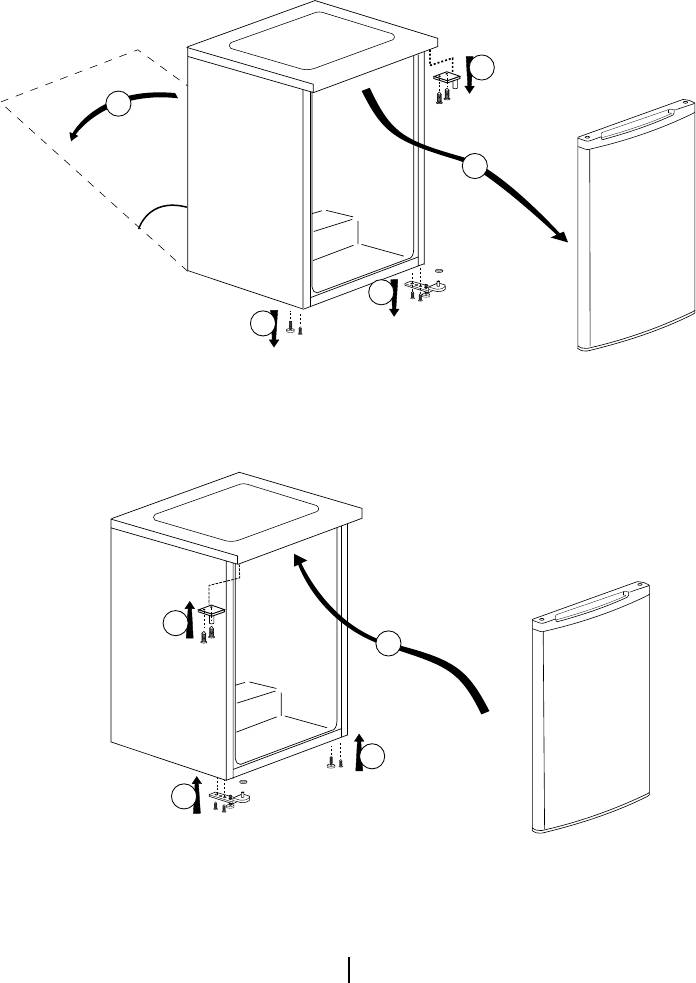
Reversing the doors
Proceed in numerical order
5
1
4
60°
3
2
9
8
6
7
11
EN


